Article Contents:
- Buy slatted panels for ceiling
- Which slatted panels to buy for ceiling
- How ceiling slat panels differ from wall panels
- Weight — the first criterion
- Length and joints
- Direction of slats
- Adjoining to walls
- Working with lighting
- Compatibility with cornice
- Which materials to choose for ceiling
- Paintable MDF: maximum color freedom
- MDF under wood: warmth without compromise
- Slat panel array: natural maximalism
- What affects the price of slat panels for the ceiling
- How to calculate the number of panels before purchasing
- Step 1. Measure the ceiling
- Step 2. Determine the direction of the slats
- Step 3. Calculate the area
- Step 4. Calculate the number of panels
- Step 5. Add a margin for trimming
- Step 6. Account for technical points
- Step 7. Calculate additional elements
- Where to use slatted panels on the ceiling
- In the living room
- In the bedroom
- In the entryway
- In the study
- In commercial interiors
- Slat panels on the ceiling: solution options
- Solid slatted ceiling
- Slat "island"
- Multi-level ceiling with a slat section
- Slatted ceiling with lighting
- Slat ceiling with acoustic filling
- Mistakes when buying ceiling slat panels
- Slat ceiling panels and interior style
- Technical parameters: what to specify in the order
- Installation of slat panels on the ceiling: main rules
- Where to buy slat panels for the ceiling in St. Petersburg and throughout Russia
- FAQ: Answers to Popular Questions
- About the Company STAVROS


Buy slat panels for the ceiling
The ceiling is the surface you see as soon as you look up. And it's often left last in line during renovations: painted white and that's it. But once you see a ceiling with slat panels in a good interior, the white plaster above your head no longer seems like a neutral solution. It starts to feel like a missed opportunity.
If you want to buy slatted panels for the ceiling, this article is made for you. There is no fluff or theory for theory's sake here. Only specifics: which panels to choose, how they differ, what affects the price, how to calculate the quantity, what mistakes are made when purchasing, and where to go to get results, not disappointment.
Read from beginning to end or jump straight to the section you need — the structure allows for both scenarios.


Which slatted panels to buy for the ceiling
The question is practical. The market offers dozens of options — from cheap PVC to solid oak. The goal is not to buy "something slatted," but to choose something that will look as good in five years as it did on the day of installation and won't require replacement due to deformation, fading, or loss of geometry.
If the goal is a decorative ceiling in a residential room, office, or commercial space — we are talking about MDF panels or solid wood panels. These materials provide the level of decorativeness that justifies the effort and investment.
Buying slatted panels for the ceiling means making several decisions sequentially:
-
Material: MDF, wood, MDF for painting, MDF with wood finish
-
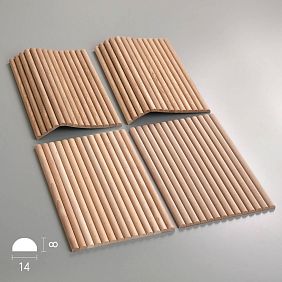
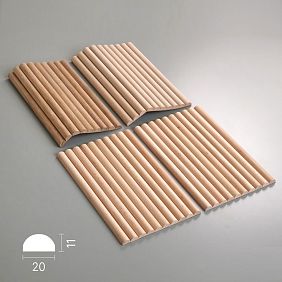
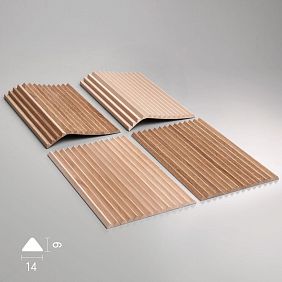
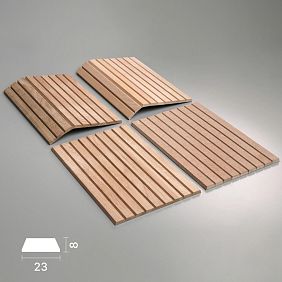
Slat width: from narrow (up to 80 mm) to wide (150 mm and more)
-
Panel length: determines the number of joints
-
Color: for painting, ready-made coating, wood imitation
-
Installation method: adhesive on frame, mechanical fastening
Each decision affects the next. So the right sequence is not "looks good in a photo," but "fits a specific ceiling and a specific interior."
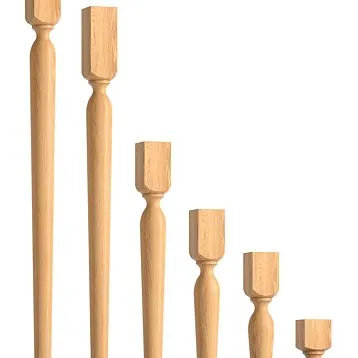
Rafter panels STAVROS products are made from MDF and solid wood with a milled slatted profile, manufactured in a controlled microclimate. Geometry is stable. The surface is ready for installation. All of this is especially important for ceilings, where any deviation from the plane is more noticeable than on walls.
Our factory also produces:


How do ceiling slat panels differ from wall panels?
Technically, wall and ceiling slatted panels can be the same product. But there are fundamental nuances that affect selection and installation.
Get Consultation
Weight is the first criterion
On a wall, the panel is held by adhesive, and its own weight presses it against the base. On a ceiling, it's different: the same panel tends to fall down. The load on the adhesive joint is constant, directional, and not compensated by weight. This means that for ceiling installation, not only the area of adhesive application is important, but also the reliability of the frame — especially with dense or heavy panels.
MDF panels with a density of 720 kg/m³, 16–18 mm thick, and 2700 mm long weigh from 4 to 6 kg each. For a large ceiling, this means a total weight of hundreds of kilograms. The frame and fastening method are not a formality, but a calculation task.
Length and joints
On a wall, a horizontal joint is hidden by a molding — this is a standard architectural technique that looks organic. On a ceiling, a transverse joint is much more noticeable: it disrupts the continuity of the surface and catches the eye under side lighting.
Therefore, for ceilings, panels with a length that is a multiple of the room size, or long enough to minimize the number of joints, are preferable. The standard length of 2700 mm fits a typical apartment ceiling end-to-end without waste. Non-standard lengths are available upon request.
Slat Direction
On a wall, vertical slats are a classic choice: they visually raise the ceiling. On a ceiling, the choice of direction is a choice of spatial effect. The longitudinal direction (along the long side of the room) lengthens the space. The transverse direction widens it. The diagonal direction adds dynamism but is more complex to install and requires more allowance.
Wall junction
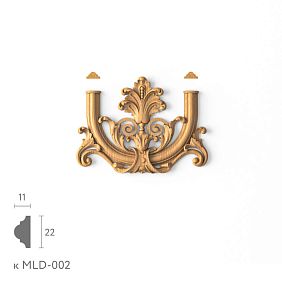
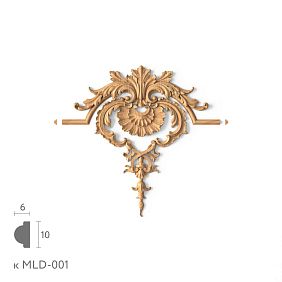
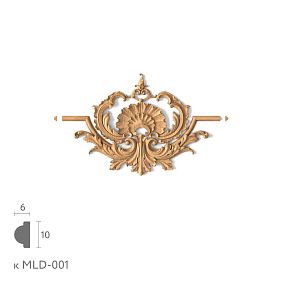
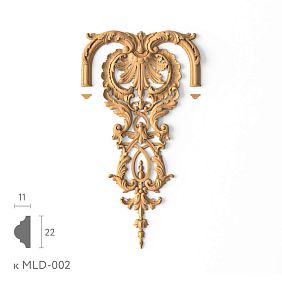
On the wall, the top edge is covered by a molding or cornice. On the ceiling, the junction with the walls needs to be properly finished around the perimeter. Moldings made of polyurethane In a ceiling corner design — a standard solution. They simultaneously cover the technical gap, shape the ceiling/wall transition, and add an architectural detail.
Working with lighting
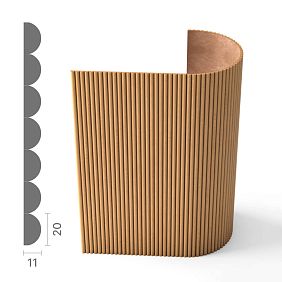
A slatted ceiling with hidden lighting is one of the most expressive interior techniques. An LED strip in the gaps between the slats creates the effect of a glowing ceiling with soft directional lighting. For this, the slats must be tall enough (30–40 mm above the base) so that the strip is not directly visible and the light goes into the gap.
This affects the choice of panels: sufficient relief height and the correct gap between slats are needed. Check when selecting — not all series are equally suitable for lighting.
Compatibility with cornice
A ceiling cornice is an element that works both on the wall (top junction) and on the ceiling (around the perimeter). A properly selected cornice from the catalog molding and cornices closes the transition and adds volume. An incorrect one creates a mismatch of profiles and spoils the final impression.
Which materials to choose for the ceiling
The answer to this question is a combination of three factors: the room's purpose, the desired visual effect, and the budget.
| Material | Where to use | Pros | Limitations |
|---|---|---|---|
| MDF for painting | Living room, bedroom, study, commercial interior | Any color, precise geometry, deep relief | Requires painting before installation |
| MDF with ready-made coating | Quick installation without painting | Minimum stages | Limited to factory colors |
| Solid wood (oak, beech) | Premium interiors, country houses | Lively texture, naturalness, durability | Higher price, requires acclimatization |
| Wood-look MDF | Living room, bedroom, study | Warm natural effect without array instability | Does not repaint |
| PVC / metal | Kitchen, bathroom, utility areas | Moisture resistance | No interior depth; not a STAVROS focus |
For most residential interiors, the right answer is MDF or wood. Let's break down each option in detail.
MDF for painting: maximum color freedom
Paintable lath panels — a working tool for designers and those who want an exact match of the ceiling with walls, moldings, or a separate accent tone. The panel is supplied with a double primer and sanding: the surface is ready for any acrylic water-based enamel without additional preparation.
Why paint before installation rather than after? Painting the ceiling after installation means working overhead, with the risk of drips, uneven edges, and poorly painted gaps. Before installation, it's a horizontal surface, spray gun, even layer, dry workshop. Edges are touched up with a brush after installation.
Color options: RAL, NCS, Pantone, Farrow & Ball, any custom mix. A ceiling in the exact wall tone creates a monochrome effect — the space elongates, the boundary between ceiling and walls disappears. A ceiling in a contrasting tone creates an accent plane overhead, making the space multi-level.
MDF wood-look: warmth without compromise
wood-look slatted panels — a solution for those who want a natural tone on the ceiling without the whims of solid wood. MDF base with embossed coating in oak, walnut, or other wood tones. Geometry remains stable regardless of room humidity and temperature.
A warm wooden ceiling in the living room above the sofa area or in the bedroom above the bed is an architectural accent that changes the feel of the space. Not loud, not dominant — but present. These are the details that set apart "just a renovation" from "a well-thought-out interior."
Solid wood: natural maximalism
Wooden slatted panels for the ceiling — a choice for those who want no compromises in material. Oak with clear oil on the ceiling of a country home office, birch slats with whitewashed coating in a Scandinavian bedroom, dark walnut in a masculine study with leather furniture — these are solutions that are immediately recognizable.
An important nuance for ceiling application: solid wood requires acclimatization. Panels must be kept in the room for at least 48–72 hours before installation. Room humidity should be in the range of 40–60%, temperature — 18–24°C. Only then will the geometry remain unchanged after installation.
STAVROS production — a controlled microclimate with constant temperature and humidity. This means the panels are manufactured in conditions close to a standard residential interior. The risk of warping is minimal.
What affects the price of slatted panels for the ceiling
Understanding pricing means avoiding surprises in the final budget. Let's break down each factor.
Material. MDF — the lower price point with quality execution. Solid wood — higher: raw materials are more expensive, processing takes longer, manual sanding. MDF for painting or wood-look — in the range of basic MDF with a small markup for the coating.
Panel length. Standard length is 2700 mm. Non-standard lengths are available by order with a surcharge. Long panels are beneficial for large ceilings: fewer joints, fewer moldings.
Slat width. Narrow slat (40–60 mm) — more frequent rhythm, more "active" surface. Wide slat (120–150 mm and more) — calm rhythm, larger scale. Wide slats require more material and are more expensive per element, but provide a different visual result.
Relief depth. Deep gap between slats — more expressive play of shadows with side and directional lighting. Milling a deep profile requires more processing time — this is reflected in the price.
Coating type. White primer for painting — base cost. Ready white enamel — slightly higher. Wood finish — additional step. "Prestige" class sanding — manual final processing with guaranteed surface quality.
Ceiling area. Obviously: larger area — more panels, higher cost. However, for large volumes, better terms often apply — check when ordering.
Amount of cutting. Non-standard ceiling with niches, beams, protrusions — more cutting, more waste, more reserve when ordering.
Installation complexity. Flat rectangular ceiling — standard installation. Non-standard geometry, sloped ceilings, niches, multi-level surfaces — more complex, longer, more expensive.
Presence of lighting. If you plan LED strip in the gaps — special profiles for the strip, dimmer, power supply are needed. This is a separate budget item that should be planned in advance.
Additional elements. Moldings made of polyurethane around the perimeter of the ceiling, decorative polyurethane elements in the corners — these items are included in the total cost. Often they are not included in the initial estimate, and people are surprised by the difference between the expected and actual amount.
Delivery. Slat panels are long-length goods with special requirements for packaging and transportation. When ordering from another region, this is a significant expense item.
How to calculate the number of panels before purchasing
Correct calculation is not just 'ceiling area'. It is a sequence of seven steps, each of which affects the final number.
Step 1. Measure the ceiling
Length and width — in millimeters, accurate to 10 mm. For non-standard rooms (L-shaped, with niches, sloped areas) — make a drawing to scale 1:50 or 1:100.
Step 2. Determine the direction of the slats
Longitudinal (along the long side) — elongates, standard choice. Transverse — widens. Diagonal — requires a significant allowance for trimming (20–25%).
Step 3. Calculate the area
Area = length × width (in meters). For non-standard shapes — sum up rectangular sections.
Step 4. Calculate the number of panels
Quantity = ceiling area ÷ area of one panel (length × width, in square meters). Round the result up.
Example. Ceiling 4200 × 3600 mm = 15.12 sq. m. Panel 2700 × 120 mm = 0.324 sq. m. 15.12 ÷ 0.324 = 46.7 → 47 pieces.
Step 5. Add allowance for trimming
For a rectangular ceiling with longitudinal or transverse direction — add 10–12% margin. For diagonal or non-standard geometry — 20–25%.
Total in our example: 47 × 1.12 = 52.6 → 53 pieces.
Step 6. Account for technical points
Lights, ventilation grilles, smoke detectors — all are cut out from the panel. For recessed spotlights in gaps between slats — ensure the slat spacing matches the light diameter.
Step 7. Calculate additional elements
Ceiling moldings — room perimeter + 10% margin for corner cuts. Corner decorative polyurethane elements — by number of corners.
If you have trouble calculating — contact STAVROS managers. They will calculate the exact quantity based on your measurements and provide a list of items to order.
Where to use slatted panels on the ceiling
In the living room
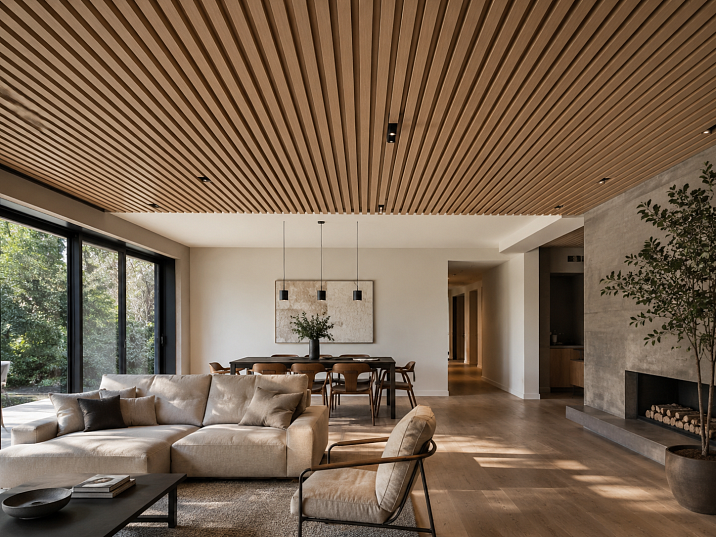
The living room is a space where a ceiling accent creates the greatest visual effect. Two classic scenarios.
Ceiling accent above the TV area. A slatted "island" above the TV and cabinet — a limited section of the ceiling with slatted panels that frames the visual focus area. LED lighting in the gaps between the slats — the evening interior changes dramatically: a soft glow that emphasizes the rhythm of the slats and creates an atmosphere.
Continuous slatted ceiling in the living room. A bolder solution that turns the ceiling into a full-fledged architectural element. Here, the length of the panels is crucial — joints should be minimal and covered with molding. Along the perimeter — a ceiling cornice made of molding and cornices.
In the bedroom
The bedroom is a place where the ceiling is always in front of your eyes. It is here that slatted finishing feels most intimate. Option with slatted panels in wood finish above the bed with warm 2700K lighting creates an atmosphere that is hard to describe in words but easy to feel.
A slatted ceiling in the bedroom is not about "design for show." It is about the quality of presence in the space. Natural texture overhead, warm light in the gaps — and the bedroom ceases to be just a room for sleeping.
In the hallway
A narrow hallway is an unconventional but rewarding space for a slatted ceiling. Longitudinal slats along the hallway visually elongate the space and accelerate the movement of the gaze along the axis. An effect similar to vertical slats on the wall, but working in a different plane.
For the hallway, it is especially important to minimize the number of joints — a short room with one transverse joint in the middle of the ceiling looks worse than without finishing. Plan the length of the panels according to the specific size of the corridor.
In the study
A workspace with a slatted ceiling made of solid wood or MDF in wood finish — an environment that simultaneously organizes thinking and creates a sense of a high-quality material context. Natural texture above the desk is not just beautiful. It is functional: wooden surfaces, according to research in the field of biophilic design, reduce stress levels in the work environment.
For a home office — Rafter panels with a warm wood tone or natural oak. For an office or meeting room — MDF for painting in a neutral tone with acoustic properties of the slatted surface.
In commercial interiors
Reception, meeting room, waiting area, lobby — a slatted ceiling in a commercial space works on two levels: it creates a first impression and reduces reverberation.
The acoustic effect is not a marketing term. A slatted surface with open gaps (rather than a solid panel) scatters sound waves, reduces reflection time, and makes the room's acoustics more comfortable. In a meeting room with laminate, glass partitions, and hard walls, this is literally audible.
decorative polyurethane elements in the ceiling area — sockets, cartouches, corner elements — enhance the architectural character of a commercial interior. Slatted rhythm + polyurethane decor = a level of detail that registers at the perception level, forming a sense of quality.
Slatted panels on the ceiling: solution options
Before making a final choice, it's worth knowing all the main scenarios for decorating a ceiling with slatted panels.
Solid slatted ceiling
Panels cover the entire ceiling without gaps. The visual effect is a full-fledged architectural surface overhead. Requires the largest number of panels and careful calculation of joints. Most expressive in large rooms — living room, dining room, hall.
Slatted "island"
A limited ceiling area — above the dining table, above the bed, above the sofa group. The perimeter of the island is framed with molding. This saves material and creates an accent effect without full ceiling coverage.
Multi-level ceiling with slatted section
Slatted panels on the lower level of a multi-level ceiling — a combination of architectural form and decorative surface. The transition between levels is finished with a molding or an LED light gap.
Slatted ceiling with lighting
The panels are mounted on a frame with a gap from the ceiling. In the gaps between the slats — LED strip. The light is not directly visible through the slats, but provides a uniform soft backlight. The effect of a "glowing ceiling" without visible light sources.
Slatted ceiling with acoustic filling
Acoustic mineral wool or acoustic foam is laid between the frame and the panels. Sound passing through the gaps is absorbed by the material. The result is a significant reduction in reverberation. A solution for home theaters, studios, meeting rooms.
Mistakes when buying ceiling slatted panels
Experience is a good advisor. But it doesn't have to be personal. Here are eight mistakes that are repeated over and over again.
Mistake 1: choosing by photo, without samples.
The color "warm oak" on a monitor and in a room with specific lighting are different things. On the ceiling, the color is perceived differently than on the wall, because the lighting is always directed from top to bottom. Samples are not a whim, but a mandatory step.
Mistake 2: not considering the weight and method of fastening.
They bought "beautiful panels", delivered them, started installation — and discovered that the wall adhesive doesn't hold on the ceiling, and the frame wasn't thought out. Proper installation of ceiling panels requires a metal frame with mechanical fastening to the ceiling. Adhesive is only an auxiliary tool.
Mistake 3: not accounting for trimming.
They ordered "exactly by area" — and at the end of the last row, one panel was missing. A 10–12% reserve is mandatory for rectangular ceilings, 20–25% for non-standard ones.
Mistake 4: not planning the lighting in advance.
Lighting on a slatted ceiling means pre-marked points in the panel layout diagram. If the light "hits" a slat, the panel is cut out. If lights were planned in the gaps, the gap width must match the light's diameter. All this is resolved on paper before installation, not during the process.
Mistake 5: not checking the connection with the cornice.
They chose one ceiling molding based on a photo, bought panels from another manufacturer — during installation, they discover profile mismatches. A single supplier solves this problem: all system elements are geometrically coordinated.
Mistake 6: choosing too narrow slats for a small ceiling.
Narrow slats with a frequent pitch on a small ceiling create a "fine vibration" effect — the surface disturbs the eye. In rooms up to 15–18 sq. m, the ceiling looks better with wide slats and a large rhythm.
Mistake 7: not matching the color to the walls and floor.
The ceiling does not exist in isolation. A warm wooden ceiling above a cold gray floor and white walls is a conflict that is difficult to reconcile with furniture. The color of the ceiling panels is part of the overall color scheme, not a separate decision.
Mistake 8: not planning the entire system.
Bought only panels. Forgot about the cornice around the perimeter. Forgot about the connecting molding between zones. Forgot about corner elements. As a result, they buy three times, wait for delivery three times, and the installation timeline drags on. Plan the system from the first order: panels + cornices + moldings + corner elements + all additional parts.
Slat panels for the ceiling and interior style
Ceiling slat panels are a material that does not dictate style, but conforms to it.
Scandinavian minimalism. White Paintable lath panels in the tone of the walls — the ceiling blends with the surface, creating an endless white space. Light wooden slats with a narrow profile add texture without color.
Japandi. The combination of white and wood is the basic formula. Slat wood-look panels above white walls or natural oak on the ceiling with whitewashed walls — Japanese restraint in a material with a natural character.
Modern classic. Slat ceiling in white or neutral tone + ceiling cornice made of molding + decorative corner elements — an architectural system with three levels of detail.
Loft. Dark slats in anthracite or graphite on a dark ceiling above a brick wall — an industrial interior with character. Minimum moldings, maximum raw rhythm.
Eco and biophilic design. Natural oak or ash with an oil finish on the ceiling — maximum naturalness without compromise. Alongside — natural textiles, stone, live plants.
Technical parameters: what to specify in the order
When placing an order for slatted ceiling panels, specify:
-
Material type: MDF for painting / MDF wood-look / solid wood (species)
-
Panel length: standard 2700 mm or custom
-
Slat width: in mm
-
Relief depth: standard or enhanced (for lighting)
-
Finish: white primer, ready enamel, wood imitation
-
Grinding: standard or "Prestige"
-
Quantity: including a 10–15% reserve
-
Additional elements: moldings, cornices, corner elements — with lengths and quantities specified
The more accurate the order, the fewer delays and recalculations.
Installation of slatted panels on the ceiling: main rules
Installing ceiling panels is more difficult than wall panels. But if you know the rules, there are no surprises.
The frame is the foundation of everything. A metal frame made of CD 60/27 profiles on hangers with mechanical fastening to the ceiling. Hanger spacing — 600 mm. Profile spacing — matching the panel width or a multiple thereof. The frame must support the weight of all panels with a safety factor of × 3.
Level. A laser level is mandatory. A horizontal deviation of the frame by 2–3 mm will result in a visible misalignment during final installation. This is more noticeable on the ceiling than on the wall.
First panel — along the laser, strictly parallel to the chosen direction. Deviation of the first panel over 30 rows will create a noticeable "fan" effect.
Fastening. Combined: MS polymer adhesive on the back side + mechanical fastening to the frame profile through the end or hidden fasteners. Adhesive alone on the ceiling is insufficient.
Joints along the length. Closed. molding — transverse or longitudinal. A butt joint without a molding will separate after a year: temperature and humidity fluctuations will cause shrinkage or expansion.
Lighting. The LED strip is installed before the panels — into a profile on the frame. Strip type: COB or SMD 2835 with a density of at least 120 diodes/m for even glow. The power supply and dimmer are in an accessible place (behind the cornice or in a niche).
The article on installing polyurethane moldings the STAVROS website provides detailed information on working with joints and corners when installing moldings — we recommend reading it before starting work.
Where to buy slatted panels for the ceiling in St. Petersburg and throughout Russia
Buy slatted panels for the ceiling in St. Petersburg — contact STAVROS directly. Production is in St. Petersburg. Pickup is available. The opportunity to inspect samples before ordering is also available.
Delivery throughout Russia by transport companies. Long-length panels are packed in protective film and wooden pallets — they arrive without damage.
Catalog — on the website stavros.ru. Rafter panels, Panels for painting, wood-look panels, Moldings and cornices, decorative elements — everything in one place, everything geometrically coordinated.
Consultation is free. Calculation based on your measurements is free. Selection of the panel system + cornice + molding is free. This is part of the work of STAVROS managers.
Production time is 5–10 working days. Delivery time depends on the region. Total from order to receipt is 2–3 weeks. Plan ahead, especially if the renovation is on schedule.
FAQ: Answers to popular questions
Which slatted panels are best to buy for the ceiling?
For residential premises — MDF for painting or wood finish. For premium interiors — solid oak or beech. Selection criteria: the room, desired visual effect, and budget. Always order samples before making a final decision.
Can wall slat panels be used on the ceiling?
Yes, if the geometry and weight are suitable for ceiling mounting. A metal frame with mechanical fastening is required. It is important to calculate the load and ensure that the panel length fits the ceiling size without unnecessary joints.
What affects the price of slatted panels for the ceiling?
Material, panel length and width, relief depth, coating type, ceiling area, installation complexity, amount of trimming, presence of lighting, additional elements, and delivery.
How to calculate the number of panels for the ceiling?
Ceiling area (m²) ÷ area of one panel (m²) = quantity, round up. Add 10–12% reserve for a rectangular ceiling, 20–25% for non-standard geometry. Account for lights and ventilation.
Where to buy slatted panels for the ceiling in St. Petersburg?
At STAVROS — a St. Petersburg manufacturer with delivery across Russia. Pickup, samples, consultations, and calculations are available.
Is a frame required for installing slatted panels on the ceiling?
Yes, absolutely. A metal frame with mechanical fastening to the ceiling slab is the basis for ceiling installation. Glue alone is insufficient to support the weight of the panels on a horizontal surface overhead.
How to combine slatted panels with ceiling moldings?
Use moldings from the same catalog — the geometry is compatible. The perimeter molding covers the technical gap and finishes the ceiling/wall transition. Corner decorative elements enhance the architectural character.
Can a slatted ceiling be made with lighting?
Yes, and this is one of the most expressive techniques. An LED strip is installed in the gaps between the slats on the frame. Important: the slats must be tall enough so that the light source is not directly visible.
About the company STAVROS
STAVROS is a St. Petersburg manufacturer of decorative interior products since 2002. The company started with restoration work at the Hermitage and the Constantine Palace in Strelna — this experience defined the approach to quality: every product must stand comparison with the classical standard.
Today STAVROS produces a full range of interior finishing systems: Rafter panels from MDF and solid wood, Panels for painting и wood-like, Moldings and cornices from polyurethane, decorative elements. Production is in St. Petersburg, with a controlled microclimate. 'Prestige' sanding is a manual finishing treatment. Delivery throughout Russia. Consultations and calculations are free.
If you want to buy slatted ceiling panels with guaranteed quality, correctly calculate the quantity, and get a system rather than a set of incompatible parts — the STAVROS catalog and team of managers await your request.