


Article Contents:
- Buy slatted wall panel: MDF, wood, sizes and selection for accent finish
- Which slatted wall panel to buy: where to start choosing
- When you need one slatted panel rather than full wall cladding
- Accent vertical in a neutral interior
- TV area: slatted panel behind the screen
- Bed headboard: slatted panel as an architectural element
- Niche and partition wall
- Narrow wall in the hallway
- Decorative insert in molding system
- Slatted MDF wall panel: a material that never lets you down
- What is MDF for slatted panels
- Main advantages of MDF wall panels
- MDF panels for painting: a designer's tool
- MDF panels combined with moldings and baseboards
- Wooden slatted wall panel: when naturalness matters
- What makes a wooden panel special
- Types of wooden panels by wood species
- Differences from MDF and wood-look panels
- Requirements for installing wooden panels
- Slat panel with wood finish: a middle ground between solid wood and MDF
- How to choose the size and format of a slat panel: a practical algorithm
- Step 1: Measure the finishing area
- Step 2: Determine whether the entire wall or just a section is covered
- Step 3: Choose the direction of the slats
- Step 4: Account for baseboard and ceiling junction
- Step 5: Choose the slat width
- Step 6: Allow for trimming waste
- Step 7: Mark outlets, switches, and TV bracket
- Where to use a slat panel on the wall: application scenarios
- Slat panel on the wall under the TV
- Slat panel for the hallway
- Slat panel in the bedroom: headboard and beyond
- Slat panel in the study
- Slat panel in commercial interiors
- Lighting for a slat panel: how light reveals the texture
- Directional spotlights: a basic tool
- Hidden lighting: atmospheric effect
- Tape in the grooves of the slats
- Dimmer: a universal comfort tool
- What affects the price of a slat wall panel
- Detailed breakdown of components
- How to form a realistic budget
- Mistakes when buying a slat wall panel: a substantive analysis
- Where to buy a slat wall panel: actionable summary
- About the Company STAVROS
- FAQ: key questions and honest answers


Buy a slat wall panel: MDF, wood, sizes, and choice for accent finishing
There is a special type of renovation solution — when you don't need to redo everything. When one precise gesture is enough: one wall, one area, one accent panel — and the space is transformed. This article is about exactly that.
If you are looking for where and how to buy a slat wall panel, it means you already understand the main thing: full finishing is not always necessary. Sometimes you just need one slat panel — under the TV, in the hallway, behind the headboard, in a niche or on a partition wall. This is an independent design solution with high visual impact at minimal cost.
Let's break it down: materials, sizes, formats, key use cases, mistakes, and selection practice. No fluff — only what works.


Which slatted wall panel to buy: where to start choosing
The first question is not "which panel is prettier," but "what is it for." It's the task that determines the choice. Different scenarios require different solutions.
If you need an MDF slatted wall panel to buy — it's about stability, predictable geometry, availability of tones, and ease of installation. If a wooden slatted wall panel is important — it's about natural texture, live grain, and natural material. Between these two poles lies a wide range of options, each justified in its own context.
Start with three questions:
1. What area are you decorating? TV wall, headboard, hallway, niche, partition, home office? Each area has its own requirements for material, slat width, and finish.
2. What is the area size? One narrow wall in the hallway is a fundamentally different calculation than a large living room with a TV zone.
3. What tone already exists in the room? The color of the floor, doors, furniture — all these are neighbors of your new panel. They should talk to each other, not conflict.
By answering these three questions, you will already significantly narrow down your choice. And this is where a conscious purchase begins slatted wall panels — not by flipping through a catalog "by looks."
Our factory also produces:


When you need one slatted panel, not a full wall finish
This is an important and underestimated scenario. Most articles about slatted panels talk about finishing an entire wall or whole room. But often the task is completely different. And it's useful to know about this.
Get Consultation
Accent vertical in a neutral interior
White walls, minimal furniture, neutral floor. One vertical element — a slatted panel in a narrow wall section between doors or a window and a corner — instantly structures the space. The rhythm of vertical slats creates an architectural accent without excess.
The panel is not across the entire wall — only 600–900 mm wide. Height from baseboard to ceiling. A molding frame around the perimeter. The result is a decorative element that works as an architectural statement.
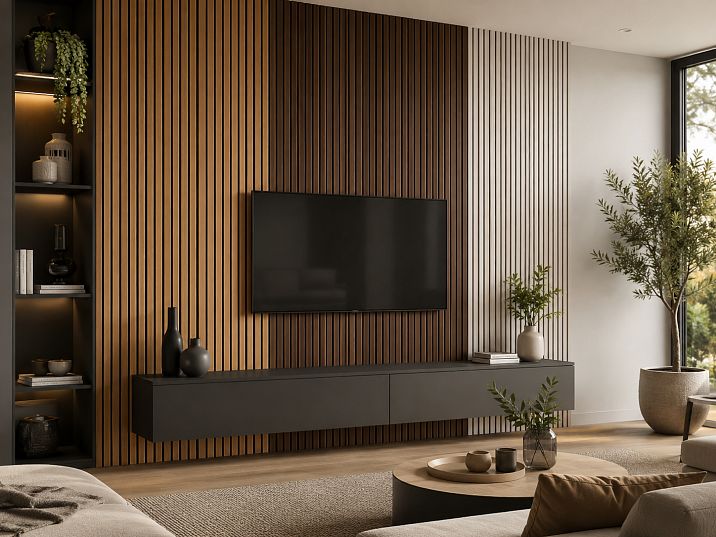
TV zone: slatted panel behind the screen
The most popular scenario. A slatted panel behind the TV is a way to turn the screen from a "technical rectangle on the wall" into part of the interior composition. The width of the zone — from the edge of the bracket to the edge of the bracket plus 200–400 mm on each side. Or — the entire wall from corner to corner.
More details on this in a separate section.
Bed headboard: slatted panel as an architectural element
No built-in headboard. No built-in niche. There is a wall and a desire to make the sleeping space recognizable. A slatted panel the width of the bed (or slightly wider) and height from floor to ceiling — or up to a chosen mark of 1600–1800 mm — solves the problem elegantly and for a long time.
Niche and wall section
In apartment layouts, there are zones that are architecturally separated: niches for the TV, piers between doorways, recesses for built-in wardrobes. It is here slatted panels for walls they work as a ready-made solution for "unfilled" space.
Narrow wall in the hallway
The hallway is often the most ungrateful room in terms of area. But it is here that a single slatted panel on the wall opposite the entrance or on the side wall of the corridor creates the first impression of the entire apartment. That's a lot.
Decorative insert in a molding system
In interiors with molding frames made of polyurethane the slatted panel can be inscribed inside one of the frames — as a decorative filling. On the outside, a molding frame; on the inside, a slatted panel. The combination of the frame's volume and the rhythm of the slats creates a multi-layered surface.
MDF slatted wall panel: a material that never lets you down
MDF slatted wall panel is the first choice for most residential and commercial interiors. Why does MDF hold a leading position, rather than solid wood or plastic? Let's break it down honestly.
What is MDF for slatted panels
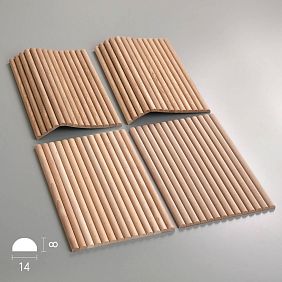
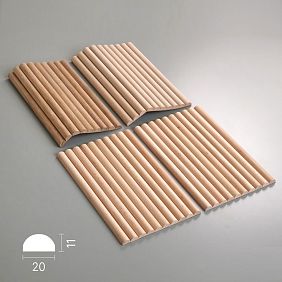
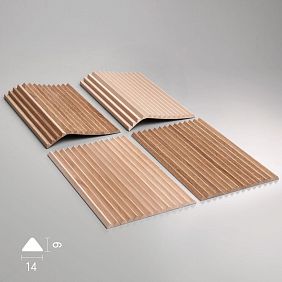
MDF (Medium Density Fiberboard) is a board made of pressed wood fibers with added binding resins. High-density MDF of 720–880 kg/m³ is used for slatted panels. This is a fundamental parameter: at this density, the milled slat profile has clear, sharp edges without chips or burrs. Lower density results in a softer profile with blurred edges.
STAVROS products are made from MDF with manual final sanding "Prestige" — an additional surface treatment stage that ensures coating smoothness at the level of paint and varnish production.
Main advantages of MDF wall panels
Stable geometry. All panels from one batch are identical. No random pattern, no different surface color, no deformations during storage. Installation is predictable — rows of slats join evenly.
Predictable behavior with humidity changes. MDF is significantly less sensitive to humidity fluctuations than natural wood. In apartments with central heating, where humidity drops to 20–30% in winter, this is a critical parameter.
Wide selection of coatings. Basic primer for painting, double "Prestige" primer with sanding, decorative wood-look coating with embossing and tinting, matte or semi-matte finish. Each option offers its own visual solution.
Ease of installation. Adhesive installation on a flat base or frame installation on a profile — both methods work with MDF panels predictably and without complications.
Applications. Living room, hallway, bedroom, study, meeting room, reception area, children's room (with appropriate coating). Virtually no restrictions for rooms without constant high humidity.
MDF panels for painting: a designer's tool
Worthy of special attention are Paintable lath panels — this is a product category that offers maximum freedom in color. Double primer with sanding, an ideal base for acrylic enamel — paint in any shade from any catalog.
Why this matters: ready-made decorative coatings are always limited by the manufacturer's line. A panel for painting completely removes this limitation. Want a monochrome slatted wall in the color of the wall — please. Want a contrasting accent in deep blue or terracotta — no problem.
For a TV zone, a monochrome solution (panel in the tone of the wall) is a particularly popular technique in modern minimalist interiors: relief is present, no color break.
MDF panels combined with moldings and baseboards
A slatted MDF panel wins maximally when included in a molding system. Polyurethane molding along the top edge of the panel — abutment to the ceiling and an architectural accent simultaneously. A baseboard along the bottom edge — completion and protection. decorative corner elements at frame intersections — the final detail that elevates "beautiful" to "architecturally complete."
Wooden slatted wall panel: when naturalness matters
A wooden slatted wall panel is a different story. Not better or worse than MDF — different. With other advantages, other requirements, and a different visual result.
What makes a wooden panel special
The live grain is the main thing. Each solid wood board is unique: its own pore texture, its own tone transitions, its own story of annual rings. No wood imitation reproduces this completely. MDF with a decorative coating is convincing, but a discerning eye will tell the difference. Solid wood is indistinguishable because it is the original.
Tactility. Natural wood under your hand is a special feeling. A living surface, slightly warm, with the character of the material. This is important in rooms where a person spends a lot of time: bedroom, study, living room.
Aroma. Fresh oak, ash, or walnut wood has a natural scent that fades over time but never completely disappears. For many, this is part of an intangible but real value argument.
Types of wood panels by species
Oak is a dense, stable species with a pronounced grain. One of the most popular options for slatted panels. Tinted in a wide range — from light natural to stained.
Ash is lighter than oak, with a fine pore pattern and a soft tone. Works well in Scandinavian and Japandi interiors.
Walnut is dark, with a rich grain. For warm, saturated, 'mature' interiors. Studies, meeting rooms, premium living spaces.
Pine is a more economical option with a pronounced knot pattern. For country houses, eco-interiors, rustic concepts.
Differences from MDF and wood-look panels
| Characteristic | Wood panel | MDF panel | Wood-look MDF |
|---|---|---|---|
| Material | Natural solid wood | Pressed fibers | Pressed fibers |
| Drawing | Unique, natural | No | Imitation, repeating |
| Stability | Requires acclimatization | High | High |
| Finish | Oil, wax, varnish | Optional | Ready-made decorative |
| Price | Higher | Moderate | Moderate |
| Application | Premium, countryside, study | Universal | Universal |
wooden lath panels — the right choice for projects where naturalness is not an option, but a concept.
Requirements for installing wooden panels
Before installation — acclimatization for 48–72 hours in the room where the panel will be installed. This allows the material to adapt to the temperature and humidity of the specific space. If this step is skipped — deformation after installation.
Room humidity: 40–60% relative. In rooms with central heating in winter — use a humidifier.
Care: matte oil or wood wax as needed. Avoid prolonged contact with water and abrasive cleaning agents.
Slatted wood-effect panel: a middle ground between solid wood and MDF
There is a third option that is often overlooked — wood-look slatted panels. It is an MDF base with a decorative coating that imitates wood texture: embossing, multi-layer tinting, matte or semi-matte surface.
Why this is an important option, not just a "cheap substitute":
-
Predictable geometry — like MDF
-
Natural visual effect — much closer to wood than it sounds
-
No acclimatization requirements
-
Stability under humidity fluctuations
-
More affordable price compared to solid wood
For an apartment with central heating, for a commercial space, for those who want a natural tone without the complexity of installation and maintenance — this is the optimal solution.
The slatted wall panel in the STAVROS collection is available in several shades: light ash, warm oak, stained oak. Each option creates a recognizable natural effect under professional lighting.
How to choose the size and format of a slatted panel: a practical algorithm
Size is not just a number. It is a combination of decisions: panel height, slat width, groove depth, finishing zone width. Each parameter affects the final result.
Step 1: Measure the finishing zone
Not 'approximately,' but precisely: with a tape measure or laser rangefinder. Write down:
-
Width of the zone (mm)
-
Height from floor to ceiling (mm)
-
Height from the top edge of the baseboard to the ceiling (or the bottom edge of the ceiling molding)
If the wall is uneven — measure at several points, take the maximum.
Step 2: Determine whether the entire wall or just a section is being covered
Entire wall (from corner to corner, floor to ceiling): calculation based on total area minus openings.
Accent section (TV area, headboard, niche): width and height of the specific section. Don't forget about offsets: if the area is behind the TV, add 200–400 mm on each side from the outermost point of the bracket.
Step 3: Choose the direction of the slats
Vertical slats — a traditional option for most scenarios. Visually raise the ceiling, create a classic slatted rhythm. Panel length = wall height (or longer, with trimming from the bottom).
Horizontal slats — for low ceilings, they give a sense of width and space. Panel length = wall width (or longer, with a joint and molding).
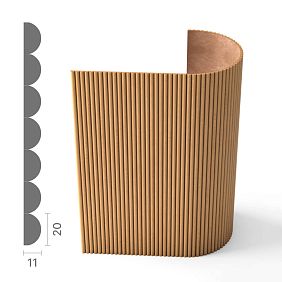
Diagonal installation — for bold solutions. Requires an increased material allowance (+20–25%).
Step 4: Account for the baseboard and ceiling junction
A baseboard along the bottom edge of the slatted area is mandatory. It protects the bottom end of the panel and provides visual completion. Baseboard height matching the panel color or the floor color.
Top junction with the ceiling: Polyurethane molding closes the gap and creates an architectural accent. For low ceilings (2.4–2.6 m) — a thin molding profile, 30–50 mm. For high ceilings (from 3.0 m) — a wider cornice can be used.
Step 5: Choose the slat width
The slat width determines the "rhythm" of the surface. Proportion rule: the larger the wall area, the wider the slat.
| Zone area | Recommended slat width |
|---|---|
| up to 2 m² (niche, narrow wall section) | 60–80 mm |
| 2–6 m² (hallway, headboard) | 80–120 mm |
| 6–12 m² (TV area, bedroom wall) | 100–150 mm |
| from 12 m² (large living room) | 120–180 mm |
A fine rhythm on a large wall — fragments, creates visual noise. A wide rhythm on a small surface — looks rough. Proportion is key.
Step 6: Add a trimming allowance
-
Simple area without openings — +12%
-
Area with openings, sockets, niches — +15%
-
Complex geometry, sloped walls — +20%
Round up to the nearest whole number of panels. It's better to have leftover stock than a shortage in the middle of installation.
Step 7: Mark sockets, switches, and TV mount
Add to the diagram: the location of all sockets in the finishing area (will be cut out in the panel or relocated), switches, the TV mount attachment point, and planned lighting points. Electrical work must be done before panel installation, no exceptions.
Where to use a slatted panel on the wall: application scenarios
Slatted panel on the wall behind the TV
The key words here are 'behind the TV', 'behind the screen', 'TV zone'. This is the most popular scenario for using a single slatted panel, and it deserves a detailed breakdown.
Why does a slatted panel work perfectly behind a TV? Because it solves the visual problem of any interior with a TV: how to make the screen not "hang" on a bare wall, but be organically integrated into the space.
The slatted background creates a vertical rhythm that gives the screen a "frame" without a literal frame. A TV on a slatted panel is part of the wall, not a technical device attached to it.
Color. A neutral tone is the best choice for a TV zone. Too active a tone competes with the image on the screen. Warm ash, oak, neutral beige — work flawlessly. For bold interiors — stained oak, dark gray, deep green.
Zone width. Standard: width of the TV bracket + 200–400 mm on each side. For a larger wall — can be up to the width of the entire wall.
Backlighting. LED strip behind the panel (if there is a gap between the panel and the wall) or behind the top molding — atmospheric lighting for the TV zone. Warm light 2700K, dimmable. In the evening, when the TV is off, it is the backlighting of the slatted panel that becomes the main source of atmosphere in the living room.
TV bracket mounting. The bracket is mounted through the panel into the wall with dowels. The load-bearing capacity of the bracket is based on the parameters of the fasteners into the wall, not into the panel. This is a standard solution that does not require special conditions.
Slatted panel on the wall under the TV — this is not a trend of recent years. This is a sustainable interior solution that worked before the Instagram era and will work after.
Slatted panel for the hallway
The hallway dictates special conditions: practicality + visual effect in a limited space.
Practical requirements. The coating is touch-resistant and easy to maintain. A lacquered or enameled surface is optimal. A matte finish in the hallway requires more careful use than a glossy or semi-glossy one.
Tone. In a narrow, dark hallway — light tones to reflect light. In a wide hallway with a window — a more saturated tone is acceptable.
Panel height. Full height from floor to ceiling — maximum visual effect of a "high ceiling". From floor to 1200–1500 mm (half the wall height) — "panel zone" in the lower part, practical protection from dirt.
The vertical rhythm of slats in a narrow corridor visually expands the space: the eye moves along the slats and "does not count" the walls. This works even in a corridor 90–100 cm wide.
Slatted panel for the hallway with a high baseboard in tone and a molding along the top edge — a complete solution that, with minimal investment, radically changes the first impression of the apartment.
Slatted panel in the bedroom: headboard and beyond
The bedroom is a space of minimal visual tension. A background is needed here, not an accent. A slatted panel on the wall behind the bed creates an architectural headboard without bulky furniture.
Width of the slatted area. Equal to the width of the bed — minimum. Better — 300–500 mm wider on each side. Even better — the entire width of the wall.
Height. Two solutions: from floor to ceiling (maximum volume) or from floor to 1400–1600 mm (headboard). The second option is for low ceilings of 2.4–2.7 m, where a full-height panel may feel oppressive.
Tone and material. Warm neutrals: light ash, soft oak, cream. wood-look slatted panels in the bedroom — one of the most harmonious options: a natural tone without surface noise.
Hidden LED strip behind the upper molding of the headboard — evening lighting for the sleeping area. Warm 2700K, must have a dimmer.
Slatted panel in the study
Study — a functional and simultaneously representative space. The wall behind the desk or the meeting area should convey "concentration" and "competence."
Paintable lath panels in a neutral tone — relief without color pressure. In a study, this works as a background: structural, restrained, professional.
Polyurethane decorative appliques in combination with a slatted background — pilasters or vertical accents — give the study architectural scale. Molding frames around the perimeter of the slatted area complete the system.
For video calls. The slatted panel behind the workspace is an excellent background for online meetings. A textured surface in a neutral tone looks professional and is not distracting.
Slatted panel in a commercial interior
Office, reception, meeting room, executive office — spaces where the interior works as brand communication. The slatted panel on the reception wall is the client's first visual contact with the company.
Reception. Panel behind the reception desk in a neutral or corporate color (For painting). Company logo on a slatted background — a standard solution for representative reception areas.
Meeting room. Wall behind the presenter's seat. Moderate relief, neutral tone, good lighting. decorative polyurethane elements enhance status.
Waiting area. Slatted panel + soft furniture + warm lighting — an atmosphere that reduces the psychological tension of waiting. Medical clinics, legal offices, financial organizations.
Lighting for slatted panels: how light reveals the relief
A slatted panel without proper lighting is half its potential. Relief only works when there is shadow, and shadow only appears with directional lighting. Without it, the surface looks flat.
Directional spotlights: the basic tool
Built-in or track spotlights at a 30–45° angle to the panel surface. Light hits the edges of the slats, shadow falls into the grooves — the relief reads clearly. This is the minimal and most affordable way to "activate" a slatted panel.
Practice. The track is installed parallel to the slatted wall at a distance of 300–500 mm from it. The heads are directed at the desired angle. The advantage of the track is flexibility: you can adjust the position and angle without redoing the electrical wiring.
Hidden backlighting: atmospheric effect
LED strip in the niche of the upper molding. Light flows from top to bottom along the slatted surface — a soft wash that creates volume and depth.
Technical detail: the molding niche must be at least 20 mm deep for hidden strip installation. If the standard molding does not provide such a niche, a custom solution with a shelf for the strip is possible.
Strip in the grooves of the slats
With sufficient groove depth, the LED strip can be laid directly into the groove between the slats. Linear glow along vertical lines. The effect is especially impressive in the dark and in dimly lit rooms — TV area, home theater.
Dimmer: a universal comfort tool
For all lighting options — a dimmable switch or a smart lighting control system. Maximum brightness for active use of the space. Minimum for atmospheric evening lighting.
What affects the price of a slatted wall panel
The price is not just the cost per square meter. It is a system: material, coating, size, additional elements, installation, and delivery.
Detailed breakdown of components
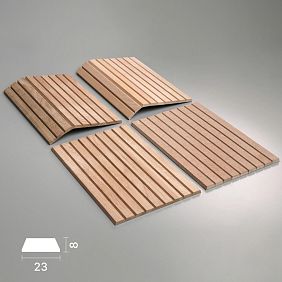
Material. MDF 720 kg/m³ — base option. MDF 880 kg/m³ — higher. Solid wood — depends on the species.
Coating. Primer → double primer "Prestige" → decorative wood finish → factory painting in color — each level is more expensive than the previous one.
Size and non-standard formats. Standard 2700 mm — optimal in price. Non-standard length — surcharge for custom production.
Relief depth. Deep profile requires slower milling and precise tool adjustment. Reflected in the price.
Slat width. Calculate in rubles per m², not per piece. Narrow slats — more passes per meter = more machine time.
Order volume. One accent panel (3–5 m²) costs more per unit than an order for several zones (15–25 m²).
Additional elements. Moldings, baseboards, decorative polyurethane elements — a mandatory budget item. In projects with an extensive molding system, it can account for 30–40% of the panel cost.
Delivery. Long-length goods (2700 mm) require special packaging and handling. Cost depends on the region and volume.
Installation. Glue-on on a flat surface — cheaper. Frame-based with leveling — more expensive, but necessary for uneven walls.
How to form a real budget
One rule: count the cost of a finished panel on the wall, not just the cost of the panels themselves. Add up: panels + moldings + baseboards + decor + installation + delivery. Only this amount is the real project budget.
Mistakes when buying a slatted wall panel: an analysis of the essentials
Each mistake in this list is made regularly — and each one costs either money or rework.
Mistake 1: buying without measuring the height.
“I’ll take the standard 2700 mm, we’ll figure it out.” Ceiling 2.75 m — panel doesn’t reach. Ceiling 2.5 m — needs trimming, no reserve to cover. Measure first, buy later.
Mistake 2: not accounting for the baseboard.
Panel ordered, installation started — and then it turns out the baseboard is a different profile, different color, from a different series. Systematically ordering panels and baseboards from one manufacturer is a basic rule.
Mistake 3: choosing the shade only by screen.
The monitor doesn’t convey the real shade. Two monitors will show different colors. A sample in your room under your lighting is the only reliable way.
Error 4: not accounting for the TV mount and wires.
Installation started, mount — after. Result: either move the wires or cut the finished panel. The scheme with the mount — before installation.
Error 5: too narrow slats for a large wall.
On a 4×2.7 m wall, narrow slats of 50–60 mm create visual noise. Fragmentation that tires the eyes. The width of the slat should be proportional to the wall area.
Error 6: not factoring in a reserve for trimming.
"Calculated by area, ordered exactly." During installation, 2 panels were missing. Reordering means production time again plus delivery. Minimum +12% — mandatory.
Error 7: not thinking through the joint with the ceiling.
A gap between the panel and the ceiling without a molding is an unfinished solution. Polyurethane molding along the top edge — a mandatory element of any slatted area.
Where to buy a slatted wall panel: summary for action
If you've read this far, you already understand what you need. All that's left is to place the order correctly.
STAVROS slatted panels — this is a complete line of products for accent wall finishing: Panels for painting, wood-like, solid wood. For panels — system Moldings and cornices, decorative elements, Polyurethane appliqués — everything is geometrically compatible and coordinated in tone.
Before ordering: take measurements, define the area, choose a series, and request samples. Calculation based on your measurements is free.
About the company STAVROS
STAVROS is a manufacturer of decorative interior products founded in 2002. St. Petersburg roots: restoration of the Hermitage, Konstantinovsky and Alexander Palaces — these projects marked the beginning of the company's history and its quality standards.
Today, STAVROS is a complete system for accent and systematic wall finishing in residential and commercial spaces. Slatted wall panels of several series, Polyurethane moldings and cornices, Decorative Inserts, Corner and decorative elements — in a unified system, with guaranteed compatibility.
Production — Saint Petersburg. Delivery across Russia. Samples — available for order. Want to buy a slatted wall panel with confidence in the result? STAVROS — a manufacturer trusted by designers, builders, and private customers across the country.
FAQ: main questions and honest answers
Which slatted panel is best to buy for a wall?
Depends on the task. For a TV area and hallway — MDF with a durable coating. For a bedroom — wood-look panels in a warm tone. For a study — paintable panels in a neutral tone. For a natural look — solid wood.
How does an MDF slatted panel differ from a wooden one?
MDF — stable geometry, predictability, wide range of coatings, optimal price. Wooden — unique living grain, tactile natural material, higher price, requires acclimatization.
Can I use one panel for an accent area instead of covering the entire wall?
Yes, and it's a complete design solution. TV area, niche, partition, headboard, hallway — scenarios where one slatted panel delivers maximum visual impact with minimal finishing area.
Which slatted panel is best for under a TV?
Neutral tone, stable geometry, moderate relief. MDF in a warm wood tone or paintable to match the wall. Be sure to plan the bracket mounting and lighting before installation.
What affects the price of a slatted panel?
Material and its density, type of coating, panel size, relief depth, order volume, additional elements (moldings, baseboards, decor), installation and delivery. Consider the cost of a finished wall, not just the panels.
Are moldings needed for a slatted panel?
Yes, they are. A molding at the top and a baseboard at the bottom are the minimum system for a finished look. Without them, any slatted area looks incomplete.
How to choose the panel shade without error?
Only with a sample in your room under your lighting. Catalog photos and monitors do not convey the real shade and texture. STAVROS samples are available for order.


