Article Contents:
- When you need an architectural decor consultation
- What the designer gets from the consultation
- What to prepare before the consultation
- If you only have a floor plan
- If you have a finished visualization
- If you have a DWG or working elevation drawing
- If you only have a photo or reference
- The first question of the consultation: what task should the decor solve
- How to determine the correct scale
- Molding selection
- Ceiling cornice selection
- Ceiling medallion selection
- Baseboard selection
- Wall panel selection
- Why wall area is not enough
- Why you shouldn't start with the capital
- Wood
- Polyurethane
- Why is that
- Why 3–5 options are better than 30
- What to check using a sample
- When 3D is needed
- Example: molding and casing
- Example: panel and baseboard
- Example: pilaster and capital
- Trim
- Panels
- Rosettes and inlays
- Pilasters and Portals
- Why a single total figure is not enough
- What's worse
- Mistake 1. Decor is too large
- Mistake 2. Profile is too thin
- Mistake 3. Molding conflicts with the casing
- Mistake 4. Cornice interferes with the cabinet
- Mistake 5. The panel cannot be laid out without a bad cut
- Error 6. Capital does not fit the pilaster
- Error 7. SKU is missing
- Error 8. 3D shows a non-existent size
- Wooden mouldings and furniture architecture
- Why this is important
- Example
- What is rechecked when replacing moulding
- When replacing the cornice
- When replacing the panel
- When replacing the socket
- Why the consultation must reach this level
- Check before handover
- There is already a fully approved specification
- The project uses one simple profile
- Décor is not a significant part of the architecture
- But a consultation is especially useful
- What does this give

A décor consultation makes sense not when the client "wants something beautiful on the wall," but when there is already a specific project task: to assemble moulding frames, design a portal, resolve the ceiling, select panels, connect built-in furniture with the architecture, or translate a visualization into real product items.
Good consultation on architectural décor should shorten the path between idea and purchase:
project materials → task analysis → décor categories → shortlist → real SKUs → size check → samples / 3D / DWG → quantity → specification → order.
The result is valuable not for the number of images shown, but for how precisely the decorative system is tied to the real object. If after the consultation the designer still does not know which SKU to use, what size it is, how much of it will be needed, and how it joins with adjacent elements, the selection cannot be considered complete.

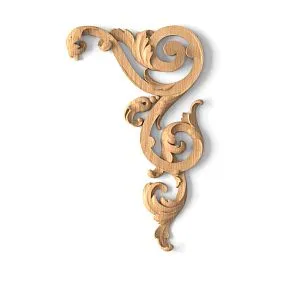


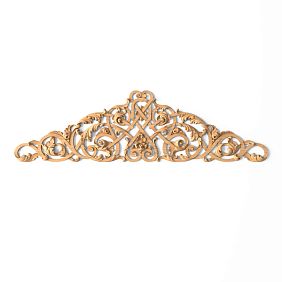
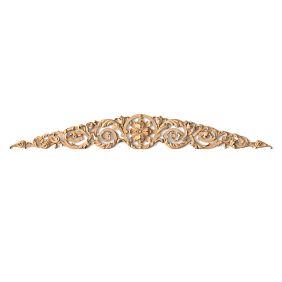
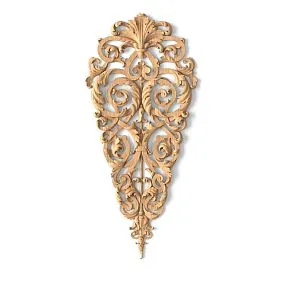
When you need advice on architectural decor
Consultation is especially useful when the project already has geometry, but the decorative system has not yet been translated into specific products.
Typical tasks:
- decorate a long wall;
- build molding frames;
- choose a ceiling cornice;
- choose a ceiling medallion for a chandelier;
- decorate a doorway portal;
- choose pilasters and capitals;
- choose a baseboard to match the door casing;
- select panels;
- link decor with furniture;
- replace conditional visualization elements with real SKUs.
If there are no dimensions, no plan, and no photos of the site, only the general concept can be discussed. In this case, the result will not be a final product set, but a direction: which categories to use, which zones to highlight, approximately what scale is needed, and what source data to collect next.
The more accurate the source materials, the faster selection of architectural decor moves from "options" to specific item numbers.




What the designer gets as a result of the consultation
A useful result is not the phrase "neoclassicism will suit you."
Ideally, after the selection, the project team has:
- list of suitable categories;
- a small shortlist of specific products;
- SKU;
- actual dimensions;
- compatibility notes;
- links to products;
- 3D/DWG, if available;
- quantity calculation principle;
- final specification or a draft for it.
STAVROS Decoration Catalog it is needed for search, but a consultation should reduce the number of options. If after the discussion the designer was given another 40 similar moldings with no priority, the task has not been solved.
A practical shortlist is a few products whose differences are clear: one profile is more restrained, the second is deeper, the third is larger and intended for a large scale.
Our factory also produces:



What to prepare before the consultation
The minimum set depends on the project stage. It is useful to provide:
- room plan;
- main dimensions;
- ceiling height;
- photos of the object;
- visualizations;
- unfoldings;
- PDF or DWG;
- stylistic references;
- information about furniture;
- doors and casings;
- lighting fixtures;
- the estimated budget range.
Without scale, it is impossible to accurately determine whether a specific molding suits the wall or will get lost. A built-in wardrobe can completely change the decision on the cornice, skirting board, or molding frame. The skirting board, casing, molding, and portal form a single unit, so doors are important as well.
Get Consultation
If there is only a floor plan
From the floor plan, it is already possible to determine the decor zones, main axes, portal locations, approximate scale, and product categories. But it is still too early to definitively approve the frame sizes, exact SKU, linear footage, and number of panels.
The result of such a consultation is a conceptual shortlist. The next step is elevations or visualization.
If there is a ready visualization
First, the visualization needs to be broken down into real element types: molding, cornice, skirting board, rosette, overlay, panel, pilaster, capital, bracket.
Then, for each element, it is checked whether a real equivalent exists, whether the size fits, whether the profile matches, whether the model is deformed, and whether it can be linked to an SKU.
The reference and visualization describe an image. The project needs a product that performs the same function and fits the geometry.
If there is a DWG or working elevation drawing
This is the most accurate source material for selection. You can measure the width of wall sections, frames, distance to doors, heights, thicknesses, and junction zones.
In this scenario 3D models and DWG of decor allow you to no longer select a product approximately, but to verify it against the actual geometry of the project.
For example, on the elevation drawing there is a field of 1180 × 760 mm. If a profile with a width of 45 mm is selected, the inner field will be 1090 × 670 mm. If the molding is replaced with 65 mm, the inner size will decrease by another 40 mm along each axis. This means the choice of SKU actually changes the composition.
If there is only a photograph or reference
The first step is to understand what exactly is depicted: a molding frame, ceiling cornice, wall panel, pilaster, overlay, rosette, or bracket.
After that, the task shifts from "find the same one" to "find a real element with the same function and a suitable scale."
From a single photo, it is usually impossible to accurately determine size, depth, material, SKU, quantity, or how it joins. That is why a photo is the start of a consultation, not a finished specification.
The first question in a consultation: what task should the decor solve?
Starting with style alone is not enough. Function comes first.
| Project task | Category |
|---|---|
| break up a long wall | Molding |
| finish the wall at the ceiling | Cornice |
| Decorate the center of the ceiling | Rosette |
| create a vertical | Pilaster |
| Design the portal | pilaster + capital |
| create a textured wall | Panels |
| add a local accent | Overlay |
After that, the material, scale, ornament, and SKU are selected.
How to determine the correct scale
The scale depends on ceiling height, area, wall length, door dimensions, furniture, and viewing distance.
If the wall is 2400 mm wide and the molding is 30 mm, the profile occupies 1.25% of the wall width. On a 7200 mm wall, the same profile occupies about 0.42%. On a large wall, it looks visually lighter.
A consultation should not just name a size, but explain why it fits or why a different scale is needed.
Molding selection
For frames and wall compositions, it is useful to start with the category Moldings made of polyurethane, and then narrow down the selection.
Width, depth, relief, frame size, casing, baseboard, furniture, and viewing distance are checked.
A molding that is too narrow on a large wall may get lost. One that is too wide reduces the inner field, visually weighs down the wall, and may conflict with furniture.
After checking the scale, it makes sense to keep 3–5 SKUs rather than dozens of similar options.
Ceiling cornice selection
A cornice cannot be chosen by style alone. You need to check the height along the wall, the projection across the ceiling, the room height, doors, cabinets, the curtain recess, lighting, and the top of wall frames.
If a cabinet goes all the way to the ceiling, the cornice may run into the facade. Then you either need to interrupt the cornice, change the profile, or give the furniture its own top finish.
Ceiling medallion selection
ceiling rosettes are selected together with the light fixture and the entire ceiling composition.
The chandelier dimensions, medallion size, ceiling height, area, cornice, moulding frame, and center are checked.
Two medallions of the same diameter can have different depths and visual mass. 3D helps you see the relief, while DWG lets you place the product in the working plan.
Skirting board selection
When selecting a skirting board, you need to know right away which doors and architraves are used, what furniture is planned, whether there are wall panels, and what the floor material is.
The key junction is the skirting board ↔ architrave. If their thicknesses differ, the installation joint needs to be resolved in advance. The skirting board is the lower part of the architectural system, not a separate strip around the perimeter.
Selection of wall panels
Wall panels cannot be selected based on color and material alone.
It is necessary to understand:
- wall dimensions;
- module;
- thickness;
- direction;
- quantity;
- edge cuts;
- the location of outlets and switches;
- Doors;
- plinth;
- built-in furniture.
For a design-based selection Wall Panels it should be considered as a layout system.
Why wall area is not enough
For example, a wall is 3650 mm wide, and the nominal panel module is 300 mm.
3650 / 300 = 12,17
This means that twelve whole modules do not cover the field without a remainder.
The consultation should help decide:
- where the trimming will be;
- whether it will be symmetrical;
- how the layout fits with the door;
- where the switches will end up;
- whether the panel conflicts with the cabinet.
Only after this does the correct quantity emerge.
Selection of pilasters and columns
pilasters and columns are selected not by a single beautiful vertical element, but as a system.
Correct sequence:
base → vertical → capital → top termination.
Need to check:
- overall height;
- width;
- protrusion;
- style;
- ornament;
- the junction with the baseboard;
- connection with the cornice;
- distance to the door;
- symmetry.
Why you can't start with the capital
Beautiful Capitals by itself does not guarantee that it will fit in width, height, and relief character to a specific pilaster.
First, the vertical and the overall scale of the system are determined.
Wooden or polyurethane decor
There is no universal answer.
Wood
wooden decorative elements reasonable to choose when the following are important:
- natural texture;
- stain;
- varnish;
- oil;
- Carving;
- connection with furniture;
- connection with wooden portals.
For a more complex ornamental scenario, you need Carved wooden decoration.
Polyurethane
Polyurethane moldings convenient when a paintable system, light weight, repeatable profiles, and developed relief are needed.
molded decoration made of polyurethane suitable for overlays, local accents, and decorative compositions.
Polyurethane wall decor useful where you need to assemble a full wall system rather than a separate part.
How to choose decor to match the style
Style is a filter, but not the first criterion.
First, the following are determined:
- function;
- scale;
- dimensions;
- the material;
- geometry.
And only then:
- classic;
- neoclassicism;
- art deco;
- Modern;
- modern interior.
Why is that
Two moldings can both suit neoclassicism equally well, but one will be too narrow for a large wall, while the second will conflict with the door casing.
From the project's perspective, the second option is worse, even if the ornament is stylistically perfect.
Why a consultant should work with SKU
Phrase:
"take a cornice of about 80 mm"
is not a finished project result.
You need to:
specific SKU → specific size → specific link.
This is the only way the solution can be:
- placed in 3D;
- verified in DWG;
- added to the specification;
- calculate;
- reordered.
The SKU is the point where consultation turns into a design solution.
What the shortlist looks like after the consultation
Example:
| Code | SKU | Category | Size | Status |
|---|---|---|---|---|
| M-01A | ... | Molding | ... | CANDIDATE |
| M-01B | ... | Molding | ... | CANDIDATE |
| CR-01A | ... | Cornice | ... | CANDIDATE |
| PR-01A | ... | Rosette | ... | CANDIDATE |
After verification, one option becomes:
APPROVED
Why 3–5 options are better than 30
A large catalog doesn't make the choice easier.
A useful consultation should:
- rule out unsuitable scale;
- remove conflicting profiles;
- filter out unsuitable materials;
- leave a few solutions with clear selection logic.
When a physical sample is needed
Product samples especially useful if the project includes:
- natural wood;
- complex relief;
- tinting;
- a large batch;
- an expensive interior;
- a sensitive color palette.
3D does not replace texture.
What is checked against the sample
- the actual surface;
- scale;
- quality of finishing;
- painting;
- shadow;
- combination with doors, furniture, and flooring.
For natural wood, a screen render is not enough.
When DWG is needed
DWG is especially needed for:
- molding;
- cornice;
- Baseboards;
- pilasters;
- complex junction;
- panel layout.
It confirms the actual geometry.
When 3D is needed
3D is needed for:
- visual scale verification;
- light and shadow;
- relief;
- repeating elements;
- the relationship between decor and furniture.
The correct combination:
SKU → DWG + 3D + sample.
How a consultant checks element compatibility
Selection cannot be done as a set of independent cards.
Joints need to be checked:
baseboard ↔ door casing
pilaster ↔ capital
molding ↔ corner element
cornice ↔ curtain niche
panel ↔ baseboard
decor ↔ furniture facade
Example: molding and casing
The molding may match in style but protrude further than the casing.
In the front visualization, this is almost unnoticeable.
In the section view, it's a real conflict.
Example: panel and baseboard
If the panel is thicker, you need to decide which one protrudes forward and how the bottom joint is finished.
Example: pilaster and capital
If the capital is much wider than the vertical, the system may become visually heavy.
The consultation should catch such issues before purchase.
How quantity is calculated after the consultation
After SKU approval, the calculation begins.
Linear trim
Moldings, cornices and baseboards:
linear meters → product length → cutting map → number of planks.
Panels
Calculated by modules and layout.
Outlets and covers
are counted individually.
Pilasters and portals
Calculated by completeness:
- base;
- verticals;
- capitals;
- the upper termination.
Why a single total figure is not enough
For example, 24 m of molding does not yet mean that it is enough to buy 24 m of the product.
The required product length of a specific strip and the actual frame segments are needed.
What should be included in the final specification
Example:
| Field | Value |
|---|---|
| Project code | M-01 |
| SKU | specific |
| Category | Molding |
| Size | real |
| Material | PU / wood / MDF |
| Quantity | pcs. / linear m |
| URL | product page |
| 3D | if any |
| DWG | if any |
| Status | APPROVED |
Additionally, it is useful to store:
- room;
- revision;
- comment on the assembly;
- sample;
- finish;
- verification date.
Consultation before or after visualization?
Better — before the final render.
Then the visualizer will immediately use real products.
But consultation is also useful after the render.
In this case, the task is:
- identify the depicted decor;
- find real equivalents;
- verify dimensions;
- replace the proxy;
- update the 3D;
- issue the DWG;
- generate the specification.
What is worse
The riskiest scenario is to leave a "similar" decor in the final visualization and look for the product after approval.
Typical mistakes that a consultation should eliminate
Mistake 1. Decor is too large
Consequence: the room feels overloaded.
How to fix: check the scale on the elevation and in 3D.
Mistake 2. Profile is too thin
Consequence: it disappears on a large wall.
How to fix: compare several real SKUs at the same scale.
Mistake 3. Molding conflicts with the door casing
Consequence: poor joint.
How to fix: check the section.
Mistake 4. Cornice interferes with the cabinet
Consequence: the installation solution has to be changed on site.
How to avoid: check the ceiling assembly in advance.
Mistake 5. The panel cannot be laid out without bad trimming
Consequence: the end modules look random.
How to avoid: lay out according to the actual module.
Mistake 6. The capital does not fit the pilaster
Consequence: the system looks inconsistent.
How to avoid: select the complete set.
Mistake 7. SKU is missing
Consequence: the kit assembler looks for an alternative.
How to remove: SKU in each line of the shortlist and specification.
Error 8. 3D shows a non-existent size
Consequence: the client approved a product that does not exist.
How to remove: 1:1 scale and card verification.
How to move from consultation to purchase
The commercial stage should begin after the consultation workflow.
Correct sequence:
consultation → shortlist → real SKUs → verification → quantity → specification → order.
First you need to understand what exactly suits the project. Only then move on to purchase.
For moldings — the actual profile and linear footage.
For stucco — specific items.
For wooden decor — SKU, material, and quantity.
For panels — module and layout.
For portals — completeness.
Wooden trim and furniture architecture
If the project requires natural profiles, Wooden moldings and cornices it is useful to consider them together with doors, furniture, and wooden portals.
This way, the consultation does not end with the phrase “fits the style,” but leads to a verifiable item that can be added to the documentation.
Final consultation workflow
1. Provide the plan, dimensions, photos, visualizations, or DWG.
2. Formulate the architectural task.
3. Determine decor categories.
4. Select a real shortlist.
5. Lock in the SKU.
6. Check dimensions and scale.
7. Check connections and compatibility.
8. Connect 3D/DWG.
9. Obtain samples if needed.
10. Move selected items to APPROVED.
11. Calculate the quantity.
12. Generate a specification.
13. Check the final project revision.
14. Pass the items to the picker.
15. Place the order using the same SKUs.
What the consultant can determine at different stages of the project
The accuracy of the result depends on the source data. It is useful to state this in advance to avoid creating false expectations.
| Source materials | What can be determined | What is still too early to finalize |
|---|---|---|
| reference / photo | decor type, style, categories | exact SKU, quantity |
| layout | zones, axes, approximate scale | final frames, details |
| Visualization | real analogues, scale, shortlist | exact junctions without dimensions |
| elevation | dimensions, frames, offsets, SKU | some installation solutions without sections |
| DWG + sections | compatibility, details, dimensions | only what is not present in the source geometry |
| full project | specification and calculation | only commercial updating is required |
Why this is important
Consultation should not create an illusion of precision where there is none.
If there is only a photograph of the wall, the linear footage of the molding cannot be reliably determined.
If there is an elevation drawing with dimensions, it can already be calculated.
If there is a section, the projections and junctions can be checked.
How to evaluate shortlist quality
A shortlist is useful only when each option has a reason for being included in it.
For each item, it is advisable to answer:
- what problem it solves;
- why it fits in terms of scale;
- how it differs from the alternative;
- what risk this option has;
- whether a sample is needed;
- which 3D/DWG are available;
- whether the item affects adjacent nodes.
Example
Option A:
- slim profile;
- suitable for a small room;
- minimally reduces the inner frame margin.
Option B:
- deeper;
- works better in side lighting;
- requires a larger offset from the casing.
Option C:
- close-up;
- suitable for a large wall;
- may feel heavy in a bedroom.
Such a shortlist helps you make a decision rather than just browse cards.
How to arrange a SKU replacement after a consultation
After the project is approved, the item sometimes changes: out of stock, budget changed, the client chose a different composition.
You cannot simply delete the old SKU.
It is necessary to record:
OLD SKU → NEW SKU → reason → date → REVISION.
What is rechecked when replacing molding
- width;
- depth;
- inner frame field;
- the joint with the architrave;
- linear footage;
- 3D;
- DWG.
When replacing the cornice
- height;
- overhang;
- curtain niche;
- wardrobe;
- backlighting;
- upper frame.
When replacing the panel
- module;
- thickness;
- trimming;
- Outlets;
- joint with furniture.
When replacing the outlet
- diameter;
- depth;
- lighting fixture;
- center;
- ceiling composition.
Replacing an item is a design change, not just a commercial transaction.
How to calculate linear footage after selecting an SKU
After approving the molding or cornice, you need to move from geometry to purchasing.
For a rectangular frame:
2 × height + 2 × width.
For example, a frame 1200 × 800 mm:
2 × 1.2 + 2 × 0.8 = 4 m.
Five frames:
4 × 5 = 20 m.
But purchasing does not automatically equal 20 meters.
Need to know:
- commercial length;
- number of whole planks;
- cutting map;
- corners;
- ornamental repeat;
- suitability of remnants.
Why consultation should reach this level
Otherwise, the selection ends at a nice SKU, and the kit assembler starts the calculation over.
How to calculate panels after selection
For panels, the module matters more than the area.
Let's say the wall field is 3600 mm.
The module is 300 mm.
3600 / 300 = 12.
If the field is 3700 mm:
3700 / 300 = 12,33.
This means separate logic is needed for the edge elements.
You need to decide:
- whether the cutting is symmetrical;
- where the module begins;
- how the door is positioned;
- where the outlets are;
- whether cutting can be used.
Therefore, the outcome of the consultation for panels is not "approximately 10 m²", but a layout with real modules.
How to prepare the consultation result for the kit assembler
The final handoff should be understandable without a call to the project author.
Minimum package:
- list of APPROVED SKU;
- dimensions;
- quantity;
- URL;
- 3D/DWG;
- room numbers;
- comments on the assemblies;
- samples;
- revision.
Check before handoff
visualization ↔ SKU ↔ DWG ↔ specification ↔ quantity
must describe the same solution.
If the render shows one profile, the DWG shows another, and the table shows a third — the consultation is not finished yet.
When consultation is not needed or can be simplified
Not every project requires in-depth selection.
There is already a fully approved specification
If SKUs, dimensions, and quantities have been verified, a repeat consultation may be unnecessary.
The project uses a single simple profile
If there are no complex junctions or compatibility with other elements, a product check and calculation are sufficient.
Decor is not a significant part of the architecture
In a minimalist interior with a single local item, there is no point in building a large project workflow.
But consultation is especially useful
When:
- there are many elements;
- they are interconnected;
- there are several materials;
- many rooms;
- the project is expensive;
- an error in one SKU will multiply across the entire project.
How to organize repeat selection for a design studio
If a studio handles several similar projects, successful items should be saved to a master library.
For each item:
- SKU;
- category;
- size;
- URL;
- 3D;
- DWG;
- sample;
- installation photo;
- comment;
- date of verification.
What this gives
The next consultation starts not with an empty catalog, but with a proven set of solutions.
But the old SKU still needs to be double-checked before a new order.
The final criterion of a good consultation
After the consultation, the project team should be able to answer without further guesswork:
- what to use;
- where to use it;
- what size;
- why this option;
- what it is compatible with;
- which SKU;
- how much is needed;
- which files to use;
- what will be included in the order.
If the answers are there, the consultation becomes a real project tool.
If all that remains is a set of beautiful images, that is reference selection, not architectural decor selection.