Article Contents:
- Why a gap at the top ruins the look of furniture — six reasons
- When you need to close the gap above furniture — a list of scenarios
- Five ways to close the gap between a cabinet and the ceiling
- Wooden cornice — expressive, architectural, long-lasting
- Decorative strip — simple, neat, modern
- Frieze — when the gap is large and architecture is needed
- Wooden molding — a thin frame and a neat transition
- Wooden trim as a construction set — build your own solution
- How to choose the option based on gap size — decision table
- How to choose the top cabinet trim style
- Modern interior and minimalism
- Neoclassicism
- Classicism and Baroque
- Kitchen
- Country house
- Installing a wooden cornice above the cabinet — step-by-step breakdown
- Mistakes when closing the gap above the cabinet
- Additional decorative elements in the cornice area
- What to buy to close the gap — complete list
- FAQ — popular questions and precise answers
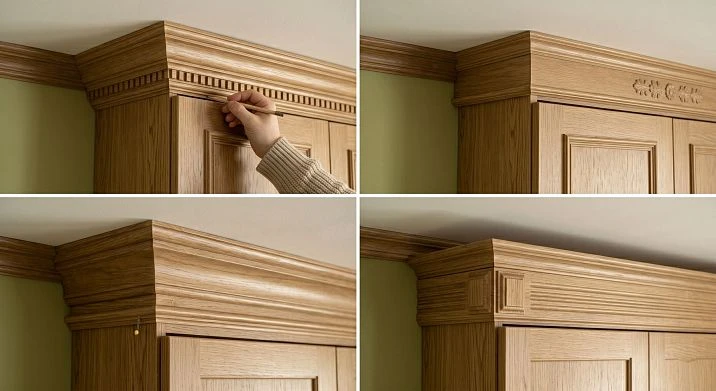
The gap between the cabinet and the ceiling is one of those interior ailments that everyone sees but rarely treats correctly. Most often, it is either ignored (and then the niche above the cabinet collects dust for years) or closed with the first board that comes to hand (and then the cabinet looks even worse than without any cover). Meanwhile, the problem is solved elegantly: a wooden cornice, frieze, molding, or decorative strip made of solid oak or beech — and the cabinet, sideboard, wardrobe, or kitchen unit suddenly starts to look like thoughtful architecture, rather than furniture that "didn't reach the ceiling."
Let's discuss this in detail — with logic, numbers, options, and mistakes to avoid.
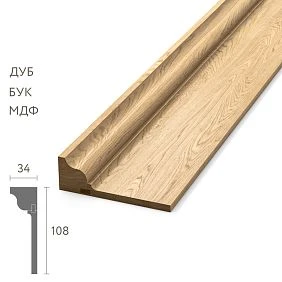
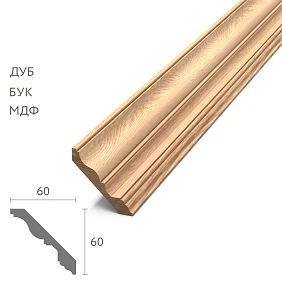
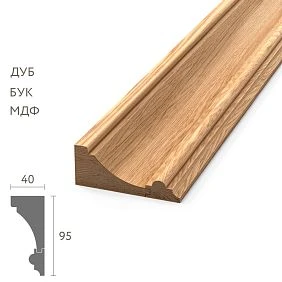
Why the top gap ruins the furniture's appearance — six reasons
Before moving on to solutions, let's understand why the problem even exists and why it can't simply be "ignored."
The cabinet seems randomly placed. When there is a 100–200 mm gap between the top of the cabinet and the ceiling, the furniture reads as temporary: as if it was brought in, placed, and will be moved. Built-in furniture should "sit" in the space — resting on the floor and reaching the ceiling. Only then does it become part of the room's architecture.
The furniture doesn't look built-in. Even if the cabinet is made to fit the niche, if there is an open gap at the top, there is no "built-in" effect. Visually, the cabinet stands separately. A closed gap — and the furniture is perceived as an integral element of the room.
The niche collects dust. This is not just aesthetics — it's everyday life. An open space above the cabinet, 15–20 cm high, is an ideal dust-collecting niche. You can't reach it with your hand or a brush. Everything accumulates there: dust, cobwebs, small debris. Closing the gap means eliminating this hygiene problem forever.
Ceiling unevenness is visible. Russian construction realities are such that the ceiling is rarely perfectly level. On a horizontal surface, a difference of 10–15 mm is unnoticeable. But when there is an open gap above the cabinet, the unevenness of the ceiling is clearly visible, especially with side lighting.
The kitchen or dressing room looks unfinished. Kitchen upper cabinets without a closed gap are a common sight. The installers set the cabinets and left. But the 150–200 mm gap to the ceiling remains. This immediately shows that corners were cut or the job wasn't finished.
The top gap breaks the vertical composition of the room. Ceiling height is a resource. When the cabinet covers the space up to the ceiling (or visually reaches it), it adds a sense of "height" confidence to the room. A gap is a hole in the vertical rhythm.




When to close the gap above furniture — a list of scenarios
There is no universal "always close." There are situations where it is mandatory, and situations where it is appropriate.
Must close:
-
Built-in wardrobe in the bedroom — the wardrobe should be part of the wall, not a piece of furniture against the wall.
-
Walk-in closet — an open top disrupts the sense of completeness and creates a dusty area.
-
Kitchen with upper cabinets — an overhanging niche above the kitchen backsplash or refrigerator immediately lowers the perception of the kitchen.
-
Library or display cabinet — they are inherently architectural items; without a closed top, they lose their grandeur.
-
Furniture wall in the living room — the gap between the top of the furniture and the ceiling breaks the horizontal line of the wall, which should read as a single unit.
Appropriate and recommended:
-
Entryway with built-in wardrobe — a cornice or trim covers the gap and fixes the top line of the entryway.
-
Children's room with wardrobes — a neat top finish makes the room feel put together.
-
Wardrobe in a classic or neoclassical interior — here an open gap is categorically inappropriate: Classic Furniture always finished vertically.
-
Furniture in a niche — if the cabinet stands in a niche, the top gap is especially visible; closing it is the first step towards the feeling of an "architectural niche."
Sometimes it can be left open:
-
A freestanding sideboard or chest of drawers in a loft or industrial interior — here incompleteness can be part of the image.
-
A low cabinet-chest in a modern minimalist interior — if it does not pretend to be "built-in," an open top is normal.
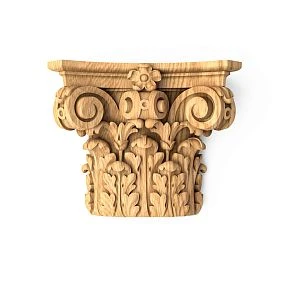
Our factory also produces:
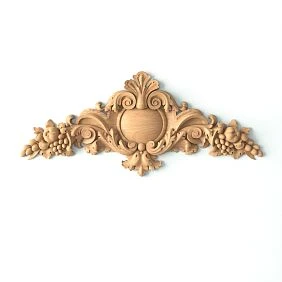

Five ways to close the gap between the cabinet and the ceiling
Each method — for its own task, its own style, its own gap.
Get Consultation
Wooden cornice — expressive, architectural, long-lasting
wooden cornice — this is a profiled product with a pronounced relief: reverse profile, heel, bead, stepped surfaces. The cornice "overhangs" the plane, creating a shadow — and it is this that makes it so expressive. Shadow is relief. Relief is scale. Scale is the feeling of expensive furniture.
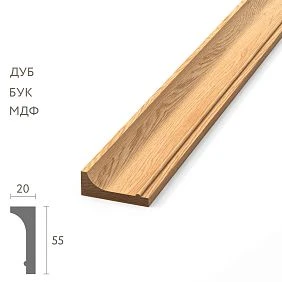
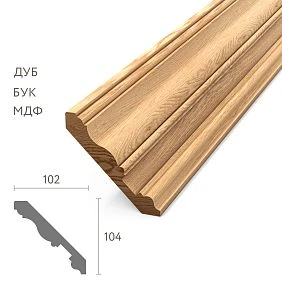
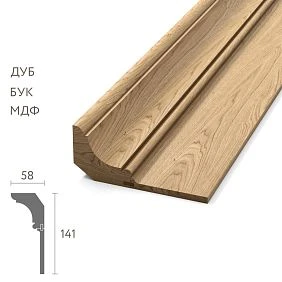
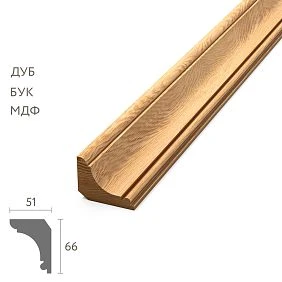
STAVROS cornices — made of solid oak and beech, size range from compact 45 mm to architectural 200 mm in height. This is fundamental: the choice of cornice size depends on the height of the gap and the scale of the furniture.
Cornice 45–60 mm — for thin accents, for chests and short cabinets, for a gap of 30–60 mm. A neat profile, almost not protruding forward. Suitable for Scandinavian style, modern classic, neoclassical.
Cornice 80–120 mm — a universal range for most tasks. Gap 60–150 mm. Expressive profile, readable from a distance of 3–4 meters. Good for hallways, bedrooms, studies.Furniture cornices, moldings and trims— is a separate big topic that STAVROS covered in detail.
Cornice 150–200 mm — a large-scale element. For tall cabinets (2.4 m and above), large gaps (150–250 mm), for classic furniture with pilasters, for halls and studies with ceilings from 3 m. A cornice of this size is already part of the architectural program: it should match baseboard и plinth doors at the same scale.
Cornice installation: on the end of the top cabinet cover (if the design allows) or on an additional mounting board attached to the cabinet's front wall. The cornice is fixed with glue + finishing nails or hidden clips. Corner joints — at 45°, joints — tight, without gaps. Gap to the ceiling — 3–8 mm, filled with elastic acrylic sealant matching the coating color.
Decorative strip — simple, neat, modern
Where a cornice with its relief is excessive, a decorative strip works. This is a rectangular profile made of wooden trim, fixed horizontally at the transition between the top of the cabinet and the ceiling. No relief — just a clean horizontal line.
Application: modern minimalism, Scandinavian style, kitchens with smooth facades, built-in cabinets in a neutral interior. Painting the strip in the cabinet color — it 'dissolves' into the furniture, closing the gap discreetly. Painting in the ceiling color (white) — it blends into the ceiling plane, and the cabinet seems to go upward without a visible boundary. This is a smart technique: a white strip creates an illusion of height.
Plank thickness: from 15 mm (to close a gap of 15–40 mm without overlap) to 40–50 mm (if massiveness is needed and the gap is 50–100 mm). Made from solid beech or oak — no chipboard with edging, no glued-on plastic. Wood holds its shape, takes paint perfectly, and lasts for decades.
Wooden trim from the STAVROS catalog — this is exactly the "base" from which the decorative plank, the lower threshold, and the insert frame are made. This is a universal constructor for any horizontal transition.
Frieze — when the gap is large and architecture is needed
Frieze — a horizontal decorative strip located between the cornice and the trunk of an architectural structure. In a furniture context: the horizontal zone between the top of the cabinet and the ceiling cornice, which needs to be "filled" not just with an extension board, but with a decorative belt.
When a frieze is needed:
-
Gap 150–350 mm — too large for a regular plank or molding.
-
The furniture aspires to a classic or neoclassical look.
-
It is necessary to create the feeling of a "cornice belt" — an architectural completion.
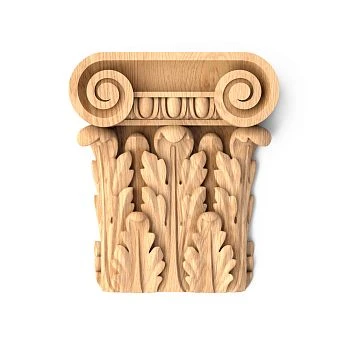
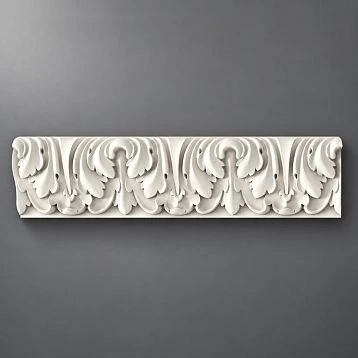
Wooden baguette with "Frieze" ornamentfrom STAVROS — carved millwork from solid oak or beech with a classic ornament. This is exactly what turns the top part of the cabinet from a "plug" into a decorative belt. Ornament: leaves, beads, key pattern, meander, herringbone — depending on the style of the interior and furniture.
The composition with the frieze is built as follows:
-
Horizontal molding along the lower edge of the frieze (on the top of the cabinet).
-
Frieze board or frieze molding with ornament.
-
Upper cornice extending to the ceiling.
Three layers — and the cabinet gets a full cornice entablature, as in classical architecture. This is no exaggeration — that's exactly how library cabinets were built in the 18th–19th centuries. Today, this technique works just as well.
Wooden molding — a thin frame and a neat transition
Wooden molding — a profiled overlay with moderate relief. At the cabinet–ceiling transition, it works as a "seam": it closes the boundary, gives it a profile, adds shadow, but does not pretend to be the scale of a cornice.
Application: gap up to 50–80 mm, neoclassical or modern interior, furniture with paneled fronts, cabinet next to doors with plinth the same profile. Molding on top of the cabinet is a continuation of the facade moldings. This is the principle of a unified system: from legs to cornice, from baseboard to ceiling, one profile repeats at different levels.
furniture moldingsin the STAVROS catalog — from narrow 15 mm to wide 180 mm. Profiles: smooth, with a heel, with a quarter round, with a reverse profile, with beads, with a cord. For the cabinet–ceiling transition, profiles with an overhang are optimal — they provide shadow and hide line irregularities.
Molding width at the top transition: 40–80 mm for a gap of 30–80 mm. If the gap is larger — molding plus an extension (neutral strip of trim) and another molding on top.
Wooden ceiling baseboard — also a solution for the top part of the cabinet if the gap is small (40–80 mm): a ceiling plinth profile installed at the cabinet-ceiling transition visually 'extends' the ceiling cornice to the top of the furniture.
Wooden trim as a construction set — assemble your own solution
If none of the standard options fit — the gap is non-standard, the style is unique, the furniture is non-standard — Wooden trim becomes a 'wooden construction set'.
From trim you can assemble:
-
Composite cornice: bottom molding + horizontal rail + top cornice. Three profiles form a single multi-level composition that covers a gap of any height.
-
Frame infill: horizontal rails + vertical inserts form a "frame" above the cabinet — this is a decorative frieze assembled from molding.
-
Hidden mounting for lighting: LED strip under the upper cornice — and the gap turns into a lighting zone. A decorative molding strip hides the strip and creates soft diffused light near the ceiling.
solid wood millwork from STAVROS — bars, slats, flat strips, shaped profiles. Oak, beech, pine. Cross-section from 10×10 to 80×80 mm. Length up to 3 m. For painting, for varnish, for oil.
How to choose the option based on gap size — decision table
Gap size is the main selection criterion. Here is the systematized logic:
| Gap height | Recommended solution | Profile type | Result |
|---|---|---|---|
| Up to 30 mm | Thin strip or molding | Molding 15–25 mm, molding 20–30 mm | Gap closed, neat border |
| 30–80 mm | Molding or small cornice | Molding 40–70 mm, cornice 45–60 mm | Accent horizontal, profile with shadow |
| 80–150 mm | Medium cornice or extension + molding | Cornice 80–120 mm or plank + molding | Expressive finish |
| 150–250 mm | Large cornice or frieze + cornice | Cornice 150–200 mm or frieze + cornice | Architectural cornice belt |
| More than 250 mm | Composite composition | Frieze + filler + cornice | Full entablature |
Additional criteria:
-
Ceiling unevenness: if the difference exceeds 10 mm, choose a cornice with sufficient overhang so that the gap between the cornice and the ceiling does not appear "crooked." Flexible sealant matching the coating color will hide the remaining gap.
-
Cabinet depth: for deep cabinets (600 mm or more), a cornice with a 40–60 mm overhang looks proportional. For narrow pencil cabinets, a cornice with a small overhang of 20–30 mm.
-
Corner cabinets: joints of cornices on internal and external corners — strictly at 45°. For complex corner structures, corner blocks or composite corner elements are recommended.
How to choose the style of cabinet top finishing
Style is not just the profile shape. It is the coating, tone, and connection with other wooden elements in the room.
Modern interior and minimalism
Smooth Wooden trim or a simple molding without relief. Coating in the color of the furniture or white — "disappears" into the ceiling. No ornaments, no steps. Maximum thin profile — 15–25 mm. Goal: not to draw attention to the transition, but to neatly cover it.
Neoclassicism
Molding with a moderate profile 40–80 mm. Symmetry: the top molding of the cabinet repeats the profile of the bottom baseboard. This is a classic technique — "framing" the object with identical horizontals at the top and bottom. Finish: matte enamel, ivory, gray, white. Sometimes — matching the cabinet fronts.
Classical and Baroque
wooden cornice 120–200 mm with a pronounced profile. Below it — a frieze band witha wooden ornament "Frieze". Even lower — a horizontal molding above the doors. Three levels — one architectural language. Toning to match oak, walnut, mahogany — with or without patina. Wooden items in this context — these are not details, this is architecture.
Kitchen
In the kitchen, the cornice or strip must consider several specific requirements:
-
Finish — moisture-resistant. The vapor-moisture load in the kitchen is serious. Two-component polyurethane varnish, moisture-resistant enamel, or epoxy coating — otherwise the cornice will start to warp within a year.
-
Connection with the fronts. The cornice above the kitchen cabinets is an extension of the front system. If the fronts are white — the cornice is white. If the fronts are wood-look — the cornice has the same toning.
-
Ventilation. If there are ventilation openings or facade grilles above the kitchen cabinets — the cover should not block them. Plan for vents in advance.
-
Access to utilities. If pipes or electrical wiring run above the cabinets — the cornice or frieze must be mounted on removable fasteners (clips, clamps) so that it can be removed without damage when necessary.
Country house
Natural oak under oil or varnish. Cornice with a large profile — 120–180 mm, no imitation, only real wood with a living texture. Tinting: warm walnut, brown, "old pine".wooden cornices and skirting boardsMade of solid wood — exactly what is needed for a country interior: naturalness, durability, warm texture.
Installation of a wooden cornice above a cabinet — step-by-step breakdown
Installing a cornice or strip above a cabinet is not difficult but requires precision. Let's break down the process.
Step 1. Preparation. Measure the gap between the top of the cabinet and the ceiling at three to four points along the length. Record the maximum and minimum dimensions. If the difference is more than 10 mm, the ceiling is uneven, and this must be considered when choosing the profile.
Step 2. Profile selection. Based on measurements and style, choose a cornice, molding, or strip from the catalogfurniture moldings. Check: the cornice overhang covers the maximum gap to the ceiling. The shadow from the cornice overhang will hide the unevenness.
Step 3. Cutting. Cut the cornice to the length of the cabinet. External corners — cut at 45° on both sides, interlocking joint. Internal corners — straight cut with butt joint or using a corner block.
Tool for cutting: miter saw with a 45° angle — ideal. Hacksaw with a jig — acceptable. Angle grinder — no, it does not provide a clean cut on wood.
Step 4. Mounting board. If the top of the cabinet does not have a rigid base for attaching the cornice — mount a horizontal strip 30×40 mm to the front wall of the cabinet with screws. This is the base for the cornice. Strip height: the lower edge of the cornice should be 5–10 mm below the top of the cabinet (to create a shadow that hides the transition).
Step 5. Applying glue and installation. Assembly glue — KLEIBERIT 503 or equivalent. Glue strips at 150–200 mm intervals on the back planes of the cornice. Press, align horizontally (level is mandatory). Finish nails 1.5×40 mm or 1.8×50 mm — at 250–300 mm intervals through the front plane (then putty), or through the back rail (preferred — no visible heads on the front).
Step 6. Corner joints. Press and check joint tightness. If there is a gap up to 1–2 mm — liquid nails + putty. If the gap is larger — recut. On the external corner joint — painter's tape for 30 minutes until the glue sets.
Step 7. Gap to the ceiling. If the ceiling is uneven, the gap between the cornice and the ceiling can be up to 8–10 mm. Fill with acrylic sealant, smooth with a wet finger or corner trowel. Sealant paintable — paint to match the ceiling or cornice color.
Step 8. Finish coating. Putty nail heads → sand with P240 → prime → paint in 2–3 coats with sanding between coats with P400. Or: apply stain → varnish 2–3 coats. The cornice is painted after installation — so the coating also covers the joints.
Mistakes when closing the gap above the cabinet
List of common mistakes — to avoid repeating them.
Closing the gap with a random board without a profile. A piece of chipboard screwed to the top of the cabinet is not a solution. It is visible. It looks cheap. And no amount of painting will fix it.
Making a cornice too massive in a low room. Ceilings 2.5 m, gap 80 mm, cornice 200 mm. The cornice will "press" — overhang overhead. Rule: the height of the cornice should not exceed the gap size by more than 1.5–2 times. For a gap of 80 mm — cornice no more than 120 mm.
Not accounting for the opening of upper doors. If the cabinet has upper hinged doors or lift mechanisms — the cornice or strip should not block the door's path. Check the opening trajectory before installing the cornice.
Not connecting the top of the cabinet with baseboards and door casings. The cornice above the cabinet in "its own" style, and everything else in another — dissonance. The cornice, Wooden baseboard on the floor and door casings — in one language. Then the system works.
Using a profile of a different style. A carved classic cornice on an IKEA cabinet with flat fronts. It looks absurd. The cornice should match the furniture, not "decorate" it against its nature.
Forgetting about ventilation. The kitchen is a special case. Above the hood, above cabinets near the stove — ventilation requirements dictate the presence of gaps. A solid cornice where ventilation is needed is a technical mistake.
Making a solid top where access to utilities is needed. Pipes, sockets, switches above cabinets — plan for access. A removable cornice on clamps is the right solution.
Not checking the unevenness of the ceiling before installation. If the ceiling "wanders" and the cornice is mounted strictly horizontally — a wedge-shaped gap appears. You either need to level the ceiling or choose a profile with sufficient overhang.
Painting before installation. Many paint the cornice before installation — this is a mistake. Joints and nail heads after installation still need to be puttied and painted. It's better to install a white (primed) cornice, level the joints, and paint it finally.
Additional decorative elements in the cornice area
The cornice above the cabinet is a point around which a broader decorative program often forms.
Decorative overlays on facades. If the cabinet facades are smooth and the cornice is classic — a dissonance. Adding decorative inserts The cabinet door is "pulled" to align the facade with the cornice level. An overlay in the center of the door, molding around the perimeter — and the smooth chipboard facade turns into a framed one.
Carved decor in the cornice belt. For a classic or country-style cabinet in the cornice belt — Carved wooden decoration: overlays with leaves, consoles, horizontal frieze elements. Installed with glue before mounting the cornice — simpler and more precise.
Illumination under the cornice. LED strip under the lower edge of the cornice — creates diffused light that hides the upper part of the cabinet in a "light haze" and provides an accent horizontal line near the ceiling. Mounting rail with wooden trim a hidden groove for the strip — in the catalog.
Ceiling plinth as a continuation of the cornice. If the ceiling cornice in the room is wooden, then the cornice above the cabinet should match or continue it. Wooden Skirting PLT-001 acting as a ceiling cornice and the same profile on the cabinet — a unified horizontal system.
What to buy to close the gap — full list
Everything for finishing a cabinet, kitchen, or wardrobe — in one place, from one manufacturer, with proven quality.
-
wooden cornice — the main element. Height 45–200 mm. Oak, beech. For painting, for varnish, for stain. For classic, neoclassical, kitchen, wardrobe.
-
Wooden cornices and moldings— a complete collection of moldings: cornices, baseboards, moldings, architraves. One system, one quality.
-
Wooden cornices and moldings in Moscow— for Moscow clients: available in stock in Moscow, self-pickup.
-
Wooden molding — for thin transitions and neoclassical solutions. Width 15–180 mm.
-
furniture moldings— the entire range of moldings for furniture.
-
Wooden trim — basic slats, bars, strips, composite profiles.
-
Wooden baguette with "Frieze" ornament— for a classic frieze belt in the cornice area.
-
Wooden ceiling plinth PLT-001 — for small gaps and for connection with the ceiling cornice.
-
Decorative Inserts — for cabinet facades under the cornice.
-
Carved wooden decoration — for cornice belts in classic interiors.
-
Solid wood products — full catalog.
FAQ — popular questions and precise answers
How to close the gap between the cabinet and the ceiling?
There are five options: wooden cornice, a decorative strip made of trim, Molding, a frieze or a composite composition. The choice depends on the gap height, furniture style, and interior. For a gap up to 50 mm — a molding or strip. From 80 mm — a cornice. From 150 mm — a cornice or frieze.
How to close the gap above kitchen cabinets?
For the kitchen — a decorative strip or cornice with a moisture-resistant coating. Important: do not block ventilation openings, consider the opening of upper facades, if necessary, provide a removable mount for access to utilities.
Can a cabinet be made to look built-in up to the ceiling?
Yes. To do this, the gap is closed with a frieze or cornice in the color of the furniture or wall. Then the eye does not fix the boundary — the cabinet 'goes' to the ceiling. A white cornice on a white cabinet with a white ceiling is a classic technique for creating the illusion of built-in.
What is better — a cornice or a simple strip?
Depends on the style. A strip is for minimalism and Scandinavian style: discreet, neat, modern. A cornice is for neoclassicism and classic style: expressive, large-scale, architectural. A cornice always looks "more expensive" due to its profile and shadow.
Can the gap be closed if the ceiling is uneven?
Yes. Choose a cornice with sufficient overhang: it creates a horizontal shadow that 'eats' the unevenness. The remaining gap between the cornice and the ceiling (up to 8–10 mm) — acrylic sealant in the color of the ceiling. A rigid straight strip without overhang, on the contrary, emphasizes the unevenness.
How to choose a wooden cornice for kitchen cabinets?
Based on three parameters: 1) gap height → determines the size of the cornice; 2) facade style → determines the profile; 3) facade finish → the cornice is painted in the same or closest possible color. For the kitchen — moisture-resistant coating, polyurethane varnish, or two-component enamel.
Is a cornice needed if the cabinet is in a niche?
In a niche, the cabinet is already 'protected' on three sides. But the gap at the top is visible, perhaps even more clearly — because the gaze moves along the ceiling of the niche. A cornice or strip in a niche is a mandatory finishing element.
How to connect the cornice above the cabinet with the overall room decor?
Three rules: 1) the cornice profile repeats the profile of the ceiling cornice or floor skirting boards; 2) the tinting — the same wood species and the same tone as of door casings; 3) the scale of the cornice matches the scale of other profile elements in the room.
The gap above the cabinet is not a structural defect. It is an incompleteness that is easy to fix. A wooden cornice, properly selected and professionally installed, gives the cabinet what it was missing: a finish. A top point. A horizontal line that says: everything is finished here, thought was put into it, it was done right.
STAVROS — manufacturer wooden crown moldings, molding, trim, baseboards и wooden decorative elements made of solid oak and beech. Own workshop, own drying to 8–10%, own quality control. Best-sellers, new items, and the full catalog are on the website. Warehouses in St. Petersburg and Moscow. Contact us to confirm shipping to your destination. STAVROS — where furniture gets a finished look.