Article Contents:
- What Is Cabinet Molding?
- Cabinet Molding vs. Cabinet Trim
- Five Main Cabinet-Trim Systems
- 1. Cabinet Crown Molding: The Top Line
- Cabinet Crown vs. Room Crown Molding
- When Cabinets Should Reach the Ceiling
- When Cabinets Should Stop Below the Ceiling
- How Large Should Cabinet Crown Be?
- 2. Applied Cabinet Door Molding
- True Frame-and-Panel Door vs. Applied Molding
- Why Applied Molding Is So Effective
- Cabinet Door Trim Molding: The Main Design Question
- How Far Should Molding Be From the Door Edge?
- Polyurethane Decorative Cabinet Trim
- MLDPU-004: A Slightly Stronger Furniture Line
- MLDPU-002: Medium-Scale Cabinet and Built-In Trim
- MLDPU-003: Use the Larger Profile Deliberately
- 3. Cabinet End-Panel Molding
- Island End Panels
- Refrigerator and Pantry Enclosures
- Built-In Bookcases
- Wardrobes and Armoires
- Bathroom Vanities
- 4. Light-Rail and Lower Cabinet Trim
- Toe-Kick and Base Trim
- 5. Decorative Overlays, Appliques, and Corners
- Example: NPU-501 as a Furniture Overlay
- Cabinet Molding and Furniture Appliques Should Not Compete
- How Cabinet Molding Changes Style
- Traditional
- Neoclassical
- Transitional
- Modern
- Art Deco
- Kitchen Remodel
- New Custom Kitchen
- Built-In Media Cabinet
- Library Built-In
- Walk-In Closet
- Bathroom Vanity
- Freestanding Furniture
- What is cabinet molding?
- What is cabinet trim molding?
- What is kitchen cabinet molding and trim?
- Can molding be added to flat cabinet doors?
- Is applied molding the same as a true shaker or frame-and-panel door?
- Can polyurethane molding be used on cabinet doors?
- What polyurethane molding is suitable for furniture?
- Which profile is best for small cabinet doors?
- Which profile is best for large wardrobe doors or island panels?
- Can polyurethane trim be stained like wood?
- Can polyurethane molding be used on MDF cabinet doors?
- Can I put molding on kitchen cabinet end panels?
- Can I use decorative corner elements on cabinet doors?
- Can I use appliques with cabinet molding?
- How should cabinet molding be painted?
- Should I remove doors before applying molding?
- How do I calculate molding for cabinet doors?
- Can cabinet molding interfere with hinges?
- Can cabinet molding interfere with pulls?
- Is polyurethane cabinet trim structural?
- What makes cabinet molding look custom rather than applied?
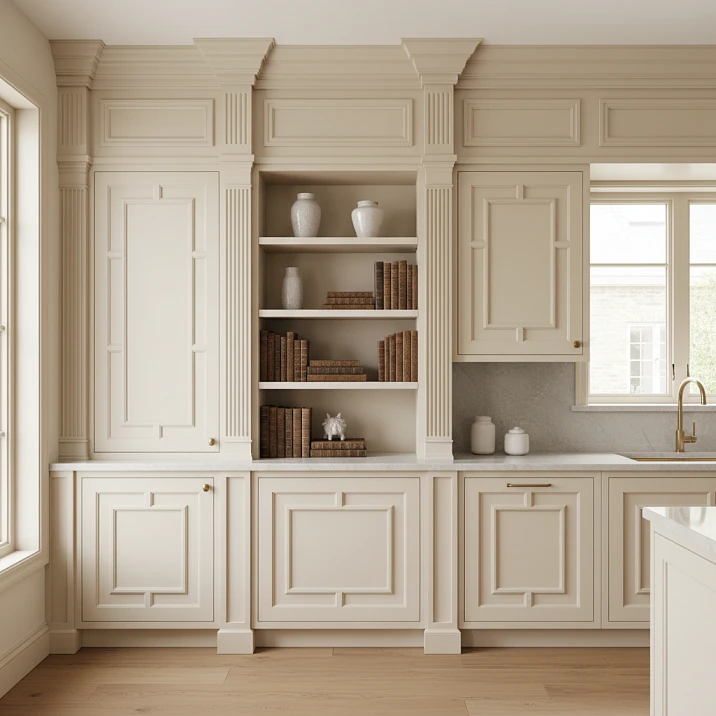
Cabinetry becomes architecture when its lines stop looking like separate boxes and start reading as one composed elevation. The top edge, door proportions, panel frames, end panels, light rails, applied molding, decorative corners, and small relief details all contribute to that effect. Two kitchens can use similar cabinet boxes and similar paint, yet one feels custom and the other feels generic. Much of the difference comes from how the trim is designed.
In the U.S., homeowners and designers search for this subject using terms such as cabinet molding, cabinet trim molding, kitchen cabinet molding and trim, cabinet door molding, and cabinet door trim molding. Those phrases cover several different products. A cabinet crown at the top of an upper cabinet is not the same thing as a narrow molding applied to a slab door. A light rail below wall cabinets is not the same thing as a decorative frame on an island end panel. Good design begins by separating those functions.
This guide explains the complete system: where molding belongs, how to scale it, how to coordinate it with doors and hardware, when wood or MDF is the logical material, and where lightweight paint-grade polyurethane molding can be useful for decorative cabinet fronts, built-ins, wardrobes, vanities, and furniture.
STAVROS has verified rigid polyurethane MLDPU profiles that are specifically presented for both interior and furniture applications. It also offers polyurethane appliques and onlays and separate decorative corner molding. Those products make sense when the goal is applied paint-grade decoration. They should not be confused with structural cabinet rails, hardwood face frames, door stiles, or load-bearing trim.
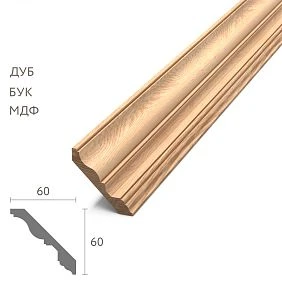
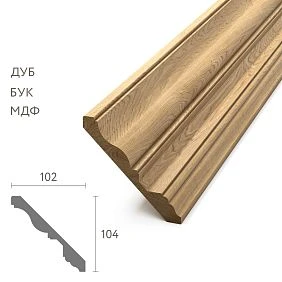
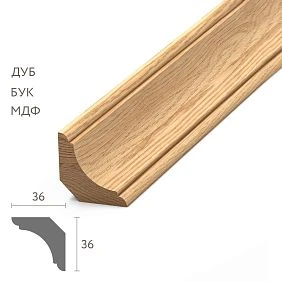
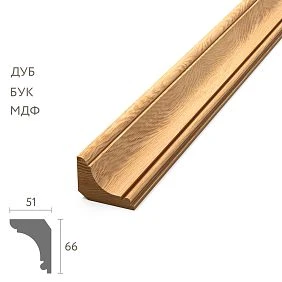
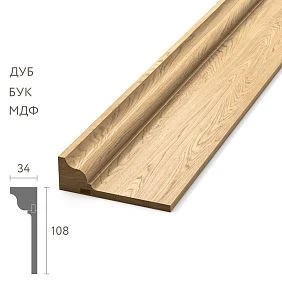
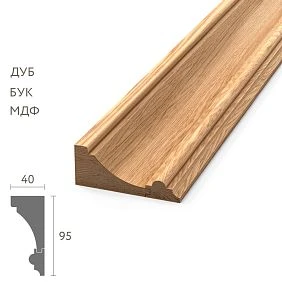
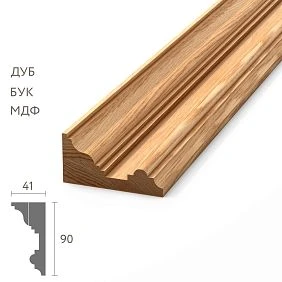
What Is Cabinet Molding?
Cabinet molding is a broad U.S. term for decorative or finish trim added to cabinetry. It can appear at the top, bottom, face, side, or around individual door panels.
Depending on the project, cabinet molding can mean:
- crown molding at the top of upper cabinets;
- light-rail molding below wall cabinets;
- scribed trim used to close a gap at a wall or ceiling;
- applied molding on slab cabinet doors;
- panel molding on end panels and islands;
- decorative trim around glass inserts;
- furniture-style cornice molding on built-ins and wardrobes;
- small bead or profile molding used to create a raised frame;
- ornamental polyurethane trim added to a paint-grade facade.
The phrase sounds simple, but the design role changes completely from one application to another.




Cabinet Molding vs. Cabinet Trim
In everyday U.S. use, cabinet molding and cabinet trim overlap. “Molding” often suggests a shaped decorative profile, while “trim” can include flatter fillers, edge pieces, scribe strips, light rails, and other finishing components.
For SEO and content planning, both phrases belong in the article. For specification, however, the drawing should identify the exact component.
Наша фабрика также производит:
Смотреть весь Каталог продукции
Five Main Cabinet-Trim Systems
Most cabinet molding projects can be organized into five systems:
- top molding and cabinet crown;
- applied door molding;
- panel and end-panel molding;
- base, toe-kick, and light-rail trim;
- decorative overlays, corners, and appliques.
Получить консультацию
1. Cabinet Crown Molding: The Top Line
The top of a cabinet run is one of the strongest horizontal lines in a kitchen or built-in. It can stop cleanly below the ceiling, continue into a furniture-style crown, or disappear into a ceiling-height filler system.
A traditional cabinet crown makes the cabinetry feel taller and more permanent. It also creates a shadow line that separates the cabinet face from the ceiling plane.
The important distinction is that cabinet crown is furniture or millwork trim. It should not automatically be treated as the same product as architectural room crown molding.
Cabinet Crown vs. Room Crown Molding
Room crown molding bridges the wall-ceiling junction and follows the perimeter of the room. Cabinet crown sits on cabinetry and terminates with the cabinet composition.
Sometimes designers intentionally coordinate the two, but they still perform different jobs.
The current STAVROS Crown Mouldings category contains HI WOOD high-density polystyrene room-crown products. Those should not be mislabeled as polyurethane cabinet crown.
When Cabinets Should Reach the Ceiling
Ceiling-height cabinetry creates a strong built-in appearance, but the top detail has to accommodate real construction tolerances.
Ceilings are rarely perfectly level. If the cabinet boxes are installed level and the ceiling varies, the gap above them will vary too. A top filler, scribe piece, or multi-part crown can absorb that variation more gracefully than trying to force a rigid cabinet directly into an uneven ceiling.
When Cabinets Should Stop Below the Ceiling
A deliberate gap can work when the cabinetry is furniture-like, when the room has a high ceiling, or when the design intentionally separates the cabinets from the architecture.
The key word is deliberate. A narrow, inconsistent gap often looks unfinished. A generous and consistent reveal can look intentional.
How Large Should Cabinet Crown Be?
There is no universal crown height for an eight-, nine-, or ten-foot ceiling.
Scale it to cabinet height, door width, ceiling height, distance between cabinet top and ceiling, depth of the upper cabinets, overall style, and adjacent room crown or ceiling details.
A large multi-step crown can make narrow upper cabinets look top-heavy. A tiny crown can disappear above tall full-height cabinetry.
2. Applied Cabinet Door Molding
Cabinet door molding is one of the most useful ways to change the appearance of a flat paint-grade door.
Instead of replacing the entire door with a true frame-and-panel construction, a narrow profile can be applied to the face to create the visual language of a panel.
This approach works particularly well for slab wardrobe doors, painted kitchen cabinet doors, bathroom vanity fronts, bookcase doors, built-in cabinetry, furniture fronts, and interior doors coordinated with cabinetry.
True Frame-and-Panel Door vs. Applied Molding
A traditional frame-and-panel cabinet door is a constructed assembly. Rails and stiles form the outer frame, and the center panel is held within that structure.
Applied molding is decorative. The underlying slab door remains structurally complete; the molding is added to its surface.
That distinction matters. Applied molding can create a similar visual effect, but it does not turn a slab door into a structural frame-and-panel door.
Why Applied Molding Is So Effective
A slab door is one uninterrupted plane. Even a shallow profile creates four new shadow lines and a defined interior field.
Once painted in one color, the viewer reads the door as more architectural without necessarily noticing how the panel effect was made.
Cabinet Door Trim Molding: The Main Design Question
The key question is not “Which molding is prettiest?” It is: How much flat surface can the door support?
Measure door width and height, hinge-side clearance, handle position, distance to neighboring doors, distance to drawer fronts, and available flat field inside any existing edge detail.
How Far Should Molding Be From the Door Edge?
There is no one correct inset. The distance should be proportional to the door size and hardware.
A narrow wardrobe door may need a tighter inset. A large pantry door can support a wider border. Paired doors must mirror each other precisely.
The most important rule is consistency across the entire cabinet elevation.
Polyurethane Decorative Cabinet Trim
For paint-grade applied work, a rigid polyurethane profile can be useful because it is lightweight and repeatable.
STAVROS MLDPU profiles are verified for wall and furniture applications. For example, the MLDPU-001 polyurethane molding is a compact 10 × 6 mm profile approximately 102.36 inches long. Its small scale makes it suitable for delicate applied frames on furniture fronts where a larger architectural profile would be too heavy.
This is the type of product that fits the intent behind the phrase polyurethane decorative cabinet trim: a paint-grade ornamental profile applied to a cabinet or furniture surface, not a structural cabinet component.
MLDPU-004: A Slightly Stronger Furniture Line
The MLDPU-004 polyurethane molding measures 15 × 8 mm and is also presented for wall and furniture finishing.
Compared with MLDPU-001, it creates a stronger shadow while remaining relatively compact. That makes it useful for larger cabinet doors, wardrobe fronts, vanity panels, and secondary built-in frames.
MLDPU-002: Medium-Scale Cabinet and Built-In Trim
The MLDPU-002 polyurethane molding is approximately 22 mm wide with an 11 mm projection.
That scale is more architectural. It can work on large wardrobe doors, built-in panels, kitchen-island ends, and substantial furniture facades where a tiny bead would disappear.
MLDPU-003: Use the Larger Profile Deliberately
The MLDPU-003 polyurethane molding is about 35 mm wide and 12 mm deep.
On a small upper-cabinet door, that can be too dominant. On a large built-in, tall wardrobe door, furniture panel, or island end, it can create the visual weight the composition needs.
This is why product scale must be judged against the facade, not selected from the catalog in isolation.
3. Cabinet End-Panel Molding
Cabinet ends are frequently visible at the end of a kitchen run, on an island, around a refrigerator enclosure, or on a freestanding built-in.
A plain finished end panel can be perfectly appropriate in a modern kitchen. In a traditional or transitional kitchen, however, applied molding can make the end panel feel like part of the door architecture rather than the side of a box.
Island End Panels
Kitchen islands are especially good candidates for applied molding because the ends are large, visible, and often free of hardware.
Common options include one large rectangular frame, two stacked frames, three narrow vertical frames, a large frame with a central applique, or a frame with decorative polyurethane corner elements.
The design should respond to island width, countertop overhang, seating, and base details.
Refrigerator and Pantry Enclosures
Tall appliance panels can look extremely flat because of their scale.
Applied cabinet molding can introduce vertical divisions that coordinate with nearby door panels without adding another material.
Keep molding clear of appliance ventilation zones and manufacturer-required clearances.
Built-In Bookcases
Built-ins benefit from a three-level trim hierarchy: top cornice or crown, vertical side trim, and panel molding on doors and lower cabinet faces.
When all three levels use compatible proportions, the bookcase reads like a permanent architectural installation.
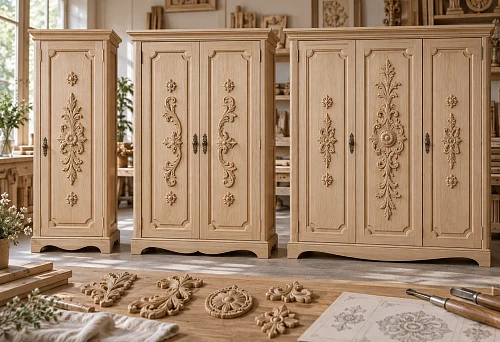
Wardrobes and Armoires
Tall doors are ideal for vertical panel molding because they offer enough surface area for elongated frames.
A narrow polyurethane profile can visually reduce the apparent width of a large slab door and create a more tailored furniture character.
Bathroom Vanities
Vanities can use the same applied molding logic as kitchens, but the finish system must be appropriate for a bathroom environment.
The exact molding material is only one part of the assembly. Adhesive, primer, paint, substrate, and cleaning exposure all matter.
4. Light-Rail and Lower Cabinet Trim
Light-rail molding sits below wall cabinets and can conceal under-cabinet lighting, wiring, or the unfinished lower edge of a cabinet box.
It should be shallow enough not to block the working light and low enough to hide the hardware from normal eye level.
This is a different product category from applied polyurethane panel molding. Do not substitute a decorative profile without checking its dimensions and installation purpose.
Toe-Kick and Base Trim
The cabinet base is the visual foundation of the composition.
Modern kitchens often use a recessed toe kick. Furniture-style kitchens may add a base molding, plinth, feet, or shaped apron.
The base detail should be coordinated with the top crown. A heavily ornamental top with an unresolved base can make the cabinet feel visually unstable.
5. Decorative Overlays, Appliques, and Corners
Linear molding creates structure. Appliques create emphasis.
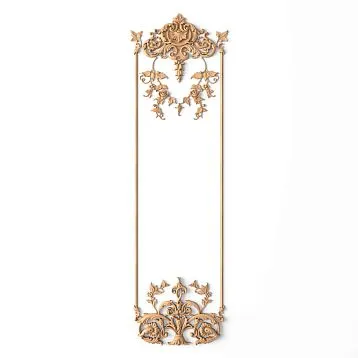
The STAVROS polyurethane appliques and onlays collection contains decorative relief elements suitable for furniture, doors, wall panels, and other interior compositions.
Use them as center ornaments on large cabinet doors, vertical accents on wardrobes, decorative motifs on vanity fronts, ornaments above drawer banks, focal details on built-ins, or accents within large applied molding frames.
Example: NPU-501 as a Furniture Overlay
The NPU-501 polyurethane applique is a separate relief ornament rather than a linear molding.
That distinction is important for design and SEO. Cabinet molding describes the linear frame; cabinet applique or furniture onlay describes the focal ornament placed within or around that frame.
Cabinet Molding and Furniture Appliques Should Not Compete
A well-designed cabinet front usually has one dominant system.
If the molding frame is elaborate, keep the applique restrained. If the central applique is highly sculptural, use a quieter molding profile around it.
Trying to maximize every layer of ornament makes the door look crowded instead of custom.
How Cabinet Molding Changes Style
The same basic cabinet box can look completely different depending on the trim language applied to it.
Traditional
Traditional cabinetry usually relies on a stronger top line, deeper door profiles, layered crown, panel molding, and occasionally carved or molded ornament. The hierarchy is clear: base, body, and top.
Neoclassical
Neoclassical cabinetry keeps the architectural logic but removes much of the excess. Applied molding frames can be narrow, symmetrical, and painted the same color as the door. Ornament is limited to a few focal areas.
Transitional
Transitional cabinetry is one of the best settings for applied molding because it combines traditional panel logic with contemporary restraint. Use clean frames, simple crown, and minimal appliques.
Modern
Modern kitchens usually need less trim. If molding is used, choose thin profiles, large fields, and monochromatic finishes. Avoid decorative corner overlays unless the concept intentionally mixes old and new.
Art Deco
Art Deco cabinet trim is driven by geometry: stepped frames, nested rectangles, strong verticals, and controlled metallic accents. A simple linear polyurethane profile can work better than floral ornament here.
Kitchen Cabinet Molding and Trim: Where to Use It
The keyword kitchen cabinet molding and trim covers a much wider design territory than crown molding alone.
In a complete kitchen, trim can appear at:
- the top of wall cabinets;
- the bottom of wall cabinets;
- island end panels;
- pantry doors;
- refrigerator panels;
- range-hood enclosures;
- glass-door frames;
- decorative pilaster-like cabinet sides;
- cabinet door faces;
- toe kicks and furniture-style bases.
Range-Hood Enclosures
A custom or semi-custom hood enclosure often becomes the architectural center of a kitchen.
Because the hood is already visually dominant, trim should reinforce its form rather than overload it. A shallow applied molding frame, side pilaster-like divisions, or a restrained cornice can be enough.
Do not place decorative polyurethane elements close to heat, grease, or exhaust paths unless the product and finish system are appropriate for that location.
Glass-Front Cabinets
Glass doors already contain a strong internal frame. Additional molding should be lighter than on solid doors.
Thin cabinet door trim can coordinate the glass doors with surrounding solid fronts without competing with the glazing.
Upper Cabinets With Open Shelves
When upper cabinets transition into open shelves, a continuous top cornice or aligned trim line can make the two systems feel related.
The crown should not suddenly change scale unless the design intentionally creates a focal break.
Cabinet Molding Around Built-In Appliances
Panel-ready refrigerators and dishwashers are designed to disappear into the cabinet elevation. Applied molding can help, but only if it respects appliance clearances.
Do not run decorative trim into gasket zones, ventilation paths, hinge clearances, or service-access areas.
Cabinet Door Molding and Hardware
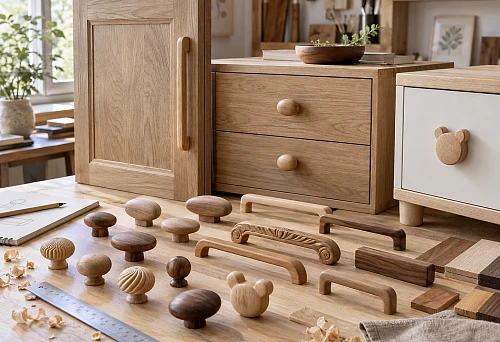
Hardware should be part of the molding layout, not added afterward.
For knobs and pulls, check:
- distance from molding to handle base;
- clear finger space behind the pull;
- alignment across paired doors;
- drawer-to-door consistency;
- whether the hardware should sit inside or outside the applied frame.
A handle that overlaps the molding makes the entire door feel under-planned.
Cabinet Molding and Hinges
Most concealed hinges are hidden from the front, but they still affect where molding can be applied.
On thin or narrow doors, a molding placed too close to the edge may interfere with hinge boring, screws, or cup locations. Check the back-side hardware before committing to the front-side trim.
Paired Doors Need Mirror Accuracy
On double cabinet doors, the applied molding should mirror perfectly across the center gap.
The eye notices even small differences in frame inset, top height, and handle alignment.
Measure from the same reference edge for every door rather than measuring each frame independently.
Drawer Fronts Need a Different Scale
A profile that works on a 42-inch-tall door may look oversized on a 7-inch drawer front.
Use a smaller molding, omit the frame, or simplify the detail on drawers. The cabinet system does not need identical trim on every component to feel coherent.
Large Pantry Doors
Tall pantry doors can support one large elongated frame or two stacked frames.
Two stacked frames often reduce the visual height of a very tall door; one large frame emphasizes verticality.
Built-In Wardrobe Doors
Wardrobe fronts can use much larger proportions than kitchen cabinet doors.
This is where medium MLDPU profiles become particularly useful. A tall frame with a clean 22 mm or 35 mm profile can create furniture-like structure without requiring a full frame-and-panel door.
Bookcase Base Cabinets
Lower cabinets beneath bookshelves often benefit from panel molding because it visually anchors the built-in.
Keep the upper shelves simpler. Too much trim above eye level can make the bookcase feel heavy.
Home Office Cabinetry
Office cabinetry can support darker colors and more architectural trim than many kitchens.
Deep green, charcoal, navy, or brown paint with same-color molding creates a tailored library effect without relying on ornate profiles.
Bathroom Vanity Trim
Vanities are viewed from close range. Molding corners, joints, and paint finish need to be especially clean.
Use shallow profiles around doors and drawers so the trim does not catch towels, cleaning tools, or adjacent cabinet fronts.
Polyurethane vs. Wood for Cabinet Molding
Wood is the natural choice when the trim will be stained, when visible grain matters, or when the molding is part of true millwork construction.
Polyurethane is useful when:
- the finish is paint-grade;
- the profile is applied rather than structural;
- repeatability matters;
- a lightweight detail is desirable;
- ornamental relief is needed without carving;
- the substrate is already structurally complete.
Neither material is universally superior. They solve different problems.
Polyurethane vs. MDF for Cabinet Trim
MDF is extremely common in paint-grade cabinetry because it is smooth, stable, machinable, and available in sheet and profiled form.
Polyurethane is more appropriate as a decorative applied component than as the structural door itself.
A practical mixed system might use an MDF slab door with a polyurethane applied molding frame and a separate PU applique. Once painted, the materials can read as one composition.
When Not to Use Polyurethane Cabinet Trim
Do not use polyurethane as a substitute for:
- structural rails and stiles;
- load-bearing shelf support;
- cabinet-box reinforcement;
- hinge mounting surfaces;
- edge banding that must resist repeated impact;
- high-heat or exterior applications without specific product approval.
Cabinet Molding on Slab Doors
Slab doors are the best blank canvas for applied molding.
Start with one rectangle. If the door is tall enough, a two-panel layout can work. If the door is narrow, avoid creating a frame that leaves only a thin strip between molding and edge.
How to Mock Up Cabinet Molding Before Installation
Use low-tack painter’s tape on the actual door.
Mark:
- frame outline;
- handle location;
- hinge clearance if needed;
- centerline;
- distance to adjacent doors.
Step back and evaluate the entire cabinet run—not just one door.
Why One Sample Door Is Worth the Time
Before trimming twenty doors, complete one sample door fully.
Cut the molding, install it, fill the joints, prime as needed, paint it, install the hardware, and hang the door.
That sample will reveal whether the molding is too large, too small, too deep, too ornate, or too close to the hardware.
How to Plan Mitered Corners on Cabinet Doors
Most applied cabinet molding frames use four mitered corners.
If the frame is a true rectangle, the theoretical cut is 45 degrees at each end. But the quality of the result depends on square layout, consistent lengths, and a saw that is actually calibrated.
Dry-fit before adhesive.
Decorative Corner Elements on Cabinet Doors
Corner overlays can replace or visually enhance a simple frame corner.
Use the STAVROS polyurethane molding decor category when a project needs decorative left/right corner components rather than plain miters.
The corner element must be compatible with the chosen linear profile and proportionate to the door.
How to Plan a Center Applique
A center applique should have enough breathing room inside the frame.
On a tall wardrobe door, a vertical ornament can sit above or below the handle zone. On a kitchen cabinet door, smaller ornaments are generally easier to integrate.
Do not add an applique merely because the center looks empty. Empty space can make the molding frame feel more refined.
Cabinet Molding Around Glass Panels
Thin molding can be used as decorative framing around a glass insert, but it should not interfere with the actual glazing retainer or removable glass system.
Separate decoration from functional glazing construction.
Cabinet Trim Around Mesh, Cane, or Metal Inserts
Textured inserts already create visual interest.
Use simple trim to frame them. Highly ornamental molding around cane, mesh, or patterned metal can create competing textures.
Cabinet Molding and Paint
Paint is what makes applied molding look integrated rather than added.
For the strongest result, the door and molding are usually finished in the same color and sheen.
This creates one continuous field where the profile is read through shadow.
Should You Paint Before or After Applying Molding?
Both methods are possible.
Prepainting can simplify coverage on intricate profiles. Painting after installation gives the best chance of visually blending joints and repaired areas.
For high-end paint-grade cabinetry, a shop-finished system is usually more controlled than field painting after the cabinets are installed.
Primer Compatibility
Do not assume every molding arrives with the same primer system.
Verify the product. The finish coating must adhere to the molding surface, joint filler, and cabinet substrate.
Paint Sheen
Satin and semi-gloss are common on cabinetry because they are more washable than flat wall paint.
Higher sheen also reveals surface imperfections more clearly. Miter joints, filler, and sanding need to be very clean.
Dark Cabinet Molding
Dark cabinetry amplifies shadow and relief.
A small molding profile can look stronger in navy, dark green, charcoal, or brown than in white.
That means profile scale should be judged in the final color, not only in raw white primer.
White and Warm-White Cabinet Trim
White paint emphasizes crisp geometry and works well with traditional, Neoclassical, and transitional cabinetry.
Warm whites often soften ornate profiles, while cooler whites make stepped geometry read more sharply.
Two-Tone Cabinet Molding
Contrasting trim is a stronger visual choice.
Use it when the design is intentionally graphic. Otherwise, same-color molding tends to feel more architectural and less applied.
How Cabinet Molding Affects Cleaning
Every added profile creates ledges and recesses where dust and kitchen residue can collect.
In high-grease zones, simpler profiles are easier to maintain.
Deeply ornate trim may be better on pantry walls, islands, dining-area built-ins, or furniture away from active cooking surfaces.
Kitchen Heat and Steam
Do not make universal temperature claims about decorative materials.
Keep applied trim clear of areas where appliance manufacturers require ventilation or heat clearance. Around ranges and ovens, follow the appliance and cabinet manufacturer requirements.
Cabinet Molding and Under-Cabinet Lighting
Light rails should hide the source without blocking useful illumination.
A decorative molding profile chosen only for appearance may project too far or create unwanted shadows on the countertop.
Mock up the lighting before finalizing the lower trim.
Cabinet Molding and LED Accent Lighting
Top-cabinet lighting can emphasize crown and ceiling transitions.
LED channels, heat management, access, and wiring should be planned separately from decorative trim. Do not trap electrical components behind non-serviceable ornament.
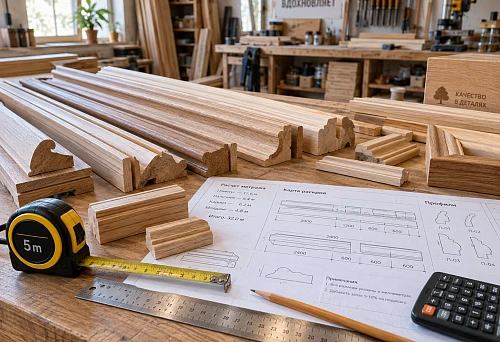
How to Calculate Linear Cabinet Molding
For applied door frames:
2 × frame width + 2 × frame height = linear length per door.
Multiply by the number of matching doors, then account for stock length and cut optimization.
For cabinet crown, measure the actual cabinet perimeter that receives crown—not the room perimeter.
Cut Optimization Matters
A simple waste percentage is less useful than a cut list.
Map the required door-frame pieces against the actual 2600 mm or other stock length. Short drawer pieces may be cut from leftovers created by tall-door pieces.
How Much Extra Material Should You Order?
Order enough for cut waste, setup errors, damaged pieces, and future repairs.
The percentage depends on how many short pieces, miters, and repeated frames the project has. A complex furniture project can create more waste than one long wall run.
Create a Cabinet Trim Schedule
For a larger kitchen or built-in project, create a table with:
- cabinet or door ID;
- door size;
- molding SKU;
- frame dimensions;
- piece lengths;
- corner type;
- applique SKU if used;
- finish color;
- hardware position.
This turns decorative trim into a repeatable production system.
Common Mistake #1: Calling Every Cabinet Top Trim “Crown Molding”
Some top pieces are fillers, scribes, valances, cornices, or light-related trim. Use accurate terminology when ordering.
Common Mistake #2: Using a Wall Profile That Is Too Large for a Door
A profile that looks elegant on a 12-foot wall may overwhelm a 15-inch cabinet door.
Common Mistake #3: Ignoring Handle Clearance
Hardware should never overlap applied molding unless that relationship is deliberately designed.
Common Mistake #4: Installing Decoration Before Testing Door Swing
Projection can cause one door to contact another, the casing, or a neighboring panel.
Common Mistake #5: Treating Applied Molding as Structural
Decorative trim does not replace rails, stiles, supports, or hinges.
Common Mistake #6: Overdecorating Small Upper Cabinets
Small doors often look better with a thin bead or no added frame.
Common Mistake #7: Using the Same Profile on Every Surface
Large island ends and tiny drawer fronts do not necessarily need identical molding.
Common Mistake #8: Mixing Too Many Ornament Families
Floral appliques, Art Deco linework, heavy crown, and rustic hardware rarely belong on the same cabinet elevation.
Common Mistake #9: Forgetting That Kitchens Need to Be Cleaned
Deep relief close to cooking zones increases maintenance.
Common Mistake #10: Choosing by Front View Only
Projection matters. A profile can be narrow in front view and still project far enough to interfere with adjacent components.
Common Mistake #11: Assuming All Cabinet Trim Is Wood
Paint-grade decorative systems may combine MDF, wood, polyurethane, and other materials successfully when their roles are clear.
Common Mistake #12: Assuming All Polyurethane Trim Can Bend
Standard MLDPU profiles are rigid unless a specific product says otherwise.
Common Mistake #13: Ignoring Existing Door Geometry
A slab door is an ideal blank canvas. A door that already has raised panels, beads, or routed details may not need another applied frame.
Common Mistake #14: Using Different Insets Across the Same Cabinet Run
Small inconsistencies become obvious when doors sit side by side.
Common Mistake #15: Skipping the Sample Door
One finished prototype can prevent an entire kitchen from being trimmed at the wrong scale.
Cabinet Molding by Project Type
Kitchen Remodel
In a kitchen remodel, molding can be used to change the visual category of existing cabinetry without rebuilding the boxes. A flat painted door can receive an applied frame. A plain island end can become a panel. A refrigerator enclosure can gain vertical divisions. A simple upper cabinet can be visually tied to the ceiling with a new top treatment.
The strongest remodels do not decorate every available surface. They identify two or three high-value areas and create a consistent trim language there.
New Custom Kitchen
In new cabinetry, the trim system should be designed before fabrication.
Door sizes, handle drilling, appliance panels, fillers, end panels, crown, light rails, and applied ornament can all be coordinated from the start. This produces a cleaner result than trying to add decoration after every other dimension has been fixed.
Built-In Media Cabinet
Media built-ins often contain wide horizontal shelves and a large central TV opening. Applied cabinet molding can help the lower doors feel more furniture-like while the upper architecture remains relatively quiet.
Keep decorative relief away from speaker vents, access panels, and service doors.
Library Built-In
A library can support a stronger cabinet trim system than a minimalist kitchen. Top cornice, paneled lower doors, decorative side trim, and a dark monochromatic finish can work together convincingly.
The cabinet molding should still remain subordinate to the books, objects, and architecture.
Walk-In Closet
Closet cabinetry often includes tall slab doors, drawer banks, open hanging sections, and glass-front accessories. A consistent narrow molding can make these different components feel like one furniture collection.
Use the largest profile on tall doors and simplify smaller drawer fronts.
Bathroom Vanity
A vanity needs more restraint because the cabinet is viewed close-up and touched frequently.
Narrow applied frames, shallow relief, and easy-to-clean paint are usually more practical than deep ornate molding.
Freestanding Furniture
Dressers, armoires, console cabinets, sideboards, and bed frames can use the same polyurethane molding language as built-ins.
The main difference is movement: freestanding furniture is bumped, moved, transported, and handled. Profile projection and adhesive strategy need to account for that.
How to Choose the Right Profile for Cabinet Doors
Start with the door size, not the catalog.
A practical selection process is:
- Measure door width and height.
- Mark handle location.
- Mark the desired frame inset.
- Measure the remaining center field.
- Choose the smallest profile that creates enough shadow.
- Mock it up at full scale.
- Only move to a larger profile if the first one visually disappears.
This avoids the common tendency to over-specify decorative trim.
Projection Is Critical on Cabinet Doors
Width is what you see in elevation. Projection is what determines physical interference.
A profile that projects 12 mm can reduce finger clearance behind a handle, contact an adjacent door, or create a noticeable edge on a drawer.
Always check both dimensions.
How to Design a Single-Panel Cabinet Door
A single-panel applied frame is the most versatile layout.
It works best when the frame is centered within the door and the inset is consistent on all four sides.
On tall doors, the frame can be vertically elongated. On wide drawers, the frame can be horizontally elongated.
How to Design a Two-Panel Tall Door
A tall pantry or wardrobe door can be divided into upper and lower fields.
The split should respond to nearby drawer lines, shelf divisions, or neighboring doors. Do not divide the door exactly in half unless the rest of the cabinet elevation supports that geometry.
How to Design a Door With a Center Applique
Use the molding frame first, then position the applique inside it.
The applique can align with the door centerline or sit above the handle zone. Keep enough negative space so the relief does not touch the molding visually.
How to Design Decorative Corner Molding on Cabinet Doors
Corner pieces can transform a simple rectangular frame into a more classical composition.
Use series-compatible decorative polyurethane corner molding where the product is designed to coordinate with the selected linear molding.
Directional left/right elements should be scheduled carefully on paired doors.
How to Design Cabinet Trim Around Glass Doors
Glass already creates a visual opening, so applied trim should remain secondary.
A thin profile around the perimeter can tie glass and solid doors together. Avoid placing deep relief where it blocks the glazing or interferes with removable glass stops.
How to Design Island Panel Molding
Island panels should be read from across the room, so they can support larger geometry than cabinet doors.
One large frame often works better than several small frames. If seating is present, keep the molding clear of knees, chair backs, and foot traffic.
Cabinet Molding and Proportion
Good cabinet trim is mostly about proportion.
A profile is successful when its visual weight matches the size of the field it frames. That relationship is more important than any fixed “correct” width.
Three proportions matter:
- profile width to door width;
- frame inset to profile width;
- center field size to overall door size.
Use Repetition, Not Random Variety
Custom cabinetry looks expensive when its details repeat intelligently.
If one tall door uses a certain molding profile, repeat that profile on other tall doors. If island end panels use a related larger profile, keep that relationship consistent.
Randomly changing trim from cabinet to cabinet makes the composition feel improvised.
Cabinet Molding and Visual Hierarchy
Every cabinet elevation should have a dominant level of detail.
For example:
- crown = strongest horizontal line;
- door molding = secondary architecture;
- appliques = focal accents;
- drawer fronts = simplified repetition;
- light rail = functional lower line.
If every level is equally decorative, hierarchy disappears.
Cabinet Trim for Small Kitchens
Small kitchens benefit from restraint.
Use narrow profiles, simple top trim, monochromatic paint, and limited ornament. Avoid deep crown that visually lowers the ceiling or projects too far from shallow upper cabinets.
Cabinet Trim for Large Kitchens
Large kitchens can support stronger trim because viewing distances are longer and cabinet runs are wider.
Large islands, tall pantry banks, and full-height refrigerator enclosures can use medium or larger molding profiles without appearing heavy.
Cabinet Trim for High Ceilings
High ceilings create vertical space above cabinetry. You can use taller cabinets, stacked upper cabinets, a larger crown, or an intentional open zone.
The trim should solve the whole elevation, not merely fill the gap.
Cabinet Trim for Low Ceilings
Low ceilings benefit from vertical continuity.
Keep crown shallow, avoid large overhanging profiles, and use door molding that emphasizes height rather than width.
Cabinet Molding and Color Blocking
Two-tone kitchens can use trim to clarify material zones.
For example, an island can be painted darker than perimeter cabinetry while both use the same molding profile. The repeated geometry ties the colors together.
Cabinet Molding and Wood Grain
When the cabinets are stained wood, polyurethane paint-grade trim is usually not the first choice because it does not reproduce natural grain.
In that situation, matching wood molding is more coherent.
Polyurethane becomes more logical when the entire facade will be painted.
Cabinet Molding and Veneer
Veneered doors need the same material logic as stained solid wood: applied trim should match or intentionally contrast with the veneer.
A paint-grade polyurethane frame on a clear walnut veneer door will look like a mixed-material accent, not an invisible extension of the veneer.
Cabinet Molding for Painted MDF Doors
This is one of the strongest use cases for polyurethane applied molding.
The MDF door provides the structural surface; the polyurethane profile provides lightweight relief. A compatible primer and paint system can visually unify the two materials.
Cabinet Molding for Plywood Doors
Paint-grade plywood slab doors can also receive applied molding when the surface is flat, stable, and properly prepared.
Check edge construction, veneer movement, and paint compatibility before installation.
Cabinet Molding for Existing Painted Doors
Existing doors can sometimes be upgraded without stripping them completely.
The paint must be sound. If the existing finish releases from the substrate, the molding will only be as secure as that weak layer.
Test adhesion and prepare the surface according to the adhesive manufacturer.
How to Install Applied Cabinet Molding
The basic sequence is similar to wall-frame molding but the tolerances are tighter:
- remove the door when practical;
- clean and inspect the surface;
- mark the full frame;
- cut matched pieces;
- dry-fit all four corners;
- apply compatible adhesive;
- fix the pieces without shifting the layout;
- allow the assembly to stabilize;
- finish joints;
- prime repaired areas as needed;
- paint;
- reinstall hardware;
- hang the door and check clearance.
Remove Doors When Practical
Working horizontally is easier than working on a vertical door attached to a cabinet.
You can measure more accurately, clamp or tape more easily, inspect miters from above, and paint more consistently.
Label Every Door
On a full kitchen, label doors and drawer fronts before removal.
Cabinet boxes are not always perfectly interchangeable, and hinge adjustments may differ from opening to opening.
Use a Layout Template
If twenty doors receive the same molding inset, make a spacer or jig.
This is faster and more accurate than measuring four offsets on every door.
Dry-Fit Before Adhesive
Assemble each frame dry.
Check corner closure, overall squareness, distance to the door edge, and relationship to hardware.
Adhesive Selection
Use an adhesive compatible with the polyurethane profile and cabinet substrate.
Current STAVROS MLDPU guidance mentions liquid nails, acrylic adhesive, and mounting adhesive for decorative work. The actual choice should match the door finish and adhesive manufacturer requirements.
Do Not Use Excess Adhesive
Too much adhesive creates squeeze-out and can make a small profile float away from the layout line.
Use enough for continuous reliable contact, not enough to fill major surface defects.
Temporary Fixation
Low-tack tape can hold narrow profiles while adhesive cures.
On shop work, jigs or light clamping may be possible depending on the door construction and profile geometry.
Joint Finishing
Small paint-grade gaps can be filled with a compatible filler or paintable sealant. Large gaps usually indicate a bad cut and should be corrected rather than buried.
Sanding
Sand repairs carefully. Do not flatten the molding profile while trying to erase a miter joint.
Painting Applied Cabinet Molding
Cabinet paint is less forgiving than wall paint because doors are viewed close-up and touched constantly.
Use the coating system specified for the cabinet substrate and compatible with the molding and primer.
Sprayed Finish vs. Brushed Finish
Sprayed finishes can produce a highly uniform cabinet surface, especially across applied molding and flat door fields.
Brushed or rolled finishes can also be appropriate in site-painted or intentionally handcrafted work, but they make joint preparation more important.
Quality Control Before Rehanging Doors
Inspect:
- miter joints;
- frame squareness;
- paint coverage;
- finish buildup in relief;
- handle clearance;
- hinge clearance;
- door-to-door clearance;
- consistency across the full set.
Cabinet Molding for Professional Shops
For a cabinet shop, applied polyurethane molding can become a repeatable production option rather than a one-off decorative trick.
Standardize:
- approved profiles;
- door-size ranges;
- frame insets;
- corner systems;
- applique options;
- adhesive;
- primer;
- paint system;
- cutting jigs.
This turns decoration into a controllable product family.
Cabinet Molding for Designers
Interior designers should document trim in elevation drawings rather than writing only “decorative molding.”
Specify profile SKU, frame dimensions, inset from door edge, hardware location, corner treatment, applique position, color, sheen, and material.
Cabinet Molding for Homeowners
If you are upgrading existing cabinets, start with one door.
Use the simplest profile first. Finish the sample completely. Rehang it. Live with it in the room for a day before ordering enough trim for the whole kitchen.
SEO Intent: Cabinet Molding vs. Polyurethane Cabinet Trim
The broad U.S. searches cabinet molding and kitchen cabinet molding and trim are material-neutral. They include wood, MDF, polyurethane, and other trim systems.
The phrase polyurethane decorative cabinet trim is narrower and belongs specifically to applied PU profiles such as the STAVROS MLDPU family.
This article therefore answers the broad design problem first and introduces polyurethane only where the product genuinely fits.
How This Article Fits the STAVROS Content Cluster
This article owns the cabinet-trim intent: linear molding on cabinets, doors, built-ins, islands, vanities, and furniture.
The separate guide to polyurethane appliques and onlays for furniture should own focal relief ornaments, onlays, and decorative furniture embellishments.
The decorative corner molding article should own corner blocks, left/right corner elements, and corner-design logic.
The installation guide should own cutting, miters, adhesive, joints, and paint-preparation technique.
Frequently Asked Questions
What is cabinet molding?
Cabinet molding is decorative or finish trim used on the top, bottom, face, side, or door panels of cabinetry and built-ins.
What is cabinet trim molding?
It is a broad term for shaped trim used to finish or decorate cabinets, including applied door frames, top molding, light rails, and panel trim.
What is kitchen cabinet molding and trim?
It includes crown or top trim, light rails, toe-kick and base details, applied door molding, island panels, end-panel trim, and decorative cabinet accents.
Can molding be added to flat cabinet doors?
Yes. Applied molding can create a raised-frame appearance on structurally complete slab doors.
Is applied molding the same as a true shaker or frame-and-panel door?
No. Applied molding is decorative. A true frame-and-panel door is constructed from rails, stiles, and a center panel.
Can polyurethane molding be used on cabinet doors?
Yes, when the profile is suitable for furniture, the substrate and adhesive are compatible, and the molding does not interfere with hardware or door movement.
What polyurethane molding is suitable for furniture?
STAVROS MLDPU-001, MLDPU-004, MLDPU-002, and MLDPU-003 are verified polyurethane profiles presented for interior and furniture use, with different widths and projections.
Which profile is best for small cabinet doors?
A compact profile such as MLDPU-001 or MLDPU-004 is usually easier to scale than a wide architectural molding.
Which profile is best for large wardrobe doors or island panels?
Medium or larger profiles such as MLDPU-002 or MLDPU-003 can work when the panel size supports their visual weight.
Can polyurethane trim be stained like wood?
Polyurethane architectural molding is primarily useful in paint-grade applications. If natural wood grain is required, matching wood trim is usually more appropriate.
Can polyurethane molding be used on MDF cabinet doors?
Yes, in paint-grade systems when the door surface, adhesive, primer, and finish are compatible.
Can I put molding on kitchen cabinet end panels?
Yes. End panels and island ends are excellent places for applied frames because they provide large uninterrupted surfaces.
Can I use decorative corner elements on cabinet doors?
Yes, when the corner pieces are compatible with the linear molding and correctly scaled to the door.
Can I use appliques with cabinet molding?
Yes. Use the molding for structure and the applique for a focal accent. Avoid overcrowding the panel.
How should cabinet molding be painted?
For the most integrated appearance, the molding and cabinet door are usually finished in the same color and sheen using a compatible coating system.
Should I remove doors before applying molding?
When practical, yes. Horizontal work makes layout, cutting, adhesive control, finishing, and painting easier.
How do I calculate molding for cabinet doors?
Calculate the perimeter of each applied frame, multiply by the number of matching doors, then optimize cuts against the stock length and add reasonable allowance for waste and mistakes.
Can cabinet molding interfere with hinges?
Yes. Check hinge-bore and screw locations before placing trim close to the door edge.
Can cabinet molding interfere with pulls?
Yes. Maintain enough clear space for the handle base and fingers.
Is polyurethane cabinet trim structural?
No. Decorative polyurethane profiles should not replace structural rails, stiles, cabinet reinforcement, or load-bearing components.
What makes cabinet molding look custom rather than applied?
Correct scale, consistent inset, clean miters, coordinated hardware, controlled ornament, and a unified paint finish.
Final Design Principle: Treat Cabinet Trim as a System
The strongest cabinet molding is almost invisible as a separate product. You notice that the kitchen feels taller, the wardrobe looks more tailored, the island has architectural depth, or the built-in seems to belong to the room. You do not immediately think, “Someone glued molding to this door.”
That effect comes from hierarchy and proportion. Crown defines the top. Door molding defines the panel. End-panel trim extends the same language around the cabinet volume. Appliques are used only where a focal point is needed. Hardware sits comfortably inside the geometry. Paint unifies the materials.
For broad U.S. search intent, think in terms of cabinet molding, cabinet trim molding, kitchen cabinet molding and trim, and cabinet door trim molding. For material-specific STAVROS applications, use verified polyurethane decorative cabinet trim from the MLDPU family, add polyurethane furniture appliques when the design needs focal relief, and use decorative polyurethane corner elements when the frame requires a coordinated ornamental corner.
Cabinet trim works best when it is designed with the cabinetry, not added as an afterthought. Once the molding, door, hardware, end panels, crown, and finish are treated as one composition, ordinary cabinet boxes can begin to read like custom architectural millwork.