Article Contents:
- What Are Furniture Appliques and Onlays?
- Applique vs. Molding: They Solve Different Problems
- Why Polyurethane Works Well for Furniture Decoration
- What Polyurethane Does Not Automatically Guarantee
- Onlays and Appliques: The Search Language American Buyers Actually Use
- Start With the Furniture, Not the Ornament
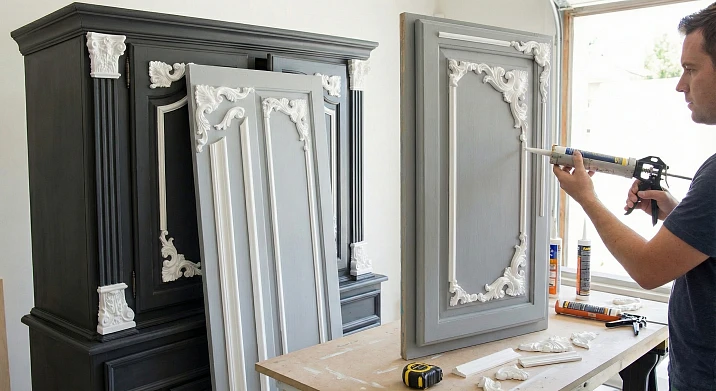
- Polyurethane Appliques for Cabinet Doors
- Decorative Onlays for Cabinets: The Proportion Problem
- Drawer Fronts: Smaller Surface, Stricter Discipline
- Dressers and Chests of Drawers
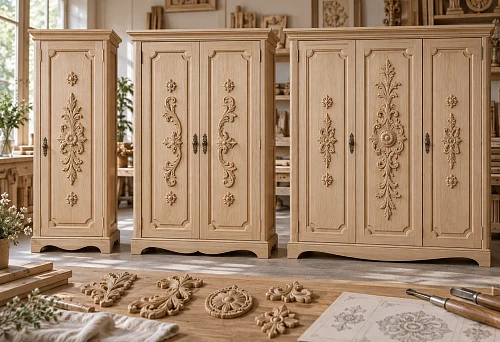
- Wardrobes and Armoires
- Built-Ins: Make Furniture Read Like Architecture
- Bathroom Vanities
- Kitchen Cabinetry
- Mirror Frames
- Bed Frames and Headboards
- Interior Doors
- Onlays for Furniture: How to Choose the Right Scale
- Visual Weight Is More Important Than Inches
- Center Appliques
- Vertical Onlays
- Horizontal Onlays
- Corner Appliques
- Pairs and Mirror Symmetry
- When Asymmetry Works
- Classical Furniture: Use Ornament as Structure
- Neoclassical Furniture: Restraint Is the Point
- French and Rococo-Inspired Furniture
- Art Deco Furniture
- Transitional Furniture
- Contemporary Furniture
- How to Combine Onlays With Linear Molding
- How Much Empty Space Should Surround an Onlay?
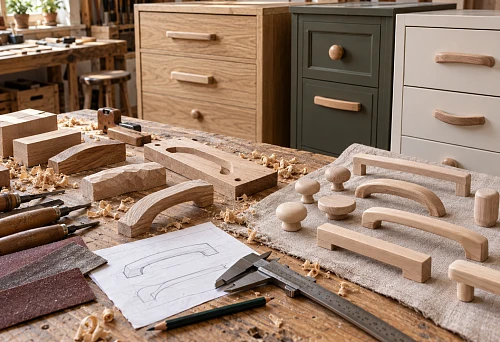
- Hardware and Onlays Must Be Designed Together
- Painting the Onlay the Same Color as the Furniture
- Contrast Color
- Gold, Bronze, and Metallic Highlights
- Patina and Antiquing
- Can Polyurethane Onlays Be Faux-Finished as Wood?
- Surface Preparation: Where Good Installations Begin
- Painted Wood
- MDF
- Laminate and Melamine
- Metal Furniture
- Glass and Mirror
- Dry-Fit Everything Before Adhesive
- Mark Centerlines, Not Just Edges
- Choosing Adhesive
- Apply Adhesive Without Creating a Mess
- Temporary Support
- Should You Use Nails or Screws?
- Joint and Edge Finishing
- Prime Before or After Installation?
- Painting After Installation
- Painting Before Installation
- Cabinet Doors With Applied Frames
- Creating a Pair of Classical Cabinet Doors
- Decorating a Plain IKEA-Style Cabinet Without Making It Look Theatrical
- French-Style Armoire Upgrade
- Vanity Upgrade
- Mirror Makeover
- Headboard Makeover
- Furniture Onlays and Appliques for Restoration
- Repairing Visual Damage With Decoration
- Polyurethane Onlays vs. Wood Onlays
- Polyurethane Onlays vs. Resin Onlays
- Polyurethane Onlays vs. Plaster Ornament
- Polyurethane Onlays and Corbels Are Not the Same Thing
- Wall Decor and Furniture Decor Can Share a Language
- Do Not Assume Every Wall Decor Set Is All Polyurethane
- How to Read a Product Page Before Ordering
- Measure in Inches for U.S. Projects
- Create a Full-Size Layout Before Ordering a Set
- Professional Specification for Designers
- For Cabinetmakers and Millwork Shops
- For DIY Furniture Makeovers
- Common Mistake #1: Decorating Before Fixing the Furniture
- Common Mistake #2: Choosing the Onlay From a Close-Up Photo
- Common Mistake #3: Using Too Many Styles
- Common Mistake #4: Ignoring Hardware
- Common Mistake #5: Overfilling the Panel
- Common Mistake #6: Assuming Every Adhesive Works
- Common Mistake #7: Installing on a Failing Finish
- Common Mistake #8: Using Mechanical Fasteners Without Need
- Common Mistake #9: Assuming Polyurethane Is Flexible
- Common Mistake #10: Treating Every Polyurethane Product as Exterior-Rated
- Common Mistake #11: Over-Painting the Relief
- Common Mistake #12: Decorating Every Door the Same Way
- Keyword Strategy: Use Search Phrases as Language, Not as Decoration
- How Internal Links Should Work
- Frequently Asked Questions
- What is a furniture onlay?
- What is the difference between an applique and an onlay?
- What are the best onlays for cabinets?
- Can polyurethane appliques be used on MDF cabinets?
- Can I put onlays on laminate furniture?
- Can polyurethane onlays be painted?
- Can they be stained like wood?
- Can polyurethane appliques be used on kitchen cabinets?
- Can they be used on bathroom vanities?
- How do I center an applique on a cabinet door?
- How large should a cabinet onlay be?
- Can I combine onlays with molding?
- Can decorative onlays cover old hardware holes?
- How are polyurethane onlays attached?
- Do I need nails?
- Can polyurethane onlays be removed later?
- Can polyurethane onlays be bent?
- Are polyurethane onlays structural?
- Where can I browse STAVROS polyurethane appliques?
A flat cabinet door can be perfectly functional and still feel unfinished. The same is true of a dresser with a broad empty drawer front, a wardrobe whose proportions are good but visually anonymous, or a built-in that looks more like a box than part of the architecture. One of the most effective ways to change that impression is not to replace the furniture, but to change the way its surfaces are articulated.
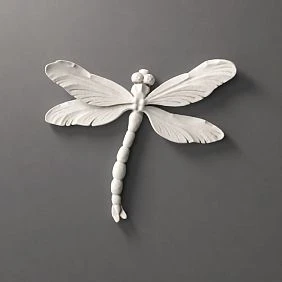
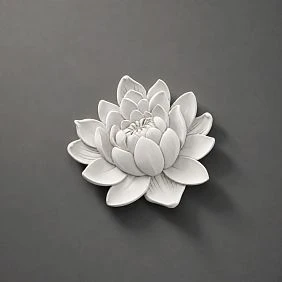
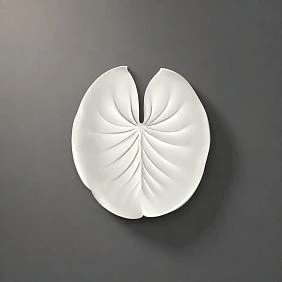
This is where decorative onlays and appliques become useful. These small relief elements can introduce a center, create symmetry, define a hierarchy, connect furniture to nearby wall molding, or give an ordinary panel enough depth to read as custom millwork. The transformation can be subtle—a pair of narrow vertical ornaments on cabinet doors—or deliberately expressive, such as a large botanical centerpiece on an armoire, vanity, headboard, or mirror surround.
For the U.S. market, the vocabulary matters. Buyers search for furniture onlays and appliques, polyurethane appliques, decorative onlays, cabinet onlays, molding ornaments, furniture embellishments, and architectural relief details. These terms overlap, but they describe a recognizable design category: decorative elements applied to an existing surface to create relief, ornament, and visual structure.
The material matters too. Polyurethane is particularly well suited to painted furniture decoration because it can reproduce crisp molded detail while remaining relatively light, consistent from piece to piece, and easy to integrate into a painted finish. That does not mean every polyurethane element is appropriate for every surface, every environment, or every adhesive. A successful project still depends on proportion, layout, surface preparation, compatible attachment, and a finish system that makes the ornament look intentional rather than added later.
This guide approaches furniture decoration as a design problem rather than a craft shortcut. It explains how appliques and onlays differ from linear molding, how to choose scale, where to place ornaments on cabinet doors and drawer fronts, how to build symmetrical compositions, how to work with painted MDF and wood, what to verify before using decor on laminate or metal, how to coordinate relief with hardware, and how to avoid the most common mistake of all: adding more ornament than the furniture can visually carry.
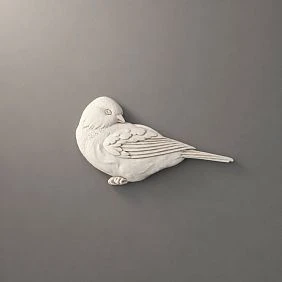
What Are Furniture Appliques and Onlays?
An applique or onlay is a decorative relief element attached to the face of another object. In furniture, that object may be a cabinet door, drawer front, side panel, bed frame, headboard, mirror frame, vanity, bookcase, built-in, console, or architectural millwork panel.
Historically, these elements were carved directly into wood, carved separately and attached, cast in plaster or composition, or produced in other decorative materials. The underlying design principle has not changed: a relatively flat surface receives a second layer that creates shadow, emphasis, ornament, and hierarchy.
In contemporary product language, “applique” and “onlay” are often used interchangeably. Some manufacturers prefer “onlay” for a molded ornament placed on furniture or cabinetry, while “applique” may sound more decorative or craft-oriented. In real U.S. shopping behavior, both words appear together frequently, which is why the phrase furniture onlays and appliques is especially useful.
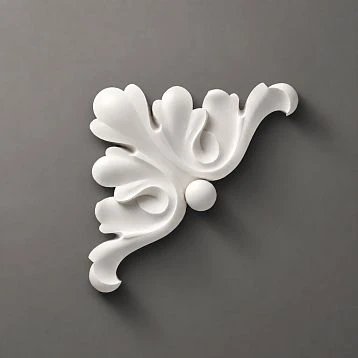
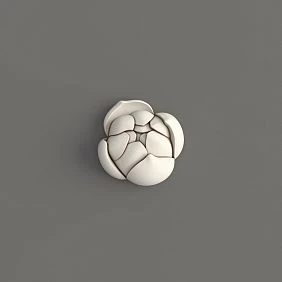
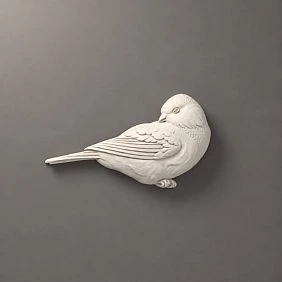
What matters more than the label is the geometry. An onlay can be central, vertical, horizontal, corner-shaped, symmetrical, asymmetric, round, oval, rectangular, curved, C-shaped, S-shaped, floral, geometric, or figurative. The STAVROS polyurethane catalog currently organizes products using many of these shape and ornament filters, which makes selection easier when you approach the piece by design function rather than by product name alone.




Applique vs. Molding: They Solve Different Problems
A furniture applique is a discrete object. A molding is a linear profile. That distinction is fundamental.
An applique creates a point of emphasis: the center of a cabinet door, the corner of a frame, the vertical axis of a wardrobe, the crest of a headboard, or the center of a drawer front. Linear molding creates boundaries: frames, panel lines, borders, rails, and continuous transitions.
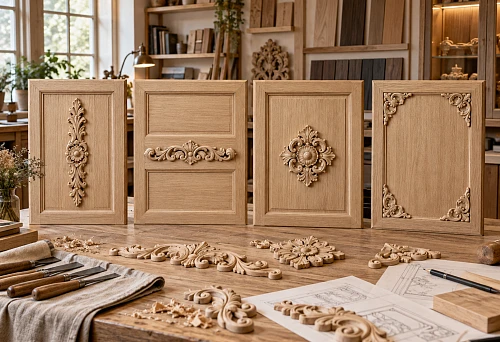
The most convincing furniture decoration often uses both. The molding establishes geometry; the applique gives that geometry a focal point. A plain slab door can be transformed into a framed panel by adding linear trim, then made more expressive by placing a vertical ornament inside that frame.
When a project needs this combination, polyurethane trim molding can provide the linear component while the applique or onlay supplies the sculptural accent. The two should be selected together so profile depth, ornament density, and visual scale feel related.
Наша фабрика также производит:
Смотреть весь Каталог продукции
Why Polyurethane Works Well for Furniture Decoration
Polyurethane is not valuable because it is an imitation of wood or plaster. It is valuable because it behaves differently from both.
For molded ornament, one of its biggest strengths is repeatability. If you need two mirrored door compositions, four identical drawer-front accents, or a sequence of matching decorative panels, consistency is important. Repeated molded pieces can produce the rhythm expected in classical and Neoclassical design.
Relatively low weight is another practical advantage. An applique mounted to a vertical cabinet door should not introduce unnecessary mass or create installation difficulty. Lower weight makes dry-fitting, alignment, temporary tape support, and adhesive installation easier.
Polyurethane also works naturally in paint-grade interiors. Once the ornament and substrate receive a coherent finish, the eye reads the relief and shadow rather than two separate materials. This is particularly effective on painted cabinetry, vanities, built-ins, doors, and wall panels.
Current STAVROS product pages also show polyurethane elements supplied as paintable architectural decor. For example, the NPU-501 onlay is listed as polyurethane and presented specifically for furniture, door panels, wall panels, mirrors, and classical interior compositions.
Получить консультацию
What Polyurethane Does Not Automatically Guarantee
The Russian source article makes several broad claims that should not be repeated as universal product facts. Not every polyurethane item has the same density, flexibility, impact behavior, primer, exterior rating, chemical resistance, or paint compatibility. “Polyurethane” describes a material family, not one identical specification.
That means product-level information matters. Before installation, verify the exact SKU, dimensions, thickness, supplied surface condition, recommended adhesive, paint system, and intended use.
The same caution applies to moisture. Polyurethane itself is far less sensitive to ordinary humidity than unfinished wood or gypsum, but a furniture project is a system. The substrate may be MDF, particleboard, veneer, paint, laminate, lacquer, metal, or another material, and the adhesive and finish must be appropriate to that substrate.
Do not turn a material advantage into an absolute claim. Good furniture finishing is about compatibility between all layers.
Onlays and Appliques: The Search Language American Buyers Actually Use
U.S. search behavior is useful because it reveals how people describe the product when they are not thinking in manufacturer terminology. Some users search broadly for “onlays and appliques.” Others start from the object: “onlays for cabinets” or “onlays for furniture.” Others specify material: “polyurethane onlays,” “urethane onlays,” or “polyurethane applique & onlay molding.”
For a U.S.-facing page, these phrases should appear naturally rather than as a list stuffed into every paragraph. A product can be described as a polyurethane applique once, an onlay in the next section, and a decorative furniture ornament elsewhere. Semantic breadth improves clarity; mechanical repetition damages it.
The strongest intent for this article is not “polyurethane” by itself. That word is extremely broad and frequently refers to coatings, foam, sealants, flooring finishes, and industrial materials. The meaningful intent begins when polyurethane is combined with applique, onlay, furniture, cabinet, decor, molding, or ornament.
Start With the Furniture, Not the Ornament
The fastest way to make an applique look wrong is to choose it first and figure out where to put it afterward. Start with the furniture.
Look at the object as a composition of rectangles, axes, openings, and negative space. Where are the door stiles? How wide are the drawer fronts? Is the cabinet symmetrical? Does the hardware already create a strong centerline? Is there a mirror, panel, handle, or keyhole competing for attention?
Then decide what the surface is missing. Does it need a center? A border? Vertical emphasis? A corner transition? A top crest? Repeated rhythm? The answer determines whether you need an applique, a pair of onlays, molding, corner elements, or no additional ornament at all.
Polyurethane Appliques for Cabinet Doors
Cabinet doors are the most natural application because they already provide a framed field. Even a flat slab door has a clear rectangular boundary, so an onlay can be positioned in relation to that geometry.
A single central ornament works well when the door is relatively wide and the design is formal. A narrow vertical onlay is useful on tall doors because it reinforces height. Small corner ornaments can turn a simple applied molding frame into a more elaborate panel without making the center too busy.
For buyers specifically looking for onlays for cabinets, the most important information is not simply whether an ornament is “beautiful.” It is width, height, thickness, orientation, symmetry, and how much empty space remains around it once it is placed on the door.
Decorative Onlays for Cabinets: The Proportion Problem
A cabinet door is a small architectural elevation. Treat it that way.
Measure the usable flat field rather than the total door size. If the door has a raised frame, bevel, router detail, or hardware zone, the available decorative area may be much smaller than the overall dimensions suggest.
Then test the applique at full scale. A paper outline is enough. Tape it to the door and stand back eight to ten feet. Open adjacent doors. Look from an angle. Check how the ornament interacts with knobs or pulls.
When comparing decorative onlays for cabinets, leave enough negative space for the ornament to be legible. Relief needs room around it. If leaves, scrolls, or floral tips almost touch the molding frame, the composition feels crowded.
Drawer Fronts: Smaller Surface, Stricter Discipline
Drawer fronts usually need less ornament than cabinet doors because their height is limited and the pull already occupies the center.
One option is to place a small applique above or below the hardware. Another is to use paired ornaments on either side of a central pull. A third is to use only linear molding around the perimeter and keep the center clean.
Do not force a symmetrical ornament directly behind hardware unless the overlap is intentional. A pull that cuts through the main motif can make both pieces look poorly planned.
Dressers and Chests of Drawers
A dresser gives you a larger furniture composition to work with. Instead of decorating every drawer independently, consider the whole front elevation.
You might use one large central applique on the top drawer and keep the lower drawers simple. Or repeat a small motif across all drawer fronts. Another approach is to create vertical alignment between decorative details on each drawer so the eye reads one continuous rhythm.
The right choice depends on furniture style. A French-inspired bombe chest can carry more ornament than a Shaker-style dresser. A transitional painted chest may need only one restrained botanical motif.
Wardrobes and Armoires
Tall wardrobes benefit from vertical decoration because their surfaces can otherwise feel broad and empty. This is where elongated polyurethane onlays are especially useful.
A current example is the polyurethane applique NPU-501, listed by STAVROS at approximately 2.28 × 11.81 × 0.43 inches. Its narrow vertical format makes the design logic easy to understand: it can sit inside a taller panel field without consuming the entire surface.
On a two-door wardrobe, paired identical ornaments create a strong formal symmetry. On a four-door wardrobe, repeating the same onlay on every door may become too busy; using the motif only on the two center doors can create hierarchy.
Built-Ins: Make Furniture Read Like Architecture
Built-ins sit between furniture and architecture. Because they are attached to the room and often extend wall to wall or floor to ceiling, decorative decisions should coordinate with baseboards, crown molding, wall panels, and nearby doors.
This makes built-ins a particularly good place for polyurethane appliques. The same ornament can be repeated on cabinet doors, end panels, valances, or a central overdoor feature to connect the cabinetry with the room’s architectural language.
If the wall itself uses polyurethane wall decor, do not copy every motif from wall to furniture. Instead, repeat one relationship: perhaps the same acanthus language, similar curve direction, or comparable relief depth. Cohesion is stronger than literal repetition.
Bathroom Vanities
A vanity can support decorative onlays, especially in traditional, French, transitional, or hotel-inspired bathrooms. Because the room is humid and cleaned frequently, the entire finishing system should be considered.
The decorative polyurethane itself may be comfortable in ordinary interior humidity, but the cabinet substrate, paint, adhesive, and edge sealing determine the durability of the finished assembly. Do not assume an MDF door becomes waterproof simply because the ornament is polyurethane.
Keep relief away from areas that receive direct standing water or aggressive cleaning. Ornate surfaces are visually rich but slower to wipe down than flat ones.
Kitchen Cabinetry
Kitchen cabinets can be decorated successfully, but restraint matters. Grease, heat, frequent touch, and cleaning create a different environment from a bedroom armoire.
Use onlays on decorative zones rather than everywhere: a range-hood surround, glass-front cabinet, island end panel, tall pantry door, or furniture-style hutch section. Avoid placing intricate relief too close to a cooktop or in areas that need constant wiping.
The strongest kitchen applications often use decoration to distinguish one furniture-like feature from the rest of the cabinetry.
Mirror Frames
Mirrors are excellent candidates because an applique can change the character of a simple frame without interfering with function.
A central crest at the top creates a traditional European look. Paired side ornaments create vertical emphasis. Corner appliques can turn a plain rectangular frame into a more ornate composition while preserving open space around the glass.
When using onlays around mirrors, consider reflection. A thick projecting ornament may appear twice—from the front and in the mirror—which can make it look visually heavier than it does on an opaque cabinet door.
Bed Frames and Headboards
Large headboards provide broad decorative fields and can support larger ornaments than typical cabinet doors. The centerline of the bed already creates symmetry, so a central applique or mirrored left/right pair feels natural.
On upholstered headboards, attachment becomes a different technical problem and should be planned carefully. Polyurethane onlays are best suited to stable rigid surfaces unless a specific construction method creates a suitable mounting substrate.
On painted wood or MDF bed frames, relief elements can help create a custom classical or transitional appearance without carving the entire panel.
Interior Doors
A flat interior door can be treated almost like a very tall cabinet front. Applied molding can create panel geometry, while onlays add ornament inside or above those panels.
Door decoration must respect handles, hinges, clearances, door stops, and the wall when the door swings open. Relief that projects too far near an edge can become a practical problem.
For a coordinated room, furniture and doors can use the same family of appliques at different scales. This creates continuity without making every surface identical.
Onlays for Furniture: How to Choose the Right Scale
One of the newest confirmed U.S. queries in the supplied keyword batch is onlays for furniture. The phrase is broad, but the design question behind it is specific: how large should the ornament be relative to the object?
Do not rely on a fixed “one-sixth of the door height” rule. Ornament shape changes perceived size. A narrow vertical applique may occupy half the door height and still feel restrained. A dense round rosette covering only one-quarter of the same door may feel dominant.
Judge four variables together: overall dimensions, percentage of surface covered, relief depth, and pattern density.
Visual Weight Is More Important Than Inches
Two onlays with identical outside dimensions can have very different visual weight. One may consist of fine open leaves with large areas of negative space. Another may be a dense medallion with deep relief and a solid center.
This is why a cardboard rectangle alone is not always enough for final selection. Print the actual product image at approximate full scale and place it on the furniture. The silhouette and internal density matter.
Center Appliques
Central appliques create immediate hierarchy. They work best when the furniture already has a clear centerline.
Good locations include the center of a wardrobe door, the upper middle of a headboard, the middle of a large drawer front, the crest of a mirror, or the center panel of a built-in.
Use central ornament when you want the eye to stop. Avoid it when hardware, glazing, or strong wood grain already owns the center.
Vertical Onlays
Vertical ornaments visually increase height. They are useful on tall cabinet doors, narrow pilaster-like cabinet sections, side panels, and mirror surrounds.
They can also correct proportions. A wide squat cabinet can feel taller when narrow vertical accents reinforce the upward direction.
Vertical onlays should be aligned precisely. A small tilt that is barely visible on a loose sample becomes obvious once the door edges provide a reference.
Horizontal Onlays
Horizontal ornaments emphasize width. They are effective above drawer banks, across wide valances, on the top rail of a headboard, or as a decorative bridge between vertical elements.
Because furniture often already has strong horizontal lines, a horizontal applique should add something new—ornament, curvature, or a focal center—not merely duplicate the existing geometry.
Corner Appliques
Corner elements are particularly useful with applied molding frames. Instead of forcing two linear profiles to carry the entire decorative burden, corner onlays can create a more finished transition.
They can also be used independently at the corners of a door panel, mirror, or furniture side. In that case, keep all four elements oriented consistently. Mirror-image parts should be checked before ordering; not every asymmetrical applique is available in left and right versions.
Pairs and Mirror Symmetry
Classical furniture depends heavily on symmetry because symmetry communicates order. If two cabinet doors are equal, the ornaments should normally relate to one another in the same way.
Measure from the actual finished door edges, not from the cabinet box. Door gaps and overlays can make the visual center different from the carcass center.
For left/right ornaments, dry-fit both before attaching either one. Once one side is glued, it becomes the reference for everything else.
When Asymmetry Works
Asymmetry can work in Art Nouveau, eclectic, contemporary, and intentionally artistic furniture. But asymmetry is not the same as randomness.
If one large applique sits on the lower left of a panel, the composition should be balanced by hardware, color, a neighboring object, or another visual mass. Otherwise it simply looks misplaced.
Classical Furniture: Use Ornament as Structure
Classical furniture is not defined by “a lot of decoration.” It is defined by order, proportion, hierarchy, and recognizable ornamental language.
Acanthus, laurel, shells, scrolls, rosettes, ribbons, and botanical motifs work because they can be organized around axes and frames. A central ornament inside a molding panel feels intentional. The same ornament floating randomly on a flat door does not.
If you want a rich classical effect, build it in layers: first the furniture proportions, then the frame, then the onlay, then hardware, then finish.
Neoclassical Furniture: Restraint Is the Point
Neoclassicism works particularly well with polyurethane because precise repeated motifs can be used sparingly.
Choose one or two ornamental languages—perhaps a vertical botanical onlay and a simple linear frame. Leave generous negative space. Paint everything in one color so the relief creates sophistication through shadow rather than contrast.
French and Rococo-Inspired Furniture
French-inspired furniture allows more movement: shells, C-scrolls, floral sprays, asymmetric branches, ribbons, and curved compositions.
These styles benefit from ornaments that interact with curved furniture shapes rather than merely sitting inside rectangles. A crest over a mirror, a floral spray across a curved drawer, or paired scrolls around hardware can feel more natural than a rigid centered medallion.
Art Deco Furniture
Art Deco requires different ornament. Instead of acanthus and Rococo scrolls, look for geometry, stepped shapes, fans, sunbursts, stylized botanical forms, and repeated linear rhythm.
Finish can do as much work as shape. Black lacquer with a restrained metallic accent, deep green with brass hardware, or monochromatic cream can make simple relief feel highly deliberate.
Transitional Furniture
Transitional interiors are a good place to use small onlays because they need just enough traditional detail to soften otherwise clean furniture.
A simple vertical applique on a painted cabinet, a pair of corner motifs on a mirror, or one quiet central ornament on a vanity can be enough.
Contemporary Furniture
Contemporary furniture can accept relief when the design is edited. Use fewer pieces, simpler profiles, and monochromatic paint.
One of the strongest strategies is to paint the onlay exactly the same color and sheen as the furniture so the object is discovered through light and shadow rather than decorative contrast.
How to Combine Onlays With Linear Molding
The most useful rule is hierarchy: molding first, ornament second.
Define the panel with linear trim. Then place the applique inside that panel so it has a clear field. If the ornament touches or nearly touches the frame, either the onlay is too large or the frame is too small.
A U.S. shopper may describe this combination as polyurethane applique & onlay molding. In design terms, it is simply the integration of point ornament with linear architecture.
How Much Empty Space Should Surround an Onlay?
There is no universal inch measurement because furniture scale varies. Instead, compare the ornament with the field around it.
If the onlay occupies almost the entire framed area, it becomes the main object. If it occupies one-third or less, it reads as an accent. Both can be correct, but the intention should be clear.
More ornate shapes generally need more surrounding empty space because the eye needs room to read their edges.
Hardware and Onlays Must Be Designed Together
Knobs, pulls, escutcheons, keyholes, hinges, and decorative onlays all compete for the same small surface.
Before attaching anything, place the hardware and applique together. A large handle can cut through a motif. A rosette behind a knob may look intentional if centered; a floral spray behind a long pull may look accidental.
Hardware finish also affects the ornament. Gold hardware may justify subtle gilding on relief. Black hardware can work beautifully with same-color monochromatic appliques. Nickel or chrome often suits cleaner geometric decoration.
Painting the Onlay the Same Color as the Furniture
This is the safest and often the most sophisticated approach.
When furniture and onlay share color and sheen, the decoration looks integrated rather than attached. The relief becomes visible only where light creates shadow.
This strategy is ideal for white, cream, gray, deep green, blue, black, and other opaque painted furniture.
Contrast Color
Contrast turns an onlay into an object rather than architecture. That can be effective on playful, theatrical, maximalist, or highly stylized furniture.
Use contrast selectively. If the molding frame, applique, hardware, and furniture body are all different colors, the composition can fragment quickly.
Gold, Bronze, and Metallic Highlights
Metallic finishes work best when they emphasize selected high points instead of coating every detail equally.
A small amount of gold on raised leaves or scroll edges can make relief visible from across the room. Antique bronze glaze in recesses can deepen shadow. Champagne or muted brass can feel more contemporary than bright yellow gold.
Patina and Antiquing
Patina works by increasing contrast between high and low relief. A darker glaze settles into recesses while raised surfaces remain lighter.
Use the effect to reveal geometry, not to make the piece look artificially dirty. Test on a sample first; decorative glazes can change color dramatically after clear coating.
Can Polyurethane Onlays Be Faux-Finished as Wood?
Yes, paint techniques can imitate wood tones and grain, but the result should be chosen for the right viewing condition.
If real exposed wood is central to the furniture concept, genuine carved wood may be the better material. Faux wood is more convincing on small decorative accents, high-mounted elements, or furniture where the surrounding surface is already painted or faux-finished.
Surface Preparation: Where Good Installations Begin
Adhesive performance depends heavily on the substrate. The back of the onlay and the furniture surface need stable contact.
Remove dust, grease, wax, silicone residue, unstable paint, and loose finish. If the furniture has been polished with products containing silicone, simple wiping may not be enough; contamination can interfere with adhesion and repainting.
Do not automatically attack every glossy surface with aggressive solvent. Laminates, lacquers, plastics, and painted finishes react differently. Use the substrate manufacturer’s guidance and test in an inconspicuous area.
Painted Wood
Painted wood is often straightforward if the coating is sound. Clean it, lightly scuff if recommended for the adhesive/paint system, remove sanding dust, and dry-fit the ornament.
If paint is peeling, the applique will only be as secure as the failing paint layer beneath it. Remove unstable coating and repair the surface first.
MDF
Painted or primed MDF is common in furniture and built-ins. Flat, stable MDF provides an excellent visual field for relief decoration.
Pay attention to exposed edges and damaged areas, because raw MDF behaves differently from a sealed face. If the project includes repainting, prepare the entire door consistently so the final sheen is uniform.
Laminate and Melamine
These nonporous surfaces need special care because adhesion is more demanding. Do not assume an adhesive that works on painted wood will behave identically on melamine.
Verify compatibility, clean the surface thoroughly, and consider a small adhesion test. If scuffing is recommended, abrade only enough to create a bonding surface without cutting through the decorative layer.
Metal Furniture
Polyurethane decor can be used on metal in some projects, but surface coating, rust, powder coat, oil, and adhesive compatibility must be evaluated.
The design opportunity can be interesting: classical relief on a modern metal cabinet creates strong contrast. Technically, however, do not assume every metal surface accepts the same adhesive.
Glass and Mirror
Direct attachment to glass or mirror creates special visual and technical issues. Transparent edges, adhesive visibility, differential movement, and future removal all matter.
In many cases, it is more elegant to attach the onlay to a surrounding frame rather than directly to the glass.
Dry-Fit Everything Before Adhesive
This is the most valuable practical step in the entire project.
Use low-tack painter’s tape to hold each applique temporarily. Step back. Photograph the furniture straight on. Open the doors and drawers. Check whether neighboring doors create symmetry. Look at the composition in the room rather than only from two feet away.
If you are using a frame, tape the frame lines first. Then position the onlay inside them.
Mark Centerlines, Not Just Edges
Centerlines are more reliable than measuring from irregular ornament edges.
Find the center of the door or drawer and mark a light vertical and horizontal axis. If the applique is symmetrical, align its own center to those axes.
For pairs, establish one shared height line and separate vertical axes. This prevents the common problem where one ornament is a fraction of an inch higher than the other.
Choosing Adhesive
There is no single correct adhesive for every furniture surface. The right product must be compatible with the polyurethane element, substrate, paint, and expected environment.
Current STAVROS product pages recommend mounting adhesive for polyurethane products and show KUDO HIGH TACK in related accessories for some items. The exact product instructions should govern the installation.
Avoid selecting glue by generic label alone. “Construction adhesive,” “epoxy,” “contact adhesive,” and “super glue” are categories with very different formulations. Some may be inappropriate for particular coatings or plastics.
Apply Adhesive Without Creating a Mess
The objective is full enough contact to secure the ornament without squeezing adhesive into visible relief.
Follow the adhesive manufacturer’s bead pattern and open-time instructions. For thin onlays, keep adhesive away from the outermost edge so compression does not force it outward. For larger pieces, use enough coverage to prevent hollow areas and edge lift.
Have clean-up materials ready before the piece touches the furniture. Once the applique is aligned, excessive repositioning can smear adhesive across the finished surface.
Temporary Support
Vertical installations may need painter’s tape or another temporary support method while adhesive develops initial grab.
Use tape that will not damage the furniture finish. Test it first on delicate lacquer, recently painted surfaces, or old finishes.
Do not assume a heavy clamp is appropriate. Some decorative relief can be damaged by concentrated pressure.
Should You Use Nails or Screws?
For small decorative onlays, mechanical fastening is often unnecessary when the product and adhesive system are designed for direct attachment. Larger elements or unusual substrates may need another approach, but that should come from product instructions or a project-specific installation plan.
Do not drill or nail through decorative polyurethane simply because the Russian source recommends it generically. A fastener can damage the ornament, create visible repair work, or compromise a finished cabinet face.
Joint and Edge Finishing
If the goal is a built-in appearance, the perimeter of the applique may need finishing after installation.
Very small gaps can sometimes be addressed with a compatible paintable filler or caulk, depending on the furniture finish. The objective is to remove the visual shadow of a poor contact edge without burying the relief.
For stained or clear-finished furniture, this approach is less forgiving because fillers remain visible. That is another reason polyurethane onlays are especially natural on paint-grade projects.
Prime Before or After Installation?
Some polyurethane products are factory primed; others may not be. The NPU-501 product page, for example, describes the piece as supplied ready for finishing.
Check the actual SKU. If the product is primed and the furniture is being repainted, many projects benefit from installing the ornament first, finishing joints, then applying the final color across both surfaces so everything reads as one object.
Painting After Installation
Painting the furniture and applique together creates the strongest illusion of integrated millwork.
Use thin coats. Deep relief collects excess paint easily, and repeated heavy brushing can soften fine detail. A small brush is useful for recesses; spraying can create a very even finish when the furniture can be properly masked and ventilated.
Painting Before Installation
Pre-finishing can be useful when the applique will intentionally contrast with the furniture or when access becomes difficult after installation.
The disadvantage is that adhesive clean-up and perimeter filling may require touch-up afterward. Plan the installation sequence before committing to final color.
Cabinet Doors With Applied Frames
A flat slab door can be transformed by combining onlays with applied molding. This is one of the most practical high-impact furniture upgrades.
First establish a rectangular frame with trim. Keep margins consistent on all sides. Then place the central ornament inside the frame. The frame creates architecture; the onlay creates identity.
For very narrow doors, skip the center ornament and use only the frame. For very wide doors, a vertical applique can prevent the framed field from feeling empty.
Creating a Pair of Classical Cabinet Doors
Two adjacent doors are an opportunity for true symmetry.
You can use identical centered appliques, mirrored left/right ornaments, or one composition that visually spans both doors while respecting the center gap.
Avoid placing the most important part of an ornament directly across the door gap. The hardware and seam will interrupt it.
Decorating a Plain IKEA-Style Cabinet Without Making It Look Theatrical
Minimal mass-market cabinetry can accept classical decoration, but the transition needs discipline.
Start with one element. Add a narrow applied frame or one central applique. Paint everything in one color. Replace hardware only if necessary. Then stop and evaluate.
The common mistake is trying to transform minimalist furniture into a palace object by adding every decorative category at once. A subtle intervention often looks more expensive.
French-Style Armoire Upgrade
A tall armoire can support a richer hierarchy: crest at the top, vertical onlays on doors, a framed lower panel, and selective metallic highlighting.
But hierarchy still matters. Choose one dominant ornament and make the others secondary. If the top crest is elaborate, door appliques can be simpler.
Vanity Upgrade
A bathroom or dressing vanity benefits from smaller, more tactile decoration because it is viewed at close range.
Use shallow relief on drawer fronts and keep edges away from high-contact zones. A central applique on the apron or an ornamental frame around a mirror can provide more impact with less maintenance than decorating every drawer.
Mirror Makeover
A simple framed mirror can be transformed with three pieces: one top center crest and two small corner or side ornaments.
This approach uses ornament efficiently and preserves plenty of negative space. It also makes the decorative hierarchy obvious from across the room.
Headboard Makeover
For a rigid wood or MDF headboard, a single large center motif can be more effective than a border of many small pieces.
Use the bed centerline as the primary axis. Align the applique with the mattress and headboard, not necessarily with wall art or nightstands if those are intentionally offset.
Furniture Onlays and Appliques for Restoration
Decorative onlays can be useful in restoration-inspired projects, but there is a difference between restoring historical furniture and restyling old furniture.
If the piece has historical value, original ornament should be documented and preserved where possible. Replacing lost carving with a modern molded element may be appropriate in some decorative refurbishments, but it should not be presented as authentic conservation unless it truly is.
For non-historic furniture, the design freedom is much greater. You can reinterpret the piece rather than reproduce its original state.
Repairing Visual Damage With Decoration
An applique can sometimes cover old hardware holes, a repaired veneer patch, or a visually awkward blank zone—but decoration should not conceal structural damage.
If a door is delaminating, warped, cracked, or unstable, repair the substrate first. The onlay is a finish element, not a structural patch.
Polyurethane Onlays vs. Wood Onlays
Wood onlays remain an excellent choice when genuine wood grain, carving, staining, or material authenticity matters. The new keyword batch even shows substantial general U.S. interest in wood onlays and appliques.
Polyurethane is usually more natural for paint-grade furniture, repeated molded ornament, lighter decorative applications, and projects where consistent relief is more important than real grain.
If the furniture is stained walnut, oak, cherry, or another visible wood species, a real wood applique may integrate more honestly. If the piece is painted, polyurethane becomes much more compelling.
Polyurethane Onlays vs. Resin Onlays
“Resin” is a broad marketplace term. It may refer to polyurethane, polyester, epoxy, or other cast materials.
Do not assume a resin applique has the same behavior as a known polyurethane product. Compare manufacturer data, rigidity, finish, adhesive compatibility, and intended use.
Polyurethane Onlays vs. Plaster Ornament
Plaster can deliver beautiful classical relief and is appropriate for architectural surfaces. For furniture, however, weight and brittleness can make plaster less convenient, especially on moving doors and drawers.
Polyurethane is generally more practical for furniture-mounted ornament because it is lighter and better suited to repeated handling, but again the final choice should follow the actual product and project.
Polyurethane Onlays and Corbels Are Not the Same Thing
An onlay is generally a surface-applied ornament. A corbel projects more strongly and visually suggests support.
If the furniture includes open shelves, hood-like projections, or architectural ledges, you may consider polyurethane corbels as a separate decorative category. Do not treat an unrated decorative corbel as structural support; the actual shelf or countertop needs an appropriate load-bearing system.
Wall Decor and Furniture Decor Can Share a Language
Furniture often looks most custom when it belongs to the room rather than floating inside it.
If the wall uses molding frames and central ornaments, a built-in cabinet can repeat one of those motifs. If the room is highly decorative, furniture can be quieter. If walls are plain, furniture can carry more relief.
STAVROS wall collections currently combine polyurethane ornament with linear elements in coordinated compositions, which illustrates the same principle at architectural scale: frame plus accent, geometry plus relief.
Do Not Assume Every Wall Decor Set Is All Polyurethane
This is important when linking product families. Some current STAVROS wall decor sets combine polyurethane decorative elements with primed MDF linear moldings.
That is perfectly valid as a design system, but the material description should be accurate. If an article says “polyurethane wall decor,” it should either refer to the polyurethane ornament specifically or clarify when a complete set includes other materials.
How to Read a Product Page Before Ordering
For every applique or onlay, check:
- overall width;
- overall height;
- thickness or projection;
- material;
- orientation;
- whether left and right versions exist;
- whether the product is central, corner, vertical, horizontal, or asymmetric;
- ornament type;
- supplied finish or primer condition;
- recommended adhesive;
- lead time;
- shipping conditions for your location.
For U.S. projects, international fulfillment should be confirmed directly rather than inferred from an English-language product page. The current STAVROS product pages still contain Russian domestic delivery information on some SKUs, so shipping to the United States should be treated as a separate order question.
Measure in Inches for U.S. Projects
STAVROS product pages now provide inch conversions for many products, which is useful for American designers and installers. Still, keep the original metric dimensions in project notes when exact fabrication matters, because the metric size is often the manufacturing basis.
When laying out a door, work in one unit system consistently. Mixing rounded inch conversions with exact millimeter dimensions can create small alignment errors across repeated furniture fronts.
Create a Full-Size Layout Before Ordering a Set
If a project uses many doors or drawers, print or trace the selected ornament at full scale and test it on one representative panel.
For a kitchen or built-in, photograph the mockup and review it across the entire elevation. Repetition can make an ornament feel much stronger than it does on one door.
Professional Specification for Designers
For an interior design or millwork package, specify appliques the same way you would specify hardware.
- manufacturer and SKU;
- material;
- dimensions;
- quantity;
- orientation;
- exact placement from panel edges or centerlines;
- substrate;
- adhesive system;
- joint treatment;
- primer and paint system;
- finish color and sheen;
- whether the part is decorative only;
- left/right pairing where applicable;
- drawing or elevation reference.
This prevents installers from treating the ornaments as loose accessories and deciding placement in the field.
For Cabinetmakers and Millwork Shops
Integrate decoration into shop drawings early. Do not wait until the cabinet is finished.
Check hinge boring, pull locations, edge profiles, door reveals, and paint sequence. If the applique is thick, confirm that adjacent doors can open without collision. If doors slide or pocket, projection may be critical.
Where possible, create one prototype door. It is easier to refine an ornament position before producing twenty identical fronts.
For DIY Furniture Makeovers
The process can be manageable for a careful homeowner, but “easy” should not mean casual.
- Choose the furniture piece and decide what is visually missing.
- Measure the usable decorative field.
- Select one onlay family and one molding family, if needed.
- Create a full-size paper mockup.
- Dry-fit the actual products.
- Confirm substrate and adhesive compatibility.
- Mark centerlines and reference lines.
- Attach the ornaments according to product instructions.
- Finish perimeter transitions if required.
- Prime where needed.
- Paint or apply the planned decorative finish.
- Reinstall or adjust hardware.
Common Mistake #1: Decorating Before Fixing the Furniture
If hinges sag, doors rub, drawer gaps are uneven, or veneer is loose, fix those problems first. Ornament draws attention to geometry; it will make poor alignment more visible.
Common Mistake #2: Choosing the Onlay From a Close-Up Photo
Product photography exaggerates visual scale. An applique that fills the screen may be only a few inches wide.
Read dimensions and mock up full size.
Common Mistake #3: Using Too Many Styles
An acanthus applique, Art Deco molding, rustic hardware, and modern slab door can coexist only if the design is intentionally eclectic. Otherwise it looks uncoordinated.
Choose one dominant language.
Common Mistake #4: Ignoring Hardware
Hardware is part of the elevation. Do not place an ornament first and then discover there is nowhere for the pull.
Common Mistake #5: Overfilling the Panel
Relief needs negative space. Leave room around the applique so its silhouette can be understood.
Common Mistake #6: Assuming Every Adhesive Works
Furniture surfaces vary too much for generic glue advice. Confirm compatibility with the polyurethane and the specific substrate.
Common Mistake #7: Installing on a Failing Finish
If old paint or veneer is lifting, the new ornament may pull away with the unstable layer. Repair the substrate first.
Common Mistake #8: Using Mechanical Fasteners Without Need
Nails and screws can damage relief and complicate finishing. Use them only when the product or project-specific installation requires them.
Common Mistake #9: Assuming Polyurethane Is Flexible
Ordinary rigid polyurethane onlays should not be bent around curves unless the specific product is designed for that purpose.
Common Mistake #10: Treating Every Polyurethane Product as Exterior-Rated
An interior furniture applique is not automatically suitable for exterior doors or outdoor furniture. Exterior exposure requires product-specific confirmation.
Common Mistake #11: Over-Painting the Relief
Heavy coats can blur fine edges. Build color gradually and preserve detail.
Common Mistake #12: Decorating Every Door the Same Way
Repetition creates rhythm, but excessive repetition can flatten hierarchy. In a large built-in, consider emphasizing center doors or key zones rather than every panel equally.
Keyword Strategy: Use Search Phrases as Language, Not as Decoration
The new U.S. keyword batch confirms demand for terms such as “onlays and appliques,” “furniture onlays and appliques,” “onlays for cabinets,” “onlays for furniture,” “polyurethane onlays,” and “urethane onlays.” Those phrases belong in the article because they describe real objects and real buying behavior.
They should not appear in every heading. The page still needs natural design language: ornament, relief, cabinet embellishment, furniture detail, molding, decorative panel, botanical motif, crest, corner element, central applique, framed door, millwork, and painted finish.
A strong SEO article answers the buying and design problem comprehensively. It does not simply repeat the query.
How Internal Links Should Work
The anchor should accurately describe the destination. Broad applique and onlay terms should lead to the verified polyurethane decorative-element category. Linear trim terms should lead to the trim category. Wall decor terms should lead to wall systems. Corbel terms should lead to decorative brackets.
That is why this article links polyurethane onlays to the polyurethane ornament category, while urethane trim leads to the linear trim section and polyurethane wall decor leads to the wall-composition section.
Good internal linking is semantic architecture. It should help both the reader and search engine understand how the product families relate.
Frequently Asked Questions
What is a furniture onlay?
A furniture onlay is a decorative relief element attached to the surface of a cabinet, drawer, door, mirror frame, bed, or other furniture component. It adds ornament and depth without requiring the design to be carved directly into the furniture.
What is the difference between an applique and an onlay?
In furniture decoration, the terms often overlap. “Onlay” is commonly used for applied architectural or furniture ornament, while “applique” is a broader decorative term. Many U.S. shoppers and manufacturers use both together.
What are the best onlays for cabinets?
The best choice depends on door size, style, hardware, finish, and desired level of ornament. Center, vertical, corner, and paired onlays all solve different visual problems.
Can polyurethane appliques be used on MDF cabinets?
Yes, when the MDF surface is stable and the adhesive and finish system are compatible. Primed or painted MDF is a common paint-grade substrate for decorative furniture work.
Can I put onlays on laminate furniture?
Potentially, but laminate and melamine are nonporous surfaces. Verify adhesive compatibility, clean carefully, and consider a small adhesion test before committing to a full project.
Can polyurethane onlays be painted?
Yes, many are designed for paint-grade finishing. Check whether the specific SKU is supplied primed and follow the manufacturer’s coating guidance.
Can they be stained like wood?
They can be faux-finished to resemble wood, but if genuine exposed wood grain is important, a real wood applique is the more authentic choice.
Can polyurethane appliques be used on kitchen cabinets?
Yes, especially on decorative zones such as island panels, hutches, tall pantry doors, and hood surrounds. Keep intricate relief away from areas exposed to intense heat, grease, or difficult cleaning conditions.
Can they be used on bathroom vanities?
Yes, with a suitable substrate, adhesive, paint system, ventilation, and placement. Do not assume the entire vanity becomes moisture-proof because the ornament is polyurethane.
How do I center an applique on a cabinet door?
Measure the usable decorative field, mark its vertical and horizontal centerlines, find the center of the applique, and align the two. Dry-fit with painter’s tape before attaching.
How large should a cabinet onlay be?
There is no universal percentage. Judge overall dimensions, ornament density, relief depth, surrounding negative space, and hardware location together. A full-size mockup is the safest method.
Can I combine onlays with molding?
Yes. This is one of the most effective approaches. Molding creates the frame and the onlay creates the focal point.
Can decorative onlays cover old hardware holes?
Sometimes, but fill and stabilize the substrate first. Do not rely on the ornament as a structural repair.
How are polyurethane onlays attached?
They are commonly installed with a compatible mounting adhesive on a clean, stable substrate. Follow the product and adhesive manufacturer instructions for surface preparation, open time, pressure, temporary support, and cure time.
Do I need nails?
Not necessarily. Small decorative pieces are often adhesive-mounted. Mechanical fastening should be used only when appropriate for the specific product and project.
Can polyurethane onlays be removed later?
Removal is possible in some cases, but it can damage paint, veneer, laminate, or the furniture surface depending on the adhesive. If reversibility matters, plan for it before installation.
Can polyurethane onlays be bent?
Rigid onlays should not be bent unless the exact product is designed as flexible. Curved furniture requires a suitable curved or flexible component.
Are polyurethane onlays structural?
No. They are decorative finish elements. If the furniture requires structural reinforcement, solve that separately.
Where can I browse STAVROS polyurethane appliques?
The current polyurethane appliques and relief-decoration category includes multiple shapes, orientations, ornament types, and sizes. Individual product pages should be checked for exact dimensions and finishing information.
A Practical Selection Checklist
- Identify the furniture style.
- Measure the usable panel field.
- Confirm hardware placement.
- Choose central, vertical, horizontal, corner, or paired ornament.
- Check actual product dimensions.
- Review projection, not just width and height.
- Print a full-size mockup.
- Check symmetry across neighboring doors.
- Coordinate with linear molding.
- Verify substrate and adhesive compatibility.
- Plan paint and joint finishing.
- Order left/right variants where required.
- Confirm shipping and lead time for the actual project location.
Final Design Principle: Make the Ornament Look Native to the Furniture
The best furniture applique does not look like an object glued onto a cabinet door. It looks as though the door was designed around it.
That effect comes from proportion, placement, repetition, negative space, hardware coordination, and finish. A small onlay in exactly the right position can add more perceived value than a much larger piece placed without regard for the furniture geometry.
Start with the object. Understand its axes and proportions. Decide whether the surface needs a center, a frame, a vertical line, a corner accent, or a crest. Then select the ornament. If linear trim is needed, establish the frame first. Dry-fit everything. Photograph it. Adjust spacing. Only after the composition works should adhesive enter the process.
For American buyers, phrases such as polyurethane onlays, furniture appliques, and cabinet onlays are useful ways to find the product category, but the final result depends on more than search terminology. The piece must fit the furniture physically and visually.
A successful application can make a standard cabinet feel like custom millwork, turn a plain dresser into a focal piece, give a vanity the character of built-in furniture, or connect a freestanding wardrobe to the architectural language of the room. That is the real value of appliques and onlays: not decoration for its own sake, but the ability to give a flat surface hierarchy, shadow, and identity.