Article Contents:
- Console zone: a scene everyone sees
- Console zone: anatomy of incompleteness
- Three signs of an incomplete console zone
- Correct logic for building a console zone
- Moldings as a frame for the console zone
- Large single frame: the "portal" solution
- Two-level frame: lower and upper zones
- Vertical moldings on the sides of the console: the "pilaster" solution
- Moldings directly around the mirror
- Frame sizes for consoles of different widths: table
- Mirror and frame: central element of the console area
- How to choose the mirror size for a console
- Frame for mirror: style and material
- When a mirror frame is not needed
- Decorative stucco in the console area: four strong positions
- Position one: above the mirror
- Position two: at the top of the frame above the sconces
- Position three: corner inserts in the molding frame
- Position four: horizontal border between the lower and upper zones
- Sconce in the console zone: rules of symmetry and architectural installation
- Symmetry as an absolute rule
- Distance from mirror to sconce
- Decorative design of the sconce mounting point
- Four spaces — four approaches to the console zone
- Hallway: the first frame
- Hall: entrance area
- Living room: side accent wall
- Bedroom: delicate console zone
- Stylistic options for the console zone with stucco
- Parisian Apartment Style
- Modern Neoclassical Style
- Classic Hall Style
- Color and Painting of the Console Area: Three Schemes
- Monochrome Scheme: Wall and Moldings in a Single Tone
- Two-Tone Scheme: Moldings Lighter Than the Wall
- Warm Classic Scheme
- Installation: Step-by-Step Plan for the Console Area
- Step one: marking
- Step Two: Installing Moldings
- Step Three: Installing Decorative Overlays
- Step four: painting
- Step five: installing the mirror and sconces
- What to buy for the console area: final table
- Frequently Asked Questions
- STAVROS: system for the perfect console area


Console area: a scene everyone sees
There are zones in an interior that work like a stage. The console is one of them. It doesn't matter where it stands: in the hallway greeting guests at the entrance, in a foyer with high ceilings, in the living room by a side wall, or in the bedroom opposite the bed. The console always draws the eye — and along with it, the wall behind it becomes the main "frame" of the zone.
That's why the wall with the console requires special attention. A beautiful console on an empty wall is an unfinished scene: the actor has come out, but there are no decorations. A mirror without a frame, a sconce without architectural context, a console without a molding frame — each element exists separately, and the eye doesn't know how to read them together.
What changes the situation? Stucco molding around the console — moldings, decorative overlays, a frame for the mirror — which gather disparate elements into a single vertical composition. It's not a lot of details. It's the right details in the right places.
The wall with the console looks expensive when the mirror, sconces, Moldings made of polyurethane и Decorative stucco work as a single composition: moldings set the frame, the mirror becomes the center, sconces add light, and decorative elements complete the area.
This article covers how to build this system — with specific dimensions, a sequence of decisions, and options for different spaces.


Console area: anatomy of incompleteness
Before discussing solutions, let's break down why the console area so often looks "almost good" but not quite. This is not a matter of taste — it's an architectural diagnosis.
Our factory also produces:


Three signs of an incomplete console area
First sign: the vertical axis is not aligned. The console, mirror, and sconces should form a clear vertical axis. If the mirror is offset from the center of the console, the sconces are hung asymmetrically, and decorative elements are placed randomly — the axis is broken, and the eye "stumbles."
Second sign: no horizontal and vertical boundaries. The empty wall around the console lacks architectural boundaries — the area "dissolves" into it. A molding frame creates these boundaries: it says "the console area starts here, ends here."
Third sign: different scale of elements. A massive mirror + small sconces + thin console legs — a conflict of scales. Stucco and moldings help balance the scale: a large frame made of molding unites elements that otherwise "don't hear" each other.
Get Consultation
Correct logic for building a console area
The order of decisions is not arbitrary. It is a sequence, violation of which leads to rework:
-
The width of the console zone is determined (usually equal to the width of the console + 30–60 cm on each side).
-
A molding frame or a vertical molding system is built.
-
A mirror with a frame or in a molding surround is placed inside the system.
-
Sconces are installed symmetrically.
-
Added to key points Decorative stucco.
Moldings as a frame for the console zone
Moldings behind the console — this is the first and main layer of architectural design. They create a visual "stage" for everything that will be inside.
Large unified frame: "portal" solution
The most powerful and architecturally convincing solution is one large molding frame covering the entire console zone from the baseboard to the cornice or to a height of 220–240 cm.
Frame parameters:
-
Width: console width + 40–80 cm on each side. For a 100 cm console → frame 180–260 cm wide.
-
Height: from the baseboard (or from the horizontal molding belt at a height of 90–100 cm) to the cornice or to a height of 220–240 cm.
-
Molding: width 30–50 mm, projection 15–25 mm. Profile — classic with several horizontal levels.
Inside the large frame — a mirror, sconces, a console, and one or two decorative accents. The frame "holds" this entire system as a single whole.
Two-level frame: lower and upper zones
A horizontal molding belt at a height of 90–110 cm divides the large frame into two zones:
-
Lower zone: from the baseboard to the belt. In this zone — the console itself. Its surface is visible above the lower part of the frame.
-
Upper zone: from the belt to the top of the frame. Here — a mirror, sconces, decorative accents.
The two-level system is especially appropriate in a hall or entryway with high ceilings: it creates an architectural "pedestal" for the console below and a "picture plane" above.
Vertical moldings on the sides of the console: a "pilaster" solution
Two vertical moldings on the sides of the console — from the baseboard to the cornice or to the height of the upper horizontal belt — create "pilasters" that frame the console like an architectural portal.
This solution is especially expressive when a mirror is present: the mirror occupies the space between the vertical moldings, the console stands at the base, and sconces are mounted on the vertical moldings.
Width of vertical moldings: 25–40 mm — the same profile as the horizontal ones. A uniform profile throughout the entire system is mandatory.
Moldings directly around the mirror
If buy polyurethane moldings for framing the mirror — they create an "architectural frame" directly on the wall. The mirror is mounted inside the molding frame.
Molding offset from the mirror edge: 5–10 mm. This creates a clear boundary between the mirror and the frame without visual "squeezing." Molding width: 25–40 mm. Profile: the same as in the rest of the system.
Frame dimensions for consoles of different widths: table
| Console width | Frame width | Frame height | Molding (width) |
|---|---|---|---|
| Up to 60 cm | 100–140 cm | 160–200 cm | 25–35 mm |
| 60–90 cm | 140–180 cm | 180–220 cm | 28–40 mm |
| 90–120 cm | 180–240 cm | 190–230 cm | 30–45 mm |
| 120–160 cm | 240–300 cm | 200–250 cm | 35–50 mm |
| More than 160 cm | 300 cm and wider | 220–280 cm | 40–55 mm |
Mirror and frame: the central element of the console area
The mirror is the undeniable center of the console area. It reflects light, creates depth in the space, and draws the eye. But the mirror only 'works' within the system when it is correctly proportioned to the console and the surrounding molding.
How to choose the size of a mirror for a console
Basic rule: the mirror should not be wider than the console. Mirror width — 70–90% of the console width. Mirror height — in proportion to the wall height above the console.
Examples:
-
Console 100 cm → mirror 70–90 cm wide.
-
Console 120 cm → mirror 85–110 cm.
-
Console 150 cm → mirror 100–135 cm.
Mirror height: the mirror is placed so that its bottom edge is at a height of 100–120 cm from the floor (10–20 cm above the console surface), and its top edge is at a height of 180–200 cm. This is the 'working' height, at which the mirror is convenient to use and looks properly proportioned.
Frame for the mirror: style and material
mirror frame made of natural wood is an independent decorative element that should match the style of moldings and stucco.
If the moldings on the wall are white and painted, the wooden frame is either painted the same white or left in its natural warm color as the only "warm" accent in a monochrome system.
If the moldings are classic with ornamentation, the frame also has a classic profile. If the moldings are rectangular and strict, the frame is also without ornamentation.
Frame width: proportional to the width of the moldings on the wall. A 15 mm frame with 40 mm moldings is a mismatch in scale. Approximate guideline: frame width = molding width × 0.8–1.2.
When a mirror frame is not needed
If the mirror is set into a molding frame on the wall, a separate frame is not needed. The molding frame itself serves as the frame. The mirror sheet is mounted directly on the wall, with molding around the perimeter.
Decorative stucco in the console area: four strong positions
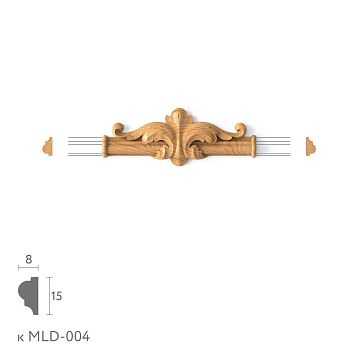
Buy Moldings for the console area means choosing one or two elements that create a "peak" in the architectural system of moldings. More than two decorative points per console area is overload.
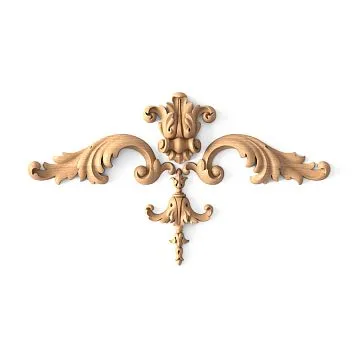
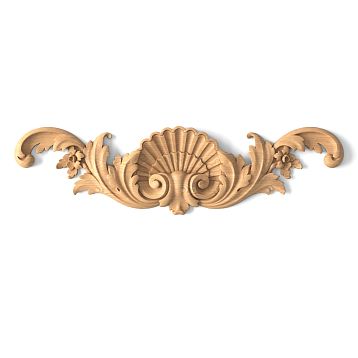
Position one: above the mirror
One element directly above the top edge of the mirror — along the central axis. This is the "header" of the entire console area. As the gaze rises from the console upward, it passes through the mirror and meets a decorative accent.
Element type: medallion, cartouche, floral appliqué. Size: 150–250 mm horizontally.
Location: central axis of the console and mirror. Indent from the top edge of the mirror: 5–15 cm. Or directly at the point where the molding frame has a "keystone" above the mirror.
Second position: at the top of the frame above the sconce
If sconces are mounted on the sides of the mirror or on the sides of the frame — a small decorative element above each sconce creates a "crown" for the light fixture. Paired symmetrical elements 80–120 mm.
This is a delicate, refined technique: the light fixtures receive an architectural framing that marks them not as randomly driven into the wall, but as planned elements of the system.
Third position: corner inserts in the molding frame
Polyurethane wall decor In the form of corner decorative inserts — in the four corners of the molding frame — works as "locks" of the structure. They cover the corner joints of the molding and simultaneously provide a decorative accent.
Size of corner inserts: 50–100 mm. For a classic system — floral rosettes. For a strict one — geometric.
Fourth position: horizontal border between the lower and upper zones
If a molding belt divides the wall into lower and upper zones — a horizontal ornamental border along this line enhances the division and adds detailing. Wall molding mounted as a border 30–60 mm wide along the belt across the entire width of the console area.
Sconces in the console area: rules of symmetry and architectural installation
Sconces are sources of directional light and decorative elements at the same time. In the console area, they serve a dual function: illuminate the console surface and create side accents in the system.
Symmetry as an absolute rule
Two sconces in the console area must be strictly symmetrical:
-
Same distance from the central axis of the mirror to each sconce.
-
Same height from the floor to the center of each sconce.
-
Same distance from the edge of the mirror or molding frame to each sconce.
Standard installation height for sconces in the console area: 150–165 cm from the floor. This is the height at which the light is directed downward onto the console surface and simultaneously illuminates the mirror from the side.
Distance from the mirror to the sconce
Sconces on the sides of the mirror: the center of the sconce is 15–25 cm from the edge of the mirror. If the distance is smaller, the sconce "crowds" the mirror. If larger, the connection between them is lost.
Sconces in a molding frame: if the frame is wide, the sconces are mounted in the side "fields" of the frame — between the mirror and the vertical moldings. This is the cleanest solution: all elements within the architectural frame.
Decorative design of the sconce mounting point
The sconce mounting point is a technical node that needs to be designed. Three options:
Option one: a small decorative plate 80–120 mm at the wiring exit point. The element hides the hardware and creates a decorative "circle" under the light fixture.
Option two: a molding frame 25×40 cm around the mounting point. The sconce is in the center of the frame. This is an architectural "window" for the light fixture.
Option three: a small diameter rosette (150–200 mm) as a wall element under the sconce. Buy molding in the rosette category — there are formats suitable for both the ceiling and walls.
Four spaces — four approaches to the console area
Entryway: the first frame
The hallway is the first thing people see when entering a home. The console area here serves as the "calling card" of the entire interior.
Features:
-
The hallway is often narrow — 120–180 cm deep. The space in front of the console is limited.
-
A mirror is essential: a functional necessity.
-
Lighting is critically important: sconces or spotlights above the mirror.
Hallway set:
-
Moldings behind the console — vertical frame from baseboard to cornice, profile 25–35 mm.
-
mirror frame — wooden, matching the color of the moldings.
-
One decorative element above the mirror — a medallion 150–180 mm.
-
Two sconces symmetrically.
-
Painting: monochrome, matching the wall color.
Advice for a narrow hallway: do not make the frame too wide — it visually consumes the already limited space. Optimal is a frame slightly wider than the mirror.
Hall: entrance area
A hall with high ceilings from 280 cm is an ideal space for a full console system.
Features:
-
The height allows creating a frame from floor to ceiling.
-
Larger space allows for larger elements.
-
The console often has decorative legs — the lower part of the frame is visible and important.
Hall set:
-
Two-level molding frame: lower panel + upper area with mirror.
-
Horizontal molding belt 30–40 mm at a height of 90–110 cm.
-
mirror frame with a classic profile.
-
Decorative cartouche above the mirror — 200–250 mm.
-
Paired decorative overlays on the sides of the sconce.
-
Cornice made of polyurethane products Along the top line of the hall.
Living room: side accent wall
In the living room, the console often stands by the side wall — not behind the sofa, but opposite. This is a "quiet" wall that needs accent decoration.
Features:
-
More space in width — the frame can be wider.
-
The console may not have a functional mirror — instead, a painting or just a decorative overlay.
-
Sconces are not required — a floor lamp by the console can replace them.
Living room set:
-
Wide molding frame 200–280 cm.
-
Mirror or painting in a molding frame.
-
Buy decorative stucco — medallion or horizontal border.
-
If there are sconces — decorative rosettes at the mounting points.
-
decor for furniture — for decorating the console itself.
Bedroom: delicate console area
In the bedroom, the console is a dressing table or a decorative item against the wall. Maximum restraint is needed here.
Features:
-
The bedroom does not tolerate active decor.
-
Mirror — often a dressing, functional one.
-
Sconces — delicate, without large mounting rosettes.
Bedroom set:
-
Molding frame 25–30 mm — narrow delicate profile.
-
Mirror in wooden frame or in a molding frame.
-
One small decorative element above the mirror — 120–160 mm, floral.
-
Painting: everything in the wall color.
Stylistic options for the console area with stucco
Parisian Apartment style
Keywords: white moldings, gilded mirror, bronze sconces, floral decor.
-
Moldings made of polyurethane — large classic profile 40–50 mm, white.
-
Mirror in gilded wooden frame with floral ornament.
-
Decorative stucco — cartouche above the mirror, floral corner inserts.
-
Wall in a warm gray or cream tone.
-
Sconce with candle-shaped shades.
Effect: lightness, elegance, Parisian charm without pomposity.
Style: Modern Neoclassicism
Keywords: monochrome, strict profile, one accent.
-
Molding frame 30–35 mm — rectangular profile without ornament.
-
Mirror without visible frame or with wooden frame in the color of the moldings.
-
One geometric medallion above the mirror.
-
Wall and moldings — a single color (white or light gray).
-
Sconce — modern minimalist light fixture.
Effect: architectural purity, feel of an expensive neutral interior.
Classic Hall style
Keywords: two-level frame, powerful cornice, grandeur.
-
Two-level frame: lower panel 80–90 cm + upper zone with mirror.
-
Horizontal molding belt 35–45 mm.
-
Large mirror 80–120 cm in wooden frame.
-
Cartouche 220–280 mm above the mirror.
-
Paired decorative overlays on the sides.
-
Buy moldings — cornice 80–100 mm along the top line of the hall.
Effect: a hall with architectural character that feels like a thoughtfully designed space.
Color and painting of the console area: three schemes
Monochrome scheme: wall and molding in a single tone
Moldings, decorative overlays, and the wall — all in one color. The frame is only readable through light and shadow. The mirror with frame and sconces are contrasting elements. This is the most restrained and modern solution.
Best colors for a monochrome console area:
-
Dark blue (midnight) — mirror in a gilded frame, white sconces.
-
Anthracite — mirror in a silver or black frame, brass sconces.
-
Deep green — mirror in a bronze frame, warm sconces.
-
Dusty pink — mirror in a white frame, matte sconces.
Two-tone scheme: moldings lighter than the wall
A wall in a rich color, moldings in white or cream. The contrast creates a clear architectural pattern. Decorative elements match the color of the moldings. The mirror is in a frame that matches the moldings in color.
Warm classic scheme
A wall in a cream-beige tone, moldings in white, wooden frame in a natural warm color. This is a "warm classic" where everything breathes coziness. Sconces with lampshades in warm tones. Decorative overlays — floral ornament with light gilding or in white.
Installation: step-by-step plan for the console area
Step one: marking
From the central axis of the console — left and right at a set distance to the vertical sides of the frame. Horizontals — by level. Symmetry is mandatory.
Marking with a pencil. Check: distances from the center to both vertical sides are equal; horizontals — by level; the height of the upper molding of the frame — matches the planned one.
Step two: installation of moldings
Frame corners — at 45°. Miter box or miter saw. Mounting adhesive for polyurethane — zigzag on the back side of the molding. Press, secure with painter's tape for 1–2 hours.
Joints — acrylic sealant. After drying — sanding with 320 grit.
Step three: installation of decorative overlays
Using the same technique. Mark the central axis with a pencil. The overlay must be strictly along the axis. Before fixing with glue, check the position dry.
Step four: painting
Prime the entire surface (moldings + wall in the frame area). After drying, apply two thin coats of acrylic paint. Use a soft brush for recessed relief areas.
Step five: installation of mirror and sconce
Mount the mirror using clamps or liquid nails plus a safety cable. Install the sconce after final painting, into pre-drilled holes for wiring.
What to buy for the console area: final table
| Task | What to buy |
|---|---|
| Create a frame on the wall | Moldings made of polyurethane 30–50 mm |
| Design a mirror | mirror frame wooden or molding frame |
| Add a decorative accent | Buy decorative stucco — medallion or cartouche |
| Design the sconce area | Decorative overlays 80–120 mm or wall rosettes |
| Finish the wall around the perimeter | Polyurethane wall decor — border or cornice |
| Style the console | decor for furniture — overlays on facades |
| Make the hallway more expensive | Moldings + mirror in frame + Buy Moldings |
| full set | Buy molding + frame + decor + glue + sealant + primer + paint + 20% reserve |
Frequently asked questions
How to design the wall with a console?
polyurethane moldings for a vertical frame or "pilaster" framing, decorative molding above the mirror, frame for mirror made of wood, decorative rosettes for sconces. Everything in a unified system and in a single color.
What to buy for the console area in the hallway?
Moldings made of polyurethane 25–35 mm for the frame, mirror frame, one decorative medallion above the mirror, mounting adhesive, sealant, primer, paint. Material reserve 20%.
Do I need to put molding around the mirror?
Not necessarily. A mirror with a wooden frame fits into the wall's molding frame without additional framing. But if the mirror is frameless, molding framing on the wall is mandatory: without it, the mirror looks 'glued' to the wall.
How not to overload the wall with the console?
One molding frame, one mirror, one decorative accent above the mirror, two symmetrical sconces. Do not add overlays on every corner and borders along the entire wall. Discipline is the main principle.
Which frame to choose for the mirror?
mirror frame made of natural wood is a classic solution. The width of the frame should be proportional to the width of the moldings on the wall: approximately 0.8–1.2 of the molding width. The style of the frame should be the same as the molding profile.
How to properly hang sconces in the console area?
Strictly symmetrical: equal distance from the mirror axis to each sconce, equal height from the floor. Standard height: 150–165 cm from the floor. Distance from the mirror edge to the sconce center: 15–25 cm.
STAVROS: system for the perfect console zone
The console zone is the showcase of the interior. It speaks of taste, attention to detail, and understanding of architectural proportions. And here, every element matters: molding, frame, decorative overlay, sconce rosette.
STAVROS offers a full range for creating a professional console zone: Moldings made of polyurethane — a wide selection of profiles for frames and trims, buy decorative moldings — medallions, cartouches, corner and paired overlays, Mirror Frames made of natural wood, decor for furniture for decorating the console itself, molding on the wall for borders and horizontal accents.
Buy molding a complete set for the console zone — means getting a system, not a collection of individual parts.
STAVROS. Delivery across Russia. Pickup in Moscow and St. Petersburg.
The console deserves a proper scene. Create it.