
























































Article Contents:
- Why the bottom joint of the trim and baseboard often looks messy
- Different profile widths
- Different thicknesses
- Mismatched relief
- Gap near the floor
- Random solution on site
- Start with the actual baseboard
- Consider the width of MLD-007.1
- Check handles, switches, and furniture
- Look at both sides simultaneously
- Illustrative example for one double-sided door
- Illustrative example for five double-sided doors
- Why the remainder cannot be considered waste in advance
- MDF under enamel
- Moisture-resistant MDF
- Oak
- Oak
- Count one heel per door
- Forget the reverse side of the opening
- Ignore the trial part
- Count only the clean length
- Order different doors at different times
- Evaluate only the close-up
- Not accounting for the baseboard height
- Do not account for the finished floor
- Make different heights without reason
- Oak heel and beech casing under transparent finish
- Regular MDF in unsuitable conditions
- Finishing after final installation without a test
- Install the baseboard first
- Trim the casing without a trial assembly
- Do not protect the ends
- What is a casing heel?
- Why is a heel needed under the casing?
- Is PLT-007 sold as ready-made short blocks?
- What is the cross-section of PLT-007?
- What casing is this heel designed for?
- How many heels are needed for one door?
- Is a heel needed on both sides of the door?
- How to determine the height of the heel?
- Is there a standard height for the PLT-007 heel?
- How to calculate the length of the workpiece?
- How many heels can be obtained from one 2600 mm plank?
- Can the casing and baseboard be joined without a heel?
- Should the heel be wider than the casing?
- What is installed first — the heel or the casing?
- Can a heel be made from MDF?
- When is moisture-resistant MDF needed?
- What to choose for enamel — MDF or beech?
- Can a heel be made from oak for tinting?
- Is a spare part needed?
- How to account for cuts?
- Can the baseboard be installed first and the heel added later?
- What to do if the floors on either side of the door are at different heights?
- What to do if the floor plinth is wider than PLT-007?
- How to design the heel near the threshold?
- What data should I send to the manager?
- Where can I see other linear products?
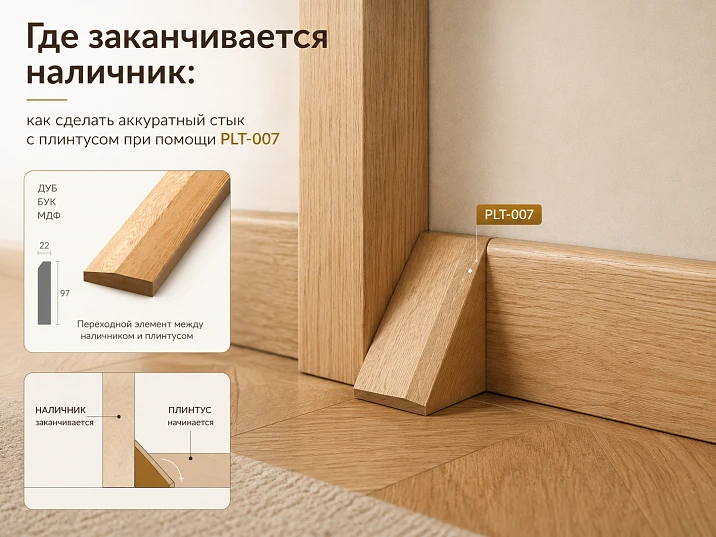
The joint between the casing and the plinth seems like a minor detail only until the door is installed, the walls are painted, and the floor plinth approaches the opening. It is at this moment that it becomes clear that a wide shaped casing and a narrower floor profile do not form a neat junction. One protrudes forward, the other goes inward, the reliefs do not match, and a gap or random cut remains between the parts.
Fixing such an assembly "on site" is late and expensive. The craftsman starts cutting off the shaped part of the casing, the plinth breaks off at a strange angle, the lower edge looks thin and random. It is much more reliable to pre-lay a separate base for the casing — a heel, which accepts the vertical profile and creates a clear termination point for the floor plinth.
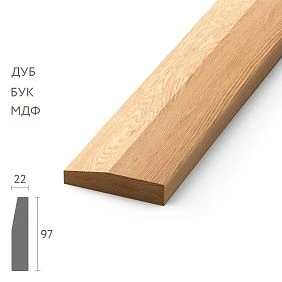
For this task, the long-length profile PLT-007 with a cross-section of 97 × 22 mm and a length of 2600 mm is suitable. The product card indicates that it can be used as a plinth, casing, or blank for a heel under MLD-007.1. From one plank, the craftsman cuts the required number of lower blocks, but their height is determined by the door assembly project, not by a random photo from the internet.
Below is a complete breakdown of the route: what a casing heel is, why PLT-007 matches MLD-007.1 in width and thickness, how many parts are needed for one or several doors, how to calculate the consumption of long-length profile, which material to choose for enamel or tinting, and what to check before ordering the entire set.
Short answer. For one doorway finished only on one side, two heels are usually needed — one under each vertical casing. For double-sided finishing, four are needed. PLT-007 is purchased as a long plank of 2600 mm and cut into blocks of the selected height, accounting for cuts and a test piece. The heel height is first checked using a paper or cardboard template at full scale.
View confirmed materials, size, and execution options in the product card: buy a heel for casing PLT-007.
Why the bottom joint of the casing and baseboard often looks messy
Vertical casing and floor baseboard serve different purposes. The casing covers the installation gap between the frame and the wall, forms the opening frame, and acts as a prominent part of the door composition. The baseboard covers the joint between the wall and the floor, runs as a long horizontal line, and is perceived as part of the room's finishing. Even if both products are made of wood or MDF, their profile, width, and thickness rarely match by chance.




Different profile widths
A wide casing often protrudes toward the wall more than the baseboard. If a narrow baseboard is simply brought to the side edge of the casing, a step appears that looks like a technical error. The reverse situation is also possible: a tall or massive baseboard turns out to be wider than the casing, extends beyond its plane, and creates a heavy protrusion near the door. The heel forms an intermediate base and makes the width difference intentional.
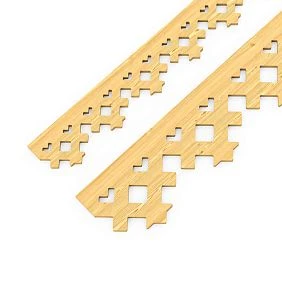
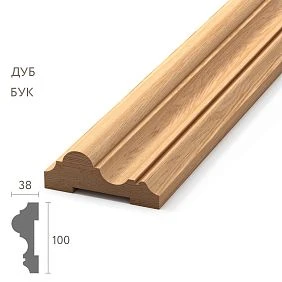
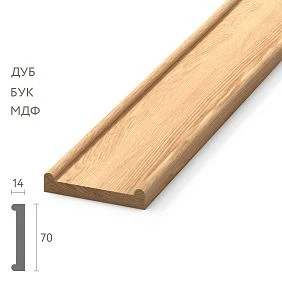
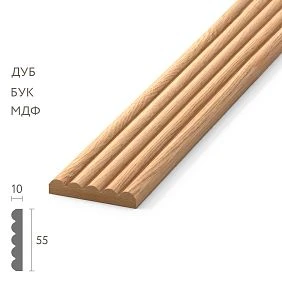
Our factory also produces:
Different thickness
Even with similar widths, profiles may have different projections from the wall. A casing 18 mm thick and a base 22 mm thick read as a stepped unit: the lower part slightly protrudes and visually supports the vertical. If two profiles of different thicknesses are joined without a base, the end of one product remains visible, and the joining line depends on how neatly the installer managed to fit the parts.
Get Consultation
Mismatched relief
A shaped trim cannot be joined end-to-end with another shaped molding without loss. The upper or side part of the profile may have ridges, grooves, bevels, and transitions. On a horizontal baseboard, these elements run in a different direction. A miter cut does not always solve the problem: the reliefs converge asymmetrically, and a small error becomes noticeable after painting or tinting.
Gap at the floor
The lower edge of the trim is often cut after the flooring is installed. If the height was measured before laying the floor or the thickness of the underlayment, tile, parquet, or threshold was not accounted for, a gap remains under the trim. Closing it with sealant or putty is inconvenient: the material may crack, change shade, or highlight the inaccuracy. A separate heel allows you to preset the lower level and neatly align the remaining elements to it.
Random solution on site
The main reason for a poor joint is the lack of a solution in the specification. A frame, extensions, trim, and baseboard are ordered, but how they should meet near the floor is not specified. The installer has to choose the option themselves. One cuts the baseboard at a right angle, another miter cuts the trim, a third makes a small insert from a scrap. The PLT-007 heel turns a random cut into a pre-designed part of the kit.
What is a trim heel in simple terms
A trim heel is a separate lower block located between the floor and the vertical trim. The upper part of the heel receives the trim, and the floor baseboard meets its side. The part can be compared to a small column base: it completes the vertical, distributes visual weight, and creates a clear transition between vertical and horizontal molding.
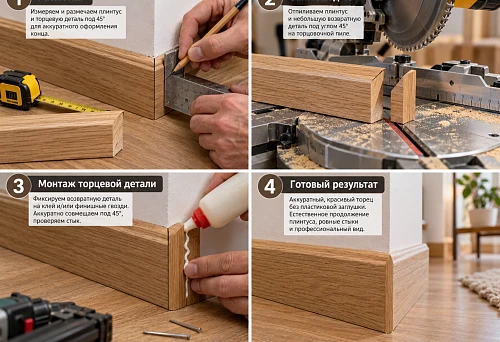
The heel is not part of the door frame and does not replace the trim attachment. Its purpose is primarily compositional and finishing. It covers the problem area, gives the craftsman flat surfaces for cutting, and avoids joining two complex profiles directly together. As a result, the bottom of the door casing looks assembled, and the baseboard ends near the opening without a random end.
In a simple modern interior, the heel can be almost invisible: a rectangular block slightly wider than the trim, painted the same color. In a classic interior, the base is made more expressive to support a wide trim, tall frame, and relief molding. But in both cases, the height, width, and material must be coordinated before cutting the workpiece.
PLT-007: long-length profile and blank for the lower base
PLT-007 has a cross-section of 97 × 22 mm and a length of 2600 mm. The product card allows several applications: the profile is used as a skirting board, architrave, or material for making a heel for MLD-007.1. It is important to understand before calculation: the customer orders not a set of pre-cut short blocks, but a long plank from which parts are made for a specific height.
| Parameter | PLT-007 | What this means for the project |
|---|---|---|
| Cross-section | 97 × 22 mm | The profile forms a noticeable base and protrudes relative to MLD-007.1 in width and thickness |
| Length | 2600 мм | The number of heels from one plank depends on the selected height, cuts, and reserve |
| Purpose | Skirting board, architrave, blank for heel | One profile can be included in different parts of the agreed door trim |
| Materials | MDF, moisture-resistant MDF, beech, oak | The material is selected for the architrave, skirting board, and future finishing |
| Related profile | MLD-007.1 | The PLT-007 card directly indicates the possibility of making a heel for this architrave |
The long-length form gives the project flexibility. For one door, you can choose a low base, for a high opening — a more noticeable block, and for several doors, make all elements from one plank or one batch. At the same time, this requires precise calculation: you cannot simply write 'four heels' without determining their height and checking how many millimeters will be spent on each cut.
Why PLT-007 is compatible with MLD-007.1 casing
MLD-007.1 has a cross-section of 93 × 18 mm. PLT-007 is 4 mm wider and 4 mm thicker. This ratio allows for a readable base: the heel slightly protrudes on the sides and forward, and the vertical casing is perceived as mounted on the base. This does not automatically mean compatibility with any cut — the final geometry must be checked against drawings and trial assembly — but the dimensional logic of the pair is clear.
| Parameter | PLT-007 | MLD-007.1 | Practical conclusion |
|---|---|---|---|
| Width | 97 мм | 93 мм | The base is 4 mm wider than the casing |
| Thickness | 22 мм | 18 мм | The base protrudes 4 mm forward |
| Delivery length | 2600 мм | 2400 or 2600 mm depending on the material | Cutting of PLT-007 and casing lengths are calculated separately |
| Role | Bottom base | Vertical framing | Profiles do not replace each other in the assembly |
| Materials | MDF, moisture-resistant MDF, beech, oak | MDF, beech, oak | For visible wood trim, it is better to match the species |
For vertical framing, you can choose a wooden casing MLD-007.1. Before placing an order, you need to match not only the nominal dimensions, but also the cross-section profile, the direction of the face side, the material, and the finishing method.
The heel does not correct incorrect wall geometry
The decorative base helps assemble the assembly but does not replace surface preparation. If the wall near the frame has a wave, the casing does not fit, and the baseboard is on a different plane, even a precisely cut heel will not hide all the differences. Before marking, you need to check the verticality of the side sections, the thickness of the plaster, the position of the frame, and the plane of the future flooring.
Special attention is required in old apartments and houses where the doorway may have been remodeled multiple times. The wall on one side may be thicker, the floor may have a slope, and the baseboard approaches the door at a slight angle. In such a case, the parts are first fitted without final finishing. Sometimes adjustment of the back side of the heel or local wall preparation is required, but it is better to preserve the face geometry of the PLT-007 and MLD-007.1 pair.
How to choose the height of the casing heel
For PLT-007, there is no single mandatory height for the finished heel. The height is chosen based on the proportions of the doorway, the width of the casing, the height of the floor baseboard, and the overall character of the interior. Therefore, the most reliable method is not to look at a small image, but to make several templates from paper, cardboard, or thin sheet material.
Start with the actual baseboard
The height of the base should account for where the floor plinth will meet it. If the heel is almost equal to the plinth in height, the transition will be smooth and utilitarian. If the base is noticeably higher, it becomes an independent part of the door frame. Neither option is universally correct: the decision depends on the scale of the opening and the design of the entire room.
Consider the width of MLD-007.1
A 93 mm wide casing looks massive compared to narrow modern strips. A block that is too low may be perceived as a random pad, while an excessively high one may seem like a separate base unrelated to the door. The template should be applied together with a fragment of the casing or its precise paper outline. This shows not only the height of the base but also the transition from 97 mm width to 93 mm width.
Check handles, switches, and furniture
The heel is positioned low, but it affects the side dimension of the door frame. Nearby there may be a cabinet, nightstand, floor convector, or decorative panel. The template helps ensure that the base does not interfere with opening furniture doors, does not hit the threshold, and does not conflict with the already installed plinth.
Look at both sides simultaneously
One template on one side of the opening does not show the overall effect. For symmetry, you need to cut two identical blocks and place them under both vertical casings. If the door is finished on both sides, it is useful to check four positions. On different walls, the same height may be perceived differently due to color, lighting, and nearby furniture, but the dimensions of the kit parts must remain consistent.
Full-scale paper template
A template is the cheapest way to avoid an expensive cutting mistake. On a sheet, mark the 97 mm width and the intended heel height. Separately, outline the 93 mm casing contour. Then, apply the mockup to the opening at the finished floor level and bring a sample or strip simulating the floor plinth to it.
- Determine the finished floor level, including the covering and underlayment.
- Mark the position of the vertical casing MLD-007.1.
- Make at least two options for the base height.
- Apply the templates on both sides of the door.
- Check the view from a distance, not just up close.
- Photograph each option in daylight and artificial light.
- Pass the selected height to the master and include it in the specification.
The template does not confirm the fastening method and does not replace the working drawing, but it solves the main issue of proportions. After choosing the height, you can proceed to calculating the total length of PLT-007.
How many heels are needed for one door
The quantity is determined not by the number of door leaves, but by the number of vertical casings that end at the floor. A rectangular opening on one side usually has two vertical casings. Therefore, for one-sided finishing, two heels are needed. If the casings are installed on both sides of the wall, there are four verticals and also four heels.
| Scenario | Vertical casings | Kablukov | What to Check |
|---|---|---|---|
| One door, trim on one side | 2 | 2 | Which side of the opening remains without architraves |
| One door, trim on both sides | 4 | 4 | Is the floor height the same in both rooms |
| Two doors, each on one side | 4 | 4 | Do the baseboard heights match |
| Two doors, each on both sides | 8 | 8 | Is a single size needed for all rooms |
| Five doors on both sides | 20 | 20 | Stock, batch of material and full cutting |
For openings of complex shape, the calculation changes. If there is an additional vertical post, side portal, floor-length transom or decorative panel, the number of bases is calculated for each vertical. Corner and arched openings require a separate scheme, so the rule "two or four per door" cannot be applied automatically.
How to calculate the consumption of PLT-007 strip
After determining the number of parts and their height, you can calculate the total length of the workpiece. The basic formula is simple:
Total length of PLT-007 = height of one heel × number of heels + total allowance for cuts + reserve for a test piece.
The cut thickness is taken not from the article, but from the actual workshop equipment. Different blades and saws remove different amounts of material. In addition, the end of the strip may require initial alignment. Therefore, the specification should include not only the net sum of heights, but also a technological allowance confirmed by the manufacturer or installer.
Illustrative example for one double-sided door
Suppose after fitting, a heel height of 150 mm is selected. For a double-sided opening, four parts are needed. The net length will be 150 × 4 = 600 mm. Actual cuts and a test block are added to this value. A 2600 mm strip has a large remainder that can be used for other doors, test finishing, or agreed linear footage. The number 150 mm in this example is not a manufacturer's standard: it only shows the calculation procedure after the height is approved by the project.
Illustrative example for five double-sided doors
Five openings give 20 heels. With the same conditional height of 150 mm, the net requirement will be 3000 mm without cuts and reserve. One 2600 mm strip is no longer enough, so at least two will be needed. But ordering two strips based only on pure arithmetic is not possible: you need to create a cutting map and take into account the quality of the ends, test cuts, and possible reserve.
Why the remainder cannot be considered waste in advance
The remaining part of PLT-007 may be useful for a replacement part if one heel is damaged during fitting, or for a future door. If the profile is painted together with the entire set, it is reasonable to keep a small prepared fragment as a color sample. For transparent finishes, the remainder from the same batch is especially valuable because subsequent purchases of wood may differ in grain and shade.
Cutting map for multiple doors
When there is more than one door, a list of "20 heels" is not enough. A cutting map is needed: how many parts are cut from each plank, where a test section is left, which sides are considered faces, and how blocks are marked. The map helps avoid mixing elements from different rooms and see in advance whether the material is sufficient for the chosen height.
For each plank, it is convenient to specify:
- article and material PLT-007;
- total actual length of the workpiece;
- number of heels;
- net height of each block;
- cut locations;
- allowance for aligning the first end;
- test piece;
- remainder and its purpose;
- room or door opening number.
If the floor height differs, it is not necessary to change the height of the heel itself. Sometimes it is enough to adjust the bottom trim while preserving the visible part. But such a decision must be confirmed by a specialist after measurements: the article cannot replace an on-site inspection.
Single-sided and double-sided finishing are not the same thing
In a new building, a door opening is usually finished on both sides, so the buyer automatically expects four heels. However, there are sliding systems, portals, built-in wardrobes, and utility rooms where the casing is installed only on one side. Before ordering, you need to walk through each opening and note the actual number of verticals.
It is especially easy to make a mistake when ordering for an entire apartment. The table may show five doors, but one of them is hidden, another adjoins a wall panel, and a third is finished only from the corridor side. Simply multiplying five by four will give an incorrect result. The work sheet must contain a separate line for each opening and each side.
Apartment with five doors: example of a work sheet
| Opening | Side 1 | Side 2 | Total heels | Comment |
|---|---|---|---|---|
| Living room | 2 | 2 | 4 | Full double-sided design |
| Bedroom | 2 | 2 | 4 | Check the baseboard height in the hallway and bedroom |
| Office | 2 | 2 | 4 | Same size as the living room |
| Wardrobe | 2 | 0 | 2 | No interior trim provided |
| Technical room | 2 | 0 | 2 | Design only from the hallway side |
| Total | 10 | 6 | 16 | Before adding a trial or spare part |
Such a list shows why you cannot buy "four per door" without checking. After counting sixteen blocks, the selected height is added to it and the length of PLT-007 is calculated. When finishing natural oak or beech, it is advisable to order the entire volume in one batch to reduce the risk of noticeable wood differences.
What is installed first
The heel cannot be considered separately from the sequence of the entire door unit. Its position depends on the frame, finished floor, wall, casing, and baseboard. The general logic of the work is as follows:
- Install and check the door frame.
- Complete the main wall work near the opening.
- Determine the finished floor level.
- Mark the position and height of the heels.
- Make a trial fit of PLT-007 and MLD-007.1.
- Install the heels.
- Trim and install vertical architraves.
- Bring the floor plinth to the side of the base.
- Check the joints and perform the final finishing according to the accepted technology.
This sequence is not an instruction for a specific fastener. The fixing method depends on the wall material, MDF or solid wood, coating, and project requirements. The master determines the glue, mechanical fastening, and surface preparation. The main principle is not to install the floor plinth finally until the size of the lower base is confirmed.
How to bring the floor plinth to the heel
The plinth should end on the flat side plane of the heel. Then its end does not protrude into the open wall area and does not compete with the architrave relief. The height of the junction point depends on the plinth profile. If the plinth is lower than the base, it approaches its lower part. If the heights are close, the joint is perceived as a single line. A higher plinth requires a separate check of proportions.
Do not automatically make an angled transition. An angled cut is appropriate only when it is confirmed by the drawing and performed identically on all doors. A straight end adjacent to a wider base is usually easier to repeat and control. But the exact option depends on the face profiles and the direction of the relief.
What to do if the plinth is wider than the architrave
The situation where the architrave is wider than the plinth is often discussed, but the opposite also happens. A tall massive plinth can protrude further than MLD-007.1. PLT-007 with a width of 97 mm helps to increase the base, but its dimensions still need to be compared with the specific floor profile. If the plinth is significantly wider or thicker, one heel may not be enough for a smooth transition.
In such a project, consider a different plinth, an additional transition piece, or a change in the door composition. You cannot file the plinth to a random thickness just for one node: the change will be visible along the wall. It is better to first buy wooden trim for a door opening as a coordinated set, rather than selecting each plank independently.
How to design a passage between different floor coverings
Near a door, two coverings are often found: for example, parquet in the room and tiles in the hallway. Their levels, thresholds, and junctions may differ. The heel should rest on the confirmed level of each side, not on an average value. If one side is higher, the craftsman decides whether to maintain the same visible height of the bases or adjust the lower cut.
The heel cannot be used to mask a poorly calculated transition of coverings. The threshold, expansion gap, and door leaf are designed separately. The lower base of the casing only completes the decorative frame and helps to guide the baseboard.
How to work with a door near a wall corner
If the opening is located close to a perpendicular wall, the protrusion of PLT-007 may become critical. The width of 97 mm and thickness of 22 mm must fit without conflict with the corner, furniture, or switch. A paper template is especially useful: it shows not only the height but also the actual lateral dimension.
Sometimes the casing on one side has to be made narrower or a different solution applied. You cannot automatically cut PLT-007 in width without assessing the profile and front surface. Changing the cross-section may disrupt the intended step relative to MLD-007.1.
MDF, moisture-resistant MDF, beech or oak
PLT-007 is available in several materials. The choice cannot be reduced only to price or the craftsman's habit. The base material must be consistent with the casing, baseboard, finishing method, and room conditions.
| Material | When to consider | What to Check |
|---|---|---|
| MDF | For a paintable set and a stable, uniform surface | Compatibility of primer, enamel, and material of adjacent profiles |
| Moisture-resistant MDF | For areas where the project requires increased moisture resistance | Actual room conditions and protection of ends after cutting |
| Beech | For a wooden assembly under enamel or agreed tinting | The species of the casing, batch pattern, and finish coating |
| Oak | For finishing while preserving expressive wood texture | Matching by tone and pattern, especially for multiple doors |
MDF under enamel
MDF is convenient when the door, casing, heel, and baseboard should look like a single painted system. A uniform surface helps achieve a calm color without differences in wood grain. However, after cutting, open ends appear that require preparation according to the accepted technology. It cannot be assumed that a cut part is automatically ready for painting.
Water-resistant MDF
The moisture-resistant option is considered for rooms where standard MDF does not meet project conditions. The material name itself does not eliminate the need to protect cuts, joints, and the lower part near the floor. It is also necessary to ensure that MLD-007.1 and the floor baseboard have compatible execution, otherwise one element will behave differently than the others.
Beech
Beech is suitable for a wooden set, especially when a dense surface is required under enamel or tinting. Under a transparent or semi-transparent coating, the beech pattern will be noticeable, so it is better to order parts together. If the casing is made of MDF and the heel is made of beech, the same color does not guarantee the same texture after finishing.
Oak
Oak is chosen when natural texture is important. In this case, PLT-007, MLD-007.1 and the plinth should ideally be matched by wood species. Heels are located on different walls and under different lighting, but a noticeable difference in tone on one door can still stand out. A set from the same batch simplifies visual matching.
Why you cannot mix materials without a project
Combining MDF and solid wood is not always prohibited. Under a dense opaque enamel, different bases can look the same if the preparation is done correctly. But they differ in edges, reaction to humidity, sanding, and coating preparation. The decision should be made by a technologist or craftsman responsible for finishing the entire assembly.
Under a transparent tint, mixing beech and oak will almost inevitably result in different grain patterns. Even a similar stain color does not turn one wood species into another. Therefore, if you want to preserve the texture, it is better to order the casing, heel, and plinth from matched wood.
How not to confuse PLT-007 with a ready-made piece heel
In the name and description of PLT-007, several roles are mentioned: plinth, casing, heel. This may create an expectation that the buyer will receive a short ready-made block. In fact, the confirmed length is 2600 mm. The profile serves as a blank from which heels are cut to the selected height.
Before ordering, you need to clarify:
- whether the selected version is supplied as a long plank;
- who performs the cutting into short blocks;
- what height is fixed in the project;
- what allowance is needed for cuts;
- who prepares the ends for finishing;
- is a test piece needed;
- how elements for different doors are marked.
It is equally important not to confuse PLT-007 with MLD-007.1. The first profile forms the lower base, the second forms the vertical casing. They are connected in one assembly but have different cross-sections and different functions.
How not to confuse the heel with the door frame and extension
The heel is located in the decorative part of the opening. The door frame holds the door leaf and forms the structural contour of the door. The extension covers the wall thickness between the frame and the casing. The heel does not replace either the frame or the extension and does not correct insufficient width of the frame profile.
For complex assembly, you can Buy door frame profile DK-001. Its size is 100 × 42 × 2400 mm, the base is made of plywood, the front part is made of MDF. But the compatibility of all parts of a specific door must be determined by the project, not just by product names.
Additional explanation of the complete assembly is provided by the material on how assemble a complete door frame kit.
What to buy with PLT-007
The heel is not an independent decorative object. It is purchased as part of an assembly, so before placing an order, it is useful to assemble the kit and check all sections in one table.
| What to add | Why | What to Check | Link |
|---|---|---|---|
| MLD-007.1 | Vertical trim installed on the heel | Material, length, face profile, and cut | Select casing MLD-007.1 |
| Floor skirting board | Horizontal line that matches the side of the base | Height, thickness, relief, and material | View linear products |
| DK-001 | Profile of the door frame part | Matching door design to wall thickness | DK-001 Card |
| Extensions | Closing wall thickness between frame and casing | Opening width and connection method | Selection of casings and extensions |
| Agreed finish | Uniform color and texture of all parts | Material, primer, enamel, tinting, and test sample | Specified in the project and order |
Alternative to the heel: unified skirting-board-and-casing profile
A separate base is not needed in all interiors. If the same profile is used vertically around the door and horizontally along the floor, the transition can be solved with a straight or matched joint without a pronounced heel. This approach is especially appropriate in minimalist interiors where a decorative base seems superfluous.
The article about other ways to connect skirting boards and casingshelps compare options. But you should not choose a unified profile just to simplify installation: you need to consider the proportions of the door frame, the height of the skirting board, and the overall style of the room.
How to coordinate the frame, casing, and skirting board
The heel completes the external composition, but an error in the frame or extension will still be visible. Before ordering the trim, it is useful to draw a cross-section of the wall and door assembly. It marks the frame, wall thickness, extension, casing position, PLT-007 overhang, and skirting board junction.
A detailed route is described in the material on how to coordinate the frame, casing, and skirting board. For ordering, the actual dimensions after rough wall preparation are especially important, not just the design values.
How to check a node on a drawing
A small-scale section helps to see what is not obvious in the list of articles. The drawing should show the wall, the frame, the extension, MLD-007.1, PLT-007, and the floor plinth. The offset of each part from the wall and the finished floor level are marked separately.
If the plinth meets the heel at a right angle, the drawing must clearly indicate its end point. If a decorative step is planned, its width is recorded. If the end of the plinth needs to be painted, this is also noted in the node so that the installer does not leave an unfinished surface.
How to coordinate heels in different rooms
One side of the door may open into a light hallway, the other into a dark room. Lighting changes the perception of the height and protrusion of the base. However, changing the size of each block just because of the wall color is usually unwise: the overall trim system will lose a uniform order.
It is better to choose one base height for a group of doors and separately check exceptions. For example, a portal to the living room can have a more prominent base, while regular doors can retain a compact size. Such differences should be deliberate and included in the specification.
Errors in calculating the quantity
Count one heel per door
A standard door has two verticals on one side, so a minimum set of two parts is needed. With double-sided trim, there are four. The phrase "one heel per door" leads to a shortage even before installation begins.
Forget the back side of the opening
In the schedule, doors are often counted, but not sides. The hallway and room may have the same trim, meaning the quantity doubles. Each side should be a separate line or a separate mark.
Do not count the trial part
The first block is needed to check height, trimming, and finishing. If it is made from a single calculated set, any error reduces the final quantity. It is better to plan for a trial element or sufficient leftover in advance.
Count only the net length
Multiplying height by quantity does not account for cuts, end alignment, and possible defective sections. The cutting map must be based on the actual workshop technology.
Order different doors at different times
For painted MDF this is sometimes less noticeable, but for oak or beech, batches may differ. When all door components belong to the same interior, it is better to collect the full volume and order it at the same time.
Errors when choosing height
Evaluate only the close-up view
In a close-up photo, a high heel may look expressive, but in a real room it overloads the bottom of the door. The template should be viewed from a distance, including the entire wall and floor baseboard.
Do not account for the baseboard height
If the base is selected independently of the plinth, the junction point may end up too high or too low. The visual transition is defined as a single node.
Do not account for the finished floor
A template applied to the subfloor gives an incorrect height after the covering is installed. Measurements are taken from the future or already finished level.
Making different heights without reason
In an apartment with uniform trim, a random difference in heels is perceived as an installation error. If the heights differ due to room conditions, the solution must be recorded in the schedule and checked visually.
Errors in material selection
Oak heel and beech casing under transparent finish
The color can be approximated with tinting, but the wood grain will remain different. On a small detail, the difference is sometimes even more noticeable because the heel protrudes and receives different light.
Regular MDF in unsuitable conditions
The material selection must account for the room and edge protection. The mere fact of painting does not make any base suitable for any area.
Finishing after final installation without a test
If the shade or coverage doesn't match, fixing all installed doors is more difficult. A test coat is done on a scrap of the same material and evaluated next to the casing and baseboard.
Errors during installation and preparation
Install the baseboard first
When the horizontal profile is already fixed, the height and position of the heel have to be adjusted to the finished end. It's better to first confirm the base, then bring the baseboard to it.
Cut the casing without a trial assembly
The vertical plank should rest neatly on the top plane of the heel and be the same on both sides. A trial assembly reveals wall misalignment and floor level differences.
Not protecting the ends
After cutting, new surfaces are exposed. Preparation depends on the material and coating. Ignoring
How to place an order for PLT-007
A good application contains not only the article number and the number of slats. The manager or production needs to be given context to verify the logic of the set.
- Article PLT-007.
- Material: MDF, moisture-resistant MDF, beech or oak.
- Number of door openings.
- Number of sides to be finished for each opening.
- Total number of heels.
- Selected height of one block.
- Technological reserve and test piece.
- MLD-007.1 and its material.
- Model and dimensions of the floor plinth.
- Future finishing.
- Photos or a diagram of the door unit.
- Information about who performs cutting and edge preparation.
If the project includes a frame and extensions, they are also added to the overall specification. Ordering a complete set reduces the risk that one profile will be wider, thicker, or made of a different material.
How to accept long-length profile before cutting
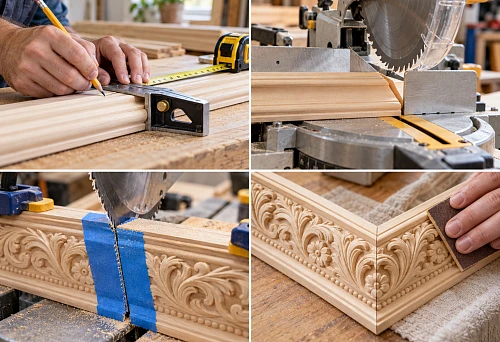
Before cutting PLT-007, it must be inspected along its entire length. Check the article number and material, the front side, edge condition, geometry, and areas from which visible heels are planned to be obtained. For wood, evaluate the pattern and distribute future parts so that paired elements of one door look consistent.
Do not cut the entire batch to a single number without a test block. First, make one part, fit it to the actual opening together with MLD-007.1 and the baseboard, confirm the height, and only then proceed with serial cutting.
How to mark heels after cutting
Identical rectangular blocks are easy to confuse, especially if the floor or walls require slight individual adjustment. On the invisible side, clear markings can be applied: opening number, side, left or right element, room, and direction of the front side.
For example, the designation "D3-K-L" could mean the third door, corridor side, and left heel. The master chooses the system, but it must be recorded in the log. Markings must not be applied to the front surface in a way that will damage the future finishing.
Storage until installation
Cut parts and the remaining profile are stored in conditions that match the material and manufacturer's recommendations. They are protected from moisture, dirt, impacts, and deformation. Paired heels are best kept together to avoid mixing the wood grain and losing the markings.
Do not leave blocks near wet processes or place them on an uneven surface. Finishing and acclimatization are coordinated with the contractor. These measures are especially important when the installation of door trims is postponed to a later stage of renovation.
How to prepare a test sample
If the set will be painted or tinted, the remainder of PLT-007 can be used for testing. The full preparation cycle is reproduced on it: sanding, primer, intermediate treatment, and finish. The sample is evaluated next to MLD-007.1 and the floor plinth under room lighting.
You cannot compare only the names of shades. The same composition looks different on MDF, beech, and oak. For transparent finishes, not only the color sample but also the wood grain is important. The final result is approved before processing all parts.
Who the PLT-007 solution is suitable for
The heel is useful when a wide or shaped architrave MLD-007.1 is used, and the floor plinth has a different width, thickness, or profile. It is also appropriate in classic and transitional interiors where the doorway should have a pronounced lower finish. In such projects, the base is not hidden: its proportions become part of the overall composition.
The solution is suitable for an apartment with several identical doors, a private house, a hotel corridor, an office, a salon, or other projects where repeatability of components is more important than one-off improvisation. The long plank allows cutting a series of identical blocks and maintaining a uniform material. For large projects, a cutting map and marking are especially useful: without them, identical parts can easily be mixed up after individual fitting.
When it is better to choose another method
A separate heel may be unnecessary in a minimalist interior with a very narrow smooth architrave and a uniform plinth profile. If the plinth and architrave match in cross-section and the project involves a direct joint, an additional base will only complicate the composition. In such a case, it is better to resolve the component with a single profile or a neat direct abutment in advance.
Another option is needed when the dimensions of the floor plinth significantly exceed PLT-007, when the doorway is hidden, when the trim does not reach the floor by design, or when an integrated wall panel is used. In such cases, the assembly is designed separately. PLT-007 should not be used just because it allows for the manufacture of a heel: the product must match the specific geometry.
Practical scenario: a standard interior door
For a standard rectangular opening, first determine whether the trim will be on one or two sides. Then check MLD-007.1 for width and thickness, select the floor plinth, and make two PLT-007 templates. After approving the height, calculate two or four heels, add a test piece, and create a simple cutting map.
If one 2600 mm plank covers the need with a margin, the remainder is saved until installation is complete. It will be useful in case of a cutting error or as a finish sample. Serial cutting begins only after fitting the first block together with the trim and plinth.
Practical scenario: a wide portal to the living room
A portal without a door leaf may have a more massive frame and several vertical elements. The number of heels is calculated not "per opening," but by the number of posts reaching the floor. If the portal is finished on both sides, the scheme may include four, six, or more bases.
The height of the heel here especially affects the scale. A small block will be lost under a wide frame, while a too-high one will turn the bottom of the portal into a heavy base. The paper template should be evaluated from a distance in the adjacent room, because the portal is visible as a complete architectural composition.
Practical scenario: an apartment with unified millwork
When all doors, plinths, and trims belong to one system, PLT-007 is conveniently calculated for the entire project at once. First, a door schedule is compiled, then one base heel height is selected and exceptions are noted. After that, the number of planks is determined and the cutting is distributed so that paired parts of one door come from close sections of wood.
A unified order reduces the risk of batch differences. This is especially important for oak: the grain and shade can vary from section to section. MDF for enamel is easier to match in color, but even here it is useful to order the entire set together to avoid encountering different processing options or delivery times.
Practical scenario: hotel, salon or office
In a commercial facility, there are many doors, and any deviation repeats dozens of times. One unsuccessful component turns into a systemic defect. Therefore, before ordering, a full-scale control sample is made: frame, extension, MLD-007.1, PLT-007, and the selected baseboard.
After the sample is approved, the height of the plinth, the method of joining, and the finish are fixed. The specification must include room numbers and sides. During installation, not only the presence of parts is checked, but also the correctness of marking. This approach is more expensive than one test part, but cheaper than reworking dozens of doors.
Practical scenario: bathroom and high-humidity area
For a room with high humidity, the material is chosen especially carefully. Moisture-resistant MDF may be appropriate if it meets the project, but open edges after cutting still require proper protection. The material of the casing and baseboard also needs to be checked: a stable plinth will not save the adjacent profile if it is not intended for the room's conditions.
The lower part of the doorway is close to the floor, where wet cleaning and accidental splashes are possible. The finishing method and gap from the covering are coordinated with the master. The technology from a dry bedroom cannot be transferred to a bathroom without verification.
Practical scenario: restoration of an old opening
In an old house, walls and floors are rarely perfectly level. First, the actual dimensions of each side are taken, the position of the frame is checked, and it is determined whether the same visible height of the plinths can be maintained. Sometimes the back part of the parts requires individual adjustment, but the face size must remain consistent.
PLT-007 helps make the bottom of the opening more assembled, but it does not replace wall leveling and frame repair. If the casing is strongly deviated from vertical, the main problem is solved first. The decorative base is installed only after preparation.
Practical scenario: door next to a built-in wardrobe
Built-in furniture can be placed almost flush with the casing. A heel 97 mm wide and 22 mm thick can cross the cabinet base line or interfere with the opening of the facade. Before ordering, a scale plan is made and minimum gaps are checked.
Sometimes the furniture base is brought to the heel in the same way as a floor plinth. In another project, the cabinet ends earlier. The solution depends on the furniture, but it must be decided before cutting PLT-007, otherwise the finished block will have to be trimmed in width and the proportions of the pair with MLD-007.1 will be disrupted.
How to buy a set on STAVROS
You should start with the PLT-007 and MLD-007.1 cards. Check the cross-sections, materials, available versions, and lengths. Then open the category of linear products and select the floor profile. If the entire door is being assembled, add the frame profile and extensions.
Before placing an order, record the number of doors, sides, heel height, and cutting map. Current availability, lead times, cost, and processing options should be checked in product cards or with a STAVROS manager immediately before purchase.
For the main element, go to the card and order PLT-007 for manufacturing a set of heels. Do not cut the long-length profile until at least one block has been finally fitted.
Pre-order checklist
| Question | The answer must be recorded |
|---|---|
| How many door openings? | As a separate list, not as a total number |
| How many sides are being finished? | For each opening |
| How many vertical casings? | This is the base number of heels |
| What is the block height? | After checking with the template |
| What material? | MDF, moisture-resistant MDF, beech or oak |
| What casing? | MLD-007.1 or another confirmed model |
| Which baseboard? | With known height, thickness, and profile |
| Who cuts the plank? | Production or installation workshop |
| What is the allowance for the cut? | Based on actual equipment |
| Is a test piece needed? | It is advisable to provide before serial cutting |
| What finish? | Enamel, tinting, or another confirmed option |
| How to mark parts? | By doors, sides, and position |
FAQ: questions about the PLT-007 trim heel
What is a trim heel?
This is the lower decorative base under the vertical trim. It creates a foundation for the trim and a level point where the floor baseboard meets.
Why is a heel under the trim needed?
It helps join profiles of different widths, thicknesses, and reliefs, covers the bottom of the door frame, and eliminates accidental trimming of the baseboard near the door.
Is PLT-007 sold as pre-cut short blocks?
According to confirmed data, PLT-007 has a length of 2600 mm. In the article, it is considered as a long-length blank from which heels are cut to the project height.
What is the cross-section of PLT-007?
The cross-section is 97 × 22 mm.
Which casing is this heel intended for?
The PLT-007 card directly states the possibility of making a heel for the MLD-007.1 casing with a cross-section of 93 × 18 mm from the profile.
How many heels are needed for one door?
For one side of a rectangular opening, two are usually needed; for two sides, four. Count the actual vertical casings.
Is a heel needed on both sides of the door?
If casings are installed on both sides of the opening and the project provides for the same bottom finish, heels are needed under each vertical. This is usually four pieces.
How to determine the height of the heel?
Make full-size templates, attach them together with the outline of the casing and floor plinth, evaluate the entire opening, and record the selected height in the specification.
Is there a standard height for the PLT-007 heel?
In the provided product scheme, the cross-section and length of the profile are confirmed, but not the uniform height of the cut block. The height is selected according to the project.
How to calculate the length of the workpiece?
Multiply the height of one heel by the number of parts, then add the actual allowances for cuts, end alignment, and a test piece.
How many heels can be obtained from one 2600 mm strip?
The quantity depends on the selected height of each block, the thickness of the cuts, and the reserve. Without this data, the exact number cannot be given.
Can the casing and baseboard be joined without a heel?
Yes, if the profiles and project allow a direct joint or a single profile is used. But for MLD-007.1 and a different baseboard, a separate base often provides a more manageable node.
Should the heel be wider than the casing?
In the pair PLT-007 and MLD-007.1, the base is 4 mm wider. This protrusion creates a readable base, but the final geometry is checked against drawings and fitting.
What is installed first — the heel or the casing?
After preparing the box, walls, and floor level, first mark and install the heel, then trim and place the vertical casing, after which the baseboard is fitted.
Can the heel be made from MDF?
PLT-007 is available in MDF. After cutting, the edges need to be properly prepared and the painting system coordinated.
When is moisture-resistant MDF needed?
It is considered for projects with high humidity requirements. The material itself does not eliminate the need for edge protection and proper finishing.
What to choose for enamel — MDF or beech?
Both options are possible depending on the entire trim system and finishing technology. It is better to choose together with the casing and baseboard material, rather than separately.
Can the heel be made from oak for tinting?
Yes, PLT-007 is available in oak. For transparent finishing, it is advisable to order adjacent profiles from the same agreed species and batch.
Is a spare part needed?
A reserve is useful for trial fitting and complex objects. The exact quantity is determined by the cutting map and the possibility of using the remainder of a long plank.
How to account for saw cuts?
Use the actual cutting width of the workshop equipment. Do not enter a random value: it must be confirmed by the cutting operator.
Can I install the baseboard first and then add the heel?
This order complicates fitting. It's better to determine the heel in advance, install it, and only then bring the floor baseboard to the finished side plane.
What to do if the floors on either side of the door are at different heights?
Take separate measurements on each side and check the visible height of the blocks. The decision on bottom trimming is made by the master after a test fit.
What to do if the floor baseboard is wider than PLT-007?
Re-check the assembly and consider a different profile or transition piece. Random trimming of a wide baseboard can ruin the line along the entire wall.
How to design the heel near the threshold?
The position of the base is coordinated with the level of the covering and the threshold. The heel should not replace the threshold itself or cover the technological gaps of the floor system.
What data to send to the manager?
Article, material, number of doors and sides, number of blocks, selected height, MLD-007.1 and baseboard data, future finishing, and node diagram.
Where can I see other linear products?
In the general category, you can view wooden linear products for doors, floors, and interiors.
How to check the finished node after installation
Acceptance should not be limited to looking at one door up close. First, inspect all openings from the corridor or other common space. Heels should have the same visible height where the project does not provide exceptions. The lines of vertical architraves should continue exactly above the center of the bases, and the PLT-007 protrusion relative to MLD-007.1 should be repeated on the left and right.
Then check each baseboard joint. The end of the horizontal profile should fit the side plane of the heel without accidental tilt, noticeable gap, or unfinished edge. If the baseboard is painted, the end color should not differ from the face. When tinting solid wood, also evaluate the grain direction and coating uniformity.
Separately inspect the top joint of the heel with the architrave. The vertical strip should not shift relative to the base or leave an open wall area. On paired sides, the distance from the frame to the architrave and the position of the heels should be symmetrical. Small floor differences should not turn into noticeably different bases without project approval.
Inspection is carried out in daylight and artificial light. Side lighting highlights plane differences, sanding marks, and uneven joints. If a defect is visible only from one angle, it does not mean it can be ignored: the door node is examined during normal movement through the room.
How to make a preliminary estimate without a made-up price
The price of PLT-007, MLD-007.1, and related profiles may vary depending on the material, finish, and current product card. Therefore, an unconfirmed amount cannot be fixed in the article. But the buyer can prepare the estimate structure in advance and quickly get the total budget after checking prices.
| Position | Calculation unit | Quantity | What to clarify |
|---|---|---|---|
| PLT-007 | Long plank 2600 mm | According to the cutting map | Material, processing and current price |
| MLD-007.1 | Vertical plank | By number of sides and opening height | Supply length for selected material |
| Floor skirting board | Linear meter or plank | Around the perimeter of rooms | Cross-section and connection method |
| DK-001 and extensions | Opening kit | By door design | Wall thickness and frame construction |
| Cutting and preparation | Work | By number of parts | Saw cuts, sanding, and edge finishing |
| Finish | Labor and materials | By area and technology | Test coating and approved color |
The estimate should account not only for the cost of one strip, but the entire path to the finished assembly. Cheap cutting without a test piece can lead to material waste, and separately buying one oak profile can result in batch differences. Therefore, it is more reasonable to compare complete kits: material, processing, cutting, finishing, and installation.
Before payment, request current data for each item. If sizes or materials have changed after measurements, recalculate the quantity before placing the order. This way, the PLT-007 heel will remain not a random addition, but a pre-planned part of the door specification.
Result: the heel must be calculated together with the entire door unit.
PLT-007 solves a specific problem: it turns the complex joint of a vertical casing and a floor plinth into a pre-designed transition. The 97 × 22 mm section creates a base for MLD-007.1 measuring 93 × 18 mm, and the 2600 mm length allows cutting a series of identical elements for one or several doors.
The main mistake is buying the profile without determining the height and number of blocks. First, calculate the vertical casings, make a base template, check the plinth connection, and only then create the cutting map. For one side of the door, two heels are usually required, for two sides — four, but complex openings are calculated based on actual verticals.
The material of PLT-007 must be coordinated with the casing, plinth, and finish. MDF is considered for painting, moisture-resistant MDF for appropriate project conditions, beech and oak for wooden sets. Under a transparent finish, it is especially important not to mix species and, if possible, order all parts in one batch.
STAVROS allows you to assemble not a random set of strips, but a complete door trim: PLT-007, MLD-007.1, floor profile, frame, and extensions. Before ordering, check the current specifications in the product cards, provide the manager with an opening diagram, and do not start serial cutting without a trial assembly of one heel.