Article Contents:
- How furniture slats differ from wall-finishing slats
- What exactly counts as a shaped wooden slat
- Where slats actually work on a furniture facade
- Tall wardrobe and cabinet doors
- Chest of drawers and drawer units
- Furniture panels, side panels, and portals
- Kitchen fronts
- What changes with an even number
- When the central seam is better emphasized
- Horizontal slats across multiple drawers
- Why the sample is painted the same way as the entire furniture piece
- Special case: solid wood facade
- Slats on already manufactured and painted furniture
- How to work with short leftovers
- Can the same spacing be maintained on fronts of different widths?
- What to do if the slat height is greater than the available length of the commercial strip?
- Can slats be used to work around a ventilation grille or technical opening?
- Is a straight wooden slat suitable for a rounded front?
- How to finish a slat if its end remains exposed?
- Will the gaps become smaller after painting?
- How should the slats be positioned near the bottom edge of the cabinet door?
- Can different slat cross-sections be used on doors and side panels?
- What should be done if decorative slats interfere with a concealed front grip?
- How can an approved pattern be reproduced six months later?

Two identical cabinet doors, each 500 mm wide, can be finished with the same wooden slats — and produce two completely different results. On the first, the slats run at an even pitch and leave equal margins at the edges. On the second, the craftsman starts marking from the left edge and makes the last gap "whatever it turns out to be." While the slats are lying on the workbench, the difference seems insignificant. On the assembled cabinet, the uneven rhythm is immediately visible, especially along the line between the doors.
A shaped wooden slat for a furniture front is not chosen separately from the layout. First, the dimensions of the face surface, the position of the handle, and the direction of the lines are determined. Then the cross-section of the specific profile is chosen, the number of slats and the intervals are calculated, and the protruding parts are checked for door opening. Only after that does it make sense to buy the material and draw up a cutting plan.
A shaped slat has a particular feature: appearance is influenced by more than just one width. A rounded edge, a chamfer, the height of the protrusion, and the shape of the side faces change the shadow between adjacent parts. Therefore, even with the same distance between slats, the front can look almost flat or distinctly textured. For a furniture manufacturer, this is a matter of appearance, ease of use, and assembly repeatability all at once.

How a furniture slat differs from a slat for wall finishing
On a wall, the pattern can be extended over several meters or finished at a corner. A furniture front has rigid boundaries. Nearby are hinges, handles, gaps between doors, drawers, and sometimes a protruding countertop. When opened, the door swings, and what looks good in the closed position may catch on the adjacent door or the cabinet body.
Imagine a tall wardrobe: both doors are identical, but the handles are positioned near the central gap. If you place a rail directly under each handle, you will have to decide in advance whether it can be drilled through and how reliably the handle will rest on the textured surface. If you leave a smooth strip near the handles, the number of rails will change. This means the handle determines the layout no less than the width of the door front.
A chest of drawers presents a different challenge. The horizontal gaps between the drawers break the vertical lines. You need to decide in advance whether to treat each drawer as a self-contained composition or to continue a single vertical grid across the entire chest. These are two valid solutions, but they must not be mixed randomly.
A shaped rail in furniture most often serves a decorative purpose. It should not by default replace a load-bearing rail, reinforce a door, or fix a structurally weak front. If a part is required to be strong, its cross-section, fastening, and performance under load are calculated separately.




What exactly counts as a shaped wooden rail
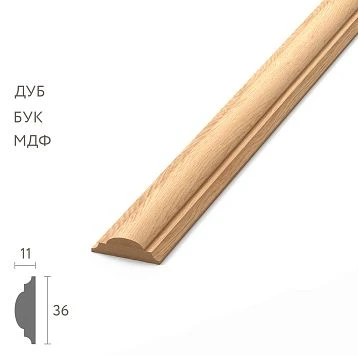
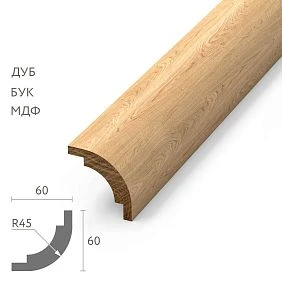
A regular flat rail is perceived primarily as a strip of a certain width. A shaped one additionally has a formed cross-section: a rounding, chamfer, convexity, recess, or other machined contour. Such a profile creates its own line of light and shadow. In furniture design, this difference matters more than the product name.
It is not uncommon for a craftsman to call a narrow applied strip, a wide wooden profile, and a three-dimensional interior element all a "rail." But that is not enough for a drawing. You need to know the actual dimensions of the visible surface, the depth of the protrusion, and the location of the mounting plane.
The STAVROS catalog has illustrative examples with different geometries:
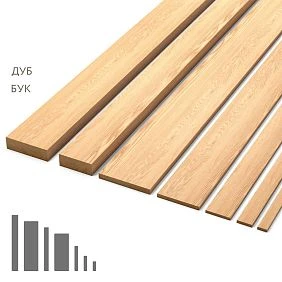
- Wooden Rail RK-001 — beech or oak products 2400 mm long, including thin cross-sections of 15 × 5, 24 × 5, and 40 × 5 mm, as well as larger options. For applied lines on a small furniture front, it is especially interesting to start testing with a thin cross-section.
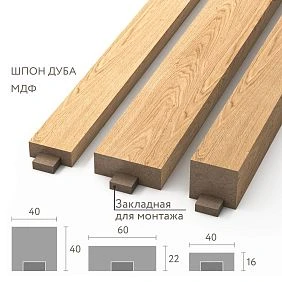
- Interior Rail RK-002 — larger cross-sections of 16 × 40, 22 × 60, and 40 × 40 mm with a length of 2750 mm. The product page offers options in MDF and MDF with oak veneer, as well as the dimensions of the mounting insert.
These products should not be considered interchangeable. RK-002 with oak veneer is not a solid oak rail: beneath the veneer is MDF. In addition, a 40–60 mm protrusion is fundamentally different from a 5 mm thick applied part. For the front of a small cabinet, the difference can be decisive.
When buying a shaped wooden strip, match the purpose of the profile to the actual furniture task. Sometimes the desired pattern is easier to achieve with several thin elements; sometimes a single wide strip sets the necessary rhythm for the facade. And for a classic closed frame, the right product may not be a strip but a solid wood molding for furniture.
Our factory also produces:
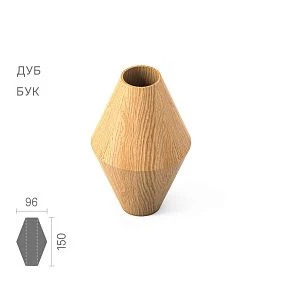
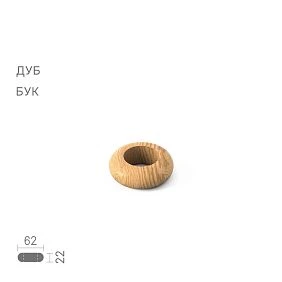
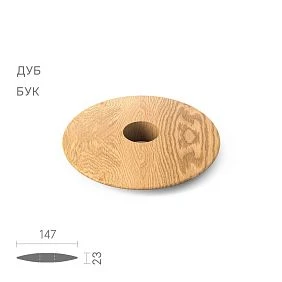
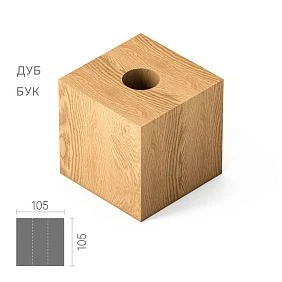

Where a strip really works on a furniture facade
Get Consultation
Tall wardrobe and cabinet doors
Vertical strips emphasize the direction of the door. On a tall facade, the parallelism of the lines is especially noticeable: even a slight deviation gradually changes the outer margin. If the wardrobe consists of several doors, it is better to design them on a single drawing rather than as separate rectangles.
On a door with a soft-close mechanism or a concealed handle, check whether the decor overlaps the grip area, the groove, or the edge profile. For a hinged door, also check that the protruding strip does not interfere with the opening path.
Chest of drawers and drawer unit
Here, the strips can repeat a vertical grid across all fronts or form independent groups. In the first approach, the center lines of each drawer align by coordinates; in the second, the craftsman separately balances the width of the decor and the position of the handle on each drawer.
If the top drawers are noticeably narrower than the bottom ones, the same number of strips does not always work. A spacing that looks calm on an 800 mm wide front may make the surface look cluttered on a 350 mm wide drawer.
Furniture panels, side panels, and portals
On a fixed panel, a more pronounced relief is acceptable, since there is no risk of touching the adjacent door when opening. But there are still junctions with shelves, the plinth, and the top cornice. You need to decide in advance whether the strip ends before the decorative band or goes under it.
Kitchen facades
Slatted design requires particularly careful consideration of maintenance and access to the surface. Frequent narrow gaps collect dirt, and protruding parts are in constant contact with hands. The finish must match the operating conditions, and the chosen layout should allow cleaning not only the front faces but also the gaps.
Four layout options: which to choose for the task
| Scheme | How the facade reads | When appropriate | What to check in advance |
|---|---|---|---|
| Vertical lines | Emphasizes height, creates a directional rhythm | Wardrobes, tall cabinets, doors, high chests | Handle, central joint of the doors, opening |
| Horizontal lines | Divides the surface into bands | Long drawers, wide furniture panels | Alignment of levels on adjacent fronts |
| Perimeter frame | Highlights the borders and the inner field | Fronts with a panel, separate inserts | Corner joints, internal dimensions, hinge positions |
| Local group | Creates an accent and keeps most of the front calm | Dressers, cabinets, individual wardrobe sections | Position of the group relative to the handle and axis |
A vertical layout is usually more convenient for a long door: each slat is cut to one specified length, and its position is calculated by width. A horizontal one may be more logical on a wide drawer, but on a four-drawer dresser there will be many lines that will be perceived together. Before choosing, it is worth looking at the front not in isolation, but as part of the entire furniture.
A frame made of slats differs from a solid slatted grid. Here the main difficulty is the corners. With a simple profile, butt joining according to the chosen drawing is acceptable; with a pronounced shaped profile, it is more often necessary to match the pattern in a miter joint. If you want to achieve a classic continuous contour, choosing a molding may be more rational.
A local group is a way to preserve free space for a handle and avoid excessive decoration. Three slats in the center of the facade and seven slats from edge to edge give completely different impressions, even though the same material is used. The decision should be made based on a full-scale drawing.
Dimensions A, C, and L: what they mean in the selected product card
In STAVROS linear trim designations, dimensions A and C describe the cross-section, while L is the length of the product. However, when reading the product card, you should rely on its drawing, especially if the model has additional dimensions for mounting.
A is the visible width of the selected slat. It affects the total occupied area, the number of parts, and how dense the pattern will be. With a width of 24 mm, seven slats will occupy 168 mm of surface even before accounting for gaps.
C is the overall depth or height of the cross-section according to the drawing. The protrusion above the base and the character of the shadow depend on it. For the thin RK-001 in the 24 × 5 mm version, this dimension is 5 mm. For the RK-002 variant with parameters 16 × 40 mm, the second overall dimension is 40 mm; such a construction cannot be considered an ordinary thin overlay.
L is the length of the commercial plank. It determines how many cut pieces can be obtained without a longitudinal joint. For RK-001 in the verified variants, the length is 2400 mm, and for RK-002 it is 2750 mm. When choosing the length, you need to consider not only the sum of the cut pieces, but also the possibility of fitting them into specific planks taking into account the saw kerf and end trimming.
For RK-002, the product card additionally specifies D = 20 mm and E = 8 mm. These parameters relate to the mounting part provided by the design; before planning, you need to verify the position of the embedded element according to the drawing, and not treat D and E as two more decorative dimensions of the front surface.
| STAVROS profile | Cross-section from the product card, mm | Length, mm | Material | What check it is useful for |
|---|---|---|---|---|
| RK-001 | 15 × 5 | 2400 | Beech or oak | Frequent narrow layout, small fronts |
| RK-001 | 24 × 5 | 2400 | Beech or oak | Medium spacing on doors and drawers |
| RK-001 | 40 × 5 | 2400 | Beech or oak | Wider flat rhythm |
| RK-001 | 60 × 23 | 2400 | Beech or oak | Checking volume and protrusion on a large panel |
| RK-002 | 16 × 40 | 2750 | MDF or MDF with oak veneer | Volumetric insert, depth and embedded support |
| RK-002 | 22 × 60 | 2750 | MDF or MDF with oak veneer | Pronounced relief, need to check opening |
The options shown are different examples of cross-sections, not a recommendation to install any of them on any front. The product may have additional mounting restrictions. For a responsible project, a size designation alone is not enough: a drawing and a trial fitting will be required.
How to determine the working area of the front before calculating the slats
The width of a door is not equal to the width that can be filled with decor. Along the edges, a free strip is often needed: for hinges, a frame, gaps between adjacent fronts, or simply for a calm completion of the pattern. A handle may be located in the center. All of this is determined before calculating the number of parts.
The practical sequence looks like this:
- Measure the face width and height of the front, not just the cabinet opening.
- Mark the position of the handle and its actual grip area. For a pull, consider not only the holes but also the space for fingers.
- Mark the outer margins and the areas where the rail will interfere with opening or adjoining.
- Choose the direction of the pattern. For vertical rails, calculate placement by width; for horizontal rails, by height.
- Determine the size of the free zone and select the number of parts for it.
For example, a door is 500 mm wide. It is decided to leave 40 mm on the left and right without decor. The working field is 500 − 40 − 40 = 420 mm. If it later turns out that another smooth strip 70 mm wide is needed for the handle, the rails can no longer be calculated based on the previous 420 mm: first the project is divided into zones and their boundaries are determined.
The 40 mm margin in this example is chosen to explain the calculation, not as a standard for any furniture. The actual value depends on the dimensions of the front, the design, and the chosen composition.
Rail width, gap, and pitch: three different values
In conversation, craftsmen sometimes use the word "pitch" to mean the free distance between rails, and sometimes the distance between their axes. On a production drawing, such ambiguity leads to errors. It is more convenient to designate separately:
- rail width — how many millimeters one part occupies on the front;
- clear gap — the distance from the edge of one rail to the nearest edge of the adjacent one;
- axial pitch — the distance between the centers of adjacent slats.
If the slat width is 24 mm and the clear gap is 32 mm, the axial pitch will be 24 + 32 = 56 mm. The numbers 32 and 56 must not be substituted for each other. If the error is repeated across six gaps, the outermost element will shift by 144 mm relative to the calculation.
When choosing a pattern, it is also useful to assess the proportion of the surface occupied by wood. Nine slats 24 mm wide will cover 216 mm of a 420 mm working field, that is, slightly more than half its width. Five such slats will occupy only 120 mm — less than a third. The cross-section is the same, but the visual density is completely different.
The profile depth changes the impression even more. A narrow slat with a high protrusion can produce a noticeable side shadow, while a wide flat one can look like a calm decorative stripe. Therefore, do not choose the spacing by the abstract rule “the gap is always equal to half the width.” It must be checked on the actual cross-section.
Symmetrical layout on a 500 mm facade: five, seven, or nine slats
Let us take the already defined working field of 420 mm and a wooden slat 24 mm wide. Several schemes can be calculated and compared without guesswork.
For the first option, let us assume that all free gaps are equal, including the two gaps at the boundaries of the working field. If the slats n, then such gaps n + 1.
Calculation:
Gap = (working field width − number of slats × slat width) / (number of slats + 1).
| Number of slats | Total width of slats | Free space | Equal gap, including edges | Center-to-center spacing |
|---|---|---|---|---|
| 5 | 120 мм | 300 мм | 50 мм | 74 мм |
| 7 | 168 мм | 252 мм | 31.5 mm | 55.5 mm |
| 9 | 216 мм | 204 мм | 20.4 mm | 44.4 mm |
In all three cases, the layout is symmetrical. But the result will be different. Five slats create a sparse pattern with wide gaps. Seven provide a more even fill. Nine noticeably densify the surface and leave less free space between the parts.
There is also a second method, often more convenient for the furniture maker: first set the outer margins, then distribute the remaining space between the slats. Suppose that within a working field of 420 mm, it is decided to leave 30 mm on each side. For seven slats of 24 mm each, the remaining space is:
420 − 2 × 30 − 7 × 24 = 192 mm.
Between seven slats there are six internal gaps. Each will be equal to:
192 / 6 = 32 mm.
We get an axial pitch of 56 mm. The outer margins relative to the entire front will be 40 + 30 = 70 mm. The center of the first slat will be located 82 mm from the left edge, the next one at 138 mm, and so on. The central, fourth slat will be exactly on the axis of the front — 250 mm.
This center check is especially useful before drilling for the handle. If it must be located on the central axis, you cannot move the fourth slat at the last minute without recalculating the entire system.
What changes with an even number
For seven slats, the central axis passes through the middle of one piece. For eight, it passes through the middle of the gap between two slats. Neither scheme is better than the other in itself.
An even number is convenient if space needs to be left in the center for a handle or to emphasize the joint between two symmetrical parts. An odd number helps create a clear central line. If a decorative button is planned in the middle of the door, you need to decide in advance whether it should sit on a slat or between slats. The pattern will turn out different even with the same overall width.
Two cabinet doors: why count them together
Let's imagine two doors each 500 mm wide and a gap between fronts of 3 mm. On each one separately, seven slats 24 mm wide are placed according to the previous scheme: an inner gap of 32 mm, and an offset to the outer slats of 70 mm.
Within one door, everything is even. But between the nearest slats of different leaves, there is a free strip of 70 + 3 + 70 = 143 mm. This is more than four times wider than the inner gaps. For a cabinet with an intended central pause, such a result may be successful. For a pattern that should read as a continuous slatted grid, it is not.
To achieve an almost continuous rhythm across the seam, first set the desired distance between the outer slats on both sides of the joint. If the inner gaps are 32 mm and the door gap is 3 mm, then with a symmetrical scheme the free field at the seam on each side should be:
(32 − 3) / 2 = 14.5 mm.
With eight slats of 24 mm on one door and seven internal gaps of 32 mm, the entire group will occupy:
8 × 24 + 7 × 32 = 416 mm.
We will distribute the remaining field 84 mm wide unevenly: 14.5 mm at the central gap and 69.5 mm at the outer edge. On the second leaf, the layout is mirrored. As a result, the visible interval between the outermost slats at the seam will be the same 32 mm as the other gaps. The outer edges of the wardrobe will remain more open than the center.
This is a teaching example of two different compositions, not a universal scheme. It shows why calculating each door independently can produce an unexpectedly wide gap in the middle of the wardrobe.
In the project documentation, it is essential to specify from which baseline the dimensions are taken: from the left edge of the carcass, from the edge of each leaf, or from the overall axis of the wardrobe. Otherwise, when assembling the right door, the craftsman may reproduce the drawing of the left one without mirroring it.
When the central seam is better emphasized
If the handles are positioned at the inner edge of the doors, it is more useful to provide a noticeable smooth strip. In this case, the 143 mm between the nearest slats may be an intentional decision rather than a mistake. The main thing is that the handles are located within this field with a comfortable grip, and the edges of the decorative elements do not collide when opening.
For furniture with sliding doors, the calculation is different: it is necessary to take into account the overlap of the leaves, their movement, and the permissible height of the applied decor. The scheme of a hinged wardrobe cannot be transferred to a sliding one without verification.
Handle among the slats: three workable options
The first option is a handle on top of a slat. It can be considered only if the shape of the part allows for a flat and reliable support for the handle, and the fastening does not compromise the permissible cross-section. One cannot assume that any hole can be drilled through a thin or shaped strip and produce a strong connection: reliability is determined by the design of the handle, the base, and the fastening.
The second option is a handle between the slats. It preserves the continuity of the parts themselves, but requires a sufficient clear gap. This is especially noticeable with bracket handles: even if the two mounting points do not fall on a slat, the fingers may not have enough room near its protruding edges.
The third is a separate smooth zone. The slats reach it or are placed only on one side. This option is convenient for a repeatable furniture series: the position of the handle does not depend on small changes in the profile, and the grip zone itself remains free.
Before ordering handles, overlay their actual dimensions on the drawing. Mark the mounting points, the projection, and the space for the hand. On a sample front, check hand access with the door closed and open. If the slat is to be surface-mounted on an already painted surface, separately assess whether any obstacles arise for precise handle installation.
Chest of drawers with several drawers: a common grid or an individual pattern for each front
A vertical layout on a chest of drawers can look like a continuation of one common pattern, despite the horizontal gaps between the drawers. For this, the position of each slat across the width must remain the same at all levels. The length of the segment on each drawer differs, but its axis does not shift to the right or left.
For example, on three drawers of equal width, nine vertical strips are chosen for each. For each drawer with a height of 180, 220, and 300 mm, allowances of 20 mm at the top and bottom are provided. The lengths of the slats will accordingly be 140, 180, and 260 mm. A total of 27 segments will be required: nine of each size. Their total usable length will be:
9 × (140 + 180 + 260) = 5220 mm.
This does not mean that you can simply buy 5.22 m of commercial linear stock: the material is supplied in strips of fixed length. We will return to the question of cutting below.
If the handles on the drawers are located in the middle, the common grid may conflict with them. Then there are two solutions: change the layout while preserving the common horizontal coordination, or create an independent composition for each front. The second option is especially appropriate when the height of the upper drawers is significantly less than that of the lower ones or the handles have different sizes.
An independent composition has a rule: each front is calculated according to its working field, rather than copying the number of slats from a large drawer. On a narrow or low front, it is reasonable to leave fewer details or omit them altogether, while preserving a single wood species and finish.
Horizontal slats on several drawers
A horizontal layout works differently. The drawers are already separated by horizontal gaps; additional strips can emphasize this structure or make it too busy. If you want to combine horizontal slats with handles, first determine the height level of the handle on each front. With an arbitrary arrangement of strips, it will appear that some drawers are "heavier" than others.
For narrow drawers, an option with one or two horizontal lines or with a smooth central zone is useful. A group of many slats is better left for a taller front or the side panel of a chest of drawers.
Shaped slat or molding: when a linear rhythm is needed, and when a frame is
A slat and a molding are often placed side by side when selecting material, because both products belong to wooden trim. But they can have different roles on the front.
If the task is to create several parallel lines, the main importance is the width of the strips, their frequency, and the nature of the projection. Here the slat is convenient as a repeatable detail. It can run vertically along the door, horizontally along the drawer, or as a group along the side panel.
If, however, a continuous decorative frame with a distinct ornamental profile is required, a molding is often better suited. Its cross-section is perceived not as a separate strip, but as a boundary within the composition. This is especially noticeable on classic fronts with a panel.
For a profile frame, it is necessary to check that the cross-section matches at the corners, the presence of a flat rear mounting surface, and the method of finishing the end. For a repeatable series of fronts, the joint is made according to one approved template; otherwise, a step at the corner will be noticeable even if all segments are the same length.
With a slat group, on the contrary, it is easier to avoid corner joints. Each vertical slat ends with its own separate end. But dozens of identical intervals appear, and a marking error may be more noticeable than a small inaccuracy of a single frame.
On one front, it is permissible to combine two techniques — for example, a molding frame around the perimeter and several slats inside. Then the calculation is performed in the correct order: first the outer frame, then the remaining inner field, then the slat width, intervals, and handle. If you start with the inner slats and add the frame afterward, the working space will shrink, and the original scheme will no longer fit.
Beech, oak, or MDF: what the material changes in a furniture layout
The material affects not only the color, but also the available cross-section option, edge treatment, finishing method, and how the part behaves in use.
Beech can be considered when you need solid wood with a relatively calm texture. For a furniture project with opaque enamel, uniform surface preparation, neat edges, and compatibility of the chosen finishing system are especially important. If the profile will be painted to match the facade, first check a sample, including the side faces that will remain visible after installation.
Oak is appropriate if you need to preserve the pronounced texture of natural wood. With clear lacquer or tinting, adjacent strips should match not only in shade, but also in the character of the grain. On a small facade, two strips with contrasting patterns can attract more attention than the entire geometry of the layout. It is better to select them by color before installation.
MDF is a separate base, not solid wood. In particular, the three-dimensional RK-002 is offered in MDF, including with oak veneer. The veneer creates a wood face surface, but does not turn the entire thickness of the product into oak wood. During edge treatment, this difference can become especially noticeable. For an open texture, you need to understand in advance how the cut areas will be closed.
| Project conditions | What to check first |
|---|---|
| Strips and facade under the same opaque enamel | Base preparation, primer, edge painting, coating compatibility |
| Natural wood under clear lacquer | Species, grain pattern, difference in shades after coating |
| Tinted oak slats | Matching of test color samples and sorting of slats by tone |
| Three-dimensional MDF slat | Mounting method, exposed ends, moisture protection according to the finishing technology |
| MDF with oak veneer | Continuity of the veneer, treatment of end cuts, and the installation part |
With the same slat width under a transparent coating, color non-uniformity is more visible than under enamel. Therefore, for a natural oak pattern, it is useful to first lay out all the blanks in installation order, and only then perform the cross-cutting. This makes it easier to place the pieces closest in color next to each other and avoid random spots on the facade.
Why the sample is painted the same way as the entire furniture
A small piece coated with a brush on a workbench will not always show the same result as a slat painted together with the facade by spraying. The layer thickness, gloss, and contrast in the recesses of the cross-section may differ. Therefore, the test color sample is made using the technology planned for the product, including the same primer and the number of layers according to the material manufacturer's instructions.
With opaque painting, individual slats may be prepared before installation if protection of visible ends and subsequent careful assembly are provided. If everything is painted after installation, it is necessary to check whether narrow gaps can be treated properly and whether untreated areas will remain in them. The choice of sequence depends on the profile geometry and the coating system, not only on the painter's convenience.
Deep slat on the door: checking the opening is mandatory
For a flat overlay strip 5 mm thick, the task is usually limited to neat fastening to the front face and checking the handle installation points. But even then, you need to assess the distance to the adjacent door and cabinet components.
With a protruding profile, the risk is higher. If the strip rises above the front by tens of millimeters, its edge moves along an arc when the door swings. The part may catch the adjacent front, side panel, handle, or protruding cornice. With the doors closed, everything sometimes looks fine, but the collision only occurs when opening at a certain angle.
Therefore, before choosing a volumetric strip for a moving door:
- Check the actual protrusion dimensions on the drawing of the specific product.
- Apply the strip to the front at full scale or make a temporary mockup of the same cross-section.
- Open the door to the intended angle and check the trajectory relative to the cabinet and adjacent fronts.
- Make sure the hinges are rated for the actual weight of the door with the decor and maintain the required gaps.
- Check the handle position and access to it when fully open.
Do not limit yourself to the phrase “the strip fits by width.” For a furniture assembly, not only the overall dimension in the closed position matters, but also the movement of the entire structure.
The volumetric RK-002 has a mounting insert. Its placement and fastening must be designed as part of the furniture assembly. Do not automatically transfer the installation method from a fixed wall to a thin moving door: the base, available thickness, weight, and loads are different here.
Slat fastening: substrate, adhesive, mechanical fixation
Before installation, determine what exactly the slat will be attached to. The substrate may be solid wood, plywood, MDF, or an already painted furniture board. These surfaces have different requirements for preparation and bonding.
For thin decorative elements on a level substrate, an adhesive bond with a compound designed for the specific materials and coating can be considered. If the front is already painted, it is important to check the adhesion strength of the paint to the base: a strong adhesive will not compensate for a weak paint layer, which may peel off together with the overlay.
Mechanical fastening is selected taking into account the thickness of the substrate and the slat itself. The fastener must not protrude through to the back side of the front, damage the thin face piece, or interfere with the installation of furniture hardware. In serial production, drilling is performed using a template, not "on site" for each door.
For a more massive slat, the fixation method is determined separately. It is not enough to decide that a wide part is heavy and therefore requires several screws. It is necessary to check the joint design, available fastening zones, weight, backing, and the material manufacturer's recommendations. Certain profiles may require a special mounting component.
Auxiliary compounds can be selected in the section STAVROS installation and finishing materials, but the final choice of adhesive or fastener is made based on the technical characteristics of the surfaces to be joined and the intended use.
Special case: solid wood front
Solid wood changes dimensions when humidity changes. Continuous rigid fixation of a long element across the grain direction can create additional stress in the joint. Before installation, the grain direction, front design, fastening scheme, and operating conditions should be coordinated. For a large solid wood product, the installation technology for MDF cannot be automatically copied.
Slats on already manufactured and painted furniture
Adding overlay decor after assembly is possible, but it requires checking the surface, geometry, and door clearances. If installation requires removing the fronts and marking them out on a workbench, this is often more reliable than gluing each strip vertically onto an already installed cabinet. After removing the doors, keep their position and adjust the hinges taking into account the added decor.
Why you need a real cross-section sample
A photo of the card helps you choose the overall look. However, from it, it is difficult to understand how far the profile protrudes, what its actual visible face width is, and how the side shadow falls. For an overlay composition, it is precisely these properties that can change the spacing decision.
STAVROS has samples of moulded products 100 mm long. Such a piece is convenient to place against the front, check the cross-section and visual scale, and make a test paint sample. Before preparing the sample, you need to confirm the availability of the required article number and material.
But a 100 mm sample does not replace a full-size commercial strip. It does not allow you to assess the straightness of a two-meter length, the actual sorting of several long parts, or the full cutting plan of the series. For these tasks, you will need a trial strip or verification of the main batch upon receipt.
To compare several cross-sections, you can make a simple mockup: cut strips of equal width from paper or cardboard, mark the intervals, and then replace two or three central strips with real samples. This will show how much the character of the relief changes the pattern without buying dozens of strips.
Dry layout: how to avoid accumulating millimeter errors
When the front width is known and the layout has been calculated, make a marking template. It is convenient to use a stop ruler or a separate strip with marks for the axes of all the strips. For a series of identical doors, one approved template is usually more accurate than repeated tape-measure measurements.
First mark the outer boundaries of the decorative field, then the central axis and the positions of all the strips. Install temporary spacers for equal gaps; check whether the size of the outer margins changes. Do not permanently fix the first part until the position of the last one has been checked.
You need to check the edges of the strips, not just their axes. If the actual strips differ slightly in width, perfectly set centers do not guarantee equal visible gaps. For the selected batch, measure several pieces and make sure the tolerances fit the requirements of the specific composition.
On a two-door wardrobe, lay out the slats on both doors at once. On a chest of drawers, lay them out on all drawers simultaneously. This makes it easier to notice misaligned verticals and an unintended wide strip near the gap between fronts.
After a trial layout, it is convenient to photograph the entire piece of furniture with a measuring ruler in the frame and record the approved pattern. This is more useful than a single photo of a beautiful slat: from the overall image, you can restore not only the article number but also the composition.
How to calculate the number of planks without excess leftovers
When purchasing decorative slats, it is easy to make a mistake if you limit yourself to the total length. The sum of all segments shows the useful requirement, but does not take into account that whole planks have a fixed length and only a certain number of parts can be obtained from one blank.
Let's look at an example for a small series: you need to decorate six doors, with seven vertical slats on each. The length of the finished segment is 720 mm. Total required:
6 × 7 = 42 segments.
Their total length:
42 × 720 = 30,240 mm, or 30.24 m.
Suppose you choose option RK-001 from the STAVROS range with a product length of 2400 mm. Based on the total meterage, the calculation gives 30,240 / 2400 = 12.6, that is, after rounding, 13 planks. But the cutting plan shows otherwise.
From one 2400 mm plank, you will get no more than three 720 mm segments. Four segments would require 2880 mm even before accounting for the saw kerf. Therefore:
42 / 3 = 14 planks.
If, for example, we take a saw kerf thickness of 3 mm and count three cuts per plank, each plank is used as follows:
3 × 720 + 3 × 3 = 2169 mm.
The remainder from one plank is 231 mm. For fourteen planks, that gives 3234 mm of leftovers and 126 mm of material lost to the saw kerf. In total, the purchased 33.6 m is divided into 30.24 m of useful parts, 0.126 m of saw kerfs, and 3.234 m of remaining offcuts.
This is a calculation based on a conditional 3 mm saw kerf and without additional trimming of defective ends. In the workshop, the values may differ, and the actual requirement may increase when selecting by wood grain pattern or upon discovering damaged sections. A universal 10% addition to every purchase should not be applied: the reserve is determined by the specific cutting map and the possibilities for reordering.
| Indicator | By linear meterage only | By actual cutting layout |
|---|---|---|
| Finished offcuts | 42 | 42 |
| Length of one offcut | 720 мм | 720 мм |
| Total useful length | 30.24 m | 30.24 m |
| Product strip length | 2400 мм | 2400 мм |
| Required number of slats | 13, if you simply round the linear meters | 14, with three segments from each |
How to handle short remnants
A 231 mm remnant cannot automatically be considered waste. It may be useful for color samples, small inserts, or testing fastening. However, it can be used in calculating a future order only if the item code, profile, material, and required color match. If a large visible surface made of oak is planned, a fragment from another batch may differ in grain pattern and shade.
Store usable remnants labeled with the item code, size, and material. This allows them to be reused meaningfully, rather than piling up unidentified pieces that then have to be measured again.
What should be included in the cutting map for a series of fronts
The note “wooden slats — 30 meters” is insufficient for furniture production. It does not state how many whole slats will be required, which specific segments are needed, or which fronts they belong to.
The work specification must indicate:
| Field | Example entry | Why it's needed |
|---|---|---|
| Product | Cabinet door, option A | Defines the specific furniture component |
| Article number | RK-001 | Prevents substitution with a similar profile |
| Cross-section | 24 × 5 mm | Specifies width and protrusion |
| Product strip length | 2400 мм | Allows creating a cutting plan |
| Material | Beech | Required for ordering and finishing |
| Quantity per facade | 7 pcs. | Defines the composition of one door |
| Length of the finished slat | 720 мм | Used during cutting |
| Number of facades | 6 pcs. | Determines the total output |
| Indents and spacing | According to layout template No. 1 | Preserves the overall pattern |
| Finish | Approved enamel sample | Ensures finish repeatability |
It is useful to attach a drawing to the list with the marked axes of the slats, the size of the clear gaps, and the position of the handle. Separately, keep an exact link to the card of the selected product, a photo of the approved sample, and the approval date.
For several furniture models, one slat can be used, but with different layout templates. Then the item code remains the same, and production instructions do not get mixed up. This is especially convenient when a workshop simultaneously produces nightstands, wardrobes, and chests of drawers from the same collection.
If repeat production is planned in a few months, it is also worth keeping a cutting plan for each commercial strip. Re-purchasing the same item code does not replace information about how parts of the required length were obtained from it.
Five mistakes that are especially noticeable on a slatted facade
Marking from one edge without checking the opposite one. The craftsman maintains an equal gap between the slats, but the outer margin turns out random. The fix is to calculate the entire row in advance and check both edges before fastening the first part.
Confusion between the clear gap and the axial pitch. The specification states "32 mm" but does not say between which points. With a slat width of 24 mm, this leads to a significant change in the pattern. The fix is to label both dimensions and show them on the diagram.
Choosing a profile without accounting for the protrusion. The decor sits on a closed door, but when opened it touches the adjacent surface. The fix is a full-section mockup and checking the movement of the front before purchasing.
The same layout on fronts of different widths. If seven slats are transferred without recalculation from a 700 mm door to a 400 mm door, the clear gaps will shrink significantly or disappear. The fix is to recalculate the working field and, if necessary, use a different number of elements.
Calculating the purchase by total meters without cutting. The theoretical meterage is sufficient, but it is impossible to obtain all the long parts from the stock planks. The fix is to count the segments and the number of segments per whole plank, separately accounting for the saw kerf, end trimming, and process waste.
There is also a less obvious mistake: changing the shade or type of coating after approving the arrangement of the parts without making a new sample. Contrasting dark stripes look visually denser than light ones, even if the geometry has not changed. Therefore, it is better to evaluate the final composition in the color that will be on the finished furniture.
When it is better to avoid a wooden slat on the front
A slat is not needed on every surface just because it is included in the collection. If the door is too narrow and already occupied by a handle, the applied relief can worsen access to it. For small upper cabinets, it is sometimes more useful to leave a smooth surface and continue the slat pattern on the lower, larger fronts.
Avoiding it is also justified when it is impossible to ensure convenient cleaning of numerous narrow gaps. On kitchen cabinets in a high-soiling area, this is especially noticeable. You can choose a smooth molding, a sparse group of wide stripes, or abandon additional decor altogether.
If a high protrusion interferes with opening, you should not hope that this can be eliminated by adjusting the hinges after assembly. It is more reasonable to consider a slat of lesser depth, a different arrangement, or a fixed decorative panel instead of a moving front.
A decorative slat should also not be used to conceal serious damage to the base without repair. If the front has swollen, delaminated, or lost rigidity, an applied element will not restore its performance properties. First solve the structural problem, then finish the surface.
How to order wooden slats for furniture without re-selecting
In the STAVROS range for this task, you can start with the wooden slats section and match the required geometry with specific designs. If you plan to buy wooden slats for furniture facade decor, it is better to specify the purpose right away in your request: doors, drawers, furniture panels, and not just the overall length of the strips.
For thin overlay elements made of natural wood, it is worth checking the RK-001 options in beech and oak. If you need a three-dimensional decorative slat with a different mounting method, compare the RK-002 design and assess whether it can be used on your specific furniture assembly. At the same time, the choice between solid wood and veneered MDF should be a conscious one: these are different materials.
If the profile in the photo is suitable, but there are questions about the depth, first order a sample or a single product strip. For repeat production, it is useful to use STAVROS information for manufacturers and agree on the selected design, quantity, and deadlines in advance. The availability, cost, and delivery terms of the selected material should be checked when placing the order.
For monitoring a specific product, the following will be useful drawings and models, and before the series you can review information about materials and product quality. But the final decision is made based on the sample and the working layout: only they show how a specific slat will look and be installed on the desired facade.
The ordering process is short: facade dimensions → cross-section and material → working field → quantity and spacing → handle and opening check → sample → cutting map → batch. This way, the workshop purchases not an indefinite number of linear meters, but a set of parts for already approved furniture.
Frequently asked questions about shaped slats for furniture
Can the same spacing be maintained on facades of different widths?
Yes. For a furniture collection, you can fix the slat width and the clear gap, and on facades of different widths vary the number of parts and the edge margins. For example, with a 24 mm slat and a 32 mm gap, five slats on a 400 mm facade will occupy 248 mm together with four internal intervals, leaving 76 mm on each side. Seven such slats on a 500 mm facade will occupy 360 mm and leave 70 mm on each side. The rhythm between the parts is the same, although the number of strips differs.
What should be done if the slat height exceeds the available length of the commercial strip?
A long visible slat should preferably be made as a single piece whenever possible. If the required length exceeds the commercial length, check whether it is possible to choose another profile or a longer strip. If a joint is unavoidable, its location is planned in advance and repeated on the corresponding facades. A random joint in the middle of one door with single-piece slats on the adjacent one is usually quite noticeable, especially with a transparent finish.
Can slats be used to work around a ventilation grille or a technical opening?
This is only possible while maintaining the ventilation provided for in the design and access to the serviceable unit. Decorative elements must not block the air intake, exhaust openings, or fasteners that need to be opened periodically. It is better to set aside such a zone with a clear margin than to trim many short elements around it without an overall layout.
Is a straight wooden slat suitable for a curved facade?
A standard rigid straight slat does not become flexible just because the facade has a small radius. Trying to pull it into place with fasteners can cause stress in the wood, joint failure, or damage to the finish. A curved surface requires a specially engineered profile or another solution compatible with the radius and fastening method. This should be tested on a sample, not on the entire furniture batch.
How should a slat be finished if its end remains exposed?
The end must be part of the approved design, not an accidental saw mark. For solid wood, check the quality of the crosscut, the easing of sharp edges, and the application of finish to the exposed wood. For an MDF slat with veneer, the finish of the exposed cut must be planned separately: the core material differs from the face surface. The finishing method depends on the chosen profile and must be consistent across repeated facades.
Will the gaps become smaller after painting?
The coating adds thickness on the side edges, so the clear gap between slats may decrease slightly. With tight spacing and a requirement for precise geometry, test a finished painted sample, not just the raw section. A universal change value cannot be specified: it depends on the primer, the number of coats, and the application method.
How should slats be positioned near the bottom edge of a cabinet door?
Check whether they pass through the area of the plinth, applied threshold, or another protrusion that the door approaches when opening. It is not always wise to extend the relief all the way to the bottom edge. Sometimes a calm lower margin and equal slat endings on all doors give a neater result and make cleaning easier.
Can different slat cross-sections be used on doors and side panels?
Yes, when the overall composition allows for it. For example, use flat strips with a slight protrusion on moving doors, and a deeper profile on the fixed side panel. In that case, it is worth keeping a consistent color, line direction, and main axes. You should not change the cross-sections arbitrarily from one front to another without a drawing: the difference in depth creates a different character of shadow even with the same spacing.
What should be done if decorative slats interfere with a concealed grip behind the front?
If opening is intended by the end of the door or by an integrated profile, this area must not be blocked by a decorative element. First determine the required space for the hand, then end the slats before it or move the entire group. The solution is checked by actually opening it: in a sketch, sufficient clearance may look convincing, but on assembled furniture it may turn out to be inconvenient.
How can an approved pattern be reproduced six months later?
Save the slat article number, material, cross-section, segment lengths, axis coordinates, dimensions of the outer margins and clear gaps, the fastening scheme, and a coating sample. Attach a photograph of the assembled front and the layout template number to them. Then the new order will reproduce a specific furniture project, rather than an approximate description of “seven oak slats with equal spacing