Article Contents:
- What does “ready-made wooden handle” mean
- Ready-shaped handle without coating
- Fully ready handle with coating
- A handle is one of the furniture parts most exposed to contact
- A ready coating also needs to be checked for real-world use
- A ready color as a standalone solution
- When a factory coating is especially convenient
- Why this is not a "raw blank"
- Example of a batch of 40 handles
- Separate the cost of finishing from the price of waiting
- Your own finishing can be more cost-effective with a combined batch
- When your own painting is truly justified
- All furniture is painted in a single color
- A custom color is needed
- Need to match an existing shade
- The workshop already has a painting process
- When a ready finish saves more time
- No dedicated painting area
- One-off furniture
- Very tight deadlines
- Repeat orders should be as simple as possible
- Oak
- Oak
- Color matched to the facade and intentional contrast are different tasks
- One wood species, different finish options
- If the handle has one mounting point
- If the handle has two mounting points
- When one handle is not enough
- Make a control front before the entire series
- The sample must be signed and kept
- How to check the finished color next to the front
- Warm and cool undertone
- Degree of gloss
- Wood texture under a clear finish
- How to organize a trial color sample of an unfinished handle
- Keep the finish chart
- Unfinished option
- Finished option
- Why this example matters more than a simple comparison of two different models
- The item code and finish must be stored together
- Quantity per product and quantity per batch are different fields
- When a reserve is actually needed
- Russian status designations
- For the series, the finish becomes part of the standard
- Do not mix variants of the same model within a series
- Separate a product defect from a defect in your own finishing
- Checking a batch with a pre-finished coating
- What to do with a part that stands out visually
- Why the handle cannot be changed after drilling
- Front thickness affects the fasteners
- The drilling template must belong to a specific article number
- Kitchen
- Cabinet
- Commode
- Cabinet
- When you should not choose a factory coating
- Wood under a clear finish requires its own logic
- Short selection procedure for the configurator
- What must be approved before placing the order
- If the original option is no longer available
- Keep not only the color name
- Replacing one handle after a year
- If a furniture series is spread across several deliveries
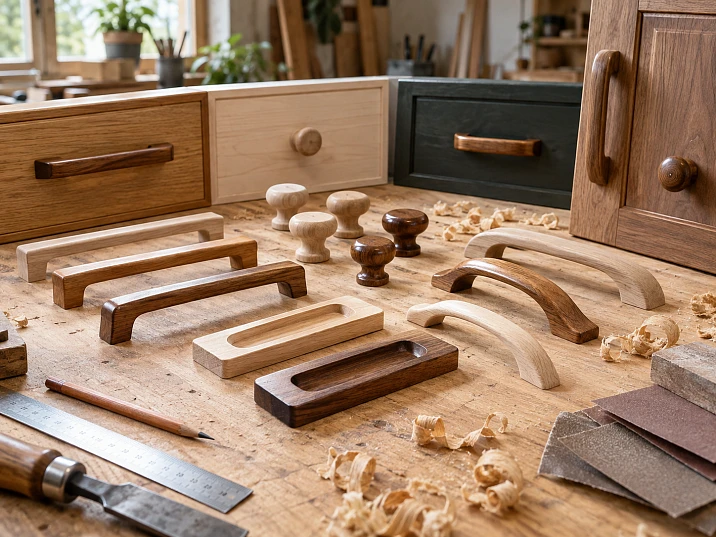
The handle shape has already been chosen, the dimensions fit, and the holes on the front can be calculated. It seems that all that remains is to order the required quantity. But a wooden handle has one more choice that directly affects production: buy it already with a factory finish, or take the same ready-made part in the same shape without a finish and finish it together with the furniture.
These are two different workflows.
In the first case, the workshop receives a product that can be installed after inspection. In the second, the complex geometry has already been manufactured, but the color, tint, lacquer, or enamel are done by the craftsman themselves.
So the right question is not “which handle is better,” but:
what degree of readiness does this specific project need, so as not to pay for unnecessary factory finishing and at the same time not create extra work for yourself?
The working sequence is as follows:
handle shape and item code → version → finished or unfinished → sample → comparison with the front → mounting check → approval → quantity → order.
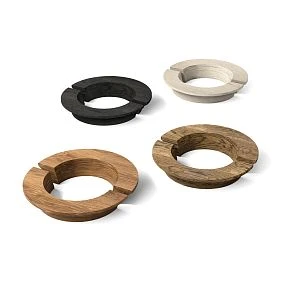
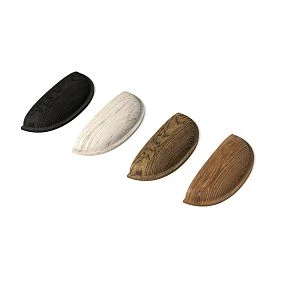
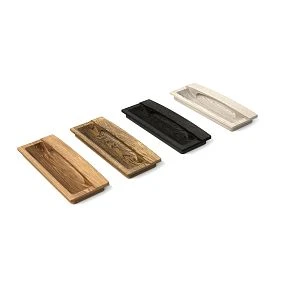
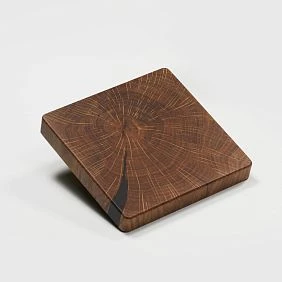
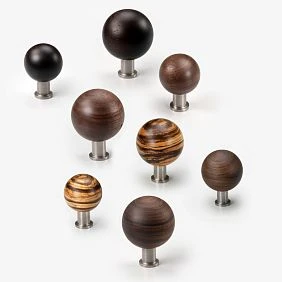
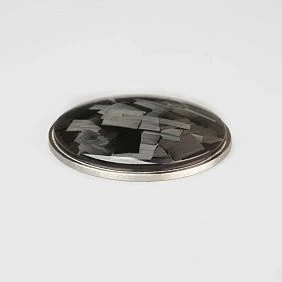
What does “ready-made wooden handle” mean
The word “ready-made” is easy to misunderstand.
For a furniture maker, a handle may already be ready-made because:
- the shape is fully manufactured;
- the dimensions are defined;
- complex milling or turning has been completed;
- the holes and mounting geometry are formed;
- the surface has undergone basic preparation;
- the part has a stable SKU.
At the same time, a decorative finish may not yet be present.
That is, there are two different options.




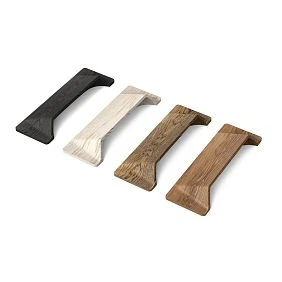
Finished-shaped handle without coating
The craftsman receives an already formed furniture part.
He does not need to make the handle from a block, shape it, replicate the geometry on each part, and create a separate technological operation.
remains:
- check the surface;
- apply its own finish;
- dry;
- check the color;
- install.
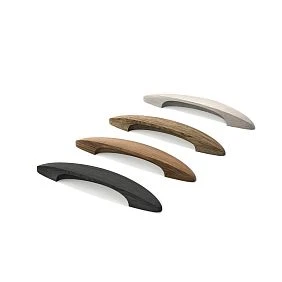
Our factory also produces:
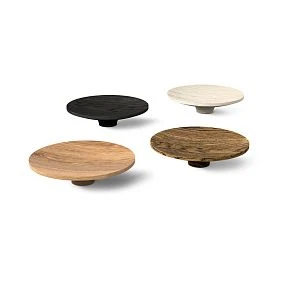
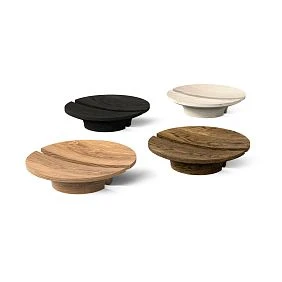
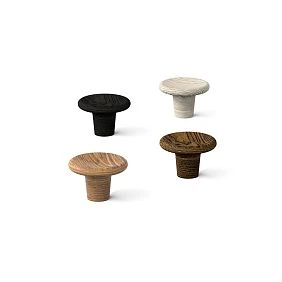
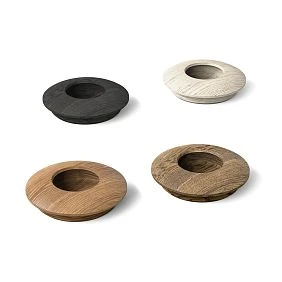
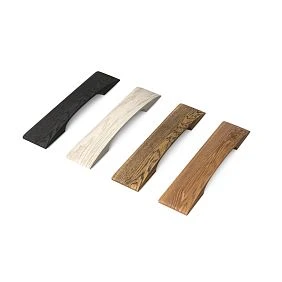
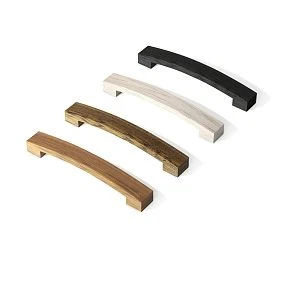
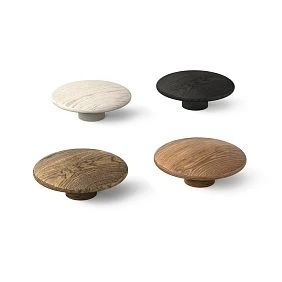
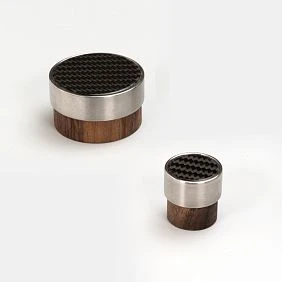
Fully finished handle with coating
The shape has already been made and the decorative finish has also been applied.
After receiving it, the workshop checks:
- appearance;
- color;
- size;
- mounting;
- completeness;
- conformity to the sample.
After that, the handle can be sent for assembly.
This is the main distinction of the entire topic:
in both cases, a ready-made furniture component is purchased, but the amount of remaining work differs.
For comparison, it is convenient to use two separate STAVROS categories: furniture handles with coating и unpainted furniture handles.
Get Consultation
Coated handles: when a ready-made finish is truly advantageous
A ready-made coating is especially convenient when the manufacturer's finish already solves the project's task.
This option is logical if:
- the ready-made color is satisfactory;
- there is no need to precisely match an individual facade shade;
- the handle can be a standalone accent;
- the workshop does not have its own painting operation for handles;
- deadlines are tight;
- handles are needed for a single order;
- the product must quickly move from receipt to installation;
- the repeat batch must arrive in the already approved finish.
The main advantage here is shortening the production chain.
The scheme is simple:
receipt → inspection → installation.
If you buy a handle without a coating, the following will be added:
preparation → finishing → drying → color control → installation.
For a single handle, the difference is negligible.
For 30, 50, or 100 parts, this is already a separate production stage.
A handle is one of the furniture parts most exposed to contact.
A person may hardly ever touch the front with their hands.
The handle is touched constantly.
Therefore, a beautiful test color sample should not be evaluated only immediately after drying.
For your own finish, it is useful to check:
- whether noticeable fingerprints remain;
- whether the sheen changes from constant contact;
- whether the surface is easy to clean;
- whether the handle has become too slippery;
- whether the edge of the coating feels unpleasant to the touch;
- whether the coating differs in the areas that are constantly touched by hand.
This is especially important for the kitchen and the dresser, which are used many times a day.
If the workshop already has a proven system for fronts, this does not automatically mean that it is perfectly suitable for handles.
A front is a large flat surface.
A handle is a small part with constant contact.
Therefore, it is better to use a test sample in real conditions for several days, rather than just evaluating it visually.
The finished coating also needs to be tested for use
A factory finish eliminates the painting operation, but does not cancel the user check.
Before the series, it helps to understand:
- is it pleasant to hold the handle;
- is the surface too smooth;
- are there any sharp edges;
- how the handle looks after several days of use;
- is it easy to clean.
If the item is intended for the kitchen, hallway, or children's furniture, this question is more important than for a rarely used decorative cabinet.
A ready-made color as a standalone solution
Not every wooden handle has to match the color of the cabinet front exactly.
For example, in a light-colored kitchen, the following can be used:
- natural wood;
- dark handle;
- transparent coating;
- contrasting brown shade;
- another pre-selected option.
If the handle color is a standalone part of the design, buying a ready-made finish is often more logical than replicating it in the workshop.
When a factory finish is especially convenient
A ready-made option wins for one-off orders.
Let's imagine a single chest of drawers with six handles.
There's no point for the workshop to run a separate painting operation just for these six parts if a suitable finish already exists.
For a batch of 60 handles, the calculation may be different — especially if all the fronts and handles need to be painted in the same custom color.
Unfinished handles: when your own finishing gives you more control
An unfinished ready-made handle is especially useful in custom furniture.
The craftsman buys an already manufactured geometry but retains control over the final appearance.
This option makes sense if:
- the handle needs to be made in the color of the facade;
- the furniture is painted in a custom shade;
- the handles must go through the same enamel system as the other parts;
- a proprietary tinting is used;
- the same degree of gloss is needed;
- the workshop's oil or lacquer is used;
- the wood must match the other furniture parts;
- the project requires its own test color sample.
For a kitchen or cabinet with a custom facade color, this is often the most straightforward scenario:
facades and handles follow a single color system.
The difference in material and shape remains, but the color is perceived as unified.
Why this is not a "raw blank"
An unpainted handle should not be confused with a wooden block.
The shape is already finished.
The complex processing has already been completed.
The workshop is not buying material to make a handle, but a finished handle for its own finishing.
This significantly reduces the work.
Do not:
- create the shape;
- repeat identical parts;
- configure processing;
- produce trial geometric samples.
Only the part where the workshop truly wants to retain control remains: the external finish.
How many operations remain with the workshop after purchase
It is better to compare by operations.
| Operation | Uncoated handle | Coated handle |
|---|---|---|
| Shape formation | already completed | already completed |
| Primary milling or turning | already completed | already completed |
| Basic surface preparation | completed for a specific finish | Completed |
| Fastening check | Need | Need |
| Test color | needed for custom finishing | needed only to verify the finished color |
| Primer | performed by the workshop if required by the system | no separate workshop operation needed |
| Enamel or tinting | performed by the workshop | already completed |
| Varnish or oil | is carried out by the workshop, if provided | are already completed in the finished version |
| Drying | Workshop | completed before delivery |
| Color control | after in-house dyeing | upon acceptance |
| Installation | Workshop | Workshop |
The difference is clearly visible.
In both cases, the geometry is purchased ready-made.
But in the version without a coating, the workshop takes on the entire decorative finish.
You need to calculate the cost of the finished handle in its installed state
A cheaper unfinished handle is not necessarily cheaper once the work is complete.
Conversely, a more expensive finished handle is not necessarily more cost-effective.
You need to calculate the cost of the handle in its installed state.
For an unfinished handle:
part price + preparation + finishing materials + labor time + drying + inspection + possible defects + installation.
For a handle with a coating:
part price + acceptance + inspection + installation.
Let's say an unfinished handle is conditionally 350 rubles cheaper than a finished one.
If a workshop spends on one part:
- a few minutes of preparation;
- soil;
- enamel;
- finish layer;
- time for layout;
- intermediate drying;
- control,
the difference may disappear.
But if all fronts and handles still go into one common painting batch, adding handles may cost the workshop very little.
Therefore, the same handle may be more cost-effective without a finish in one project and with a finish in another.
Example of a batch of 40 handles
Let's assume the difference in purchase price between the two options is a conditional 300 rubles per part.
For 40 handles:
300 × 40 = 12,000 rubles.
This is the visible saving of the option without a finish.
Now let's calculate the in-house finishing.
If preparation, painting, layout, and inspection of the entire batch require, for example, 7 hours of workshop time, and an hour of production time is conventionally valued at 1,800 rubles:
7 × 1,800 = 12,600 rubles.
Materials and the risk of rework are not yet accounted for.
With such conventional initial data, a ready-made coating may already turn out to be cheaper.
But if handles are added to an already started facade painting process and require only one additional hour:
1 × 1,800 = 1,800 rubles.
Then the version without coating may be noticeably more cost-effective.
The figures are approximate and are needed only for the calculation method.
The main idea: you need to calculate the entire batch, not just one item in the catalog.
Separate the cost of finishing from the cost of waiting
In-house painting has another expense that rarely makes it into a simple calculation: the time when the handles have already been finished but cannot yet go into assembly.
For example, the craftsman spent only an hour applying the coating. Formally, the labor costs are small. But then the parts take up space in drying, require careful storage, and cannot be installed until the full cycle is complete.
If the furniture is already ready for delivery, but the handles delay assembly by a day or two, that is also a production cost.
It is especially noticeable when:
- the order is urgent;
- the drying area is limited;
- several colors are being processed in the area at the same time;
- the handles need to be turned over or hung;
- additional inspection is required after painting.
Therefore, a ready-made finish is sometimes advantageous not because of the number of minutes of work, but because it eliminates a separate technological route.
In-house finishing can be more cost-effective when done in a joint batch
The opposite situation occurs when handles are finished together with the fronts.
If the workshop is going to:
- prepare the material;
- mix the required color;
- start the paint booth;
- dry a large batch,
adding a few dozen handles may barely increase the preparation costs.
Then the version without coating becomes especially logical.
This leads to a simple rule:
a separate painting cycle for handles is expensive; adding handles to an existing cycle is much cheaper.
That is exactly why two workshops can quite rightly choose different options for the same handle.
When custom painting is truly justified
There are several typical scenarios.
All furniture is painted in a single color
For example, fronts, legs, decorative elements, and handles must have the same shade.
Then unfinished handles can be added to the general production cycle.
Instead of a separate operation, you get a single finishing system.
A custom color is needed
The catalog does not have a ready-made shade that matches the project.
Buying a handle with a finish and then reworking its surface is an unnecessary operation.
It is more rational to take the unpainted version right away, if it is available.
Need to match an existing shade
This is typical for:
- restoration;
- adding to already installed furniture;
- replacing some of the handles;
- repairing individual fronts.
Here, custom color matching can be more valuable than a ready-made factory option.
The workshop already has painting technology
If the handles easily fit into the standard cycle:
preparation → primer → color → finish → drying
a separate purchase of a ready-made finish is not always necessary.
When a ready-made finish saves more time
There are reverse situations.
No in-house painting area
If every handle has to be sent out, buying the unpainted version just to save a little on the purchase price may be pointless.
One-off furniture
Six ready-made handles are often easier to buy already in the desired finish than to start a separate process.
Deadlines are very tight
In-house finishing requires not only working time but also technological pauses.
Even if the actual work takes only a few minutes, the piece needs to:
- dry;
- stabilize;
- pass inspection.
A ready-made finish eliminates these waiting times.
Repeat orders should be as simple as possible
If a workshop produces the same furniture model in small batches and uses a stable ready-made finish, repeat ordering becomes very simple:
item code → finish option → quantity.
There is no need to repeat the painting process from scratch every time.
Material, color, and gloss level should be chosen as a single system
Species is an important parameter, but not a standalone answer to the question of "with or without coating."
Beech
It is practical to consider in projects where:
- opaque enamel is used;
- the wood texture should not be the main decorative effect;
- the handle should match the facade in color;
- the workshop performs the painting itself.
This does not mean that beech is only suitable for enamel.
It is only about a common production scenario.
Oak
Especially interesting if:
- the wood texture should remain visible;
- oil is used;
- clear varnish;
- stain;
- Tinting;
- the handle should match the oak elements of the furniture.
If the oak is fully covered with a dense enamel, part of its visual value simply stops being perceived.
But the material is ultimately chosen based on the specific model and project.
A color matching the facade and a deliberate contrast are different tasks
It is useful for the workshop to decide this in advance.
Matching the facade — the handle should visually almost blend with the door. Here, custom painting often provides more control.
Contrast — the handle should read as a separate element. Then a ready-made finish can be more convenient if its color already fits the overall palette of the furniture.
Natural wood on a painted facade — the handle remains a visible wooden accent. Here it is important to coordinate it with:
- a tabletop;
- open wooden shelves;
- legs;
- other decor.
The same product code can work across all three schemes if different finish options are available.
That is why the role of the handle in the composition is determined first.
And only then — the finishing method.
One wood species, different finish options
Even with a single material, the result can vary.
An oak handle can:
- remain natural;
- receive a clear lacquer;
- be tinted;
- become dark;
- be fully painted.
Therefore, the specification must include a finish option alongside the wood species.
The article number, finish, and mounting must be approved before drilling the batch.
At first glance, the color of the handle and the hole in the facade are independent things.
In practice, before the batch, you need to approve not just a "wooden handle," but a specific article number and a specific design.
Why?
Because if after drilling 30 facades the handle is changed to another model, the new part may have:
- a different mounting;
- a different position of the mounting point;
- a different base size;
- a different projection;
- different overall dimensions.
Therefore, the safe sequence is:
article → finish → sample → size check → mounting check → drilling template → first front → series.
Not:
first we drill, then we finally choose the handle.
Even if an unfinished version is planned, the geometry itself must be approved before launching the fronts.
If the handle has one mounting point
A knob handle seems simple.
But even here you need to precisely fix:
- axis;
- the height from the edge;
- position relative to the frame;
- the base diameter;
- the projection from the front.
If the handle is later replaced with a larger one, the visual axis may remain the same, but the base will begin to conflict with the molding or a neighboring element.
If the handle has two mounting points
Here, replacement is even more risky.
The center-to-center distance determines the holes.
After drilling, another handle is no longer a simple replacement.
Therefore, the handle, finish, material, and mounting are approved as a single option before serial drilling.
Handle sample: what to check before ordering the entire batch
One sample resolves several issues at once.
Check on it:
- actual size;
- grip comfort;
- protrusion from the front;
- hand position;
- external scale;
- mounting;
- surface quality;
- color of the finished coating;
- result of own finishing;
- combination with the facade;
- combination with the countertop;
- neighboring hardware.
After this, the decision moves from "seems to fit" to a specific approved option.
For an unfinished handle, the scheme is:
one part → trial finishing → fitting to the facade → approval → the whole batch.
For a handle with a coating:
one part → comparison with the facade → checking shade and gloss → approval → batch.
When one handle is not enough
If two handles are used on a wide facade or the entire item has many repeating parts, it is sometimes useful to order a small set and look at them together.
This makes it visible:
- whether the color is perceived the same way;
- whether there is a noticeable difference in the natural wood;
- how the repetition looks across several fronts.
Make a control front before the entire series
For a kitchen, wardrobe, or a series of chests of drawers, one handle in hand is not enough.
It is better to install the sample on one real front.
This simultaneously checks:
- position;
- scale;
- grip;
- the hole;
- distance to the edge;
- proximity to molding;
- color;
- gloss;
- the shadow from the handle.
If the handle has no coating, a control front is especially useful after a test paint. The color may look good on a separate part, but on a large front surface the match will turn out to be too exact or, conversely, accidentally close.
After approving the first front, you can finalize:
SKU → finish → position → drilling template.
And only then transfer the decision to the entire series.
The sample must be labeled and kept
If a workshop produces repeatable furniture, the approved handle should remain not only in a photograph.
On the sample or in the project card, it is useful to record:
- article number;
- the material;
- approval date;
- finish option;
- your finishing system, if one was used;
- project number.
This way, on the next order, a new batch can be compared not with a memory of the color, but with a physical reference.
How to check the finished color next to the facade
A screen does not provide a reliable assessment.
The perception is influenced by:
- monitor settings;
- lighting;
- camera;
- gloss level;
- color of the adjacent surface;
- texture of the material.
Therefore, it is best to evaluate the finished handle next to a real cabinet front.
Check it:
- in daylight;
- under the main lighting of the room;
- next to the countertop;
- next to other wooden details;
- next to metal hardware, if it is part of the composition.
Warm and cool undertone
Two white colors can differ noticeably.
One leans toward a warm shade.
The other — toward a cool one.
In a separate photo, this is almost imperceptible.
On a white kitchen facade, the difference can become obvious.
Degree of gloss
A matte handle and a glossy facade can differ even when the colors are close.
Sometimes this is intentional.
Sometimes it looks like accidental incompatibility.
That's why you need to compare not only the color, but also the character of the surface.
Wood grain under a transparent finish
If the handle is oak and the texture remains visible, evaluate more than just the tone.
Check:
- how noticeable the grain is;
- whether it matches the countertop;
- whether the handle looks too contrasting;
- whether the transparency of the finish suits the overall design.
How to organize a test finish on an unfinished handle
There is no need to finish the entire batch at once.
It is better to make a single sample.
Sequence:
- take one handle of the required item number;
- check the surface;
- perform the accepted preparation;
- apply the selected finishing system;
- allow a full drying cycle;
- attach it to a real facade;
- check the color and gloss;
- approve the result;
- only after that, proceed with the remaining handles.
This is especially important for:
- non-standard enamel;
- toning;
- stain;
- oils;
- clear lacquer;
- patina.
One sample costs significantly less than redoing several dozen handles.
Keep the finishing card
For a repeat order, it is useful to record not only the color but also the system itself.
For example:
Finish 01 — primer → enamel → matte protective layer.
Or:
Finish 02 — stain → clear lacquer.
Then six months later the workshop isn't trying to recreate the result from a photograph.
HL-053-1 and HL-053-1M: one size, two production routes
The difference is especially clear on a pair of Proun items.
Proun furniture handle HL-053-1 unfinished has a base size of 28 × 28 × 29 mm. The current product page offers options in beech and oak.
Proun handle HL-053-1M with finish has the same size of 28 × 28 × 29 mm, but comes already in options with a ready finish.
Geometrically, it's one idea.
Production — two different schemes.
Uncoated option
The craftsman receives a finished form.
Next:
in-house finishing → drying → inspection → installation.
Coated option
The craftsman receives a finished form and a finished decorative finish.
Next:
inspection → installation.
That is why when choosing, you cannot look only at the price or the shape.
You need to decide where exactly the finishing should be done: at the manufacturer or in the workshop.
Why this example is more important than a simple comparison of two different models
When comparing two different handles, the question always remains: what had a stronger influence — the shape or the finish?
Here the base size matches.
That is why the effect of the readiness level is clearly visible.
The craftsman can calculate in advance how much work he is buying along with a specific version.
How to record the handle, finish, and quantity in the specification
Entry:
wooden handle — 12 pcs.
too weak.
It is necessary to specify:
- article number;
- the material;
- finish option;
- color or finishing system;
- quantity;
- link to the product;
- approval status.
For example:
HND-01 | HL-053-1 | beech | without finish | finish together with the front | 12 pcs.
Or:
HND-01 | HL-053-1M | with finish | approved color | 12 pcs.
This allows:
- do not mix up the two versions;
- reorder the same variant;
- maintain a consistent finish;
- avoid accidental substitution.
The item code and finish must be stored together
For serial furniture, it is not enough to record only the handle shape.
A conditional standard should include:
item code + material + finish variant + mounting + quantity per item.
If the finish changes, this is already a different project configuration, even if the geometry remains the same.
Quantity per item and quantity per batch are different fields
A single chest of drawers may require six handles.
For a series of eight dressers:
6 × 8 = 48 handles.
In the specification, it is better to store:
- quantity per item;
- the number of items in the batch;
- the final quantity.
For example:
HND-01 | 6 pcs. per dresser | 8 dressers | total 48 pcs.
If two more handles are taken as a reserve, they should not be hidden within the quantity per dresser.
Better:
calculated quantity — 48
reserve — 2
to order — 50.
This is how the workshop understands why more parts are ordered than required by the drawing.
When a reserve is actually needed
A universal percentage is not needed here.
A reserve may be justified if:
- the series is stretched out over time;
- in-house finishing carries a risk of defects;
- a repeat reorder takes a long time;
- the handle is used in a popular furniture model;
- it is useful to keep one or two parts for warranty repairs.
For a single nightstand, a spare may not be needed at all.
For a serial project, it becomes a management decision.
Russian status designations
For internal documentation, clear words are sufficient:
- SELECTED;
- sample;
- APPROVED;
- ordered;
- RECEIVED.
This way, the specification remains clear to the carpenter, the component picker, and the assembler without unnecessary terminology.
For a series, the finish becomes part of the standard
For a single chest of drawers, a mistake will affect six handles.
For a series of ten wardrobes — already dozens.
Therefore, after approving the sample, it is necessary to freeze not only the shape.
The following are recorded:
- article number;
- the material;
- coating;
- mounting method;
- position on the facade;
- quantity per item.
For example:
HANDLE-01 | 4 pcs. per cabinet | 10 cabinets | 40 pcs. total.
If the version is without coating, the own finishing system is indicated next to it.
If with coating — the approved factory option.
Do not mix variants of the same model within a series
If the first five cabinets are assembled with handles without coating, painted together with the fronts, and the next five receive ready-made factory handles of a similar color, the result may differ.
Even with a close shade, the following may differ:
- gloss;
- color depth;
- transparency;
- texture.
For a series, it's better to choose one system once and stick with it.
Incoming inspection: how to keep an unsuitable batch out of assembly
You need to check both finished and unfinished items.
For handles without a finish:
- article number;
- the material;
- size;
- surface;
- the quality of sanding;
- absence of damage;
- compliance with the approved sample.
For handles with a finish, additionally:
- color;
- gloss level;
- coating uniformity;
- finish damage;
- differences between parts from the same batch.
If the handles are for one large cabinet, it helps to lay out the whole set side by side.
This makes it easier to see the difference that cannot be noticed from a single part.
Separate product defects from defects in your own finishing
For unfinished handles, it is very important to understand at which stage the problem appeared.
If the part arrived:
- with damaged geometry;
- with a surface defect;
- with a different size;
- made of a different material,
this is a matter of incoming inspection.
If the geometry was fine, but a spot, run or color difference appeared after your own painting, the cause is already inside the workshop.
This separation is useful not only for claims to the supplier. It allows you to honestly calculate the cost of your own finishing.
Checking a batch with a finished coating
On finished handles, they look not only at the color of each part separately.
Lay out several pieces next to each other on a neutral background.
Compare:
- tone;
- gloss;
- transparency;
- uniformity of the coating along the edges;
- visible damage;
- condition of the attachment points.
After that, place several parts against the actual cabinet front.
This way you can see the difference between batches before the handles end up on already assembled furniture.
What to do with a part that visually stands out
Do not send it straight to installation.
First compare it with the approved sample.
If we are talking about natural wood under a transparent finish, slight variation in the material is normal.
But if one handle differs noticeably from the others and this disrupts the composition of the front, it is better to resolve the issue before installation.
The handle, fasteners, and front should be checked as a single unit
The finish should not distract from the mechanics.
Before ordering a batch, you need to check:
- the mounting point;
- fastener type;
- the screw length;
- facade thickness;
- access to the back side;
- availability of a drilling template.
If the handle is a knob, one mounting point simplifies the task, but the position must still be precisely fixed.
If the handle has two points, the center-to-center distance becomes critical.
Why the handle cannot be changed after drilling
Another model may not cover the old holes.
Even if it looks similar visually.
Therefore, changing the product code after drilling the fronts requires checking:
- mounting points;
- base;
- size;
- position on the front.
That is why it is better to choose the finish option together with the final product code.
Front thickness affects the fasteners
The same handle can be installed on fronts of different thicknesses.
If a screw is used from the back side, its length must match the actual thickness of the door or drawer.
A screw that is too short will not provide a proper connection.
One that is too long may hit the handle, protrude into an unwanted area, or require washers and additional adjustment.
Therefore, it is useful to store not only the handle in the specification, but also the associated fasteners.
For example:
HND-01 — HL-053-1 — 19 mm front — fasteners K-01.
For a different front thickness, the fasteners may change even if the handle itself remains the same.
The drilling template must belong to a specific SKU
For a series, you should not store a universal sheet for "drilling for wooden handles."
A template for the specific model is needed.
If the handle has one point, the template defines the position of that point.
If it has two, the position and the center-to-center distance.
When the product code is changed, the template is automatically considered unconfirmed until the new handle has been checked on a reference front.
How the choice changes for a kitchen, wardrobe, chest of drawers, and cabinet
The degree of readiness depends not only on the color, but also on the type of project.
Kitchen
If the fronts are painted in a custom color and the handles need to blend with them, the unfinished option is very convenient.
If the handle needs to be a separate wooden accent, a finished coating may be better.
Wardrobe
Consistency is especially important for a large wardrobe.
If 20–30 identical handles are used, you need to decide in advance who is responsible for finishing the entire batch.
Chest of drawers
On small furniture, the handle strongly influences the look of the front.
A physical sample is especially useful here: the part is visible from close up and is constantly within hand reach.
Cabinet
The quantity is small.
Therefore, a separate painting operation is sometimes not economically viable.
If a ready-made color is suitable, coated handles can be simpler.
When you should not choose a custom finish
An unpainted option is not automatically more professional.
It is not needed if:
- the workshop does not have its own finishing;
- a suitable ready-made color already exists;
- the quantity is small;
- the project is urgent;
- the handle does not need to match the front;
- custom finishing will add extra cost;
- there are no conditions for a consistent finish;
In these cases, a pre-finished coating eliminates an extra production step.
When not to choose a factory finish
The reverse situation:
- the handles will still need to be repainted;
- a precise custom color is needed;
- the project uses a special stain;
- the gloss level must match the facade;
- the pre-finished version does not match the other wooden parts;
- the workshop already has one shared finishing batch.
Then paying for a factory finish that later needs to be redone is illogical.
If the same product code is available without a finish, it fits better into your own technology.
Wood under a clear finish requires a separate logic
If the goal is to show natural wood, the question of "with or without a finish" becomes more complex than with enamel.
A finished handle is convenient when its clear or tinted finish already matches:
- a tabletop;
- the facade frame;
- the wooden molding;
- legs;
- other visible details.
If there is no match, the unfinished option gives more control.
But here a test finish is mandatory: stain or oil on a small textured handle may look different than on a large flat countertop.
The goal is not necessarily to achieve an identical wood grain pattern.
You need to achieve a deliberate match in tone, degree of transparency, and the overall character of the surface.
Quick comparison table between two options
| Situation | Which is usually the smarter choice |
|---|---|
| A ready-made standard color works | Handle with coating |
| An exact facade color is needed | handle without coating |
| No in-house painting area | Handle with coating |
| All furniture parts are painted with a single system | handle without coating |
| Natural visible wood is needed | depends on the material and finish option |
| One-off project | a ready-made finish is often more convenient |
| Custom color | Unfinished |
| Compressed timeline | usually a ready-made finish |
| Repeatable series with an approved factory finish | with a finish |
| Repeatable series with a custom finish | Unfinished |
| Need to match existing furniture | sample and custom finish selection |
| The handle should blend completely with the front | without coating with a shared finish |
The table does not replace the calculation.
It shows where the logical first choice usually is.
Short selection sequence for the assembler
If you need to make a decision quickly, use the six questions.
- Has the handle geometry already been approved?
- Do you need the exact front color?
- Does the workshop have its own finish?
- Will the handles be painted together with the fronts?
- Is there a ready-made factory finish that already works?
- How many handles are in the batch?
If an exact color isn't needed, there's no finishing in the workshop, and a ready-made option works — it's more sensible to choose a handle with a coating.
If a custom color is needed and the handles can easily be included in the overall painting batch — the uncoated version is usually the more logical choice.
If the answers are mixed, you need a sample and a batch calculation.
This way the decision is made based on the production route, not on habit.
Repeat order: what to save to get the same result
For serial furniture, archive more than just the link.
Save:
- article number;
- the material;
- size;
- finish option;
- your own finish card, if the handle is uncoated;
- photograph of the approved sample;
- fasteners;
- quantity per item.
This way, a repeat order does not depend on the craftsman's memory.
If a handle with a finish was used, the exact same finish option must be repeated.
If there is no finish, repeat your own process.
What must be approved before placing an order
Before paying for the batch, it is useful to do a final check.
The following must match:
- article number;
- size;
- the material;
- the finish or its absence;
- color;
- mounting;
- quantity;
- sample;
- placement on the front.
If even one point is still under discussion, it is too early to consider the order final.
A particularly dangerous wording:
the shape is the same, we'll decide the color later.
For the unpainted version, the color is indeed applied later, but the finishing system must still be selected before the batch if it affects lead times and cost.
For a handle with a coating, the color is part of the purchased configuration itself.
If the original option is no longer available
Do not replace the handle only in the purchasing line.
The new model must undergo re-verification:
- size;
- mounting;
- position of holes;
- overhang;
- the material;
- coating;
- appearance next to the facade.
After that, the production documentation is updated.
Otherwise, purchasing and the drawing begin to describe different products.
Save not only the color name
Wording white handle almost useless for repeat production.
Need to preserve:
- specific article number;
- a ready-made finish option or your own finish map;
- the material;
- sample;
- mounting method;
- drilling template.
If a custom enamel was used, the workshop's technology is additionally saved.
If it is a factory finish — the exact selected version.
This way, a repeat batch truly replicates the original project.
Repairing one handle a year later
For warranty or post-warranty repair, a separate handle must be reproducible.
If the archive contains only a photograph of the dresser, the craftsman starts the selection process from scratch.
If the specification has been saved:
RUC-01 → item code → material → finish → fastening
the task turns into a regular reorder.
This is exactly where a small amount of documentation saves more time than it seems at the moment of the first project.
If a furniture series is spread across several deliveries
Five cabinets may be manufactured now, and another five in three months. In such a project, it is important to decide in advance how much variation between batches of handles is acceptable.
For a finished coating, it is useful to keep one approved handle as a reference and compare the next delivery against it.
For in-house finishing, the reference becomes not only the handle but also the process map:
- the material;
- preparation;
- coating composition;
- application procedure;
- gloss level;
- approved sample.
If a new batch of wood differs slightly in its natural grain, this is not necessarily a problem. But the workshop should see the difference before installation, not after the handles have been distributed across the finished fronts.
For a large wardrobe, handles are best assembled per item before assembly: select the pieces that visually work well together, label the set, and only then send it for installation.
This way, series production does not turn into a formal repetition of the article number. What is repeated is the approved visual result.
Where to buy ready-made wooden furniture handles
The full range is gathered in the section wooden furniture handles.
If you need the shortest possible path to installation, see Handles with a ready-made coating.
If the color and finish will be done inside the workshop — unfinished wooden handles.
For a responsible project, the following are also useful:
- Product samples;
- finishing recommendations;
- information about the quality of wooden products;
- conditions for furniture manufacturers;
- Payment and delivery.
The main principle of choice is simple:
if the handle shape has already been chosen, the next question is where the production cycle should end: at the supplier or in your workshop.
If the ready-made finish is completely satisfactory, there is no point in creating an unnecessary finishing operation.
If the handle must fit precisely into the furniture's own color system, there is no point in paying for a coating that will later have to be redone.
In both cases, the furniture maker buys a ready-made wooden handle.
The only difference is how much work he consciously leaves for himself.