Article Contents:
- The finished size and the blank size must be separated already in the drawing
- Why the "drawing" size is often insufficient for purchasing
- What "allowance per operation" means
- An allowance is not a reserve "just in case"
- Separate the allowance by length, width, and thickness
- Production allowance and purchasing stock are not the same thing
- Operations must be recorded in the correct order
- Create an operations map before talking to procurement
- Which operations are best done on a test piece
- One end is already finished
- Both ends are rough
- The part is cut at an angle
- Conditional example
- Cutting a long series: why the last millimeter is sometimes the most expensive
- Fitting into an assembly is a separate reason to leave extra length
- General formula
- Example with production size
- Why the kerf width should be taken from the actual equipment
- Example: 12 parts from 2400 mm strips
- Example with a defect zone
- Decorative recess within the plane
- Groove
- Quarter
- Forming the outer contour
- Profile along the edge
- External milling of a shaped part: calculate using the bounding rectangle
- Datuming may require more material than the milling itself
- A conditional example by width
- When a margin is still needed
- Hole at the edge
- Drilling after finishing and before finishing are different routes
- Drilling and future trimming must share a common datum
- When the sanding allowance has almost no effect on the purchasing size
- When the margin is needed in advance
- What to check
- Test corner
- Example frame made of 30 mm profile
- Frame series: long elements first
- When finished geometry is more advantageous than a large rough blank
- Post with a tenon: finished height and blank length differ intentionally
- Support with metal fastening
- When a rough rectangular blank is exactly what is needed
- Draft version
- Finalized version
- Adding one trial part
- Adding a defect zone
- Comparison of 2400 mm and 2600 mm boards
- Summary table: where allowance usually occurs and where it does not
- Why you should not immediately buy 100 identical blanks
- Approval must be documented in writing
- What to count after approving a trial part
- The reserve norm must be explainable
- Store the cutting map separately
- The cutting map must have a version
- Path 1. Buy rough lumber
- Path 2. Buy finished geometry
- Small series
- Large batch
- When material cost is most misleading
- Cost calculation should be based on the finished part
- Setup time should be distributed across the number of parts
- When to recalculate the allowance after the first batch of ten
- Do not reduce the allowance just to save material
The drawing specifies a part 600 × 60 × 30 mm. The most common mistake is to order or cut a base exactly 600 × 60 × 30 mm, and only then discover that both ends need to be trimmed, material must be removed from the width with a router, the edge brought to final finish, and after drilling the part must still fit precisely into the furniture assembly.
The finished size and the production blank size are not the same thing.
The correct order is the reverse: first determine the final part, then list all operations that will remain after purchase, and only after that add machining allowance where it is actually needed.
Work sequence:
finished size → remaining operations → allowance per operation → production blank size → cutting → trial part → finished size check → production run.
This is more important than any universal advice like "add 5 or 10 mm." For one part, 5 mm will be excessive; for another, insufficient. The allowance must compensate for actual machining, not exist for its own sake.



The finished size and the blank size must be separated already in the drawing
If the finished part must have:
600 × 60 × 30 mm
this is a description of the result.
But it says nothing about the state in which the part arrives at production.
Different options are possible:
- rough beam;
- planed strip;
- finished profile;
- turned part;
- carved part;
- unpainted formed element;
- a part ready for installation.
Each stage has its own scope of subsequent processing.
For example, a planed strip 62 mm wide can be a normal basis for a finished part of 60 mm if the technology provides for further milling of both edges.
But a finished decorative profile 60 mm wide can no longer be automatically considered a blank with 'zero allowance': perhaps it still needs to be cut to final length, and the length of the original strip must account for the saw kerf and the quality of both ends.
Therefore, it is useful to keep two lines in the production documentation:
finished part size
и
blank size before processing.
If the part is purchased under a specific item code, a third line is added:
original item code or profile.
This way, the craftsman, procurement, and process engineer are talking about the same product, but at different stages.




Why the "drawing" size is often insufficient for purchasing
The designer is responsible for the finished product.
The purchaser is responsible for the material from which this product will actually be made.
There is a technological route between them.
The more complex the route, the more the purchasing size may differ from the finished size.
If after purchase only drilling one hole remains, the overall dimensions may not change at all.
If the following are required:
- squaring the ends;
- profiling;
- external milling;
- fitting;
- finish sanding,
the allowance is already becoming part of the technology.
That is exactly why a good specification should not force the buyer to guess the allowance on their own.
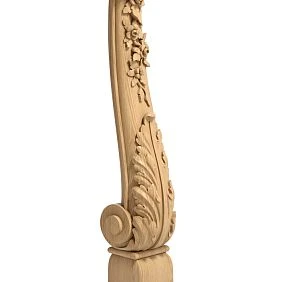
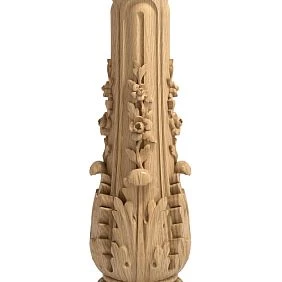
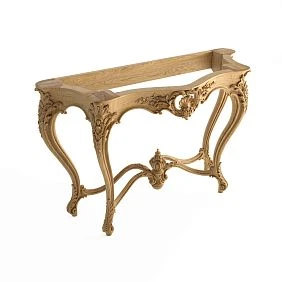
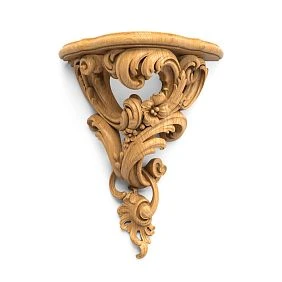
Our factory also produces:


There is no universal allowance
The figure of “5 mm per side” is convenient to remember, but technologically it explains nothing.
The allowance depends on:
- the condition of the original part;
- the supplier's accuracy;
- the specific operation;
- the type of machine;
- kerf widths;
- the tool;
- grain direction;
- method of positioning;
- quality of the factory end;
- required surface finish;
- length of the part;
- need for trial machining;
- number of items;
- whether the geometry needs to be corrected or the surface only needs slight finishing.
One operation requires extra length allowance.
Another requires extra width allowance.
For a third, the overall dimensions do not change at all, but a clear area around the hole is needed.
Get Consultation
What does “operation allowance” mean?
Let's imagine a simple post.
Finished size:
700 × 50 × 30 mm.
After purchase, the workshop plans to:
- refresh both ends;
- remove 1 mm from each side by milling;
- drill a hole;
- perform light sanding;
- apply oil.
Allowance is needed:
- along the length — for cross-cutting;
- along the width — for milling;
- possibly along the thickness — if it is also calibrated.
For drilling, additional length by itself is not needed.
For oiling — likewise.
Sanding is taken into account only to the extent that it actually changes the size.
That is, one part can have three different allowances along three axes, rather than one common number.
An allowance is not a reserve "just in case"
Too large a reserve is also bad.
It means:
- excess material;
- more removal;
- more machine time;
- more chips;
- higher tool load;
- more expensive purchasing.
It is especially pointless to buy stock noticeably thicker than required if the workshop then simply removes the excess without a technological need.
The goal is not to make the workpiece as large as possible.
The goal is to make it sufficient.
Separate the allowance by length, width, and thickness
For a rectangular part, it is convenient to treat three independent production dimensions:
blank length = finished length + allowance on the left + allowance on the right
blank width = finished width + allowance on the first edge + allowance on the second edge
blank thickness = finished thickness + allowance for calibrating two faces, if such an operation is actually provided for.
This is a simple notation, but it immediately eliminates the common confusion when the phrase "leave 5 mm" does not make it clear which axis it refers to.
Let's imagine a finished part:
800 × 70 × 28 mm.
The workshop technologist decided:
- leave 3 mm on both ends along the length;
- along the width — 1 mm for finishing each edge;
- by thickness — take a planed base of 29 mm and remove the remainder during calibration.
Production size:
806 × 72 × 29 mm.
It is obtained not "by the rule of plus a few millimeters," but as the sum of three specific operations.
If later the process engineer changes the routing and decides to use one edge as ready-made, the workpiece width may already be different.
Production allowance and purchasing stock are not the same thing
For one part, the craftsman calculated 806 mm.
This does not yet mean that the purchaser should look for a product exactly 806 mm long.
If the part is cut from a 2400 or 2600 mm strip, purchasing is done in whole original lengths. Then two levels of calculation appear:
- how many millimeters are needed for one production workpiece;
- how many such blanks can realistically be obtained from one commercial strip.
The first is responsible for the part technology.
The second is responsible for the amount of material purchased.
It is precisely the mixing of these levels that produces strange statements like 24 parts × 606 mm = 14.544 m, buy 14.544 m. Linear stock is purchased not as an abstract sum of centimeters, but in specific lengths from which a set of parts must be obtained.
First, write out all operations after purchase
Before calculating the size, answer the question:
what exactly will be done with this part after it ends up in the workshop?
Useful list:
- trimming;
- angle cutting;
- longitudinal cutting;
- calibration;
- milling of the outer contour;
- groove selection;
- rabbet;
- drilling;
- turning;
- sanding;
- fitting to the adjacent part;
- trial assembly;
- painting;
- Installation.
Then, opposite each operation, a mark is placed:
changes dimensions / does not change dimensions.
For example:
| Operation | Changes length | Changes width | Changes thickness |
|---|---|---|---|
| Trimming | Yes | No | No |
| Longitudinal milling | No | Yes | Possible |
| Groove | No | outer dimension usually no | Locally |
| Drilling | No | No | No |
| Sanding | Slightly | Slightly | Slightly |
| Outer contour | Possible | Yes | Possible |
| Oil or varnish | No | No | Practically none |
This immediately makes it clear where the allowance is actually needed.
Operations must be recorded in the correct order
The sequence also affects the size.
For example:
rough cut → milling → finish trimming
and:
finish trimming → milling
may impose different requirements on referencing and end faces.
If the workshop is used to first making a part slightly longer and deriving the exact length as the last operation, this must be taken into account in the blank.
Allowance cannot be considered separately from the routing.
Create an operations map before talking to procurement
For repeatable products, it is convenient to use a simple table:
| Step | What we do | Size before operation | Size after operation | Allowance needed |
|---|---|---|---|---|
| 1 | Rough crosscutting | 806 мм | 803 мм | Yes |
| 2 | Width calibration | 72 мм | 70 мм | Yes |
| 3 | Drilling | 70 мм | 70 мм | does not fit the dimensions |
| 4 | Finish trimming | 803 мм | 800 мм | Yes |
| 5 | Sanding | 800 мм | about 800 mm | Minimal |
The numbers are illustrative and describe an example only.
The value of the table is not in the numbers themselves, but in the transparency of the route. If the dimension does not change after drilling, procurement should not automatically add millimeters "for holes." If the finished length is formed by the final trimming, the corresponding allowance should survive until that step.
Which operations are best tested on a trial part
On a single sample, it is worth checking exactly those stages where there is a risk of losing the dimension:
- first locating;
- finished end;
- outer milling;
- groove at the edge;
- hole near the end;
- transition from rough size to finished size;
- final sanding.
After a test run, the craftsman knows the actual removal, not the theoretical one.
If it turns out that 1 mm at the end is consistently enough instead of the conventional 2 mm, future batches can be recalculated. If, on the contrary, more is required, it is better to find that out on a single piece.
Allowance for end trimming: the margin is needed not "for the length in general," but for specific ends
If both ends must be finished, a workpiece exactly to the drawing length is often inconvenient.
Causes:
- the factory end may be uneven;
- the edge could have been damaged during transport;
- the first cut is needed only to create a reference surface;
- the second outputs the final length;
- there may be a wood defect on the end;
- the part must be precisely fitted to the adjacent joint.
Therefore, before calculating, ask:
which ends are already suitable as finished ends?
One end is already finished
If the supplier provides an exact length and one end can be used as a reference, additional allowance may be needed only on the second edge.
Both ends are rough
Then the workshop must be able to process both.
The part is cut at an angle
The allowance is no longer determined only by the finished length, but also by the marking method.
For a mitered frame, the long point and the short point are different dimensions.
Such a part cannot be treated as a rectangular block without accounting for the angle.
Conditional example
A finished upright 700 mm long is required.
The workshop decided to leave 3 mm of technological allowance for finish cross-cutting of each edge specifically in its own operation.
Then the production length is:
700 + 3 + 3 = 706 mm.
This is not a universal recommendation of “3 mm each.”
This is an example of how one’s own technology turns into a calculation.
If your cross-cut requires a different value, that value is used.
Long-series cross-cutting: why the last millimeter is sometimes the most expensive
For a single part, a craftsman can allow a slightly larger margin.
In a large batch, a small difference is multiplied by the quantity.
For example, 100 uprights have a finished length of 700 mm.
Option A — production length 706 mm.
In total, in the blanks alone:
706 × 100 = 70,600 mm.
Option B — after refining the technology, it turned out that 703 mm was sufficient.
703 × 100 = 70,300 mm.
The difference — 300 mm of material.
Over the total length, this looks insignificant. But the real savings can be greater or smaller depending on whether the yield from a whole board changes.
If three parts of 706 mm do not fit into a specific usable length, while three of 703 mm already fit, the economic effect becomes stepwise: the workshop saves not 9 mm per board, but an entire additional source length on part of the batch.
That is why it is useful to optimize the series allowance after a trial batch, rather than permanently keeping the first rough reserve.
Fitting into an assembly is a separate reason to leave the length longer
Sometimes the exact size depends on already assembled furniture or the room.
For example, a decorative post must fit between two existing surfaces. The drawing gives the nominal size, but the craftsman deliberately leaves a small technological reserve and finally fits the part on site.
Such a reserve must not be confused with an allowance for an uneven end.
Its purpose is different — to allow adaptation to the actual assembly.
In the specification, it is better to label this:
the finished size is specified on site.
Then the assembler understands why the part arrived longer.
Kerf width: why 2400 / 600 = 4 does not yet mean four parts
This is one of the most common mistakes when cutting long strips.
Initial length:
2400 мм.
Finished length of one part:
600 мм.
Mathematically:
2400 / 600 = 4.
But between the four parts there are kerfs.
Four parts require three separating cuts.
If the width of each kerf is denoted as К, the condition looks like this:
4 × 600 + 3 × K ≤ 2400.
For any positive К the equality no longer holds.
This means that from exactly 2400 mm, four finished parts of 600 mm each cannot be obtained if each must be an independent part after three separating cuts and there is no special processing scheme.
General formula
for n identical parts:
n × L + (n − 1) × К ≤ Lисх
Where:
L— length of one production part;К— actual kerf width;Lисх— usable length of the source strip;n— number of resulting parts.
If additional allowances for end trimming are needed, the production blank length is used in the formula instead of the finished dimension.
Example with production dimension
Finished part:
590 мм.
The workshop leaves 2 mm on each end.
Production length:
594 mm.
Source strip:
2400 мм.
Kerf width (assumed):
3 мм.
For four parts:
4 × 594 + 3 × 3 = 2385 mm.
Theoretically, it fits.
remains:
2400 − 2385 = 15 mm.
But even this calculation does not yet account for:
- the trimming of the original plank itself;
- a defect at the end;
- the need to create a clean base;
- marking error.
Therefore, a mathematical “it fits” does not yet mean a production “you can start the batch.”
Why the kerf width must be taken from the actual equipment
Different saws, blades, and modes have different actual kerf widths.
Therefore, the value К In the formula, it's better not to take values "from the internet" or from memory.
Make a test cut on the same equipment and with the same blade that will be used for the production run. Measure the actual material loss.
For accurate cutting, also consider:
- blade condition;
- runout;
- feed method;
- the need to clean up the end after sawing.
If the end still requires additional finishing after each rough cut, a separate allowance for this finishing must be included in the production length.
Example: 12 parts from 2400 mm strips
Finished length — 580 mm.
Production length after adding allowance for two ends — 586 mm.
Kerf width — conventionally 3 mm.
We check four parts:
4 × 586 + 3 × 3 = 2353 mm.
remains:
2400 − 2353 = 47 mm.
Four blanks fit.
For 12 parts, a minimum of three perfect strips is needed.
But if each strip first requires removing 20 mm from one damaged end, the usable length becomes 2380 mm. Four parts still fit, but the margin decreases to 27 mm.
If the production length increases to just 594 mm:
4 × 594 + 3 × 3 = 2385 mm.
With a usable length of 2380 mm, four no longer fit.
Then three planks turn into at least four.
So a few millimeters of allowance change the purchase of an entire series.
The usable length of the original plank may be less than the nominal length
Nominal length is what is specified in the catalog or invoice.
Usable length is what can actually be used for face parts.
The difference is created by:
- a damaged end;
- crack;
- a knot;
- crushing;
- a surface defect;
- an area that is not suitable for a clear finish;
- the first base cut.
For a painted part, some visual defects may be less critical.
For clear oak, on the contrary, the craftsman may deliberately exclude an area from the face element.
Therefore, before serial cutting, it is useful to inspect the entire strip and mark:
usable zones
и
and excluded zones.
After that, the cutting map becomes realistic.
Example with a defective zone
The strip has a nominal length of 2600 mm.
80 mm at one end is damaged.
Another 120 mm in the middle the craftsman does not want to use on the face part due to a noticeable defect.
The usable length is no longer 2600 mm.
Moreover, these 200 mm cannot simply be subtracted as a single number, because the defect is in the middle and divides the strip into two sections.
The cutting plan depends on which lengths are needed.
For short parts, such material may be quite suitable.
For one long upright, it is no longer suitable.
That is why a defect map is more important than the overall waste percentage.
The milling allowance depends on the type of milling
The phrase “still needs to be milled after purchase” by itself says nothing about the allowance.
It is necessary to clarify what exactly the cutter does.
Decorative recess within the plane
For example, a shallow groove on the facade.
The outer dimensions of the part may not change at all.
A width allowance is not needed just because milling is present.
Groove
The outer dimension is usually preserved.
Critical:
- depth;
- width;
- position;
- residual wall thickness.
Here the blank size must guarantee sufficient thickness after pocketing, but it does not necessarily have to be wider.
Quarter
Part of the material is removed from the edge.
The outer dimension in one direction may remain the same, but a step appears.
The residual cross-section must be checked.
Forming the outer contour
This is where additional geometric freedom is often needed.
If the craftsman forms a curved contour from a rectangular base, the original workpiece must fully cover this contour.
The most reliable method is to overlay the finish contour on the rough rectangular blank and check the minimum allowance at all critical points.
Profile along the edge
If the cutter removes the edge, the workpiece must account for the volume of material removal.
But again — not "plus 5 mm in general," but the specific tool cross-section and machining path.
External milling of a shaped part: calculate using the bounding rectangle
Let's imagine a future shaped part with maximum finish dimensions of 300 × 120 mm.
If the contour has protrusions, narrow necks, and curved sections, the workpiece must cover the entire pattern.
Working method:
- build the finish contour at a 1:1 scale;
- enclose it with a minimal rectangle;
- add machining allowance only on the sides where the tool must form a finished edge;
- check the clamping and locating zones.
Sometimes for a 300 × 120 mm part, a 304 × 124 mm blank is quite sufficient.
Sometimes, due to the clamping method, much more will be required.
Therefore, the size of the bounding rectangle is only the first step.
Locating may require more material than the milling itself
The milling cutter may only need to remove 2 mm along the edge, but the machine needs an area where the workpiece can be held safely.
If the clamp falls within the future contour, the machinist is forced to leave a machining "tab" or an extended zone that will be removed later.
This is a good example of why the allowance is determined not only by the part's drawing, but also by the tooling.
For a large batch, it is worth trying to reduce this tail after the fastening has been worked out — the excess material is repeated on every unit.
A conditional example by width
The finished width of the part is 50 mm.
The workshop wants to form both longitudinal edges, removing 1.5 mm from each side after calibration.
Production width:
50 + 1.5 + 1.5 = 53 mm.
If the supplier offers a planed blank of 52 mm, it no longer matches the adopted route.
You can change the technology, but you cannot simply hope that “a millimeter will somehow be enough.”
For drilling, what is more often needed is not an allowance, but the correct mounting zone
Drilling clearly shows why not every operation should be converted into additional millimeters on the outer dimensions.
If a hole is needed in the finished part, what matters more:
- the distance from its center to the edge;
- diameter;
- depth;
- grain direction;
- the thickness of the part;
- the size of the fastener;
- the ability to clamp the workpiece;
- the presence of material around the hole.
For example, a 40 mm wide finished strip may be sufficient for drilling as well.
Increasing it to 45 mm just because "there will still be a hole" is pointless if, after drilling, it must still remain 40 mm and the edges are not being processed.
When allowance is still needed
If the hole is first used as a technological datum, and then the edge of the part is trimmed, the position of the hole is calculated relative to the production dimension and the future finished edge.
If you drill first and then shorten the part, it is important not to cut off the mounting zone.
Therefore, the sequence of operations must be visible in the routing sheet.
Hole near the edge
The closer the hole is to the end or edge, the more important it is to verify the specific wood and fastener.
Here, a design calculation cannot be replaced by a universal "minimum offset" without data on the joint.
You need to look at the specific structure.
Drilling after finishing and before finishing are different routes
If the hole is made before coating, the craftsman can safely use a template, check for chips, and, if necessary, slightly refine the edge.
If drilling is performed after finishing, the risk of damaging the coating becomes a separate factor.
Therefore, for a serial part it is better to decide in advance:
- when to drill;
- which side to use as the base;
- how to protect the face surface;
- whether a test sample is required after finishing.
The outer overall dimension itself may not change.
That is, the operation is highly important, while the allowance in length and width is zero.
This once again shows that "there is subsequent processing" does not equal "the part must be enlarged on all sides."
Drilling and future trimming must share a common datum
Let's imagine a part 610 mm long that, after drilling, needs to be trimmed to 600 mm.
If the hole in the finished part must be 40 mm from the end, you cannot simply measure 40 mm from the rough end of the 610-millimeter blank.
You need to consider exactly how much will be removed and from which side.
The easiest approach is to set the hole from the datum that will remain on the finished part.
If such a datum does not yet exist, first create it by trimming, then drill.
This reduces the accumulation of dimensional error.
Sanding: light preparation and correcting geometry are not the same thing
Final sanding removes a very thin layer and is needed primarily for surface quality.
If the workshop plans to remove serious warping by sanding, it is better to call the situation honestly:
this is already correcting geometry, not ordinary preparation for coating.
Why is this important?
Because the expectation of “we’ll sand it later” often masks an incorrectly chosen degree of readiness of the workpiece.
If the part must have an exact thickness, and the supplied stock varies greatly in size, you need:
- calibration;
- planing;
- Milling;
and not an attempt to remove millimeters with a sander.
When the sanding allowance has almost no effect on the purchase size
If the surface is already flat and the craftsman only:
- removes light fuzz;
- brings it to primer-ready condition;
- prepares it for oil or varnish,
the difference in dimensions is minimal.
In this case, there is no point in noticeably increasing the workpiece.
When the allowance is needed in advance
If, after cutting or milling, the craftsman deliberately leaves the surface slightly larger for subsequent calibration, this is already a separate technological operation.
It must have its own allowance and its own norm.
Blanks for the frame: 45° angles require calculating long and short points
A carpentry frame is a good example where the finished length of one side is ambiguous.
The profile is cut at 45°.
You can measure:
- by the outer contour;
- along the inner contour;
- along the axis.
The workshop must choose one system.
If the outer size of the frame:
500 × 800 mm
this does not yet mean that rectangular blanks can simply be cut at 500 and 800 mm without taking into account the profile shape and the long miter points.
What to check
- profile width;
- direction of the face side;
- long point;
- short point;
- test corner allowance;
- quality of the first cut;
- repeatability of the four corners.
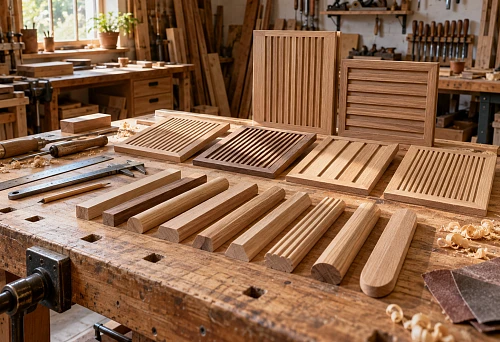
For a furniture frame, it is convenient to use a ready-made Wooden trim, when the profile is already formed and the workshop only has cutting, joining, finishing, and installation left.
Test corner
Before a batch of frames, it is useful to first make two short offcuts and check one corner.
This way the craftsman will see:
- the actual joint;
- profile orientation;
- coating behavior;
- whether the stop or template needs adjustment.
A test corner uses less material than redoing four long parts of the first frame.
Example of a frame made from 30 mm profile
Let the outer finished size of the frame be 600 × 900 mm, and the profile width be 30 mm.
The inner size comes out to approximately:
540 × 840 mm, if the profile takes up 30 mm on each side.
For the four parts, the craftsman decides to measure the length along the outer long points:
- two verticals of 900 mm each;
- two horizontals of 600 mm each.
Now each part needs a technological allowance for the first test cut and the clean joint only to the extent used by the specific mitre-cutting scheme.
If the profile comes in 2400 mm strips, you can separately check the layout of long and short elements.
Two verticals:
900 + saw kerf + 900
leave a significant remainder.
This remainder can yield one 600 mm horizontal piece if the lengths and saw kerf allow.
Therefore, the total perimeter of the frame:
2 × 900 + 2 × 600 = 3000 mm
does not mean that for one frame it is enough to buy “exactly three meters” in random pieces. You need actual source lengths from which the required set of long and short parts is assembled.
Series of frames: long elements first
If you need ten identical frames, first reserve 20 verticals of 900 mm each.
Only after this are the remnants distributed along the horizontal lines.
This is how the workshop protects the parts that are hardest to obtain from short remnants.
This is the same principle as with furniture moldings: linear footage does not replace a cutting plan.
Blank for a post or support: the height allowance depends on the upper and lower joint
For a post, you cannot look only at the overall height.
Need to check:
- lower joint;
- upper joint;
- fasteners;
- holes;
- presence of a tenon or seating part;
- possibility of clean end trimming;
- decorative profile.
If a ready-made furniture leg is purchased, it cannot automatically be considered free to shorten.
At the end there may be:
- mounting plate;
- a threaded element;
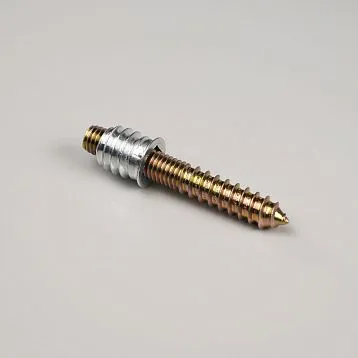
- a metal base;
- decorative profile;
- a prepared mounting assembly.
Therefore, before trimming the finished product, you need to check the specific geometry.
For choosing ready-made supports, the section is useful of wooden furniture legs, and for your own finish — from STAVROS open boundless possibilities for designers, furniture makers, and anyone striving to create unique high-quality furniture..
When a finished geometry is more advantageous than a large rough blank
If the craftsman wants to get a complex turned leg and is still going to:
- buy a large beam;
- turn;
- sand;
- check four identical parts,
it may be more cost-effective to buy an already formed support and keep only the adaptation and finishing for yourself.
Then the allowance is needed not for the entire geometry, but only for those operations that will actually remain.
Post with a tenon: the finished height and the length of the workpiece differ intentionally
Let's imagine a vertical piece that, after assembly, should give a visible height of 700 mm, but on top a 20 mm long tenon is formed that fits into a cross piece.
Then the full finished size of the part itself is no longer 700 mm, but at minimum includes this structural section — if 700 mm refers only to the visible part.
That is why in the drawing it is useful to separate:
- visible height;
- overall length of the part;
- tenon length;
- allowance for clean end trimming.
Otherwise, the purchaser may take a base "at 700 mm", and the technologist will discover that there is no material left for the tenon.
Support with metal mounting
In a finished support, part of the height may be taken up by the mounting assembly or a metal element.
Trimming from the bottom or top can destroy the standard mounting system.
Therefore, for finished furniture legs, the trimming allowance cannot be planned before checking the product card and drawing of the specific item.
Sometimes the right choice is not to leave any allowance on a finished leg at all, but to select a different size.
Wooden blank for decor: do not leave an allowance where it will destroy the relief
With a finished carved or shaped element, there is the opposite problem.
A craftsman may want to use it as a basis for their own modification.
Before doing so, you need to determine:
- which areas can be trimmed;
- where the relief begins;
- whether the mounting plane remains;
- whether the symmetry is disrupted;
- whether the thin edge disappears;
- whether the space for the fastening is preserved.
For a finished carved overlay, the allowance cannot be "assigned" retroactively.
The geometry has already been formed.
If the piece is too large, it is better to find another size than to cut the ornament randomly.
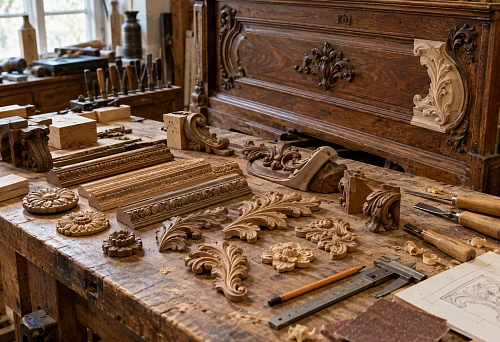
For such tasks, they use Carved decorative inserts for furniture and the general section wooden carved decoration.
When a rough rectangular blank is exactly what is needed
If the craftsman intends to create an original relief himself, he does not need a ready-made overlay.
Then an ordinary blank of sufficient dimensions is the rational choice.
But the allowance is determined by:
- the depth of the future carving;
- the shape of the outer contour;
- the method of fastening;
- the ability to safely position the part.
This is a different technological approach.
A shaped or turned base can drastically reduce the required allowance.
Not every woodworking project has to start with a rectangular block.
If the future part has a complex repeating shape, the craftsman can buy an already formed component.
In the section STAVROS wooden construction set ready-made elements are presented, from which furniture and interior solutions are assembled.
In such a scenario, the size of the workpiece is determined no longer by the allowance for fully forming the part, but only by the remaining operations:
- trimming;
- drilling;
- assembly;
- by finish.
This fundamentally changes the material calculation.
Draft version
You need to allow a margin for:
- the entire outer contour;
- fixturing;
- profile forming;
- possible defects on the first part.
Completed version
The geometry is already there.
An allowance is only needed where the craftsman deliberately plans his own finishing work.
Therefore, comparing the price per kilogram of wood and the price of a finished shaped component directly is incorrect.
All remaining operations must be counted.
Actual yield from a bar: parts first, then meters
Let's imagine a batch of 24 identical posts.
Finish length:
600 мм.
The workshop has set its production length:
606 мм.
Source strip:
2600 мм.
Kerf width (assumed):
3 мм.
Let's check four parts:
4 × 606 + 3 × 3 = 2433 mm.
remains:
2600 − 2433 = 167 mm.
Four blanks fit.
Five:
5 × 606 + 4 × 3 = 3042 mm.
They don't fit.
So the theoretical yield is four blanks from one bar.
For 24 parts:
24 / 4 = 6 planks.
But this calculation is only for ideal material.
Add one trial piece
If one separate trial post is required before the series, the total number of production blanks becomes 25.
Six planks will yield only 24.
This means a seventh plank is needed, or the trial piece must be obtained from another agreed-offcut.
This is why “plus one sample” sometimes dramatically changes the purchasing quantity.
Add a defect zone
If one of the six main planks has a 250 mm unusable section, the actual usable length is:
2600 − 250 = 2350 mm.
Four blanks of 606 mm no longer fit.
The theoretical batch yield changes.
That is why, before a production run, one must distinguish:
nominal yield
и
actual production yield.
Comparison of 2400 mm and 2600 mm bars
For the same production length of 606 mm and a 3 mm saw kerf:
from 2400 mm:
3 × 606 + 2 × 3 = 1824 mm; four already require 2433 mm and do not fit;
From
Summary table: where allowance usually occurs and where it does not
| Subsequent operation | Is an allowance for overall dimensions needed | What to check |
|---|---|---|
| Finish trimming | yes, for the machined end | end condition, locating scheme |
| Longitudinal cutting | yes, in the cutting direction | kerf width, clean edge |
| External milling | Usually yes | contour, tooling, locating |
| Groove inside the part | often no | residual wall, position |
| Drilling | Usually not | edge, diameter, fastening, base |
| Light sanding | Minimal | Surface Quality |
| Calibration | Yes | actual removal |
| 45° miter cut | depends on the dimension system | long/short point, test angle |
| Custom finishing | does not fit the dimensions | surface, material, sample |
| On-site fitting | yes, where the trimming will be | actual joint |
This table does not replace a process engineer. It helps avoid two opposite mistakes:
- not buying a blank "to zero" when material will actually be removed;
- not inflating the dimensions on all sides just because some operations remain after purchase.
A trial part must be produced before the main batch purchase
The more complex the processing, the more valuable a single trial piece is.
Working scheme:
SKU or material → production size → allowance → processing → final inspection → finishing → approval → batch.
A trial part allows you to check:
- whether the allowance is sufficient;
- whether the fixturing is convenient;
- whether a defect falls within the working area;
- whether the actual size matches the calculation;
- whether the sequence of operations is correct;
- whether the template needs to be changed;
- how the material behaves after milling;
- whether the surface is suitable for finishing.
Why you shouldn't buy 100 identical blanks at once
If the allowance is calculated incorrectly, the error is multiplied across the entire batch.
Suppose a workshop bought 100 parts with a length of 605 mm for a finished size of 600 mm.
After the first instance, it turned out that the actual routing requires 608 mm.
The remaining 99 no longer conform to the process.
A test piece is cheaper than such a mistake.
The statement must be recorded in writing
After a successful test, record:
- source size;
- finished size;
- allowance;
- equipment;
- kerf width;
- sequence of operations;
- control dimensions.
Now the series relies not on the craftsman's memory, but on a verified map.
What to measure after approving the test piece
After the test, the workshop already has actual source data:
- actual allowance;
- actual kerf width;
- actual yield during milling;
- processing time;
- material usability percentage;
- yield from the plank;
- quality of the remainder.
Now the batch can be calculated much more accurately.
For example, the initial estimate assumed 7 planks of 2600 mm.
After a trial cut, it turned out that the usable remainder from every second plank is suitable for another short part of the project. Formally, the number of planks did not decrease, but the total material cost was distributed across two types of products.
And vice versa: if the first 40–50 mm consistently have to be removed from the end of the material, the purchase may increase by one additional plank.
The reserve norm must be justifiable
The phrase "add 10 percent" is convenient, but it poorly shows the reason.
It is better to split the reserve:
- one trial part;
- one possible processing defect;
- one spare blank for urgent repair;
- an additional strip due to unstable defects.
Then the workshop sees why it is buying extra material.
If the risk disappears, the reserve can be reduced.
How to record a blank in the specification
Line:
wooden part — 30 pcs.
not suitable for production.
One must distinguish:
- source material or item code;
- purchase size;
- production blank size;
- finished size;
- the material;
- remaining operations;
- quantity.
Example of a clear entry:
PART-04 | beech | source strip 2600 mm | blank 606 mm | finished 600 mm | trimming, drilling, finishing | 24 pcs.
If a ready-made profile is purchased:
PART-05 | profile item code | source strip length | part 420 mm | 45° cut, finishing | 20 pcs.
If a ready-made element:
DET-06 | item code | without trimming | drilling and finishing | 8 pcs.
This shows where an allowance exists and where it does not.
Store the cutting plan separately
The specification answers:
what needs to be made.
The cutting plan answers:
how to obtain this from the purchased length.
Mixing these documents into one line is inconvenient.
For a series, it is better to keep:
- list of finished parts;
- dimensions of production blanks;
- layout for cutting from the source boards;
- remainders;
- reserve;
- trial part.
The cutting map must have a version
If, after the trial part, the production length changed from 606 to 608 mm, the old map is no longer valid.
It cannot be left nearby without a mark.
Even two millimeters can change the yield from the board if the cutting layout was tight.
Therefore, after the trial piece is approved, the map receives a date or version number.
This is especially useful in a workshop where cutting and assembly are performed by different people.
When a finished part is more advantageous than a large blank
The main economic question of the article appears here.
Let's imagine two paths.
Path 1. Buy rough lumber
After purchase, you need to:
- cut to size;
- calibrate;
- mill;
- drill;
- sand;
- finish.
Path 2. Buy ready-made geometry
Remaining:
- check;
- minor adaptation;
- holes;
- finish;
- Installation.
You need to compare:
material cost + machine time + craftsman time + tooling + trial + defects + finishing
with:
cost of the ready-made component + remaining processing + finishing.
Small series
For four complex parts, purchased geometry often has a strong advantage because the machine setup is spread across only four pieces.
Large batch
For 400 identical parts, in-house production can become more cost-effective.
The setup is spread across hundreds of units.
Therefore, a ready-made component is not universally the best solution.
But it is especially useful where the workshop wants to remove a complex and rare operation from its workflow.
When material cost is most misleading
The most dangerous case is a cheap rough blank for a complex one-off part.
At purchase, it looks advantageous.
After adding:
- the settings;
- test machining;
- correction of the first error;
- sanding;
- control,
it may turn out to be more expensive than a ready-made semi-finished product.
Therefore, the final comparison should be made after the process route has been filled in.
Cost calculation should be carried out up to the finished part
To compare two options, it is useful to bring them to the same point of readiness.
Suppose a workshop is choosing between two blanks for 24 parts.
Option 1 — a rough blank.
After purchase, the following are needed:
- initial cross-cutting;
- calibration;
- Milling;
- drilling;
- Sanding.
Option 2 — the pre-assembled semi-finished product.
After purchase, the following remain:
- finish crosscutting;
- drilling;
- finishing.
Let's assume the rough base is conditionally cheaper by 700 rubles per part.
For 24 pieces, the purchase difference is:
700 × 24 = 16,800 rubles.
Now let's add only those operations that are not present in the second option.
If the additional processing of the first scheme takes an average of 22 minutes per part:
22 × 24 = 528 minutes, or 8 hours 48 minutes.
At a conditional internal cost of a production hour of 1,800 rubles:
8.8 × 1,800 ≈ 15,840 rubles.
The purchase difference almost disappeared even before accounting:
- the tool;
- the settings;
- test specimen;
- possible defects;
- additional sanding.
This is not proof that the formed option is necessarily cheaper. The figures are conditional.
But the example shows the correct point of comparison: not the price of the blank, but the cost of achieving the same finished state.
Setup time must be distributed across the number of parts
Suppose a milling operation requires 45 minutes of setup and 6 minutes per part.
For four items:
- setup — 45 minutes;
- machining — 24 minutes;
- total — 69 minutes;
- one part accounts for 17.25 minutes for this operation alone.
For 100 parts:
- setup — the same 45 minutes;
- processing — 600 minutes;
- total — 645 minutes;
- per part — 6.45 minutes.
This shows why the same purchased blank can be rational for a small batch and unprofitable for a large one.
The smaller the batch, the more expensive each changeover is per part.
When should the allowance be recalculated after the first ten
For a long production run, it is useful not to treat the first technological allowance as sacred.
After the first 10–20 parts, it is already clear:
- how much is actually removed at the ends;
- how stable the material is;
- whether a full allowance is required on both edges;
- how much scrap is produced;
- which offcuts can be used.
If the process has stabilized, the size of the production blank can be optimized.
For example, the first batch was made with a length of 608 mm for a finished 600 mm. After inspection, it turned out that the actual operation reliably fits within 605 mm.
On a single part, saving 3 mm looks negligible.
For 500 parts, this is already:
3 × 500 = 1500 mm of production length.
But even here, what matters more is not the sum itself, but the ability to change the yield from a whole board.
Therefore, after optimization, the cutting map must be recalculated from scratch.
Do not reduce the allowance just to save material
Optimization has a limit.
If the margin becomes so small that the craftsman is forced to "chase" every end and loses time on careful processing, saving wood can turn into increased labor and defects.
A good allowance keeps operations stable.
That is, the technological goal is not the minimum possible millimeter, but the minimum reliable size at which the batch consistently meets the finish tolerance.
Where to find blanks and ready-made wooden elements for joinery products
For a general selection, you can use the section of wood and MDF products.
If the workshop needs pre-formed shaped bases — wooden construction set.
For specific tasks:
- wooden furniture legs;
- from STAVROS open boundless possibilities for designers, furniture makers, and anyone striving to create unique high-quality furniture.;
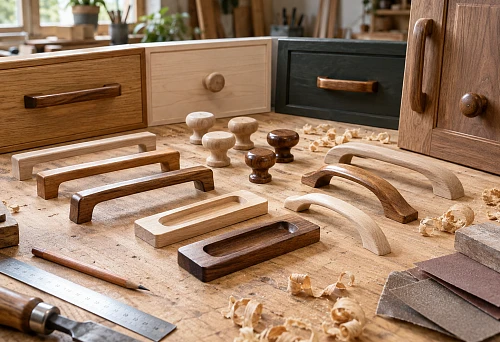
- unpainted wooden handles;
- Carved decorative inserts for furniture;
- Carved wooden decoration;
- Wooden trim;
- Wooden planks;
- Product samples;
- drawings and product models;
- information about the quality of wooden products;
- Mounting and finishing materials;
- conditions for manufacturers;
- Payment and delivery.
But you shouldn't start your search with the category.
First, answer three questions:
- what finished size is needed;
- what operations will remain after purchase;
- how much material each operation will actually remove.
After that, the production size is determined.
And only then is the blank or finished element selected.
Main principle:
the allowance is needed not because we are dealing with a "blank," but because the specific next operation requires additional material.
Cross-cutting requires one allowance.
Forming the outer contour requires another.
Drilling may not require any increase in overall dimensions at all.
Light sanding should not become a justification for an oversized blank.
And a finished, formed part can practically eliminate the allowance for geometry, leaving only local fitting and installation.
When the workshop thinks exactly this way, the purchasing size stops being a guess. It becomes the result of a process chart — and the series is repeated no longer "approximately," but according to a verified production size.