Article Contents:
- Short answer: which batten to buy for lathing
- Where wooden batten is used as lathing
- Main application scenarios
- Wooden batten for panels: when it is convenient
- Drywall on wooden battens: what is important to consider
- Which cross-section to choose: table of wooden batten sizes
- Planed or regular batten: what to buy for interior finishing
- How to check the batten before purchasing
- Batten inspection checklist
- How to calculate the number of battens for lathing
- Calculation scheme
- Example calculation
- Wooden batten price: what it depends on
- Key pricing factors
- Mistakes when buying battens for lathing
- Typical miscalculations
- What to buy together with a wooden batten
- Decorative elements and accessories
- Wooden batten for interior finishing: nuances of working with the material
- Batten acclimatization
- Pre-installation treatment
- Installation direction
- Fasteners
- How to choose a batten for a specific interior style
- Batten in loft and industrial style
- Batten in a classic interior
- Batten in Scandinavian interior and Japandi style
- Batten in modern minimalism
- Conclusion: how to approach the choice correctly
- FAQ: Answers to Popular Questions

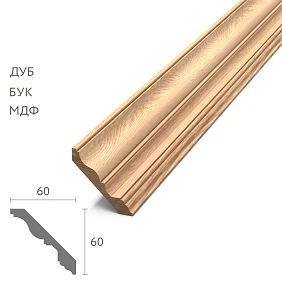
Short answer: which batten to buy for lathing
If you already know that you need a wooden batten for lathingThe main thing is not to waste time on secondary details and immediately move towards the right choice. The task of the lathing is simple in essence, but requires precision at the input: an uneven, damp, or geometrically unstable batten turns any installation into a problem even before the first fastener enters the wall.
For light interior finishing, frames for decorative panels, installation of moldings, and cladding tasks, the optimal choice is a smooth planed batten with a clear cross-section and verified geometry. For small tasks, thin battens with a cross-section of 10–20 mm are sufficient. For a more serious base for panels, slatted structures, and final finishing, the correct size is 20×40, 30×40, or 40×40 mm. If it concerns drywall, you need to additionally consider the humidity of the room, the nature of the base, and the load.
Buy Wooden planks with even geometry, the required cross-section, and high-quality surface treatment — means immediately closing the issue of the base and moving on to the final finishing without rework.




Where wooden batten is used as lathing
Wooden batten in the role of lathing is a mounting base, without which most finishing scenarios are either impossible or unstable. Before buying a wooden batten for lathing, it is worth determining exactly what task it is for. Different scenarios dictate different cross-sections, installation spacing, and requirements for processing quality.
Our factory also produces:
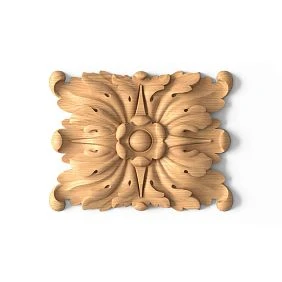
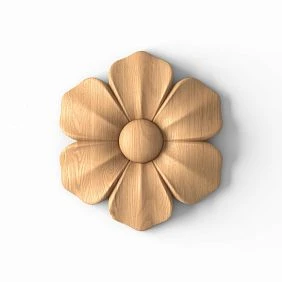
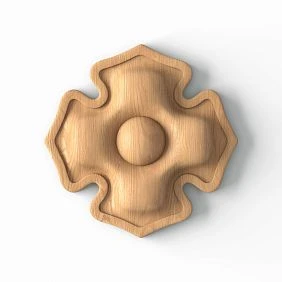
Main application scenarios
Here is a list of tasks where wooden batten for wall finishing is used as a load-bearing or mounting base:
-
Frame for decorative panels — battens are attached to the wall vertically or horizontally, panels are fixed on them. The geometry of the batten directly affects the evenness of the final coating.
-
Base for slatted panels and linear elements — during installation of solid wood slatted panels the lathing acts as a leveling layer between the load-bearing wall and the decorative covering.
-
Underlayment for wooden linear elements — Pogonazh iz massiva it attaches more securely when there is a flat wooden surface underneath, rather than an uneven concrete or brick wall.
-
Leveling the wall plane before cladding — if the wall has minor deviations, lathing from slats with shims helps create a single mounting plane.
-
Installation on the ceiling — horizontal slats form the base for ceiling panels, slatted structures, and decorative grilles.
-
Designing niches and slopes — in niches, the slat is used to create an internal frame for the final finish.
-
Base for decorative grille — when installing decorative wooden grilles, the lathing fixes the elements in the desired position.
-
Wall preparation for wooden cornice, trims and moldings — the slat creates a flat surface for precise abutment of decorative elements.
Each of these scenarios requires its own approach. The general rule is: the more critical the task and the heavier the finish, the stiffer the base needed. And the more important the quality of the batten itself.
Get Consultation
Wooden batten for panels: when it is convenient
Wall paneling is one of the most popular ways to create a textured, warm, and expressive interior without spending a lot of time and resources. But most walls have their own history: unevenness, traces of old finishes, protrusions, and plane differences. This is where the Buy wooden skirting board which can be used as a mounting base that levels the working plane.
When panels are attached directly to the wall, even a small bump or dip causes some panels to come off, creak, or look uneven. A lathing made of wooden battens solves this problem radically: horizontal or vertical guides are mounted with shims according to the level, creating a single plane. The panels lie precisely on it and hold securely.
Important: for such tasks, finishing wooden battens must be planed, with smooth edges and a consistent cross-section along the entire length. A warped batten is not just an aesthetic defect; it is a warped plane for the future finish. Check each piece before fastening.
For lightweight panels — MDF, plywood, thin clapboard — a batten with a cross-section of 20×40 mm and a spacing of 400–600 mm is quite sufficient. For heavier wooden elements, massive of slatted panels and composite structures, it is better to consider a cross-section of 30×40 or 40×40 mm with a reduced spacing.
Another argument in favor of wooden lathing under panels is the convenience of hidden utility routing. In the space between the wall and the lathing, it is convenient to place wires, cables, and small tubes. This is relevant for renovations without demolishing walls.
Drywall on wooden battens: what is important to consider
The topic of drywall and wooden battens is among the frequently asked and not always straightforward ones. Yes, such a scenario exists: in some cases, drywall is mounted on wooden battens in dry indoor spaces with normal humidity levels. This can be justified when there is no possibility or desire to use a metal profile, and the load on the structure is minimal.
But here it is important to clearly understand several things.
Firstly, wood and drywall react differently to changes in humidity. Wood expands and contracts — and if the batten is damp or poorly dried, over time it will pull the entire structure along with it. Secondly, the fastening step during such installation matters: for reliable holding of drywall sheets, the lathing must be correctly calculated in terms of cross-section and spacing. Thirdly, for rooms with high humidity (bathrooms, kitchens, basement floors), a wooden batten as a base for drywall is not the best choice.
For dry living rooms, where drywall is needed as a leveling layer of small height, wooden lathing is quite appropriate. The main thing is to take a dry planed batten with a cross-section of at least 20×40 mm, check the plane with a level, and use the correct fasteners according to the spacing.
If the task involves serious load, complex geometry, or a room with a variable microclimate, it is better to check the technology and material compatibility in advance, without relying only on general recommendations.
Which cross-section to choose: table of wooden batten sizes
Choosing the cross-section of the batten is not a matter of taste, but a calculation of load, spacing, and type of finish. A mistake here costs redoing the entire structure. The table below will help you quickly navigate the sizes.
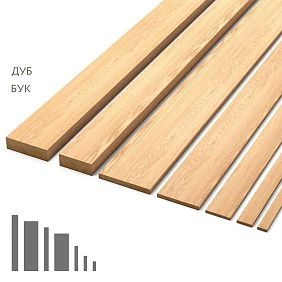
| Slat size | Where to use |
|---|---|
| 10 mm (flat) | Thin pads, light plane correction, small decorative tasks, leveling individual sections |
| 10×20 / 10×30 | Light interior finishing, auxiliary guides, small installation areas, substrates for moldings |
| 20×40 | The most popular format: a reliable lathing for panels and covering, optimal stiffness-to-weight ratio |
| 30×40 / 40×40 | A stiffer base, high walls, large heavy panels, loaded ceiling areas |
| 50×50 | Reinforced structure where maximum stiffness is needed: under heavy massive elements |
A 10 mm wooden batten is the thinnest format, used exclusively as a lining or adjusting element. It is not designed to bear load on its own. A 10 mm wooden batten works well in combination with thicker battens when you need to precisely set the plane at several points.
wooden strip 20×40 — the workhorse of most installation tasks. This size is most often purchased for wall lathing because it provides sufficient stiffness with low weight and accepts standard fasteners well. Buying a planed wooden batten 20×40 means getting a material ready for installation without additional processing.
Sections 30×40 and 40×40 are chosen when the wall height exceeds 3 meters, the finish involves significant weight, or the spacing between battens is increased due to installation conditions. In these cases, a thin batten begins to sag in the span, which is unacceptable for a flat plane.
Planed or regular batten: what to buy for interior finishing
This question arises for most buyers: why pay more for a planed batten if the appearance under the cladding is still not visible? The answer lies in geometry and performance.
buy sanded wooden plank costs more for one simple reason: it has precise dimensions. A planed surface means that all four edges are processed, the cross-section is constant along the entire length, and the planes are parallel to each other. This seems like a technical detail until you try to set up lathing from an unplaned batten with a "wandering" cross-section — and realize that one row is 2 mm thicker than another.
A regular construction unplaned batten is cheaper. But it requires additional inspection, often has an uneven cross-section, a fuzzy surface, and higher residual moisture content. For rough work where precision is not critical, it will do. For wooden batten for wall finishing, frames for decorative coatings and any tasks where plane matters, it's better to take planed one.
Sanded wooden batten is the next level of processing. Such a batten not only has a precise cross-section, but also a smooth surface without fuzz and burrs. This is relevant when the batten is partially visible in the structure — for example, in open slat systems, niches with lighting, or decorative frames.
Planed wooden batten 20×40 is the optimal choice for most interior finishing tasks: the mounting plane is level from the first try, and fasteners go in without skewing.
How to check a batten before buying
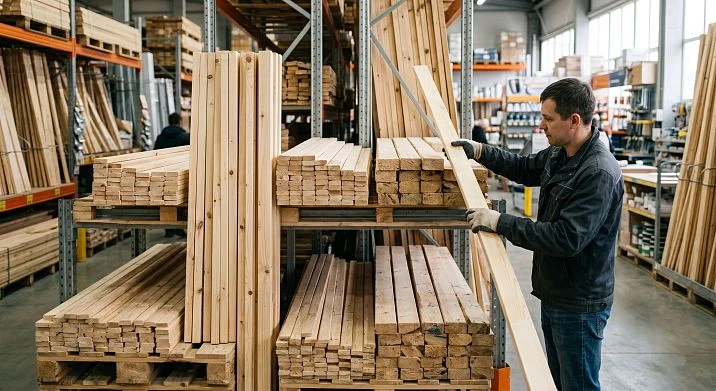
When buying wooden battens for lathing wholesale or individually, you shouldn't rely only on the description. A good batten is easily checked visually and by touch — you just need to know what to look for.
Batten inspection checklist
-
Straightness along the length — place the batten on a flat surface or press it against a wall. A good batten fits without gaps.
-
No twist — lift the batten to eye level and look along the end. Twisting along the axis by even a few degrees is a defect for lathing.
-
Dryness — the batten should not be cold and heavy. Damp wood dries out, warps, and cracks already in the installed state.
-
Consistency of cross-section — apply a ruler at several points along the length. A deviation of more than 1 mm indicates unstable geometry.
-
Surface finish cleanliness — a planed batten should have no fuzz, burrs, or unsawn areas.
-
Absence of large cracks and chips — small surface cracks are not critical, but through cracks or those running along the grain reduce strength.
-
Suitable length — standard lengths are 2–3–4–6 meters. Make sure the required length is in stock, otherwise you will have to make extra joints.
-
Compatibility with fasteners — a thin batten will not withstand a large-diameter self-tapping screw without pre-drilling.
The check takes a few minutes but saves hours of rework. This is especially true for batches of several dozen pieces: even 5–10% defective battens in a batch can ruin an entire row of lathing.
How to calculate the number of battens for lathing
Calculation is not complicated but requires consistency. Inaccuracy at the calculation stage results either in a shortage of material in the midst of installation or in extra expenses for unused stock.
Calculation scheme
-
Measure the wall area or its width — consider all sections, including areas above door and window openings, if the lathing runs as a continuous strip.
-
Determine the spacing between battens — standard spacing for lightweight panels is 400–600 mm, for heavy panels 200–400 mm. Spacing for lining and thin plywood is usually 300–400 mm.
-
Calculate the number of guides — divide the wall width by the spacing, add one guide. This gives you the minimum number of battens.
-
Add horizontal battens — around the perimeter (top and bottom), as well as intermediate ones along the height depending on the rigidity of the covering.
-
Allow for trimming waste — at least 10–15% of the calculated quantity. For complex rooms with niches, sockets, corners, and openings, add 15–20%.
Example calculation
Wall width 3000 mm, height 2700 mm, batten spacing 500 mm.
-
Number of vertical battens: 3000 / 500 = 6, plus edge ones = 8 vertical battens
-
In height — battens 2700 mm long or with a composite joint
-
Horizontal battens around the perimeter and mid-height — another 3 horizontal guides
-
Total: 11 battens + 15% waste allowance = 13 battens
This is an approximate calculation. The actual situation depends on the location of sockets, doorways, slopes, and corner areas. In corners, battens are installed on both sides, which adds extra consumption.
The calculation should be done before the purchase, not after — otherwise, delivery costs hit the budget precisely at this stage.
Price of a wooden batten: what it depends on
The price of wooden battens varies widely, and this spread is not accidental. The price per piece of a wooden batten is determined by a number of factors that directly affect quality and applicability.
Key pricing factors
-
Cross-section — the larger the cross-section, the higher the material consumption and, accordingly, the price per linear meter.
-
Length — long battens (4–6 m) cost more in absolute terms, but are often more advantageous in terms of price per linear meter.
-
Wood species — pine is traditionally cheaper, oak and beech are dense hardwoods with a higher price. For interior finishing with subsequent painting, pine is quite suitable; for open elements with tinting, oak looks better.
-
Processing quality — unplaned batten is cheaper than planed, but requires additional processing at the installation site.
-
Planed or sanded surface — sanded batten costs more, but saves time on preparation.
-
Geometric stability — a precisely maintained cross-section with minimal tolerances is valued higher than standard construction batten.
-
Order volume — buying wooden battens for lathing in bulk is always more profitable than buying individually. When ordering large volumes from the manufacturer, the price per piece decreases significantly.
-
Appearance requirements — a batten "for enamel" (made of finger-jointed lamellas without texture matching) is cheaper than a batten "for tinting" with color and pattern matching.
-
Availability of finish coating — an unpainted batten is cheaper; if a batten with primer or finish varnish is needed, the cost increases.
When choosing, you should focus not only on the wooden batten price per piece, but also on the total cost: a cheap batten with poor geometry will require more time for adjustment, and therefore higher labor costs.
Mistakes when buying battens for lathing
Mistakes when buying wooden battens are widespread. Most of them repeat from project to project and are almost always solved by simple attentiveness at the selection stage.
Typical miscalculations
-
They buy too thin a batten for heavy finishing — a 10–15 mm batten does not hold massive panels and deforms under load, especially at attachment points.
-
They do not check humidity and geometry — a damp or twisted batten guarantees problems after installation: cracks in the finish, panel detachment, structure squeaking.
-
They take construction unplaned battens for visible decorative areas — in open slatted structures, niches with lighting, or decorative frames, unplaned battens look rough and require refinement.
-
They don't calculate the lathing step — they either buy too little (not enough for the entire perimeter) or with a huge surplus (unnecessary expenses).
-
They don't add a reserve for trimming — this is especially painful in rooms with niches, ledges, and non-standard angles.
-
They don't account for sockets, corners, and doorways — this means additional consumption of slats and non-standard installation areas.
-
They choose a slat without understanding the fastening method — a thin slat cracks when using a self-tapping screw without pre-drilling, especially near the end.
-
They use a wooden slat where a different type of base is required by technology — in wet areas, on loaded ceilings, or under heavy facing materials, wood may not be the best choice.
Each of these mistakes is easily avoided if you ask the right question in advance: what exactly do I need this slat for, and what should it withstand.
What to buy together with a wooden slat
Lathing is the foundation of finishing, but not the entire finish. When the base is ready, the final layer begins: panels, linear elements, moldings, baseboards, architraves. This is where the entire visual image of the space is formed.
Decorative elements and accessories
-
Wooden panels and solid wood slat panels — the main covering over the lathing, creating the texture and warmth of natural wood.
-
Pogonazh iz massiva — universal add-on elements for finishing the perimeter, joints, and transitions between surfaces.
-
Wooden angle — covers external and internal corners of the lathing and finishing, giving the entire structure a neat, finished look.
-
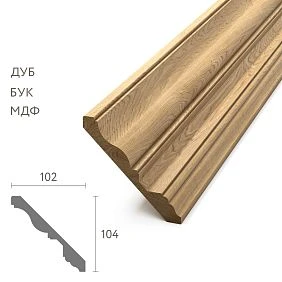
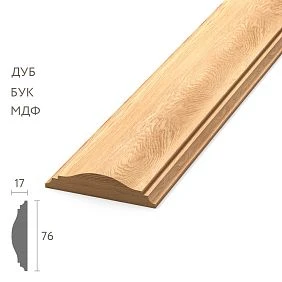
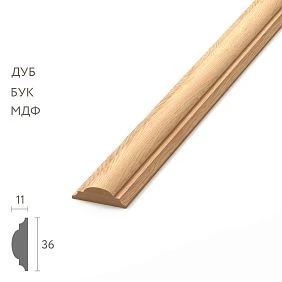
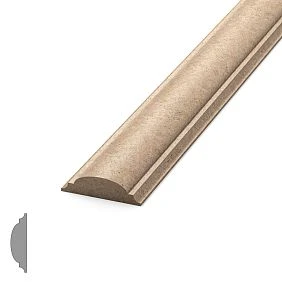
Wooden moldings — decorative profiles for finishing walls, transitions, frame panels, and accent areas.
-
Wooden baseboard — the main lower finishing element that covers the joint between the wall and floor. Works in tandem with any panel or slat wall finishing.
-
MDF Skirting Board — an affordable alternative to solid wood with good geometry and a wide range of profiles.
-
wooden cornice — the upper decorative element that completes the finishing at the ceiling. Looks organic with slat panels and wooden wall coverings.
-
Wooden casings — finishing of door and window openings, an essential element of a cohesive interior with wooden finishing.
-
Fasteners — dowels, screws, perforated hangers, and brackets for precise level installation of the lathing.
By selecting all of this in a unified concept, you get an interior where wood works as a complete system — from the lathing to the final cornice.
Wooden slat for interior finishing: nuances of working with the material
wooden planks for interior wall finishing — living material in the literal sense of the word. Wood breathes, reacts to temperature and humidity, and adapts to room conditions. This is both its strength and weakness.
Acclimatization of the batten
Before installing a wooden batten indoors, it must be kept in a horizontal position in the same space for at least 48–72 hours. This allows the material to absorb or release moisture until it reaches equilibrium with the surrounding environment. A batten brought from a cold warehouse and immediately installed in a warm room will inevitably deform.
Pre-installation treatment
Decorative wooden battens that will be covered with a finish can be left without additional coating. If the batten is partially exposed, it is better to treat it with a primer or antiseptic impregnation — this provides protection against biological damage, mold, and humidity fluctuations.
Installation direction
For horizontal panels, the battens of the lathing are mounted vertically; for vertical panels, they are mounted horizontally. This is a basic rule that ensures maximum support for each panel at multiple points.
Fasteners
The batten is attached to a concrete or brick wall using dowel nails or dowel screws. To a wooden base — with self-tapping screws with pre-drilling at the ends. The distance between attachment points is no more than 400–600 mm, depending on the cross-section of the batten.
How to choose a batten for a specific interior style
A batten is not just a utilitarian material. In a number of interior concepts, it itself takes center stage as a decorative element working in tandem with the finish coating.
Batten in loft and industrial style
In loft and industrial styles, wooden slats look good in their natural, slightly aged form. Slats with pronounced texture, dark oak tinting, or brushing treatment are appropriate here. Visible constructiveness is part of the aesthetic.
Slats in a classic interior
For classic, neoclassical, and art deco styles, precise cross-sections, a smooth surface, and compatibility with wooden moldingscornices and trims are important. Here, the slat acts as an invisible foundation on which all wall decor is built.
Slats in Scandinavian and Japandi interiors
In Scandinavian and Japandi interiors, light wood species, matte sanded surfaces, and minimal processing without excessive varnishing are relevant. Here, the slat is visible—and that is part of the design intent. Thin slats as decorative vertical lines on the wall create a characteristic rhythm and texture.
Slats in modern minimalism
In minimalist spaces, the slat works as a tool for zoning and texturing without unnecessary details. Precision of geometry, surface uniformity, and neat joints with molding elements made of wood.
Conclusion: how to approach the choice correctly
A wooden slat for lathing is the first decision in the chain of interior finishing installation. The evenness, strength, and durability of the entire structure above depend on its quality, geometry, and correct cross-section selection. This is not an element to skimp on at the risk of rework.
Before buying a wooden batten for lathing, define the task: base for panels, wall leveling, installation of decorative elements, or frame for interior finishing. Then choose the cross-section, length, processing quality — and calculate the quantity with a 10–15% margin. Only this approach gives a predictable result without extra trips to the store and overpaying for urgent deliveries.
STAVROS has been producing wooden interior products since 2002. During this time, the company's portfolio includes work with cultural heritage sites, top-level restoration projects, including the Konstantinovsky Palace, the Hermitage, and the Alexander Palace. Today, STAVROS offers a full range of planed wooden battens, slat panels, moldings, cornices, baseboards, and architraves made of solid oak and beech with Contact us to confirm shipping to your destination. Products without complaints, a large warehouse program, and adherence to production deadlines are not declarations, but proven practice from thousands of completed orders. Order a wooden batten for wall finishing or sanded wooden boards can be done directly on the company's website — from one piece with delivery to any region.
FAQ: Answers to popular questions
Which wooden batten to buy for lathing?
For light interior finishing, small cross-sections of 10×20 or 10×30 mm are suitable. For reliable lathing under panels and coverings, it is better to choose 20×40, 30×40, or 40×40 mm. The main criteria are even geometry, planed surface, and dry wood without deformations.
Can drywall be mounted on wooden battens?
In dry interior rooms with normal humidity levels, this scenario occurs. It is important to use dry planed battens with a cross-section of at least 20×40 mm, check the plane with a level, and maintain the correct fastening step. For critical structures and rooms with variable humidity, it is better to check the technology in advance.
Which is better: planed or regular batten?
For interior finishing, a planed batten is much more convenient: precise and consistent cross-section, smooth edges, clean surface without fuzz. It installs faster and creates a more even lathing. Unplaned batten is only suitable for rough work where plane accuracy is not critical.
What size batten should I choose for the panels?
For lightweight thin panels (MDF, plywood, thin lining) — 20×40 mm with a spacing of 400–600 mm. For heavier wooden panels and massive slatted structures — 30×40 or 40×40 mm with reduced spacing. The cross-section is selected based on the weight of the finish and the height of the wall.
How many battens are needed for wall lathing?
Divide the wall width by the spacing between battens, add two outer guides. Add horizontal battens around the perimeter and intermediate ones along the height. Increase the final quantity by 10–15% — a reserve for cutting and bypassing complex areas. Example: wall 3000 mm, spacing 500 mm — about 8 vertical battens plus reserve.
Where to buy wooden battens for lathing with delivery?
Buy wooden battens for lathing with Contact us to confirm shipping to your destination. on the STAVROS website. Delivery — from one piece via CDEK and DPD. Production in Saint Petersburg, showrooms in Saint Petersburg and Moscow.
Is acclimatization of the batten required before installation?
Yes. The wooden batten must be kept in the room in a horizontal position for at least 48–72 hours before installation. This allows the material to stabilize and prevents deformation of the lathing after installation.
What is the difference between a batten "for enamel" and a batten "for tinting"?
The "under enamel" batten is made by gluing lamellas without matching texture and color — it is cheaper and suitable for opaque coatings. The "under tinting" batten — with lamellas matched by color and pattern — is chosen for translucent finishes where the wood texture should be visible.