
























































Article Contents:
- What Does “Cabinet Molding” Mean in the United States?
- Why Polyurethane Molding Is Worth Considering for Furniture
- Polyurethane, wood, MDF, and plaster are not substitutes in every application
- MLDPU-001: the smallest visual gesture
- MLDPU-004: restrained cabinet-front definition
- MLDPU-002 and MLDPU-003: more visual weight
- Applied molding on kitchen cabinet doors
- Upper cabinet molding and cabinet crown molding
- Light rails, fillers, and toe kicks
- 1. Identify the door construction
- 2. Check the hinge-side sweep
- 3. Keep handles usable
- 4. Avoid appliance and high-heat conflicts
- 5. Inspect edge condition and reveal
- Convert linear feet into complete STAVROS molding strips
- What changes if you choose rope molding instead?
- What if you add four corner ornaments per door?
- Beaded molding: controlled classical rhythm
- Rope molding: a finer decorative twist
- Egg-and-dart molding: reserve it for suitable scale
- Traditional painted kitchen cabinets
- Modern cabinet molding on a flat-front kitchen
- Built-in wardrobes and armoires
- Dressers and chests of drawers
- Bookcases, display cabinets, and sideboards
- Step 1. Remove and label parts where appropriate
- Step 2. Inspect the existing finish
- Step 3. Mark a full-size frame
- Step 4. Dry-fit and test the opening arc
- Step 5. Cut the molding accurately
- Step 6. Apply the approved mounting system
- Step 7. Finish joints and paint
- Step 8. Reinstall and verify operation
- One color across the whole cabinet
- Contrasting decorative trim
- Antiquing, patina, and metallic details
- Faux wood and natural wood
- Buying STAVROS cabinet trim for a U.S. address
- What is cabinet molding?
- Can I add polyurethane molding to existing kitchen cabinets?
- Is polyurethane molding the same as a Shaker cabinet door?
- Which STAVROS polyurethane molding is suitable for a small cabinet front?
- Which profile gives a more classical cabinet look?
- What is the difference between beaded molding and rope molding?
- What is upper cabinet molding?
- How many linear feet do I need for six cabinet doors?
- Can I install molding over laminate or thermofoil cabinets?
- Can decorative trim be used next to an oven or cooktop?
- Can polyurethane molding support cabinet shelves or reinforce damaged doors?
- How do I match decorative cabinet trim to my handles?
- What is a furniture applique?
- Are STAVROS polyurethane moldings available for delivery in the USA?
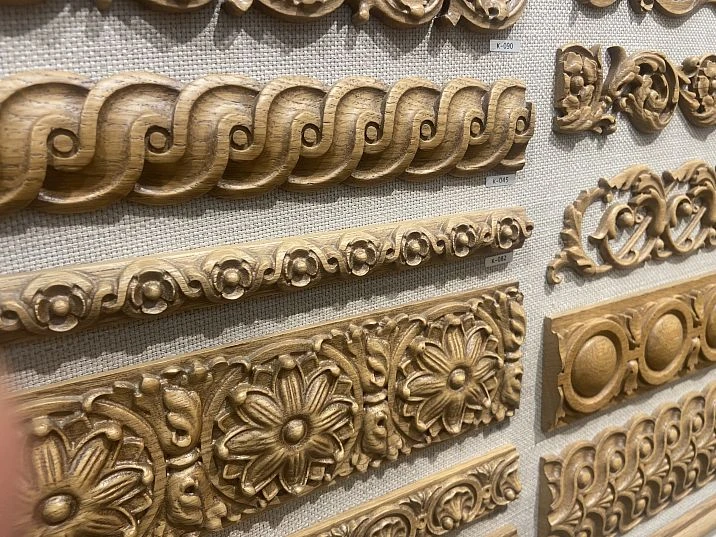
A flat cabinet door can look deliberately minimal, or it can look unfinished beside the rest of a carefully designed kitchen. The difference often lies in a few architectural details: a narrow raised border, a controlled shadow line, or a small ornamental accent. Cabinet molding makes it possible to introduce those details without assuming that every existing door must be replaced with an expensive carved or five-piece construction.
For American homeowners, cabinetmakers, and renovation contractors, the most useful question is not simply which molding looks best? It is which molding will fit a particular door, clear its hardware, bond to its surface, accept the intended finish, and remain appropriate for everyday furniture use? A decorative profile that looks elegant on a wall may be too deep for a full-overlay cabinet door. A wide floral band suitable for a tall armoire may be excessive on a 15-inch-wide upper kitchen cabinet. A product described as urethane molding may be suitable for paint-grade decoration, but that description alone does not establish its compatibility with every furniture substrate.
This guide explains how to use polyurethane decorative trim on cabinet doors, wardrobes, dressers, display cabinets, and selected built-ins. It draws on the actual STAVROS polyurethane molding collection, ornamental decorative trim, and polyurethane furniture appliques. You will learn how the different types of cabinet trim work, how to measure a raised frame, when to choose beaded or rope molding, how to calculate full stock lengths, and what to check before buying materials for a U.S. renovation.
The emphasis is applied decorative molding on furniture fronts. Traditional upper-cabinet crown molding, cabinet scribe, toe-kick trim, and structural door rails are different products and must be specified according to their actual functions.
What Does “Cabinet Molding” Mean in the United States?
Searching for cabinet molding or kitchen cabinet molding in the United States can lead to several distinct products. They may all be called trim, but their locations, geometry, and installation requirements differ.
| U.S. term | Typical location | Primary purpose | Can applied decorative polyurethane trim be considered? |
|---|---|---|---|
| Cabinet door molding / applied molding | On the face of a cabinet door or drawer front | Create a raised panel-style border | Yes, if the profile, substrate, clearance, and attachment are suitable |
| Cabinet crown molding | Across the top of wall or tall cabinets | Finish the upper transition to the ceiling or soffit | Only with a separately planned, suitable construction; not automatically interchangeable with face trim |
| Light rail molding | Along the bottom of upper cabinets | Conceal or frame under-cabinet lighting | Use a product specifically appropriate for its location, fixtures, and required clearances |
| Scribe molding | At cabinet-to-wall or cabinet-to-ceiling junctions | Conceal small installation irregularities | Generally a different fit-and-finish task from applied PU ornament |
| Cabinet edge or face-frame trim | Along cabinet edges or frame members | Finish visible cabinet construction | Depends on installation and structural requirements |
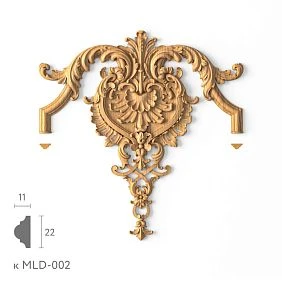
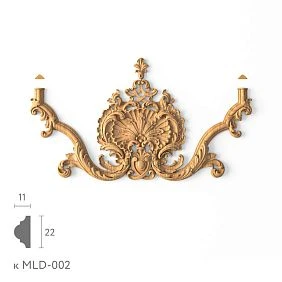
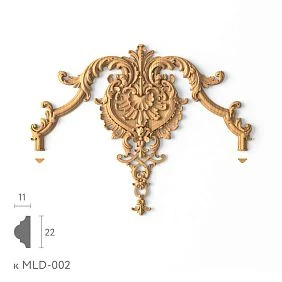
| Decorative onlay / applique | On a door panel, drawer face, or furniture body | Add sculpted floral, geometric, or classical relief | Yes, for a verified nonstructural application |
This distinction changes the shopping intent. Someone researching upper cabinet molding may be looking for crown or top trim. Someone researching furniture appliques is usually considering sculpted ornaments. This article concentrates on the overlap between cabinet door decorative molding, cabinet molding and trim, and individual polyurethane profiles that STAVROS actually lists.
In retail listings, decorative trim molding often means a patterned linear strip rather than a structural cabinet part. Its exact motif, supplied length, and projection must be specified separately from the cabinet itself.
Applied molding should not be confused with the stiles and rails of a true five-piece cabinet door. A decorative frame attached to a slab door creates an appearance; it does not transform the substrate into traditional solid-wood frame-and-panel joinery.




Why Polyurethane Molding Is Worth Considering for Furniture
Rigid polyurethane can reproduce a narrow bead, stepped classical profile, or repeating ornament in a paint-grade decorative component. Compared with carving a detailed motif into every cabinet front, applying a separately manufactured piece may simplify the visual-design process. It can also allow a cabinetmaker to repeat the same decorative pattern across multiple doors.
The advantages should be stated precisely rather than exaggerated. Polyurethane trim is not automatically impact-proof, waterproof, heatproof, or more durable than every wood product. Performance depends on the product formulation, dimensions, attachment, finish, surrounding environment, and how the furniture is used. It may be appropriate for painted cabinets and furniture panels, but that is not permission to install it near an oven, on an exterior cabinet, or on an incompatible laminate without verification.
The key practical benefit is design repeatability. A measured profile can be cut into matching pieces for a series of doors, while a separate ornament can establish the decorative theme. The trade-off is that every added piece creates a potential collision point, finish interface, or joint that needs to be planned.
Наша фабрика также производит:
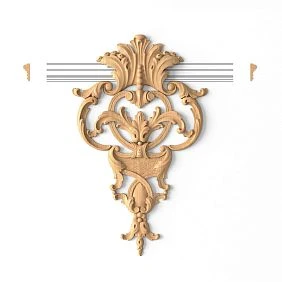
Смотреть весь Каталог продукции
Polyurethane, wood, MDF, and plaster are not substitutes in every application
Solid wood provides natural grain and can be suitable for stained furniture. Primed MDF is often used for paint-grade linear details but must be evaluated for its specific exposure, edges, and installation method. Polyurethane gives access to molded ornament and fine relief. Plaster is typically associated with architectural decoration and is generally a poor default choice for frequently operated cabinet fronts because weight, brittleness, and attachment become important concerns.
For a stained oak wardrobe, a genuine wood profile may create the most coherent appearance. For a painted MDF slab door, a compatible polyurethane decorative border may be worth evaluating. The correct material follows the intended finish, door construction, and use—not a universal ranking.
The STAVROS molding catalog includes polyurethane, MDF, and polystyrene listings. Do not assume that every item in the category is polyurethane. Use the specific MLDPU product card and its material field when specifying PU furniture trim.
Получить консультацию
Real STAVROS Polyurethane Profiles for Cabinet and Furniture Decoration
The following examples are real polyurethane products available to compare on STAVROSDECOR.COM. Dimensions are the listed width × projection × stock length, in U.S. inches. The face width controls the visual border; the projection is how far the profile stands above a flat surface. Neither measurement establishes suitability for a particular hinge or finished substrate.
| Profile | Listed dimensions, inches | Decorative character | Typical design direction |
|---|---|---|---|
| MLDPU-001 | 0.39 × 0.24 × 102.36 | Narrow rounded bead | Slim borders on painted door and drawer fronts |
| MLDPU-004 | 0.59 × 0.31 × 102.36 | Compact stepped profile | Transitional kitchen doors and restrained furniture panels |
| MLDPU-002 | 0.87 × 0.43 × 102.36 | More pronounced classical steps | Wardrobe doors, larger cabinet fronts, and strong painted frames |
| MLDPU-003 | 1.38 × 0.47 × 102.36 | Wide architectural relief | Larger furniture doors and display-cabinet accents where clearances permit |
| KPU-125 rope molding | 0.35 × 0.20 × 39.37 | Fine twisted or braided ornament | A delicate ornate border on a furniture front |
| KPU-105 beaded molding | 0.43 × 0.24 × 39.37 | Repeating beads | Classical or neoclassical furniture accents |
| KPU-016 egg-and-dart molding | 0.91 × 0.67 × 78.74 | Strong historical ornament | Selected large decorative bands, not automatically standard cabinet doors |
Important: The size table is a product comparison, not approval to use each profile on every type of cabinet. Check the exact product drawing, available finish, adhesive system, and required operating clearances. Ornamental KPU moldings can have much shorter stock lengths than MLDPU profiles, which directly affects cost and cutting waste.
MLDPU-001: the smallest visual gesture
The MLDPU-001 polyurethane bead molding creates a fine line that can be useful when the cabinet face needs refinement rather than a dramatic remodel. Its approximately 0.39-inch width keeps the pattern in proportion with smaller doors and drawers. The 0.24-inch projection still needs to be checked against neighboring doors, frames, and hardware.
A small bead is a logical candidate for slim rectangular borders on a painted dresser or a group of cabinet fronts. The shadow line can produce a paneled effect while retaining the original slab underneath. It also works as a secondary inner border when a more substantial outer frame is already present.
MLDPU-004: restrained cabinet-front definition
At 0.59 inches wide and 0.31 inches deep, MLDPU-004 sits between the very slim bead and the more prominent classical profile. Its stepped relief can be appropriate for a kitchen in a transitional style or a painted built-in wardrobe.
For a small kitchen, controlled detail usually works better than a wide ornamental border repeated around every door and drawer. A shallow, consistent profile helps the cabinetry relate to existing baseboards and door casing without implying that the furniture contains carved solid-wood joinery.
MLDPU-002 and MLDPU-003: more visual weight
MLDPU-002 has a 0.87-inch face and a 0.43-inch projection. It is a more visible decorative frame on larger doors. For a painted wardrobe, display cabinet, or freestanding dresser, that may be the correct scale. For close-set kitchen doors, the additional projection requires especially careful collision testing.
At 1.38 inches wide, MLDPU-003 makes a stronger statement. It should be considered for appropriately sized furniture rather than selected simply because it looks substantial on a wall. Check the door width, border setback, handle position, and full opening arc before choosing it.
Kitchen Cabinet Molding: Decorative Door Frames vs. Cabinet Crown Molding
A kitchen renovation creates two very different reasons to buy molding. One is to update the visible faces of doors and drawers. The other is to finish the cabinet installation at the top or along structural transitions. Treat them as separate specifications.
Applied molding on kitchen cabinet doors
For painted slab-front cabinets, a rectangular molding border can suggest a paneled or traditional door. It does not create the structural construction of a Shaker door, but it can bring more architectural detail to an otherwise flat surface. A profile such as STAVROS MLDPU-004 may be considered after the door's finish and hinge clearances have been checked.
The key questions are whether the existing surface accepts the approved attachment system, whether the molding remains clear of the door perimeter, and whether the finished raised relief will collide with adjacent doors or cabinets as the hinges rotate. The hinge-side problem is dynamic: a molding may clear its neighbor when both doors are shut and still hit it during opening.
Some cabinet doors have a five-piece frame already. Adding an applied border on top of an existing raised stile or panel can create visually excessive layering and may interfere with the center panel's movement. It is generally more sensible to evaluate flat, stable surfaces than to automatically cover every existing door detail.
Upper cabinet molding and cabinet crown molding
The search term upper cabinet molding often refers to top trim or crown that finishes the gap between upper cabinets and the ceiling. That involves cabinet height, uneven ceilings, scribe allowances, end returns, and independent secure attachment to the cabinet assembly. A decorative polyurethane molding intended for a door face should not be assumed to work as a full cabinet crown or gap-covering board.
STAVROS's ornamental trim selection may provide decorative accents for a properly designed upper cabinet composition, but the supporting crown construction and fit must be specified separately. Avoid treating narrow KPU beading as though it were a full-depth crown molding.
Light rails, fillers, and toe kicks
Under-cabinet light rails need to coordinate with electrical fittings and the heat and clearance requirements of the actual light fixtures. Fillers and scribe pieces often accommodate site variations. Toe kicks are exposed to feet, cleaning, and impact. These applications call for purpose-suitable materials and details; decorative polyurethane cabinet-front molding does not automatically replace them.
A sound kitchen proposal separates all these line items instead of using cabinet trim as one catch-all purchasing category.
What to Check Before Adding Decorative Trim to a Cabinet Door
The most costly mistake is purchasing molding before checking how the door actually moves. A cabinet door is not a motionless wall panel. It may be full-overlay, partial-overlay, inset, frameless, face-frame, soft-close, push-to-open, or fitted with specialty hinges. Those distinctions affect the space available for decoration.
1. Identify the door construction
A flat painted MDF or stable paint-grade door may offer a suitable receiving surface if the installation system is approved for it. A laminate, thermofoil, high-pressure laminate, lacquered, or factory-coated door can be more difficult because the adhesive must be compatible with the actual coating and substrate. Do not assume an ordinary wall adhesive will bond properly to melamine, laminate, or a glossy cabinet finish. Test the specified system on a representative sample and follow both manufacturers' instructions.
2. Check the hinge-side sweep
Cabinet hinges do not move a door straight forward. The opening arc depends on the hinge geometry, door thickness, overlay, mounting-plate position, and adjustment. A decorative strip close to the pivoting edge may move toward a neighboring door, a face-frame member, or the cabinet body.
Before installation, tape a cardboard or foam mockup with the same projection as the selected trim to the proposed location. Open the door through its intended full travel, including the range required for drawer access and appliance use. Repeat with adjacent doors open, where relevant. Verify clearance at the top, bottom, and hinge-side corners.
Hinge manufacturers provide planning tables for front gaps and overlay configurations. Those technical documents, rather than a universal “1/8-inch reveal” assumption, control the correct hinge adjustment and operating clearance.
3. Keep handles usable
A raised border near a knob, pull, or edge grip can reduce finger clearance. If a handle is centered on a drawer, the decorative frame must leave room for fingers to reach behind it comfortably. If the pull is near the door edge, check its position before planning the decorative frame.
Do not glue polyurethane ornament over existing screw heads or areas that must remain accessible for hardware replacement. If handles will be relocated, deal with the original holes and the new drilling pattern as a separate cabinetmaking task.
4. Avoid appliance and high-heat conflicts
Decorative PU should not be installed against hot oven surfaces, appliance vents, open flames, or other heat-producing components unless the specific product and installation are expressly approved for that condition. Normal kitchen use does not automatically make every profile suitable next to a range or a warming appliance.
5. Inspect edge condition and reveal
A face molding can create a nice recessed-looking panel only if its setback from the outer door edge is consistent. Verify that the frame does not project beyond the door, overlap the door's edge banding, cover a routed groove, or block adjacent panels when the furniture is closed or operated.
For framed cabinet fronts, align the applied decoration with the existing stile-and-rail proportions rather than placing an arbitrary rectangle across the functional joints.
A Real Cabinet Door Layout: Six Fronts, One Repeating Decorative Frame
Consider an illustrative project with six flat cabinet doors measuring 16 inches wide by 30 inches high. You want an applied molding border whose outside dimensions are 12 × 24 inches, centered on each front. The door itself remains intact; these are purely decorative frames.
The horizontal setback to the molding's outside edge is:
(16 − 12) ÷ 2 = 2 inches on each side.
The vertical setback is:
(30 − 24) ÷ 2 = 3 inches at the top and bottom.
The frame dimension is measured at the outside long points of the 45-degree mitered pieces. Each door needs two 24-inch vertical members and two 12-inch horizontal members. The installed trim length per door is:
2 × 24 + 2 × 12 = 72 inches, or 6 linear feet.
For all six doors:
6 × 72 = 432 inches = 36 linear feet.
This is only a material-length calculation. The chosen face width and projection must still be physically checked. If a wide profile looks crowded inside those 2-inch side margins, redraw the frame before purchasing.
Convert linear feet into complete STAVROS molding strips
Suppose the chosen product is MLDPU-004, supplied in strips of approximately 102.36 inches. Six doors require twelve 24-inch cuts and twelve 12-inch cuts.
One practical cutting plan is:
| Stock strips | Cuts from each strip | Nominal length used | Pieces produced |
|---|---|---|---|
| Four strips | 24 + 24 + 24 + 12 + 12 in. | 96 in. per strip | 12 long pieces + 8 short pieces |
| One strip | 12 + 12 + 12 + 12 in. | 48 in. | 4 short pieces |
| Five complete strips | — | 432 in. installed | 12 × 24-in. and 12 × 12-in. pieces |
With a representative 1/8-inch saw kerf, the four 96-inch cutting plans still fit within each 102.36-inch strip; the fifth strip also has ample allowance. End defects, setup cuts, breakage, and any manufacturer-prescribed joining method may require additional material. Five strips are the minimum feasible purchase here because four full strips total only 409.44 inches—less than the 432 inches required, even before kerf.
The extra offcut in the five-strip layout is real. Buying by linear feet without performing the individual cut plan would conceal that waste. Keep the door list and the cut plan together when ordering.
What changes if you choose rope molding instead?
KPU-125 polyurethane rope molding is approximately 39.37 inches long, rather than 102.36 inches. One KPU-125 strip can supply one 24-inch piece plus one 12-inch piece (36 inches nominal, leaving room for reasonable kerf and trimming). The twelve pairs therefore require twelve complete KPU-125 strips for the same six decorative frames.
The installed quantity remains 36 linear feet. The purchasing quantity jumps from five long MLDPU strips to twelve short KPU strips. This is precisely why rope molding, beaded molding, and plain cabinet trim must be estimated using the specific product's stock length and pattern, not only the total door perimeter.
What if you add four corner ornaments per door?
Six frames with four corner ornaments each would need 24 individual corner pieces, assuming that is how the selected ornament is designed to be used. But many cabinet fronts do not need corner appliques. If the corners have a larger footprint than the door can accommodate, or the matching series is unavailable, choose a simpler clean miter rather than forcing a decorative element into the design.
The STAVROS molding corners and decorative accents range contains profile-specific pieces. Confirm the SKU, orientation, and whether each component overlays or replaces part of the straight molding before calculating quantities.
Beaded Molding, Rope Molding, and Egg-and-Dart Trim for Furniture
Decorative trim molding adds a different design language from a plain stepped profile. Its repeat, scale, and relief must harmonize with the door size. The U.S. search terms beaded molding, rope molding, and egg and dart molding refer to recognizable motifs, not to one interchangeable class of cabinet parts.
Beaded molding: controlled classical rhythm
A beaded profile creates a repeating line of rounded details. The KPU-105 polyurethane beaded molding is a narrow option with a 0.43-inch face. It may complement a traditional sideboard, dresser, or cabinet front when the bead scale remains in proportion with the door.
Pattern alignment matters. A miter might cut through the center of a bead, and two sides may start their repeats at different positions. Dry-fit the complete frame before bonding, rather than cutting every side independently to a theoretical dimension and assuming the ornament will match.
Rope molding: a finer decorative twist
A KPU-125 rope-style polyurethane profile provides a narrow braid-like relief. It can introduce a traditional detail to cabinet-front frames or a separate accent band on a tall furniture door. Do not assume its short stock lengths make it economical for large furniture runs; calculate full-piece count first.
Rope molding can look attractive alongside turned furniture legs and classical handles, but it need not be repeated on every surface. A cabinet with a strong ornamental rail may look better with plain surrounding door frames.
Egg-and-dart molding: reserve it for suitable scale
STAVROS KPU-016 has an approximately 0.91-inch face and 0.67-inch projection, with a 78.74-inch stock length. Its ornament makes a stronger visual statement than narrow beading. It may be worth evaluating for a large wardrobe or furniture cornice detail, but it is generally too prominent to assume suitability for a narrow kitchen cabinet door without a full-size mockup.
On a busy kitchen run, deeper repeating trim may create awkward shadowing near pulls and complicate cleaning. Use the motif as a focal detail only if the door geometry, finish, and everyday use support it.
Furniture Appliques and Cabinet Onlays: A Secondary Accent, Not Another Frame
Furniture appliques and decorative onlays are individual relief elements that add a central, corner, vertical, or horizontal motif. Unlike linear molding, their purchase is normally based on piece count and actual dimensions, not linear footage. They can complement cabinet molding without becoming the main topic of the project.
The STAVROS polyurethane onlay catalog includes floral, scroll, classical, and geometric forms. An example is NPU-501, a vertical applique approximately 2.28 × 11.81 × 0.43 inches. It can be evaluated as a central detail on a sufficiently tall wardrobe door, subject to clearance and finish requirements.
For smaller furniture, NPU-496 is a compact flower-like polyurethane onlay measuring approximately 1.81 × 1.81 × 0.71 inches. The small footprint does not mean the projection is negligible; at 0.71 inches it is actually deeper than some straight moldings in the comparison table.
A wide floral applique and a fine molding frame may form a coherent traditional cabinet front. But choose the center ornament only after defining the panel. If the onlay competes with the handle or crowding occurs, use just the linear border. Distinguish cabinet onlay from a protective corner, an electrical fixture, or structural furniture hardware.
Design Ideas for Kitchen Cabinets, Wardrobes, Dressers, and Built-Ins
Traditional painted kitchen cabinets
For a classic or transitional kitchen, repeated narrow decorative frames can give simple slab doors a more refined appearance. Keep the same molding width and frame setback across matching doors. Base cabinets and upper cabinets may have different door heights, so the vertical border lengths will change even if the side setbacks remain consistent.
A STAVROS MLDPU-004 profile provides one relatively restrained option to compare. Match the paint sheen to the existing cabinet finish only after testing the complete attachment and coating process. White, cream, greige, and darker painted finishes are all possible design directions, but surface preparation—not color—is the critical compatibility question.
Modern cabinet molding on a flat-front kitchen
Modern cabinet molding is less about elaborate ornament and more about disciplined lines. On flat-front doors, a single small profile may be enough to introduce shadow and rhythm. Avoid stacking multiple relief bands over minimal hardware; that usually weakens the simplicity of the design.
If the cabinetry uses integrated edge pulls or push-to-open hardware, test the raised profile carefully. A narrow frame may still interfere with where users naturally press or grip the door. The ornament should follow the cabinet's operation, not force an inconvenient change in behavior.
Built-in wardrobes and armoires
Tall wardrobe doors have more visual space for a stronger rectangular molding frame. The MLDPU-002 stepped polyurethane profile can be considered on large painted panels where its approximately 0.87-inch face feels balanced. A selected vertical applique may provide a central classical detail.
However, wardrobe doors may be hinged, sliding, bifold, or fitted with concealed tracks. Do not use projecting decorative trim on sliding or pocket doors unless the mechanism and clearances explicitly permit it. For a sliding wardrobe, even a profile that fits visually may strike an adjacent track or door during travel.
Dressers and chests of drawers
A chest of drawers can be refreshed with slim decorative borders on its drawer fronts. The best results often come from repeating a consistent setback across every drawer. If the drawer heights differ, you may preserve equal top and bottom margins or choose a scaled layout for each size; sketch both approaches before cutting.
Drawer pulls are the biggest practical obstacle. A centered pull may leave little space for an onlay, and a deep molding may make finger access uncomfortable. Mock up one drawer at full scale, check the handle, and then replicate the approved pattern. A compact NPU-496 polyurethane decorative applique may be an alternative to a full frame on a suitable drawer front, but it still requires projection clearance.
Bookcases, display cabinets, and sideboards
A built-in bookcase or display cabinet can use applied trim to connect its furniture details to the room's architectural molding. Straight polyurethane profiles may outline door faces, while an ornamental accent can identify a central cabinet. Do not confuse trim with structural shelf support or with the cabinet's existing face frame.
For a formal sideboard, a beaded polyurethane molding can be a controlled reference to traditional millwork. For a modern media sideboard, a simple MLDPU-001 bead profile may be less visually intrusive.
Match Cabinet Trim to the Room Without Copying Wall Details Blindly
Cabinetry does not exist in isolation. Door casing, baseboards, chair rails, and crown molding already establish a visual vocabulary in the room. Furniture trim should acknowledge those proportions, but it need not reproduce every architectural profile literally.
A traditional dining room might have broad door casing and decorative wall panels. A cabinet with a stronger molded border may therefore feel appropriate. In a modern kitchen with flat baseboards and narrow casing, a slim profile is more likely to maintain continuity. Consider face width and projection separately: an unusually deep profile can dominate even when the visible face is relatively narrow.
Where the room contains ornate wooden furniture legs or carved accents, the STAVROS ornamental polyurethane trim assortment can suggest a related motif. But stain-grade wooden molding and paint-grade polyurethane behave differently. A painted faux wood effect is a visual finish, not the same material as natural oak or beech. Choose genuine wood when exposed grain is central to the design.
A small number of repeated decisions—one main profile, a consistent border setback, a compatible paint color, and a limited selection of ornaments—will usually create a stronger result than a cabinet covered with unrelated decorative pieces.
How to Install Decorative Polyurethane Molding on Furniture
Installation starts with verification, not with adhesive. The cabinet may already have a factory coating, moving panel, hidden fastener, or hinge adjustment that must remain accessible. The sequence below is a planning framework for appropriate nonstructural decorative trim, not a guarantee that every STAVROS profile may be bonded to any cabinet surface.
Step 1. Remove and label parts where appropriate
For a removable cabinet door or drawer front, taking the component off the cabinet can make layout and finishing easier. Label every door and hinge position and photograph existing adjustments before disassembly. Support the component on a suitable bench. For built-in or unusually large fronts, use an installation method appropriate to the weight and size rather than attempting unsupported work.
Step 2. Inspect the existing finish
Identify whether the front is painted MDF, finished wood, laminate, thermofoil, veneer, or another substrate. Check for loose coating, swelling, grease, wax, silicone residues, and previous repairs. Ask the adhesive and coating manufacturers which preparation is approved for that exact system. A product described simply as construction adhesive is not adequate evidence of compatibility.
Step 3. Mark a full-size frame
Choose the outside dimensions of the decorative frame and mark equal setbacks from the door edges. Account for face width, the miter long points, and the position of the handle. Use a square, straightedge, and repeatable template to ensure that every matching cabinet door receives the same geometry.
Step 4. Dry-fit and test the opening arc
Cut a trial profile or make a full-projection mockup. Check the frame while the door is closed and through its full operating range. Test neighboring doors, drawer travel, appliance doors, shelf pull-outs, and any soft-close or push-to-open mechanism. Make adjustments to the layout before bonding. Do not rely on a single measured reveal to prove compatibility.
Step 5. Cut the molding accurately
Use tools suited to the specific rigid polyurethane product, a stable cutting setup, and appropriate personal protection. For a rectangular applied frame, accurate 45-degree miters can create clean corners, but the precise cut reference depends on the profile and corner system. Cut a test joint and verify its appearance under the intended paint finish.
For ornamental KPU trim, align beads, rope repeats, or egg-and-dart motifs before cutting the final pieces. An otherwise tight miter can still look unfinished if the pattern stops abruptly at the corner.
Step 6. Apply the approved mounting system
Use an adhesive or fastening method expressly suitable for the trim and cabinet substrate. Apply it according to the specified pattern and open time, and secure the pieces while curing as directed. Large onlays may require different support from thin straight trim. Do not assume that a product suitable for plastered walls will bond correctly to factory-lacquered MDF.
Explore the STAVROS installation and finishing materials catalog as a source of related supplies, but confirm actual compatibility from the product instructions. Decorative polyurethane molding should not be used to conceal required hinge screws, structural fasteners, or access panels.
Step 7. Finish joints and paint
Treat seams with the approved filler or joint system, allow materials to cure, and finish according to the manufacturer's requirements. Paintable caulk may close certain cosmetic gaps, but it cannot replace a specified structural bond. Use compatible primer and enamel on both the existing cabinet front and the decorative trim.
A consistent cabinet-grade finish matters more than trying to make the surface look heavily carved. Protect narrow ornamental relief from excessive paint buildup. Test adhesion and final appearance on a spare piece if possible, especially when the original surface has a glossy factory coating.
Step 8. Reinstall and verify operation
Reattach the doors and drawer fronts, restore alignment, and check the hardware once the finish has reached its specified handling condition. Inspect the trim under side lighting. Open and close every door and drawer, including adjacent units, before the project is considered complete.
Paint and Finish Choices for Furniture Molding
One color across the whole cabinet
Painting the door and decorative molding the same color produces a more integrated raised-panel appearance. This can suit classic white cabinetry, muted green, warm gray, navy, or other paint-grade furniture. The surface preparation and cure schedule must be compatible with both the original cabinet finish and the added polyurethane component.
Contrasting decorative trim
A contrasting line can create a stronger decorative statement, but it also exposes inaccurate miters and inconsistent frame spacing. For a kitchen, consider limiting the contrast to one display unit or island instead of applying a busy border to every cabinet.
Antiquing, patina, and metallic details
A light glaze or metallic highlight can emphasize ornate molding or floral relief on a traditional sideboard. But every additional finish layer changes the visual weight of the ornament and may complicate touch-ups. Test glaze or patina products on the exact polyurethane and base-coat combination before applying them to a finished cabinet.
Faux wood and natural wood
Polyurethane may be painted to suggest wood, but it will not display the same natural grain or refinishing behavior as solid oak, beech, or walnut. On premium stained cabinetry, it may be more coherent to buy a suitable real wood molding rather than trying to match deep transparent stain on polyurethane.
What Does Cabinet Molding Cost? Build a Real Project Estimate
A reliable estimate separates the material from the rest of the cabinet renovation. Published catalog prices can change, and a U.S. buyer also needs to verify whether international fulfillment is available.
| Project element | Proper purchasing basis |
|---|---|
| Straight polyurethane molding | Number of complete MLDPU stock strips from the individual cut schedule |
| Beaded or rope molding | Number of shorter KPU strips, including pattern matching and joints |
| Decorative appliques | Exact onlay SKU and piece count |
| Corner accents | Compatible orientation and number of pieces per frame |
| Adhesives, primer, joint treatment, enamel | Material-specific coverage and approved systems |
| Cabinet preparation | Cleaning, removal, substrate repair, surface testing |
| Labor | Door removal, cutting, fitting, finishing, hardware adjustments |
| Packaging and shipping | Confirmed shipment details for the destination |
For a strip sold as one complete piece, the comparison value is current strip price ÷ length in linear feet. But the order still depends on how many full pieces can supply the required cuts. In the six-door example above, 36 linear feet of installed trim requires five long MLDPU strips or twelve much shorter KPU-125 strips using the stated cutting schemes.
There is no defensible universal promise that polyurethane trim is always cheaper than wood. Total cost depends on selected profiles, available stock lengths, installation complexity, refinishing needs, and freight. In some cases the most economical option is to replace damaged doors or choose purpose-made cabinet fronts rather than applying trim to an unstable substrate.
Buying STAVROS cabinet trim for a U.S. address
The STAVROS website displays English product information, prices in U.S. dollars, and dimensions in inches. That does not establish routine delivery to the United States. Its published payment and delivery page primarily addresses Russia and CIS destinations.
If you intend to order from the United States, request written confirmation of the shipping route, packaging for long profiles, availability, total freight and import responsibilities, damage handling, payment method, and delivery timing. Do not schedule cabinet installation around a presumed international lead time. The exact items, such as MLDPU-004 or KPU-125, should be confirmed as available for your destination before you finalize the cut list.
Common Mistakes With Decorative Cabinet Molding
Confusing cabinet-top crown molding with cabinet-door trim. They solve different problems and use different construction details. A narrow polyurethane face profile is not automatically crown molding.
Ordering by linear feet without a cut list. Strip lengths vary widely. A six-door arrangement using 39.37-inch rope molding can require more full pieces than the same design using 102.36-inch straight molding.
Ignoring hinge clearance. A raised border may clear the next door when closed but collide during opening. Test the exact projection across the entire hinge arc.
Adding trim too close to pulls. Knobs and handles need finger clearance. Confirm hardware function before choosing a deep profile or central applique.
Assuming all cabinet coatings accept the same adhesive. Painted MDF, melamine, thermofoil, laminate, and factory lacquer are different substrates. Obtain an approved attachment and coating system.
Using the deepest ornament on the smallest door. Large egg-and-dart or wide classical molding can overwhelm a narrow front and increase collision risk.
Buying generic corner pieces without checking the profile. Decorative corners may be series-specific or act as overlays rather than joining components.
Presenting PU as structural reinforcement. Applied decorative trim is not a substitute for a damaged door, properly attached shelf, or sound cabinet carcass.
Claiming universal water and heat resistance. The precise material, mounting, finish, and exposure determine suitability. A kitchen is not one uniform environment.
Assuming U.S.-dollar pricing includes U.S. delivery. Confirm the destination-specific shipping and import terms in writing.
Frequently Asked Questions About Cabinet Molding and Trim
What is cabinet molding?
In the United States, cabinet molding can mean applied decoration on a door face, crown molding at the top of upper cabinets, light rail trim, scribe pieces, and other finishing components. This guide concentrates on decorative applied molding on furniture and cabinet fronts, where a nonstructural polyurethane profile may be considered after compatibility checks.
Can I add polyurethane molding to existing kitchen cabinets?
Potentially, if the doors have a suitable receiving surface and the specific molding, adhesive, coating, and hardware clearances are compatible. Perform a test on a representative surface and inspect the opening arc before installing a full kitchen run.
Is polyurethane molding the same as a Shaker cabinet door?
No. A traditional Shaker-style door is typically built with stiles, rails, and a center panel. An applied polyurethane molding frame changes the look of a flat door but does not alter the door's underlying structural construction.
Which STAVROS polyurethane molding is suitable for a small cabinet front?
The narrow MLDPU-001 and compact MLDPU-004 are reasonable dimensional references. Suitability still depends on the specific door, hinge motion, finish, and attachment instructions.
Which profile gives a more classical cabinet look?
MLDPU-002 provides stronger stepped relief. KPU-105 introduces a repeating beaded ornament. For very large furniture compositions, an egg-and-dart motif might be evaluated, but a stronger profile should not be selected without checking its projection and scale.
What is the difference between beaded molding and rope molding?
Beaded molding repeats rounded details; rope molding repeats a twisted or braided motif. STAVROS lists KPU-105 beaded trim and KPU-125 rope-style trim. Their stock lengths and pattern geometry should be considered when creating cabinet-door frames.
What is upper cabinet molding?
The term often refers to cabinet-top crown molding or another upper finishing profile. It is not necessarily the same product as applied cabinet-door molding. Specify the actual location, support, ceiling gap, and desired function before choosing any trim.
How many linear feet do I need for six cabinet doors?
For six 16 × 30-inch doors with centered 12 × 24-inch decorative frames, the nominal installed quantity is 36 linear feet. With 102.36-inch MLDPU sticks and the illustrated cuts, five full strips are sufficient under the stated assumptions. Different door sizes, profiles, or pattern matching will change the quantity.
Can I install molding over laminate or thermofoil cabinets?
Do not assume compatibility. The adhesive and finish must be approved for the specific coating and substrate, and the original surface must be sound. Testing on a representative sample may be necessary. Some cabinet finishes or conditions are poor candidates for applied decorative molding.
Can decorative trim be used next to an oven or cooktop?
Do not install polyurethane decoration within a prohibited hot zone or near appliance vents without express approval for the actual product and installation. Follow the appliance manufacturer's clearance and finish requirements.
Can polyurethane molding support cabinet shelves or reinforce damaged doors?
No. These decorative products should not be used as structural repairs or shelf supports unless the specific component has an engineered, documented structural application. Repair damaged cabinet construction separately.
How do I match decorative cabinet trim to my handles?
Start with handle position, projection, and required finger clearance. Select a molding frame that preserves comfortable operation. Use one dominant decorative vocabulary; a richly ornamented pull often looks better with a quieter frame than with several competing patterns.
What is a furniture applique?
It is a separate decorative element, such as a floral, scroll, central or corner ornament, applied to a suitable furniture surface. The STAVROS polyurethane applique collection includes individual pieces, while linear moldings are sold as profiles by the full strip.
Are STAVROS polyurethane moldings available for delivery in the USA?
U.S.-dollar prices and inch dimensions appear on the English website, but published shipping details primarily refer to Russia and the CIS. Confirm availability, international shipping, total delivered price, and customs responsibilities directly with the supplier before ordering.
Choose Cabinet Molding That Fits the Furniture—Not Just the Photograph
A furniture upgrade succeeds when the trim complements the construction beneath it. Decorative trim molding is most effective when it has a specific visual role, rather than being applied to every possible edge. Cabinet molding can bring a measured border to painted kitchen doors, establish a classical rhythm across wardrobe fronts, or introduce a restrained ornamental line on a dresser. But the result depends on precise layout, operating clearance, surface compatibility, and an honest materials specification.
For straight decorative frames, compare STAVROS polyurethane molding profiles such as MLDPU-001, MLDPU-004, and MLDPU-002. For a more traditional pattern, browse ornamental polyurethane trim, beaded molding, and rope molding. To finish a carefully chosen focal cabinet, consider polyurethane decorative onlays and verify any molding corner components against the selected profile.
Measure the door and its full opening path first. Choose the profile second. Then prepare a cut list and confirm a compatible installation and finishing system. That process turns decorative cabinet molding from a general idea into a repeatable, properly specified furniture detail.