Article Contents:
- What readiness of a decorative piece means
- Where to start the inspection after receipt
- How to verify dimensions against the installation location
- Why thickness must not be confused with carving depth
- What to check on the front side
- The back side: where the piece actually contacts the base
- What to do if the joint does not fit
- How to do a test fit before finishing
- What to look for in various decorative elements
- Plates and Receptacles
- Brackets
- Capitals and pilasters
- Moldings and other linear trim
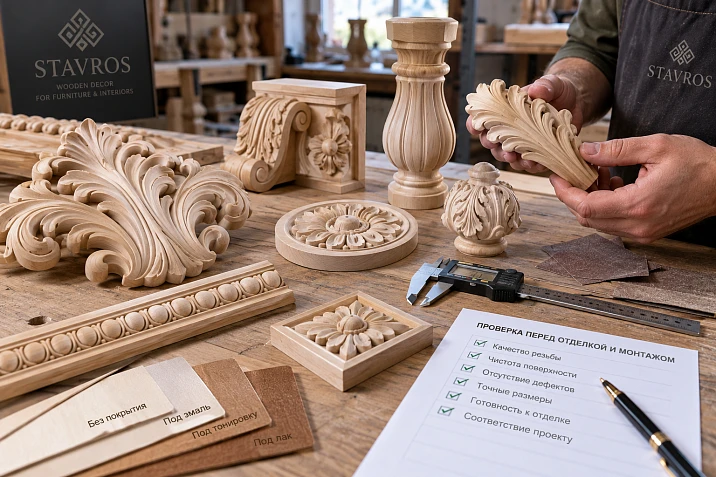
The overlay is placed on the front, and the pattern matches the furniture, but during a test fit one edge remains raised. After painting, correcting such an imperfect joint will be more difficult: you will have to work next to the finished coating and restore the finish again. It is better to check the reverse side and the fit before primer, glue, and drilling.
Decorative solid wood parts are assessed from two sides. The front determines the pattern, scale, and character of the surface. The back shows where the part contacts the base and how it can be fastened. Between them is the thickness, which affects the protrusion, the position of handles, and the movement of adjacent fronts.
The selected model is first checked against the order and drawing, inspected, measured, and test-fitted. Then the future finish and mounting assembly are checked. This order helps to understand which operations the workshop actually still has left before starting a single part or an entire batch into work.
What readiness of a decorative part means
Finished geometry, a prepared surface, and an applied coating are different states of the product. They need to be distinguished when purchasing, estimating time, and transferring the part between sections of the workshop.
| Product condition | What has already been done | What still needs to be checked or done |
|---|---|---|
| Joinery blank | Source material prepared | Form the geometry specified by the project |
| Formed part | Main dimensions and shape obtained | Confirm remaining finishing and installation operations |
| Decorative part without coating | Profile or ornament manufactured | Check preparation, test fit, perform finishing and installation |
| Part with coating | Specific finishing completed | Verify workmanship, check fit and fastening method |
The product name alone does not establish the full list of remaining operations. Surface preparation, the back side, and the presence of holes may differ for a specific item. This information is confirmed in the product page and when finalizing the order.
In the section decorative solid wood parts choose a specific model and version. The wording “without coating” refers to the finish, but it does not mean that the workshop will have to cut out the ornament on its own.




Where to start the inspection after receipt
Before sanding and trimming, compare the part with the order: full article number, size version, wood, grain direction, processing option. Check the quantity and marking. A resemblance to the photo is not enough if the model has several sizes or mirrored versions.
Inspect the packaging and the element itself. If there is noticeable damage, keep photos of the general view and the problem area. If a discrepancy is found, first clarify further actions with the supplier. After you modify it yourself, it is harder to separate the original condition from the result of the processing.
Prepare a clean surface on which the relief will not rest on a random protrusion. Do not stack thin carved elements so that the weight of the upper parts falls on the leaves and scrolls of the lower ones.
Take into account the storage and preparation conditions for work. After cold transportation, a part should not be immediately coated with a material intended for a different surface temperature. Follow the conditions of the product manufacturer and the finishing system, avoid water and accelerated heating near a heater. There is no universal holding time for any wood and any delivery.
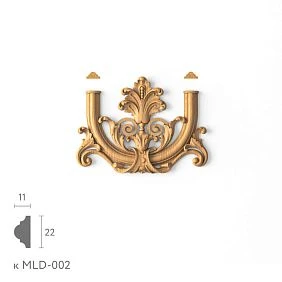
Our factory also produces:
How to verify dimensions against the installation location
Take the overall dimensions and compare them with the drawing of the selected version. For linear measurements, use a suitable ruler or caliper; for position relative to a plane, use a square and a flat test surface. Thin protrusions of the relief should not be squeezed with the measuring tool.
Record between which points the dimension was obtained. The maximum width of the ornament and the width of its mounting area can differ significantly. Both values are needed for installation.
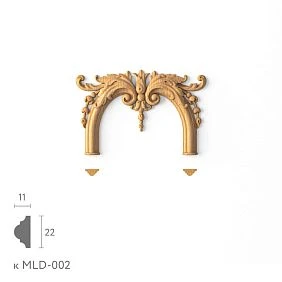
Read the designations A, B, and C according to the specific product. For STAVROS appliqués, these are width, height, and thickness; for brackets, they are height, width, and depth. The usual order cannot be carried over from one product group to another.
Check the available field of the front itself. A conditional example: a flat area inside the frame measures 420 × 260 mm, while the overlay is 300 × 180 mm. With geometric centering, 60 mm will remain on each side and 40 mm at the top and bottom. But if part of the field is occupied by a handle or a bevel, the calculation must be based on the actually available space.
Verify critical areas against drawings and product models. Measurements of a single received item do not set permissible deviations for the entire batch. If the fit depends on an exact dimension, its requirements are agreed separately.
Get Consultation
Why thickness must not be confused with thread depth
Thickness describes the overall dimension of a part from one boundary surface to another. Thread depth is the difference between sections of the pattern. The protrusion after installation also depends on how the back side seats onto the base.
For a flat overlay on a level front, the overall thickness helps estimate the protrusion. If there is a recess for a profile, a step, or a recessed fit, the position will be different. Therefore, a single figure from the product card is compared with the cross-section of the mounting assembly.
Look at what is nearby: the handle, the adjacent door, the frame, the cornice. Check the space for fingers and the opening path. A part may fit freely on a closed front but touch the adjacent post when it turns.
A full-size paper template is useful for a preliminary assessment of width, height, and offsets. It does not show volume, contact with the base, or the shadow from the relief. These properties are checked on the actual element or a suitable three-dimensional mock-up, and the final fit is checked on the selected part.
What to check on the front side
Inspect the pattern under direct and side lighting. The first look reveals the composition, the second helps you see tool marks, grain, chips and the condition of the transitions. Pay particular attention to the thin ends of the ornament, the inner corners and the areas next to the future mounting point.
Compare what you find with the ordered quality of finish. On the STAVROS page about product quality the "Standard" and "Prestige" options differ: the latter includes more detailed hand sanding. Availability of the finish and the actual preparation are confirmed for the selected item.
The roughness permitted by the agreed supply option and damage to the thin sheet require different solutions. In the first case, the specified preparation for finishing may remain. In the second, you need to assess the integrity of the part and agree on further steps, rather than expecting the paint to hide everything.
Check the top and bottom of the pattern, the compositional center and the direction. For a mirrored pair, compare both items, including the full article number with the L or R designation. Two similar elements are not always the left and right versions of the same model.
The reverse side: where the part actually touches the base
Turn the element over using a support that will not damage the relief. Identify the working areas: these are what must contact the facade, profile or other base. The outer contour of the decor does not equal the bonding area.
The reverse side may be flat, have a rebate for a molding, ledges or provided recesses. Such features cannot automatically be considered a defect. They are compared with the drawing and the purpose of the model.
Place the part against the prepared base without glue. Check whether it occupies the intended position, whether it rocks, and where gaps appear. If a flat overlay sits flush against a flat test surface but not against the facade, examine the geometry of the facade itself. The cause may lie in the base.
Mark the contact and gap areas. For a part with several separate contact zones, it is important to check each one. One tightly fitting edge does not yet confirm that the entire element is correctly seated.
What to do if the joint does not fit
First determine the cause. Possible causes include an incompatible profile, an incorrect size version, a sloped base, deformation, or an obstruction in the installation area. The solution depends on the cause: modify the assembly, choose a different element, prepare the base, or agree on the condition of the received part.
A thick layer of installation material is not a universal way to correct geometry. The adhesive has an allowable layer thickness and surface requirements. If these are not met, increasing the amount of adhesive does not confirm the reliability of the bond.
Do not pull a thin carved overlay onto an uneven base in the hope that the fasteners will force it into the required shape. This can damage the relief or create stress in the part. An appropriate structural solution must be decided first.
The condition of the base coating is also part of checking the joint. Strong adhesion of the adhesive to peeling paint will not fix the weakness of the paint itself. For a painted facade, choose a compatible installation method and check the base, rather than automatically transferring the technique for gluing bare wood.
How to do a dry fit before finishing
A dry fit is a check of position without final gluing or irreversible fixation. It should answer the questions that will later have to be resolved next to the finished surface.
- Mark the axis and the boundaries of the installation field.
- Place the part in the required orientation and check the contact.
- Compare it with the adjacent profiles, rosettes and handles.
- Check that the fronts move through the required angle.
- Confirm access to the fastening points and the assembly sequence.
- Record the position with dimensions from fixed reference points.
For temporary fixing, use a method that does not damage the wood or the existing finish. On an unfamiliar surface, first test it on an inconspicuous area. If the element cannot be held safely while opening, use a suitable mock-up or fitting aid.
After finishing, the fit dimensions and coating thickness may change. Therefore, a dry fit before painting does not replace a careful check before final installation. This is especially important for tight joints and parts with a pre-finished fit.
What to check on different decorative elements
The general checking procedure remains the same, but the critical areas depend on the shape. For a flat applique it is the mounting area; for a bracket it is also the projection; for linear trim it is the cross-section and the joints.
Overlays and rosettes
У wooden decorative overlays check the protruding parts of the pattern, the direction and the contact area. A corner model must match the actual frame joint. A vertical part cannot be considered horizontal just because it can be rotated.
for wooden rosette compare the center and outline with the installation field. If it serves as a joint for moldings, check the fit of each profile, the transition thickness, and the type of end faces. The name "rosette" alone does not confirm compatibility with any cross-section.
Brackets
У wooden brackets evaluate the three dimensions and both main mounting planes. A side view is needed: it shows the projection under the shelf and the position relative to the vertical base.
Check access to the fastening and which sides will remain visible. If the element is to bear a load, its purpose and the entire mounting assembly are assessed separately. A decorative trial fit does not replace such a check.
Capitals and pilasters
wooden capitals fit it to a specific vertical component and the top finial. Check the lower seating, the width of the projections, and the depth under the cornice.
When using pilasters and columns assemble the unit from the base to the capital. A mismatch at a single joint cannot be assessed from the front side alone: a noticeable step may appear on the side, or the required contact may be missing.
Moldings and other linear trim
У wooden molding check the cross-section, length, mounting side, and straightness under the intended installation conditions. For a frame, make a trial joint on the pieces intended for this purpose.
Cutting is planned taking into account miter cuts, kerfs, and the pattern. The length of the retail strip and the total length of the finished sides are different values. It is better to detect incompatibility of the profile with the corner element before cutting the entire batch.
The wood and the future finish must match the order
Finished solid wood parts for furniture may be made from glued wood lamellas. Therefore, the word "solid wood" does not necessarily mean the absence of glued joints. For a clear finish, it is important how the color and texture of the blank are matched.
STAVROS lists variants for enamel and for tinting, which differ in the selection of wood. Check the agreed finish if the grain pattern is to remain visible. Do not expect the same result from blanks intended for different finishing tasks.
Beech can be considered for opaque painting, oak — when pronounced texture is part of the design. But this is not a mandatory division. The suitability of a specific coating is confirmed on the selected material with the required preparation.
Compare the part with the carcass or adjacent decor, not just with the color name. Natural variations in wood may persist even within a single order. The acceptable appearance is determined by the agreed requirements and a trial finish.
A trial coat tests the entire process
A flat sample helps choose the color direction but does not fully show how the coating will behave on three-dimensional carving. On the trial piece, assess the recesses, end-grain areas, narrow transitions and raised areas.
Carry out the entire selected sequence: preparation, priming or tinting, intermediate treatment and protective coating, if provided by the system. The compatibility of materials, number of coats and drying times are determined by the manufacturers' instructions. Not all of the listed types of products need to be applied to every part in succession.
After drying, check whether fine lines have been lost, whether material has accumulated in the recesses, and how the color and sheen look next to the facade. For patination, the degree to which the recesses are highlighted is important: the result on a flat surface says little about the definition of real relief.
Record the products, mixing proportions, application method and surface preparation. If additional manual work was needed to achieve the result, include it in the series process. A single successfully painted part without this information remains a visual reference but not a complete instruction for reproduction.
Choosing Product samples, clarify what question they allow you to check. A wood species sample does not replace a real carved part when you need to assess the complexity of painting and the appearance of the coating in the recesses.
What to decide before sanding and drilling
Additional processing must have a specific purpose. You need to remove the agreed roughness, prepare the surface for the chosen system, or make the specified mounting hole. Sanding the entire part "just in case" is not required: you can soften edges, change the pattern, and affect the precise fit.
Choose the tool and abrasive taking into account the wood, the shape, and the coating requirements. After processing, remove dust in a way compatible with the subsequent finishing, and inspect the complex areas again. Strong pressure on a thin curl does not speed up quality preparation.
Before drilling, compare the position of the hole with the face relief and the geometry of the back side, and check the available thickness. A high protrusion near the hole does not mean that there is enough wood at the drilling point itself. Compare the fastener length, hole depth, and remaining material.
The part must be securely fixed without loading fragile elements. If the chosen model does not allow the specified connection to be made without damage, the assembly or product is changed. An additional hole should not be made before the suitability of the part has been determined by the other critical parameters.
In what order to perform finishing and installation
A dry fit is needed before final finishing. The further sequence depends on the connection: sometimes the decor is first attached to the cabinet and painted together with it, and sometimes it is more convenient to finish the elements separately.
| Work option | What to check in advance |
|---|---|
| Installation, then overall painting | Access to the relief, cleanliness of the joint area, ability to process the abutments |
| Separate finishing, then installation | Compatibility of the fastening with the finish and preservation of the finished surface |
| Some operations before assembly, some after | Which areas must remain accessible and how to replicate the sequence across a batch |
If adhesive is used, consider both surfaces being joined. A formulation designed for bare wood cannot automatically be transferred to a primed or painted part. The mounting area can only be protected from the finish in accordance with the chosen technology, while preserving the required bonding area.
When staining, the cleanliness of visible areas is especially important: adhesive that has penetrated the wood can alter the perception of the dye and leave a stain. Preventing contamination is usually easier than correcting it after the color has been applied.
Before final fastening, check the position, contact and completeness once more. For a frame or an assembly with several parts, the suitability of one element does not confirm that the entire assembly is correct.
When a sample can be considered approved
A sample is ready for approval when its position, mounting joint, remaining operations and finishing result are known. A single decision of "looks suitable" is not enough to transfer the part into repeatable production.
Record the verified dimensions and fit, the agreed appearance, the fastening method and the finishing technology. If trial operations have altered or damaged the element, decide separately whether it can be included in the finished furniture. Do not automatically deduct it from the purchase quantity.
For directional parts, the required versions are checked. To compare the finish on beech and oak, both materials are required. One sample is useful as a first step, but it does not confirm all variants of the model at once.
Keep the control sample with the project designation and approval date. If necessary, keep a separate joint sample: the painted front surface does not show how the concealed mounting part is made.
How to perform incoming inspection of a batch
The received batch is checked against the approved specification. Verify the items, dimensional versions, species, grain direction, surface preparation and quantity. Visually similar parts are not combined into one line if they have different characteristics.
The scope of measurements is determined by the project requirements and the criticality of the fits. One successful trial fit does not confirm that all subsequent pieces conform. For mating elements, completeness is additionally checked: left and right side, profile and connecting decor, pilaster and capital.
It is convenient to sort the results by the next action:
| What was found | What to do before release to work |
|---|---|
| The execution matches, the fit has been checked | Pass to the operation specified by the technology |
| Agreed surface preparation is required | Record the scope of processing and repeat the trial finishing if necessary |
| A mismatch of item code, material, or orientation has been detected | Set the item aside and clarify the configuration |
| There is damage or an unclear geometric discrepancy | Record the condition and agree on a decision before rework |
| The mounting assembly or finish has changed | Re-check the affected conditions of use |
This procedure does not turn any natural characteristic of wood into a defect, nor does it allow any discrepancy to be considered acceptable. The reference points are the agreed specifications, the condition of the specific item, and the furniture requirements.
After preparing or correcting the agreed area, perform a re-check. The part must pass the very inspection for which it was previously set aside, not simply be returned to the general box.
What information to keep for production and reordering
In the part card, specify the full item code and a link to the product, the size with measurement breakdown, the material, the processing quality, and the orientation. Add the installation location, the quantity per product, and the finish designation.
Attach to the card a drawing of the junction, fastening details, and photos of the reference sample. If there is a critical dimension, record the agreed requirement for it. A photo with a ruler helps clarify the measurement point but does not replace a clear record of dimensions.
When changing the model, surface preparation, or installation method, update the document. Otherwise, the purchaser will repeat the previous item code, and the craftsman will work from the changed scheme. The date and version make it possible to distinguish between these decisions.
A repeat order is placed using the saved specifications, with availability of the finish and lead time confirmed again. Replacing a part with an "approximately similar" one requires checking the affected dimensions, junctions, and finish. A previously successful sample does not confirm the suitability of another model.
Where to buy decorative solid wood parts
in the STAVROS catalog Solid Wood Items, from which you can select ready-made wooden elements for furniture: overlays, rosettes, brackets, capitals, and profiles. For a specific project, the model is chosen together with the size, wood species, and preparation option.
Before buying decorative wooden elements, prepare a short request: where the part is installed, what overall size is acceptable, what it connects to, and what finish is planned. If the question concerns the back side or the fit, attach a diagram of the assembly and specify the missing dimensions.
For workshops, on the page with conditions for manufacturers shipping from one piece is indicated. You can start with a trial sample of the selected finish, test it in the project, and then calculate the batch. Availability, cost, and lead times are confirmed for each specific order; the procedure for receiving is in the section payment and delivery.
A part is ready for the next operation when exactly what that operation depends on has been checked. Before painting — the surface and coating technology; before drilling — the fastening geometry; before installation — the fit and compatibility of the joint. This sequence allows you to use the finished decor with a clear scope of work and to repeat the result in subsequent products.