Article Contents:
- KPU-121 is a molding, not a baguette or a regular smooth trim
- Where exactly the frame runs: three different geometries that cannot be mixed in one calculation
- The molding is entirely on the wall, with the inner edge touching the mirror
- A visible strip of wall is left between the mirror and the molding
- Part of the profile overlaps the mirror surface
- Why you can't just "add 140 mm from the bottom"
- Economical layout with four slats
- When to consider five slats
- Don't place a short extension near a corner without need
- Joints of two verticals should have explainable symmetry
- The center is not always the best place
- Ornament matters more than perfect arithmetic
- Two joints are sometimes better than one bad one
- Should you make straight joints in the corners
- Why the four corners need to be cut after a dry fit
- First the layout of one side, then the whole frame
- Check the layout with the room reflection
- Take photos of three versions
- Less than 20 mm to the side wall
- A cabinet opens nearby
- The switch is 25 mm from the mirror
- The mirror is almost to the floor
- The mirror reaches the ceiling cornice
- In the color of the wall
- In the color of the adjacent stucco molding
- Contrast framing
- Do not do complex painting just to make the ornament noticeable
- 1. Protect the mirror and the finish
- 2. Determine the exact line of the inner edge
- 3. Dry assembly
- 4. Check the pattern at the joints
- 5. Choose a fixation method based on the actual base
- 6. First assemble the geometry, then fix the cosmetics
- The price of the remainder does not equal its uselessness
- Do not convert the price to rubles per meter and do not lose the sales format
- Can a KPU-121 frame be made on only three sides?
- What to do if the mirror has rounded corners?
- Can two adjacent mirrors be framed with one common KPU-121?
- Does the KPU-121 need to cover the mirror bevel?
- Can KPU-121 be used on a wall with wallpaper?
- What to do if the mirror is slightly off level?
- Can a frame be made without joints on a 2100 mm high mirror if more strips are purchased?
- Does it make sense to make two parallel rows of KPU-121 around one mirror?
- Can KPU-121 be cut lengthwise if a few millimeters are missing near the wall?
- What to do if there is already backlighting behind the mirror?
- Do I need to buy an extra strip as a spare?
- What to do with the leftovers after four strips?
- Can the bottom strip be placed directly above the baseboard?
- If the mirror is in a niche, should KPU-121 be centered relative to the niche or the glass?
- Can KPU-121 be used in a bathroom around a mirror?
- When is it better to look at the full catalog rather than order KPU-121?
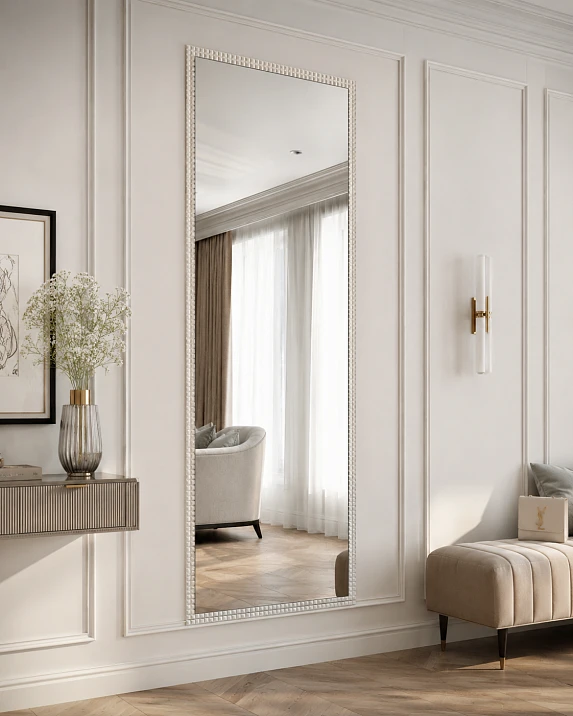
A full-height mirror is often ordered without a frame: the panel fits exactly into a niche or partition, is glued to a prepared wall, and visually works as a large reflective surface. After installation, it may turn out that the interior does not need a massive frame, but the edge of the mirror itself looks too technical. Removing an already glued panel for the sake of a separate baguette in such a situation is illogical. It is much more interesting to check whether a thin decorative contour can be assembled around the finished mirror directly on the wall.
For this scenario, the decorative molding KPU-121 made of polyurethane is suitable. The STAVROS card shows the size A × C × L = 20 × 6 × 2000 mm: the face width of the profile is 20 mm, the relief is 6 mm, and the length of one strip is 2000 mm. The price at the time of verification is 5,190 ₽ per two-meter strip, a minimum purchase of one piece is possible, and the average production time for custom orders is stated as 3–7 days.
The main advantage of this size for an already installed mirror is not an abstract "lightness," but specific geometry. If the molding is placed entirely on the wall, it needs to fit within a 20 mm wide strip along each side of the mirror. For a mirror that almost touches a side wall, furniture, a switch, or the ceiling, it is precisely these 20 mm that can become the decisive constraint. If there is a free strip, KPU-121 allows creating a very thin carved edging without turning the mirror into a second heavy furniture frame.
But you cannot buy molding based solely on the perimeter. The strip is exactly 2 m long, and a full-height mirror is often taller than two meters. Moreover, if the frame is placed outside the mirror and the four corners are joined at 45°, the actual long cut points turn out to be larger than the dimensions of the glass itself by the width of the frame. For a mirror of 900 × 2100 mm, the conditional perimeter of the glass is 6 m, but the external geometry of the 20 mm frame gives about 6160 mm of total length at the long points. The vertical pieces come out to approximately 2140 mm each, so making each from a single two-meter strip is impossible.
This is where the real buyer question lies: not just how many meters are required, but how many two-meter KPU-121 strips to add to the order, where seams are inevitable, whether it is possible to avoid a seam on the visible side, and whether the 20 mm edge will turn out to be too tight next to an already glued mirror.
KPU-121 is a molding, not a baguette and not an ordinary smooth trim
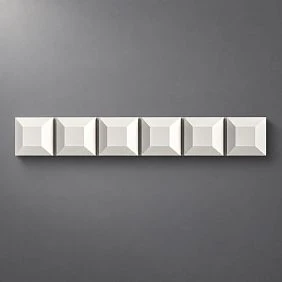
In this task, terminology affects the solution itself. KPU-121 should not be turned into a "mirror baguette" in the text just because a rectangular frame is assembled from it. It is a decorative polyurethane molding 2000 mm long. It is used as a linear ornamental element that can be cut into sections of the required length and assembled into a contour. The card indeed classifies KPU-121 under molding and indicates the size A × C × L — 20 × 6 × 2000 mm.
A finished baguette frame is a separate product or structure that already has a defined frame logic: cross-section, corner joints, internal size, sometimes a choice of a quarter for the mirror. KPU-121 does not decide any of this for the buyer. It provides two things: a narrow face width of 20 mm and a continuous decorative pattern on a two-meter strip. Everything else — the position relative to the glass, the way corners are handled, the locations of longitudinal seams, and the number of strips — is determined by the project.
The difference with an ordinary trim is different. Trims can be smooth, profiled, wide, or narrow and are often used for architectural frames on the wall. With KPU-121, the buyer chooses a carved linear ornament specifically. Therefore, it is useful in a situation where you want to draw a thin border around the mirror and simultaneously add a pattern on that border.
This is especially noticeable on a full-height mirror. With a panel width of 800–1000 mm, a 20 mm frame occupies only a small fraction of the front and should not visually "eat up" the reflection. At the same time, the 6 mm relief creates a shadow and separates the framing from the wall plane. Such a profile can be considered a decorative edge, not a massive frame.
There is also a downside. A narrow size does not mean versatility. On a mirror 1400–1600 mm wide and 2500–2700 mm high, a twenty-millimeter ornament may be too thin from the main viewing point. In this case, the problem is not solved by increasing the number of KPU-121 pieces next to each other: that would already be a different composition. It is more rational to compare a wider molding or another type of trim.
Therefore, the first step is not ordering, but checking the scale. Make a strip 20 mm wide from cardboard or thick paper, run it along the edge of the mirror on at least one vertical and the top side, and step back to the point from which the mirror is usually seen. If the frame reads as a neat ornamental outline, you can proceed to cutting. If it almost disappears, the two-meter length and convenient price no longer matter: the wrong scale has been chosen.




Where exactly the frame runs: three different geometries that cannot be mixed in one calculation
The phrase "KPU-121 around the mirror" does not define the position of the profile. The dimensions of the parts and the amount of material directly depend on it. Before calculating, you need to choose one of three schemes.
Our factory also produces:
Trim entirely on the wall, inner edge meets the mirror
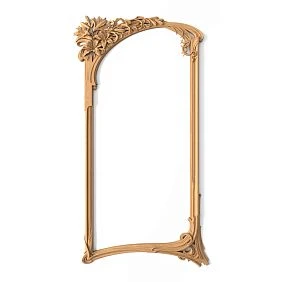
This is the main scenario for an already glued sheet. KPU-121 does not support the mirror and does not go under it. Its inner edge meets the edge of the glass, and the entire face width of 20 mm lies on the wall.
If the mirror is W × H, then the inner opening of the frame approximately matches W × H. When cutting corners at 45°, the long outer point of each horizontal piece will be approximately:
W + 2 × 20 mm,
and each vertical:
H + 2 × 20 mm.
For a mirror of 900 × 2100 mm, this gives horizontals of approximately 940 mm and verticals of approximately 2140 mm.
This is the scheme used in the main cutting examples of the article.
Get Consultation
A visible strip of wall is left between the mirror and the trim.
Sometimes the edge is not wanted to be pressed directly against the glass. Let a gap G be left between the mirror and KPU-121.
Then the inner size of the frame increases:
Win = W + 2G
Hin = H + 2G.
And the long points of the parts at 45-degree angles become:
horizontal = W + 2G + 40 mm;
vertical = H + 2G + 40 mm.
Even a 10 mm gap will increase each horizontal and vertical by another 20 mm. In total, the closed loop will become 80 mm longer.
This is a small increase relative to a large mirror, but it can change the cutting layout if the part is already almost two meters long.
Part of the profile overlaps the mirror surface
Such a composition is sometimes considered as a way to cover the edge of the glass, but for an already glued mirror, this cannot be assumed by default. The base for KPU-121 changes: part or all of the part must work on glass, which means proven compatibility of the specific adhesive solution with the mirror and finish is required. The profile also begins to reduce the visible area of the panel.
Therefore, in this article, the calculation is done for wall framing, not for gluing KPU-121 onto the mirror. If the project involves overlapping the glass, it must be calculated and approved separately.
The difference between these schemes seems small while the mirror is low. On a panel of 2100–2400 mm, every additional 20–40 mm can determine whether a side fits into one strip or requires a longitudinal joint. Therefore, you cannot first buy the linear material and then choose where exactly it will run.
Free 20 mm around the mirror is the first condition checked before the perimeter
If KPU-121 is placed entirely on the wall, each side requires a continuous base strip with a width of at least the profile dimension — 20 mm. Moreover, you need to check not "roughly there is space," but the actual situation along the entire length.
For a full-height mirror, restrictions most often arise in four places.
The first is the side wall of the niche. If 12–15 mm remains between the mirror and the inner corner, the twenty-millimeter profile physically does not fit into this strip without changing the scheme.
Second — furniture. A wardrobe, console, tall cabinet, or side panel of a built-in system may be closer than 20 mm to the mirror. Even if the KPU-121 fits visually, you need to check the opening of the facade and the 6 mm protrusion from the wall.
Third — a switch, socket, touch panel, intercom, or thermostat near the mirror. The profile must not overlap the device frame or hinder its removal.
Fourth — a baseboard, ceiling cornice, or other linear decor. If the mirror lowers almost to the floor, the bottom side of the frame may intersect the baseboard. If it comes close to the ceiling, the top side may intersect the cornice.
For a closed frame, it is convenient to make a small map of the free space.
| Mirror side | Minimum needed for KPU-121 on the wall | What can actually be measured |
|---|---|---|
| Left | 20 mm along the entire height | Narrowest spot to the wall, furniture, switch |
| Right | 20 mm along the entire height | Narrowest spot and the trajectory of the doors |
| Top | 20 mm across the entire width | Distance to ceiling, cornice, or light fixture |
| Bottom | 20 mm across the entire width | Distance to baseboard, floor, or console |
This table describes geometric placement without a decorative gap. If a gap G is planned between the mirror and the molding, a strip of G + 20 mm from the glass edge will actually be required.
For example, a mirror is in a niche, and there is only 24 mm from the left side of the glass to the wall corner. With a frame flush against the mirror, a 20 mm wide KPU-121 fits, but only 4 mm of free space remains. This is a borderline situation: an uneven corner or local narrowing can easily consume the margin. If you want a 10 mm offset from the glass, 30 mm is already required — this scheme does not work.
The most dangerous measurement is a single value in the middle of a side. The niche may be slightly non-parallel, the baseboard may have a protrusion, and furniture may have a tilt or decorative trim. For vertical sides, it is useful to check the distance at least at the bottom, middle, and top. For horizontal sides, check at both corners and in the center.
If at least one side does not provide the required strip, there are three honest solutions: abandon the closed frame, change the profile position, or choose a narrower product. Cutting KPU-121 lengthwise, turning the 20 mm ornament into a 12–15 mm one, without a confirmed design and pattern, should not be done: this is already a modification of the product itself, not a standard length cut.
Why dividing the mirror perimeter by two meters gives only a preliminary number
For a 900 × 2100 mm mirror, simple arithmetic is straightforward:
0.9 + 2.1 + 0.9 + 2.1 = 6 m.
If one KPU-121 strip has a length of 2 m:
6 ÷ 2 = 3.
But this answer only describes the total line length along the edge of the glass. It says nothing about the four corners, the twenty-millimeter frame width, the length of each individual side, and the possibility of obtaining the required segments from a two-meter blank.
For a frame located entirely outside the mirror and joined at 45°, the horizontal pieces at the long outer point are approximately 940 mm, and the vertical ones are 2140 mm. The sum:
940 + 2140 + 940 + 2140 = 6160 mm.
The pure arithmetic minimum is already:
6160 ÷ 2000 = 3,08,
that is, at least 4 strips even without accounting for the width of the cut, pattern fitting, and technological losses.
There is also a more serious limitation: 2140 mm cannot be cut from a single 2000 mm strip. This means that on each vertical, there is at least one longitudinal joint if this particular frame scheme is used.
From this, a useful threshold follows. For a twenty-millimeter frame with the inner edge at the mirror and 45° corners, one side of the mirror fits into one two-meter strip only if:
mirror size + 40 mm ≤ 2000 mm.
That is:
mirror size ≤ 1960 mm.
If there is a gap G between the glass and the frame, the condition becomes even stricter:
mirror size ≤ 1960 − 2G.
With G = 10 mm, the maximum glass side for a single solid piece is about 1940 mm.
This is much more useful than the general advice "calculate the perimeter." For a mirror 1800 mm high, the verticals can be made solid. For 2000 mm — no longer, although the height itself exactly matches the length of the plank: the outer long point of a 20-mm frame will be about 2040 mm.
Therefore, KPU-121 has three different consumption figures:
- the line length along the mirror edge — for the overall scale;
- the total length of parts considering the geometry of the corners — for the arithmetic minimum;
- the actual number of two-meter planks considering what segments can be obtained from each — for the order.
The buyer needs the third figure.
Mirror 900 × 2100 mm: why four planks are the real minimum, and the joint location needs to be designed
Let's consider the most illustrative case: a mirror 900 × 2100 mm, already glued to the wall, KPU-121 goes outside flush to the glass, the frame is closed by four corners at 45°.
For this scheme, approximate long points are obtained:
- two horizontals of 940 mm each;
- two verticals of 2140 mm each.
In total — 6160 mm.
Four two-meter planks give 8000 mm of raw length. By material sum, this is sufficient with a large remainder — about 1840 mm before accounting for cuts and fitting. But a convenient remainder does not mean convenient cutting. The main problem is two verticals of 2140 mm each.
Why you can't just "add 140 mm from the bottom"
The simplest idea: cut 2000 mm from two planks for the verticals, and make up the missing 140 mm from leftovers. Mathematically, the scheme works. Visually, it is questionable.
The joint will be only 140 mm from one of the corners. On carved molding, this creates a very short insert that is harder to perceive as a deliberate part of the ornament. If the KPU-121 pattern has a repeat, the short extension may also align poorly with the main plank.
It is much more reasonable to choose the location of the longitudinal joint in advance.
Economical scheme for four planks
With four planks, you can make one joint on each vertical, but it won't be perfectly centered if you also use the two horizontals efficiently.
One practical principle:
- from the first plank, get a horizontal of about 940 mm and one vertical segment of roughly 980–1000 mm;
- from the second, get the second horizontal and a similar segment for the second vertical;
- from the third, get the remaining part of the first vertical, about 1140–1160 mm;
- from the fourth, get the remaining part of the second vertical.
Exact millimeter measurements are only set after determining the saw kerf width, the method of angled cuts, and the pattern position. What matters here is not a specific "ideal" size of 1000 mm, but the logic: four planks allow you to avoid short 140-mm inserts and get one proper joint on each long side.
With this scheme, the joints will end up slightly above or below the geometric center of the verticals. For a mirror 2100 mm high, this usually looks calmer than a short filler near the corner.
When to consider five planks
The fifth KPU-121 increases the budget but gives more freedom.
If you want to make both vertical seams almost strictly centered, each vertical can be divided roughly into two equal parts. For a long side of about 2140 mm, that is about 1070 mm per segment. Two such pieces from one two-meter plank are no longer possible: 1070 + 1070 = 2140 mm.
Therefore, four identical halves require separate cutting solutions, and horizontals also take up material. A fifth plank can make the cutting noticeably freer and provide a margin for pattern alignment.
You don't need to buy it automatically. First, you need to see the KPU-121 ornament itself and decide how critical the centered longitudinal seam is. But commercially, the choice looks honest:
- 4 planks — an economical working minimum for a frame of this geometry;
- 5 planks — a variant with a larger margin of freedom for placing seams and fitting the ornament.
By price at the time of checking:
4 × 5 190 = 20 760 ₽;
5 × 5 190 = 25 950 ₽.
The difference is 5,190 ₽, which is the price of one additional plank. The buyer should understand that they are not paying for "extra two meters just in case," but for the ability to make a less compromise cutting.
Mirror 800 × 1800 mm: three planks can already give four solid sides
Now we change not just the numbers, but the situation itself. The mirror 800 × 1800 mm is below the 1960 mm threshold, so with the same outer frame with 45° corners, the vertical sides can be solid.
Long points of parts:
- horizontals: 800 + 40 = 840 mm;
- verticals: 1800 + 40 = 1840 mm.
Total:
840 + 1840 + 840 + 1840 = 5360 mm.
Three planks give 6000 mm.
Here the cutting is fundamentally more convenient:
- first plank — one vertical 1840 mm;
- second — second vertical 1840 mm;
- third — two horizontals of 840 mm each.
The third plank after two horizontals has a nominal remainder of about 320 mm, and the two vertical planks have about 160 mm left each before accounting for cuts.
Unlike a 900 × 2100 mm mirror, longitudinal joints on visible sides are not required at all. That is why two mirrors with similar perimeters may require fundamentally different strategies.
Cost of three KPU-121:
3 × 5 190 = 15 570 ₽.
Here, the arithmetic minimum and practical cutting layout match much better.
This example shows why you need not dozens of calculations for different mirrors, but a few scenarios with different conclusions. For 800 × 1800 mm, the key is a compact three-plank layout without longitudinal joints. For 900 × 2100 mm, it is the need for joints and the choice between economy and fitting freedom.
Table of typical sizes: where a side fits entirely, and where a joint is inevitable
To avoid repeating the same arithmetic for each mirror, it is convenient to summarize the range in a table. It applies to one specific scheme: KPU-121 with a width of 20 mm lies entirely on the wall, the inner edge of the frame coincides with the edge of the mirror, and corners are mitered at 45°.
| Mirror Size | Long point of horizontal | Long point of vertical | Sum of parts | Net minimum of planks by length | Longitudinal joint on verticals |
|---|---|---|---|---|---|
| 700 × 1800 mm | 740 мм | 1840 мм | 5160 мм | 3 | Not required |
| 800 × 1800 mm | 840 мм | 1840 мм | 5360 мм | 3 | Not required |
| 900 × 1900 mm | 940 мм | 1940 мм | 5760 мм | 3 | Not required |
| 900 × 2000 mm | 940 мм | 2040 мм | 5960 мм | 3 | Needed |
| 900 × 2100 mm | 940 мм | 2140 мм | 6160 мм | 4 | Needed |
| 1000 × 2200 mm | 1040 мм | 2240 мм | 6560 мм | 4 | Needed |
| 1000 × 2400 mm | 1040 мм | 2440 мм | 6960 мм | 4 | Needed |
| 1200 × 2200 mm | 1240 мм | 2240 мм | 6960 мм | 4 | Needed |
The table has an important boundary: a mirror 1900 mm high still allows a vertical of 1940 mm from a single plank. At a height of 2000 mm, the long point is already about 2040 mm — a solid two-meter plank is not suitable.
But the column “clean minimum of planks by length” cannot be perceived as an automatic order. For example, for 900 × 2000 mm, the total 5960 mm formally fits into three planks, but both verticals of 2040 mm require splitting. It is necessary to check whether segments and horizontals can be conveniently placed in three blanks, taking into account the actual cut and pattern.
In other words, the table answers two different questions:
how much material is needed in total;
is it possible to get each side as a whole piece.
The third question — the convenience of a specific cut — is resolved separately after this.
Where to place the longitudinal joint if the mirror is taller than two meters
For a full-height mirror, the joint location often determines the quality of the result. A short profile 20 mm wide seems unnoticeable, but the connection of two carved fragments can end up at eye level and attract more attention than the frame itself.
There are several working principles.
Do not place a short filler piece next to a corner without necessity
A segment of 100–150 mm technically covers the lack of length, but visually looks like an insert. If the ornament has a pronounced repeat, finding a convincing connection point within such a short segment is especially difficult.
It is much better to divide the side into two normal-length fragments.
Joints of two verticals should have explainable symmetry
If the frame is symmetrical, a random seam on the left side at 300 mm from the floor and on the right at 900 mm is perceived as a cutting error.
It is not necessary to place both joints at exactly the same height if the pattern or furniture interferes, but for a regular mirror this is a good starting option.
The center is not always the best place
The geometric center of the vertical is often approximately at eye level. If the joint is noticeable, that is where a person will look most often.
Sometimes it is more rational to shift the joints above or below the central zone, keeping the same height on the left and right.
For example, for a vertical of about 2140 mm, you can consider segments of approximately 1000 and 1140 mm. The joint will be about 1 m from one edge of the frame. If the mirror starts almost from the floor, this mark may be below the main face area.
But the specific height cannot be chosen based only on the number. You need to consider the console in front of the mirror, switches, wall sconces, door handles, and the eye line.
The ornament matters more than perfect arithmetic
KPU-121 has a decorative pattern. The length of its repeat is not specified in the source data, so you cannot invent a number of millimeters for "alignment." The correct approach is to place two real strips together or study the drawing/sample and find a repeating section where the joint can be made least noticeable.
If you have to shift the joint by a few centimeters to match the pattern, that is a normal reason to change the cutting layout.
Two joints are sometimes better than one bad one.
At first glance, an extra joint always seems worse. But with a rigid four-plank layout, sometimes a symmetrical division of the long side into three parts can look neater than one short add-on at the corner. The decision depends on the pattern.
Therefore, one cannot promise that "four planks guarantee a perfect result." They guarantee sufficient nominal length for a 900 × 2100 mm mirror in the described geometry. The quality of the layout is determined by the cutting plan.
45° angles: why the frame length becomes longer than the mirror itself
For a narrow profile, twenty millimeters are easy to lose track of mentally. But they add 40 mm to the long point of each side for an external frame.
Let's imagine the top horizontal element. Its inner edge runs from the top left corner of the mirror to the right and has a length close to the glass width. At each end, the profile turns 90°, and the cut line runs at 45°. The outer point protrudes by the profile width.
Therefore, with a mirror width W, the long point of the top piece is approximately:
W + 2A,
where A = 20 mm.
For W = 900 mm:
900 + 40 = 940 mm.
The bottom side is also considered.
For verticals:
H + 40 mm.
This geometry explains several practical things at once.
First, a 1960 mm mirror is the last boundary size at which the long point of the side equals 2000 mm. In practice, cutting "to zero" without allowance is inconvenient, so caution is needed even near this threshold.
Second, adding a decorative gap between the mirror and the frame increases the parts even more.
Third, if the corners are not made at 45° but with a different scheme — for example, one plank butts into another with a straight cut — the lengths will be different. The 40 mm formula cannot be applied to any joining method.
Should straight joints be made at the corners
For a regular rectangular frame, a 45° miter gives a logical continuation of the contour: the 20 mm width evenly wraps around the corner.
Straight abutment is simpler in geometry, but one side visually "cuts into" the other. On carved moldings, this is even more tied to the pattern.
Therefore, it is better to test the corner joint method on trial pieces. If the 45° pattern looks unsuccessful, another joint can be considered, but then the entire cutting layout must be recalculated from scratch.
Why the four corners should be cut after a dry fit
An already glued mirror cannot be moved. If the walls or the panel itself have a slight deviation from a perfect rectangle, the theoretical 45° may require adjustment.
First, mark the frame on the wall, then temporarily assemble the four pieces without final fixation and check the joints.
For a thin 20-millimeter profile, a small gap in the corner is noticeable precisely because the entire frame looks delicate. A rough seam ruins the effect faster than on a massive profile.
Template KPU-121 before ordering: check the 20 mm width and 6 mm relief separately
Two different mockups are useful for a mirror.
The first is frontal. Cut long strips 20 mm wide from thick paper or cardboard and temporarily attach them around the mirror. They will show the visual thickness of the frame.
The second is volumetric. A small fragment can be made about 6 mm thick from cardboard, foam board, or several layers of material. It is needed where a door opens nearby, furniture passes, or a switch is located.
These two tests answer different questions.
The front mockup shows: whether the frame is too thin or too active.
Three-dimensional: whether the 6 mm protrusion interferes with adjacent objects.
First, a mockup of one side, then the entire frame.
One vertical edge helps understand the scale, but does not show the four corners and the top/bottom line.
After the first impression, assemble the full rectangle from paper strips. It is especially important to see the bottom side. On a floor-to-ceiling mirror, it may end up near the baseboard and make the lower part too heavy.
Sometimes after such a fitting, it becomes clear that it is better to make not four sides, but a three-sided U-shaped frame without the bottom strip. This is a different composition, and the amount of material needs to be recalculated. It should not be disguised as a "frame around the perimeter": the buyer must understand that the bottom contour is intentionally absent.
Check the mockup with the room's reflection.
A mirror differs from a regular panel in that inside the frame there is not a calm color, but a constantly changing reflection.
A twenty-millimeter ornament that seems almost unnoticeable on an empty wall may read as more active next to a bright reflection of furniture and light.
Therefore, the mockup is checked in the actual room, not on a separate sample of the molding.
Take photos of three versions
It's useful to take three shots from one point:
- a mirror without a frame;
- a paper frame 20 mm in the color of the wall;
- the same frame in a suggested contrasting shade.
In the photo, it's easier to compare the overall weight of the composition. If the second option already solves the edge problem, there's no reason to move to a more massive molding.
If the mirror almost touches a wall, cabinet, switch, or baseboard
An already glued mirror doesn't have the option to "shift the panel by twenty millimeters." Therefore, an obstacle on at least one side can change the entire composition.
Less than 20 mm to the side wall
If 12 mm remains on the left between the glass and the inner corner, a KPU-121 with a width of 20 mm won't fit entirely on the wall.
The solution has several paths:
- abandon the left side and make a different composition;
- choose a narrower profile;
- reconsider the position of the frame relative to the glass;
- consider partial overlap onto the mirror only as a separate technically verified project.
The worst option is to buy KPU-121 and decide on site how to "squeeze in" the missing 8 mm.
A cabinet opens nearby
Frontally, the distance may be sufficient. But the trim protrudes 6 mm from the wall.
If a furniture door opens along the wall, check its edge along the entire trajectory. Facades with a handle or protruding edge are especially dangerous.
Here you need a volumetric template, not a paper strip.
The switch is located 25 mm from the mirror
When the frame is flush against the glass, KPU-121 takes up 20 mm. Nominally, 5 mm remains.
This may not be enough visually, and the switch frame is sometimes wider than the mounting mechanism. You need to measure to the actual outer edge of the faceplate.
If the switch needs to be removed for maintenance, the trim must not block disassembly.
Mirror almost to the floor
If a tall baseboard runs along the bottom, a closed rectangular frame may intersect it.
There are three different compositions:
the baseboard is interrupted under the mirror, and KPU-121 closes at the bottom;
the bottom rail of KPU-121 is positioned above the baseboard with a separate gap;
the trim becomes U-shaped and opens downward.
You cannot calculate the quantity until one of these is selected.
The mirror fits up to the ceiling cornice
A similar problem occurs at the top. If there is 15 mm between the mirror and the cornice, the upper KPU-121 does not fit on the wall.
Interrupting the cornice for a thin frame after completed renovation is usually much more difficult than choosing another way to finish the mirror. Therefore, the top gap is checked before purchase.
KPU-121, smooth molding, or ready-made frame: the choice is determined not only by style
The buyer has at least three real alternatives. It is useful to compare them by task, not by general words about "beauty."
| Criterion | KPU-121 20 mm | Smooth or profiled molding | Separate ready-made frame |
|---|---|---|---|
| Original mirror | Already glued to the wall | Already glued or designed together with the wall | Often requires a separate frame solution |
| Visual width | Very thin | A wide range can be selected | Depends on the design |
| Character | Continuous carved ornament | From smooth to architectural profile | From minimal to massive |
| Main task | Make a thin decorative edge | Build a more prominent architectural frame | Get a standalone frame object |
| Layout | Planks of 2 m, longitudinal joints possible | Depends on the length of the specific molding | Depends on the finished structure |
| Mirror already glued to full height | a particularly interesting scenario | Suitable if space is available | May be more difficult to integrate after glass installation |
KPU-121 is chosen when a twenty-millimeter width looks sufficient and a carved linear pattern is desired.
The molding wins if the mirror is large and 20 mm gets lost, if the interior is built on smooth frame lines, or if the glass needs to be more strongly separated from the wall. Then you can buy polyurethane moldings and choose a different cross-section.
A finished wooden frame becomes a separate project. For an already glued mirror, it either needs to be constructed around the existing panel, or the mirror must be removed if the frame is designed for inserting glass. This is not always justified when only a thin edging is required.
There is a fourth honest option — leave the mirror without a frame. If the edges are neatly finished, the panel stands in a minimalist interior, and there are no other ornamental details nearby, KPU-121 may be unnecessary.
Frame color: the same KPU-121 can either blend in or become the main outline
The 20 mm width is small, so color greatly affects the perceived weight.
Matching the wall color
If the molding is painted in the same tone as the wall, the pattern is read through the shadow and the 6 mm relief. This is a calm strategy for a large mirror: the outline appears but does not turn the glass into a separate heavy picture.
This approach is especially well tested with a paper mockup. The strips can be painted with a close color or simply use paper of a similar tone.
In the color of adjacent stucco molding
If the room already has a cornice, molding frames, or other carved elements, KPU-121 can match their color. Then the mirror becomes part of the overall decorative system.
But color matching does not fix scale mismatch. If adjacent moldings 60–80 mm wide are very active, a twenty-millimeter edge may look too thin. This needs to be seen as a whole on the wall.
Contrast framing
A dark, metallic, or other contrasting color increases the visual weight of the frame. Even 20 mm begins to clearly separate the mirror from the wall.
Therefore, the contrasting option should not be evaluated against a white template. First, roughly reproduce the future color on the mockup.
Do not do complex painting just to make the ornament noticeable
If KPU-121 completely blends into the wall color, this may be a signal not for more complex painting, but that 20 mm is too little for this mirror and viewing distance.
Then it is more useful to compare a wider profile than to compensate for the wrong scale with many decorative effects.
Installation around an already glued mirror: order of work matters more than speed
The mirror is already a fixed part of the wall. This changes the sequence of work: the trim is fitted to the existing geometry, not the mirror to a ready-made frame.
1. Protect the mirror and finish
Before cutting and fitting, the edge of the glass and the adjacent surface must be protected from accidental scratches, dirt, and tools. The specific protective material is chosen so that it does not damage the wall covering and mirror when removed.
2. Determine the exact line of the inner edge
If the frame goes flush to the mirror, its actual edge becomes the inner base. If a gap is provided, mark it out first.
You don't need to start with the outer contour of KPU-121. Otherwise, a small width error will accumulate at the corners.
3. Dry assembly
The four sides or main segments are first applied without final fixation. Corners, lengths, longitudinal joints, and symmetry are checked.
On a 900 × 2100 mm mirror, dry assembly is especially important because the two verticals are composite.
4. Check the pattern at the joints
The repeat length of KPU-121 is not specified in the source data. Therefore, it cannot be guaranteed in advance that any segment will match the adjacent one.
Before the final cut, you need to see the actual pattern and choose the connection point.
5. Choose a fixation method based on the actual substrate
The product card shows polyurethane and offers adhesive accessories. But the specific installation depends on what is on the wall: paint, plaster, panel, or other covering.
The composition must be compatible with both polyurethane and the existing base. If part of the profile is to be glued to a mirror, that is a separate task requiring confirmed compatibility with glass and the mirror product.
6. First assemble the geometry, then fix the cosmetics
Attempting to hide an incorrect angle or a poorly placed longitudinal joint with finishing material does not replace precise cutting.
First, the lines must match geometrically. After that, final treatment of the joints is performed within the chosen finishing system.
This order differs from assembling a separate frame on a table. Here, it is impossible to completely remove the structure, flip it over, and adjust it from the back: everything happens around an already fixed mirror.
Price of one slat The price of the remainder does not equal its uselessness
After cutting four slats for a 900 × 2100 mm mirror, a significant length nominally remains.
This does not mean the order is overpriced. The reason is the limitation of two-meter length.
Remnants can be considered for other decorative tasks only after checking the pattern and required dimensions. They cannot be pre-allocated to another frame if the lengths do not fit.
Do not convert the price to rubles per meter and do not lose the sales format
5,190 ₽ per 2 m plank roughly corresponds to 2,595 ₽ per meter of raw material, but you cannot buy 2.37 m as one continuous length.
For commercial calculation, the price per piece and the length of the piece are more important, because they determine the basket.
Errors when framing an already glued KPU-121 mirror
| Mistake | Why it occurs | What happens | How to avoid |
|---|---|---|---|
| Divide only the mirror perimeter by 2 m | Frame width and corners are forgotten | This results in an underestimated quantity | Calculate the real long points of the parts |
| Consider a 2000 mm mirror compatible with one plank | Compare the glass height and the KPU length | At 45° angles, the outer point is about 2040 mm | Use a threshold of 1960 mm for the described scheme |
| Add the long side with a 100–150 mm insert at the corner | Want to use the maximum of each plank | The short fragment looks random | Design the joint location in advance |
| Not checking the 20 mm at the side wall | They only look at the overall view | The profile does not fit | Measure the minimum gap along the entire side |
| Forget about the 6 mm relief | The mockup is made only on paper | A conflict arises with the furniture door | Make a three-dimensional fragment |
| Buy along the perimeter before choosing the angle | They think that 45° and a straight joint are the same | The lengths of the parts change | First fix the corner joint |
| Do not take into account the ornament in the longitudinal joint | Molding is perceived as a smooth slat | The drawing breaks off noticeably | Check the real limit before the final cut |
| Use the exact 10% allowance without cutting | Habit of finishing materials | You can buy extra or still not solve the joint | Count whole two-meter blanks |
| Try to hide the uneven edge of the mirror with a wall frame | Expect the profile to cover the glass | The edge may remain visible | Separately determine whether the KPU lies on the wall or extends onto the mirror |
| Make a contrasting frame without a layout | 20 mm seem small | The outline becomes too active | Paint the template |
| Bring the profile flush to the switch | They don't account for maintenance | The device frame cannot be removed | Check the external dimensions of the switch |
| Order four sides when there's a conflict with the baseboard | Want a closed frame at any cost | The bottom node looks random | Compare the U-shaped scheme |
The errors here differ in nature: some are related to geometry, some to operation, and some to visual scale. Therefore, one piece of advice, "measure everything carefully," does not replace a thorough check.
When it's better not to buy KPU-121
Narrow carved molding doesn't have to suit every frameless mirror.
The first case is when there is no free 20 mm strip on at least one critical side, but the composition requires a closed contour. Then the purchase knowingly creates a placement problem.
The second is when the mirror is too large for a twenty-millimeter frame. If the pattern almost disappears from a normal viewing distance, it's better to choose a wider profile.
The third is when the wall is already overloaded with ornament. If there are several molding frames nearby, carved overlays, active furniture, and a complex cornice, an additional carved edge may not add completeness but simply increase the number of details.
The fourth is when there is no way to neatly handle the joints on a mirror over two meters high. If the longitudinal seam will be at the most visible point and the pattern cannot be aligned, it's wiser to compare another molding of greater length or a different type of framing.
The fifth is when the mirror already looks finished without a frame. A well-executed panel from floor to almost ceiling can be part of a modern interior precisely because of the absence of a contour.
The sixth — the profile should work as a load-bearing frame. KPU-121 in this article is considered only as a decorative frame around an already fixed mirror. It does not replace the structure that holds the glass.
If the only issue is that a different decorative scale is needed, you can buy decorative polyurethane molding and compare other linear elements. If a calm architectural frame is required, it makes more sense to look at moldings.
Practical algorithm: from the already glued mirror to the quantity of KPU-121 in the cart
To avoid returning to the calculation several times, it is convenient to go through the task in one order.
Step 1. Record the actual size of the mirror.
Do not use the size from the old order if the panel is already installed. Measure what resulted after installation.
Step 2. Check the free space around it.
For a frame on the wall flush against the glass, you need at least 20 mm on each side. If there will be a gap G, then G + 20 mm is required.
Step 3. Mark obstacles.
Baseboard, cornice, cabinet, switch, sconce, door, inner corner.
Step 4. Make a paper template 20 mm.
Check if it gets lost at the mirror scale.
Step 5. Choose the frame position.
Flush to the mirror, with a gap, or another scenario. Do not mix them in one calculation.
Step 6. Choose the corner joint.
The main calculations in the article refer to 45° angles.
Step 7. Calculate the long points of the four parts.
For a flush frame: horizontals W + 40 mm, verticals H + 40 mm.
Step 8. Check each side against 2000 mm.
If the value is larger, a longitudinal joint is needed.
Step 9. Create a cutting layout using whole planks.
Don't limit yourself to the total meters.
Step 10. Place the joints symmetrically and considering the pattern.
Step 11. Add an extra plank only with a clear purpose.
For example, to shift seams or to get extra material for matching the pattern.
Step 12. Calculate the cost.
Number of planks × 5,190 ₽ at the price at the time of checking.
Step 13. Verify the product card right before placing the order.
After such a check, you can order KPU-121 20 × 6 × 2000 mm already for a specific cut, not "approximately around the perimeter".
Where to look for a broader decor system if one thin frame is not enough
STAVROS already has a separate comprehensive article on wall decor with a mirror, covering molding frames, side compositions, and ready-made sets. It is useful when the task goes beyond a single twenty-millimeter trim:
Wall decor with mirror from polyurethane: moldings, frames and ready-made kits
The current scenario is deliberately narrower: the mirror is not being redesigned, it is already glued, and the buyer needs to decide whether only a thin KPU-121 can be added, how many two-meter strips will be needed, and where the joints will appear.
If after trying it on it turns out that a full wall composition is needed rather than a thin trim, you can You can buy ready-made stucco matching the Baroque style. Calculate the quantity: linear meters of cornices and moldings, number of rosettes, pilasters, consoles, corner elements. Add a ten to fifteen percent allowance for trimming. and compare other types of linear and piece decor.
If a carved linear element of a different scale is needed, the next step is buy decorative polyurethane molding.
If a thin carved edge is deemed correct, you can buy KPU-121 molding in the calculated quantity.
If a calmer frame without such a pattern is required — buy polyurethane moldings.
So the buyer doesn't go by the principle "the more decor, the better," but chooses exactly the level of finishing that the finished mirror already needs.
FAQ: additional questions about KPU-121 around an already installed mirror
Can the KPU-121 frame be made on only three sides?
Yes, this is a separate composition if the fourth side rests against the floor, baseboard, countertop, or another element. But this option cannot be calculated using the closed rectangle formula. For example, when the bottom side is absent, one horizontal piece is excluded from the cutting layout, and the corner joints at the bottom of the verticals get a different finish. First, draw a U-shaped outline and only then calculate the strips.
What to do if the mirror has rounded corners?
Don't automatically try to replicate the radius with straight KPU-121. The product card for the item in question does not confirm flexible execution, so you cannot invent the possibility of bending. You can check the frame as a separate rectangular outline around the mirror, leaving the glass rounding inside, or choose another element designed for the required geometry.
Can two adjacent mirrors be framed with one common KPU-121?
You can design a common outer outline if the two panels are perceived as one composition. Then the consumption is calculated by the external size of the entire group, not as the sum of two separate frames. If a vertical decorative divider is also needed between the mirrors, its length is added separately. This option may be more economical in terms of the number of corners, but requires its own cutting layout.
Is it necessary to cover the mirror bevel with KPU-121?
No, if the frame lies on the wall with the inner edge at the glass. The bevel remains part of the visible mirror. If the goal is specifically to cover the bevel or unfinished edge, that is already a scheme with an overlap onto the glass, which needs to be separately checked for geometry and fastening method.
Can KPU-121 be used on a wall with wallpaper?
Based on the name of the base alone, reliable installation cannot be guaranteed. You need to check the condition of the wallpaper, its adhesion to the wall, and the compatibility of the chosen adhesive with polyurethane and the covering. If the finishing layer holds weaker than the adhesive itself, the decorative element will depend on the strength of that layer.
What to do if the mirror is slightly off level?
Do not use the frame as a way to visually "straighten" a crookedly installed panel without checking. If KPU-121 runs strictly along the edge of the glass, it will follow the deviation. If you align the frame by level, an uneven gap will appear between it and the mirror. First, measure the amount of deviation and decide which defect will be more noticeable.
Can a frame without joints be made on a mirror 2100 mm high if more strips are purchased?
The number of strips does not change the maximum length of one piece: each KPU-121 is 2000 mm. In the described external scheme, the vertical piece is about 2140 mm, so at least one longitudinal joint on each vertical is inevitable. An additional strip only gives more freedom in choosing the location of these joints.
Does it make sense to make two parallel rows of KPU-121 around one mirror?
This is no longer a thin edging, but a double frame. Between the rows, a separate field will be needed, the overall width of the composition will increase significantly, and the consumption will almost double. If one 20-millimeter row seems too weak, first compare one wider molding: it may solve the task more simply.
Can KPU-121 be cut lengthwise if a few millimeters are missing at the wall?
This method cannot be considered ordinary fitting. Longitudinal cutting changes the width and pattern of the profile. If 20 mm does not fit, it is more correct to look for another product size or change the composition, rather than promise that KPU-121 can be narrowed on site without consequences.
What to do if there is already lighting behind the mirror?
First, turn it on and see where the light halo falls. The KPU-121 on the wall may end up inside this zone and change the nature of the shadow. You also need to maintain access to the lighting elements if they are serviced. Here, the template is especially useful: a three-dimensional fragment 6 mm thick will show the effect better than a flat paper strip.
Do I need to buy an additional strip as a spare?
There is no universal percentage of spare here. Strips are purchased according to a specific cutting plan. An additional KPU-121 makes sense if you know in advance why you need it: complex pattern matching, risk of test cuts, desire to shift longitudinal joints, or a future additional zone. An automatic "plus 10%" may not solve any of these tasks.
What to do with the leftovers after four strips?
First, label their actual lengths. A leftover of 800 mm and two leftovers of 100 mm are not the same as one solid meter. You can use them in another zone only where specific pieces fit by length and pattern. For the next project, leftovers are accounted for individually, not added arithmetically into "total meters."
Can the bottom strip be placed directly above the baseboard?
Yes, if there is a clear joint between the elements and the frame does not conflict with the baseboard relief. But if the mirror almost touches the baseboard, the 20 mm KPU-121 may not fit. In that case, a U-shaped frame without a bottom sometimes looks more logical than a random short gap.
If the mirror is in a niche, should the KPU-121 be centered relative to the niche or the glass?
For a frame that visually belongs to the mirror, the mirror itself is usually the base object. But with a noticeably asymmetric niche, a strict frame around the glass may emphasize the difference in side margins. So first make a template based on the mirror, then evaluate the entire niche as a whole. If the asymmetry bothers you, a wall composition of moldings may be needed rather than a thin edging.
Can KPU-121 be used in the bathroom around a mirror?
The mere fact that the product is made of polyurethane is not enough to promise the readiness of the entire system for a specific wet area. The substrate, coating, adhesive, joints, and room conditions must be considered. For such an installation, it is better to confirm the compatibility of the entire finishing system, not just the profile material.
When is it better to look at the entire catalog rather than order KPU-121?
When the template shows that 20 mm is too little or too much; when continuous two-meter strips create inconvenient joints; when a different ornament character is needed; or when the mirror becomes part of a large wall panel. In such a situation, it is more useful Buy Molded Decoration after comparing categories, rather than forcing one item to solve an unsuitable task.
A thin frame around a glued mirror starts not with the perimeter, but with four checks
KPU-121 is interesting precisely because, at 20 × 6 × 2000 mm, it allows creating a very narrow carved contour around a large mirror. It does not require turning an already glued sheet into a massive baguette structure and can work as a decorative wall layer.
But the four checks are more important than the product choice itself.
The first is whether there are physical 20 mm of substrate on each side. If a gap between the mirror and the frame is planned, the profile width is added to it.
The second is what scale of the frame results in the actual room. Twenty millimeters need to be seen in full size, not just on the product card.
Third — how the corners and cutting are arranged. For the outer frame flush against the mirror with 45° joints, the long points of the parts are 40 mm larger than the glass itself. Therefore, a mirror 2000 mm high no longer allows making a single vertical piece from a 2000 mm long plank.
Fourth — where the longitudinal joints will end up and how the carved pattern continues. For a 900 × 2100 mm mirror, four planks provide a sufficient minimum amount of material, but the joint location of the verticals still needs to be designed. A fifth plank makes sense not as an abstract reserve, but only if it actually improves the layout.
For an 800 × 1800 mm mirror, the situation is simpler: three KPU-121 allow for two full verticals and two horizontals. The price of such a set at the current cost is 15,570 ₽. For 900 × 2100 mm, four planks cost 20,760 ₽.
After marking and checking the cutting layout, you can buy KPU-121 molding in the quantity that actually results from the cutting map. If the twenty-millimeter frame does not match the scale of the mirror, it is better buy decorative polyurethane molding of a different size or switch to polyurethane moldings.
This approach is especially important for an already finished renovation: the mirror does not have to be adjusted to the decor. On the contrary, the decor is chosen based on actual dimensions, available space, and existing connections. That is why the thin KPU-121 can be a good solution only after precise measurement — and a completely unnecessary purchase if at least one of these checks fails.
STAVROS allows you to choose a specific KPU-121, other decorative molding options, moldings, and wider stucco decor. For an already glued mirror, it is reasonable to start with the smallest intervention: a full-size 20-millimeter template, a map of the four sides, and cutting of two-meter planks. If this scheme works on the wall and in numbers, only then does it turn into a justified order.