Article Contents:
- What is confirmed regarding KPU-107
- What layers the assembly around the pass-through window should consist of
- Why slats on the slopes are not mandatory, even if the entire wall is slatted
- Where the KPU-107 line should run relative to the edge of the slats
- KPU-107 directly at the boundary of the slatted zone
- First a smooth pause, then KPU-107
- KPU-107 closer to the slats, while a smooth field remains near the opening
- Full rectangle
- U-shaped scheme
- In the color of a smooth wall
- In the color of the slats
- Contrast color
- Before installation
- After installation
- Leave a full rectangle
- Make a U-shaped contour
- Raise the lower KPU above the countertop
- Mistake 6. Choosing a contrasting color before testing the lighting
- Mistake 7. Purchasing KPU before installing the countertop
- Mistake 8. Calling KPU-107 a molding and applying foreign installation logic to it
- Can KPU-107 be installed only above the service window?
- What to do if one side of the opening is longer than 2000 mm?
- Can KPU-107 be run along a metal slope?
- If the window is closed by a sliding sash, where to place the frame?
- Can the KPU-107 frame be made around two adjacent windows with one common line?
- What to do if the smooth strip is tiled?
- Can KPU-107 be painted in the ceiling color instead of the wall color?
- Are two extra slats needed "in reserve" for a large window?
- What to do if KPU-107 is visually too thin for a large window?
- Where can I see other options if KPU-107 does not fit the pattern?
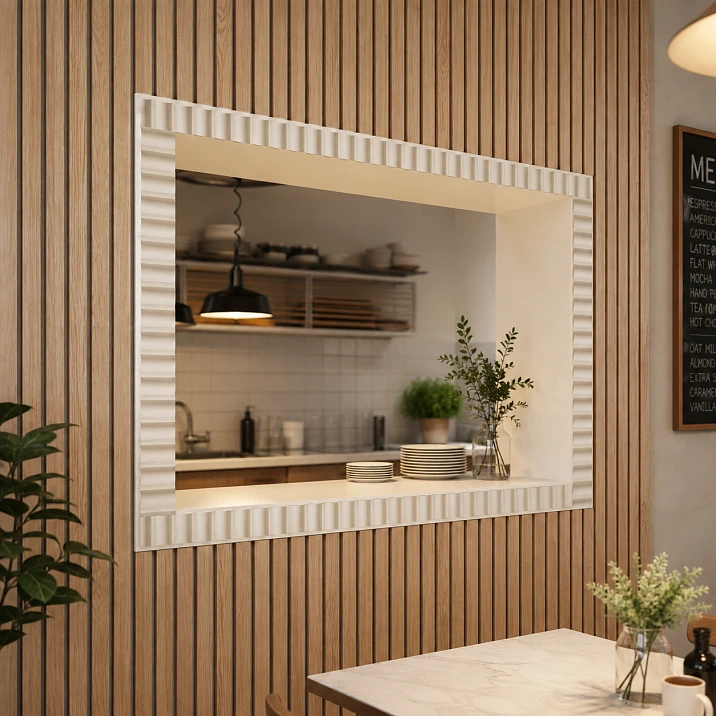
A pass-through window from the kitchen inside a slatted wall creates a conflict between two different tasks. From the hall side, you want to preserve the beautiful vertical rhythm of the panels. The opening itself remains functional: it has slopes, a lower surface, edges, possibly a pass-through countertop, and constant contact with trays, dishes, or staff.
The most literal option is to bring the slats right up to the opening and continue them onto the slopes. But a small rectangular window then quickly turns into a heavy wooden box: the vertical rhythm of the wall breaks into short fragments, the ends require precise fitting, and the work area gets extra relief.
An alternative is to stop the slatted panels before the opening, leave a smooth face strip around it, and run a decorative KPU-107 contour along that strip.
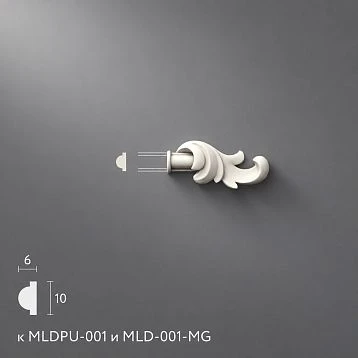
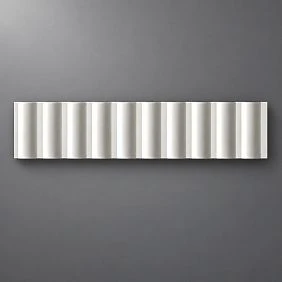
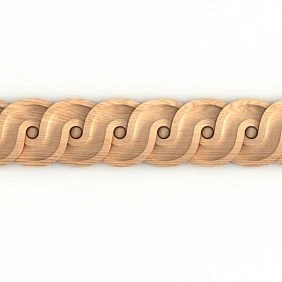
KPU-107 from STAVROS is precisely a decorative polyurethane molding. For the current position, the dimensions A × C × L = 30 × 5 × 2000 mm are specified, meaning the decorative strip width is 30 mm, the projection is 5 mm, and the length of one slat is 2000 mm. The current price is 5,500 RUB per piece.
Such a profile can be considered as a thin border between the smooth area around the service window and the active vertical slats. But it should not be turned into a protective trim, working edge, slope cladding, or part of the pass-through countertop. The product card describes KPU-107 as a decorative interior element — it is used in this role in the article.
The direct answer is as follows:
KPU-107 makes sense to install only on the front smooth plane of the wall around the pass-through window, if the contour is noticeable enough, the profile does not extend onto the working slopes, and the cutting of two-meter slats is calculated before purchase. The slats then end earlier, and the internal surfaces of the opening receive their own separate functional finish.
For a small contour of 900 × 600 mm, two KPU-107 strips are sufficient. For 1400 × 800 mm, three are needed. And for some sizes, even a calculation based on total length gives too optimistic a result: for example, a frame of 1800 × 1100 mm has a total length of 5800 mm, but from three two-meter strips, four solid sides cannot be laid out — four are needed.
That is why the article should not start with the phrase "the linear footage is easy to cut," but with a node map and a cutting diagram.
As confirmed for KPU-107
The STAVROS card gives a specific size without choosing from several options.
| Parameter | KPU-107 |
|---|---|
| Product type | decorative linear molding |
| Material | Polyurethane |
| Size A | 30 мм |
| Size C | 5 мм |
| Length L | 2000 мм |
| Current price | 5,500 ₽/pc. |
| Basic article scenario | decorative contour on the front plane of the wall |
| Drawing / 3D model | available in the card |
The STAVROS catalog decodes A as width and C as height/projection of the profile, so calculations use 30 mm for face width and 5 mm for projection. The strip length L is 2000 mm.
After checking the project, you can buy decorative molding KPU-107.
At the same time, the article deliberately does not call KPU-107 a molding. In semantics, queries about moldings may be close in user intent, but the specific product in the card belongs to molding. The product type cannot be changed for the sake of a key phrase.




What layers should the assembly around the service window consist of
To avoid mixing decor and working finish, it is useful to mentally divide the opening into four zones.
Zone 1 — slatted wall. This is the main interior background from the hall side.
Zone 2 — smooth strip around the opening. It is on this strip that KPU-107 can be located.
Zone 3 — slopes. Internal surfaces of the opening itself.
Zone 4 — working edge and lower surface. If dishes or trays are passed through the window, this part experiences a different load than the decorative wall.
KPU-107 belongs only to the second zone.
This simple division solves several problems at once.
First, the slats do not have to be routed onto short slopes and cut into many narrow fragments.
Second, polyurethane molding does not imitate structural edge protection, which it is not according to the spec.
Third, the interior part and the operational part of the window can be serviced independently.
Fourth, if over time the working surface of the opening needs repair, the decorative contour on the front wall does not have to be dismantled along with it.
Our factory also produces:
Why slats on slopes are not mandatory, even if the entire wall is slatted
In a slatted interior, there is a temptation to continue the material onto every adjacent surface. For large niches, this sometimes works. For a small pass-through window, the result often becomes too fragmented.
Imagine a wall with vertical panels and an opening 900 mm wide and 600 mm high.
On the front plane, the slats form long verticals from floor to ceiling. Inside a slope with a depth of, say, several tens of centimeters, these same lamellas have to be abruptly cut off and rearranged. In the top and bottom slopes, the direction changes character altogether: short segments are no longer perceived as a continuation of the wall, but as a separate box.
If instead you stop the panels at a smooth boundary:
rails → calm field → KPU-107 → technological opening,
the composition reads simpler.
The slats remain the background.
The trim forms a thin frame line.
The slopes remain an independent functional surface.
This approach is especially useful when the window is small and should not become the main decorative object of the hall.
For a general understanding of other window areas, STAVROS has an article about molding around the window opening. There, a regular window is considered; here the task is already an internal technological opening of a cafe and a specific KPU-107.
Get Consultation
Where should the KPU-107 line run relative to the edge of the rails
There are three basic schemes.
KPU-107 directly at the boundary of the slat zone
The slats end, immediately the molding begins, then a smooth section up to the opening.
This option makes KPU part of the transition "slats → smooth zone".
Plus — a clear boundary.
Minus — the ornament and relief of the molding are very close to the active slats, so the two patterns may compete.
First a smooth pause, then KPU-107
A noticeable smooth strip is left between the outermost slat and the molding.
This way KPU is perceived as the frame of the window itself, not as the end profile of the slat panel.
For the original theme, this is usually the most logical scheme.
KPU-107 closer to the slats, while a smooth field remains at the opening
Here, the trim defines the edge of the panel, not the opening.
This can be done if you need to emphasize the rectangle of the slat zone, but that's a different compositional meaning.
Therefore, before ordering, it's important to decide what exactly KPU-107 should frame: the service opening or the end of the slats.
In this article, the main scenario is the service opening. So, the profile is better linked to the geometry of the opening itself, leaving the slat edge secondary.
The width of the smooth strip around the opening is not derived from the 30 mm figure.
KPU-107 has a width of 30 mm.
This does not mean that the smooth strip around the window should be exactly 30 mm.
If you make it the same width, the trim will almost completely occupy the transition.
If you leave more space, there will be a gap between the slats, the decorative line, and the edge of the opening.
The correct width depends on:
-
width of the outer rail;
-
depth of the grooves;
-
dimensions of the window itself;
-
color of the smooth wall;
-
color of the KPU;
-
presence of a countertop;
-
viewing distance;
-
lighting.
Therefore, the article does not introduce a universal rule of "leave 50 mm."
The working method is a full-size mockup.
On the wall, mark with painter's tape:
-
the actual boundary of the future rails;
-
outer edge of KPU-107;
-
inner edge of KPU-107;
-
edge of the opening.
After this, it is visible whether there is enough smooth pause.
KPU-107 should not turn into a protective edge of the working window
The most important operational boundary is located right at the opening itself.
If the lower part of the window is used as a dispensing surface, the following are possible:
-
touching of trays;
-
dishes;
-
cleaning;
-
frequent wiping;
-
random impacts;
-
contact with staff hands.
Decorative molding should not be placed on this work edge just because it is prettier than a simple profile.
KPU-107 is better placed on the front wall.
Then between it and the work opening there remains a separate zone that can be made of material designed for the actual operation of this unit.
This is especially important at the bottom. The lower side of the frame visually tempts you to place the KPU right at the edge of the countertop, but that is exactly where the decorative relief receives the greatest mechanical load.
If the work surface protrudes forward, the lower section of the KPU can either be raised above it, or you can abandon the closed frame altogether and use a U-shaped decorative contour. This solution is already calculated as a separate scenario.
Closed frame or U-shaped contour: the lower side decides more than it seems
For a regular wall panel, a closed rectangle looks natural. For a service window, the lower side may conflict with the work logic.
If there is a protruding countertop, metal edge, or separate shelf below, the trim under it can become almost invisible or, conversely, fall into a dirty and impact-prone zone.
Therefore, before calculating the quantity of KPU-107, you need to choose one of two schemes.
Full rectangle
Four sides are needed:
-
two horizontal;
-
two vertical.
Plus — a finished frame composition.
Minus — the lower segment must have a normal clean surface for installation and must not fall into the working edge.
U-shaped scheme
Are designed:
-
the top;
-
left side;
-
right side.
The bottom line remains without KPU-107, because it is visually completed by the countertop or another functional element.
This is not a "missing fourth side" if the horizontal work surface actually forms the lower boundary.
For a U-shaped contour, the order also changes.
For example, a window 900 × 600 mm:
900 + 600 + 600 = 2100 mm.
By total length, one two-meter strip is not enough, so at least two are needed.
But the cutting is simpler than for a full rectangle, because there are only three parts.
For a window 1400 × 800 mm, the U-shaped contour:
1400 + 800 + 800 = 3000 mm.
Two strips of 2000 mm already give 4000 mm of initial length, and the parts can be laid out as follows:
-
first plank — 1400 mm;
-
second — 800 + 800 = 1600 mm.
That is, a U-shaped scheme can reduce the number of KPU-107 compared to a full frame.
But you shouldn't choose it just to save money. First, the lower part must compositionally and functionally justify the absence of a decorative profile.
How to count the number of KPU-107: first the list of solid segments, then the total length
The most common mistake when ordering linear molding is counting only the perimeter.
For a simple rectangle, the first approximation is indeed:
P = 2W + 2H.
Then you can get a lower bound for the number of planks:
N₀ = rounding up(P / 2000).
But N₀ — is not yet a guaranteed quantity.
Why: each side of the frame must be cut from a specific two-meter blank. If long pieces do not combine well with each other, part of the total length will remain in short offcuts, and an additional plank will be needed despite sufficient total footage.
Therefore, the calculation order should be as follows:
-
write down four whole segments;
-
check that none exceeds 2000 mm;
-
distribute the parts across planks;
-
only then calculate the cart.
If a side is longer than 2000 mm, a separate joint task arises. In this article, it is not automatically considered acceptable: the joint location must be coordinated with the KPU-107 pattern and the type of opening.
Cutting examples: where two planks are enough, and where three or four are needed
Cutting 900 × 600 mm: two planks are indeed enough
For a 900 × 600 mm frame, you need:
-
900 mm;
-
900 mm;
-
600 mm;
-
600 mm.
Total length:
3000 mm.
Two strips give:
4000 mm of source material.
But the main thing is that the parts actually lay out.
Plank 1: 900 + 900 = 1800 mm.
Plank 2: 600 + 600 = 1200 mm.
Or you can distribute it:
Plank 1: 900 + 600 = 1500 mm.
Plank 2: 900 + 600 = 1500 mm.
The second option is often more convenient if you want to get two similar leftovers.
Summary:
2 × KPU-107 = 11,000 ₽ at the current price of 5,500 ₽ per plank.
The calculation does not include glue, painting, and base preparation.
Layout 1200 × 700 mm: also two planks, although the frame is noticeably larger
Required parts:
-
1200 mm;
-
1200 mm;
-
700 mm;
-
700 mm.
Total length:
3800 mm.
Two planks give 4000 mm.
Here is the ideal layout:
Plank 1: 1200 + 700 = 1900 mm.
Plank 2: 1200 + 700 = 1900 mm.
100 mm remains on each.
Product summary:
2 × 5 500 = 11 000 ₽.
This example is useful not because the sum again equals two planks, but because it shows the boundary: the frame almost uses the entire available length of two blanks, but the layout is still successful.
Cut 1400 × 800 mm: already three strips
Required:
-
1400 mm;
-
1400 mm;
-
800 mm;
-
800 mm.
Perimeter:
4400 mm.
Two strips give only 4000 mm, so they are clearly insufficient.
Three give 6000 mm.
Practical scheme:
Strip 1: 1400 mm.
Strip 2: 1400 mm.
Strip 3: 800 + 800 = 1600 mm.
Summary:
3 × KPU-107 = 16 500 ₽.
Here the additional strip appears due to the total length, not due to complex fragmentation.
Why a frame of 1800 × 1100 mm requires four strips, although the perimeter is only 5800 mm
This is the most useful edge case.
Need details:
-
1800 mm;
-
1800 mm;
-
1100 mm;
-
1100 mm.
Total length:
5800 mm.
If you only look at the total length:
5800 / 2000 = 2.9, so you'd want to round up to three planks.
But now let's lay out the pieces.
Two 1800 mm segments each require a separate plank, because only 200 mm remains for each.
Two 1100 mm segments remain.
They don't fit together into one two-meter plank:
1100 + 1100 = 2200 mm.
So each of them also requires a separate piece.
Summary:
4 planks, not 3.
Cost:
4 × 5 500 = 22 000 ₽.
That's why for KPU-107 you need not only a perimeter calculation, but also a cut layout based on specific segments.
Table of typical sizes and number of slats
For a rectangular contour made of four solid sides up to 2000 mm, it is convenient to keep several typical cases in mind.
| Decorative contour size | Segments | Perimeter | Minimum KPU-107 | Cost of linear footage |
| 900 × 600 mm | 900 + 900 + 600 + 600 | 3000 мм | 2 pcs. | 11 000 ₽ |
| 1200 × 700 mm | 1200 + 1200 + 700 + 700 | 3800 мм | 2 pcs. | 11 000 ₽ |
| 1400 × 800 mm | 1400 + 1400 + 800 + 800 | 4400 мм | 3 pcs. | 16 500 ₽ |
| 1700 × 1000 mm | 1700 + 1700 + 1000 + 1000 | 5400 мм | 3 pcs. | 16 500 ₽ |
| 1800 × 1100 mm | 1800 + 1800 + 1100 + 1100 | 5800 мм | 4 pcs. | 22 000 ₽ |
| 1900 × 1000 mm | 1900 + 1900 + 1000 + 1000 | 5800 мм | 3 pcs. | 16 500 ₽ |
| 1100 × 1100 mm | 1100 + 1100 + 1100 + 1100 | 4400 мм | 4 pcs. | 22 000 ₽ |
The last two rows clearly show why the same perimeter does not mean the same basket.
For 1800 × 1100 and 1900 × 1000, the perimeter is the same — 5800 mm.
But in the second case, two segments of 1000 mm fit into one plank:
1000 + 1000 = 2000 mm.
Therefore, three are enough there.
A square of 1100 × 1100 is even more illustrative: the perimeter is only 4400 mm, but two sides of 1100 cannot be combined in one two-meter plank. Each blank gives only one whole side, and four planks are required.
Why you can't automatically add "10% extra" to the calculation
In linear work, a common piece of advice is often used:
take another 10% for trimming.
For this article, such a universal percentage is not introduced.
The reason: leftovers depend much more on the geometry of a specific cut than on the overall percentage.
For a frame of 1200 × 700 mm, two slats are used almost completely.
For 900 × 600 mm, much more material remains.
For 1800 × 1100 mm, a fourth slat appears due to fragmentation, although the total stock after purchase is already significant.
Therefore, it is more correct not to add an abstract percentage, but to make a cutting map.
An additional spare slat makes sense to consider separately if:
-
the object is remote;
-
repeat delivery is inconvenient;
-
the ornament is difficult to align;
-
the installer wants to have a reserve for errors;
-
there are also small areas in the interior for the same KPU.
But this is already a project decision, not a universal consumption standard.
What 45° miter cuts change in the calculation
For a rectangular frame, corners are often solved with a diagonal miter cut.
But the length cannot be calculated as "30 mm extra per corner" just because of the profile width.
You need to determine in advance which line the frame dimensions refer to:
-
to the outer dimension;
-
to the inner opening;
-
to the centerline of the profile.
If the decorative contour is defined by the outer vertices, the side length is marked along the long points of the cut.
If defined by the inner light dimension, the long point will be larger.
Therefore, before cutting, you need to make a working sketch with at least four dimensions:
-
outer left edge;
-
outer right;
-
the top;
-
bottom.
The plank itself is cut according to the marking of the specific angle.
The article does not add a fictitious millimeter allowance because it depends on how exactly the frame size is specified and what type of angle is chosen.
Do I need to align the KPU-107 pattern at the corners
The KPU-107 card shows a decorative profile and a 3D model, but the available specifications do not include a confirmed pattern repeat value.
Therefore, you cannot write:
the pattern repeats every 100 mm, just adjust it.
The exact repeat is unknown.
If the ornament is noticeable, it is useful to open the 3D model and a real sample before ordering and cutting.
There are three possible approaches.
The angle is built according to the profile geometry. The main task is a neat 45° line, and the pattern meets as the specific cut allows.
The ornament is adjusted. Then it may be necessary to shift the cut location, and the consumption will increase.
The angles are solved through another element. This is only possible if the manufacturer has a suitable compatible corner decor and it matches the project.
Until the repeat is confirmed, it is better not to promise a perfect continuation of the pattern without additional consumption in the estimate.
Join KPU-107 along the length or avoid joints on one side
If the frame side is shorter than 2000 mm, it is more logical to cut it as a single piece.
This reduces the chances of getting a noticeable transverse joint near the window.
If the side is longer than 2000 mm, a joint becomes inevitable unless a different profile is chosen.
Then you need to decide:
-
where it will be located;
-
how noticeable the pattern is;
-
can the pattern be aligned;
-
how lighting will highlight the seam;
-
whether the joint will fall into the most visible upper area.
For the dispensing window, it is especially desirable to avoid an accidental joint in the center of the upper side, if it can be shifted to a less visible area and this does not spoil the pattern.
But the exact location is determined after reviewing the profile and layout.
How the cutting changes if the dispensing window is asymmetrical
Not every opening is a perfect rectangle with equal lengths of opposite sides.
After finishing, the following may appear:
-
different width at top and bottom;
-
slight skew;
-
non-standard countertop;
-
right post is wider than left;
-
protruding portal.
Trim should not mask a geometric error.
First, check the opening itself.
Need to measure:
-
top width;
-
bottom width;
-
left height;
-
right height;
-
diagonals of the decorative contour.
If the difference is noticeable, first decide where the visually correct rectangle will be: based on the actual opening or on the new smooth finishing frame.
KPU-107 is better mounted according to the verified decorative geometry, rather than repeating a random construction misalignment.
Separately measure the depth of the slope: KPU-107 should not create a false "frame" inside the opening
Even if the trim remains only on the front wall, the depth of the opening affects perception.
For a very shallow opening, the smooth strip and KPU-107 read almost like a regular wall frame.
For a deep opening, a volumetric portal emerges: the front frame is only the first layer, and then the eye sees long slopes.
If the slopes are dark, KPU in a light color can sharply emphasize the opening.
If the slopes match the color of the smooth strip, the frame looks calmer.
If the slopes are clad with metal or another contrasting material, the trim should be a subtle visual transition, not try to compete with the working finish.
Therefore, before purchasing, it is useful to photograph the window not frontally, but at an angle of 30–45°. This is how a showroom visitor often sees it.
This angle immediately shows:
-
how deep the opening is;
-
whether the worktop protrudes;
-
how the slats end;
-
whether KPU-107 looks too decorative for a utility unit;
-
whether a full contour is needed or only the top and sides.
Color of KPU-107: matching the smooth strip, slats, or as a separate accent.
A width of 30 mm makes the profile noticeable but not heavy. The color determines whether it becomes a standalone frame or almost blends into the wall.
In the color of the smooth wall
The calmest option.
KPU-107 is defined by its 5-millimeter relief and its own pattern, but it does not create a separate color line.
This is especially useful if the slat panels are contrasting — for example, natural wood on a light wall.
In such a combination, the slat zone remains the main material, while the molding contour only frames the opening.
In the color of the slats
This way, you can connect the service window to the wooden rhythm of the wall without transferring the slats themselves to the slopes.
But polyurethane painted in a single color does not reproduce wood texture.
Therefore, this is a color echo, not an imitation of wood.
If the shade is close but does not match, the difference may look accidental. It is better to do a real color sample next to the panel.
Contrast color
Black, graphite, metallic, or another contrast turns KPU-107 into a graphic frame.
For a cafe, this can work if the same color is repeated:
-
in lamps;
-
in furniture legs;
-
in metal elements of the stand;
-
in display case frames;
-
in door hardware.
Without repetition, the decorative profile risks becoming too independent an object around the technical window.
Should KPU-107 be painted before or after installation
The choice depends on the wall finish and the frame color.
Before installation
Useful if:
-
KPU will be contrasting;
-
nearby natural slats that must not be stained;
-
the profile is difficult to paint neatly near the working edge;
-
installation is carried out after the completion of the main finishing.
Plus — less risk of hitting adjacent materials with paint.
Minus — after cutting and fitting corners, local touch-ups may be required.
After installation
It makes sense if KPU-107 and the smooth strip are painted in the same color.
This way you can achieve a cohesive architectural relief.
But the slat panels must already be well protected.
For a restaurant or cafe, it is especially important not to transfer painting work to an already operating kitchen without organizing the process. The article does not specify the painting technology at an active site — it is determined by the chosen finishing system and work schedule.
Lighting can turn a 5 mm relief into a much more noticeable frame
KPU-107 has a small overhang — 5 mm.
On a uniformly lit wall, this is a delicate relief.
But the dispensing window is often located near the bright light of the kitchen, pendant lights, or track spots.
Side light creates a shadow along the edge of the profile.
Because of this, the contour becomes visually wider and deeper than in the frontal product photo.
It needs to be checked in at least three modes:
-
daylight from the hall;
-
evening interior light;
-
bright light from the kitchen through the window itself.
The last scenario is especially important. The opening may glow from within, and KPU-107 will be at the edge of strong contrast.
If the relief starts to look too much like a "classic frame" around a technical opening, it is better to choose a monochrome finish or abandon the molding altogether.
For a modern cafe, the KPU-107 ornament must pass a separate style test.
The size and layout may be perfect, but the pattern itself may not suit the interior.
In a cafe with:
-
smooth concrete;
-
black metal;
-
minimalist slats;
-
large typography;
-
industrial kitchen,
an expressive decorative ornament may be perceived as too classic.
Then there are three paths.
Make KPU-107 monochrome. The relief becomes less literal.
Choose a simpler polyurethane profile. In the category polyurethane molding you can compare other patterns and sizes.
Leave a smooth opening without molding. This is a full-fledged solution if the wall architecture is already expressive enough.
That is, KPU-107 should not be purchased just because its width of 30 mm is "conveniently suitable."
How to choose the distance from KPU-107 to the opening
If the molding is too close to the opening, it can be perceived as a decorative edge of the window itself.
If it is too far, it is perceived as an independent frame, not connected to the opening.
The exact indentation depends on the window size.
For a small opening of 900 × 600 mm, even an extra 50–70 mm visually noticeably enlarges the frame composition.
For 1400 × 800 mm, the same addition is less significant.
Therefore, it is convenient to make not one template, but three contours with painter's tape:
-
tight;
-
medium;
-
more loose.
On each contour, mark a 30 mm strip over the tape for KPU-107.
This way, you can compare where the frame looks natural.
You don't need to turn the choice into arithmetic like "the offset equals the profile width." The proportion is determined by the entire wall.
How the outer strips should approach the smooth strip
The thinner the decorative frame, the more noticeable the quality of the finish of the slat zone.
KPU-107 will not fix poorly cut panels.
Before installing the profile, you need to check:
-
whether the slats end the same on the left and right;
-
whether open ends remain;
-
whether the edge of the backing matches;
-
whether there is a torn line around the perimeter;
-
whether the border is parallel to the opening;
-
whether the transition looks the same at the top and bottom.
If the outermost lamella is cut accidentally or the step has "shifted" near the window, the decorative contour will only emphasize the problem.
First, the slat geometry is brought to specification.
Then the KPU is installed.
If the panels have not been purchased yet, the layout can be checked before installation and only after that order slat panels for walls.
The mounting surface of KPU-107 must remain continuous
A strip with a width of 30 mm requires a flat support along its entire length.
Problems arise if the smooth strip actually consists of:
-
a painted wall;
-
the end of a panel;
-
a metal profile;
-
tiles;
-
sealant.
One plank should not accidentally transition across several different substrates without compatibility checking.
The best scenario is that KPU-107 lies entirely on one prepared face plane.
If there is paint under the top side of the frame and another material under the side, the mounting compound is selected considering both substrates.
The product card shows KPU-107 as a polyurethane element and suggests adhesive mounting, but specific compatibility with paint, metal, tiles, or laminated surfaces needs to be checked separately.
Why the decorative contour is better installed after the final window geometry
If KPU is installed earlier and then changed:
-
tabletop;
-
slopes;
-
protective profile;
-
edge finishing;
-
thickness of the slat panel,
The frame may lose proper alignment.
Therefore, it is better to structure the repair sequence as follows:
-
form a technological opening;
-
finish the working slopes;
-
install the countertop or lower edge;
-
finish the slat cladding;
-
level the smooth strip;
-
take the final measurement of the decorative contour;
-
lay out KPU-107 along the slats;
-
perform a dry fit;
-
only then glue.
Thus, the trim adapts to the already confirmed geometry rather than setting it too early.
What to do with the lower KPU if the countertop extends beyond the wall
Let's imagine that the service countertop protrudes into the hall by 80–150 mm.
Then the lower KPU, located on the front wall, will visually end up behind it.
Depending on the visitor's eye height, it may be almost invisible.
There are three options.
Leave a full rectangle
Suitable if the countertop is thin, the profile remains visible, and the composition truly requires a closed frame.
Make a U-shaped contour
The countertop becomes the bottom line.
This is often simpler and more functional.
Raise the lower KPU above the countertop
This creates a horizontal gap between the work surface and the decorative profile.
This approach is possible but requires a mockup: two parallel horizontal lines may look redundant.
The choice also affects material consumption, so the layout is finalized before ordering the slats.
The calculation for the U-shaped contour must be done separately
For the U-shaped layout:
L = W + 2H.
For example:
| Opening size | U-contour segments | Overall length | Minimum KPU-107 |
| 900 × 600 mm | 900 + 600 + 600 | 2100 мм | 2 pcs. |
| 1200 × 700 mm | 1200 + 700 + 700 | 2600 мм | 2 pcs. |
| 1400 × 800 mm | 1400 + 800 + 800 | 3000 мм | 2 pcs. |
| 1800 × 1100 mm | 1800 + 1100 + 1100 | 4000 мм | 3 pcs. |
The last line shows another feature of the cutting layout.
In total, 4000 mm equals two slats.
But parts 1800, 1100, and 1100 cannot be placed in two blanks:
-
only 200 mm remains for 1800;
-
1100 + 1100 = 2200 mm.
Therefore, three are needed, not two.
This is the same principle: first the list of parts, then the basket.
Commercial cost of the full and U-shaped variant
At a price of 5,500 ₽ for KPU-107, the difference becomes noticeable.
For an opening of 1400 × 800 mm:
-
full rectangle — 3 strips = 16,500 ₽;
-
U-shaped contour — 2 strips = 11,000 ₽.
The difference is 5,500 ₽, that is, one strip.
But you can't choose the P-scheme just to save money.
If the lower side is visually necessary, saving ruins the composition.
If the bottom line is naturally formed by the tabletop, the third plank may indeed be unnecessary.
When KPU-107 leftovers can be used, and when you shouldn't plan the whole project on them
After cutting, parts of the profile almost always remain.
For 900 × 600 mm with two planks, a significant length remains.
For 1200 × 700 mm — only 100 mm each with the 1200 + 700 scheme.
Leftovers can be used for:
-
paint testing;
-
checking glue;
-
test cutting;
-
a small sample for approval;
-
another short decorative section.
But you shouldn't promise in advance that the leftovers will definitely be enough for another node.
Especially if the KPU pattern requires phase matching or angular fitting.
A practical approach is to first cover the main opening, then measure the actual leftovers, and only then decide where they fit.
Several identical service windows: counting each separately is convenient, but the overall cutting layout may be more advantageous
In a cafe or restaurant, sometimes two or three identical service windows are made. In this case, there are two ways to calculate KPU-107.
The first is to count each frame separately and multiply the number of planks.
The second is to compile a common list of segments for all openings and lay them out on two-meter blanks as a single order.
For three identical frames 900 × 600 mm, a separate calculation gives:
2 slats per window × 3 windows = 6 slats.
But the overall list of parts consists of:
-
six pieces of 900 mm each;
-
six pieces of 600 mm each.
They can be arranged into five slats:
-
slat 1: 900 + 900 = 1800 mm;
-
slat 2: 900 + 900 = 1800 mm;
-
slat 3: 900 + 900 = 1800 mm;
-
slat 4: 600 + 600 + 600 = 1800 mm;
-
slat 5: 600 + 600 + 600 = 1800 mm.
It turns out:
5 slats instead of 6.
At the current price:
5 × 5,500 = 27,500 ₽ instead of 33,000 ₽.
The difference is one slat, that is, 5,500 ₽.
But such a combined cutting layout can only be used after a final check of actual lengths, angles, and pattern. If some cuts have to be shifted to align the ornament, the actual layout may change.
For three frames 1400 × 800 mm, there is no longer any savings: six 1400 mm pieces take up six separate slats, and six 800 mm pieces fit two per slat, which is still
Mistake 6. Choosing a contrasting color before testing the lighting
Why it happens: you want to make the window noticeable.
Consequence: the 5-millimeter relief under side lighting looks much more active than expected.
Check: evening mockup.
How to avoid: first check in monochrome.
Error 7. Purchase KPU before installing the countertop
Why it occurs: you want to order all the decor in advance.
Consequence: after mounting the work surface, the bottom line of the frame turns out to be unnecessary or hidden.
Check: final window unit before ordering.
How to avoid: calculate the linear footage after confirming the bottom boundary.
Error 8. Calling KPU-107 a molding and applying foreign installation logic to it
Why it occurs: in search, the word "molding" is more frequent and familiar.
Consequence: the product begins to be described by the wrong type and attributed properties of another category.
Check: product card.
How to avoid: in the article and order, use the exact name — decorative linear molding KPU-107.
When KPU-107 around the dispensing window does not need to be purchased
KPU-107 may be unnecessary if the smooth strip itself already separates the opening from the slats well.
It is also reasonable not to purchase it in the following cases:
-
the window is very small, and the 30 mm profile makes the frame too noticeable;
-
there are no other ornamental details in the interior;
-
the cafe is built on a strict industrial aesthetic;
-
the lower and side areas are too functional for decorative relief;
-
there is no continuous smooth plane around the opening;
-
the edge of the slat area is already finished with a separate profile;
-
the window is closed by a shutter, roller blind, or another element that conflicts with the frame;
-
the layout requires too many slats relative to the visual effect;
-
KPU needs to be brought onto the slopes so that the composition comes together at all;
-
the lighting makes the ornament excessively active.
A commercial article should allow for the conclusion:
0 KPU-107 slats is also a correct configuration if a smooth opening looks better.
When KPU-107 is truly justified
The profile works well when:
-
the slat wall is active, but the edge of the opening is desired to be calmer;
-
there is a separate smooth strip around the window;
-
the slopes have their own functional finish;
-
30 mm on the face does not overload the scale;
-
5 mm of relief is enough for a light shadow;
-
KPU is not on the working edge;
-
the color supports the interior;
-
the layout is clear before ordering;
-
the corners can be assembled neatly;
-
the cost of 2–4 slats is justified by the visual result.
Then the linear molding becomes not random stucco, but a precise boundary between the technological opening and the interior slatted surface.
What to choose instead of KPU-107 if its pattern does not fit
If the logic of the smooth contour itself is appealing, but the ornament of KPU-107 is too classic, there is no need to return to slats on the slopes.
You can keep the principle and change the profile.
In the polyurethane trim There are other widths and patterns.
If you need a more architectural linear frame without pronounced carved ornament, you can compare Polyurethane moldings for walls.
This is already a different product scenario, but the principle remains the same:
smooth front strip — decorative linear profile — functional opening.
If the problem is not in the profile but in the slat layout itself, it's better to reconsider the panel boundaries.
Practical algorithm from opening to order
-
Record the final size of the dispensing window.
-
Determine where the work area ends and the decorative front wall begins.
-
Decide whether the slopes will be completely smooth.
-
Mark the boundary of the slat panels.
-
Select the width of the smooth strip around the opening according to the layout, not the KPU width.
-
Decide: a full rectangle or a U-shaped contour.
-
Measure the top, bottom, left, and right sides separately.
-
Check the diagonals.
-
Make a list of whole segments.
-
For each segment, check whether it is less than 2000 mm.
-
Distribute the segments across individual slats.
-
Do not limit yourself to dividing the perimeter by 2000.
-
Check the KPU-107 pattern and corner cuts on the sample/3D model.
-
Make a template for a 30 mm wide strip around the opening.
-
Add a visual overhang of 5 mm.
-
Look at the node from the hall side and at an angle.
-
Check the light from the kitchen in the evening.
-
Determine the color.
-
Install the working slopes and countertop before the final measurement.
-
After that, place the order.
If the scheme is confirmed, you can order KPU-107 30 × 5 × 2000 mm in the calculated quantity.
Decision matrix: whether KPU-107 is needed and how much to buy
| Condition | Solution |
| The slats want to be extended onto the slopes, but the opening is small | first compare the smooth scheme |
| There is a flat smooth strip around the window | KPU-107 can be mocked up |
| The molding hits the working edge | Move to the front wall or abandon |
| The bottom line is covered by the countertop | Check the U-shaped contour |
| Frame 900 × 600 mm | 2 planks |
| Frame 1200 × 700 mm | 2 planks |
| Frame 1400 × 800 mm | 3 planks |
| Frame 1800 × 1100 mm | 4 planks due to cutting |
| The ornament is too classic | choose a different trim/molding |
| A smooth opening already looks finished | Do not buy KPU |
| Panels are not installed yet | first coordinate the entire assembly |
| The opening is already ready | calculate by actual dimensions |
Result: KPU-107 is needed not on the slopes, but as a thin face border
KPU-107 — decorative polyurethane molding, size 30 × 5 × 2000 mm, current price 5,500 ₽ per plank.
For a cafe service window, its key role is not to cover working edges or replace slope finishing.
It works as a thin decorative contour on the front smooth wall surface between slat panels and the technical opening.
Correct sequence:
finished opening → functional slopes → slat boundary → smooth strip → full or U-shaped KPU layout → cutting → order.
For the frame:
-
900 × 600 mm — 2 planks = 11,000 ₽;
-
1200 × 700 mm — 2 planks = 11,000 ₽;
-
1400 × 800 mm — 3 planks = 16,500 ₽;
-
1800 × 1100 mm — 4 planks = 22,000 ₽.
The last example is especially important: a perimeter of 5800 mm looks like three two-meter blanks, but the actual segments cannot be laid out into three planks.
Therefore, you cannot buy KPU-107 just "by perimeter".
If the profile matches the style, the slopes remain functional, the smooth strip looks convincing, and the layout is verified, KPU-107 allows you to avoid running the slats inside the window and get a clean decorative border.
If not, the opening can be left smooth or another one can be chosen Polyurethane trim.
Available for the entire wall Slatted panels for interior finishing, and for a wider selection of decor — Polyurethane moldings.
FAQ
Can KPU-107 be made only above the service window?
Yes, if the top line is needed as an independent decorative accent. But this is no longer a frame. This option should be checked together with the slat layout: one horizontal profile must have a clear purpose and not look randomly cut off.
What to do if one side of the opening is longer than 2000 mm?
A joint or another profile/scheme will be needed. Before ordering, the joint location must be determined and the KPU-107 pattern checked. The repeat value in the available card is not confirmed, so the allowance for pattern matching cannot be made up in advance.
Can KPU-107 be run along a metal slope?
For the original scenario, it's better not to: the linear profile is designed as a decorative interior element, and the slope of a service window has its own function. If the project still assumes such installation, the compatibility of the base and adhesive is checked separately.
If the window closes with a sliding sash, where should the frame be placed?
First, you need to determine the full trajectory of the sash and its guides. The KPU-107 should not interfere with movement or maintenance. If the sash moves along the front wall, a decorative contour may be impossible on that side.
Can the KPU-107 frame be made around two adjacent windows with one common line?
A common composition can be designed, but that is a different cut and a different scale. First, you need to decide whether the windows should be perceived as a single block or as two independent technical openings.
What to do if the smooth strip is tiled?
You need to separately check the compatibility of the mounting compound with the tile and polyurethane. The trim should not overlap working joints or areas that must be serviced independently.
Can the KPU-107 be painted in the ceiling color instead of the wall color?
Yes, if this color is repeated in the interior and the frame does not look detached from the wall. For cafes, a real paint sample is especially useful: under bright kitchen lighting, shades can be perceived differently.
Are two additional strips needed "in reserve" for a large window?
There is no universal rule. First, an accurate cut is made. A separate reserve makes sense only based on the object's conditions — complex delivery, risk of error, the need to match a pattern, or additional short sections.
What to do if KPU-107 is visually too thin for a large window?
Do not automatically increase the number of parallel strips. It is better to compare a wider molding or trim, or keep the frame minimalist. Several lines around a technical opening may look heavier than one.
Where can I see other options if KPU-107 does not fit the pattern?
In the section STAVROS polyurethane molding and in the category of polyurethane moldings.