Article Contents:
- Why the linear meter does not see the pattern
- What is confirmed about the carved baguette K-086
- Motif, repeat, and axis: the language used to create a cutting map
- Motif — a recognizable part of the pattern
- Repeat — a repeating segment
- The motif axis sets the compositional center
- The neutral area helps hide the cut
- Count only the total perimeter
- Choosing the width based on a photo
- Considering 300 mm as a universal length
- Inventing a rapport
- Starting cutting from the factory end
- Cutting the main element in the corner
- Making paired facades independently
- Considering any leftover as useful
- Mixing batches without layout
- Paint before dry assembly
- Do not include packaging in the order
- Order without specific reservation
- One furniture facade
- Series of cabinets or identical doors
- Portal or long wall composition
- What sizes does K-086 have?
- Is there a short version of K-086?
- Can I order a length of 300 mm for a section of 80 mm?
- How to find out the exact ornament repeat?
- How to position the central motif?
- How to calculate K-086 for four sides of the facade?
- How much extra should be added?
- Can leftovers be used?
- What to choose for covering enamel: beech or oak?
- When should I choose oak?
- What is the difference between "Standard" and "Prestige"?
- Can I paint first and then adjust?
- How to connect two planks on the long side?
- Why is a rigid packaging frame needed?
- How many planks fit in a package?
- Can beech and oak be mixed in one frame?
- Will K-086 be suitable for a painting?
- Where to buy K-086 by the main card?

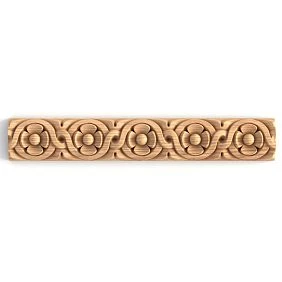
Buy wooden baguette K-086 it is priced not just by total linear footage, but after laying out the leaf-and-berry ornament across the entire composition. This approach is needed so that the central motif falls on the axis of the facade, door, wall panel, or portal, identical sides start with the same part of the pattern, and corner cuts do not pass through a prominent leaf or berry element. First, the position of the pattern is determined, then a cross-section of 50 × 12, 80 × 18, or 100 × 23 mm is selected, a cutting map is made, and only then is it converted into the number of whole planks 2000 mm long. The short version 50 × 12 × 300 mm can be used for preliminary scale fitting and finishing, but it cannot be automatically considered an official manufacturer sample or transferred to other cross-sections.
Simple arithmetic only answers the question of how many meters the sides of the frame will take. It does not show where the repeating pattern will start, which motif will end up in the center, how paired uprights will meet, and whether the segment after the first cut will remain useful. Therefore, four two-meter planks can cover a perimeter of 6.6 m in length and at the same time not provide a neat symmetrical layout. For carved moldings, not only the sum of millimeters matters, but also the artistic logic of each cut.
K-086 is especially demanding of such a calculation because its ornament is perceived as a continuous frieze. If installation starts from a random edge of the plank, one facade may get a complete central motif, while the adjacent one gets a cut-off half. The error will be noticeable even after expensive finishing. A competent purchase begins with a list of sides, a motif diagram, dry assembly, and distribution of leftovers, and ends with ordering the required number of whole planks from one agreed batch.
Why the linear meter does not see the pattern
The linear meter is convenient for a smooth profile: the lengths of the sides are added, a technological allowance is added, and the number of planks is obtained. For carved baguette K-086, this is not enough. The repeating leaf-and-berry pattern forces you to consider not only the end of the segment but also the content of that end. Two leftovers of the same length can have different values: one retains a complete motif and a neutral zone for cutting, the other only a fragment of a leaf that cannot be placed in a visible part of the composition.
| Usual linear footage calculation | Calculation of K-086 by ornament |
|---|---|
| The length of all sides is summed | First, the position of central and edge motifs is determined |
| A conditional percentage of allowance is added | Allowance is formed based on actual cuts, angles, and symmetry |
| Remnants are considered interchangeable | Each remnant is evaluated based on which part of the pattern it starts from |
| The angle is perceived as a simple miter cut | It is checked which element of the ornament falls into the vertex of the angle |
| The planks are distributed randomly | The planks are pre-assigned to the top, bottom, left, and right sides |
The correct calculation therefore starts not in the cart and not at the miter saw. First, the designer or craftsman creates a graphic layout. Then, they determine the permissible cutting points. Only after this do they see how many planks are actually needed and which remnants can be transferred to other sides or repeating facades.




As confirmed for the carved baguette K-086
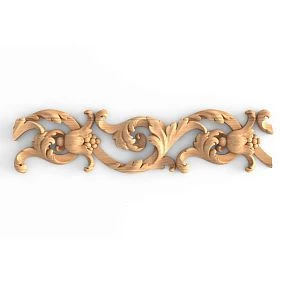
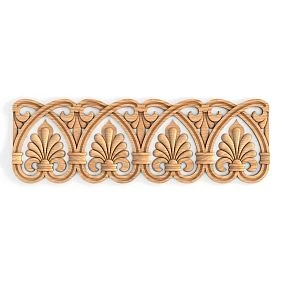
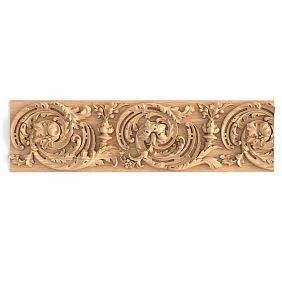
K-086 is a wooden carved molding with a leaf-and-berry ornament. The design combines features of Russian decorative art and Baroque plasticity. Such a frieze can work on furniture, door panels, wall panels, or portals, but its scale and pattern density must be correlated with the viewing distance.
| Parameter | Confirmed data |
|---|---|
| Article number | K-086 |
| Product type | Carved wooden molding, decorative baguette or frieze |
| Ornament | Leaf-and-berry, with motifs of Russian tradition and Baroque |
| Size 1 | 50 × 12 × 300 mm |
| Size 2 | 50 × 12 × 2000 mm |
| Size 3 | 80 × 18 × 2000 mm |
| Size 4 | 100 × 23 × 2000 mm |
| Materials | Beech or oak |
| Surface preparation | "Standard" or "Prestige" |
| Numeric repeat | Not specified in source data; determined by drawing, actual product, or agreement |
| Main card | View dimensions and version K-086 |
It is especially important not to assign an unverified repeat length to the product. The layout formula may use the designation R, but the number should only be substituted after measuring the actual strip, working with the drawing, or receiving confirmation from the manufacturer. A made-up value turns a beautiful scheme into a source of serial error.
Our factory also produces:

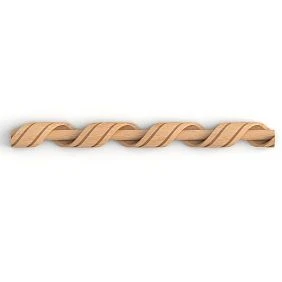
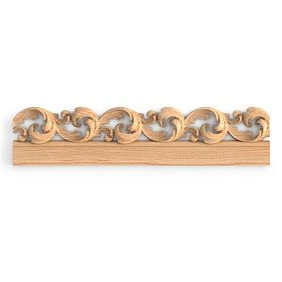
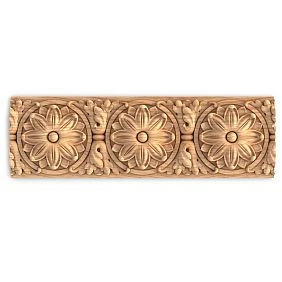
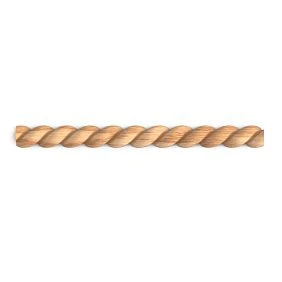
Motif, repeat, and axis: the language for creating a cutting map
Get Consultation
Motif — a recognizable part of the pattern
A motif can be a complete leaf, a berry cluster, a curl, or their stable combination. The buyer does not have to use art history terminology, but must learn to see in a long strip not a continuous band, but a sequence of recognizable elements. It is the motif that is placed in the center of the facade, positioned symmetrically on paired sides, and protected from accidental cutting.
Repeat — a repeating segment
A repeat is the section after which the pattern repeats. In working with K-086, it is needed for planning the continuation of the pattern. However, the convenient pattern step mentioned in the card does not replace the actual size. Before cutting, the repeat is measured at identical points of two adjacent repetitions, and the result is entered into the project card.
The motif axis sets the compositional center
Every expressive element has a visual axis. It can pass through the middle of a berry cluster, the tip of a leaf, or the center of a curl. If the frame is symmetrical, this axis is aligned with the geometric axis of the top side, door, or panel. Then the ornament looks designed, not randomly cut from a long strip.
A neutral area helps hide the cut
Between strong motifs there are usually less expressive fragments. That is where it is convenient to place a longitudinal joint or choose a cut point, if the pattern allows. It cannot be assumed that any gap is equally safe. It is assessed visually and checked on a dry layout.
A broader context of repeating ornaments reveals material about how the rapport of a wooden ornament works. For order K-086, the general principle needs to be translated into specific marks on each strip.
Three sections — three perception distances
The size K-086 affects not only the physical width of the band. It changes the distance from which the ornament is read, the relationship of the frieze to the facade, and the depth of chiaroscuro. Therefore, sections of 50, 80, and 100 mm are reasonably considered as three architectural scales of one theme.
| Section | How it is perceived | Typical design scenarios | What to Check |
|---|---|---|---|
| 50 × 12 mm | Thin, finely readable line | Furniture front, door panel, small frame, narrow decorative strip | Does the pattern overload the handle, molding, and panel |
| 80 × 18 mm | Medium interior scale | Wide door, large cabinet, wall panel, horizontal band, small portal | Is there enough free space around the relief |
| 100 × 23 mm | Expressive long-distance scale | Tall cabinet, large portal, front panel, public interior | Does the profile match the wall size and viewing distance |
These scenarios are not strict manufacturer prohibitions. They help assess proportion. A large profile can be placed on furniture if the facade is large enough and the composition is calculated. A thin option can be used in a large wall scheme if it works as a series of repeats. The decision is made after a full-size fitting, not based on a miniature in the card.
Short fragment 300 mm: scale check before ordering two-meter planks
The 50 × 12 × 300 mm version is useful as a practical fragment for fitting. It allows you to apply a real carved baguette to the facade, see the 12 mm thickness from the side, check proximity to a handle, panel, or molding, and evaluate the pattern under side lighting. On a short element, it is convenient to make a test paint, compare covering enamel with tinting, see how the relief appears, and understand whether the chosen surface preparation level matches the future finish.
However, the short version cannot be called an official sample if the card does not assign it that status. It is an independent size version. Also, a length of 300 mm cannot be promised for sections 80 × 18 and 100 × 23 mm: in the confirmed grid, these options are represented by planks 2000 mm long.
- apply the fragment to the actual facade, not to a photograph;
- look at it from close range and from the room entry point;
- check that the relief does not conflict with the grip area;
- make a test finish over the entire depth of the pattern;
- evaluate how the shadow changes the readability of the leaf-berry motif;
- record the result with a photo and caption of the selected finish.
The motif should be centered, not the physical middle of the plank
A two-meter plank is a blank, not a finished side of the frame. Its middle rarely has to coincide with the center of the future facade. First, choose the motif that will be the main one: for example, a whole berry cluster or the most expressive leaf. Then align its axis with the geometric center of the composition and lay out repeats to the right and left.
This order is especially important for a two-door cabinet, a central wall panel, a door or fireplace portal, a long horizontal frieze, and paired furniture facades. If you start from the end, the center will be random. After trimming one side, it is often impossible to correct the position of the pattern without an additional plank.
- Find the geometric axis of the side or the entire composition.
- Select the specific element of the ornament that should fall in the center.
- Mark its axis on the actual plank or printed drawing.
- Lay out repeats towards both edges.
- Mark the future corners and miter zones.
- Check if the pattern ends the same on both sides.
- Only then assign the cut lines.
Full-size layout before sawing and finishing
Even a good drawing does not replace a dry assembly. Before cutting, the planks are laid out on a flat surface or temporarily attached to a marked base. At this stage, misalignments of axes, unsuccessful corner fragments, different pattern starts on paired sides, and useless leftovers become visible.
For a large project, it is useful to print photographs or scans of the ornament at a 1:1 scale and assemble a paper model. It does not replace the actual measurement of the repeat, but allows checking the overall composition before delivering the full volume. On the facade, mark the outer border of the frame, side axes, handles, hinges, panels, technological grooves, and areas where the relief may interfere with opening.
The dry layout is photographed from above and from a normal viewing angle. These photos are attached to the cutting map. If the project is serial, the approved photo becomes the standard for all identical products.
The four sides of the frame cannot be considered four identical segments
A rectangular frame seems like simple geometry, but the ornament makes each side a separate task. The top horizontal usually has the strongest impact on perception: its center coincides with the facade axis, and the pattern is read entirely. The bottom side may be partially covered by furniture, a countertop, or the line of sight, but this does not mean a random break is acceptable. The left and right stiles must support each other and start with coordinated fragments.
The horizontal and vertical sides may have a different number of repeats. Therefore, you cannot take one ready-made layout and simply rotate it 90 degrees. For each side, assign its own start, center, end, and source plank. Sides of equal length should preferably be cut mirror-wise or according to one approved map, so that their beginnings do not differ by half a sheet.
| Side | Main task | Typical mistake |
|---|---|---|
| Top | Align the central motif with the product axis | Start from the end of the plank and get a random center |
| Bottom | Maintain connection with the top and avoid abrupt break | Use any remaining piece |
| Left post | Align start and direction with the right post | Place a whole motif on the left and half a motif on the right |
| Right post | Repeat the approved vertical logic | Cut independently after mounting the left side |
The cutting map turns an artistic idea into a procurement list
A cutting map is a table or drawing where each side is linked to a specific plank, cut points, and remainder. It is needed not only by the installer. Through it, the purchaser sees the actual quantity of two-meter elements, the designer checks symmetry, the finisher understands which parts belong to one composition, and the client can verify the received batch before work begins.
| Position | Side or part | Finished length | Source plank | Pattern start | Pattern end | Remainder |
|---|---|---|---|---|---|---|
| 1 | Top of facade A | As per project | Plank 1 | Central motif along axis | Symmetrical endings | Mark separately |
| 2 | Bottom of facade A | As per project | Plank 2 | Matched with top | Checked before cutting | Evaluate by motif |
| 3 | Left post | As per project | Plank 3 | Full repeat | Angle aligned | Assign to facade B |
| 4 | Right post | As per project | Strip 3 or 4 | Repeats the left | Angle aligned | Do not mix with waste |
In a real project, instead of the words "as per design", exact millimeters and the actually measured repeat are specified. Each version of the map receives a date. If the position of the central motif changes after fitting, the old diagram is not corrected by hand without a mark: it is replaced with a new version so that the craftsman does not work from an outdated sheet.
The calculation formula is only useful after actually measuring the repeat
To explain the logic, four variables can be used: L — finished side length, R — actually measured repeat, Z — process allowance for each end, N — number of full repeats. The working length of the part is defined as L plus allowances on both ends. Then the positions of the motifs are shifted so that the central element and the ends look symmetrical.
Working length = L + Z left + Z right.
This entry does not provide a ready quantity of planks. It only shows what area needs to be available before the final cut. The next step is to check how many repeats R fit relative to the selected central axis and where the corner points will end up. If the numerical repeat K-086 is not confirmed, an approximate value cannot be substituted. Even a small error in one repeat accumulates along the long side and shifts the last motif.
The percentage margin also does not replace a map. For a smooth profile, the phrase "add 10–15%" sometimes serves as a quick reference. For K-086, it can be both excessive and insufficient. The actual reserve depends on the number of identical sides, the arrangement of motifs, the number of corners, the possibility of using leftovers, and the cost of error when reordering.
Example with a perimeter of 6.6 m: why four planks still do not guarantee a result
Suppose the project includes two sides of 2400 mm and two sides of 900 mm. The total perimeter is 6600 mm. Simple arithmetic suggests buying four planks 2000 mm long, i.e., 8000 mm of material. By length, the margin is 1400 mm. But the cutting map may show that each long side requires a joint, and the joint location must align with a neutral section of the pattern. Short sides may need the same pattern start, and leftovers from long sides may begin with incompatible fragments.
In this case, one leftover longer than, say, 900 mm cannot be automatically assigned to a short side. It may contain a trimmed central leaf and not provide the required start. Another, shorter fragment may turn out to be artistically more useful if it retains a whole motif and a safe zone for corner cutting.
Therefore, the final number of planks is determined after layout, not before. Sometimes four planks are indeed enough. Sometimes a fifth is needed so that two long sides get aligned centers and short sides get identical endings. The article should not promise a specific number without the actual repeat and project diagram.
A leftover is evaluated not by a ruler, but by the content of the pattern
Leftovers of K-086 are conveniently divided into three categories. The first is ready-to-use: they start at a suitable point, contain a whole motif, and have sufficient length for the assigned side. The second is conditionally useful: they can be used after additional checking on an inconspicuous side, within a series of identical facades, or as a fragment for finishing tests. The third is technological waste, where the cut passed through the main element and a new start does not allow assembling a clean composition.
| Leftover type | Characteristics | Possible application |
|---|---|---|
| Project | Whole motif, coordinated start, sufficient length | Next side, paired facade, repeating panel |
| Reserve | Pattern partially usable, length limited | Replacement of damaged area, paint-out, hidden detail after inspection |
| Waste | Motif destroyed, no valid continuation point | Tool technology setup, but not visible decor |
Each suitable remnant is labeled: article, cross-section, material, batch number, length, photo of the beginning and end of the pattern. The inscription "K-086, 420 mm" is of little use. It is much more important to know which sheet the segment starts from and which side it was originally attached to.
Paired facades require a common map, not two independent calculations.
On two cabinet doors, a slight shift in repeats is more noticeable than on a single panel. If the left facade starts with a whole berry group and the right one starts with half a leaf, the furniture appears to be assembled from different sets. Therefore, paired facades are designed simultaneously.
First, a common axis for the entire pair is built. Then, it is decided whether the composition should mirror from the central gap or each facade should have its own center. After that, the planks are distributed so that the wood, sanding level, and relief character do not create random contrast. With transparent finishes, the pattern of beech or oak is additionally considered.
- do not start cutting the second door after completely finishing the first;
- assign planks to both doors before the first cut;
- use a single template for axes and angles;
- photograph the dry layout of the entire pair;
- mark parts as "left" and "right", not just by length;
- check the overall appearance with facades both closed and open.
A series of identical facades helps save money if the cutting layout is planned in advance.
In serial furniture, the offcut from one facade can become a full-fledged part for the next. But this is only possible with a unified cutting map. If each facade is cut separately, the craftsman gets a set of random scraps that are difficult to match. If all identical sides are consolidated into a common list, short parts are placed between long ones, identical starts are repeated, and offcuts are assigned in advance.
For a series, it is useful to make one control set of parts without final assembly. It is laid out on the facade, the positions of motifs are approved, and dimensions are fixed. This set then becomes the standard. One cannot assume that artistic symmetry will automatically repeat just because the lengths are the same: the craftsman must use the same axes and starting points of the rapport.
Ordering in one batch reduces the risk of noticeable differences in material and surface preparation. However, natural wood still has an individual grain. Before finishing, the slats are laid out across the facades so that elements closest in tone are placed next to each other.
K-086 on a furniture facade: the ornament must be subordinate to the construction
On a cabinet or chest of drawers, a carved molding does not exist separately from the panel, handle, hinges, and opening lines. A width of 50 mm may look compact on a plan, but together with a depth of 12 mm and an active pattern, it occupies a noticeable part of the facade. Sections of 80 and 100 mm require even more free space.
Before ordering, not only the outer contour of the molding is noted, but also the actual grip zone. The hand should not constantly touch the protruding relief. If the handle is located nearby, a short fragment of 50 × 12 × 300 mm helps to check for conflicts in reality. On a drawer, the opening trajectory and the adjacent facade are considered. On a framed door, it is checked whether the molding encroaches on the technological groove or moving part.
General questions about the profile, frame, and areas of application can be further verified in the guide on how to choose molding trim for furniture and a portal. In the specific project K-086, the decisive factor remains not the name of the zone, but the full-scale layout.
Door panel and portal require different composition centers
On an interior door, the ornament center is often tied to the panel, not the entire leaf. The handle, lock, and lower protective zone can shift visual balance. Therefore, you cannot mechanically align the motif with half the total door height. First determine the decorative field, then its axis.
In a portal, the center of the upper frieze usually coincides with the opening axis. Vertical posts follow this axis, but their pattern may start from floor level, baseboard, or capital. Here it is especially dangerous to cut all three parts independently. The junction of the top and side pieces should be perceived as a single transition, not as a meeting of three random fragments.
For a large portal, a 100 × 23 mm section can work convincingly at a distance. But the solution is tested on the wall with a full-size paper strip or a real fragment of another confirmed size, understanding that the short 300 mm version is only available for 50 × 12 mm.
Wall panel: first the architectural axis, then the decorative frame
On the wall, K-086 can be perceived not as a furniture detail, but as an architectural belt. Here it is especially noticeable how precisely the ornament is tied to the room axis, furniture group, and light. If the panel is located behind a sofa, console, or bed, the center of the top side is usually aligned with the center of the item, not with an arbitrary point on the free wall.
Before cutting, mark outlets, switches, sconces, ventilation grilles, and furniture edges. An active leaf-and-berry frieze should not accidentally break off at a technical element. If intersection cannot be avoided, include the endpoint in the artistic scheme: choose a neutral part of the repeat and check it at scale.
On a long wall, a joint of two-meter planks is almost inevitable. Place it not based on 'where the first plank ended,' but in the calmest zone of the pattern. First, assemble the entire horizontal on the floor, photograph it, mark the parts, and only then transfer them to the wall.
Leaf-and-berry ornament connects Russian style and Baroque plasticity
K-086 does not look like a neutral strip. Leaves, berries, and flowing curls define a specific cultural character. In an interior with Russian motifs, the frieze can support carved architraves, paneled furniture, warm wood, and decorative painting. In a more classical or Baroque composition, it works through rhythm, depth, and shadow, without requiring literal repetition of all historical details.
The key task is not to gather too many competing ornaments nearby. If K-086 becomes the main frieze, it is better to subordinate neighboring moldings, cornices, and handles to its rhythm. On small furniture, an active pattern requires a calm field. On a large portal, on the contrary, too subtle surroundings can make the baguette look like a random insert.
To expand the stylistic composition, you can look wooden baguette in Russian style and compare K-086 with other elements of the collection direction. Within a specific order, the main reference and source of characteristics remains the card of carved molding K-086.
Beech under enamel: when the carving pattern is more important than the wood grain
Beech is reasonable to consider for projects where the baguette will be painted with opaque enamel or included in a single color with the facade, door, or wall panel. In this scenario, the buyer primarily sees the shape of the leaf-berry ornament, the depth of carving, and the chiaroscuro. The wood texture fades into the background.
This does not mean that beech automatically suits any color and any technology. Before ordering, you need to agree on the primer, enamel, application method, and surface preparation quality. Deep areas of the relief are more difficult to paint than flat parts. A too thick layer can soften fine transitions, and insufficient preparation will reveal risks after finishing.
A short fragment 50 × 12 × 300 mm is useful for testing: it is primed and painted using the same system planned for the entire project. After drying, the sample is examined under frontal and side lighting. This way, you can see if the pattern is preserved and if the recesses are cleanly prepared.
Oak under transparent finish: the ornament and natural texture work together
Oak is chosen when visible wood structure, tinting, stain, oil, or clear varnish is important. In this case, the artistic effect is created by two patterns simultaneously: the carved leaf-berry motif and the natural fibers. They cannot be evaluated independently.
Planks of the same species are never photographically identical. Before cutting, oak K-086 is laid out on the sides of the composition and the shade, direction, and activity of the texture are compared. It is reasonable to assign the closest elements to paired posts. A sharp difference between the top and bottom may be an acceptable artistic decision, but it should not occur by chance.
Test tinting is performed on material of the same species and with comparable surface preparation. It cannot be claimed that the color from the catalog will be exactly repeated on each plank. The final shade depends on the wood and the finishing system. Therefore, not only the name of the stain is specified, but also the physical color sample.
| Criterion | Beech | Oak |
|---|---|---|
| Main visual accent | Carving shape and opaque color | Carving together with natural texture |
| Typical project scenario | Enamel, uniform color of facade and decor | Tinting, clear varnish, oil |
| What to check especially | Cleanliness of the relief under the opaque coating | Combination of slat pattern and shade |
| Risk | Enamel too thick hides small details | Random texture distribution breaks symmetry |
"Standard" and "Prestige": preparation level linked to final finish
Choosing the sanding level cannot be reduced to the formula "more expensive means always necessary." The buyer purchases a certain degree of surface preparation, and its sufficiency depends on the finish, viewing distance, and project requirements. Under a dense covering system, some minor differences can be corrected with primer and intermediate sanding. Under a transparent tint, every scratch and relief transition is more visible.
Before ordering, you need to answer several questions:
- will the coating be covering or transparent;
- who performs the final finishing after corner cuts;
- at what height is the baguette located;
- how close does the viewer approach the ornament;
- Is a patina that will emphasize the recesses intended;
- Should all parts be ready for finishing without additional manual processing.
"Standard" cannot be described as poor quality. "Prestige" also does not negate the need to check joints after installation. Both options are chosen according to the project's technological map and specified in the product card before placing an order.
The trial finish must replicate the entire future technology
One brushstroke of paint on the front surface does not show the real result. For K-086, the trial system must include preparation, primer, intermediate sanding, base color, patina or tinting, and a protective layer, if provided. Only then can you see how the finish behaves in recesses and on sharp edges.
The joint is checked separately. Two short fragments are joined as the working planks will be joined and finished together. This helps to understand whether the joint line is noticeable, whether additional manual finishing is required, and whether the absorption at the end differs.
The approved sample is marked: article K-086, beech or oak, size, preparation level, name and sequence of materials, date. Without such a signature, it is easy to confuse two similar samples after a few weeks and order a batch for a different system.
A miter cut is part of the pattern, not just 45-degree geometry
Technically, two sides of a frame are often joined with a 45-degree miter cut. Artistically, this is not enough. Half a berry, a sharp part of a leaf, or a neutral gap may end up at the corner vertex. These options are perceived differently. Therefore, the corner is modeled before cutting.
On a paper or digital layout, future 45-degree lines are superimposed on a photo of the ornament. Then, they look at which elements appear at the vertex. For four corners, it is not always possible to get an absolutely identical picture, especially with different side lengths. But you can eliminate the most unfortunate intersections and achieve a consistent rhythm.
After rough cutting, the parts are dry-fitted again. Final adjustment is made based on the actual angle of the base: a wall, door, or facade may deviate from ideal geometry. A serious error cannot be compensated for with a thick layer of glue or putty if it disrupts the pattern.
The longitudinal joint of two planks must be designated in advance.
A side longer than 2000 mm requires joining two elements. The joint location is chosen during the cutting layout. It should be in an area where the pattern continuation can be controlled. The joint is not automatically placed exactly in the middle if the main motif is located there. Sometimes it is more reasonable to shift it, keeping the central composition intact.
Two planks are laid out side by side, the repeat is aligned, and the cut line is marked on both parts. After that, the total length and allowance for adjustment are checked. It is important to preserve the marking: the left part of the joint and the right part of the joint form a pair. If they are mixed with other pieces, the match may be lost.
With a transparent finish, the wood tone is additionally matched. Even an accurate ornamental transition will be noticeable if two oak planks differ sharply. Therefore, material and pattern distribution are done simultaneously.
Dry assembly protects against costly mistakes after painting.
The complete set of parts is first assembled without glue. On a flat surface, four corners, longitudinal joints, the center of the top side, uniformity of verticals, and overall geometry are checked. After that, the frame is temporarily applied to the base or transferred using a template.
Painting parts before such a check is risky. Adjustment may require additional cutting, sanding of the end, or correction of the joint. The finished coating will be damaged. An exception is possible for contrasting decor, which is technologically finished separately, but even then, the rough geometry must be approved in advance.
At the dry assembly stage, it is convenient to create a mounting diagram:
- number of each part;
- top/bottom orientation;
- facade or panel number;
- adjacent part in the joint;
- installation order;
- photo of correct layout;
- size check mark.
The base is checked before selecting the mounting material
The fixing method depends on the base, the weight of the specific part, operating conditions, and the finishing system. The article should not prescribe a universal adhesive without this data. A wooden molding can be installed on a furniture facade, painted wall panel, door, or prepared base, and each option requires its own verification.
Old peeling coating, dust, grease, and weak putty do not ensure reliable contact. The surface is cleaned, sanded if necessary, and primed with a compatible compound. The technology is tested on a trial area. The adhesive must not damage the finish, seep onto the front side, or leave an impossible-to-remove trace in the thread.
Suitable categories can be explored in the section materials for installing wooden baguette, but the final composition is selected based on the specific base and the manufacturer's material instructions.
What to buy together with K-086
Ordering carved moldings is rarely limited to just slats. The project may require materials for trial finishing, installation, protection during transportation, and marking of parts. Related items are determined after the cutting plan to avoid buying a random set.
| What to add | Why | When it is especially important | What to Check |
|---|---|---|---|
| Short K-086 50 × 12 × 300 mm | Check scale, depth, and finish | Before a large order of section 50 × 12 mm | Do not consider it an official sample and do not transfer the size to other sections |
| Installation and finishing materials | Prepare the base, perform a test, and secure the parts | For self-finishing or a complex base | Compatibility with wood, coating, and base |
| Marking materials | Preserve axes, numbers, and part order | For series of facades and long portals | Marking must not damage the front surface |
| Rigid packaging frame | Protect two-meter carved slats | When delivering long-length moldings | Current packaging conditions and standards in the card |
| Spare plank | Reduce the risk of project stoppage after an error or damage | For remote objects and serial furniture | Calculate reserve by card, not by universal percentage |
Packaging frame is part of the specification, not an inconspicuous addition
A two-meter carved strip is sensitive to impact, bending, and point load. Therefore
Inspection of long baguettes begins before unpacking
The received batch is first inspected together with the packaging frame. Dents, impact marks, geometry violations, and the condition of packaging fasteners are recorded. If the frame is damaged, this is photographed before removing the strips. Then the elements are taken out without jerking and placed on even supports, without leaning the long carved molding against the wall at a single point.
After unpacking, the article, cross-section, length, material, and surface preparation level are checked. The strips are recounted for each line of the specification. The ornament is inspected under raking light: this makes chips, relief creases, and edge defects more noticeable. Special attention is paid to the ends, because that is where transport damage can reduce the usable length for the cutting plan.
- photograph the packaging before opening;
- check the quantity for each size;
- check the straightness of the strips on a level surface;
- inspect the face relief and ends;
- match beech or oak with the order;
- check the "Standard" or "Prestige" according to the documents;
- do not start cutting until the batch is distributed on the map.
Storage before installation must preserve geometry and marking
After acceptance, the planks are stored horizontally on level supports with a sufficient number of support points. Heavy materials must not be stacked on top of the carving or elements left in the passage. Each group is kept together with a tag of size, material, and purpose. If the packaging is removed, parts of one composition are tied with soft pads without pressure on the relief.
Storage conditions are coordinated with the future finish. A sharp change in temperature and humidity between the warehouse and the project room is undesirable for a wooden product. Before cutting, the material must be in the appropriate conditions of the facility for as long as the adopted technological scheme requires. The specific mode and duration should not be invented without instructions and project conditions.
Marking is applied to the back side or a separate tag. The face carving is not signed with a marker or taped with tape that can leave a mark or tear fibers.
The specification of order K-086 must be understandable to both the buyer and the installer
The line "K-086 — 8 meters" is not enough. It does not specify the cross-section, length, material, preparation quality, number of whole planks, and the role of short execution. A correct specification links product parameters to the project map.
| Field | What to specify | Why this is important |
|---|---|---|
| Article number | K-086 | Eliminates confusion with similar carved molding |
| Cross-section | 50 × 12, 80 × 18, or 100 × 23 mm | Determines scale, depth, and packing rate |
| Length | 300 or 2000 mm only for confirmed combinations | Prevents mistakenly ordering 300 mm for 80 or 100 mm |
| Material | Beech or oak | Links the order to future finishing |
| Preparation | "Standard" or "Prestige" | Fixes the surface treatment level |
| Quantity | Number of whole slats per variant | Meters do not replace product units |
| Project | Side dimensions and number of identical facades | Allows checking the cutting logic |
| Ornament | Central motif scheme and cut map | Protects against accidental start of the pattern |
| Reserve | Specific additional strips | Reserve is linked to risk, not an abstract percentage |
| Packaging | Number and type of packaging units | Needed for delivery and acceptance |
| Address | Exact object and recipient contact | Allows coordinating delivery of long-length goods |
Reserve is calculated based on the consequences of an error
For a single small facade installed near the supplier, the risk of reordering may be acceptable. For a series of furniture in another city, one damaged strip can halt the finishing of the entire batch. Therefore, the reserve is determined not only by the number of cuts but also by the consequences of a shortage.
It is useful to divide the reserve into installation and design reserves. The installation reserve covers sawing errors, damage during installation, or discovered defects. The design reserve is needed when the layout contains complex centers and some material inevitably goes to symmetry. Sometimes one additional whole strip is more rational than a large number of random offcuts.
A universal percentage is not assigned in the article. The specification states specifically: "main calculation — so many strips; reserve — one or several strips of such and such cross-section and material." Then the customer understands the cost of insurance and can make an informed decision.
When K-086 really fits the project
K-086 is appropriate where a repeating leaf-and-berry ornament should become a noticeable part of the composition, and the project allows for precise layout. This could be a central cabinet facade, a door panel, a long frieze, a wall panel, a portal, or a series of identical furniture frames.
This article is especially useful when the customer wants:
- to get carved wooden decor made of beech or oak;
- to choose one ornament in three architectural scales;
- work with planks 2000 mm long;
- check the 50 × 12 mm option with a short 300 mm fragment;
- assemble a symmetrical series of facades;
- prepare the frieze for enamel, tinting, or other agreed finish;
- design not random decor, but a consistent ornamental rhythm.
When it's better to look at other wooden moldings
K-086 may be unnecessary for a minimalist project where a completely smooth line without noticeable ornament is required. It is also not suitable for a buyer who is not ready to make a cutting map, check the repeat, and coordinate joints. On a very narrow facade, even 50 mm can take up too large a share of the field. On an object with a high probability of constant impacts, the protruding carved relief requires a separate assessment.
Another profile should be considered when:
- a neutral frame without a repeating motif is needed;
- the available field is smaller than the actual cross-section and necessary offsets;
- the client wants a material different from the confirmed beech and oak;
- the project requires short parts of 80 or 100 mm, which are not in the confirmed grid;
- the decor must be polyurethane or metal, not wooden;
- it is impossible to ensure safe delivery and storage of two-meter slats.
In that case, you can open the category and buy wooden molding after comparing other profiles, sizes, and pattern character.
How not to confuse K-086 with a regular baguette and a ready-made frame
K-086 is not a ready-made picture frame or a framing workshop service. It is a carved wooden molding that is supplied in confirmed dimensional versions and requires project-based cutting. The buyer receives long or short elements, while the frame geometry, joints, finish, and installation are determined by the specific project.
Also, K-086 cannot be described as a polyurethane molding, ceiling baguette, or plastic profile. Substituting the category leads to incorrect expectations regarding weight, finish, cutting, and fastening. The order always retains the wording "carved wooden molding K-086 made of beech or oak."
If the goal is a ready-made frame of a given size, you need to look for another product group. If a long ornamental frieze is needed, which will be cut for furniture or interior, K-086 fits the task.
Twelve mistakes that ruin the ornament before installation
Counting only the total perimeter
The sum of lengths does not show the position of motifs, joints, and corners. The footage is converted into planks only after the map.
Choosing the width from a photo
The scale of the card is deceptive. The cross-section is checked with a full-size contour, and 50 × 12 mm — with a short fragment if possible.
Considering 300 mm as a universal length
Short execution is confirmed only for 50 × 12 mm. For 80 × 18 and 100 × 23 mm, the original grid specifies a length of 2000 mm.
Inventing the rapport
The numerical step of the pattern is measured or agreed upon. An approximate number cannot be used in working cutting.
Starting cutting from the factory end
The end is not a compositional center. First, choose the motif and axis, then mark the cut.
Cut the main element in the corner
A 45-degree cut is simulated in the drawing. A geometrically precise angle can be artistically unsuccessful.
Make paired facades independently
Left and right doors are calculated using a common scheme, otherwise the pattern beginnings diverge.
Consider any remainder useful
Length does not determine suitability. The remainder must contain the desired motif and a suitable starting point.
Mix batches without layout
With transparent finishing, differences in texture and shade can disrupt symmetry even with an accurate pattern.
Paint before dry assembly
Adjustment after finishing damages the coating. Geometry is approved before final finishing.
Do not include packaging in the order
Two-meter carved molding requires coordinated protection. The packaging frame and standards are checked in advance.
Order without a specific reserve
The precisely calculated number of slats does not account for error or damage. The reserve is fixed as separate product units.
How to order K-086 on STAVROS without losing commercial logic
First, open the main card and buy the wooden baguette K-086 only after verifying the selected section, length, material, and preparation level. Do not use the collection duplicate instead of the main card if the main URL of the carved molding is fixed in the working structure.
Before adding the quantity to the cart, prepare:
- dimensions of all sides in millimeters;
- number of identical facades, doors or panels;
- full-size diagram of central motifs;
- actually measured or confirmed rapport;
- cutting map of whole two-meter strips;
- solution for beech or oak;
- option "Standard" or "Prestige";
- technology of future finishing;
- number of spare strips;
- need for short execution 300 mm;
- packaging and delivery conditions.
Current price, availability, lead time, packaging cost and commercial terms are checked directly before ordering. The article helps to prepare a correct request but does not replace the product card and manager confirmation.
The ornamental layout passport preserves the project after installation
For a large or serial composition, it is useful to create a separate passport. This is not a complex design album, but a single clear document that contains information without which it is impossible to repeat the result. A passport is needed for reordering, replacing a damaged part, manufacturing a second batch of furniture, and transferring the project to another installer.
| Passport section | What to fix |
|---|---|
| Product | K-086, cross-section, length, beech or oak, "Standard" or "Prestige" |
| Ornament | Photograph of the full repeat, actual size R, selected central motif |
| Geometry | Finished side dimensions, allowances, angles, and locations of longitudinal joints |
| Layout | Numbers of original planks, cut lines, purpose of each remainder |
| Finishing | Materials, layer sequence, and photograph of the approved color sample |
| Installation | Base, agreed fixing method, order of part installation |
| Archive | Order date, batch number, photos of packaging and finished composition |
The document is especially useful if identical elements are distributed across multiple rooms. Without it, a year later it is impossible to remember which sheet was considered the center, where the longitudinal joint was, and why a remnant of a certain length was deemed unusable. The passport turns a visual solution into a reproducible system.
Transfer to the installer: a single diagram with dimensions is not enough
The installer must receive not only the side lengths but also an approved photo of the dry layout. It shows the direction of the pattern, the top and bottom of each part, joint pairs, and the position of central motifs. If only a list like '2400, 2400, 900, 900' is passed on, the master may reasonably optimize the material from a technical standpoint while simultaneously destroying the artistic symmetry.
The transfer kit includes a cutting map, a passport, marked parts, an axis template, and sequence instructions. Each part indicates the composition number, side, and adjacent element. The labels 'long' and 'short' are insufficient if the project has several identical frames.
Before applying the mounting compound, the master must dry-fit the parts again. This is not a lack of trust in production, but a final check after transportation, storage, and finishing. If a joint or corner has changed, the problem is resolved before contact with the base.
Side lighting reveals errors that are invisible on the drawing
Carved relief is read through light and shadow. With frontal diffused lighting, a slight shift in the joint may be almost imperceptible, but under a side sconce, it will create a break in the rhythm. Therefore, the layout is checked under conditions close to the future interior.
If the lights are already installed, the main and evening scenarios are turned on. If not, a portable source is used and the angle is changed. They check whether a dark stripe forms at the joint, whether the left and right posts are read equally, and whether a trimmed sheet turns into a visual defect.
Under enamel, the relief may appear calmer; under patina, more contrasting. Oak texture under a transparent coating adds another pattern. Therefore, final approval is done after a trial finish, not just on an unpainted plank.
Replacing a damaged part without reassembling the entire frame
A spare strip is only useful together with a saved map. When one side is damaged, it is not enough to cut a new piece of the same length. The start and end of the pattern, the position of the corners must be repeated, and, with a transparent finish, a similar wood must be selected.
First, the original strip and the actual repeat are found in the passport. Then, the same central or starting motif is marked on the spare. The new part is dry-assembled with adjacent elements, the corners are checked, and only then is it finished. If the spare has already been painted separately, the shade is compared under real light: batches of finishing material and wood may differ.
When there is no suitable spare, a reorder is placed with a full specification. The article number and length do not guarantee visual matching. Photos, material, cross-section, surface preparation, and the purpose of the part are passed to the manager. This is why a project archive saves more time than a randomly saved unmarked offcut.
Final audit before adding the quantity to the cart
The final check should answer not the question 'are there enough meters', but the question 'can the approved pattern be assembled from this list'. The audit is conducted using a ready-made map, not from memory.
- the main URL leads specifically to K-086;
- for each item, the exact cross-section and confirmed length are specified;
- the short version of 300 mm is used only together with 50 × 12 mm;
- beech or oak are agreed upon with the finish;
- "Standard" or "Prestige" are included in the specification;
- the actual rapport is measured or confirmed;
- central motifs are marked on all visible sides;
- longitudinal joints and corners are checked on the pattern;
- each useful remnant has a purpose;
- the reserve is indicated in whole planks;
- packaging units and delivery route are agreed upon;
- the installer has received the approved dry layout.
If at least one item remains uncertain, it is better not to convert the total footage into the final quantity. Fixing the map before ordering is cheaper than replacing an already painted frieze with a trimmed central motif.
Three purchasing scenarios: one facade, a series of furniture, and a large portal
One furniture facade
For a single facade, the main task is not to overcomplicate the order, but to preserve the center of the pattern. First, a full-size outline is made, the section is selected, a short version of 50 × 12 × 300 mm is applied when working with this size, and the main motif is determined. Then the four sides are calculated and it is checked whether the remnants can be used within one frame. Even here, you cannot buy only the perimeter length: one bad corner may require a whole new plank.
Series of cabinets or identical doors
In a series, savings come from a common map. All identical horizontals are combined into one group, all verticals into another. Remnants are assigned in advance, rather than being put into a common bin after cutting. First, the control facade is approved, then its axes and starting points are repeated on the others. Ordering in one batch helps maintain material consistency, but each plank is still distributed by tone and wood grain before finishing.
Portal or long wall composition
For a large portal, longitudinal joints, packaging, and viewing distance become decisive. The upper central motif is aligned with the axis of the opening. The posts are calculated together with the top, not as separate strips. Planks 2000 mm long are distributed so that the joints fall into neutral areas. The order includes a rigid packaging frame, a delivery scheme, and a place for horizontal acceptance. Reserve is especially important here: reordering one part after finishing can delay the entire project.
These scenarios show that the same card K-086 leads to different specifications. The quantity is determined not by the room name, but by geometry, pattern repetition, number of identical parts, and acceptable consequences of an error.
Control after finishing: the ornament is checked again
The finish coating changes the perception of the relief and sometimes slightly alters the fit of parts at the joints. After primer, enamel, tinting, or varnish, the set is laid out again according to the approved map. It is checked whether the top and bottom are mixed up, whether the markings are preserved, whether the pairs of longitudinal joints match, and whether a darker element has ended up on one of the symmetrical sides.
Special attention is paid to the corners. The coating layer on the ends may require careful adjustment, but it should not shift the ornament line. The parts are applied without force: if the frame has to be strongly tightened to close the corner, the reason may be in the geometry, not in the lack of mounting compound.
Only after a repeated dry check is the set handed over for final installation. The date is noted in the passport, the finished layout is photographed, and one approved finishing fragment is saved. Such control is especially important for transparent oak and patinated relief, where chiaroscuro emphasizes even a slight discrepancy. Additionally, the part numbers are cross-checked with the list to ensure that after painting, a similar-length element is not installed on the wrong side of the composition.
FAQ: calculation and ordering of carved baguette K-086
What sizes does K-086 have?
Four versions are confirmed: 50 × 12 × 300 mm, 50 × 12 × 2000 mm, 80 × 18 × 2000 mm, and 100 × 23 × 2000 mm. Before ordering, check the current card.
Is there a short version of K-086?
Yes, the size grid includes K-086 50 × 12 × 300 mm. It is convenient to use as a short fragment for checking scale and finish, but the source data does not call it an official sample.
Can I order a length of 300 mm for the 80 mm section?
In the confirmed data, the 80 × 18 mm variant is specified with a length of 2000 mm. The possibility of a different length cannot be promised without separate coordination.
How to find out the exact pattern repeat?
It is determined by the drawing, actual strip, or manufacturer's confirmation. In the article, the numerical repeat is intentionally not invented.
How to position the central motif?
Find the geometric axis of the facade or side, select an expressive pattern element, align its axis with the center, and distribute repeats toward both edges.
How to calculate K-086 for four sides of the facade?
For each side, a separate map line is compiled: net length, allowances for ends, motif position, source plank, corners, and remainder. Then the lines are combined into a common cutting plan.
How much allowance should be added?
A universal percentage does not provide an exact answer. The allowance is calculated based on corners, joints, symmetry, the number of identical facades, and the risk of project stoppage.
Can remnants be used?
Yes, if the remnant retains a suitable motif, the correct start of the pattern, and sufficient length. Each segment is evaluated by the ornament, not just by millimeters.
What to choose for covering enamel: beech or oak?
Beech is often considered when texture should not be the main effect, but the decision depends on the entire finishing system. Make a test swatch and confirm the project material.
When should you choose oak?
Oak is interesting with a transparent or tinted finish, when the natural pattern should work together with the carving. The planks need to be sorted by tone before installation.
What is the difference between "Standard" and "Prestige"?
These are surface preparation levels. The choice is related to the transparency of the coating, viewing distance, and the amount of subsequent manual finishing. The current description is checked in the card.
Is it possible to paint first and then adjust?
It is safer to first perform a dry assembly, check the joints and geometry. Adjustment after final painting may damage the coating.
How to connect two planks on the long side?
The joint is assigned in a calm area of the pattern, the repeat is aligned on two planks, and the resulting pair is marked. Do not place the connection automatically in the center of the main motif.
Why is a rigid packaging frame needed?
It helps protect long carved elements during transportation. Packing standards and current commercial terms are checked before ordering.
How many planks fit in a package?
The original card specifies standards of up to 18 pieces for 50 × 12 mm, up to 8 pieces for 80 × 18 mm, and up to 5 pieces for 100 × 23 mm. The relevance should be double-checked.
Can beech and oak be mixed in one frame?
Technically, the project may allow for different materials, but they should not be mixed randomly. They differ in pattern and behavior under finishing. The decision must be deliberate and confirmed by a test sample.
Is K-086 suitable for a painting?
K-086 is a carved molding, not a ready-made frame. It can be used project-wise in a frame composition if the profile, base, joints, and installation are calculated, but a finished frame is not automatically included in the set.
Where to buy K-086 from the main product card?
The main product URL leads to the carved molding K-086 in the solid wood products section. There, you need to check dimensions, materials, price, availability, and ordering conditions.
Summary: first the pattern, then the number of whole planks
K-086 cannot be ordered like a smooth slat where you just add up lengths. Its value lies in the continuous leaf-and-berry ornament, so the purchase must preserve this pattern. First, choose the scale of 50, 80, or 100 mm, then inspect the product in person, determine the central motif, measure the actual repeat, build a map of the four sides, and distribute the remnants. Only then does it become clear how many two-meter planks are actually needed.
Beech or oak, 'Standard' or 'Prestige', test finishing, dry assembly, rigid packaging, and incoming inspection are all part of a single purchase route. Skipping any of these steps may turn savings on one plank into a cut-off motif, a visible joint, or a halt in installation.
STAVROS provides the ability to select confirmed versions of K-086 and move from an idea to a specific order. The buyer no longer needs to guess the footage but instead provides a precise specification: article number, cross-section, length, material, preparation, number of whole planks, reserve, ornament map, and delivery requirements. This way, the wooden baguette becomes not a random strip of decor but a assembled architectural composition.