Article Contents:
- Break the turned leg down into four functional zones
- Overall height, mounting height and visible length
- The top section matters more than the widest bead
- Maximum and minimum diameters describe different properties
- Evaluate the pattern only on the part that will remain visible
- How to read the dimensions of a specific model
- A short leg: how many transitions can be read
- A long leg: look at where the mass is concentrated
- Turned legs for a dresser, wardrobe and nightstand
- Turned legs for a sofa
- Turned chair legs
- Turned legs for a console
- For a table, a stretcher and legroom are added
- Lower support section and foot pad
- The fitting is selected and test-fitted before painting
- Beech or oak: the choice depends on the future surface
- Unpainted leg or ready-made finish
- One leg as a sample: what to check before the batch
- Four identical legs are checked as one set
- What to record in the specification for a repeat order
- When to choose a different profile
- Where to buy turned furniture legs
- Additional questions
- Can the diameter be measured from a catalog photo?
- Does a round profile mean the leg can be rotated to any side?
- What should I do if the individual parts are identical but the furniture wobbles?

In the photo of the leg, a large bead under the top block is clearly visible. After installation under the dresser, the bead is almost entirely hidden behind the lower band of the cabinet. Only a thin neck and a short base remain visible on the outside — the furniture looks different, even though the item number and height were chosen correctly.
To choose turned legs for furniture, you need to match the drawing of the support with the section of the cabinet. Check the upper mounting part, the installed height, the diameters at different sections, and the boundary of the visible profile. Only after that can you assess whether the turning pattern suits a particular piece.
A finished part has several dimensions that answer different questions. The overall height determines its size. The top section limits the connection options. The widest point affects the silhouette and the free space nearby. The bottom platform receives the glide. One dimension cannot be substituted for another.

Break the turned leg down into four functional zones
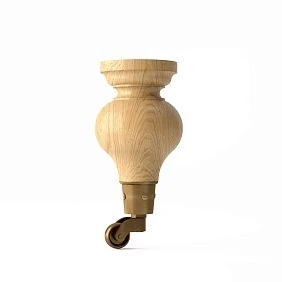
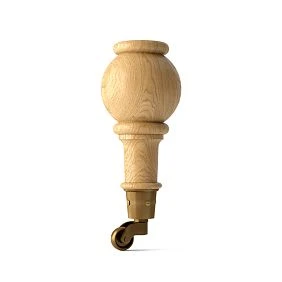
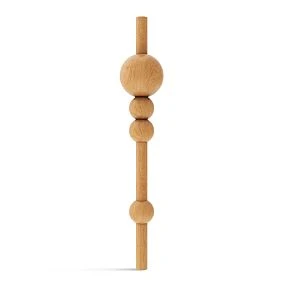
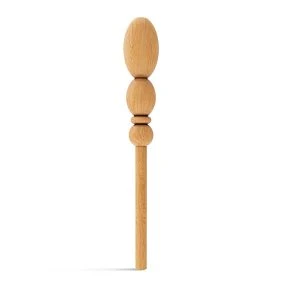
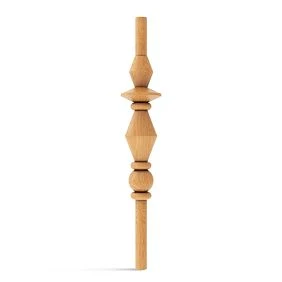
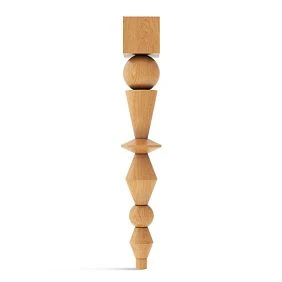
A turned furniture leg has a profile formed by rotating a blank around an axis. It can alternate cones, necks, convex beads, concave coves, and smooth transitions. At the same time, the upper mounting block sometimes keeps a square or rectangular section: the entire part does not have to be round.
It is easier to read such a support from top to bottom.
| Zone | What it does in furniture | What to Check |
|---|---|---|
| Upper mounting part | Connects the leg to the body, frame, or apron | Cross-section, block height, flat platform, holes, and fastener position |
| Upper transition | Connects the mounting part to the main profile | Where the taper begins and whether it falls within the joint area |
| Main turned body | Forms the visible silhouette | Diameters, section lengths, and placement of thickenings |
| Lower support part | Contacts the floor via the end face or glide | The actual footprint, the method of installing the base plate and its additional height |
The boundaries of these zones are not always marked in the product card. They are indicated on the drawing: first the end of the mounting block, then the start of the main profile and the lower support platform. If the upper thickening transitions smoothly into the neck, the outer contour still does not show to what depth drilling is permissible. For fastening, information about the specific assembly is required.




Overall height, mounting height and visible length
Start with two lines on the section: the floor and the plane to which the load from the body is transferred. The distance between them shows what height the assembled leg assembly with fastening and base plate must provide.
For a vertical support, if its top is recessed into the mounting seat, you can write:
Mounting height = overall leg height − depth of insertion into the body + additional height of the hardware and base plate.
Add only the thickness that actually increases the distance to the floor. A stud located inside the parts adds nothing by itself. A plate recessed flush also does not add its full thickness. For inclined installation, a separate section of the assembly is required: the length of the part is no longer equal to its vertical projection.
Visible length answers a different question — how much of the wooden profile will remain exposed on the chosen side of the furniture.
Suppose that in a hypothetical project the leg has an overall height of 180 mm. Its top is inserted into the body by 20 mm, and the lower band covers another 25 mm below the mounting seat. The base plate adds 3 mm. Then the mounting height to the mounting plane will be 180 − 20 + 3 = 163 mm, and the visible wooden part at the front will be 180 − 20 − 25 = 135 mm.
The clearance under the lower band in this section is 135 + 3 = 138 mm. This does not guarantee the same passage under the entire piece of furniture: further along there may be a crossbar, a central support or another protrusion.
If the height of the cabinet from the mounting plane to the top is 640 mm, the final furniture height in the example will be 640 + 163 = 803 mm. The lower band is already accounted for in the cabinet geometry; there is no need to add it to the height again.
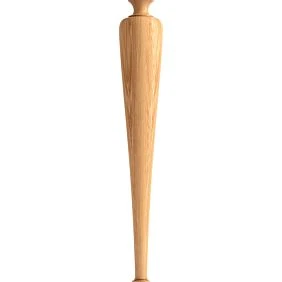
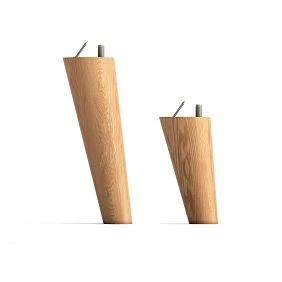
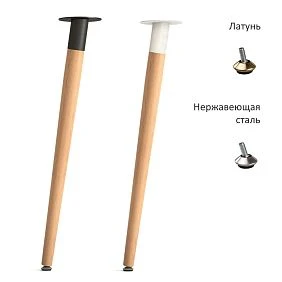
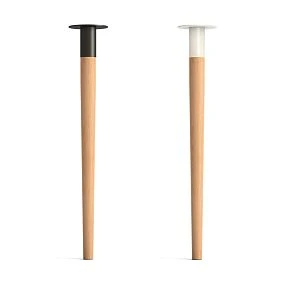
Our factory also produces:
The top section matters more than the widest bead
A large thickening in the middle of the leg does not increase the area available for mounting from above. For the connection, you need the dimensions of the mounting part specifically: width, depth, height and the position of the flat surfaces.
Imagine a free zone under the cabinet measuring 70 × 70 mm. The top block of 68 × 68 mm fits geometrically within it, leaving only 1 mm on each side when centered. But this does not mean that the mounting plate, fastener heads and tools will fit. A 76 × 76 mm plate already extends beyond the specified zone. All dimensions here are illustrative: the example shows the order of checking, not a recommended clearance.
On the bottom view, sequentially draw the cabinet outline, reinforcements, top of the leg, mounting holes and the outer contour of the hardware. On the section view, check the drilling depth and the material thickness around the connection. Also take into account adjacent connectors and runners: a hole may fit within the area but intersect with another part inside the cabinet.
STAVROS offers drawings and product models. For the selected leg, look for its design drawing. The same size letter in two product cards does not replace the explanation on the drawing.
Get Consultation
Maximum and minimum diameters describe different properties
The maximum diameter shows the widest round section. It helps estimate the visual mass and the profile's offset relative to the axis. The minimum diameter indicates the narrow point, which must not be ignored when checking the structure.
At the same height, a leg with one large ball is perceived differently from a support with several wide beads. The difference is also determined by the length of the thickenings: a short ring does not create the same mass as an extended barrel-shaped section.
| Size or position | What it is for |
|---|---|
| Maximum diameter of the entire turned part | Check the full outer dimension |
| Maximum diameter of the exposed section | Assess the silhouette after installation |
| Minimum diameter | Find the narrowing that requires a design check |
| Distance from the end to the thickening | Understand whether it will be visible and what will be next to it |
| Diameter at a specific cross-section | Check the clearance to the adjacent part at the same height |
For example, the leg axis is 35 mm from the outer face of the cabinet, and the diameter of the exposed roll is 90 mm. Its radius is 45 mm, so the roll will protrude beyond this face by 45 − 35 = 10 mm. If the protrusion is undesirable, you will need to change the position of the support or choose a different profile.
To check for collision with an adjacent part, compare the contours at the same height. If a wide thickening is located below the apron, the intersection of their projections in the top view does not yet mean a physical obstruction. The opposite mistake is to measure the clearance at the thin neck and miss the wide roll located nearby. A section through the disputed area removes both uncertainties.
This is a geometric check. The permissible load cannot be determined from a single maximum diameter alone: narrow sections, the wood, grain direction, fastening, and the behavior of the entire furniture assembly all matter.
Evaluate the pattern only on the part that will remain visible
To compare two models, place their images at the same scale, align the floor lines, and overlay the cabinet outline. Aligning the top points of the photos is not enough: the legs may differ in the length of the mounting block and the position of the decorative sections.
Then cover in the drawing everything that is hidden by the bottom, the apron, or the lower rail. If the widest roll turns out to be hidden, use the maximum diameter of the remaining part for visual comparison. In this case, the catalog width describes the overall dimensions of the part but poorly explains its appearance under the furniture.
Here is a comparison of two conventional profiles with a height of 180 mm. In both cases, 45 mm is hidden at the top, and the exposed wooden part is 135 mm. The dimensions in the table serve as a teaching example and do not relate to the catalog model mentioned below.
| Parameter | Profile 1 | Profile 2 |
|---|---|---|
| Maximum diameter of the entire turned part | 90 мм | 76 мм |
| Position of the widest section | Fully concealed by the cabinet | Below the cabinet, exposed |
| Maximum diameter of the visible part | 54 мм | 76 мм |
| Length of the main exposed thickening | 12 мм | 40 мм |
By overall dimensions, the first leg is wider. Beneath the cabinet, the second retains a wider and longer thickening, so it is the one worth checking as the more massive visible option. This kind of breakdown is more useful than choosing by a single number in a filter. Mounting compatibility for each option should be assessed separately.
The error is especially noticeable when the cabinet edge runs through the middle of the roll. Instead of a complete transition, only its lower half is visible, as if the profile were cut off. Sometimes it is enough to choose a model whose decorative body starts lower. Raising the entire cabinet for the sake of a single thickening usually means changing other furniture parameters as well.
Check the front and side views separately. The front rail may be lower than the side rail, so the same leg is exposed to different lengths. After a flat drawing, a full-scale mockup is useful: from a normal viewing angle, a support recessed beneath the cabinet may be hidden more than in an orthographic view.
How to read the dimensions of a specific model
In the product card turned furniture leg MN-029 For STAVROS, three size combinations A × B × F are specified: 650 × 70 × 146, 740 × 80 × 167, and 850 × 88 × 192 mm. Beech and oak options are available.
This is an example of why a model name alone is not enough. When switching between versions, several dimensions change. You cannot choose a taller leg while keeping all the cross-sectional dimensions from the smaller version in the project.
The purpose of B and F is clarified using the diagram, and any missing dimensions should be obtained from the supplier. Do not automatically record B as the top section or assume F is the visible length after installation. The latter is determined by the combination of the specific part with your cabinet.
A low support: how many transitions can be read
Under a sideboard or sofa, a turned profile sometimes leaves a short exposed section. If several necks and beads are placed close together on it, from a distance they may be perceived as one striped mass. A calmer profile with one pronounced transition can be more noticeable.
Evaluate the distances between the thickenings after the cabinet is placed over the leg. When the lower band covers the first bead, the next neck may become the visual start of the leg. The support then looks thinner than it does on its own against a white background.
For low installation, it is useful to compare two models with the same mounting height: one with a wide, short body and one with a pronounced taper. The perceived weight of the cabinet changes, even though the furniture stays at the same level. The structural suitability of both parts should be checked separately.
A long leg: look at where the mass is concentrated
On a tall exposed support, the extent of the narrow sections matters. Two identical maximum diameters do not produce the same proportion if one model's wide section takes up almost the entire length while the other's remains only a small accent at the top.
On the side view, mark the long neck, the main bead, and the lower flare. Compare them with the cabinet height and the clear opening. On a console with a shallow drawer, a heavy thickening in the middle of the leg can become the most noticeable element of the entire piece of furniture.
Do not turn the diameter-to-height ratio into a universal standard. It helps compare silhouettes, but it does not confirm the rigidity of a long support. If a leg replaces a shorter one in an existing structure, the joint and the stability of the item must be re-checked.
Turned legs for a dresser, wardrobe and cabinet
For cabinet furniture, first find the actual support zone. The bottom of the facade, the bottom panel and the lower decorative band may be at different levels. The facade line shows how much of the profile a person will see, while the position of the bottom panel shows where the support is to be attached.
In the selection legs for a chest of drawers, wardrobe, and nightstand check the type of each model: an application filter by itself does not mean that all products in it are turned.
For a compact cabinet, compare the diameter of the visible body with the width of the carcass itself. For a wide dresser, additionally check the distance between supports and whether intermediate bottom support is needed. Four decorative legs at the corners do not replace such a check. For a tall wardrobe, changing the height of the supports also requires assessing stability and the furniture's intended fastening.
Turned legs for a sofa
Under a soft body, the visibility boundary is often the edge of the upholstery rather than the wooden frame. A leg that is exposed on the frame assembly drawing may end up almost hidden after upholstery. The outer contour of the finished sofa must be carried over into the design.
Choosing Sofa legs, coordinate the height with the seating position and the existing support points of the frame. Maintaining the specified clearance is not enough: raising the supports also raises the seat. Its actual height also depends on the construction and compression of the soft elements.
The number of legs is taken from the sofa design. A long body may have intermediate supports that are not visible from the front. They must not be omitted in favor of a set of four identical decorative pieces.
Turned legs for an armchair
On an armchair, the front and rear supports are checked as a linked system. A different height increase at the front and rear changes the seat tilt; an equal increase raises the seating position as a whole.
In the section chair legs choose a turned model taking into account the mounting position in the frame. Then place side and front views next to each other: wide front rollers may look appropriate, while the same rear ones may protrude beyond the upholstery.
If the design provides for different front and rear parts, they are listed as separate items. The requirement for an identical set applies to interchangeable supports and does not override the design of the armchair.
Turned legs for a console
On a narrow console, the space for the mounting block is limited by the depth of the body. A large round profile below may protrude beyond its outline, even when the upper part fits without difficulty.
When comparing console legs, check the clear opening at several heights. For two vertical round supports with a centre-to-centre distance of 760 mm and a diameter of 90 mm, at the selected level the clearance between them is 760 − 90 = 670 mm. If at another level the diameter decreases to 40 mm, the opening there increases to 720 mm.
This calculation is useful when a bench must fit under the console. Check its entire path, including the most protruding sections of the legs, the apron and any lower crossbar. For a wall-mounted console, the fixing specified by the design is retained separately.
For a table, an apron and legroom are added
On table supports, the upper block must accommodate the connection to the apron, while the open profile must leave enough space for seating. A large roller at knee level reduces the usable opening regardless of how thin the lower part of the leg is.
Selection legs for the table are checked together with the tabletop and the base. A detailed breakdown of this construction is covered in the article “Turned table legs”.
Lower support part and glide
For a leg with a spherical or rounded base, the maximum diameter at the bottom may noticeably exceed the size of the flat end face. The glide is selected based on the actual surface area on which it is installed.
Check whether the selected hardware fits, whether it extends beyond the edge, and whether the fastening method is suitable. If a hole is required, sufficient depth is needed specifically in the lower part of the model. An accidentally long fastener can protrude into the tapered area.
The thickness of the glides is taken into account in the overall height. Glides of different designs can produce unequal installed heights even with identical wooden parts. The final wobble of the furniture is assessed after assembly, also checking the flatness of the cabinet and the condition of the floor.
The fastening is selected and test-fitted before painting
First identify the specific leg and mounting part, then select furniture hardware for legs. The presence of a thread of the required diameter does not yet confirm compatibility: the seating depth, engagement length, and the mating part in the cabinet are important.
The dowel screw connects the prepared parts, the threaded insert creates a threaded socket, and the mounting plate defines the fastening pattern to the base. Each solution has its own dimensional assembly. A plate designed for a sturdy frame does not automatically make a thin, unreinforced bottom suitable.
Before finishing, perform the specified drilling and a trial assembly. Check the fit, tool access, and absence of obstructions. For angled installation, confirm the compatibility of the leg and hardware: rotating a standard vertical support "as drawn" does not replace a proper assembly calculation.
The order of painting and final assembly is agreed with the technology. If the joint is glued, the preparation of the contact surfaces is determined by the chosen adhesive. The required Mounting and finishing materials are selected to match this work sequence.
Beech or oak: the choice depends on the future surface
Beech furniture legs are convenient to consider when the goal is a uniform opaque color for the cabinet and supports. Oak parts are of interest where the wood texture should remain part of the design. These are finishing scenarios; they do not mean that one species is unconditionally stronger or suitable for any assembly.
Oak can be painted with enamel, while beech is finished with transparent compositions. However, the desired surface appearance must be agreed in advance with the preparation of the blank. A smooth opaque layer and a surface with readable texture require different results from a test finish.
In the description quality of solid wood products STAVROS distinguishes between laminated timber "for enamel" and "for tinting". In the first case, the lamellas are not matched by color and texture; in the second, they are matched, but natural differences remain. The quality of sanding is specified separately. Therefore, the word "oak" in an order does not yet determine the appearance of the leg after a transparent finish.
Unfinished leg or a ready-made finish
If the workshop finishes the furniture independently, from STAVROS open boundless possibilities for designers, furniture makers, and anyone striving to create unique high-quality furniture. they allow the coating to be coordinated with the fronts and frame. Before starting a batch, the surface is checked and a test finish is made on the actual profile.
A flat swatch helps you choose the color direction, but it does not show how the flutes and beads will look. On a turned part, the lighting, the surface direction, and the visibility of the wood grain all change. Compare the recesses and raised areas especially carefully: the finish should not visually merge adjacent elements of the relief.
The pre-finished option makes sense if the category furniture legs with a coating has a suitable version. Check the model, size, color, and gloss level. A matching shade name on screen does not guarantee a match with an already painted cabinet.
When comparing cost, factor in your own preparation, materials, labor, and drying. An unfinished part does not necessarily cost less than a finished leg; a coated one shortens the production route only when it fits without rework.
One leg as a sample: what to check before ordering a batch
For a new project, it is useful to order one leg in the size and material you plan to use. A sample checks more than color: it is placed in a trial cabinet assembly.
Verification sequence:
- Check the overall dimensions and the top mounting part against the drawing.
- Try on the fitting and mark the line above which the profile is concealed.
- Evaluate the exposed necks and beads from the front, the side, and a normal viewing point.
- Check the bottom plate with the chosen glide.
- Carry out a trial finish and retain the agreed result.
Section product samples useful for getting acquainted with the available samples, however a material sample does not replace a full-size leg for checking the fit.
A single part also does not confirm the stability of the entire piece of furniture. After checking the assembly, a trial assembled item or another design verification provided for by the project is required.
Four identical legs are checked with one set
One item code describes the model, but a set requires matching its execution: dimensions, species, preparation and finish. Under a clear finish, additionally compare the shades and grain pattern of the wood on the sides that will remain exposed.
Lay out the four parts in their future positions and mark their placement. If the design allows rotation around the axis, you can choose the side with a suitable grain pattern. With fixed holes or a square mounting block, freedom of rotation is limited by the assembly.
Then check that the installed height with the hardware is identical. For a series of five cabinets with four identical supports each, 20 legs will be required. If the tested sample is to be incorporated into the product, it is included in this quantity. If it remains a reference sample or is damaged by testing, five cabinets still require 20 suitable parts in addition to it.
What to record in the specification for reordering
The entry "wooden legs — 4 pieces" does not preserve the decisions made. After a few months, it is impossible to restore from it either the dimensional variant or the exposed part of the profile.
| Field | What to fix |
|---|---|
| Product | Turned furniture leg, exact item code |
| Finish | All dimensions of the selected variant according to the card and drawing |
| Top part | Width, depth, height of the block, hole pattern |
| Profile | Maximum and minimum diameters, position of significant thickenings |
| Visible part | Front and side length according to the furniture project |
| Material | Beech or oak, blank preparation variant |
| Finishing | Compositions, application order, color and approved paint sample |
| Installation | Fasteners, mating parts, glide and assembly drawing |
| Quantity | Number of parts per product and per batch |
| approval | Date, sample designation and drawing version |
| Order source | Link to the product page and saved specifications |
Separate rows are created for different front and rear legs. When reordering, current specifications are checked against the saved specification: a visually similar photo does not confirm interchangeability.
When to choose a different profile
Avoid a specific turned model if a suitable silhouette can only be achieved after extensive modification of the mounting part. Cutting off the top block to hide it under the cabinet means changing both the height and the mounting options. Such a modification cannot be considered ordinary fitting without verification.
A different profile is also needed if the cabinet covers almost the entire decorative body or a wide thickening interferes with an adjacent part. First, a suitable version is sought among of wooden furniture legs, comparing drawings at the same scale.
If the visible part is completely hidden by the plinth, complex turning may not provide any noticeable advantage to the project at all. In that case, it is more sensible to subordinate the shape of the support to the design of the base and furniture maintenance.
Where to buy turned furniture legs
In the STAVROS catalog Turned legs for furniture are collected in a separate selection of unfinished products. Start with the required size group, then compare the upper part and profile within the visible length.
Before buying turned furniture legs as a set, check the availability of the exact version, the scope of delivery, whether separate fasteners are required, and the final cost including finishing. If the product page shows several sizes of the same model, the order must specify the exact variant that was verified.
For the workshop, it is useful to study separately conditions for manufacturersand when planning assembly — payment and delivery. The lead time for receiving parts is agreed with the production schedule after order confirmation.
Provide the supplier with the item code, the full set of dimensions, the material, the preparation for the selected finish, and the quantity. Include questions about any missing dimensions of the mounting part. Such an order can be checked before payment and then repeated without selecting the silhouette again.
Additional questions
Can the diameter be measured from a catalog photo?
A photo helps to make a preliminary assessment of the shape. A working dimension requires a drawing or a measurement of the part: perspective, tilt, and an unknown image scale introduce error. Even a labeled height does not make any photo an accurate drawing.
Does a round profile mean the leg can be rotated to any side?
Only if the mounting part and fasteners allow it. A round center section may be combined with a square top, pre-drilled holes, or a fixed position relative to the apron. The orientation is set during fitting.
What should I do if the individual parts are identical but the furniture wobbles?
Check the furniture on a level surface, compare the glides, the fit of the fasteners, and the position of the support areas of the cabinet. The cause may be a skewed assembly or the floor. Do not shorten the leg before identifying the cause: such an operation changes the profile and may not eliminate the source of the wobble.