Article Contents:
- First the table design, then the turned profile
- Leg height and finished table height are different dimensions
- Minimum calculation table
- What to check on the apron
- Checking a long table
- Checking a square table
- If the table has no aprons
- Where to measure the maximum profile
- The rhythm of four identical profiles
- How to compare real SKUs without false precision
- MN-106: traditional tall turned leg
- MN-124: same height class, but a different scale
- MN-195: no-tsar scenario
- MN-203.1: turning plus a metal element
- Beech for an opaque system
- Oak for transparent finish
- What should be approved on the sample
- When one leg is not enough for a prototype
- Choosing a leg based only on height
- Mistaking leg height for table height
- Checking only the distance between leg axes
- Designing the apron first, then looking for a leg
- Not checking the armchair with armrests
- Mix different models in one set
- Replace SKU without recalculation
- Error: not accounting for the difference between a drawing and a product photo
- Error: not accounting for grain direction and finish in the set
- Error: not leaving the option for reorder
- Error: buying exactly four pieces for a large series without accounting for production risk
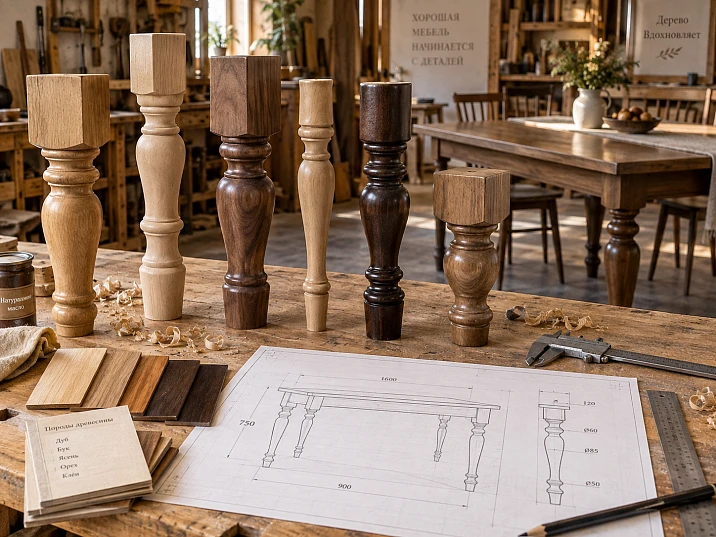
A beautiful turned leg is easy to choose separately from the table. You just open the catalog, compare the profile, and picture four identical supports under the tabletop. The mistake shows up later: the leg gives the wrong final height, the apron drops too low, the armrests of the chair don't fit under the table, a massive thickening eats up legroom, or the top part of the support doesn't match the planned joint well.
That's why turned table legs should be chosen not by the profile pattern, but by the construction of the future piece.
The working sequence for a furniture maker looks like this:
table purpose → tabletop dimensions → final height → tabletop thickness → apron and underframe → required leg length → top cross-section → maximum profile diameter → material → actual SKU → sample → set of four identical parts → BOM → order.
This way, the leg becomes not a decorative accessory added at the very end, but one of the initial parts of the structure. For a production or custom table, this is a fundamental difference: before cutting the apron and drilling, the geometry can still be changed. After assembly, you have to redo the finished product.
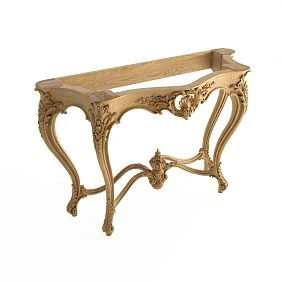
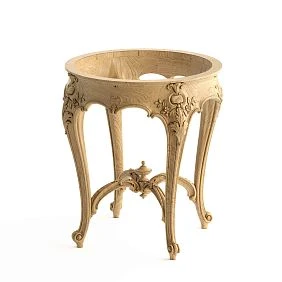

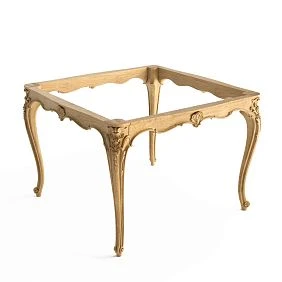
First the table structure, then the turned profile
The main question is not "which leg is more beautiful," but what geometry the table should have after assembly.
Before choosing an SKU, at least define:
- table purpose;
- tabletop length and width;
- required final height;
- countertop thickness;
- the presence and height of the apron;
- method of connecting the apron to the legs;
- estimated overhangs;
- distance between supports;
- required legroom.
Only after that does it make sense to open the catalog turned table legs and compare actual products.
The reason is simple. A turned leg's profile changes along its height. The upper part may be solid and almost rectangular, the middle narrow, and lower down a ball, bead, or cone appears. A single height figure says nothing about how much space the leg will occupy under the tabletop and how it will join with the apron.
In a small image, two models look roughly equally slender. On a table 800 mm wide, the difference in maximum cross-section already changes the entire lower silhouette.




Leg height and finished table height are different dimensions
For a simple table without an additional underframe, the basic check looks like this:
Table H = leg H + tabletop H + additional structural layers.
If the tabletop simply rests on the top of the legs and there are no additional height components, the formula simplifies:
Table height ≈ leg height + tabletop thickness.
But the word "approximately" matters here. A mounting plate, an inset, a support block, a recessed fit, or a separate frame can change the result.
For example, a leg 720 mm high and a tabletop 30 mm thick mathematically give 750 mm. If the tabletop sits directly on top, this is a clear starting point for the calculation. If there is a structural frame between them, you need to check whether it adds height or is partially hidden in the tabletop.
Therefore, the phrase "we need a 750 mm table — let's buy 750 mm legs" cannot be used as a production rule.
First, break the height down into its actual components.
There is another reason not to start with the leg height: a table can have a different construction of the upper part. A thick solid wood tabletop, a tabletop with a support frame, a thin panel on a base, and a tabletop with an integrated apron give different total heights even with the same support.
It is useful to think not in terms of a "leg" but of a vertical stack-up:
floor → bottom point of the leg → top of the leg → mounting assembly → bottom surface of the tabletop → top surface of the tabletop.
If at least one of these levels is not defined, the final height is not yet fixed.
For a prototype, it is convenient to make a simple control side drawing. Draw a horizontal floor line, the top of the tabletop, the bottom of the tabletop, and the bottom edge of the apron. Then insert the actual leg outline. Such a sheet immediately shows three different parameters that are often confused:
- table height;
- support height;
- free height under the table.
For a desk, pedestals, cable channels, and a possible back panel are added to this. For a dining table, primarily the apron and chairs. That is, the same leg may be structurally appropriate in one table and inconvenient in another, even though the overall height matches.
If the project is built around existing chairs, it is better to start with the "table + chair" pair. Measure the actual seat height, armrest height, and the user's maximum knee height in the chosen chair. Only after that, fix the lower boundary of the apron. This order is especially useful for custom furniture: ergonomics is defined by real objects, not by an averaged image of a "dining table."
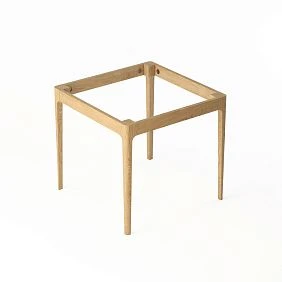
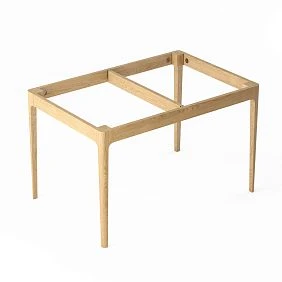
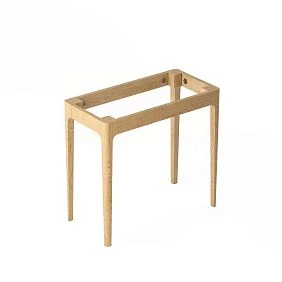
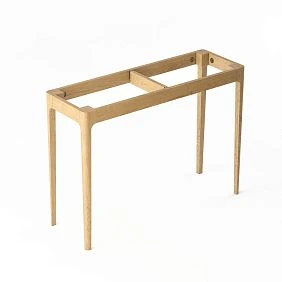
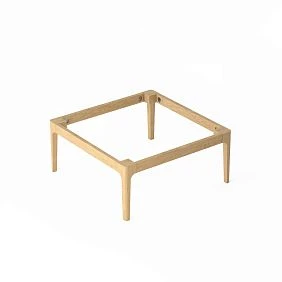
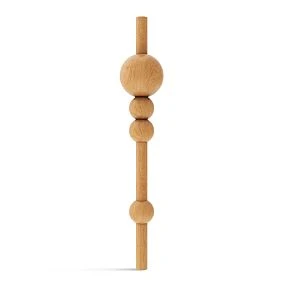
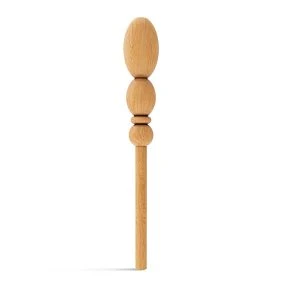
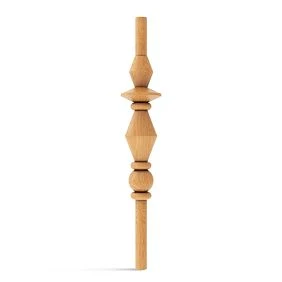
Our factory also produces:
Minimum calculation table
| Parameter | What we record |
|---|---|
| H of the finished table | Design height |
| H of the tabletop | actual thickness |
| H of the intermediate assembly | if present |
| H-shaped legs | required or actual |
| Total | sum check |
This calculation takes a minute, but it immediately eliminates one of the most common mistakes when buying ready-made supports.
Get Consultation
The apron can make a leg that fits in height unsuitable
The apron solves a structural task: it connects the legs, contributes to the rigidity of the underframe, and forms the assembly under the tabletop. But at the same time, it takes up space that the user perceives as legroom.
Therefore, for a dining or writing table, two heights are important:
floor → top of the tabletop
и
floor → bottom edge of the apron.
The second is often more practical than the first.
Let's imagine two structures of the same overall height. In the first, the apron is tall and positioned low. In the second, it is more compact or partially hidden. From the outside, the tables may have the same height, but sitting at them will feel different.
When choosing a turned leg, you need to check how much straight or structurally suitable section remains at the top for connecting to the apron.
If the decorative thickening starts too high, a wide apron may fall directly into the profile.
This is exactly where a "beautiful leg" becomes unsuitable for a specific table.
What to check on the apron
- The height of the apron.
- The thickness.
- The method of connection to the leg.
- The level of the bottom edge.
- Whether the connection falls within the suitable part of the upper block of the leg.
- Whether the apron intersects with the first decorative transition.
It is better to draw the actual joint at a 1:1 scale, at least in CAD. Even better — test it on a physical sample before production.
There is another subtlety: the apron does not necessarily have to be the same height on all four sides. For example, on the long side rails you can use a more substantial structure, while on the end faces a different geometry can be used if the design allows it. But such a solution must be deliberate and drawn out, otherwise visually identical legs end up with different joinery.
If the joint is made with a tenon, the furniture maker checks not only the outer dimension of the apron but also the depth of the mortise in the leg. The decorative profile may come too close to the tenon area. If fastening is planned via a metal bracket or special hardware, you need a clear flat surface and tool access.
So the apron has three different "heights":
- the outer decorative dimension;
- the structural joint zone;
- the actual lower level, which determines the space for the legs.
It is the third that affects user comfort, while the second affects whether the table can be assembled. They may not coincide.
For a production series, it is worth adding a separate joint detail to the drawing LEG/APRON. Then, when replacing a leg, there is no need to review the entire project: it is enough to open one joint detail and compare the upper block of the new SKU with the apron geometry.
The chair's armrests and legroom must be checked before ordering the legs
A table is not designed for empty space under the tabletop. It will be used with chairs or armchairs.
If armchairs with armrests are planned, check whether they can be pushed under the table.
Condition:
Armrest height H + working clearance < distance from floor to the bottom of the apron.
There is no need to look for a universal clearance figure: it depends on the specific armchair, upholstery, armrest angle, and usage scenario. What matters here is the method of checking.
Take the actual armrest height, add a reasonable operational margin, and compare it with the actual height to the apron.
If the armchair does not fit, there are several options:
- reduce the apron height;
- raise it;
- choose a different underframe design;
- change the table height;
- opt for a chair without armrests.
Changing the leg height just to solve this problem is usually a bad idea: the entire seating position at the table will change along with it.
For a long dining table, the clear span between the legs is checked separately. A turned profile can be significantly thicker in the middle than at the top section, so the distance "between axes" is not yet equal to the actual clear space for knees and chairs.
The tabletop size is determined not by the leg, but by the layout of the four legs
The same SKU can work well under one tabletop and look too bulky or too sparse under another.
For the calculation you need:
- tabletop length;
- width;
- end overhang;
- side overhang;
- support axes;
- maximum leg cross-section;
- position of the aprons.
Let the tabletop have a width of W, and the leg axes are inset from the edges by E1 и E2. Then the distance between the axes is:
W − E1 − E2.
But what matters to the user is not the center-to-center dimension, but the clear space. Therefore, the actual width of the profile in the area where the legs are located must be subtracted from it.
For a long table, the longitudinal distance is checked in the same way.
Look separately at the tabletop overhang. A very small overhang makes the upper part of the legs visually almost part of the edge. A large overhang, on the contrary, hides the supports further inward. Both solutions are possible, but they produce a different table architecture.
Therefore, a turned profile cannot be evaluated only against the white background of the card. It needs to be placed under the real contour of the tabletop.
Checking a long table
A 2000 × 1000 mm tabletop may raise an additional question: whether four supports are sufficient for the chosen design and whether a central support or a different base configuration will be needed. The answer depends on the tabletop material, its thickness, the frame, and the joints, so a universal rule is dangerous here.
But the layout of the four legs can be checked geometrically even before strength calculations.
Mark:
- end overhangs;
- side overhangs;
- leg axes;
- outer contours of the maximum cross-section;
- inner free rectangle.
The resulting inner dimension shows how much space remains for seating at the end and on the side.
If a turned leg has a large ball or bead in its middle section, this free rectangle is better built not from the upper block, but from the most protruding section at knee height.
Checking a square table
A small square table has a different problem: the legs visually appear closer to each other, and the large profile begins to compete with the central free space.
Here it is useful to make a bottom view at a 1:1 scale and literally "seat" four real contours under the tabletop. If little space remains between them, you may need a thinner SKU or a different type of base.
Such a check gives more than evaluating a single photo of a leg, because the profile immediately appears at the real density of four repetitions.
The upper cross-section of the leg must match the connection method
For a classic construction with an apron, the upper part is especially important.
Check:
- the width or diameter of the upper block;
- the length of the straight section;
- the available mounting plane;
- the position of decorative transitions;
- the space for fasteners;
- the thickness of the apron;
- the depth of the selected joint.
If the leg tapers sharply at the very top or the decorative profile begins almost immediately, the familiar assembly with a wide apron may prove inconvenient.
Conditionally, a leg with a height of 720 mm may be excellent in proportions, but if the structurally suitable upper block is too small for your apron, height alone will not save the choice.
This is the case when a production drawing is more important than a photograph.
If the table is apronless
The logic changes. Then the main method becomes mounting directly to the tabletop or to a hidden frame.
Here there is no need to artificially look for space for a classic apron. It is better to immediately choose a support designed for the corresponding mounting scenario.
For example, model MN-195 has a metal base and on the current card is described as a support for apronless structures of dining and writing tables, as well as consoles. This is already a completely different assembly than a traditional turned leg for a wooden apron.
Therefore, the structural scheme of the table is chosen first. Then — the model within it.
The upper section also influences the choice of the joint itself. Several scenarios can be conditionally distinguished:
| Scenario | What to check |
|---|---|
| wooden apron + traditional joinery joint | straight top block, joint depth, distance to the profile |
| apron + furniture hardware | space for fasteners and tool access |
| apron-free tabletop | mounting base, plate, installation angle |
| hidden frame | compatibility of the support with the frame and attachment points |
This is not a strength calculation guide. Strength depends on the design, material, and specific joint. But the table helps rule out geometrically incompatible options before detailed design work.
For example, if a craftsman plans a traditional wooden apron and a mortise-and-tenon joint, a long straight leg top is more useful than a decorative profile that starts almost immediately from the tabletop. If a metal plate is used, on the contrary, the shape of the base and the fastener holes become decisive.
Therefore, the field Mounting Scenario in a worksheet it can be no less useful than Height.
For custom furniture, you can keep a record:
LEG-01 | apron mortise
or
LEG-02 | plate mount
So on a repeat order it is clear not only which leg was purchased, but also why that particular one suited the design.
The maximum diameter of a turned profile is more important than it seems
A turned leg is a body of revolution with a variable profile.
It may successively include:
- cylinders;
- beads;
- necks;
- spheres;
- cones;
- fillets;
- radiused transitions.
Because of this, the top width does not describe the entire part.
A leg with a top section of 90 mm may have a decorative thickening that is noticeably wider. It affects:
- distance between supports;
- legroom;
- visual mass;
- proximity to the apron;
- the ability to place a chair closer to the end.
For each SKU, find the widest section on the drawing or in the dimension diagram and transfer it to the table model.
Where to measure the maximum profile
On a turned part, the maximum diameter may not be where one would expect. Sometimes the widest part is located high up and hardly interferes with the legs. Sometimes the ball or roller is right at knee level.
Therefore, a single value Dmax is not enough — it is useful to know its height mark as well.
In CAD, you can do a simple check:
- insert the side profile of the leg;
- draw horizontal lines at the level of the apron, knees, and seat;
- check the actual width of the part at each mark.
This makes it clear where the profile actually takes up space.
The rhythm of four identical profiles
A turned leg is perceived not once, but four times. A complex profile is repeated in every corner. The more active the turning, the stronger the rhythm becomes.
On a long table, four massive supports can work as separate architectural verticals. On a small one, they compress into a dense group.
That is why sometimes a simpler profile looks more convincing not because it is "more modern," but because four repetitions provide sufficient decoration without overload.
For evaluation, it is better to compare not large photos of two legs, but two full sketches of the table with four instances of each SKU.
If the exact maximum diameter is not specified separately in the product card, do not guess it from the photo. Use the available drawing or request technical information.
The proportion of the profile should match the tabletop, but without universal coefficients
A furniture maker is tempted to derive a formula: for a tabletop of this size, a leg of this diameter is needed.
There is no universal coefficient here.
Perception is simultaneously influenced by:
- tabletop length;
- its thickness;
- the material;
- table height;
- overhangs;
- tsarga;
- distance between supports;
- the shape of the turning itself.
A thin tall leg under a massive thick tabletop may look weak. A very rich profile under a small light tabletop may look heavy.
But that doesn't mean you always need to "balance the mass."
Sometimes deliberate contrast is the very idea of the piece.
A practical way to check is simpler than theory: assemble the front and side views to scale, then compare two or three real SKUs.
The best question:
how does this particular leg look at the scale of this particular tabletop?
And not:
which leg is prettier on its own?
Four separate legs and a ready-made base are different constructions
If you choose four separate turned legs, the workshop itself is responsible for the geometry of the base.
You need to determine:
- the position of each support;
- aprons;
- joints;
- overhangs;
- diagonal rigidity;
- distance between the legs.
Ready-made wooden table base — a different product. There, the base is already treated as a connected system.
This article is specifically about four separate turned supports.
If the designer does not want to determine the relative position of the legs and the structure of the aprons on their own, a ready-made table base may be more rational.
If, however, you need to control the length, width, overhang, and architecture of the table, separate legs offer more freedom.
Freedom requires more design decisions.
Four real STAVROS SKUs show why you cannot choose a “turned leg in general”
The category is the same, but the structural scenarios are different.
| Model | Verified geometry from the product page | What is especially important to check |
|---|---|---|
| MN-106 | 720 × 138 × 88 mm | the top block, the apron, the proportions of the massive profile |
| MN-124 | 720 × 160 × 100 mm | a larger cross-section, the apron joint, the tabletop overhang |
| MN-195 | 740 × 51 × 220 × 97 mm | the metal base, the installation angle, the apron-free design |
| MN-203.1 | 740 × 52 × 56 mm | straight/corner mounting, metal decor, fasteners |
The numbers here do not replace a drawing. They show the principle: the same product group does not mean the same construction.
In this group of four, another difference is clearly visible: a traditional apron table and an apron-less construction should not compete in the same filter based only on height.
MN-106 and MN-124 are logical to consider as candidates where the craftsman wants to work with a massive turned profile and designs the upper assembly independently. MN-195 already has a metal base and is specified for apron-less constructions. MN-203.1 allows different mounting options via the appropriate hardware.
That is, before comparing price, material, or shape, it is worth introducing another filter:
what is the structural design of the table?
If you need a classic table with a wooden apron, models with an integrated metal base may simply turn out to be a different class of solution. If you need a light modern apron-less table, on the contrary, a massive upper part for a wooden apron may be excessive.
Such a selection reduces the number of candidates faster than sorting by style.
How to compare real SKUs without false precision
For each candidate, create one row:
| Field | Candidate A | Candidate B |
|---|---|---|
| SKU | real | real |
| Height | By card | By card |
| Top geometry | According to the drawing | According to the drawing |
| Max profile | According to the drawing | According to the drawing |
| Mounting | selected node | selected node |
| Material | desired option | desired option |
| Finish | own / ready-made | own / ready-made |
| Sample | Yes / no | Yes / no |
After such a table, appearance remains important, but it is no longer the only criterion.
MN-106: traditional tall turned leg
Turned leg MN-106 has a current card size of 720 × 138 × 88 mm and options in beech and oak.
For the project, you should look not only at the height of 720 mm. The more massive upper geometry requires checking the apron and the overall scale of the tabletop.
MN-124: same height class, but a different scale
У MN-124 current size 720 × 160 × 100 mm.
In height it is close to MN-106, but the transverse geometry and visual mass are already different.
This is a good example of why the phrase "need a turned leg 720 mm" is insufficient for ordering.
MN-195: legless apron scenario
MN-195 on the current product page has a size of 740 × 51 × 220 × 97 mm and a metal base.
For the table manufacturer, what matters here is not finding a place for a wooden apron, but checking the mounting to the underside of the tabletop, the installation angle, and the associated hardware.
MN-203.1: turning plus a metal element
MN-203.1 has a current size of 740 × 52 × 56 mm and a metal decorative element. The product page provides for different installation methods — including straight and angled with the corresponding hardware.
This is no longer a classic "baluster under the tabletop," but a modern support where the mounting design becomes part of the choice.
Pure turning and a combined support give the table a different character
For a classic turned leg, expressiveness is created by the profile itself:
- with varying diameters;
- with necks;
- with rollers;
- with spheres;
- with cones;
- with radii.
Such a support reads well together with a wooden apron and a traditional tabletop.
A combined leg introduces a second material — for example, metal. Then the profile can be calmer, and the visual accent shifts to the base or the tip.
This expands the options for modern tables, but does not change the main principle: first structural compatibility, then decorative effect.
There is no need to turn a turned leg into a synonym for classical style. Turning technology describes a method of forming geometry, not a single external image.
Beech or oak for turned table legs
It is better to choose the wood species together with the finish.
Beech for an opaque system
If the legs and apron are to be painted with enamel, the natural wood grain is not the main visual parameter.
In such a project, the workshop can include an unpainted beech support in the overall finishing cycle:
preparation → primer → enamel → inspection → assembly.
This does not mean that beech is “always better for enamel.” The specific execution of the product and the workshop’s technology must be taken into account.
Oak for transparent finish
If the wood is to remain visible, these work better:
- texture;
- pattern;
- tone;
- stain;
- oil;
- transparent lacquer.
Then the leg must be coordinated not only with the tabletop in geometry, but also with other wooden parts in material and finish.
In a complex project, it is useful to make a test paint application specifically on a sample or similar wood, rather than choosing the color only from a screen.
For transparent finishing, it is especially important not to promise an exact color match between different wooden parts without a sample. Even within the same species, the grain pattern and perceived tone depend on the specific blank, surface preparation, and finishing system.
If the countertop has already been manufactured, a reasonable order is as follows:
- take one leg;
- prepare a test area using the same technology;
- apply the chosen stain, oil, or lacquer;
- compare it next to the countertop under real lighting;
- only after that, confirm
Finish Code.
For enamel, the logic is similar, although the wood texture plays a smaller visual role. Here, consistency of primer, gloss level, and final color is more critical.
In the BOM, it is convenient to separate material from finish:
Material: beech
Finish: F-01 / enamel
or
Material: oak
Finish: F-02 / stain + clear coat
Then one SKU can be used in different projects with different finishes without confusion between the product and the workshop's technology.
An unfinished ready-made leg is especially convenient for a custom table
A ready-made unfinished part already removes one of the most difficult operations from the workshop — producing a repeatable turned profile.
The craftsman receives:
- finished geometry;
- four identical production items;
- a known SKU;
- a repeat order.
And within their own workshop, they handle:
- tinting;
- enamel;
- oil;
- varnish;
- patina;
- a different custom finish.
This is convenient when the tabletop, apron, and legs should look like a single piece.
In the section unfinished wooden legs you can first choose a structurally suitable model, and then plan your own finish.
A ready-made leg here means ready-made geometry, not necessarily a ready-made color.
Four legs should be considered as one set
One table requires four identical items:
one SKU → one material → one geometry → one finish.
In the BOM:
LEG-01 × 4
Not:
wooden legs — 4 pcs.
For a turned profile, repeatability is especially noticeable. Beads, necks, and thickenings form a vertical rhythm on the four corners of the table. Even a slight visual difference in one support destroys the sense of a set.
For a small batch, this is even more important.
If 12 identical tables are produced:
Qty per table = 4
Tables = 12
Total Qty = 48
This way, the structural BOM does not have to be rewritten when the batch size changes.
One sample before the full set — a cheap check for expensive mistakes
For a new SKU, a practical scheme:
1 leg → SAMPLE → fitting → stretcher check → color sample → APPROVED → order the full set.
What to check on the sample:
- actual height;
- top section;
- maximum profile width;
- straightness and geometry;
- surface quality;
- scale relative to the tabletop;
- position of the apron;
- chosen mounting method;
- finish result.
If the project is a series, one trial leg becomes part of the prototype of the first table.
A problem on the sample costs time.
A problem after purchasing 48 identical legs costs a batch.
What must be approved on the sample
Status APPROVED makes sense only when it is clear what exactly was approved.
For the leg, it is better to record:
- SKU;
- the material;
- dimensional specification;
- orientation, if it matters;
- mounting method;
- finish code;
- the result of fitting with the rail or tabletop.
A photo of one sample is useful to attach to the project card, but it does not replace these fields.
If the supplier later offers a replacement, the comparison becomes concrete: the new SKU must meet the same criteria.
When one leg is not enough for a prototype
Sometimes the geometry of a single part can be checked, but the behavior of four supports cannot. For example, you need to evaluate the rhythm, the distance between the thickenings, or the stability of the visual composition.
Then it makes sense to assemble the first table entirely from four approved supports and consider it the prototype for the series.
This is especially reasonable if the furniture is being launched in a run of 10–20 pieces. A mistake on the first table is cheaper than a mistake in the entire batch.
A 1:1 template helps verify the layout of the four supports
For the underside of the tabletop, it is useful to make a simple full-size template.
Mark:
- tabletop contour;
- axes of the four legs;
- actual maximum profile contours;
- aprons;
- mounting points;
- overhangs;
- free span;
- legroom.
It is immediately clear that it can get lost on a regular plan.
For example, the axes are positioned nicely, but the maximum leg diameters come too close to each other. Or the end overhang is good along the front, but the top platform almost extends beyond the edge of the tabletop.
If the installation is corner, the template is especially useful: the tilt changes the actual lower overall dimension of the base.
It is too late to check this after drilling.
How to record turned legs in the BOM and working drawing
For project documentation, it is convenient to use a short code.
For example:
LEG-01
In the BOM:
| Field | Value |
|---|---|
| Project Code | LEG-01 |
| Manufacturer | STAVROS |
| SKU | MN-124 |
| Type | turned |
| Application | table |
| Material | oak / beech — approved finish |
| Size | according to the current product page |
| Finish | own / factory |
| Qty per table | 4 |
| Sample Status | APPROVED |
| Revision | current |
| URL | Product |
On the drawing:
LEG-01 × 4
In purchasing:
exact SKU × Total Qty
Such a system is more useful than a description turned wooden legs. A year later, it is impossible to reliably restore the original model from this phrase.
For a series, it is useful to add two more fields to the BOM:
Qty per table
и
Total Qty.
For example:
LEG-01 | MN-124 | Qty/table 4 | Tables 12 | Total 48
If one table is non-standard and gets six supports, it is better to put it in a separate line or a separate Project Code. It is not worth changing the value Qty per table for the entire model because of one exception.
For serial production, it is useful to split acceptance into two levels.
The first is geometric. From the batch, the height, the upper mounting part, and key transverse dimensions are checked selectively. The point is not to re-measure every leg like a laboratory part, but to make sure that the delivery corresponds to the SKU and dimensional version that was approved on the prototype.
The second is finishing. If the workshop paints the parts itself, the surface is inspected before finishing: whether there are any defects that will show up after enamel or tinting. If the legs arrive with a ready-made coating, the shade and degree of gloss are compared within the same batch.
For a transparent finish, it makes sense to decide in advance whether visual sorting of the four parts per table is needed. Natural wood does not have to have an identical grain pattern, but the four legs of a single piece are perceived better when the differences do not look random.
The following fields can be added to the production bill of materials:
Batch
Incoming Check
Finish Status
Then the path of the item becomes transparent:
ORDERED → RECEIVED → CHECKED → FINISHED → READY FOR ASSEMBLY.
This is especially useful if the legs go through a separate painting cycle and are not installed immediately after delivery.
Another useful field is Replacement Allowed.
For a critical custom leg, you can set:
NO — engineering approval required
This is not a legal status, but an internal workshop rule. It protects against a situation where a purchaser sees a similar leg and replaces it without checking the drawing.
In the production archive, store the BOM together with the latest drawing revision. Then a repeat order truly reproduces the product, rather than only approximately recreating it from a photograph.
Common mistakes when choosing turned legs for a table
Choosing a leg by height only
Why it happens: height is the most straightforward parameter in the product card.
Consequence: the top section or profile does not fit the apron.
How to prevent: check the entire part drawing.
Mistaking leg height for table height
Why it happens: the tabletop thickness and structural layers were forgotten.
Consequence: the finished table is taller than the design.
How to prevent: calculate the assembly height.
Checking only the distance between leg axes
Why it happens: the plan shows points, not actual outlines.
Consequence: profile thickenings eat up legroom.
How to prevent: use the maximum overall dimension.
Design the stretcher first, then find the leg
Why it happens: the base is considered independent.
Consequence: the joint falls within a decorative transition.
How to prevent: choose the SKU before finalizing the stretcher assembly.
Not checking the chair with armrests
Why it happens: only the overall table height is checked.
Consequence: the chair cannot be pushed in properly.
How to prevent: check the lower edge of the stretcher.
Mixing different models in one set
Why it happens: similar items appear interchangeable.
Consequence: the profile, cross-section, or height differs.
How to prevent: four legs = one APPROVED SKU.
Replace SKU without recalculation
Why it happens: the buyer sees an "equivalent size."
Consequence: the stretcher, fasteners, or proportions change.
How to prevent: any replacement must pass a drawing check.
Mistake: not accounting for the difference between a drawing and a product photo
A photograph may be taken at an angle and visually make the profile appear smaller or larger.
Consequence: the leg appears thinner than at actual scale.
Check: work from the dimensional diagram and 1:1 models.
Mistake: not accounting for grain direction and finish within the set
With a clear finish, four parts may differ in the natural wood pattern.
Consequence: the set is perceived as inconsistent.
Check: accept the batch as a set and approve the finish on the actual parts.
Mistake: not leaving the option to reorder
The project is stored only as a render.
Consequence: a year later, the model cannot be quickly restored.
Check: save the SKU, link, size, material, and revision in the BOM.
Mistake: buying exactly four units for a large series without accounting for production risk
For a single table, four legs may be a sufficient order. For a series, the workshop must separately address the question of reserve, defects during its own finishing, and the possibility of prompt reordering.
A universal reserve percentage is not needed here. It depends on the batch size, finishing technology, and availability of the specific SKU.
When a ready-made turned leg is not suitable
The catalog should not dictate the design at any cost.
A ready-made SKU may be a poor solution if:
- no model provides the required height;
- the top part does not fit the apron;
- the maximum diameter is too large;
- a unique historical replica is required;
- the profile must continue the author's geometry of the table;
- a special connection is provided;
- a non-standard species or technological blank is required;
- the table is the workshop's own serial product, and the leg is its unique identifier.
Then custom manufacturing may be more rational.
Another option is a ready-made base if the workshop does not want to design four separate supports and an apron system on its own.
An expert choice sometimes means rejecting a ready-made leg.
Before rejecting a ready-made SKU, it is useful to go through a short decision tree.
1. The height does not fit?
Check whether the design of the upper part, the thickness of the tabletop, or the fit can be changed without worsening the project. If not, look for another SKU.
2. The height fits, but the apron gets in the way?
The problem may not be with the leg itself, but with the chosen base frame scheme. Compare a different profile or a different connection method.
3. The geometry works, but the profile feels too heavy?
Make a sketch with four supports at real scale. One leg and four identical legs are perceived differently.
4. Everything works except the finish?
If an unfinished version is available, the workshop's own finishing can solve the task without custom manufacturing of the geometry.
5. The profile itself doesn't work?
Then the compromise already affects the design. It's better to move to another SKU or custom manufacturing than to distort the table's idea around an unsuitable part.
This order helps separate a truly unique task from a problem that can be solved by adjusting the design.
How to buy turned table legs without redesigning after ordering
Final sequence:
tabletop → height → apron → clearance → actual SKU → drawing → sample → APPROVED → 4 pcs. per table → Total Qty → order.
There is a separate section for searching by purpose wooden table legs, and the full assortment is collected in the catalog of wooden furniture legs.
Before paying for a batch, it is useful to do a final check not by category name, but by a single procurement line:
SKU → size variant → material → quantity → fasteners → finish status → revision.
If at least one field does not match the prototype, the order should be paused and checked.
For a four-legged table, “almost identical” substitutions are especially dangerous. A difference of a few millimeters in height or in the upper cross-section may be unnoticeable in the product list, but it will show up four times during assembly.
If production runs in batches, it is better to keep the card check date and the purchase date. Availability, price, and lead time may change, but the approved geometry of the project does not. This makes it possible to separate the constant part of the BOM from the dynamic commercial information.
After receiving the batch, do not mix leftovers from different SKUs just because they look similar. A leftover leg should remain tied to its own item number. For reassembly, this is much more reliable than a box labeled “turned legs 720.”
And one more practical point: if the table is designed as a long-lived workshop model rather than a one-off order, archive more than just the URL. Save a PDF or screenshot of the dimensional diagram, the internal assembly drawing, and your own Finish Code. The product page may change, but the production documentation must remain reproducible.
If the task is specifically about a turned profile, it is more convenient to start with the category turned furniture legs, then filter the models by the geometry of the specific table.
It makes sense to buy turned table legs not at the moment when "four beautiful supports are needed," but when the craftsman already knows:
- what final height it should have;
- where the apron runs;
- how much space remains for the legs;
- what cross-section the structural joint takes;
- how the profile looks at the scale of the tabletop;
- which material and finish are approved;
- which specific SKU has passed inspection.
In that case, four ready-made wooden legs really do speed up production: the workshop doesn't waste time on in-house batch turning, and at the same time it doesn't give the supplier the right to determine the table's design after it has already been manufactured.