Article Contents:
- Total linear footage doesn't tell you where the joints will appear
- Wholesale building material must be calculated simultaneously in meters, lengths, and segments
- What is an installation segment
- Why two rooms with the same perimeter require different numbers of lengths
- Class A — a joint is highly undesirable
- Class B — a joint is acceptable, but its position must be chosen
- Class C — a joint is barely noticeable
- Why the joint cannot be automatically placed in the center of the wall
- How to choose the joint location in advance
- Construction materials in bulk: saving on waste is not always visually beneficial
- A short insert is a separate risk signal
- Why the joint map should appear before the cutting map
- Why minimal waste is not always the best cutting layout
- How to use useful leftovers instead of automatically discarding them
- A leftover cannot be considered universal
- How to reserve long-length material for main rooms
- Why reserved long-length material cannot be considered free stock
- For a frame, first determine the whole sides
- Identical frames are best cut in batches
- A cornice on a long wall is best planned from architectural breaks
- Why you shouldn't hand out all the trim to the crew in one pile
- The 'VISIBLE / STANDARD / HIDDEN' labeling simplifies warehouse work
- Priority labeling must not hide the SKU and material
- What to do if the map changed after installing the first zone
- What to do if one long plank is not enough
- Redistribution between classes must be done deliberately
- The operational reserve must not be cut to fix poor cutting
- When it pays to calculate several rooms together
- When spaces cannot be combined into a single cutting plan
- How to account for wood grain direction and visual matching
- Why a short insert is especially noticeable on a clear finish
- If one SKU has multiple stock lengths
- What to do if the required long version is out of stock
- Why a single reserve percentage does not suit all areas
- How not to turn the seam map into bureaucracy
- Materials from a single delivery may have different priorities already at unloading
- How to act when a reserved plank is damaged
- How to plan joints around doorways
- How to work with an external corner
- Why cutting the entire project in advance is also risky
- A control measurement before cutting protects the map from outdated dimensions
- How to store the cutting map together with the joint map
- Why the 600-millimeter insert in the example is not necessarily bad
- Returned leftovers need to be re-identified
- How to distinguish useful offcuts from waste
- How to avoid accumulating a stockpile of useless offcuts
- How the joint map affects installation cost
- How to compare two cutting layouts before ordering
- How to handle a SKU change after creating the map
- How to handle a length change after ordering
- How to link the joint map to the installation schedule
- What to do if the schedule requires starting with C zones
- How to run a short meeting on long-length trim
- Practical example: a 5.4 m feature wall with limited stock lengths
- Practical example: seven sections of 2450 mm each
- The rule for approving a short insert must be known before cutting
- How to check the joint map before paying for the full batch
- How to hand over the joint map to installers without a long meeting
- How to check the first installed A-zone
- After installation is complete, the joint map becomes a useful record of the project

A project requires 310 m of wooden skirting, 180 m of moulding, and 74 m of cornice. The total linear meterage is calculated correctly, a reserve is included, and the purchaser has received the right quantity of material. Formally, everything has been done without error. But after delivery, it turns out that the main wall of the living room, 7.2 m long, is being assembled from several awkward pieces, a short insert appears in the middle of an open section in the long corridor, and the best long planks have already been cut up for wardrobes and small wall sections.
The problem did not arise because there is too little material. The problem is different: before ordering, no one determined which architectural sections must be as seamless as possible and where a joint is acceptable. The total linear meterage answered the question "how much wood does the project need," but it did not answer the question "how exactly should these whole planks be distributed across the walls."
Therefore, when purchasing construction material wholesale for long walls, it is necessary to plan not only meters and the number of lengths. A separate joint map for the project is needed: a list of installation segments, their class of visual importance, permitted joint locations, required commercial lengths, and a reserve of long planks for critical zones.
FINISHED DIMENSIONS → INSTALLATION SEGMENTS → CLASSES A/B/C → JOINT MAP → COMMERCIAL LENGTH → CUTTING MAP → RESERVED/AVAILABLE → NUMBER OF LENGTHS → INSTALLATION RESERVE → OPERATIONAL RESERVE → ORDER → LABELING → ISSUE → INSTALLATION
The central idea of the article is simple: first, the architecture determines the permissible joints, and only then does purchasing optimize the cutting. Not the other way around.
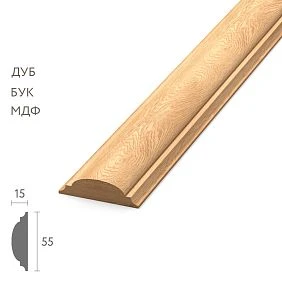
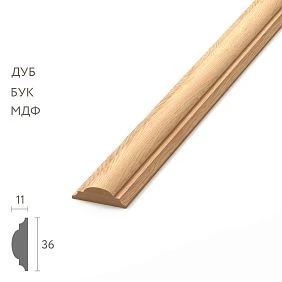
Total linear meterage does not indicate where joints will appear
Suppose a project requires 24 m of skirting. This figure can describe completely different situations. In one room, it is eight sections of 3 m each; in another, four walls of 6 m each; in a third, one long corridor; in a fourth, many short wall sections. The total length is the same, but the purchase of whole planks, the number of connections, and the ability to use offcuts will be different.
| Project variant | Total length | Nature of the sections | Risk of joints |
|---|---|---|---|
| 8 wall segments of 3 m each | 24 м | Many identical segments | Medium |
| 4 walls of 6 m each | 24 м | Long open lines | High |
| Corridor 24 m | 24 м | One long line | Very high |
| short wall sections | 24 м | Many independent sections | Low |
Therefore, the statement "skirting — 24 m" should not be the only basis for ordering. It describes the volume but hides the architectural structure. For long-length trim, it is precisely this structure that determines how many solid lengths will be needed and which of them cannot be allocated to secondary zones.




Building material purchased wholesale must be calculated simultaneously in meters, lengths, and segments
Long-length trim has three different units of management. Meters show the total requirement. Lengths show what is actually purchased, stored, and handed over to installers. Installation segments show what must actually appear on the wall.
Level — What it shows — Who benefits
Meters — Total volume — Estimate, budget, preliminary calculation
Lengths — Actual product units of a specific length — Supplier, warehouse, purchaser
Segments — Continuous architectural sections — Designer, specifier, installer
Weak logic goes top-down: meters → lengths → the installer decides how to cut. For a feature interior, it is better to go bottom-up: segments → allowable joints → cutting plan → number of lengths → total order.
SEGMENTS → ALLOWABLE JOINTS → CUTTING PLAN → LENGTHS → TOTAL ORDER
This way, purchasing becomes a consequence of the architectural solution, not a source of random joints.
Our factory also produces:

What is a mounting segment
A mounting segment is a continuous architectural section for which the length, joints, and cutting plan are decided separately. It can be a section from an inner corner to a door, from a door to a column, from a column to a built-in wardrobe, from an outer corner to the next opening, one side of a moulding frame, or a section of cornice from a corner to an architectural break.
A segment is not a room or its perimeter. One room can have ten segments. Two segments of the same length can have different priority: one is on the main feature wall, the other is completely hidden by a wardrobe.
That is why mounting segments should become the base rows of the joint map. Once they are fixed, it is possible to discuss which segment should be seamless, where a joint is acceptable, and where the usable offcuts will go.
Get Consultation
Why two rooms with the same perimeter require different numbers of lengths
Room A has four simple walls and one door. Room B has the same perimeter, but three doors, a niche, a column, a wardrobe, and two outer corners. In metres, the requirement is the same, but the cutting plan is completely different.
| Parameter | Room A | Room B |
|---|---|---|
| Perimeter | Identical | Identical |
| Number of segments | Low | Many |
| Long open lines | Present | Smaller |
| short wall sections | Low | Many |
| Outer corners | Minimum | several |
| Use of short offcuts | Limited | Wider |
Room A requires more long continuous segments. Room B allows more offcuts to be used, but creates a complex system of corners and terminations. If the buyer looks only at the perimeter, these differences are not visible.
We introduce classes A, B, and C based on joint visibility
Before calculating the cutting plan, it is necessary to determine how sensitive each segment is to a joint.
Class A — joint is highly undesirable
The main feature wall, the long wall of the living room, the entrance hall, the central axis of the restaurant, the reception area, a wall with side lighting and minimal furniture. Class A does not mean an absolute prohibition of a joint. It means that the joint must be agreed in advance, and the long-length piece for this area is reserved first.
Class B — joint is acceptable, but its position must be chosen
Bedrooms, side walls, ordinary corridors, secondary rooms. Here a joint is fine if it does not create a short random insert and does not fall in an obviously unfortunate place.
Class C — joint is barely noticeable
Walk-in closets, utility areas, sections behind built-in furniture, short wall piers, and places that are almost never in the field of view. These are the first places where suitable usable offcuts are directed.
CLASS A → CLASS B → CLASS C → USABLE OFFCUTS → RESERVE
Bulk materials: first preserve long planks for class A
When purchasing materials in bulk, installation often begins with the rooms that are ready first. This makes sense according to the construction schedule, but it is dangerous for cutting. Workers take convenient long planks and cut them into small sections because the main walls are not ready yet.
For example, long oak strips go into 600, 900, 1250, and 1450 mm segments. A week later, the lobby begins, where the longest possible pieces are needed, and there is no longer enough free long-length stock. In meters, the warehouse may show a good remaining balance, but its structure has become inconvenient.
Therefore, even before the first cut, material must be reserved for critical A-segments. Physically, it may lie next to the rest of the batch, but in accounting and labeling it must be protected from accidental use.
Wooden skirting board: where the joint is most noticeable
on wooden baseboard the joint is especially noticeable if the wall is long and free, side light falls along it, the wood has a pronounced grain pattern, furniture does not cover the lower line, and the viewer moves along the wall.
This does not make the joint a defect. But its position becomes part of the interior design solution. On the same wall, a joint near an architectural break may be perceived calmly, while a short insert in the center feels like an accident.
In a walk-in closet or behind a wardrobe, the same joint may have no visual significance at all. Therefore, the same article requires a different cutting policy depending on the zone.
Why a joint should not automatically be placed in the center of a wall
Symmetry seems like a safe solution, but the center of a wall is often the most noticeable place. For example, a wall of 7200 mm. A 3600 + 3600 layout creates a single seam exactly in the center. If the central axis of a sofa, panel, or portal is located there, the joint may become too noticeable.
A 2400 + 2400 + 2400 layout creates two joints. Sometimes this is advantageous if they align with vertical moldings. Sometimes it is worse if the wall should read as one long line.
Option 1: 3600 | 3600
Option 2: 2400 | 2400 | 2400
Option 3: 3000 | 2400 | 1800
The best option is determined not by arithmetic, but by the interior, the available product lengths, and the agreed joint map.
How to choose the joint location in advance
Before cutting, check furniture, doors, columns, window axes, vertical decorative elements, the direction of light, and the direction of movement through the room.
| Factor | How it helps choose the joint |
|---|---|
| Furniture | Can partially cover the joint |
| Door | Creates a natural break in the line |
| Column | Can divide a long wall into separate sections |
| Window axis | Helps maintain compositional symmetry |
| Molding layout | Allows linking the joint to a vertical |
| Side light | Can make the seam more noticeable |
| Direction of movement | Determines perspective visibility |
Sometimes the best joint location is not where waste is minimized, but where it naturally integrates into the architecture.
Wholesale building materials: saving on waste is not always visually beneficial
When ordering wholesale building materials the buyer naturally seeks to reduce waste. But optimizing solely by the percentage of remainder can lead to a weak interior result.
| Option | Waste | Joints | Result |
|---|---|---|---|
| А | 7% | At architectural breaks | Feature walls preserve the composition |
| Б | 4% | Several short inserts on the main wall | Less material, but the visual result is weaker |
In a premium interior, a few extra percent of waste can be a rational price for preserving sightlines. This does not mean ignoring economics. Two parameters need to be optimized simultaneously: material consumption and the quality of joint placement.
A short insert is a separate risk signal
A combination of 2400 + 180 mm or 2400 + 320 mm may be technically feasible. But a short insert on an open wall often looks like the result of poor planning. Therefore, a flag "CHECK SHORT INSERT" is useful in the map.
There is no need to set a universal length threshold. 300 mm behind a cabinet and 300 mm in the middle of a lobby are different situations. The flag is needed not as a prohibition, but so that a short fragment is noticed before purchase and cutting.
How to build an object joint map
The joint map is the central document of the new article. It is built before the cutting map and does not have to know immediately which specific plank each segment will come from. First, the architectural requirements are recorded.
Zone — Segment — Length — Class — Joint plan — SKU — Note
Living room — W01 — 5400 mm — A — Coordinate in advance — PLT-… — Side light
Corridor — W02 — 2450 mm — B — One joint at the door — PLT-… — Open line
Bedroom — W03 — 1800 mm — B — No joint — PLT-… — Feature wall
Wardrobe — W04 — 920 mm — C — Allowed — PLT-… — Behind furniture
The "joint plan" field does not have to contain millimeters until the final layout. For some segments, the status "no joint", "one joint at the doorway", "joint allowed", "approval required" is sufficient. After selecting the commercial length, this turns into a specific scheme.
Why the joint map should appear before the cutting map
The joint map answers architectural questions: where a connection is allowed, where it is desirable to avoid it, which short inserts are unacceptable without approval, and where offcuts can be used. The cutting map answers production and procurement questions: which stock length is cut into which segments, what offcut is produced, and how many whole items need to be ordered.
JOINT MAP = architectural constraints
CUTTING MAP = the way to fulfill these constraints with specific stock lengths
If you start with cutting, the algorithm optimizes material without understanding the architecture. If you start with the joint map, cutting receives the correct constraints.
Wholesale building materials: how to turn the joint map into the number of whole items
When for wholesale building materials segments and allowed connections are already defined, you can move on to commercial lengths. For each SKU, record the available length, segment lengths, visibility class, whether offcuts can be used, and the required installation reserve.
For example, segment W01 of class A has a length of 4700 mm, while the commercial length of a conventional profile is 2400 mm. Obviously, at least two parts will be required, but their ratio may vary. If one option creates a short insert near the center of the wall, while another moves the joint toward the door, the second may be preferable even with greater waste.
After the critical A-segments have been resolved, the free material is optimized for B and C.
Why minimal waste is not always the best cutting plan
For one project, two cutting plans may be correct in terms of meters. In the first, waste is 4%, but three short inserts appear on visible walls. In the second, waste is 7%, but all A-segments have pre-agreed joints, and the short offcuts go into closets and behind furniture.
| Indicator | Cutting plan A | Cutting plan B |
|---|---|---|
| Waste | 4% | 7% |
| Short inserts of class A | 3 | 0 |
| Joints of class A | Random | Coordinated |
| Use of remnants in C-zones | Average | High |
| risk of rework | Higher | Below |
In a premium interior, option B may be more economical in a broad sense, because it reduces the risk of rework and preserves the appearance. Therefore, the waste percentage is not the only criterion for cutting quality.
How to use useful remnants instead of automatically discarding them
After the 1700 mm segment, 700 mm remains from the 2400 mm length. Such a remnant can cover a short section near the door, a niche, a wardrobe, part of a frame, or a hidden C-segment. But the usefulness of a remnant is determined not only by its length.
A match is required:
- item code;
- material;
- the finish;
- size;
- lengths;
- design version, if it was changed.
Therefore, remnants should not be stored as a nameless pile of offcuts. They are given simple identification and a list of acceptable uses.
A remnant cannot be considered universal
There is a 900 mm remnant MLD-A. An 850 mm section MLD-B is needed. Length-wise it all fits, but the article number does not. There is an oak remnant PLT-A and a short PLT-A section made of beech. The geometry matches, the material does not. There is the same article number but a different finish. And again, this is not an interchangeable remnant.
| Remainder | Article | Material | Finish | Length | Can be used |
|---|---|---|---|---|---|
| R-01 | PLT-A | Oak | F01 | 700 | W14, W22 |
| R-02 | MLD-A | Beech | F02 | 900 | Frame R7 |
| R-03 | PLT-A | Beech | F01 | 850 | Beech sections PLT-A only |
Building materials wholesale: divide planks into "reserved" and "free"
When working with wholesale construction materials it is useful to physically and documentarily separate long planks by purpose.
RESERVED — a specific length or quantity is intended for critical segments.
FREE — the material can be used for B/C zones and remnant optimization.
For example:
PLT-A / oak / 2400 / 14 pcs. / LOBBY / W01–W05 / RESERVED
RESERVED FOR A → FREE FOR B → REMNANTS FOR C → SEPARATE RESERVE
So an installer does not cut a long plank for the storage room just because it happened to be closest to the warehouse exit.
How to reserve long-length material for the main rooms
It is not enough to set aside "a few good planks." The reserve must be tied to specific segments.
| Article | Material | Product length | Quantity | Zone | Segments |
|---|---|---|---|---|---|
| PLT-… | Oak | 2400 | 14 | Lobby | W01–W05 |
| MLD-… | Oak | 2400 | 10 | Main hall | R01–R03 |
| KZ-… | Oak | 2600 | 8 | Restaurant | C01–C04 |
If a specific product has a different length, the actual value from the current product card and order is used. The point of the table is not universal 2400 or 2600 mm, but the link between the plank and the future architectural section.
Why reserved long-length material cannot be considered free stock
There may be ten untouched planks in the warehouse, yet the installer reports that the current room is three short. If the purpose of the stock is not visible, he will take them. But those very ten planks may be the only suitable ones for the feature wall that will be started in a week.
Therefore, free stock is determined not by the fact that the material is physically sitting unused, but by the fact that it is not tied to a future critical segment. This is an important distinction between warehouse stock and the purchasing-and-installation resource.
Wooden molding: a joint map is needed not only for the baseboard
У wooden molding the joint may end up directly inside a decorative frame or a long horizontal band. Therefore, the total linear meterage is even less informative.
For each frame, you need to know the length of the sides, the feasibility of full-length verticals and horizontals, whether a joint is allowed within a side, the possibility of using offcuts from neighboring frames, and the number of repetitions.
For a frame, first determine the full sides
Suppose a frame has dimensions of 1800 × 900 mm. If the stock length allows obtaining vertical sides of 1800 mm in one piece, it makes sense to reserve them first. The offcuts after the verticals can be used for the horizontals if they fit in length and the project allows such cutting.
VERTICALS 1800 → FULL-LENGTH WHERE POSSIBLE
HORIZONTALS 900 → USE SUITABLE OFFCUTS
If a series consists of 18 identical frames, it is more correct to calculate the entire set at once. Then the offcut from one frame can cover a side of the next.
Identical frames are better cut in series
Serial cutting provides more than just savings. It makes the result repeatable. The installer gets the same corner logic, clear sets by room, and fewer random short pieces.
For a series, it is useful to first form a list of all required sides, then distribute them across lengths, and only then assemble sets by frames. This way, optimization happens at the level of the entire series, not each room separately.
Wooden cornice: the long top line requires its own map
wooden cornice is located above eye level and often runs continuously along a long wall. Side light, curtain niches, and the upper perspective make random joints noticeable differently than on a baseboard.
The cornice is additionally affected by internal and external corners, built-in wardrobes, light lines, ceiling breaks, columns, and architectural axes. Therefore, the joint map for the cornice must be built separately, even if the lower baseboard in the same room has already been planned.
It is better to plan the cornice on a long wall from architectural breaks
If the wall is 9.4 m long, the joint can be tied to the window axis, a column, a cross beam, the start of a curtain niche, or a decorative vertical element. If there are no such reference points, the joints are distributed as part of the overall composition.
A weak scenario is to first cut the material into lengths convenient for storage, and then look for a place to hide the resulting seams.
Construction materials wholesale: feature rooms first, secondary ones later
for building materials wholesale it is useful to record not only the order volume but also the usage priority. Recommended logic: A-zones → B-zones → C-zones → useful leftovers → installation reserve → operational reserve.
This does not mean that A-zones must be installed first according to the schedule. Their long-length material is simply protected from being used on secondary areas.
Why you shouldn't hand out all the trim to the crew in one pile
If, after delivery, the entire batch is handed over to the installers without separation, the joint map remains only on paper. Physical issuance must support the design logic by at least three attributes: SKU, zone, and priority.
For example:
LOBBY / PLT-A / CLASS A / 14 lengths
FLOOR 2 / PLT-A / CLASS B / 22 lengths
WARDROBES / PLT-A / CLASS C / free remnants
This way, the installer does not choose material based only on how convenient it is to access the stack.
The marking “EXPOSED / STANDARD / HIDDEN” simplifies warehouse work
Letter classes A/B/C are convenient for the designer, but the warehouse can use clear Russian labels.
| Class | Label | Rule |
|---|---|---|
| A | EXPOSED | Do not cut without segment binding |
| B | Standard | Use according to cutting map |
| C | Hidden | Prioritize using suitable remnants |
VISIBLE → STANDARD → HIDDEN
The priority label supplements the article, material, and length, but does not replace them.
The priority marking must not hide the article and material
The label "VISIBLE" alone is insufficient. The article, material, finish, length, and zone must remain on the packaging or picking list. Otherwise, a good long log of another profile could end up in the visible zone just because it is also marked as priority.
Minimal clear entry:
PLT-A / oak / 2400 / F01 / LOBBY / VISIBLE / W01-W03
This line links a warehouse object to the design map.
What to do if the map changed after installing the first zone
Installation provides new information. It may turn out that the joint near the doorway looks better than expected, or side lighting makes the seam more noticeable. In that case, there is no need to continue automatically with the first version.
A new revision is created:
JOINT MAP R1 → JOINT MAP R2
Only uninstalled zones are recalculated. Already completed segments remain a fact and must not disappear from the history.
Revision — What changed — What to recalculate
R1 — Original map — Entire object
R2 — Joint location W05 changed — Only uninstalled PLT-A
R3 — Furniture added in zone W12 — Segments W12-W14
What to do if one long plank is missing
A reorder is not the first reaction. First, free material of the same article, material, and finish is checked. Then, usable offcuts of sufficient length. Next, it is assessed whether the joint position can be changed without degrading class A. After that, the possibility of redistributing a long stick from a less priority zone is checked, covering that zone with short offcuts.
Only if these options do not provide an acceptable solution does a justified reorder become necessary.
FREE STICK → USABLE OFFCUT → REDISTRIBUTION B/C → JOINT CHANGE → REORDER
Redistribution between classes must be done consciously
Class A is missing one long plank. Class B has a suitable reserved stick. It can be transferred to A only if B then receives another acceptable cutting plan. You cannot simply "take it from the bedroom": the problem will arise there in a week.
Therefore, any redistribution updates two rows of the map — where the material was taken from and where it was transferred to.
The operational reserve must not be cut to fix a bad cutting plan
The installation fund and the operational reserve serve different purposes. The installation reserve is needed for the risks of the current installation. The operational reserve remains after handover so that a damaged area can be replaced in the future.
If the operational reserve starts being used to fix a random joint, the project simply shifts the deficit into the future. That is why reserve planks are marked separately and do not participate in regular optimization without a separate decision.
| Fund | Purpose | Can it be used in standard installation |
|---|---|---|
| Main | Installation according to the joint map | Yes |
| installation reserve | Damage, test cuts, complex nodes | By decision of the foreman/kit assembler |
| operational reserve | Repair after handover | No without a separate decision |
Joint map for multiple floors
On a large project, it is convenient to keep separate maps by floors or phases: floor 1, floor 2, floor 3. But the register of useful offcuts can be shared for the entire project.
For example, after installing the first floor, 850 mm of PLT-A remains. On the second floor there is a hidden segment 820 mm long of the same article, material, and finish. The offcut can be reserved in advance for this section.
This way the floors remain manageable separately, while the material is optimized globally.
| Remainder | Source | Length | Purpose | Status |
|---|---|---|---|---|
| R11 | Floor 1 / W08 | 850 | Floor 2 / W24 | Reserved |
| R12 | Floor 1 / R03 | 920 | Floor 3 / frame R18 | Reserved |
| R13 | Floor 1 / C02 | 430 | No task yet | available |
When it makes sense to calculate several rooms together
Combine cutting plans rationally when the SKU, material, commercial length, finish, and design revision match. Then the remainder from one room can be used in another without losing identity.
It is especially useful to calculate serial hotel rooms, identical offices, repeating corridors, and frame compositions together. At the same time, the joint map still preserves separate segments for each room.
When rooms cannot be combined into a single cutting plan
Even the same profile should be separated if the species, finish, visual batch, wood grain requirement, visibility class, or design version differs. Otherwise, the program will show a nice saving that is impossible on site.
Combining should only be done where the material is truly interchangeable.
How to account for wood grain direction and visual matching
Natural wood is not a printed pattern. Two planks of the same article can differ in texture and tone within natural limits. On A-walls, this should be considered before cutting.
Useful:
- select visually compatible boards for one long line;
- do not place a sharply different short offcut between two calm planks;
- maintain the agreed orientation if it is important to the project;
- do not promise absolute identity of natural material.
The joint map may contain a "visual matching" note for particularly noticeable segments.
Why a short insert is especially noticeable on a transparent finish
The reason is not only the presence of two seams. A short piece may have a different grain pattern or a slightly different tone, which makes it read as a separate patch. With opaque coating this effect may be less pronounced, but the geometry of the joint still remains.
Therefore, the same short offcut receives a different risk assessment depending on the material and finish.
How to link the joint map to a supplier order
The supplier does not need to receive all the interior analytics. But the buyer must get specific order parameters from the map: SKU, material, commercial length, number of sticks, distribution by lengths, reserve, and, if necessary, batch marking requirements.
If a single profile is available in several commercial lengths, the joint map shows which lengths the project actually needs. Purchasing stops selecting the assortment "on average."
If a single SKU has several commercial lengths
Having several lengths is a strong tool for reducing seams and waste. Long versions are directed to A-zones, medium ones to B-zones and frames, and short ones to C-segments and wall sections.
| Length group | Priority | Typical tasks |
|---|---|---|
| Maximum available | A | Long feature walls, cornices |
| Medium | B | Standard walls, vertical frames |
| Short | C | Wall piers, wardrobes, hidden areas |
Specific values are taken from the current product page of the selected item. There is no universal length for all wooden mouldings.
What to do if the required long version is out of stock
You cannot automatically replace a long length with a shorter one while keeping the same cutting plan. You need to recalculate the critical segments using the available length, check that the joint is moved to an architectural break, confirm the production lead time for the required length, and if necessary split the order into phases.
If a different SKU is being considered, this is already a specification change and requires separate approval, not just a new cutting plan.
How to account for installation allowance without mechanical percentages
An allowance is needed, but it is useful to derive it from real risks: corners, ends, test cuts, uneven substrate, complex junctions, pattern selection, possible damage during installation. If the cutting map is already built by segments, the allowance becomes clearer than an abstract "add 10%".
For example, zone A may require an additional full-length plank as installation insurance, whereas zone C is almost entirely covered by offcuts and does not require a separate percentage.
Why a single reserve percentage does not suit all zones
Reserve type — Purpose — How it is determined
Installation long-length reserve — Replacement of a damaged plank for A/B zones — By critical segments
Short installation reserve — Trims and C zones — By offcut structure
Operational reserve — Repair after handover — By separate project decision
Separating reserves helps avoid buying "extra meters" without understanding their purpose.
How the joint map helps control the contractor
The installer doesn't need the entire project archive — just a clear working set: segment code, length, grade, permitted joint location, assigned bundle group, and allowable offcuts.
If a different seam appears on the wall, it becomes clear: the project changed, the material ran out, or the installer made an independent decision. This makes quality verifiable.
How not to turn the joint map into bureaucracy
For an apartment with several long walls, one table is enough. For a hotel — floor-by-floor schedules. There's no need to code every hidden 300-millimeter section if it doesn't help the decision.
The minimum useful level of detail includes long and feature segments, short inserts, critical frames, reserved long-length stock, usable offcuts, and project changes.
Materials from a single delivery can have different priorities already at unloading
If the map is ready before delivery, part of the material can be assigned right away to future A-zones. This doesn't mean choosing a specific plank by pattern while still in the truck, but the quantitative reserve of long-length stock must be protected.
On a large project, after acceptance the kit assembler can create separate storage zones: "feature long-length stock," "standard stock," "short sections and offcuts." This physical organization reduces the risk of accidental consumption.
How to act when a reserved plank is damaged
If one plank from the A-stock is damaged during carrying, you can't just take the first available one. You need to check whether the remaining lengths are enough for the original map. If not — start redistribution: find a suitable free long-length piece, free one up from the B-zone, or revise one joint.
Thus, a single damage does not destroy the entire cutting plan.
A long corridor is better divided not into "equal pieces", but into architectural zones
A corridor often looks like one long line, but in reality it contains doors, niches, turns, widenings, fire cabinets, furniture, columns, and lighting accents. If joints are mechanically distributed at equal intervals, they may end up in the most exposed places.
It is more practical to first carry out architectural zoning:
- entrance section;
- main perspective;
- area near the elevator;
- turn;
- a niche;
- technical section.
After that, the joints are tied to natural boundaries or placed where they are least noticeable.
How to plan joints around doorways
A door naturally divides the skirting line. But a short wall section between the door and the corner can create an awkward offcut. That's why it's useful to consider the trio at once: long wall → wall section by the door → next wall.
Sometimes the offcut from the long wall perfectly covers the wall section. Sometimes its length almost fits but requires a short insert. In that case, it's better to redistribute the cutting of the adjacent length in advance.
LONG WALL | DOOR | SHORT WALL SECTION | CORNER | NEXT WALL
How to work with an external corner
An external corner makes both sides visible. If one side ends with a short insert right at the corner, the joint can become more noticeable. That's why in A-zones it's worth checking which length transitions to the corner and where the nearest seam will be.
It's useful to limit random joints on short
Why cutting the entire project in advance is also risky
A joint map doesn't mean you need to immediately saw the entire trim into hundreds of pieces. Final dimensions may be refined, walls may change their actual length after finishing, and the first zone may provide new data.
It is more rational to combine preliminary reserving of lengths with staged cutting. For standard series, you can cut in large batches; for unique zones — after the final control measurement.
A control measurement before cutting protects the map from outdated dimensions
The map is built according to the finished design dimensions. Before serial cutting of critical A-segments, it is useful to confirm the actual length on site. Especially after changes to plaster, architraves, built-in furniture, or cladding.
If the actual length differs, the specific segment and the lengths associated with it are adjusted, not the entire project's linear footage.
How to store the cutting map together with the joint map
It is convenient to link documents by segment code.
| Segment | Length | Class | Joint | Stick | Segment | Remainder |
|---|---|---|---|---|---|---|
| W01 | 5400 | A | Approved | X01 | 2400 | 0 |
| W01 | 5400 | A | Approved | X02 | 2400 | 0 |
| W01 | 5400 | A | Approved | X03 | 600 | 1800 → W07 |
Thus any leftover retains its origin and new purpose.
Why a 600 mm insert in the example is not necessarily bad
If W01 has an agreed joint location at the door portal, 600 mm can be a normal finishing fragment. If the same insert lands in the center of the central wall, it needs to be reconsidered.
Length alone does not determine quality. What matters is the combination of length, position, and visibility.
How to work with multiple crews
On a large site, different floors may be installed by different crews. Then a shared warehouse stock is especially risky: one team may take a long-length piece reserved for another.
It is useful to issue material by segment request:
crew 1 → floor 1 → W01-W12 → 28 lengths issued
crew 2 → floor 2 → W21-W34 → 31 lengths issued
The return of usable leftovers is also recorded so that they become visible to the whole project again.
Returned remnants must be re-identified
After a day of installation, the crew returns several offcuts. If they no longer have markings, the warehouse may not know the product code and material. Therefore, useful remnants are best labeled immediately during cutting or returned together with the kit card.
Without identification, a remnant ceases to be a purchasing resource, even if it is physically long enough.
How to distinguish a useful remnant from waste
A useful remnant is not everything longer than a conventional 300 or 500 mm. It must have a real potential task.
Criteria:
- product code identified;
- material and finish known;
- geometry not damaged;
- length matches existing or expected segments;
- storing it is cheaper and more useful than writing it off.
Very short fragments can be kept as reference samples if they are no longer suitable for installation.
How to avoid accumulating a stockpile of useless offcuts
The remnants registry is periodically cleaned. If, after all C-zones are completed, a 430-millimeter fragment has no future task, it should not be considered useful stock for years.
At each stage, a status can be assigned:
ASSIGNED, FREE, SAMPLE, WRITE OFF.
REMNANT → ASSIGN TO SEGMENT / LEAVE FREE / KEEP AS SAMPLE / WRITE OFF
How the joint map affects installation cost
A more thoughtful map may slightly increase material usage but reduce labor. Fewer short inserts mean less fitting and fewer additional joints. On the other hand, an overly strict requirement of "minimum joints at any cost" can increase material cost without noticeable visual benefit.
Therefore, the balance is assessed for a specific project: material, labor, aesthetics, and the risk of rework.
How to compare two cutting layouts before ordering
| Criterion | Option A | Option B |
|---|---|---|
| Number of lengths | Smaller | Larger |
| Waste | Below | Higher |
| Joints of class A | 3 disputed | 0 disputed |
| Short inserts | 4 | 1 hidden |
| Labor intensity | Higher due to fitting | Below |
| risk of rework | Higher | Below |
This way the buyer sees not only the cost of the material, but also the quality of the solution.
How to handle a change of SKU after the map has been created
If PLT-A was replaced with PLT-B, the old map is not transferred automatically. The new profile may have a different commercial length, a different finish, or different joining logic. The segments and classes remain, but the cutting plan and some joint decisions are re-checked.
This is another reason to separate the joint map and the cutting map: the architectural part is preserved better than the production part.
How to handle a length change after ordering
The supplier may confirm a different available length than expected. Before payment or the start of production, critical segments need to be re-checked. If the order has already been placed, the consequences of the change are assessed separately.
One cannot assume that the total footage compensates for any length of the stick.
How to link the joint map to the installation schedule
The map determines the priority of the material, while the construction schedule determines the order of the rooms. These documents must work together.
For example, class A on the third floor will start in a month, while class C on the first floor starts tomorrow. Material for A is reserved, but it does not block the entire warehouse: the C zone receives free sticks and leftovers that will not be needed for the future A.
What to do if the schedule requires starting with C-zones
This is a normal scenario. The main thing is to separate the A-fund in advance. Then the crew can actively use the leftovers and free trunks in technical rooms without destroying future feature walls.
This is exactly where the joint map becomes a logistics tool, not just a design one.
How to hold a short meeting on long-length moldings
For a large project, there is no need to discuss every wall every day. It is enough to review once per established period:
- open A-segments;
- short inserts under approval;
- shortage of long-length material;
- new useful leftovers;
- redistribution between floors;
- map changes;
- remaining installation reserve.
This way the map remains a living document, not an archive at the start of the project.
15 mistakes when ordering long-length wooden trim
- Calculate only the total linear meters. Meters do not show the wall structure and the visibility of joints.
- Not making a list of installation segments. The installer determines the breaks themselves.
- Not identifying feature walls. The best long-length pieces go to secondary rooms.
- Cutting long planks into short sections at the start of installation. Later there is not enough material for class A.
- Automatically placing the joint in the center. The center may be the most noticeable place.
- Allowing short inserts without approval. They appear after cutting, when the decision is difficult to change.
- Optimizing only waste. The mathematically best cutting plan may be visually the worst.
- Ignore actual product lengths. The project operates with abstract meters.
- Mix SKUs. A leftover of similar length is mistakenly considered suitable.
- Mix materials of the same profile. Oak and beech leftovers are not automatically interchangeable.
- Do not label reserved planks. They get used up on B/C zones.
- Distribute material to the entire crew at once. Priority management disappears.
- Write off all short leftovers. Material for hidden segments is lost.
- Cut into the operational reserve. An installation error turns into a future shortage.
- Update the project but not the joint map. Cutting continues to work with the old geometry.
Practical example: a feature wall of 5.4 m with a limited product length
Suppose a living room has a feature wall 5400 mm long. For a conventional skirting board, 2400 mm lengths are available. Simple arithmetic says two lengths are not enough, because 2400 + 2400 = 4800 mm. A third plank is needed.
But then the options begin. You can do 2400 + 2400 + 600 mm. You can redistribute the parts differently if the layout allows a different joint. You can use the remainder from an adjacent segment if it matches in article, material, and finish. You can check whether the selected product has another commercial length. In each option, the number of meters is almost the same, but the composition is different.
If this wall belongs to class A, the 2400 + 2400 + 600 scheme should not be accepted automatically. First you need to see where the two joints will end up and where the short fragment will be. If the 600 mm goes to the door portal and is perceived as a natural completion, the solution may be acceptable. If the short insert ends up in the center of an open wall, it is better to look for a different layout.
This example shows why the joint map must exist before the final order. It does not guarantee the absence of joints where the commercial length is physically shorter than the wall. It guarantees that joints appear consciously.
Practical example: seven sections of 2450 mm each
Another scenario is seven identical segments 2450 mm long. If the commercial length of a conventional skirting board is 2400 mm, each segment is short by only 50 mm. The total shortfall seems small: seven times 50 mm is 350 mm. But the problem cannot be solved with one additional piece of 350 mm, because each individual segment requires its own continuation.
If the 2400 + 50 mm scheme is applied thoughtlessly, seven micro-inserts will appear on the site. Formally, the meterage is covered, but the installation solution is weak. Other options need to be considered: a different joint position, a different commercial size, redistribution of several lengths, changing the segment at the architectural break if the project allows it.
This scenario shows especially well the difference between meters and segments. A total deficit of 350 mm is not equal to seven installation tasks of 50 mm each.
The rule for approving a short insert must be known before cutting
The installer should not have to call the designer every time after the length has already been cut. It is better to determine in advance which situations require approval.
For example, the project can establish the following internal logic:
- a short insert in class A — always subject to review;
- a short insert in class B — subject to review if located in an open area;
- a short insert in class C — allowed if it does not impair installation and the material matches;
- any new joint not present in the map — subject to review;
- a change of article or finish is not a matter of the joint map, but a change of specification.
The company determines the specific thresholds itself. It is important that the rule exists before a dispute arises on the wall.
How to check the joint map before paying for the full batch
Before a large order, it is useful to conduct a short procurement audit. It does not repeat the full quantity calculation, but checks that the material structure corresponds to future lines.
- All long visible segments are included in the map.
- A connection policy has been defined for A-zones.
- The actual commercial length of the selected SKUs is known.
- Short inserts are placed in a separate check.
- Class A long-length items are reserved in quantity.
- B/C zones have space for usable offcuts.
- Installation and operational reserves are separated.
- The furniture and architectural versions match the map.
- If multiple lengths of the same SKU are used, their quantities are calculated separately.
- Changes from the latest project revisions are taken into account.
After this, the purchaser understands not only how many bars are being paid for, but also why the selected lengths are needed.
How to hand over the joint map to installers without a long meeting
The working version can be much shorter than the editorial one. The installer needs: a plan or elevation, segment codes, classes, permitted joint locations, and markings of the issued planks.
For a typical room, one sheet is enough. For a corridor — a linear diagram. For frame moulding — a list of sides and a template. The main principle: the working document must answer the question "what can I cut and where does it go" without reading the entire procurement article.
Changes can be stored on the back side or in a digital card. If the installer sees that the actual wall dimension differs, they stop only the affected segment, not the entire project.
How to check the first installed A-zone
The first visible zone should become a control point before mass continuation. They check not only the quality of the seam, but also the correctness of the joint policy itself.
Questions:
- is the joint visible under normal lighting;
- does it become more pronounced under side light;
- is the position relative to furniture and doors chosen correctly;
- did another option turn out to be more natural;
- how labor-intensive it is to repeat the joint;
- whether the visual selection of wood meets expectations.
If the solution is unsuccessful, the map is adjusted before the same joint appears in twenty rooms.
The joint map, once installation is complete, becomes a useful record of the project
After handover, it is not necessary to keep every intermediate version as a daily working document, but the final map is useful for operation. It shows where the joints are located and which segments were assembled from several parts.
If a section is damaged several years later, the technical service can more quickly determine whether a single short segment can be replaced, where the nearest joint is located, and which article number was used. This links purchasing logic to future repairs.
Final working register
| Segment | Zone | Article | Length | Class | Joint | Purpose of the stem | Status |
|---|---|---|---|---|---|---|---|
| W01 | Lobby | PLT-A | 5400 | A | Approved | Х01+Х02+Х03 | done |
| W02 | Corridor | PLT-A | 2450 | B | at the door | Х04+R01 | done |
| W03 | Wardrobe | PLT-A | 920 | C | Allowed | R02 | done |
| R01 | Dining room | MLD-B | 1800 | A | Seamless | M01 | Reserved |
Final algorithm: from object dimensions to installation
1. FINISHED DIMENSIONS
↓
2. INSTALLATION SEGMENTS
↓
3. CLASSES A/B/C
↓
4. JOINT MAP
↓
5. COMMERCIAL LENGTH
↓
6. CUTTING MAP
↓
7. RESERVED / AVAILABLE
↓
8. NUMBER OF STRIPS
↓
9. INSTALLATION RESERVE
↓
10. OPERATIONAL RESERVE
↓
11. WHOLESALE ORDER
↓
12. LABELING
↓
13. ISSUE BY ZONES
↓
14. INSTALLATION AND MAP UPDATE
If the stages are performed in this order, the total footage ceases to be the only purchasing figure. It becomes the result of a more meaningful calculation that takes into account the future geometry of the interior.
Before the final payment, it is useful to save a snapshot of the joint and cutting map as the original version of the purchase. Then, after the first phase, you can compare the plan with the actual result: which segments changed, which remnants were actually used, where an additional strip was required, and which rules should be carried over to the next floor. This turns the document not only into an installation instruction but also into a data source for the next similar project. If the same short insert regularly appears in standard rooms, the problem is no longer local: the product length, standard segment, or cutting policy needs to be revised before the next purchase.
Conclusion: you need to buy not only square meters, but also the future geometry of the walls
Two projects of 420 meters each may require different quantities of lengths, different reserves, and completely different installation logic. The main reason is installation segments. Each section has a length, architectural boundaries, and a degree of visibility.
A joint on the central wall of a lobby and a joint behind a cabinet are not equivalent, even if they are technically executed in the same way. That is why professional procurement begins with a joint map. First, A/B/C zones and permissible connections are determined. Then the cutter selects lengths and remnants. After that, the buyer receives the actual number of product units and reserves long-length material for critical walls.
This is how building material is purchased wholesale not as an abstract sum of linear meters, but as a set of future architectural lines. Long planks are assigned a purpose in advance, short remnants find useful hidden zones, and the installer works according to an agreed scheme rather than deciding the composition after the first cut.
It is precisely this sequence that reduces random short inserts, preserves the integrity of feature walls, and allows material to be used rationally without a mechanical race for the minimum waste percentage.