Article Contents:
- Why choosing a wall panel from a photo isn't enough for a designer
- Which wall panels to use in a design project
- MDF Slat Panels
- Solid wood and natural wood panels
- Slatted decorative panels
- Fine rhythm
- Medium rhythm
- Large architectural rhythm
- Vertical direction
- Horizontal direction
- Partial finishing
- Accent wall in the living room
- Wall behind the sofa
- TV Area
- Bed headboard
- Entry Hall
- Study and commercial interior
- Front light
- Side lighting
- Top and bottom lighting
- Daylight
- Joint along the architectural line
- Joint in an open plane
- Transition to painting
- Transition to wallpaper
- Skirting
- Door portal
- Angle
- In the color of the wall
- Contrast panel
- Dark panel
- Light panel
- Wood tone
- Do not change the scale "for beauty"
- Take test shots
- Do not replace the working drawing with a render
- Starting point of the layout
- Sockets and Switches
- Junction with furniture
- What must match between 3D and DWG
- Step 1. Determine the clear finishing area
- Step 2. Subtract openings only if they are truly not covered by a panel
- Step 3. Consider the format
- Step 4. Check the trimming
- Step 5. Add a technological allowance
- Step 6. Check the batch consistency
- Example calculation by module
- What to check before ordering
- When you can order right away
- When a sample is needed first
- When the order is premature
- Why the price per square meter is not always enough
- Price of a mistake
- Sample and color swatch
- Control of the first fragment
- What to photograph
- Mistake 1. Choosing based only on a frontal photo
- Mistake 2. Not counting the edge modules
- Mistake 3. Not matching the panel with the skirting board
- Mistake 4. Placing the socket "roughly here"
- Mistake 5. Approving the color based only on the render
- Mistake 6. Changing the scale of the 3D model
- Mistake 7. Planning LED after the finish has been approved
- Mistake 8. Not keeping a sample
- Mistake 9. Calculating only the area
- Mistake 10. Ordering different walls in separate batches when there is no need
- Mistake 11. Not checking the light on a dark panel
- Mistake 12. Forgetting about access to hidden elements
- If the wall is already compositionally active
- If there is no logical boundary
- If the relief conflicts with the function
- If the engineering does not allow for neat installation
- If the project budget does not include units
- Concept
- Material
- Geometry
- Adjacent elements
- Engineering
- Documentation
- Procurement
- Which wall panels are better for a designer to use — MDF or wood?
- Should a designer order a wall panel sample?
- Can a 3D model be used instead of a sample?
- Where can I get DWG and 3D files for the STAVROS project?
- How to choose the correct width of a panel field?
- Should outlets be taken into account when calculating panels?
- How to calculate the reserve?
- Where is it best to use slatted panels?
- How to combine panels with lighting?
- How to order panels after project approval?

Wall panels for designers are not a separate decorative purchase that can be added after visualization. If a panel affects the rhythm of the wall, the depth of the relief, the interplay of light and shadow, the junction with the door, the position of outlets, the baseboard, and the furniture, it must be designed together with the entire surface. Otherwise, an impressive catalog image turns into a set of random joints on site: the slat butts against the door casing, the baseboard protrudes relative to the panel, the switch lands on an edge, and the vertical pattern ends a few centimeters from the furniture axis.
Working scheme for the designer:
interior idea → panel zone → material → geometry and rhythm → color → light → sample → visualization → working drawing → specification → calculation → order.
In the STAVROS catalog you can view MDF wall panels and slatted solutions for interior tasks. But the catalog is only the beginning. Before purchasing, the designer needs to determine where the panel field begins and ends, what scale of relief is needed, how it relates to furniture and doors, what will happen in the corners, and how the installers will understand the concept without verbal explanations on site.
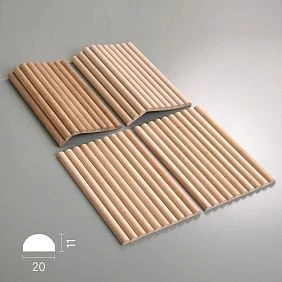
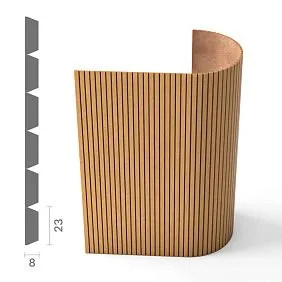
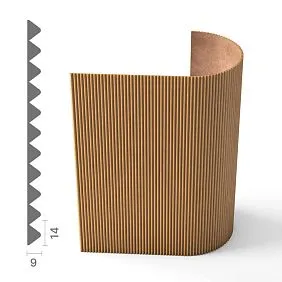
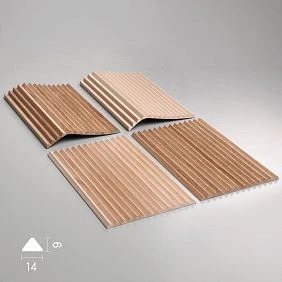
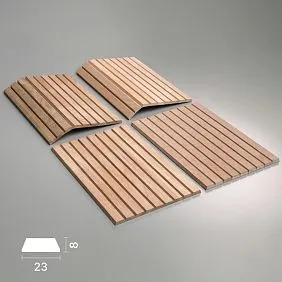
Why choosing a wall panel from a photo is not enough for a designer
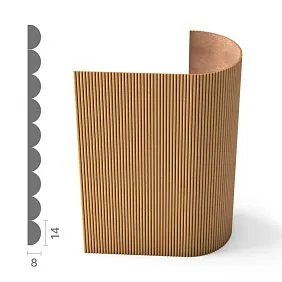
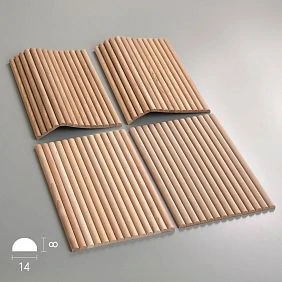
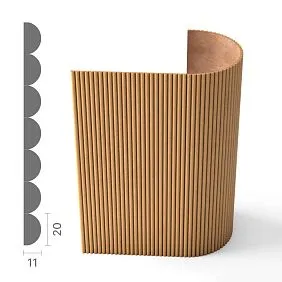
A photo shows the character of the product well, but answers project questions poorly. It almost never allows you to accurately assess the scale of the relief relative to your wall, the actual depth, the light and shadow from side lighting, the position of the panel next to a doorway, or how the last slat will end at the corner.
For a designer, not only the material matters, but also the context. The same slatted surface is perceived differently on a 1.6 m wall in a hallway and on an eight-meter wall in a public space.
On a small surface, a frequent rhythm can look neat. On a long wall, it can turn into visual noise. A large relief, on the contrary, can be too heavy in a small bedroom, but works well in a spacious lobby.
The catalog shows the product as a commodity, while the project requires showing it as part of a system:
panel → skirting board → door portal → furniture → sockets → light → ceiling line.
If even one boundary is not designed, the installer will be forced to come up with a solution on the spot. That is exactly the moment when the design begins to diverge from the visualization.
Before approving the material, it is useful to ask five questions:
-
Where does the panel field physically begin?
-
Where does it end?
-
What do the first and last modules look like?
-
Which engineering elements cross the surface?
-
How does the panel connect to adjacent materials?
If there are answers, the panel becomes an architectural element of the project.




Which wall panels to use in a design project
It is better to choose the type of panel not by a style label, but by the task of the wall.
Our factory also produces:
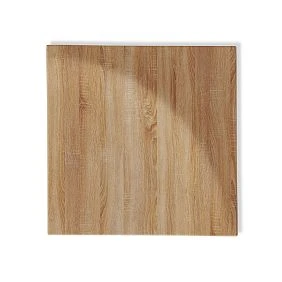
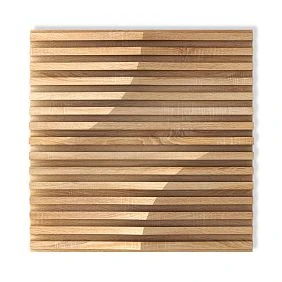
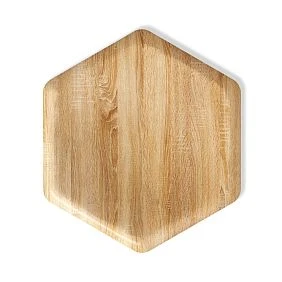
Slatted MDF panels
MDF wall panels are convenient where a predictable rhythm, clean geometry, and the ability to control color are needed. Options that are planned to be painted in a project-specific tone are especially interesting.
MDF allows you to build an interior not around a natural pattern, but around form. If the panel and the wall are painted in closely matching tones, the relief is read primarily through light and shadow. With contrasting paint, the panel itself becomes a graphic accent.
If the project involves painting, it is useful to study separately Painted MDF plank panels and decide in advance where the finishing is done: before installation, after installation, or in combination.
Get Consultation
Solid wood and natural wood panels
wooden wall panels are chosen when the wood texture should work as a material in its own right. Here the designer controls not only the geometry but also the natural variability: the grain pattern, the shade, the direction of the texture, and how the surface responds to light.
In a project with natural wood, it is especially important not to demand the sterile uniformity typical of a painted surface. If natural variability is undesirable, this must be taken into account already at the material selection stage.
Slatted decorative panels
The slatted structure is first and foremost a rhythm. It can bring a long wall together into a single composition, highlight a vertical axis, form a backdrop behind furniture, visually zone a space, and connect the wall with lighting.
The panel does not have to cover the entire wall. Sometimes it is more precise to highlight a fragment tied to the sofa, bed, TV stand, or desk.
MDF or solid wood: what should a designer choose
There is no clear universal winner. The difference lies in how the project needs to manage color, texture, and repeatability.
| Parameter | MDF | Solid wood / natural wood |
|---|---|---|
| Primary visual resource | geometry, relief, color | texture, grain pattern, material |
| Color management | convenient through painting | through species, tone, and finish |
| Repeatability | above with the same finish | natural variability |
| Reaction to side light | emphasizes the graphic quality of the relief | emphasizes the relief and wood texture |
| Design intent | controlled architectural plane | natural material accent |
MDF is useful when the designer wants to subordinate the panel to the overall color scheme. For example, the wall and the panel can be the same shade but of different depths. Visually, the color remains unified, while the architecture emerges through the relief.
Wood makes sense when the material itself should be legible. Then the value is created by the fibers, the shade, and the living perception of the surface.
Practical selection test: if rhythm should remain the main thing after color disappears, priority usually goes to controlled geometry. If natural texture should remain the main thing, it is worth looking toward wood.
How to choose the rhythm of slatted panels
The rhythm is made up of several parameters:
width of the visible slat → interval → depth → repetition frequency → wall scale → viewing distance.
Fine rhythm
Frequent repetition creates dense graphics. It works well in intimate zones where the viewer is close to the wall.
Risks: visual noise on a long plane, complex cutouts around sockets, excessive fragmentation next to active furniture or flooring.
Medium rhythm
A medium module is easier to integrate into a residential interior: it is noticeable but does not turn the wall into a dominant pattern. It is convenient to link it with furniture axes.
Large architectural rhythm
Large relief requires space. On a long wall, it can work almost like a system of vertical divisions. But it is sensitive to edges: a narrow random cut is more noticeable.
Suppose there is a wall of 4200 mm and a nominal module of 300 mm:
4200 / 300 = 14
The ideal case is 14 modules with no remainder.
If the width is 4100 mm:
4100 / 300 = 13,67
A simple installation of “thirteen full modules and cut the last one” can produce a poor edge. The designer needs to check symmetrical trimming, changing the field width, or aligning the end module to the architecture.
Vertical or horizontal panels
Vertical direction
Vertical slats enhance the sense of height and create a consistent rhythm from floor to ceiling. But they require a solution for the bottom and top ends.
Horizontal direction
A horizontal structure can emphasize the length of the wall and connect several sections, but it conflicts more strongly with doorways and furniture if the lines do not match in height.
Partial finishing
Sometimes MDF wall panels in the interior they work more effectively as a local plane. For example, a panel can span the width of a sofa group rather than the entire living room.
The criterion is simple: the boundary should be tied to architectural or furniture logic.
Where to use wall panels in a project
Accent wall in the living room
A panel is justified if it helps build a composition around the main zone: TV, sofa, fireplace, or art object.
Wall behind the sofa
The panel can match the width of the sofa, be wider and include side lights, span the entire wall, or create asymmetry.
A weak option is when the edge of the panel is a few centimeters from the edge of the sofa for no reason.
TV area
A slatted surface works well behind the TV, but the project becomes technical: the bracket, sockets, cables, and lighting must be designed before installation.
Bed headboard
Here you need to check the sconces, sockets, the height of the nightstands, and how the rhythm continues behind the headboard.
Hallway
In a hallway, the panel is close to the user, so joint errors near the door are especially noticeable.
Office and commercial interior
Panels can form a representative backdrop and part of the corporate architecture. For visual research, it is useful to look at slatted wall panels in interior photos, but a ready-made technique should be transferred into a project only after checking the scale.
Accent wall: how not to turn panels into random decor
The accent should support the scenario of the space.
If the TV cabinet is centered on the wall, but the panel field is offset without reason, the composition falls apart. The same happens behind a bed or sofa.
Working options:
-
the center of the panel coincides with the center of the furniture;
-
the edge of the panel coincides with the edge of the group;
-
the panel is deliberately asymmetrical and balanced by light.
The door already creates a strong vertical. The panel next to it should either continue the geometry or deliberately step away from it.
A column, niche, pier, or portal can itself define the natural boundary of the panel field. This is usually stronger than an artificial termination line in the middle of a flat wall.
Panels and light: why relief needs to be checked in a visualization
Relief exists thanks to shadow. If shadow is completely eliminated, part of the meaning of the slatted wall disappears.
Front light
A source directed almost perpendicular to the wall reduces the contrast between the protrusion and the recess. Such light is suitable if the panel should be a calm background.
Side light
Side lighting emphasizes depth and creates repeating shadows. The deeper the profile and the sharper the angle of light, the more graphic the pattern becomes.
Therefore, it is useful for a designer to create not just one visualization, but several lighting scenarios.
Top and bottom lighting
Light from above creates vertical shadow falloff. Light from below gives a more theatrical picture and more strongly connects the panel with the baseboard.
If the light line is concealed, its position must be planned before finishing the ceiling or the lower part of the wall.
Daylight
A window can produce a stronger side effect than artificial lighting. A panel next to a window may look different in the morning and in the evening.
For a significant accent wall, it is useful to check the window orientation and the direction of daylight.
Slatted panels with lighting
Slatted panels with lighting require electrical planning earlier than it seems.
You cannot first approve a decorative wall and then ask the electrician where to hide the power supply.
Before issuing working drawings, it is necessary to determine:
-
position of the LED strip;
-
profile and diffuser;
-
cable route;
-
location of the power supply;
-
serviceability;
-
switch or control system;
-
intersection with TV, sconces, and outlets;
-
skirting board position.
The drawing should not say “LED along the panel,” but specifics:
line coordinate → height → offset → profile → light direction → cable outlet → power supply location.
How to combine wall panels with wallpaper and a painted wall
The junction of two materials is one of the areas where visualization often looks better than execution.
For the transition between the panel and a regular wall, you need to decide:
-
whether the thickness matches;
-
is a profile needed;
-
whether the end face is visible;
-
how the baseboard runs;
-
what happens on top;
-
where the boundary is located relative to the furniture.
A detailed scenario is covered in the article about slatted panels and wallpaper.
Joint along an architectural line
The calmest option is to end the panel at a corner, a wall pier, a doorway, or built-in furniture.
Joint in an open plane
If the panel ends in the middle of a wall, the end face becomes part of the design. It cannot be treated as a installation leftover.
Transition to painting
If the panel and the wall are the same color, the boundary may be almost invisible in color but strongly readable in depth.
Transition to wallpaper
Wallpaper is thinner than most volumetric panels. A simple abutment can leave a step. The designer must decide whether it is an acceptable shadow transition or requires detailing.
How to combine panels with skirting and doors
The bottom and side boundaries determine whether the panel looks built into the architecture.
Baseboard
Logic options:
-
the skirting runs in front of the panel;
-
the panel starts above the skirting;
-
the skirting and the panel are in the same color system;
-
the bottom boundary is resolved with a shadow method;
-
the panel reaches the floor, while the baseboard is interrupted.
No single option is universal. It is important to choose one and show it on the detail.
Door portal
If the slats meet the door casing, you need to check the depth of both elements. The casing may be thinner than the panel, and then the junction will create an unexpected step.
If a hidden door is used, the task is different: the panel can visually continue the plane of the door leaf, but then the gaps and opening are especially important.
Angle
On an outer corner, the end face is visible. On an inner corner, it is the line where two planes meet. For complex areas, it is better to make separate detail components.
Color of wall panels in the design project
Color influences what a person notices first: the material, the relief, or the composition.
Matching the wall color
If the panel and the adjacent painted surface have a similar shade, the pattern is created by shadow. This is a good technique when a complex surface is needed without an additional color accent.
Contrast panel
Contrast makes the field a dominant element in its own right. Then its boundaries must be especially logical.
Dark panel
On a dark surface, shadows can become deeper and the relief more graphic under directional light. With weak, even lighting, some of the geometry may instead "collapse."
Light panel
A light color makes the rhythm softer and often works better as a background, but joints and installation defects are more noticeable on it in passage areas.
Wood tone
It is advisable to coordinate the wood tone not by a screen, but by a physical sample next to the floor, door, furniture front, countertop, textiles, and metal.
Combinations of several close but non-matching wood shades are especially risky. Sometimes a deliberate contrast looks more professional than an attempt to assemble "almost one color."
Panel sample before project approval
For professional work, a sample is a tool for verifying the design solution.
Work sequence:
catalog → sample → light → paint swatch → combination with materials → approval → specification.
On the sample, the designer checks:
-
actual relief size;
-
depth;
-
surface quality;
-
color;
-
texture;
-
side lighting;
-
adjacency to the floor;
-
adjacency to the door;
-
a furniture facade;
-
textiles.
A physical sample shows the material in real lighting conditions. This is especially important if the project includes several warm neutral shades.
Instead of asking “do you like the panel?”, it is more useful to show the combination:
panel sample + floor sample + facade + textile + metal + selected lighting.
This way, the client approves not an individual product, but a material composition.
3D models of wall panels for visualization
For a designer, a 3D model is valuable only when it is linked to a real product code. Otherwise, the visualization may approve a geometry that is not available in the supply.
STAVROS has a section 3D models of STAVROS and DWG drawings. Workflow:
item code → geometry → 3D model → material → visualization → approval → the same item code in the specification.
Do not change the scale “for beauty”
One of the dangerous mistakes is to stretch the model in the visualization so that the rhythm looks better in the frame. If the actual product has a different module, the client approves one image, but a different one arrives on site.
Make test shots
For a relief wall, it is useful to check:
-
general view of the room;
-
oblique angle along the wall;
-
close-up fragment;
-
daylight;
-
evening lighting.
It is the oblique angle that best shows the real depth.
Do not replace a working drawing with a render
A visualization answers the question “what does it look like.” A working elevation answers “how to build it.” These are different documents.
DWG wall panels: what to include in working drawings
Even if a ready-made profile exists, the designer still needs to create an elevation for the specific wall.
It indicates:
-
the overall width and height of the area;
-
panel direction;
-
the starting point of the layout;
-
position of the first and last slat;
-
material boundaries;
-
door openings;
-
sockets;
-
switches;
-
wall sconce;
-
LED outputs;
-
furniture anchors;
-
baseboard;
-
the top abutment;
-
angles.
Layout starting point
If the installer starts from the other edge, the entire composition may shift. On the drawing, it is better to explicitly place an axis or dimension from a clear construction point.
Sockets and switches
It is necessary to determine not only the coordinate of the center, but also the position relative to the relief. An outlet on a flat part and an outlet on an edge are two different installation situations.
Junction with furniture
If a built-in wardrobe fits flush against the panel, a detail is needed. The panel thickness affects the actual width of the niche.
What must match between 3D and DWG
Minimum:
SKU → direction → scale → field boundaries → color → main joints.
If the parameters diverge, the visualization and the working documentation describe different walls.
How to calculate the number of wall panels
The calculation depends on the actual format of the product, so a universal reserve figure without context is incorrect. But the algorithm is stable.
Step 1. Determine the clean finishing area
You need to count not the entire room, but the actual area of the panels.
Step 2. Subtract openings only if they are truly not covered by a panel
If the panel extends onto the reveal or the door leaf, simply subtracting the opening will give an incorrect result.
Step 3. Take the format into account
If the product is counted by pieces, the module width matters. If by area, the area of the element and the layout scheme matter. If there is a pattern direction, some offcuts cannot be used flipped.
Step 4. Check the trimming
Mathematically, the remainder may be sufficient, but practically unusable. You need to count using the cutting map, not just the total length.
Step 5. Add a technological reserve
The reserve depends on the number of corners, openings, complex cutouts, pattern matching, and the ability to use offcuts.
Step 6. Check batch consistency
For wood and materials with pronounced texture, it is advisable to think in advance about whether the difference between deliveries will be noticeable.
Example of calculation by module
Let the width of the panel zone be 3650 mm, and the working repeating module be conventionally 250 mm:
3650 / 250 = 14,6
A minimum of 15 modules across the width is required, but the designer must check what the edge will look like:
-
the 15th module is trimmed;
-
the outer elements are symmetrically reduced;
-
the field expands to the architectural boundary;
-
the field is reduced and centered relative to the furniture.
The number 15 is the minimum purchase width, not a finished design solution.
How to transfer panels into the design project specification
The specification should not contain the line “slatted panels, oak, on site.” That is not enough for purchasing.
| Field | What to specify |
|---|---|
| Manufacturer | STAVROS |
| Article number | exact SKU of the selected product |
| Name | By card |
| Material | actual material |
| Size | actual product size |
| Color / finish | approved option |
| Room | where used |
| Zone | specific wall or area |
| Quantity | calculated number |
| Reserve | as a separate line or percentage per project |
| Direction | vertical / horizontal / other |
| Installation type | as per the approved decision |
| Note | joint, cut edge, batch matching, sample |
The name may repeat across different collections, while the article number links the visualization, sample, commercial proposal, and order.
A single living room may have two panel zones with different directions or colors. Therefore, it is better to separate "room" and "zone".
It is convenient to use a finish code, for example:
WP-01 — slatted panel, TV zone
This code must appear on the finish plan, elevation, specification, and bill of materials.
How to buy wall panels for a project
The commercial stage must begin after the design stage, not the other way around.
Correct sequence:
task → material → color → geometry → sample → visualization → elevation → calculation → specification → order.
If you need buy wall panels for a single project, first make sure the selected category actually covers the project constraints.
What to check before ordering
-
Does the product code match the visualization.
-
Does the actual size match the 3D model.
-
Has the color been approved.
-
Has the sample been checked under real lighting.
-
Has the quantity been calculated according to the layout?
-
Have the cuts been taken into account?
-
Have the corners been resolved?
-
Has the joint with the skirting board been resolved?
-
Have the doors been resolved?
-
Have the sockets and switches been marked?
-
Is the wiring for the lighting prepared?
-
Has the reserve been recorded?
When you can order immediately
A direct order is reasonable if the material has already been used in a previous project, the product code is familiar, the color is confirmed, the wall geometry is simple, the studio has a sample, and the installation detail is repeated.
When a sample is needed first
A sample is preferable if:
-
the material is new;
-
non-standard finish;
-
critical matching with wood or stone;
-
large panel area;
-
high-end commercial interior;
-
the batch is for several rooms;
-
the client is sensitive to shade and texture.
When the order is premature
It is not advisable to place an order if the working documentation has not yet defined the panel boundaries. Buying "so the material is already on site" creates a risk that the field dimensions will be adjusted to the available quantity rather than to the design.
If the project is already ready for purchase, you can go to the category and buy wall slat panels according to the approved specification.
How to compare the price of wall panels
The query "wall panels price" is useful to convert from the price of a single item into the cost of a finished wall.
The full project cost includes:
panels + finishing + installation + cuts + corners + joints + lighting + logistics + possible reserve.
Why the price per square meter is not always sufficient
Two systems with a similar material price can differ greatly in installation complexity.
For example, one wall requires only a straight layout. Another has:
-
two doors;
-
five sockets;
-
an external corner;
-
transition to wallpaper;
-
lighting;
-
hidden skirting board.
In terms of the price of the panels themselves, the options may be similar, but in terms of labor costs, they are not.
Cost of a mistake
If the batch is ordered before the rhythm is approved, the cost of a mistake is not only extra panels. It includes:
-
repeat delivery;
-
installer downtime;
-
electrical rework;
-
re-approval with the client;
-
new cuts;
-
loss of deadlines.
That is why professional savings begin with an accurate specification, not with the lowest price for a single panel.
How to order wall panel samples
The request "order wall panel samples" reflects a separate professional stage.
It makes sense to tie the sample to a specific task:
-
compare two materials;
-
check the color;
-
check the depth;
-
evaluate light and shadow;
-
show to the customer;
-
select a finish that matches the floor and door.
If the studio runs several projects, samples are best labeled:
manufacturer → article number → material → finish → date received.
This way, after a few months, you can restore exactly which option was approved.
Sample and color swatch
If the panel is painted, one original sample is not enough. You also need a color swatch in the project color.
It is the color swatch that shows:
-
how well the texture reads after painting;
-
how the color behaves in shadow;
-
whether the panel matches the wall;
-
whether a more matte or more expressive surface is needed.
How to organize designer's supervision on a panel wall
Designer's supervision is needed not for the designer to be present on site daily during installation, but to ensure that critical decisions are not changed without approval.
Before starting work, it is useful to check:
-
the actual wall size after final measurements;
-
matching of the product code;
-
position of the first module;
-
the end module;
-
position of electrical outlets;
-
lighting wiring;
-
door junctions;
-
baseboard;
-
Color.
First fragment check
It is better to check the first few installed elements than the entire finished wall.
At this stage, you can still adjust:
-
step;
-
the starting line;
-
trimming;
-
position relative to furniture;
-
the visual vertical.
After installing half of the wall, such adjustment becomes expensive.
What to photograph
For the report, the following are useful:
-
general view of the wall;
-
the first and last module;
-
junction with the door;
-
joint with the baseboard;
-
sockets;
-
LED line;
-
angles;
-
packaging marking.
This helps link the real object to the design documentation.
Designers' mistakes when working with wall panels
Mistake 1. Choosing based only on a frontal photo
Why it happens: the product shot looks convincing.
Consequence: the actual relief, when viewed from the side, turns out to be too deep or too shallow.
How to prevent it: request a sample and check it under angled light.
Mistake 2. Not accounting for the edge modules
Why it happens: the visualization shows the overall pattern.
Consequence: a narrow cut appears at the door or corner on site.
How to prevent it: create a layout based on the actual wall width.
Mistake 3. Not linking the panel to the skirting board
Why it happens: the skirting board is selected in a separate specification.
Consequence: different thicknesses create an accidental step.
How to prevent it: draw the lower junction of the panel and skirting board together.
Mistake 4. Placing the socket “roughly here”
Why it happens: engineering points are marked before choosing the actual rhythm.
Consequence: the mechanism lands on an edge or a complex transition.
How to prevent it: after choosing the article, recheck the electrical layout on the elevation.
Mistake 5. Approving the color based only on the render
Why it happens: the visualization looks photorealistic.
Consequence: the actual tone conflicts with the floor or furniture.
How to prevent: a physical sample and a paint swatch.
Mistake 6. Changing the scale of the 3D model
Why it happens: you want to adjust the rhythm to fit a beautiful shot.
Consequence: the specification contains a real product, but the approved sample does not match its geometry.
How to prevent: keep the real dimensions of the model.
Mistake 7. Planning LED after the finish has been approved
Why it happens: lighting is perceived as a decorative option.
Consequence: there is no space for wires and a power supply.
How to prevent: design the lighting before the electrical work is released.
Mistake 8. Not recording the sample
Why it happens: the designer remembers which option the client chose.
Consequence: when purchasing a few months later, it is impossible to restore the exact finish.
How to prevent it: save the sample code, photo, SKU, and approval date.
Mistake 9. Calculating only the area
Why it happens: area is easy to calculate in square meters.
Consequence: direction, cutting, and format are not taken into account.
How to prevent it: calculate based on the layout of the specific product.
Mistake 10. Ordering different walls in separate batches unnecessarily
Why it happens: construction proceeds in stages.
Consequence: a natural material may look visually different between batches.
How to prevent: decide in advance which areas should be perceived as a single field and how to assemble them.
Mistake 11. Not checking the light on a dark panel
Why it happens: the color was chosen based on a daytime visualization.
Consequence: in the evening, the texture is lost or becomes too contrasty.
How to prevent: create a separate evening lighting scenario.
Mistake 12. Forgetting about access to hidden elements
Why it happens: you want to get the cleanest possible wall.
Consequence: the power supply or connection ends up inaccessible for maintenance.
How to prevent: provide an access panel where it is technically necessary.
When wall panels are not needed
A panel should not appear in the project just because an empty wall seems bare.
If the wall is already compositionally active
Large stone, artistic plaster, complex furniture, lighting, and art may already create sufficient density.
If there is no logical boundary
When a panel has to be cut off at a random spot and no architectural element supports that edge, ordinary paint may look better.
If the relief conflicts with the function
In a very narrow passage, a deep panel reduces the usable dimension and complicates use.
If the engineering does not allow neat installation
A large number of outlets, panels, hatches, and equipment can turn a rhythmic surface into a set of cutouts. Sometimes it is better to shift the accent to another wall.
If the project budget does not include the nodes
Buying a panel without detailing the edges, corners, skirting, and lighting can produce a result worse than a simple, high-quality paint finish.
The professional solution is not to use panels at any cost, but to choose them where they genuinely improve the architecture.
Designer's working checklist before releasing the project
Concept
-
the function of the panel is clear;
-
the accent zone is defined;
-
the direction is chosen;
-
the rhythm matches the scale of the room.
Material
-
MDF, wood, or another finish is selected;
-
the sample is approved;
-
color coordinated;
-
finish defined.
Geometry
-
precise boundaries applied;
-
edge modules calculated;
-
corners worked out;
-
end faces shown.
Adjacent elements
-
baseboard;
-
doors;
-
cabinets;
-
furniture;
-
ceiling line;
-
floor.
Engineering
-
sockets;
-
switches;
-
TV;
-
wall sconce;
-
LED;
-
power outputs;
-
access to power supply.
Documentation
-
3D matches the actual SKU;
-
DWG matches 3D;
-
the unfolded view has dimensions;
-
the specification contains the SKU;
-
the quantity is calculated;
-
the stock is justified.
Procurement
-
availability has been checked;
-
the color has been confirmed;
-
completeness has been checked;
-
the logistics are clear;
-
the sample is retained until the project is completed.
For preparing the design part, it is convenient to use STAVROS catalogs, where catalogs, DWG and 3D materials are collected.
FAQ
Which wall panels are better for a designer to use — MDF or wood?
It depends on the design task. MDF is convenient when controlled geometry and color are the priority. Wood works better as a natural material with authentic texture. It is worth choosing after checking a sample.
Should a designer order a wall panel sample?
For a new material, it is advisable. A sample allows you to check the scale of the relief, texture, color, and combination with the floor, doors, fronts, and textiles.
Can a 3D model be used instead of a sample?
No. 3D is responsible for geometry and visualization, while a sample is responsible for the real surface, color, and how the material reacts to light.
Where can I get DWG and 3D for the STAVROS project?
In the section STAVROS DWG drawings catalogs, DWG drawings, and 3D materials are available. In a project, it is important to link the downloaded file to a specific product code from the specification.
How do you choose the width of a panel field correctly?
Start not with the number of packs, but with the composition. The field should be tied to an architectural boundary, furniture, or axis. After that, the module layout and edge cuts are checked.
Should sockets be taken into account when calculating panels?
Yes. They affect not only consumption, but also geometry. A socket should not accidentally fall on a complex change in relief.
How do you calculate the reserve?
A universal percentage without knowledge of the product and layout is incorrect. The reserve depends on the number of cuts, corners, openings, pattern direction, and the ability to use offcuts.
Where is it best to use slatted panels?
Where the rhythm supports the architecture: in the TV area, behind the sofa or headboard, in the hallway, office, reception, and commercial interiors.
How do you combine panels with lighting?
Lighting must be designed before installation. The LED line, profile, cable route, power supply, and maintenance method are determined. These elements are then reflected in the working layout.
How do I order panels after the project is approved?
After the material, sample, color, and layout are approved, create a specification with the article number and quantity. Then you can order the panels according to the approved project and save the order data for design supervision and possible reordering.
Final algorithm for the designer
1. Determine the role of the panel.
Not "I want slats," but "I need a background for the TV area," "I need to highlight the headboard," "I need to fill a long wall."
2. Choose the material.
MDF — for controlled geometry and color. Wood — for natural texture and materiality.
3. Choose the rhythm.
Check the width, depth, frequency, wall scale, and viewing distance.
4. Determine the direction.
Vertical, horizontal, or local field.
5. Get a sample.
Check the actual color and texture.
6. Create a 3D model.
Use the real scale.
7. Check the lighting.
Daylight, side, evening, LED.
8. Draw the elevation.
Indicate doors, baseboard, outlets, furniture, and boundaries.
9. Calculate the quantity.
By format and layout, not just by area.
10. Generate a specification.
Manufacturer, item code, material, color, quantity, stock, room, and notes.
11. Check completeness.
Corners, edges, joints, finishes, and installation materials.
12. Place the order.
After that, the design selection becomes a purchase rather than improvisation on site.
To select products and check the current assortment, you can use the catalog STAVROS, keeping the exact item code of each approved item in the project.