Article Contents:
- Why slat panels are often combined with other finishes
- Where the combination of slat panel + wallpaper/paint works best
- Living room: TV area and wall behind the sofa
- Bedroom: Headboard
- Hallway and corridor
- Home office in the living room or bedroom
- Kitchen-living room
- The main problem: what happens at the junction of a slat panel and wallpaper
- Option one: transition through a wooden molding
- How molding works at the transition
- When Molding is the Best Choice
- Molding width: how to choose correctly
- Molding color: matching the panel color or the wallpaper color
- Option two: transition using a wooden batten
- Where a batten works better as a transition than molding
- How exactly the batten covers the transition
- Thickness and width of the batten for the transition
- Option three: transition using a wooden corner piece
- Three scenarios for the wooden corner piece
- Protective function of the corner piece
- How to connect a combined wall to the baseboard
- MDF baseboard for walls to be painted
- Wooden baseboard for natural wood systems
- Baseboard under active wallpaper
- Baseboard joint with panel end
- Ready-made design schemes for a combined wall
- Scheme 1. Slat panels in the center + wallpaper on the sides (TV area, wall behind the sofa)
- Scheme 2. Slat panels on the side + smooth painted wall (hallway, study)
- Scheme 3. Slat panels at the bottom + wallpaper above (decorative lower panel)
- Scheme 4. Slat panels behind the bed + wallpaper on the rest of the wall (bedroom)
- Scheme 5. Wood-look panels + solid wallpaper + white baseboard (soft modern interior)
- Table: transition element — situation — result
- Mistakes when combining slatted panels with wallpaper and paint
- What to buy for a beautiful combined wall
- FAQ: Answers to Key Questions
- About the Company STAVROS
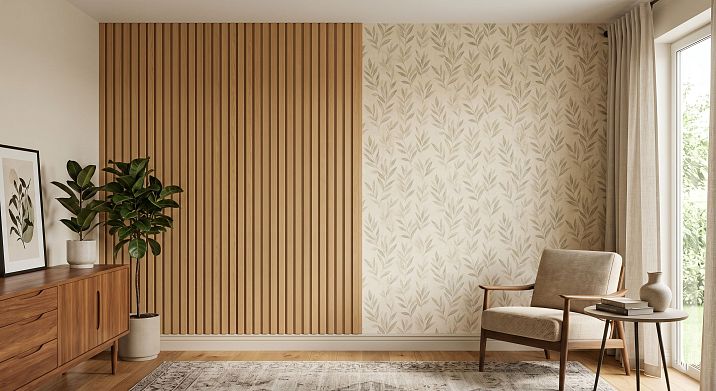
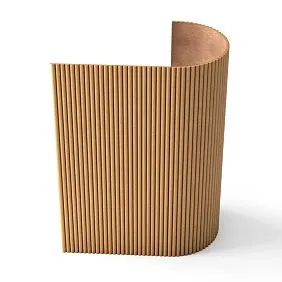
Not every wall needs to be fully slatted. This is an important understanding that doesn't come immediately — especially when you see beautiful interior projects where slats cover the entire plane from floor to ceiling. But in reality, full wall coverage is just one option. And not always the best one.
Combined wall — where slatted panels for walls they coexist with wallpaper, painted surfaces, or decorative plaster — this is both material savings, design freedom, and the ability to create an interior with character. An accent slatted zone works stronger than slats everywhere: it stands out precisely because there is a different texture around it.
But such a wall has its own main task — the transition. The place where the textured slatted surface ends and wallpaper or paint begins requires a thoughtful solution. A rough joint here is always visible — and always looks unfinished. In this article — in detail and specifically: how to design the transition beautifully, what elements are needed for this, and how to turn a combined wall into a real design technique.


Why slatted panels are often combined with other finishes
Let's start with the main question: why combine at all? Why not cover the entire wall with slats?
The first reason is visual. Wall slatted panels on the entire wall create a powerful, rich background. In small rooms, this can be excessive: the slats "press down," the space shrinks. An accent slatted zone on part of the wall works differently: it stands out against the smooth finish, drawing the eye exactly where needed.
The second reason is functional. The TV area, the headboard of the bed, the coat rack area in the hallway, the wall behind the desk — these are specific places where a slatted panel is needed. The rest of the wall can remain smooth: this is not a compromise, but a conscious decision.
The third reason is economic. Slatted panels only cover the area where they are truly needed. The budget is spent efficiently.
The fourth reason is stylistic. Patterned or textured wallpaper + a slatted insert create a layered interior where each surface has its own role. This is richer and more interesting than a single uniform wall.


Where the combination of "slatted panel + wallpaper/paint" works best
The task of combining arises in a variety of spaces — and in each one, it is solved a little differently.
Our factory also produces:


Living room: TV area and wall behind the sofa
In the living room, a combined wall is most common. A typical scenario: in the center of the wall is the TV area with decorative slatted panels, on the sides — wallpaper or painted surface. The width of the slatted zone matches the size of the TV section or is slightly wider. The side parts of the wall with wallpaper "frame" the center.
The second option: the entire wall behind the sofa is a slatted panel, the other walls are wallpaper. Here, the boundary between the panel and the wallpaper runs along the corners — where one wall transitions into another. Corner joining is a common case in this option.
Get Consultation
Bedroom: headboard
A slatted panel behind the bed + wallpaper on the side walls is a classic scheme for a bedroom. The panel occupies the wall behind the headboard completely or as a horizontal fragment, wallpaper covers the rest of the space. Transitions are needed on the sides: where the slatted zone meets the wallpaper on the same wall or in the corner.
Hallway and corridor
In the hallway, a slatted panel often runs along one wall — the one where the coat rack hangs. The other walls are painted or wallpapered. Here, the transition between the panel and the smooth finish is clearly visible when moving along the corridor, so it needs to be designed particularly carefully.
Study in the living room or bedroom
Slatted area behind the desk + wallpaper or paint around. The border is vertical, along the side edges of the slatted panel. A good option for those who want to highlight the workspace without a partition.
Kitchen-living room
Slatted panels in the living room area + solid wallpaper or paint in the kitchen area. The transition is needed where the character of the space changes — at the boundary of two functional zones.
The main problem: what happens at the junction of the slatted panel and wallpaper
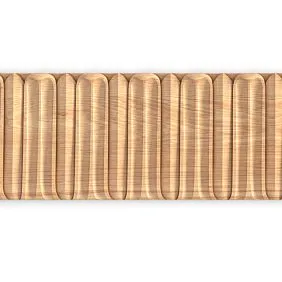
This is where the main technical challenge lies. The slatted panel has thickness: an MDF base plus slats. The total thickness from the wall is 15–30 mm depending on the design. Wallpaper is millimeters. Decorative plaster is a few millimeters. Paint is practically zero.
A step occurs at the junction. Sometimes — several centimeters. It cannot simply be 'sanded down': it physically exists and will be visible under any lighting.
The second point: the end of the slatted panel is an open cut of MDF with visible slats in cross-section. Without treatment, it looks like unfinished installation: raw, technical, careless. Any guest will notice it at first glance.
The third point: the transition line must be strictly vertical or strictly horizontal — otherwise the joint will appear 'crooked' even with perfect installation.
All three points are solved by one method — a properly selected transition element. And here the work with begins wooden molding, batten, corner piece and mouldings.
Option one: transition through a wooden molding
wooden molding — is a decorative profiled batten with a shaped cross-section. It simultaneously covers the joint, compensates for the thickness difference, and creates a decorative border between two textures.
How molding works at the transition
The molding is attached vertically — where the slatted panel ends and the wallpaper begins. Its profile overlaps the panel end on one side and "lies" on the wallpaper on the other. The joint is closed. The end is hidden. The thickness difference is compensated by the shaped profile of the molding.
Horizontal molding is used where the slatted panel ends in height — if it does not reach the ceiling or if it is placed as a horizontal fragment on part of the wall. Horizontal molding along the top edge of the panel covers the top end and creates a clear decorative horizontal line.
When molding is the best choice
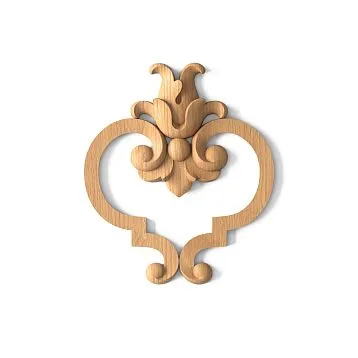
Wooden decorative moldings MLD-019 are primarily suitable for:
-
Classic and neoclassical interiors, where profiled details are organic.
-
Interiors with stucco and architectural details — the molding supports them.
-
Cases where a decorative frame around the slatted area is needed — molding around the entire perimeter.
-
Wide joint — when the thickness difference is more than 15 mm and a wide profile is needed to cover it.
Molding width: how to choose correctly
The molding width should be proportionate to the context. A molding that is too thin will get lost next to wide slats. One that is too wide will dominate both materials and turn the joint into an independent decorative element, which is not always necessary.
Guideline: the width of the molding at the transition is from one to two slat steps. If the slat step is 30 mm — the molding is 30–60 mm. If the slat step is 50 mm — the molding is 50–80 mm.
Molding tone: matching the panel color or the wallpaper color
A molding in the tone of the slatted panel belongs to the 'slatted side,' and the boundary reads as the completion of the slatted zone. A molding in the tone of the wall with wallpaper belongs to the 'smooth side,' and the boundary reads as a frame set into the wall. A contrasting molding is a decorative accent, an independent element. The choice depends on what you want to emphasize.
Option two: transition via a wooden slat
If molding is a decorative, profiled, 'architectural' element, then wooden plank — it is laconic, geometric, modern. A slat as a transition element is a thin vertical strip that covers the joint without a decorative profile, preserving clean geometry.
Where a slat works better as a transition than a molding
Decorative wooden slat as a transition element is ideal for:
-
Modern, minimalist, and Scandinavian interiors where profile moldings are inappropriate.
-
Thin joints — when the thickness difference is small and a wide profile is not needed.
-
Situations where you want to preserve the 'continuation' of the slat rhythm in the transition element.
-
A vertical boundary that needs to be marked without emphasizing.
How exactly the slat covers the transition
Vertical Wooden plank is attached along the edge of the slat panel — it overlaps the end on one side and presses against the wallpaper or painted wall on the other. The slat is wider than the panel end — it 'covers' it. The joint is closed, the end is hidden, the transition line is clean.
Additional effect: the slat as a transition element supports the vertical rhythm of the slat panel. The eye perceives it as part of the slat system — another, larger slat at the zone boundary.
Thickness and width of the slat for the transition
The transition rail should be slightly thicker than or at least equal to the thickness of the slat panel — to cover the end. Width: sufficient to overlap the wallpaper by a few millimeters and securely press the edge. Usually 20–40 mm depending on the context.
Option three: transition via a wooden corner piece
Wooden corner UG-001 — for external corner situations. This is not the same as a molding on a flat wall: a corner piece is needed when the slat panel extends to an external corner or ends where the wall turns.
Three situations for a wooden corner piece
The panel ends at an external corner of the wall. For example, the slat panel runs along the hallway wall up to the corner, and after the corner — wallpaper. The corner piece covers the external end of the panel at the corner: on the hallway side it looks like a decorative detail, on the reverse side — like a technical element pressing the edge of the wallpaper.
The slat area transitions to the adjacent wall. When the slat panels 'wrap around' the corner — the corner piece covers the external corner at the transition and creates a neat line.
Next to a niche or slope. In a hallway or corridor, the slat panel often adjoins a door slope. The corner piece covers the junction and protects the edge from mechanical damage.
Protective function of the corner piece
The external end of the slat panel is a vulnerable spot. The slats are fragile at the cut: a sudden impact can chip the corner. Wooden angle physically protects this end: it absorbs the impact, preserving the integrity of the panel.
How to connect a combined wall to a baseboard
A baseboard is a horizontal border that runs along the entire room. When part of the wall is slatted and part is with wallpaper or paint, the baseboard should run as a single line under both materials. An interrupted baseboard, an accidental change in height or tone — that's the first thing that catches the eye when looking at the lower part of the wall.
MDF baseboard for walls under paint
MDF Skirting Board — for systems where both the slatted area and the smooth wall are to be painted uniformly. The baseboard is painted the same color — and the lower horizon of the wall "disappears," perceived as a single base. This is the cleanest solution for monochrome combined walls.
Wooden baseboard for natural wooden systems
When slatted panels are wood-look (PAN-003) and next to them wallpaper in a neutral tone — Wooden baseboard around the entire perimeter connects the slatted area and the smooth wall through a common lower horizon in wood. This creates a sense of thoughtfulness: the baseboard "unites" the different textures of the wall into one system.
Baseboard under active wallpaper
If the wallpaper has a pattern — bright, geometric, large — it's better to make the baseboard calm: white MDF or neutral wooden. A bright baseboard next to bright wallpaper creates visual chaos in the lower area of the room.
Joint of the baseboard with the end of the panel
Where the baseboard meets the side of the slatted panel — an end joint. The baseboard is cut at 90°, flush against the side. Gap no more than 1–2 mm. If the side is covered molding or a corner piece — the baseboard butts against them. All three elements — baseboard, side molding, corner piece — must be coordinated in height and tone.
Ready-made schemes for designing a combined wall
Five proven schemes for the most common situations.
Scheme 1. Slatted panels in the center + wallpaper on the sides (TV area, wall behind the sofa)
Central slatted zone width for the TV section or sofa. On the sides — wallpaper. Transition: vertical molding MLD-019 on both side borders of the slatted zone. Below — a single MDF Skirting Board along the entire wall. Molding in the tone of the slatted panel or in the tone of the wall — as chosen.
Result: a clean frame structure. The center is highlighted, the side parts with wallpaper are "wings" supporting the accent.
Scheme 2. Slat panels on the side + smooth painted wall (hallway, study)
A slatted panel along one part of the wall — along the coat rack, behind the desk, along one pier. Next to it is a painted surface. Transition: vertical Wooden plank along the side edge of the panel. At the bottom — a single Wooden baseboard or MDF Skirting Board.
Result: a concise modern solution. The slat at the transition supports the geometry of the slat panel.
Scheme 3. Slat panels at the bottom + wallpaper above (decorative lower panel)
The lower part of the wall is a slat panel 80–120 cm high, the upper part is wallpaper or paint. Horizontal wooden molding along the horizontal border between the panel and the wallpaper. At the bottom — MDF Skirting Board along the bottom edge of the slatted panel.
Result: a classic "panel" wall decoration scheme adapted for a slatted panel. The lower part of the wall is protected from mechanical damage, the upper part has lively wallpaper decor.
Scheme 4. Slat panels behind the bed + wallpaper on the rest of the wall (bedroom)
Slat panel the width of the bed headboard, wallpaper on the side parts of the wall and on adjacent walls. Vertical Moldings along the side borders of the slat area. Horizontal molding along the top border (if the panel does not reach the ceiling). Below — a single Wooden baseboard around the entire perimeter of the bedroom.
Result: the slat zone as a "headboard-architecture". The bed is built into the space, the wallpaper is a light background around.
Scheme 5. Wood-look panels + solid-color wallpaper + white baseboard (soft modern interior)
Slat panel oak PAN-003 + solid-color wallpaper in a neutral tone (gray, linen, warm white) + White MDF Skirting Board. Molding in oak tone or white — at the transition.
Result: a warm and calm space. Wood + neutral wallpaper + white baseboard — a timeless combination.
Table: transition element — situation — result
| Situation | Transition element | Style | Result |
|---|---|---|---|
| Slat zone + wallpaper next to it, flat wall | molding MLD-019 | Classic, neoclassic | Decorative frame |
| Slat zone + painted wall | wooden plank | Minimalism, Scandinavian | Concise border |
| Slat zone on external corner | Wooden corner piece UG-001 | Any | Protection and neat end |
| Slat zone below + wallpaper above | Horizontal wooden molding | Classic, eclectic | Clear horizontal border |
| Non-standard angle or joint | Trimming Items | Any | Technical and decorative solution |
Mistakes when combining slat panels with wallpaper and paint
Let's look at real mistakes — the ones that occur most often and are easy to avoid if you know about them in advance.
Joining a panel and wallpaper without a transition element. The most common mistake. An open end of a panel next to the edge of wallpaper always looks unfinished. A molding, batten, or corner profile is mandatory here.
Active wallpaper next to textured slats. Two rich textures on one wall compete with each other. Wallpaper with a large pattern or bright design next to a pronounced slatted texture creates visual overload. One of the surfaces should be calmer.
Not accounting for panel thickness. If you don't plan a transition element considering the panel thickness, the molding or batten won't fully cover the end. Measure the joint depth before purchasing the profile.
Interrupting the baseboard. The baseboard is a single line. It does not stop before the slat panel and does not change in height. A single MDF Skirting Board or Wooden baseboard around the entire perimeter — without exceptions.
Leaving the panel end open. The end of a slat panel is an open cut of MDF with visible slats in cross-section. It always requires finishing.
Choosing a molding of a different style. A classic profile molding next to minimalist Scandinavian slats is a style conflict. The transition element should be in the same style register as the slat panel.
Mixing many wood shades. A slat panel in oak, molding in walnut, baseboard in pine — three wood tones without connection. Maximum two tones, and only with a deliberate contrast. The transition element should match the panel tone or be neutral.
Not aligning the vertical boundary. The transition line between the slat area and the wallpaper must be strictly vertical — level. A crooked transition line is noticeable even with a correctly chosen molding.
What to buy for a beautiful combined wall
The complete set needed for designing a wall with slat panels and wallpaper or paint.
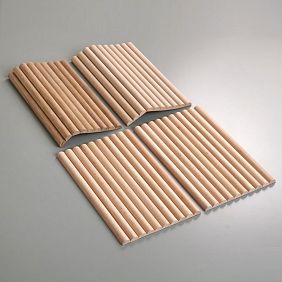
slatted panels for walls — in the finish PAN-001 with coating, PAN-002 for painting, PAN-003 in oak wood. The base of the accent zone.
Wooden slat RK-001 — for a minimalist transition element at the vertical joint.
Decorative wooden slat — a range of sections for non-standard places and add-ons.
wooden molding — for decorative transitions, frames around accent areas, horizontal and vertical borders.
Wooden decorative moldings MLD-019 — for accent framing of slatted zones in classic and modern interiors.
Wooden corner UG-001 — for external corner ends of the slatted zone.
MDF Skirting Board — for systems to be painted. A single lower horizon around the entire perimeter.
solid wood baseboard — for natural wood systems.
wood trim items — for non-standard joints and transition nodes that do not fit into standard categories.
FAQ: Answers to Key Questions
Can slatted panels and wallpaper be combined on one wall?
Yes, and this is one of the most interesting design solutions. A slatted zone as an accent, wallpaper as a background — this combination works in the living room, bedroom, hallway, and study. The main condition is a properly designed transition between materials.
What to cover the joint between the slatted panel and wallpaper with?
wooden molding — for decorative framing. wooden batten — for a concise geometric transition. wooden corner piece — on the external corner end. mouldings — for non-standard nodes.
What is better for the transition: molding or a wooden batten?
Molding — for classic interiors, wide joints, and decorative frames. Rail — for minimalist, Scandinavian spaces and thin joints. The choice is determined by the interior style and joint width.
Which baseboard to choose for a wall with panels and wallpaper?
MDF Skirting Board — for systems to be painted. Wooden baseboard — for natural wooden systems. Main thing: a single baseboard along the entire wall without changing tone or height.
Can slatted panels be combined with decorative plaster?
Yes. Decorative plaster is a smooth or textured surface without a pronounced thickness difference. The transition element is the same Molding or Rail — covers the joint. With textured plaster, molding works better: it creates a clear boundary between the relief plaster and the relief slats.
How to design slat panels next to a painted wall?
Vertical Wooden plank at the transition — for a modern style. molding MLD-019 — for a more pronounced frame. If the painted wall is the same tone as the panel, the slat can be minimal. If in contrast, the molding will define the border more clearly.
Is a corner profile needed on the panel end?
On external corner ends — definitely. Wooden angle covers the MDF cut, protects the corner from chips, and creates a neat line in a visible spot.
Which wallpaper looks best next to slat panels?
Solid colors or with a delicate texture are the best choice. They don't compete with the slat relief but serve as a calm background. A large pattern is possible but requires more distance between the slat area and the ornament — so the two patterns don't 'clash' in the same field of view.
About the company STAVROS
A combined wall with slat panels and wallpaper is not a complex project. It's a system where each element knows its place: the panel creates an accent, the molding covers the transition, the slat maintains geometry, the corner profile protects the end, and the baseboard unifies the lower horizon.
STAVROS produces this entire set: Wall slatted panels in three versions, Wooden moldings, Decorative Planks, Wooden corner pieces, MDF Skirting Board, Wooden baseboard и Trimming Items for any non-standard nodes.
STAVROS — when the transition between materials looks as beautiful as the materials themselves.