


Article Contents:
- Why mirror and slat panels work together
- Where such a wall is needed most
- Entryway at the entrance
- Hallway
- Walk-in closet
- Bedroom
- Pier between doors and niche with mirror
- First option: mirror in the center, slat panels on the sides
- What happens visually
- Baseboard under this scheme
- Molding as a connecting element
- Second option: mirror on the side, slat panel as accent background
- When it works
- How to design the side edge of a slat panel next to a mirror
- Matching panel tone with doors and floor
- Option three: mirror in a niche with slatted panels
- How to arrange elements in a niche
- Finishing the ends in a niche
- Lighting in a niche
- How to design the joint between a mirror and a slatted panel: four solutions
- Solution one: shadow gap
- Solution two: vertical wooden molding
- Solution three: decorative batten as a border
- Solution four: corner piece at the end of the panel near the mirror
- Which baseboard to choose for a wall with a mirror and slats
- MDF baseboard for paint-ready systems
- Wooden baseboard for natural wood systems
- High baseboard for hallway and dressing room
- Single line under the mirror
- Molding, slat, and corner: what and when to use
- Mirrored slat panels: a separate discussion
- Mistakes when designing a wall with a mirror and slats
- Decision table: mirror + slats by room
- What to buy for a wall with a mirror and slat panels
- FAQ: Answers to Key Questions
- About the Company STAVROS

A wall with a mirror is always potential. The mirror adds depth, reflects light, and visually expands the space. But a single mirror on a smooth wall often looks unfinished: as if the wall was simply forgotten. This is where wall slat panels come into play — and the picture changes fundamentally.
Slats give the wall rhythm, verticality, and texture. The mirror gives it light and depth. Together, they create what designers call a 'finished wall': a wall you look at and understand — everything is in its place. It is this result — expensive, thoughtful, and neat — that we will break down in this article. With all the details: joints, moldings, baseboards, corners, and specific solutions for the hallway, dressing room, and bedroom.


Why mirror and slatted panels work together
It's not just aesthetics — it's geometry and physics. A mirror reflects everything in front of it. When a person stands in front of it in the hallway, they see themselves against the background of the room. When a slatted panel is placed next to the mirror Slatted wall panel — the mirror reflects its rhythm, multiplies the vertical lines, and creates the illusion of more space. This works especially noticeably in small hallways.
From a design perspective: a mirror is an "empty" element — it has no texture of its own. Wall slatted panels — a rich, textured element. Together, they balance each other: the slats provide "fullness," the mirror provides air. The wall is neither empty nor overloaded.
Finally, in practice: slats around or next to the mirror create a natural "frame" — they guide the eye to the mirror and emphasize it. A mirror without a frame gets lost. A mirror in a slatted context becomes the main element of the wall.


Where such a wall is needed most
The "mirror + slats" combination solves specific problems in specific spaces.
Our factory also produces:


Entryway at the entrance
Slatted panels in the hallway — one of the most popular scenarios. The entry area is small, lighting is often dimmer than in the main rooms, and walls get mechanical damage from bags, umbrellas, and outerwear. A mirror in the hallway is a functional necessity. A slatted panel next to it serves as both decor and protection.
Get Consultation
Corridor
A long, narrow corridor is a classic "problem area." It feels oppressive, constricting, and more like a prison than part of the home. A mirror visually expands it. slatted panels in the corridor they provide vertical dynamics — the slats "raise" the ceiling. Together, they transform the corridor.
Walk-in closet
In the dressing room, a mirror is a working tool. The slatted panels around it give the dressing room "character": it ceases to be just a closet and becomes a designed space. They work especially well decorative slatted panels PAN-001 on the side walls from floor to ceiling with a mirror in the center of the back wall.
Bedroom
A mirror in the bedroom — by the vanity table, in the wardrobe corner area, or simply on the wall for visual expansion. Rafter panels next to the mirror in the bedroom create an accent wall. With a properly chosen tone — warm oak, linen, quiet gray — such a wall becomes the main visual element of the room.
The wall section between doors and the niche with a mirror
Where the architecture offers a niche — a mirror and slats fit into it perfectly. The niche structures the solution itself: slatted panels on the back plane or on the side walls, a mirror in the center or across the full depth of the back wall.
Option one: mirror in the center, slatted panels on the sides
This is the most organic and most common scheme. The mirror is placed in the center of the wall — at a height of 60–70 cm from the floor and above, with a width of 40 to 80 cm. On both sides of it — Slatted wall panel at full height or to the same height as the mirror.
What happens visually
The mirror appears to be "inserted" into the slat system. The slats on both sides create a symmetrical frame. The gaze that falls on the wall first reads the vertical rhythm of the slats, then centers on the mirror. This is a classic design triad: movement — accent — rest.
Additional effect: the mirror between two slat panels reflects the slats — especially if the angle of light allows seeing the side panels in the reflection. The rhythm of the slats multiplies, the space seems wider.
Baseboard under this scheme
The bottom line of the wall requires a single MDF Skirting Boards or wooden baseboard across the entire width — under the mirror, under the panels, without a break. This is the lower "base" of the entire composition. If the baseboard is interrupted under the mirror, the lower part of the wall looks unfinished.
Molding as a connecting element
Horizontal wooden molding along the top line of the slat panels — if they do not reach the ceiling — creates an upper "base" and visually connects the slat zones and the mirror into a single horizontal strip. Vertical moldings along the inner edges of the slat panels (where they meet the mirror) complete the "frame."
Option two: mirror on the side, slat panel as an accent background
An asymmetrical scheme is less classic but more modern. The mirror is not centered but placed on one side of the wall. The slatted panel occupies the other part — or the entire wall except for the mirror.
When it works
This scheme works especially well in a hallway: the slatted panel runs along the long wall, with the mirror embedded as a separate rectangular element — not centered, but closer to the entrance. A person sees the slats while moving along the hallway, and the mirror when needed.
In the bedroom: Wood-look slatted panel along the wall by the vanity table, the mirror is on the adjacent wall or in a corner area. The slats provide a background, the mirror provides an accent without competing for attention.
How to finish the side edge of a slatted panel next to a mirror
Side edge wall slatted panels — an open MDF cut with visible slats in cross-section. It cannot be left unfinished, especially next to a mirror: the mirror doubles the visibility of this edge, and a sloppy end will be seen twice.
Solution: Wooden corner UG-001 along the side edge or vertical molding MLD-019 along the end. Both options cover the cut and create a neat vertical line at the boundary of the slatted area.
Matching the panel tone with doors and floor
In asymmetrical schemes, it is especially important that the tone of the slatted panel does not conflict with other wooden elements in view: doors, trims, floor. In hallways and entryways, they are constantly present. A panel matching the floor tone or door tone is the safest solution. Contrast should only be deliberate and strong: for example, a dark panel against white doors.
Option three: a mirror in a niche with slatted panels
A niche is an architectural gift. Where the wall has a recess, an ideal place for a mirror with slatted design emerges.
How to arrange elements in a niche
The back plane of the niche can be finished slatted panel completely — and then the mirror is mounted on top of it, reflecting the slats behind. A frameless mirror against a slatted background looks like a 'window' into depth — especially effective with backlighting.
The side planes of the niche are finished with slats or left smooth — depending on the depth of the niche. If the depth is more than 15 cm, slats on the side walls create a feeling of a 'cabinet' inside the niche. If less, it is better to leave the side walls smooth to avoid creating a cramped feeling.
Finishing the ends in a niche
The angle between the back wall of the niche and the side planes is an internal angle. Where the slatted panel on the back wall meets the side plane of the niche, an internal corner profile made of molding productsis needed. Where the niche meets the main wall — an external corner, which is covered with a wooden corner piece UG-001.
The lower joint of the niche's back plane with the floor — MDF Skirting Board or Wooden baseboard matching the entire perimeter of the room. Even in a niche, a baseboard should be present — it completes the bottom line.
Lighting in the niche
A niche with a mirror and slats is an ideal place for lighting. An LED strip along the top edge of the niche illuminates the slats from above. Recessed spotlights inside create volume. Perimeter lighting of the mirror allows the niche to be used as a makeup area. All of this is planned during the panel installation stage: wiring is laid before attaching the slatted elements.
How to design the joint between a mirror and a slatted panel: four solutions
This very question — both technical and aesthetic — most often arises when designing such a wall. The mirror is thin, the panel has thickness. They cannot stand flush without a gap — or they do, but the joint looks rough. Let's examine the options.
Solution one: shadow gap
A deliberate gap of 5–8 mm between the edge of the mirror and the end of the slatted panel. No profile, no molding — just a clear shadow line between the two surfaces. This is a modern minimalist technique: the joint becomes part of the design. It only works with perfectly straight edges of both elements and a level wall. If the wall is even slightly uneven, the gap 'wanders,' and minimalism turns into carelessness.
Solution two: vertical wooden molding
wooden molding along the vertical edge of the slatted panel, next to the mirror. The molding covers the end of the panel and simultaneously 'frames' the edge of the mirror. This is a decorative solution with an accent: the molding is noticeable, adding an architectural detail. It works well in classic, neoclassical, and transitional interiors.
Solution three: decorative batten as a border
Decorative wooden slat covers the vertical joint between the mirror and the slatted panel — thin, geometric, without a profile. It maintains the rhythm of the panel's vertical slats while covering the edge. Works in modern, Scandinavian, and minimalist interiors.
Solution four: corner piece at the panel edge near the mirror
If the mirror and panel are in different planes — for example, the mirror is slightly recessed and the panel protrudes — Wooden angle covers the cut along the panel edge and compensates for the difference. This is a technically reliable and visually neat solution for non-standard situations where molding does not fit correctly.
Which baseboard to choose for a wall with a mirror and slats
The baseboard is the horizontal foundation of the entire wall. A mistake here is immediately visible. Let's break down the choice by situation.
MDF baseboard for paint-ready systems
If Slatted panel paintable PAN-002 and the wall is also painted — MDF Skirting Board is painted in a single tone. The lower horizon 'disappears,' the wall and floor connect through a neutral line. The mirror in such a system reads cleanly, without visual noise at the base.
Wooden baseboard for natural wooden systems
Slat panel oak PAN-003 next to the mirror — and Wooden baseboard in tone with the oak, it connects the lower horizon through the common wood. In such a system, the mirror stands on a "wooden base" — visually warm and organic.
High baseboard for hallway and dressing room
In the hallway and dressing room, a high baseboard (100–120 mm and above) creates a sense of expensive renovation. Especially in combination with slatted panels: the high MDF Skirting Board or Wooden baseboard under the slatted panel — this is a proportion you notice immediately. The interior looks more expensive without any extra effort.
Unified line under the mirror
The baseboard does not break where the mirror hangs on the wall. It runs under the mirror as a single line — even if the mirror hangs low. If the mirror is attached to the floor as a floor mirror, the baseboard wraps around its edges with neat miter cuts.
Molding, slat, and corner piece: what and when to use
Three different elements — three different situations. They are easy to confuse, but each has its own role.
wooden molding — when a decorative frame is needed. Around the entire mirror, along the perimeter of the slatted area, along the horizontal boundary of the slatted panel. Molding adds an architectural layer — it is noticeable, it "speaks." Suitable for classic and transitional styles.
Wooden slat RK-001 — when a concise geometric border is needed. A vertical batten at the joint of the panel and mirror, a horizontal one along the top line. The batten does not claim to be decorative — it supports the geometry and covers the technical joint. Suitable for modern and minimalist interiors.
Wooden corner UG-001 — when there is an open end or external corner. The corner profile is protection and completion. It always covers the open cut and absorbs impact instead of the fragile MDF end. On any external edge of the slatted area next to the mirror, a corner profile is mandatory.
wood trim items — for non-standard situations. Internal corners of niches, transitions between different planes, complex junctions in a dressing room or in the trim area — this is the job for linear moldings.
Mirror slatted panels: a separate discussion
There is a special category — Mirror slat panels. These are panels where slats alternate with mirror inserts — or slats are mounted on top of a mirror surface. Such solutions create an effect of multiplied space and multiplied light: each mirror strip between the slats reflects.
Such panels require particularly careful installation of joints — mirror inserts are even more demanding of transition elements than regular mirrors. molding MLD-019 along the perimeter of such panels and Wooden angle along the ends — are mandatory elements.
Mistakes when designing a wall with a mirror and slats
Mistakes here are costly — both literally (reworking the installation) and visually (an unpleasant result in the most noticeable spot of the apartment).
A mirror flush against a textured panel without a thought-out joint. The relief of the slatted panel prevents the mirror from sitting flush without a gap. Forcing it creates misalignment, and an unadorned gap looks random.
Not accounting for the thickness of the mirror and panel. The transition element is selected based on the total height difference. If the molding is too thin, it won't cover the edge. Measure everything before buying the profile.
Leaving an open edge of the slatted panel. The mirror reflects the open edge — and you see it twice. This is doubly untidy.
Breaking the baseboard at the mirror. A wall with a baseboard that abruptly ends at the mirror looks like unfinished renovation. MDF Skirting Board or Wooden baseboard run in a single line without exceptions.
Mixing mismatched wood tones. A slatted panel in dark walnut, molding in light oak, baseboard in pine — three different wood tones on one wall create chaos. Maximum two tones with a deliberate contrast.
Dark panels in a narrow dark hallway without lighting. Dark decorative slatted panels in a hallway without a window and without good lighting make the space gloomy. A mirror partially compensates — but without light, its potential is not realized. Lighting is a separate element that is planned in advance.
Too narrow a slatted insert next to a large mirror. A narrow strip of slats 15–20 cm wide next to an 80 cm wide mirror looks timid and insignificant. Proportions should be balanced: side slatted zones should be at least one-third the width of the mirror.
Not planning the location of the switch and lighting in advance. A switch that ends up right in the center of the slatted panel means complex installation and an unattractive result. The location of all points must be planned before installation begins.
Decision table: mirror + slats by room
| Room | Scheme | Transition element | Skirting board |
|---|---|---|---|
| Hallway | Mirror in the center, slats on the sides | molding MLD-019 | MDF Skirting Board High |
| Corridor | Slats on the wall, mirror on the side | Vertical slat + Angle | MDF Skirting Board unified |
| Wardrobe | Slats on the side walls, mirror in the center | Trimming Items for corners | Wooden baseboard |
| Bedroom | Slats behind the bed, mirror on the side | wooden molding | Wooden baseboard |
| Niche | Rails on the back wall, mirror on top | Corner bracket UG-001 on the outer corners | MDF Skirting Board |
What to buy for a wall with a mirror and slatted panels
Complete set for designing a wall where the mirror and rails work as a single system.
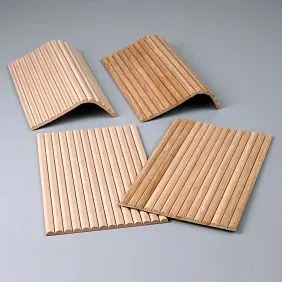
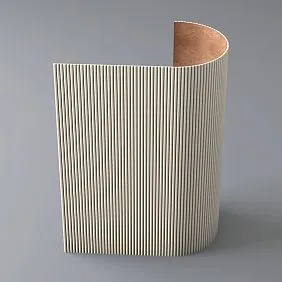
slatted panels for walls — in the finish PAN-001 with a ready-made coating, PAN-002 primed for painting or PAN-003 oak wood. The base of the entire wall.
Wooden slat RK-001 — for minimalist vertical and horizontal transitions next to the mirror.
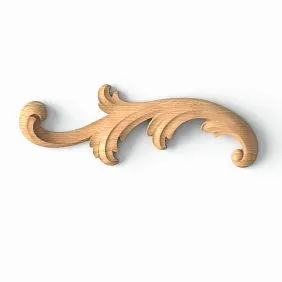
Decorative wooden slat — for custom additions and framing.
wooden molding — for decorative frames around mirror areas, for horizontal and vertical borders.
Wooden decorative moldings MLD-019 — for accent framing in classic and modern interiors.
Wooden corner UG-001 — for external corner ends of slat zones near the mirror.
MDF Skirting Board — for systems to be painted.
solid wood baseboard — for natural wood systems.
wood trim items — for corner junctions in niches, complex transitions, and non-standard joints.
FAQ: Answers to Key Questions
Can you combine a mirror and slat panels on one wall?
Yes, and this is one of the best solutions for a hallway, dressing room, and bedroom. The mirror adds light and depth to the space, Rafter panels — rhythm and texture. Together they create a complete, visually rich wall.
How to frame a mirror with slat panels in the hallway?
The most organic way — the mirror in the center, Wall slatted panels on the sides. The transition — vertical wooden molding or Rail along the edges of the mirror. Below — a single MDF Skirting Board across the entire width. More details — in the article Slatted panels in the hallway.
How to close the joint between a mirror and a slatted panel?
Four options: shadow gap — for minimalism, wooden molding — for classic style, Decorative rail — for modern style, Wooden angle — for corner and non-standard situations.
Is a molding around the mirror necessary?
Not necessarily — but wooden molding around the mirror zone turns the mirror from a simply hung object into an architectural element of the wall. In classic and transitional interiors — recommended.
Which baseboard to choose for a wall with a mirror and slats?
MDF Skirting Board — for systems for painting, Wooden baseboard — for natural wooden solutions. A single baseboard along the entire wall without breaks or changes in height.
Will slatted panels work for a walk-in closet?
They will work perfectly. decorative slatted panels PAN-001 slatted panels on the side walls of the walk-in closet and a mirror in the center of the back wall — this is a design solution that transforms the walk-in closet from a utilitarian wardrobe into a styled space.
What is better next to a mirror: a slat, a molding, or a corner piece?
It depends on the situation: Molding — for decorative frames, Rail — for minimalist geometric transitions, Angle — for external edges and corner situations.
How not to overload a small hallway with slatted panels?
Accent slatted zone — only on one wall, behind a coat rack or mirror. The other walls are smooth. Light tone of panels. Mirror opposite or nearby. High MDF Skirting Board — for a sense of height. Minimum of colors.
About the company STAVROS
A wall with a mirror and slats is an architectural project in miniature. Every detail matters: from the choice of panel execution to the last millimeter of the baseboard under the mirror. This is how an interior that looks expensive is created — not because it costs a lot, but because it is thought through to the end.
STAVROS produces a complete set: slatted panels for walls in three versions, Wooden moldings, Decorative Planks, Wooden corner pieces, MDF Skirting Board, Wooden baseboard и Trimming Items for any non-standard joints and transitions.
STAVROS — when a wall with a mirror looks exactly as you envisioned it.


