Article Contents:
- Where slatted wall panels with lighting have the maximum effect
- TV zone: the main scenario
- Wall behind the bed: bedroom as a place to relax
- Hallway and corridor
- Office and work area
- Niche and showroom
- Which panels are suitable for lighting: analyzing by material and relief
- Wooden panels: lighting reveals the texture
- MDF panels for painting: precision and control
- Panel relief and lighting: a dependency not visible in photos
- Where to place backlighting: options for different tasks
- Top lighting: descending light curtain
- Bottom lighting: ascending light from the baseboard area
- Rear lighting: light between the panel and the wall
- Side lighting: light from the edge
- Lighting in a niche or along a horizontal belt
- Baseboard with lighting: why it is a key component
- How to choose a baseboard for slatted panels with lighting
- Wooden baseboard: organic feel and warmth
- Paint-Ready MDF Skirting Board
- Tall baseboard: architectural foundation
- Baseboard matching door and trim color
- Ratio of baseboard height to panel relief
- How to hide wires: practical electrical work without visible compromises
- Step one: power plan before installation
- Step two: location for the power supply
- Step three: cable routing from the power supply to the strip
- Step four: connecting the strip and sealing
- Access for maintenance: in advance, not later
- Ends, corners, and junctions: details visible with backlighting
- Side ends: three solutions
- Top end: molding or ceiling baseboard
- Bottom joint: baseboard plus sealing
- Outside corner
- Slat panels with lighting in the TV area: full scenario
- Slat panels with lighting in the bedroom: softness without excess light
- Wiring in the bedroom: behind the headboard
- Baseboard in the bedroom: invisible or accent
- Slat panels with lighting in the hallway and corridor
- Mistakes when installing slat panels with lighting
- Where to buy slat panels, baseboards, and additional elements for a wall with lighting
- FAQ: Answers to Popular Questions
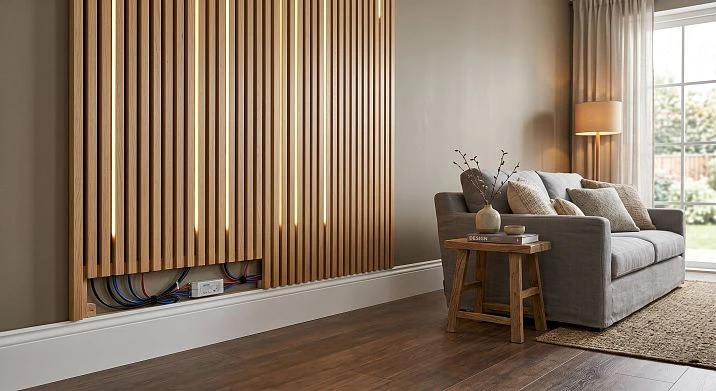
There are ideas that look flawless in renders but disappoint in reality. A slat panel with lighting is not one of them. But only under one condition: if it was designed as a system, not bought as a decorative rug with the plug placement figured out later.
Slatted panels with lighting — is perhaps the most expressive tool for an accent wall in modern interiors. Vertical slat rhythm plus a hidden light line: the wall ceases to be a plane and becomes a volume. Each slat casts a soft shadow, the space between the slats glows — and this entire effect works both in bright evening lighting mode and in dim night light mode.
But behind a beautiful result lies solving a dozen technical issues that need to be addressed before installation. Where is the power supply? Where is the power unit hidden? How is the bottom edge of the panel covered? Is there a baseboard, and what kind? Are the side edges covered? How is the wire routed from the source to the LED strip, and is it visible? That's exactly what this is about — here, without beating around the bush and without fluff.


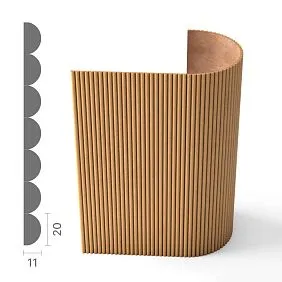
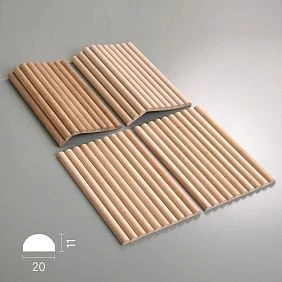
Where slatted wall panels with backlighting achieve maximum effect
Before discussing the technique, it's worth talking about scenarios. Because backlighting works differently depending on the room, the panel's placement, and the lighting task.




TV zone: the main scenario
Slatted panels for the TV zone with backlighting are the most common request, and it is absolutely justified. A TV on a slatted wall with soft ambient backlighting solves three tasks at once: decorative (the wall ceases to be just a "place for the TV"), ergonomic (backlighting behind the screen reduces eye strain when watching in the dark), and spatial (the accent wall visually structures the living room, highlighting the TV zone as an independent architectural block).
For the TV zone, especially effective are decorative slatted panels with pronounced relief: side light from the backlighting along the panel's perimeter creates deep side shadows that make the relief voluminous and convincing. A TV on such a wall is not a black screen in the center of a smooth surface, but a thoughtfully designed element of the interior composition.
Our factory also produces:


Wall behind the bed: the bedroom as a place to rest
Slatted panel with backlighting behind the headboard is a soft, diffused light line that replaces bedside sconces as evening lighting. Warm white light (2700–3000 K) against a background of wooden slats creates an atmosphere that no standard ceiling light can replicate.
Here, brightness is not important, but character. This is not task lighting — it's light in which it's pleasant to read or simply relax. Side or bottom placement of the LED strip behind the slats creates indirect lighting without direct beam exposure to the eyes.
Get Consultation
Hallway and corridor
In the hallway, a slatted wall with backlighting works as an architectural element that greets guests from the first steps. A narrow corridor with a lit slatted wall on one side is not a "pass-through tunnel," but a corridor with character. The lighting along the slatted panel visually expands the wall, creating an illusion of depth where there is none.
In the hallway, slatted panels with backlighting are often placed above the coat rack or dresser area — this provides both functional and decorative lighting simultaneously.
Office and work area
A slatted accent wall with backlighting in the study creates a professional, representative background for video calls — and at the same time shapes the right atmosphere for the workspace. Not a domestic mess in the background of the screen, but a well-thought-out wooden wall with soft lighting.
Niche and showroom
A niche, designed with wooden slatted panels with backlighting — an intimate architectural element that works as a light accent in the wall. This is a built-in display case, shelf space with lighting from below and behind, or simply a decorative volume. For commercial interiors — reception, showroom, cafe — slatted panels with backlighting create a branded visual image without complex architectural remodeling.
Which panels are suitable for backlighting: analyzing by material and relief
Not every slatted panel benefits equally from backlighting. There are clear patterns here that are worth understanding before purchasing.
Wooden panels: backlighting reveals the texture
oak slat panel under side lighting — it's a spectacle that cannot be replicated on MDF. Oblique light reveals the fiber structure: every stroke of the wood pattern gains volume, the surface ceases to be uniform and becomes alive. Warm light 2700–3000 K enhances the honey, amber, or ash tone of the wood — depending on the species and finish.
A feature of wooden slatted panels with backlighting: avoid choosing a deep varnish coating with a bright gloss — it will create glare. Matte oil or matte varnish is optimal: the surface absorbs light softly, without mirror reflections.
MDF panels for painting: precision and control
MDF slatted panel for painting in combination with backlighting — an ideal option for monochrome interiors where there is no natural wood and a single color scheme works. A white slatted panel with white or warm backlighting is a minimalist, neutral accent wall. A dark gray panel with warm light is a representative, strict background.
MDF with matte paint handles side light well: shadows from the slats are clear, the relief is clearly readable. Semi-matte coating is acceptable. Glossy is undesirable for walls with backlighting for the same reasons as for wood.
Panel relief and backlighting: a dependency not visible in photos
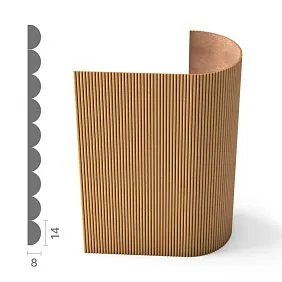
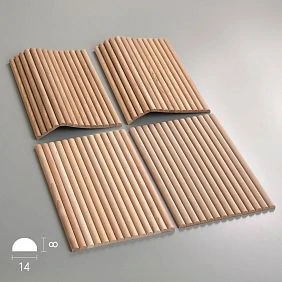
This is a fundamental point. The height of the slats and the width of the inter-slat space determine how the backlighting "behaves" on the surface.
| Panel parameter | Effect from backlighting |
|---|---|
| High slats 20–30 mm, wide spacing | Deep, expressive shadows, strong volume |
| Moderate slats 12–18 mm, medium spacing | Balanced relief, soft shadows |
| Low slats 6–10 mm, frequent spacing | Fine texture effect, ripples |
| Narrow inter-slat space | Light does not penetrate deeply, less volume |
| Wide inter-slat space | Light penetrates deeply, backlight illuminates the substrate |
For an accent wall with a pronounced lighting effect, choose panels with slats 15–25 mm and sufficient inter-slat space through which light from the LED strip reaches the substrate.
Where to place backlighting: options for different tasks
The location of the light line is a design decision that cannot be adjusted after panel installation. Therefore, it is made before material procurement.
Top lighting: descending light curtain
An LED strip along the upper perimeter of the slatted panel creates a downward flow that gradually fades towards the bottom. The upper part of the wall glows brightly, the lower part in soft diffused light. This is a striking, atmospheric solution that works best in TV zones and living rooms with high ceilings.
Installation: the strip is attached to the top edge or the top horizontal profile, wiring is routed to the ceiling or behind the ceiling molding.
Bottom lighting: upward light from the baseboard area
A light line at the base of the panel, hidden behind the baseboard or in a special base profile, is a soft upward light that creates the feeling that the panel is floating above the floor. Bottom lighting is especially effective in the dark: the wall glows from below, and the floor next to the panel also receives a soft contour light.
Technically: for bottom lighting, a gap must be provided between the bottom edge of the panel and the baseboard — or use a baseboard with an open light channel. Wiring to the bottom strip needs to be routed through the wall or floor before installation.
Back lighting: light between the panel and the wall
The LED strip is mounted on the wall behind the panel — in the space between the wall and the panel backing. Light seeps through the gaps between the slats, creating a uniform soft glow across the entire panel area. This is the most technically complex option, requiring ventilated installation with a gap of at least 15–20 mm.
The result is a uniformly lit surface without a pronounced light direction. The slats appear as dark stripes on a light background. Very effective on light and white wooden panels.
Side lighting: light from the edge
Light strips along the side vertical edges of the panel create a strict, graphic effect: two vertical light contours frame the slatted surface. This is a common solution for a TV area, when the accent wall has clear boundaries, and the lighting visually "draws" these boundaries with light.
Side lighting requires a neat closed end part with a channel for the strip — or a special corner profile.
Lighting in a niche or along a horizontal belt
For niches and horizontal decorative belts — lighting along the entire perimeter of the niche. This creates a soft "aquarium" effect: a wall with a niche that glows from within. Slatted panels on the back and side walls of the niche — with lighting along the upper perimeter — create a focal point that draws the eye when entering the room.
Baseboard with lighting: why this is a key component
This is where most people make a fundamental mistake. The slatted panel with lighting is ordered, installed, the strip is connected — and suddenly it turns out that the lower edge of the panel is not covered by anything. The cut end of the MDF is visible, the fasteners are visible, the wall behind the lower edge of the backing is visible. And if the lighting is from below — also the wire running along the lower edge to the floor.
Light emphasizes everything. In the dark, every gap, every open end, every poorly closed joint becomes noticeably more visible than in daylight. Lighting is a magnifying glass for all untidy details.
Wooden baseboard under slatted panels with lighting solves several tasks at once. It covers the lower end of the backing, hides the technological gap between the panel and the floor, creates a horizontal line that "grounds" the accent wall, and — with proper installation — can become a channel for routing part of the wiring to the lower light strip.
In areas with lower lighting, a light channel is hidden behind the baseboard: the strip is mounted on the wall at a height of several centimeters from the floor, the baseboard covers it from the outside, leaving only a light gap between the baseboard and the floor open. This is an elegant technical solution where the light source is completely hidden, and the light appears from under the baseboard — as if the floor is glowing.
How to choose a baseboard for slatted panels with lighting
Wooden baseboard: organic feel and warmth
Wooden baseboard from the same wood species as the slatted panels — the first and most organic choice. A baseboard made of oak under oak slatted panels, tinted to the same tone, creates a wooden system from bottom to top. With side lighting from the strip, the wooden baseboard becomes part of the light picture: warm light plays along the profile, adding extra tactile volume at the base of the wall.
Baseboard profile: for minimalist interiors — a straight rectangular profile without chamfers; for interiors with a natural, Scandinavian, or eco character — a baseboard with a soft rounding; for a classic or eclectic style — a baseboard with a cornice profile.
MDF skirting board for painting
For walls with slatted MDF panels for painting — an MDF baseboard in the same color. Precise color unity, perfectly smooth surface, no natural tone transitions. In monochrome interiors, this solution creates a wall without horizontal accents: the panel, baseboard, and wall read as a single volume.
Tall baseboard: architectural foundation
For TV zones with a floor-standing cabinet or hanging furniture, a baseboard 100–120 mm high creates a powerful architectural foundation for the wall. A tall baseboard under a backlit slatted wall is the base that visually "holds" the entire accent wall. It is especially effective with a dark baseboard: a dark base + wooden slatted wall + warm top light — this is a living room interior that gets photographed.
Baseboard matching the color of doors and trim
In a room where doors have a pronounced tone — dark walnut, white enamel, natural oak — a baseboard under the slatted panels of the same color creates a horizontal binding rhythm. Wooden casings matching the baseboard complete this system: the entire "framing" wooden trim of the room — baseboard, architraves, cornice — works as a single architectural framework, inside which the slatted wall with lighting acts as a decorative "canvas".
Ratio of baseboard height to panel relief
| Slat relief | Recommended skirting board height |
|---|---|
| Thin slats 6–10 mm | 60–70 mm — delicate transition |
| Medium slats 12–18 mm | 80–100 mm — proportional base |
| High slats 20–30 mm | 100–120 mm — substantial foundation |
How to hide wires: practical electrical work without visible compromises
This is the section that most articles either avoid or limit to a single phrase "it's better to hide the wiring." Let's break it down in detail — because this is where most mistakes occur when installing lighting in slatted panels.
Step one: power plan before installation
The first rule is that the socket or power cable must be brought to the right point before installing the panel. This means: during the renovation stage, when chasing is still possible, you need to run power to the panel installation location. The output point is hidden, behind the panel or behind furniture.
If the renovation is already complete, power can be run behind the panel through a wooden Trim or cable channel hidden behind the baseboard. But this is a compromise — it's better to plan ahead.
Step two: location for the power supply
The LED strip operates from a power supply — a 12V or 24V transformer. The power supply has a physical size (usually 100–200 mm in length), and it needs to be hidden somewhere. Options:
Behind the panel in the technical gap — if mounted on a batten, the gap behind the panel allows for a small power supply. Ventilation of the gap must be ensured.
In a nearby furniture cavity — a TV stand, bedside table, hallway cabinet. This is the most convenient option: the power supply in a closed furniture cavity with power output through a hole in the back wall.
In a separate built-in box behind the trim or baseboard — if there is sufficient clearance. This requires planning at the layout stage.
Step three: running the cable from the power supply to the strip
The cable from the power supply to the LED strip is a small wire 2×0.75 mm, but it also needs to be hidden. Methods:
In the technological gap behind the panel — an ideal option. The panel is on a lathing, the wire runs along the wall in the gap, to the strip attached to the lathing or substrate.
In the groove under the baseboard — the wire runs vertically behind the baseboard from the floor to the bottom edge of the panel. With a wide baseboard (80–100 mm), this is quite feasible.
In a cable channel hidden behind a decorative strip or molding — decorative wooden molding on the vertical end of the panel can hide a small cable channel.
Step four: connecting the strip and sealing
The connection point of the cable to the LED strip must be hidden — behind a rail, in the end zone of the panel. An exposed connector protruding from the edge of the panel or hanging at its base is a mounting defect.
Access for maintenance: in advance, not later
The LED strip is a consumable item with a limited service life. After 3–5 years, it may need to be replaced. This must be considered during installation: at least one fragment of the panel or baseboard should be removable without damaging the entire system.
Ends, corners, and junctions: details that are visible when backlit
Backlighting — as already mentioned — is a magnifying glass. Therefore, requirements for ends, edges, and junctions with backlighting are stricter than in any other situation.
Side ends: three solutions
Molding along the side edge — wooden molding is mounted along the vertical edge of the panel, covering the end of the substrate and slats. This is a decorative solution with volume — the molding profile adds a vertical frame line along the panel edge. With side backlighting, the molding creates a light frame: light plays along the profile, adding extra volume.
End strip from millwork — a thin wooden or MDF strip covering the end flush. A minimalist option without adding volume. Suitable for modern interiors where frame lines are not needed.
Junction with a door casing — when the panel adjoins a doorway, wooden casing is mounted over the panel, covering the side end. This is a standard solution where the door casing simultaneously serves as the end profile for the panel.
Top end: molding or ceiling plinth
The top end of the panel at partial wall height is covered by a horizontal molding. This is the top frame line that completes the panel field. For top backlighting: the strip is mounted in the technical channel behind or above the molding — light flows from above, and the molding hides both the strip itself and its cable.
At full wall height up to the ceiling — ceiling plinth or cornice Wooden trim closes the top joint of the panel with the ceiling.
Bottom joint: baseboard plus sealing
The bottom end of the panel must be covered by a baseboard with a gap from the floor. With bottom lighting: tape behind the baseboard, the baseboard covers the tape, between the baseboard and the floor — a light gap of 8–12 mm. Without bottom lighting: baseboard flush or with minimal gap, joint with the floor — silicone sealant.
External corner
If the slatted panel forms a corner of the room, extending onto the adjacent wall — corner profile from wooden trim covers the external corner. This is both edge protection and a decorative vertical line. With lighting on the corner wall, the light line along the edge of the corner can be continued onto the adjacent wall — then the lighting "flows around" the corner, creating a continuous light contour.
Slatted panels with lighting in the TV area: full scenario
The TV area is where details matter most. Let's break down the scenario from start to finish.
Panel. For the TV area, optimal decorative slatted panel with a relief of 15–25 mm. The width of the accent zone is typically from 140 to 220 cm (depends on the TV size and wall proportions). Height — full wall height to the ceiling or to the cornice line.
Lighting. Warm LED strip (2700–3000 K) around the perimeter — top, bottom, sides. Or only top + bottom lines without sides. Control — via a dimmer built into the wall or a smart home remote.
Wiring. Power is routed from the wall behind the TV bracket. The power supply is located in the cavity of the TV stand. Cables from the power supply to the strips run behind the panel in the technical gap.
Baseboard. Wooden baseboard under the panel, matched in tone to the wood of the panel. Height — 80–100 mm, flush with the baseboard around the room perimeter. Or an accent dark baseboard if the wall is finished in a neutral light tone.
Edges. The side edges of the panel are covered with molding or abut the casing of an adjacent doorway. The top edge is covered with molding or goes under the ceiling baseboard.
TV bracket. Mounted to the wall through the panel with reinforcement using anchors directly into the load-bearing wall. Wires from the TV are hidden behind the panel through a hole in the substrate — to a junction box or an outlet behind the panel.
TV stand. Selected to match the panel tone or in a contrasting accent color. The furniture base of the stand aligns with the baseboard of the panel wall in height.
Slatted panels with lighting in the bedroom: softness without excess light
In the bedroom, the task of lighting is fundamentally different from that in the living room. Here, a bright accent is not needed — what is needed is soft, diffused, warm light that creates a state of calm.
oak slat panel behind the headboard with side lighting at 2700 K and a dimmer — this is a solution that works perfectly: the evening bedtime ritual begins with a subdued wooden backdrop, where each slat casts a soft shadow.
An important point: in the bedroom, you should not choose cold or neutral light (4000–5000 K) — it interferes with falling asleep and activates the nervous system. Only warm light, from 2700 to 3000 K. Preferably — 2700 K with the ability to dim to 10–20% brightness.
Wiring in the bedroom: behind the headboard
Power for the strip behind the bed headboard is routed from the wall behind the headboard — or through the floor. If there are bedside tables, the power supply can be placed inside them. The switch or dimmer is mounted on the wall at a convenient height — at the level of the bedside shelf.
Baseboard in the bedroom: invisible or accent
In the bedroom, the baseboard under the slatted panel behind the bed is usually chosen to match the wall color or the wood tone of the panel — it should not compete with the soft lighting effect. A tall dark baseboard in the bedroom is only appropriate with dark panels and sufficient space.
Slatted panels with lighting in the hallway and corridor
The hallway is a space where the first impression is created in the first seconds. And where making it convincing is most difficult: a small space, typically with one natural light source or none at all.
Wall slat panels with backlighting In the hallway, this is a solution that both illuminates and decorates. An accent slatted wall on one side of the corridor with vertical lighting on the sides visually expands the space — the light stretches upward, drawing the eye up.
In the hallway, slatted panels are often combined with a functional area: a shelf for keys in a niche, a built-in coat rack next to the slatted wall. A wooden hallway area with slatted panels and lighting, wooden door trims, and a wooden baseboard creates a natural, warm entrance that relieves city stress right in the corridor.
Mistakes when installing slatted panels with lighting
-
Buying panels without a wiring plan — a wire running along the panel surface to the strip ruins the entire effect. The wiring must be planned before purchase
-
Not thinking through the baseboard — the open bottom end of the panel looks rough when backlit: the light emphasizes the unfinished look
-
Leaving a visible wire or connector — when the backlight is on in the dark, any protruding wire is clearly visible
-
Not covering the ends — open ends of MDF or wood create an ugly "ragged" edge under side lighting
-
Choosing cold light for warm wood — cold white light 5000–6000 K kills the warm tone of natural wood: oak turns gray, the ambient atmosphere disappears
-
Installing too bright a strip — accent lighting works at 20–40% brightness of the maximum. A strip at 100% in a living space is a spotlight, not ambient
-
Forgetting about sockets and TV mount — the mount is installed through the panel, and the TV wires need to be hidden somewhere. This is planned in advance, not solved when the TV is already mounted
-
Not accounting for panel thickness — a slatted panel on a batten with a gap pushes the wall surface out by 40–60 mm. This affects trim, baseboards, and distance to furniture
-
Not providing a dimmer — fixed brightness without dimming deprives the backlight of its main advantage: controlled atmosphere
-
Mixing warm wood with cold finishing materials — wood and cold concrete, white gloss and dark oak are working contrasts. But oak + a "cold" plastic baseboard in marble color is a stylistic mismatch
Where to buy slatted panels, baseboards, and additional elements for a backlit wall
A backlit wall is a project, not a set of parts. When all elements are selected in a unified system, the result looks designed. When assembled from random sources, there is always a mismatch in thicknesses, tones, and profiles.
The STAVROS catalog offers everything for a slatted backlit wall with neat details:
-
Rafter panels — natural oak, MDF for painting, decorative with relief, several profiles
-
decorative slatted panels — with a pronounced three-dimensional relief for accent backlit walls
-
Primed MDF slat panel — a base for painting in any color for monochrome solutions
-
Oak Slat Panel — natural solid wood for warm wooden accent walls
-
Wooden baseboard — several profiles and heights for the lower node of a slatted backlit wall
-
Wooden moldings — for top, side, and horizontal end closures of the panel
-
Wooden trim — corner profiles, end strips, trims for all junctions and joints
-
Wooden casings — for door openings in a unified system with a slatted wall and baseboard
-
Solid wood products — complete catalog of wooden elements for finishing and furniture
Choosing the entire set from one source means getting a guarantee of compatibility in material, tone, and tolerances. Panels will fit neatly, baseboards will align without trimming, and moldings will cover the end on the first try. The wall with lighting will look exactly as it did in the render — not like "almost what was wanted."
FAQ: Answers to popular questions
Can you install lighting in slatted panels yourself?
Yes, if the wiring was planned in advance. The LED strip is installed in the technical gap behind the panel or along the perimeter. The difficulty is not in mounting the strip, but in hiding the power supply and block — this needs to be thought out before installing the panels.
What color of lighting should you choose for wooden slatted panels?
Warm white — 2700–3000 K. This is the only temperature range at which natural wood looks as it should: warm, honey-colored, alive. Neutral and cool light removes the warm tone, making the wood look gray and lifeless.
What baseboard should you choose for slatted panels with lighting?
A wooden baseboard matching the panels is the first choice. MDF for painting — for monochrome solutions. Height: 80–100 mm with medium slat relief. For bottom lighting — a baseboard with a technical gap of 8–12 mm from the floor for a light slit.
How to hide wires behind slatted panels?
The power supply is brought out from the wall before installing the panels. The power supply unit is placed in nearby furniture or in the gap behind the panel. The cable from the unit to the strip is in the technical gap behind the backing or behind the baseboard. All connections are behind the panel — no wire should be visible from the outside.
Do I need to close the ends of the panels if there is backlighting?
Absolutely. Backlighting enhances the visibility of any unclosed edges. Side ends — molding or abutment to the casing. Top — molding or cornice. Bottom — baseboard. No open cut of MDF or wood should be visible when the light is on.
Where do slatted panels with backlighting look best?
In the TV area — most expressive. Behind the headboard — atmospheric and functional. In the hallway — decorative and practical. In the study — representative. In a niche — accent and intimate. In a commercial interior — a branded visual image without complex architectural work.