Article Contents:
- Glazing bead: a small detail with a big function
- When you need a wooden glazing bead
- How to choose a glazing bead for a specific facade
- Polyurethane decor: how it works on furniture
- Top cornice: the main visual accent of the sideboard
- Blind lower facades: a place for frame molding
- Side panels and ends
- Base line
- Wall behind built-in display case
- Five scenarios: what exactly to buy for each task
- Scenario 1: sideboard with glass doors on the upper tier
- Scenario 2: classic display cabinet
- Scenario 3: kitchen with glass fronts on upper cabinets
- Scenario 4: classic library with glass doors
- Scenario 5: restoration of an old sideboard or cabinet
- How to combine wooden glazing bead and polyurethane decor
- Uniform painting: the cleanest result
- Natural wood + painted polyurethane
- Monochrome polyurethane on facades
- Technical details: correct glazing bead installation
- Tools
- Fastening
- Length and calculation
- Molding decor: corner elements and accent overlays
- Handles: a detail that cannot be left 'for later'
- Compatibility table: what works with what
- Complete shopping list: don't forget anything
- Mistakes: eight decisions you'll regret later
- Buying glazing bead without measuring glass thickness
- Choosing a profile that is too wide for a narrow frame
- Gluing relief decor where it interferes with opening
- Do not account for handles when marking decor
- Mix glazing bead and molding styles
- Forget about the top cornice
- Do not take material allowance
- Buy decor without a facade scheme
- Additional keys and related materials
- Calculation: example for a buffet with four glass inserts
- FAQ: popular questions and detailed answers
- What to buy for glass furniture facades?
- Can you combine wooden glazing bead and polyurethane molding on one facade?
- Where is it best to use polyurethane decor on a display window?
- Which glazing bead should I choose for a classic-style sideboard?
- Can a wooden glazing bead and a polyurethane molding be painted the same color?
- How much molding is needed for two frames on the lower facades of a sideboard?
- Is primer needed before painting polyurethane?
- Can an old credenza be restored with new glazing bead and polyurethane decor?
- STAVROS: production that covers the entire task
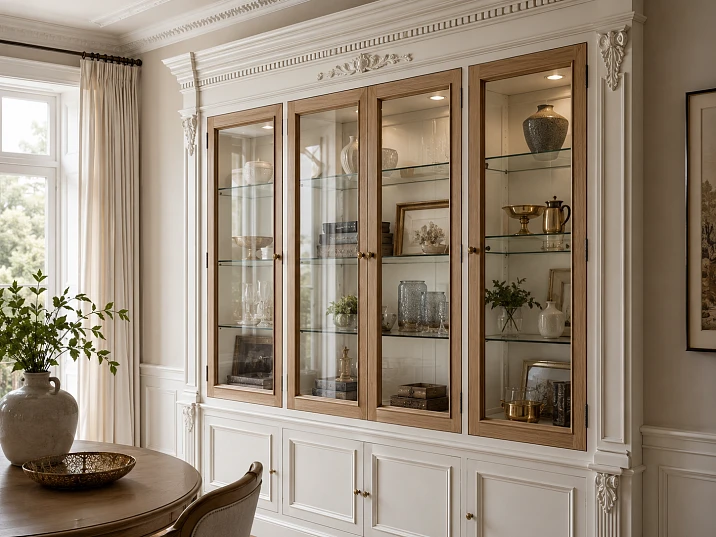
A glass facade is always about details. Beautifully seated glass in a wooden frame, a neat profile around the perimeter, a precise cornice on top, and a decorative overlay in the right place — together, this creates the feel of expensive, well-thought-out furniture. But the exact same sideboard with crookedly inserted glass, no profile, and bare ends of the facades looks cheap, even if the body is made of good wood.
Wooden trim — this is the very detail that holds the glass, hides the edge of the insert, and gives the facade a finished look. And Polyurethane moldings — a decorative layer that turns an ordinary display cabinet into an object with character. Together, they solve a task of any scale: from restoring an old credenza to assembling a classic library from scratch.


Glazing bead: a small detail with a big function
Most people don't think about the glazing bead until the glass starts rattling or the edge of the insert sticks out with an unsightly white end. That's when the question becomes acute: what to buy so that the glass sits tightly, neatly, and beautifully.
Wooden trim — it is a thin trim profile with a characteristic cross-section that is installed along the perimeter of the glass insert in the facade. It presses the glass against the frame rebate, secures it from vibration, and simultaneously covers the end — the very visible edge that would otherwise spoil the appearance.
But the task of the glazing bead is broader than just "holding the glass." It shapes the furniture logic of the facade: the correct profile of the glazing bead sets the style — from the strict geometry of modern classics to soft curves in the spirit of Provence. And it is the glazing bead that determines how neat the glass fit will be — with a properly selected profile, the glass sits perfectly, without gaps or misalignments.




When a wooden glazing bead is needed
The glazing bead is used wherever glass is embedded in a wooden facade:
-
in sideboards with glass upper doors
-
in display cabinets with single- and double-door facades
-
in credenzas and china cabinets with display sections
-
in upper kitchen cabinets with glazed facades
-
in library cabinets with glazed sections
-
in built-in cabinets with glass doors
-
in decorative partitions with glazing
In all these cases, the glazing bead is an essential element. Without it, the glass is either held only by sealant (which is not durable) or not held at all.
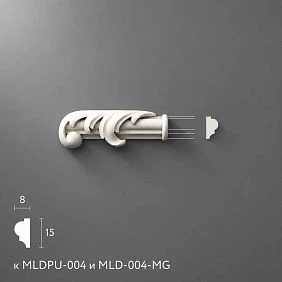
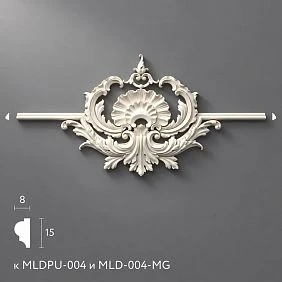
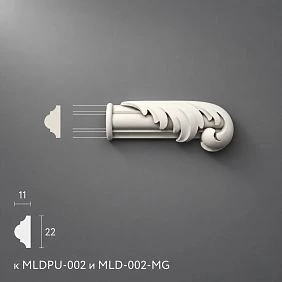
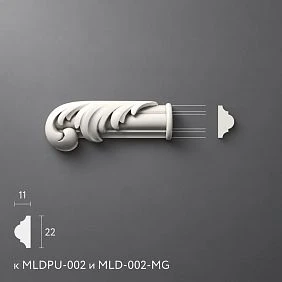
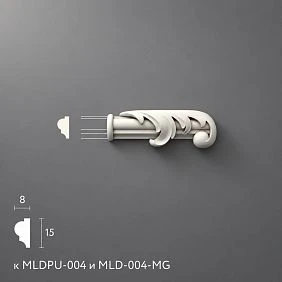
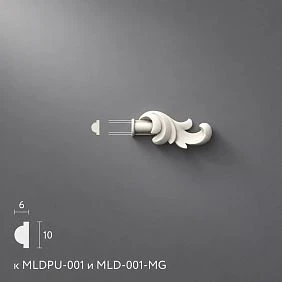
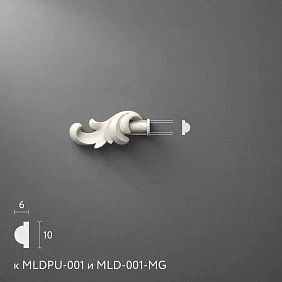
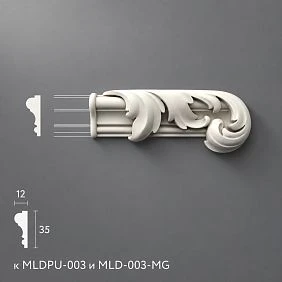
Our factory also produces:
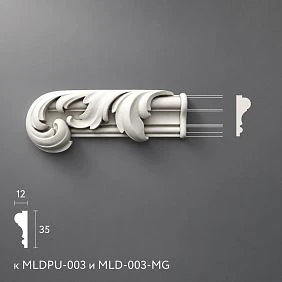
How to choose a glazing bead for a specific facade
The choice of glazing bead is determined by three parameters.
First is the glass thickness. Standard glasses for furniture facades have a thickness of 4, 5, or 6 mm. The glazing bead must match: a groove that is too narrow will not accept the glass of the required thickness, while one that is too wide will create play. Before purchasing, check the glass thickness and select a glazing bead with a corresponding groove or designed for a gasket.
Second is the width of the facade frame. The wider the frame, the wider the glazing bead can be. For a narrow frame of 20–25 mm, use a glazing bead with a face width of up to 12–15 mm. For a wide frame of 40–60 mm, use a glazing bead with a width of 18–25 mm and a more pronounced profile.
Third is the furniture style. A glazing bead for classic furniture has a soft profile with rounded edges or a beading. For modern classics, a more straightforward profile without unnecessary relief elements. For furniture intended for painting, the profile can be more pronounced, as paint emphasizes the relief.
Get Consultation
Polyurethane decor: how it works on furniture
There is a question that arises for everyone who sees polyurethane moldings in a furniture decor catalog: "Is this really for furniture? I thought it was for walls." The answer is for furniture as well.
Moldings made of polyurethane have been used on furniture facades for a long time and successfully. Polyurethane easily takes any profile, has minimal weight, is easily painted, and accurately reproduces the relief — whether it's a classic molding, ionic, or a smooth rectangular profile. It is mounted with glue or self-tapping screws with a glue fixative.
On a sideboard, display cabinet, and credenza, polyurethane decor is located in several zones.
Top cornice: the main visual accent of the sideboard
The top cornice of the sideboard is what is immediately visible from any point in the room. It sets the 'crown' of the furniture and determines its architectural scale. A wooden cornice made of solid wood is a classic solution, but requires complex processing and is significantly more expensive.
wooden cornice made of solid wood — a choice for those who want to maintain material uniformity. A polyurethane cornice — for those who want an expressive relief at minimal cost and with painting in a single color. Both solutions work well, and they are often combined: a wooden body + a polyurethane decorative cornice on top.
Blind lower facades: a place for frame molding
The lower tier of the sideboard, as a rule, consists of blind facades without glass. It is here that Moldings made of polyurethane give maximum effect: a frame panel assembled from four pieces of profile turns a flat facade into a classic paneled one. When painted white or cream, the result is indistinguishable from milled MDF — but costs less.
Side panels and ends
The side walls of a sideboard or display case are another area for decor. Vertical molding frames or single vertical profiles along the height of the side wall create the feel of a pilaster and give the furniture additional architectural volume.
Base line
The base of a buffet or display case is a part that is often left empty. Meanwhile, a decorative profile around the perimeter of the base visually "lifts" the furniture body off the floor and adds completeness to the entire lower section.
Wall behind the built-in display case
If the display cabinet is built-in and adjacent to the wall, the space between the side panel of the furniture and the room wall often looks like an unfinished joint. Moldings made of polyurethane on the wall next to the display case — and the wall begins to continue the architecture of the furniture.
Five scenarios: what exactly to buy for each task
Practical block. Five typical tasks that buyers solve in this topic — with specific lists of materials.
Scenario 1: buffet with glass doors on the upper tier
Classic buffet: the lower tier is solid, the upper tier has glass. The furniture is restored or assembled anew for painting in white or cream.
What you need:
-
Wooden trim for the thickness of the glass of the upper doors
-
wooden cornice or cornice profile made of solid wood trim for the top line of the sideboard
-
Moldings made of polyurethane for frame panels on the lower blind facades
-
Polyurethane decorative appliques — 1–2 accent elements on the upper tier
-
furniture handles — according to the style
-
Adhesive for polyurethane (more details — what to glue polyurethane molding with)
-
Fasteners for glazing bead (finishing nails 1.6×35 or 1.6×40 mm)
-
Acrylic sealant for joints
-
Primer for wood and primer for polyurethane
-
Finish paint — 2–3 L for two coats
-
Spare glazing bead and molding 10%
Result: a sideboard with neatly fitted glass, decorated blind facades, a finished cornice, and uniform paint — a classic that looks expensive.
Scenario 2: classic display cabinet
Fully glazed display case spanning the entire height. Two or four glass doors, wooden frames, classic style.
What you need:
-
Wooden trim — along the perimeter of each glass insert
-
decor for furniture made of solid wood — overlays on horizontal crossbars of frames
-
Moldings made of polyurethane for a decorative frame along the outer perimeter of the body
-
Cornice — wooden or made of polyurethane decor — for the top line
-
furniture handles — classic, matching the display case style
-
Fasteners, glue, sealant, primer, paint
Feature: on a fully glazed display case, a decorative polyurethane accent is appropriate only along the outer contour of the body and on the cornice — inside the glass space, relief decor will interfere with the perception of the contents.
Scenario 3: kitchen with glass fronts on upper cabinets
The upper tier of a kitchen with glazed fronts is a practical story. There is no room for lavish stucco. Neat geometry is needed.
What you need:
-
Wooden trim — minimal profile for 4mm glass
-
Moldings made of polyurethane with a smooth straight profile — for frames on blind facades of the lower tier
-
Decorative wooden molding — for the cornice line along the top of cabinets
-
Without active overlays: the kitchen is a functional space
-
Glue, fasteners, sealant, primer, paint or enamel for MDF
Principle: in the kitchen, decor must be functionally justified. Glazing bead — yes, cornice profile — yes, moderate moldings on blind facades — yes. Lush overlays and complex relief — no.
Scenario 4: classic library with glass doors
The library is a separate world. Dark wood, glass doors, a serious atmosphere. Strictness and precision of decor are important here.
What you need:
-
Wooden trim with a soft profile for 5mm glass
-
wooden cornice made of solid wood for the top line of the library
-
Moldings made of polyurethane — on the walls next to the library (not on the furniture itself)
-
Polyurethane wall decor — frame panels on adjacent walls for architectural unity
-
furniture handles — strict, without ornament
-
Fasteners, glue, sealant, primer, paint or stain with varnish
Scenario 5: restoration of an old sideboard or cabinet
A Soviet sideboard or cabinet — a space with history. The glass is often already replaced, hinges work poorly, the glazing bead is dried out or broken off. Restoration is a chance to turn it into something stylish.
What you need:
-
New Wooden trim — to match the thickness of the new glass
-
decorative elements for furniture from solid wood — for horizontal crossbars of the frames
-
Moldings made of polyurethane on the blind lower facades — for a frame effect
-
Decor for polyurethane moldings — corner elements in frames
-
furniture handles — new, in a classic style
-
Glue, fasteners, wood putty, sealant, primer, paint — white or cream
Result: a sideboard with a 60-year history, completely repainted white with new details, becomes a stylish interior piece in the spirit of French classics. This is not retro — it's a renewed item with character.
How to combine wooden glazing bead and polyurethane decor
There are several approaches to combining these two materials — the choice depends on the style of furniture and the intended finish.
Uniform painting: the cleanest result
If the furniture is to be painted — wooden glazing bead and polyurethane elements, after priming and painting in one color, are perceived as a single whole. The boundary between wood and polyurethane disappears. It is this approach that gives an "expensive" look — the furniture appears solid, monolithic, as if cast from one material.
Important nuance: wood and polyurethane require different preparation before painting. Wood is sanded with 100–120 grit sandpaper, then coated with wood primer. Polyurethane is degreased and primed with a special adhesion compound. Only after that — finish paint on both materials.
Natural wood + painted polyurethane
Second option: the glazing bead and door frames are left in natural wood (or tinted to walnut, oak, cherry), and the polyurethane decor on the walls next to the furniture is painted white or the wall color. This solution works when the furniture is dark and the walls are light.
Polyurethane moldings on light walls create an architectural backdrop that visually supports dark furniture without blending into it.
Monochrome polyurethane on facades
If the furniture is entirely for painting, all wooden and polyurethane elements are painted in one color. The glazing bead, door frames, cornice, molding frames on blind facades, overlays — everything in a single tone. The result is a maximally architectural look, which is currently very popular in classic and neoclassical styles.
Technical details: proper installation of the glazing bead
The glazing bead is a profile that requires precision during installation. A few rules to help avoid common mistakes.
Tools
For cutting wooden glazing beads at angles, a miter box or miter saw is used. A correct 45° angle at corner joints and 90° at straight connections ensures a neat fit. A ragged or oblique cut cannot be hidden by any putty or paint.
Fastening
The glazing bead is fastened with finishing nails of 1.6–1.8 mm cross-section, 30–40 mm long. The nails are driven in with a nail set, and the head is countersunk into the wood. Small holes from the heads are puttied before priming.
A soft sealing gasket is placed on the glass from the inside before installing the glazing bead, or silicone sealant is applied — this prevents rattling and ensures a tight fit of the glass.
Length and calculation
The perimeter of the glass insert = (width + height) × 2. Add 10–15% margin for cutting to this value. For example, for an insert of 40×60 cm: perimeter = 200 cm, with margin — 220–230 cm = 2.3 m of glazing bead per insert.
For a sideboard with four glass inserts of 40×60 cm each: 4 × 2.3 m = 9.2 m of glazing bead. With a margin for the entire job — 10–11 m.
More about the types and parameters of wooden glazing bead — in the article wooden glazing bead for windows, doors and furniture.
Decor for moldings: corner elements and accent overlays
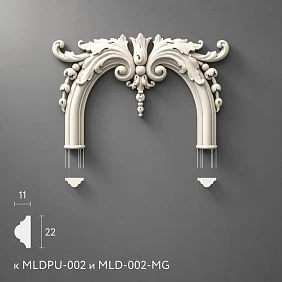
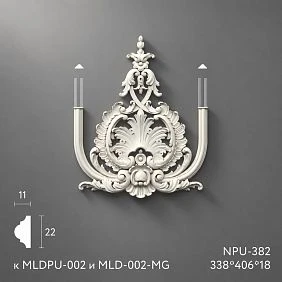
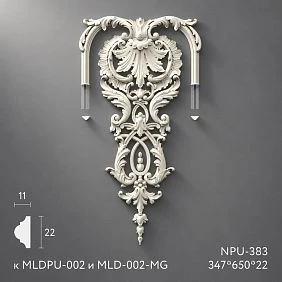
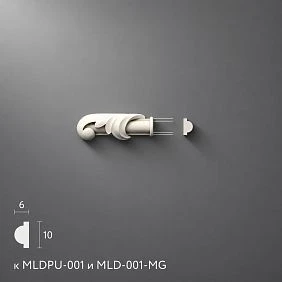
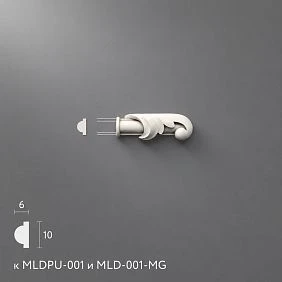
On the display case and sideboard, moldings often go together with decor for polyurethane moldings — corner elements that decorate the joints of profiles. Instead of a simple 45° cut, a decorative accent appears at the corners of the frame.
Corner elements should be chosen considering the width of the molding: a small corner element on a wide molding looks accidental, too large — overloads the frame. Approximately: the width of the corner element should overlap the face of the molding by 2–4 mm on each side.
For a classic-style sideboard, corner elements on the frames of solid doors are a sufficient decorative accent. For a server in the spirit of French classicism — you can add a central rosette on a large frame.
Handles: a detail that cannot be left 'for later'
furniture handles — an element that is directly related to the decorative solution of the facades. A skeptic might object: 'What do handles have to do with it when we're talking about glazing bead and moldings?' The point is that the handle is the final detail that is always visible. It either supports the style or destroys it.
Classic wooden handles made of solid wood organically complement a sideboard with wooden glazing bead and polyurethane decor. They create unity of materials. Metal handles are appropriate in more modern solutions. The main thing is not to leave furniture with old warped handles after restoration: this is the only element that can negate all the work.
Compatibility table: what works with what
| Furniture type | Glazing bead | Crown Molding | PU molding | PU overlays | Handles |
|---|---|---|---|---|---|
| Classic sideboard | Mandatory | Wooden | On lower fronts | Corner, spot | Wooden |
| Display cabinet | Mandatory | PU or wooden | Along the perimeter of the body | Minimally | Wooden or metal |
| Kitchen upper tier | Mandatory | Wooden molding | Smooth profile | Not needed | Any |
| Library | Mandatory | Wooden | On adjacent walls | No | Strict |
| Sideboard (restoration) | New | PU | On lower fronts | Corner pieces | New classic |
Full shopping list: don't forget anything
When the task is clear, make a full list right away, don't buy in three trips.
Main materials:
-
Wooden trim — calculation around the perimeter of all glass inserts + 15%
-
Moldings made of polyurethane — calculation around the perimeter of all decorative frames + 12%
-
wooden cornice or cornice profile — by furniture width + allowance
-
decorative inlays for furniture from solid wood — by number of accent points
-
Decor for polyurethane moldings — 4 pieces per frame
-
furniture handles — by number of doors and drawers
Consumables:
-
Mounting adhesive for polyurethane — 1 tube per 3–4 m of molding
-
Finish nails 1.6×35 or 1.6×40 mm — for glazing bead
-
Silicone or acrylic sealant for glass installation
-
Acrylic sealant for molding joints
-
Wood primer — 0.5–1 L
-
Adhesion primer for polyurethane — 0.5 L
-
Finish paint — 2–3 L for two coats
-
Sandpaper 100–120 for sanding wood
-
Stock of all profiles 10–15%
Mistakes: eight decisions you'll regret later
Buying glazing bead without measuring glass thickness
Sounds obvious, but this mistake is the most common. They bring a glazing bead — and it either doesn't fit on 5 mm glass or wobbles on a 4 mm insert. First — measure the glass, then — choose the glazing bead.
Choosing too wide a profile for a narrow frame
A door frame 20 mm wide and a glazing bead with a face part of 20 mm — that's the whole frame taken up by the bead. The face part of the glazing bead should not occupy more than 50–60% of the frame width, otherwise the structure itself remains invisible.
Gluing relief decor where it interferes with opening
An overlay or molding in the hinge or handle area can prevent normal door opening. All decorative elements are marked before installation — taking into account the door travel, hinges, and handle.
Do not account for handles when marking decor
The handle is the last element to be installed, but the first to interfere with the decor if not thought about in advance. A decorative molding in the center of the facade and a handle in the center of the facade are not always compatible. The handle location must be determined before applying the decor.
Mixing glazing bead and molding styles
A glazing bead with a pronounced baroque profile and a smooth minimalist molding on the same facade is a stylistic dissonance. All profiles should be from the same family: either rounded classic, or straight-line neoclassical, or strict modern.
Forget about the top cornice
A buffet without a cornice is like a coat without a collar. Wood, glass, handles — everything is there, but there is no finish. The cornice is purchased and installed together with all other decor, not "later."
Not buying extra material
The glazing bead is cut at angles, and each corner joint "eats" length. With four inserts and eight corners on each, cutting losses will be 20–40 cm per insert. A 15% reserve is the minimum.
Buying decor without a facade diagram
Moldings are bought, decor is there — but where exactly, in what scale, how many frames, where is the accent? Without a facade diagram, the purchase turns into a lottery. Even a simple sketch on paper with dimensions saves money and time.
Additional keys and related materials
The buyer in this topic is looking not only for glazing bead and moldings. They also have related requests that lead to catalog products.
Wooden linear products from solid wood — slats, baseboards, cornices, glazing beads, corner pieces from natural wood — all in the section solid wood trim. This is the source section for those working with wooden furniture and looking for linear products in natural material.
Decorative wooden overlays for furniture — milled overlays, rosettes, relief elements from solid beech and oak — in the section furniture decor. They are used directly on wooden facades as an alternative to polyurethane overlays where it is important to maintain material uniformity.
Classic furniture — finished products: sideboards, display cabinets, credenzas, bookcase cabinets — in the section classic furniture. For those looking for a ready-made solution rather than assembling it themselves.
Full range of polyurethane stucco — moldings, cornices, baseboards, overlays, wall decor and molding decor — in the section moldings from polyurethane.
Molding installation — installation technology, corners, joints, painting — in the article installing polyurethane molding.
Calculation: example for a sideboard with four glass inserts
Sideboard width 120 cm. Upper tier: two doors, each with one glass insert 35×55 cm. Lower tier: two solid doors 35×60 cm, each with one decorative molding frame 26×50 cm.
Glazing bead:
Perimeter of one insert (35+55)×2 = 180 cm. Two inserts: 360 cm. With 15% margin: ~415 cm ≈ 4.2 m of glazing bead.
Molding for lower frames:
Perimeter of one frame (26+50)×2 = 152 cm. Two frames: 304 cm. With 12% margin: ~340 cm ≈ 3.5 m of molding.
Corner pieces: 2 frames × 4 corners = 8 pieces.
Cornice along the sideboard width: 120 cm + 10% margin = 1.35 m.
Glue: 1 tube per 3–4 m of molding = 1 tube.
Sealant: 1 tube of acrylic for molding joints, 1 tube of silicone for glass.
Primer: 0.5 L for wood + 0.3 L for polyurethane.
Paint: 1.5–2 L for two coats.
Handles: 4 pieces (2 for upper cabinet doors + 2 for lower).
Total: everything fits in one order, covering the entire task without extra trips to the store.
FAQ: popular questions and detailed answers
What to buy for glass furniture fronts?
First of all — Wooden trim to match the thickness of your glass. For front decoration — Moldings made of polyurethane for blind sections, wooden cornice for the top line, furniture handles, glue, sealant, primer, and paint.
Can you combine a wooden glazing bead and polyurethane molding on the same facade?
Yes, this is a working combination. The glazing bead is a functional element for holding the glass. polyurethane decor — a decorative layer. When painted in one color, both materials are perceived as a single whole.
Where is it best to use polyurethane decor on a display case?
On the top cornice, blind facades, side panels, and base. Not on the glass doors themselves — there, a glazing bead and frame are sufficient. Not in areas where decor interferes with hinges, handles, or opening.
Which glazing bead should I choose for a buffet in a classic style?
A glazing bead with a soft profile — a rounded molding or multi-step cross-section. The width of the front part should be no more than 60% of the door frame width. Be sure to account for the glass thickness: the standard for furniture inserts is 4–5 mm.
Can you paint a wooden glazing bead and a polyurethane molding in one color?
Yes. The wood is sanded and coated with an acrylic primer for wood. The polyurethane is degreased and primed with an adhesion compound. After that, both materials are painted with the same finish paint. The boundary between them disappears.
How much molding is needed for two frames on the lower facades of a buffet?
Calculate the perimeter of each frame, sum them up, and add 12–15% margin for trimming. Corner joints consume 2–5 cm from each end. Example: two frames 26×50 cm — total perimeter ~304 cm, with margin ~3.5 m of molding.
Is primer needed before painting polyurethane?
Absolutely. Without an adhesion primer, paint does not hold on polyurethane surfaces: it rolls off during application or peels after a few months. Primer is not an optional step; it is mandatory.
Can an old sideboard be restored with new glazing bead and polyurethane decor?
Not only can it — this is one of the most effective ways to update old furniture. New glazing bead, new handles, molding frames on blind facades, and a uniform paint in white or cream turn a Soviet hutch into a stylish piece with character.
STAVROS: a production that covers the entire task
The company STAVROS produces and supplies a full range of products needed for working with glass facades and furniture decor: wooden glazing bead and solid wood moldings, wooden cornices, Decorative Inserts, furniture handles, as well as a complete line moldings from polyurethane — moldings, cornices, overlays, decor for moldings, and wall decor.
STAVROS production is located in Saint Petersburg. Wooden products are made from solid beech and oak using precision milling equipment and manual finishing of each profile. Polyurethane products are manufactured by precision casting, preserving relief details. All of this is in one catalog, with the ability to assemble a complete set for a specific task.
STAVROS works with both retail customers and designers, workshops, and furniture manufacturers. For professional clients — special conditions, assistance in calculating lengths and selecting profiles. Contact us to confirm shipping to your destination. and the CIS. Showrooms in Moscow and Saint Petersburg — for those who want to choose the material in person, in their hands, with a precise understanding of the relief and quality.