Article Contents:
- First the handle, then the decor: the main principle of a finished facade
- R-058 is a wooden furniture rosette, not an electrical product
- Confirmed characteristics of R-058
- Starting table for fitting
- Knob handle
- Bracket handle
- Profile or long handle
- Two handles
- Socket above the handle
- Socket below the handle
- Two small R-058 on the sides
- Leave the center free, and place the decor in the frame
- Tall cabinet door
- Cabinet door
- Desk front
- Wide dresser door
- How to do a fitting
- Why you should try on adjacent sizes
- Why you can't glue the printout permanently
- Beech for opaque finish
- Oak with visible texture
- The choice cannot be reduced to the rule 'beech — enamel, oak — tinting'
- When basic preparation is sufficient
- When enhanced surface readiness is especially important
- What to check on painted MDF
- Step 1. Fix the facade axes
- Step 2. Mark the handle position and the hand's working area
- Step 3. Place template R-058
- Step 4. Compare adjacent dimensions
- Step 5. Check the facade in motion
- Step 6. Save the markup
- Cabinet with smooth doors
- Dresser with multiple drawers
- Nightstand with one door
- Desk
- Furniture panel or decorative insert
- Mistake 1. Choosing the size based on a photo
- Error 2. Measure only the free width
- Error 3. Forget about the thickness
- Error 4. Glue the decor flush to the handle
- Error 5. Consider the center a mandatory place
- Error 6. Use a large R-058 on a small cabinet
- Error 7. Place a small socket on a huge panel
- Error 8. Not check the opening of the adjacent door
- Error 9. Glue onto peeling paint
- Error 10. Choose glue only by the word "wood"
- Error 11. Not do a test
- Error 12. Mixing beech and oak in one pair
- Error 13. Not coordinating the sanding
- Error 14. Painting without a test swatch
- Error 15. Ordering a new handle without checking the holes
- Error 16. Using a socket as a repair patch
- Error 17. Not checking the side view
- Error 18. Gluing the first part without overall marking
- Error 19. Using aggressive preparation on veneer
- Error 20. Ordering a batch at different times
- Can R-058 be installed on a finished facade?
- Do I need to mill the door?
- Is R-058 an electrical socket?
- What sizes are available?
- What is the thickness of the 60 mm version?
- What is the thickness of R-058 100 mm?
- How much does R-058 150 mm protrude?
- What size should I choose for the cabinet?
- What should I try on the middle facade?
- Can I place an outlet directly behind the handle?
- Where should I place R-058 with a central handle?
- What should I do if the handle is on the side?
- Can I use two R-058s?
- Which is better under enamel: beech or oak?
- When to choose oak?
- What is the difference between "Standard" and "Prestige"?
- Can I glue it onto painted MDF?
- Will a veneered facade work?
- Is glue included with the R-058?
- Can I remove the outlet later?
- Do I need to order a spare?
- How to avoid mistakes with size?
- What to choose if square R-058 doesn't fit?
- Can R-058 be used on a wall panel?
- How to calculate the quantity for a dresser?
- Do I need to replace an already installed handle?
- Where can I see the current price?
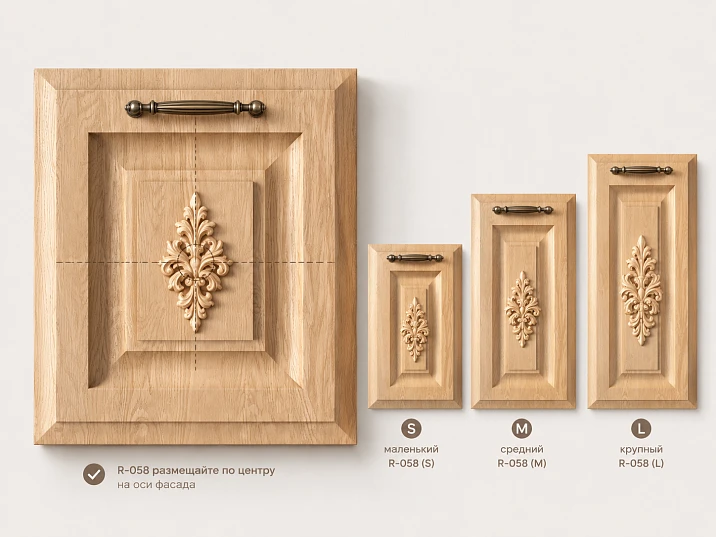
The cabinet is already assembled, the handle is installed, the holes are drilled, but the smooth door still looks unfinished. Changing the facade is late and expensive. Moving the handle is undesirable: old holes will have to be covered, marking will have to be done anew, and the result is still unknown. In this situation, what helps is not new milling, but an overlay wooden decor — the R-058 rosette, which can be fitted into the free field of the finished facade.
The main difficulty here is not choosing a beautiful part. R-058 has seven sizes — from 60 × 60 to 150 × 150 mm, and along with the width, the thickness increases: from 12 to 30 mm. This means a larger model not only takes up more space on the plane. It protrudes more above the door, comes closer to the hand, can conflict with the handle, touch the adjacent facade, or visually weigh down a small drawer.
The short answer is this: first, mark not the center of the facade, but the working area of the already installed handle. Then measure the remaining free field and apply paper templates of all suitable sizes. For a compact door, they usually start with R-058 60, 70, or 80 mm; for a medium facade — with 90, 100, or 120 mm; for a large panel — with 120 and 150 mm. This is not a strict standard, but a reasonable fitting sequence that allows you to see the proportions before purchase.
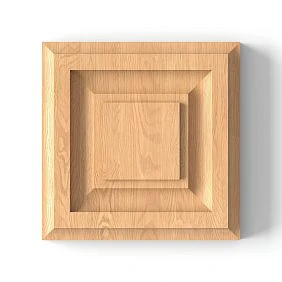
R-058 is not an electrical outlet or a switch frame. It is a decorative rosette made of solid wood, intended for furniture and interior compositions. It is installed using an overlay method, so the pattern does not need to be selected with a cutter inside an already finished door. However, overlay installation does not mean that the part can be glued to any free point. You need to check the position of the handle, the hand trajectory, the coating material, the protrusion of the rosette, and the possibility of reliable gluing.
After taking measurements, you can buy wooden rosette R-058 in a suitable size, made of beech or oak, with the selected sanding quality. But first, let's figure out where exactly it will work on the facade, and where it will become an obstacle.
First the handle, then the decor: the main principle of a finished facade
On a new furniture project, the handle, moldings, and central ornament can be laid out simultaneously. On finished furniture, the initial conditions are already set. The holes determine the position of the handle, the handle determines the movement of the palm, and the movement of the palm limits the space for applied decor.
Therefore, the center of the facade is not always the best place for R-058. It may be occupied by the handle base, screws, bracket, or grip zone. Even if a few millimeters remain between the handle and the rosette, using the door may be inconvenient: fingers will catch on the relief, and the protruding wooden part will be perceived not as decoration, but as an obstacle.
Before choosing the size, answer four questions:
-
Where is the handle itself located — in the center, at the edge, in the upper part, on the side, or between two symmetrical grip points?
-
How does the hand move when opening — pulls toward itself, goes upward, slides along the facade, or rotates the wrist?
-
What field remains free after accounting for the handle base and finger movement?
-
How far will the future R-058 protrude above the plane?
The last question is often forgotten. The buyer cuts out a paper square of 150 × 150 mm, applies it to the door, and sees a beautiful proportion. But a flat sheet does not show the 30 mm thickness. On real furniture, such a relief can approach the hand by almost three centimeters. Therefore, the template should have not only a contour, but also a conditional side offset — at least a strip of cardboard of the required width.




R-058 — wooden furniture rosette, not an electrical product
The search phrase "surface-mounted rosette in wood style" is ambiguous. Some people are looking for electrical fittings with a wood imitation. R-058 belongs to a completely different group. It is a geometric wooden overlay that decorates a furniture facade, door, panel, or frame composition.
Its purpose is to add relief to a flat surface without routing a complex pattern into the facade itself. The decoration is applied on top and then secured using a method suitable for the specific base and chosen mounting compound.
The practical benefit of the overlay solution is especially noticeable after furniture has been manufactured. Routing cannot be added without disassembly, a machine, and refinishing the entire surface. R-058 allows for local work: select the size, check the composition, prepare the area, and install a separate piece.
However, the rosette does not automatically hide any defects. It can cover a small, calm area of the facade, but should not be used as a random patch over peeling coating, deep chips, or an unstable base. If the surface is damaged, first assess the repair, then the decorative finishing.
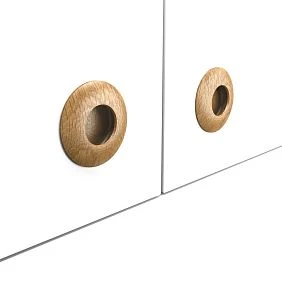
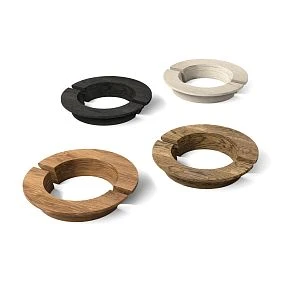
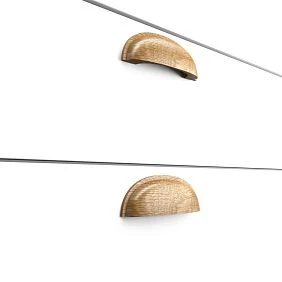
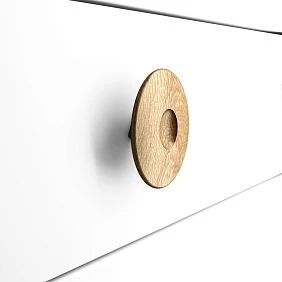
Our factory also produces:
Confirmed characteristics of R-058
| Parameter | Confirmed data | What this means for the buyer |
|---|---|---|
| Article number | R-058 | The full article number and size must be specified in the order |
| Type | Surface-mounted wooden rosette | No routing of a pattern inside the facade is required for installation |
| Shape | Geometric, square in dimensions | Convenient to align vertically and horizontally on the facade |
| Material | Beech or oak | You can choose a scenario for opaque or transparent finishing |
| Dimensions | 60, 70, 80, 90, 100, 120, and 150 mm | There are seven options for facades of different scales |
| Thickness | From 12 to 30 mm | The larger the rosette, the more it protrudes above the surface |
| Sanding | "Standard" or "Prestige" | The quality of preparation needs to be coordinated with the future finishing |
| Place of application | Furniture and interior surfaces | Before ordering, check the base and the free field |
| Installation | Surface-mounted | Adhesive and base preparation are calculated separately |
| Completeness | One selected socket | Molding, handle, glue, and paint are not considered automatically included |
Product card — the point of choosing a specific configuration. The article helps to do what the card itself does not solve: compare seven sizes with a real door, already drilled with a handle, and the way of using the furniture.
Get Consultation
Seven sizes of R-058: width grows along with thickness
The size range is arranged sequentially. Each increase in side is accompanied by an increase in the protrusion above the facade.
| Size R-058 | Thickness | Difference in side relative to 60 mm | How it is perceived on the facade |
|---|---|---|---|
| 60 × 60 mm | 12 мм | 0 мм | Small point accent |
| 70 × 70 mm | 14 мм | +10 mm | Compact but noticeable detail |
| 80 × 80 mm | 16 мм | +20 mm | Confident accent for a small or medium facade |
| 90 × 90 mm | 18 мм | +30 mm | Transition to an expressive central composition |
| 100 × 100 mm | 20 мм | +40 mm | Clear square relief, noticeable from a distance |
| 120 × 120 mm | 24 мм | +60 mm | Large decor for a wide door or panel |
| 150 × 150 mm | 30 мм | +90 mm | Independent dominant element |
The increase seems uniform, but the visual effect grows faster. The area of a 150 × 150 mm square is 6.25 times larger than the area of a 60 × 60 mm square. Therefore, the large R-058 cannot be perceived as "the same socket, just slightly bigger." This is already a different scale of composition.
Thickness also changes the character. The 60 mm version protrudes by 12 mm and is usually perceived as a neat overlay. The 150 mm version has a thickness of 30 mm and reads almost as an independent volumetric block. In side light, it will cast a deep shadow and attract more attention.
After comparing seven options, you can order R-058 in the desired size, but it is better to make the choice not based on a table or product photo, but using full-size templates on your own furniture.
Why a universal percentage of the facade width does not work
Sometimes it is advised to choose a socket as a certain percentage of the door width: for example, 20, 25, or 30%. This rule seems convenient, but it does not take into account the handle, panel, molding, facade height, and decor protrusion.
Two doors 400 mm wide may require different solutions. On the first, there is a small knob handle near the edge — the center is almost free, and R-058 100 or 120 mm can be considered. On the second, a long pull handle is installed in the center — the same socket will conflict with the grip, although the percentage of the width remains the same.
Height is no less important. A 100 × 100 mm square on a low drawer 180 mm high looks large. On a tall cabinet door of 700–800 mm, it can be perceived calmly. This means that width alone is not enough.
A reliable method consists of three steps:
-
measure the free field not occupied by the handle and hand movement;
-
make templates of several adjacent sizes;
-
compare them on the facade from a normal viewing distance.
Starting table for fitting
| Free facade field | What sizes to start with | What else to check |
|---|---|---|
| Up to 250 mm | 60 or 70 mm | Will the relief come close to the hand and edges |
| 250–350 mm | 70, 80, or 90 mm | Ratio with the handle and drawer height |
| 350–500 mm | 90, 100, or 120 mm | Will a small size get lost and will a large one overload |
| More than 500 mm | 120 or 150 mm | Is one large rosette needed or a composition of several elements |
This table is not a manufacturer's technical standard. It only reduces the number of initial attempts. On a specific facade, the result may differ.
Hand map: how to mark the zone where decor cannot be placed
The handle occupies not only the area of its base. Around it there is a working zone — the space through which fingers and hand pass with each opening.
To see this zone, stick a sheet of thin paper or masking tape on the facade around the handle. Open the door several times with a normal motion. Mark the extreme positions of the fingers. The result will not be a perfect circle, but an elongated area, the shape of which depends on the type of handle.
For a button, the palm often approaches from the side or below. For a bracket, fingers go behind the crossbar. For a long vertical handle, the hand can move along the entire height. If the future R-058 crosses this area, the size or position must be changed.
Knob handle
A compact button leaves more free space, but finger movement occurs close to the facade. An overlay 24–30 mm thick next to the button can interfere more than a thin molding.
Pull handle
The bracket occupies a large area, but the hand is often far from the plane. Here you need to compare the handle's protrusion and the rosette's thickness. If the bracket protrudes noticeably further than R-058, the conflict may be less, but this is only verified on real furniture.
Profile or long handle
Such an element sets a strong horizontal or vertical line. A square socket should either support this geometry or be in a separate zone. Random proximity looks cramped.
Two handles
On a wide drawer, two handles create symmetry. The central R-058 can tie them into a composition, but it also reduces space for two hands. Before ordering, you need to open the drawer with both hands and make sure your fingers do not touch the intended relief.
Handle in the center: four layouts that do not require moving holes
The central handle seems to be the main obstacle for decor, but it does not exclude R-058. You need to stop perceiving the center as the only possible place for the socket.
Socket above the handle
On a tall cabinet or dresser door, a calm field often remains above the handle. R-058 can be placed along the vertical axis of the facade, keeping the handle below. This layout works if there is a noticeable gap between the elements and the hand does not rise to the socket when opening.
The size depends on the height of the upper field. For a compact door, start with 60–80 mm. On a tall panel, you can compare 90, 100, and 120 mm. The 150 mm version is only appropriate with a sufficiently large free area: it should not look pressed against the top edge.
Socket below the handle
This option suits upper doors where the handle is located closer to the bottom edge, and the main area remains above. On lower drawers, a socket under the handle may fall into the knee zone or constant contact with clothing, so the placement is checked in real use.
Two small R-058 on the sides
If the central handle occupies the axis, two compact rosettes of 60 or 70 mm can be spaced symmetrically. The result is not one large center, but a rhythm of three elements: rosette — handle — rosette.
This technique requires precise marking. The distances on the left and right must match, and the height of the rosettes must correspond to the handle axis or be deliberately offset. Before ordering two parts, make sure the composition does not become too dense.
Leave the center free and move the decor into a frame
Sometimes the right answer is not to glue R-058 next to the handle. The central zone may already be filled with hardware, and expressiveness is better created with a molding or corner overlays. In the catalog you can buy a wooden molding for the facade frame and build relief around the free field without interfering with the grip.
Handle at the edge: the free center becomes the main advantage
When the handle is located on the side, in the upper corner, or closer to one edge, the central part of the facade remains open. This is the most convenient scenario for a single R-058.
On a tall cabinet door, the rosette can be placed along the vertical axis. On a wide drawer, in the center between the side boundaries. On a cabinet with a handle at the top edge, below the hardware, leaving a gap for the hand.
But even a free center needs to be checked. A handle at the edge is often used with a sweeping motion: the palm may pass diagonally through the middle of the door. This is especially noticeable on a heavy leaf. Therefore, the paper template is left in place for several days and the furniture is used as usual. If the hand never touches it, the scheme is viable.
Tall cabinet door
On a vertical facade, a small rosette of 60 mm can get lost. You can start with 90 or 100 mm, then compare 120 mm. A size of 150 mm is only suitable when the free field is truly large and the composition does not conflict with the panel or molding.
Cabinet door
The cabinet facade is usually smaller, and the distance to the floor is shorter. Here, 60–90 mm is more appropriate. A large R-058 can visually lower the center of gravity and make small furniture look bulky.
Desk facade
On desk drawers, the hand moves frequently. The socket should be positioned so that it does not touch the edge of the tabletop, knees, or fingers. For narrow drawers, small sizes are suitable; for the central panel, 90–100 mm can be considered.
Wide dresser door
The dresser allows for one large R-058 or two small ones. The choice depends on the number of handles, the width of the drawer, and the overall rhythm of the cabinet body.
Two handles on one facade: the central decor should leave room for both hands
On a wide drawer or door, there can be two handles. Between them, a decorative rosette naturally fits, and R-058 can indeed fill the empty center. But this scheme cannot be evaluated only from the front.
Ask a person to open the furniture with both hands. Note the position of the wrists and elbows. If the hands converge toward the center, the large rosette will be in the working area. If the handles are far apart and the movement is strictly toward oneself, the central decor will not interfere.
Compare three options:
-
one R-058 90–120 mm between handles;
-
one small R-058 60–80 mm, leaving more air;
-
absence of a central rosette and framing along the perimeter.
Size 150 mm requires a particularly wide middle zone. Thickness 30 mm enhances the relief, so even with sufficient width, the side view needs to be checked.
One large or two small R-058
The same free field can be styled differently. One large rosette creates a central point. Two small ones create rhythm and symmetry.
| Solution | Visual effect | Practical advantage | Possible risk |
|---|---|---|---|
| One R-058 100–150 mm | Strong central accent | Easier to mark and install | May overload a small facade |
| Two R-058 60–80 mm | Paired composition | Can go around the central handle | Requires precise symmetry |
| One R-058 60–90 mm | Calm detail | Smaller protrusion and contact area | May get lost on a large panel |
| Socket + molding | Architectural frame | Ties the entire facade together | Need to count additional elements |
Two small details are not equal to one large one in area and perception. For example, two sockets 70 × 70 mm give a total area of 9800 mm², and one 100 × 100 mm — 10,000 mm². The areas are close, but the composition is completely different: paired elements emphasize the axis, while a central square gathers attention at one point.
Thickness also differs. Two R-058 70 mm protrude by 14 mm, one 100 mm by 20 mm. If the furniture stands in a narrow passage, a smaller protrusion may be more practical.
Paper templates: seven minutes of work instead of an error in the order
You cannot choose R-058 from a photo. On the product card, the item is shown large, without the scale of specific furniture. Make seven squares from paper or thin cardboard:
-
60 × 60 mm;
-
70 × 70 mm;
-
80 × 80 mm;
-
90 × 90 mm;
-
100 × 100 mm;
-
120 × 120 mm;
-
150 × 150 mm.
Mark the thickness on each template. For a more accurate check, glue a strip of cardboard of the corresponding width to the edge: 12, 14, 16, 18, 20, 24, or 30 mm. This will create a conditional 3D model.
How to do a fitting
Secure the template with painter's tape that won't damage the surface. First, evaluate the front strictly from the front. Then step back to the distance from which the furniture is visible in the room. After that, look from the side and open the door several times.
Take photos of each option from the same point. Comparing photos is more useful than memory: the eye quickly gets used to the current size and starts to consider it normal.
Why you need to try adjacent sizes
If you like the R-058 100 mm, be sure to compare it with 90 and 120 mm. A difference of ten or twenty millimeters on the table seems small, but on the front it changes the amount of free space and the attitude to the handle.
Why you can't glue the printout permanently
The template only checks the composition. It does not confirm adhesion, relief accuracy, wood shade, or actual thickness. After choosing the size, you need to go to the card and verify the specific configuration.
Size 60 × 60 × 12 mm: a small accent for a tight space
R-058 60 mm fits where large decor inevitably approaches the handle or edge. It is the most compact version in the line and at the same time the thinnest — 12 mm.
It is worth trying it on:
-
a narrow drawer;
-
a small cabinet;
-
a door with a central handle;
-
a paired composition on the sides of the hardware;
-
a facade that already has a molding frame;
-
several identical drawers when a repeating rhythm is needed.
Small size does not mean inconspicuousness. On a smooth painted facade, a 60 mm square creates a clear shadow and reads as an intentional detail. But on a wide door without other elements, it may look like a random dot.
Size 70 × 70 × 14 mm: a soft transition from a dot to independent decor
The 70 mm version remains compact but takes up 36% more area than the 60-millimeter one. The thickness increases to 14 mm.
It is convenient to compare it with 60 and 80 mm on small facades. If 60 mm seems too timid, and 80 mm already approaches a handle, 70 mm often provides the right balance.
A paired scheme of two R-058 70 mm works well on the sides of a central button or on two identical doors.
Size 80 × 80 × 16 mm: noticeable decor without a large protrusion
R-058 80 mm — an intermediate option for small and medium surfaces. A thickness of 16 mm creates a pronounced but not yet heavy relief.
This size is worth testing on a cabinet door, a dresser front, the top drawer of a desk, and a narrow wardrobe door. It is large enough not to get lost, but leaves more breathing room than 90–100 mm.
Size 90 × 90 × 18 mm: the beginning of a central composition
With a side of 90 mm, the rosette begins to be perceived as an independent center. The 18 mm thickness is already noticeable from the side.
The size suits a medium facade, especially if the handle is shifted toward the edge. On a low drawer it may be large, while on a tall door it may be moderate. Therefore, the surface height matters more than a universal percentage.
Size 100 × 100 × 20 mm: a clear square for a medium facade
One hundred millimeters is easy to measure and visualize, so R-058 100 mm often becomes a starting point. But a convenient number should not replace fitting.
A thickness of 20 mm means the part protrudes by two centimeters. Next to a flat button, this can be noticeable. Next to a deep bracket, it is less critical. On a painted facade, a 100 mm square forms a clear geometric accent.
Size 120 × 120 × 24 mm: for a wide door and noticeable relief
R-058 120 mm suits large facades, wall panels, and doors with a large free center. A thickness of 24 mm creates a deep shadow.
On furniture with two handles, the size can be considered between them, but only after checking the movement of both hands. On a single handle near the edge, a 120 mm rosette can become the main element of the central field.
Size 150 × 150 × 30 mm: a decorative center that cannot be chosen randomly
The largest R-058 covers an area of 22,500 mm² and protrudes by 30 mm. This is not a neutral overlay, but a dominant volume.
It suits a wide furniture panel, a large cabinet door, a wall composition, or a massive dresser. On a small nightstand, the size will almost certainly be excessive.
Before purchasing, check:
-
front view;
-
side protrusion;
-
distance to the handle;
-
opening of adjacent facades;
-
passage next to furniture;
-
matching the scale of the entire room;
-
need for a molding frame.
Not just width: how thickness changes comfort and appearance
A flat facade reflects light evenly. The R-058 relief creates its own shadow. The thicker the part, the stronger the contrast between the lit and shaded sides.
On light enamel, the shadow emphasizes the geometry. On dark oak, the relief may appear deeper. With side lighting, the 30-millimeter version will become very noticeable.
Practically, thickness affects four zones:
-
Grip. Fingers may touch the protrusion.
-
Opening. An adjacent door or drawer may pass close by.
-
Passage. On furniture in a hallway, protruding decor is easier to bump into.
-
Maintenance. Deep relief collects more dust in shadowed areas and requires careful cleaning.
Therefore, choosing a size is always also choosing thickness. You cannot take a table by width alone and forget the third coordinate.
Beech or oak: the material is chosen together with the finish, not separately from it
R-058 is available in beech and oak. Both species are suitable for wooden decor, but they give a different visual impression after finishing.
Beech has a calmer and more uniform structure. It is convenient to consider it for opaque painting, when the main role is played by the shape of the rosette, not the wood grain. Light, dark, or colored enamel unites R-058 with the facade, handle, and moldings into one composition.
Oak has a more expressive texture. If the project involves staining, oil, varnish, or another finish that preserves the grain, an oak R-058 can become a standalone material accent. But matching the wood species does not guarantee a full match of shade: an oak facade and an oak rosette may have different grain, so a test sample is needed.
Beech for opaque finish
This scenario is suitable if:
-
the facade is already painted with enamel;
-
the socket is planned to be made in the color of the furniture;
-
need to hide differences in the natural pattern;
-
unpainted handles and moldings are installed together with R-058;
-
the composition should be perceived as a single relief.
Before ordering, one cannot assume that the selected color is already applied. The card shows the material and the quality of sanding; the final painting must be calculated and agreed upon separately. When a uniform opaque finish of the entire group of parts is required, it is possible buy R-058 from beech under enamel and check the available preparation in the selected configuration.
Oak with visible texture
Oak should be considered if:
-
the facade is veneered or made of solid wood;
-
the wood grain should remain visible;
-
the rosette should match oak handles, legs, or moldings;
-
natural variation in fibers is allowed;
-
the finish is selected based on a test sample.
Large R-058 120 and 150 mm show more wood grain than compact versions. Therefore, it is especially useful to see the actual material or a finish sample for them.
The choice should not be reduced to the rule "beech — enamel, oak — tinting"
These are two clear scenarios, not a prohibition on other options. The final decision depends on the product card, the finishing system, and the project. Beech can be used with a transparent finish, and oak — under an opaque paint, if this is agreed upon technologically and visually.
"Standard" or "Prestige": the quality of sanding must match the future finish
The R-058 card presents sanding quality options "Standard" and "Prestige". They cannot be chosen only by name or considered that any preparation is equally suitable for any finish.
If the socket is to be painted with dense enamel, the surface must be prepared so that unwanted irregularities do not appear after primer. If transparent tinting is planned, the quality of processing is especially noticeable: stain and oil emphasize not only the wood grain but also traces of insufficient sanding.
When choosing, it is useful to check the sanding quality of the wooden decor and inform the finisher in advance what result is required.
When basic preparation is sufficient
The option is chosen based on the actual technology. If the craftsman still performs the full cycle of priming, intermediate processing, and painting, part of the preparation may be included in their work. But this is decided after inspecting the item, not by assumption.
When increased surface readiness is especially important
-
with transparent tinting;
-
with a thin matte coating;
-
on a large R-058 120 or 150 mm;
-
with side lighting;
-
when installed on furniture that is viewed from a close distance;
-
when the entire batch must look the same.
The quality of sanding does not eliminate inspection before installation. After transportation, the wooden part is examined, dust is removed, and if necessary, local finishing is performed.
R-058 and an already painted facade: can it be glued to MDF
Surface mounting allows finishing a ready-made door, but the strength of the connection depends not only on the glue. The glue adheres to the top layer of the surface. If this layer is weak, the rosette will come off along with the paint, varnish, or film.
Painted MDF can be a suitable base if the coating is firmly bonded to the board, does not peel off, and is compatible with the chosen adhesive. Before work, you should test an inconspicuous area or make a trial on a sample with the same coating.
What to check on painted MDF
-
Are there any bubbles or cracks;
-
Does the surface chalk;
-
Does paint remain on painter's tape;
-
Is there any wax, polish, or grease;
-
Does the finish allow local degreasing;
-
Will preparation damage the gloss around the installation area;
-
Is the adhesive compatible with the coating and wood.
On a glossy surface, an error is especially visible. Excess adhesive can leave a mark that is difficult to remove without damaging the shine. Therefore, a dry layout is done first, and only then is the compound applied.
Veneer: a beautiful base requires careful inspection
A veneered facade visually pairs well with oak or beech R-058, but the thin decorative layer cannot be aggressively sanded without understanding its thickness.
Check the condition of the varnish or oil. If the veneer is covered with a durable factory coating, installation depends on adhesion to that coating. If the surface is untreated, you need to account for absorbency and possible color changes around the adhesive joint.
For veneer, a test on a separate sample is especially useful. It cannot be claimed that the same adhesive works equally well on lacquered oak veneer, painted MDF, and untreated solid wood.
Solid wood: the species matched, but the surface still needs preparation
On a solid wood facade, R-058 is perceived naturally, especially when the species and finish are coordinated. But natural wood may be coated with oil, wax, varnish, or polish. These compounds change adhesion.
If the surface is oily or waxy, ordinary gluing without testing is risky. The craftsman must assess whether the area can be locally prepared and how this will affect the appearance.
Also consider seasonal changes in the wood. The rosette and facade should be prepared for use in the same room, and installation should be performed using technology suitable for the specific materials.
Film, laminate, and unknown coatings: don't guess, check
Finished furniture often has a film facade. Externally, it may look like painted MDF, but it behaves differently. If the type of coating is unknown, you should not start installation with a large R-058 150 mm.
Procedure:
-
determine the facade material from documentation or from the manufacturer;
-
check the condition of the surface;
-
study the requirements of the selected adhesive;
-
make a test on an inconspicuous area or a similar sample;
-
evaluate the result after the full curing time;
-
only then install the decorative part.
If the reliability of the joint is not confirmed, it is better to change the finishing method or consult a specialist.
Adhesion test: a small test before installing large decor
The test should simulate real installation, not just a drop of adhesive that is immediately wiped off.
Apply a small piece of material or a wooden strip prepared in the same way as R-058 to the substrate sample. Allow the time specified for the selected composition. After that, check not only the peel force but also the condition of the coating.
If the adhesive holds but the paint comes off with it, the problem is in the substrate. If the joint separates cleanly and easily, the composition or preparation is unsuitable. If the surface around the test is damaged, the technique needs to be reconsidered.
Do not perform destructive testing on the visible part of the facade. For expensive furniture, it is better to use a separate coating sample.
Assembly adhesive: choose based on the substrate, not just the word "wood"
In the accompanying order, you can buy TYTAN assembly adhesive for wooden decor. However, the presence of the product in the materials section does not make it a universal solution for any door.
Before use, check:
-
material R-058;
-
facade material;
-
coating type;
-
contact area;
-
part position;
-
preparation requirements;
-
working hours;
-
fixation time;
-
possibility of removing excess;
-
compatibility with future paint.
The transparency of the glue does not negate the need for care. Excess compound may leave a glossy mark, alter wood absorption, or interfere with painting.
Other compounds and tools can be selected in the section where it is suggested to buy materials for furniture installation and finishing. There is no need to buy everything at once: first, a technological sequence is compiled, then specific items are added.
Dry layout: precise order before the first touch of glue
R-058 has a square footprint, so even a slight misalignment is noticeable. Marking cannot be done "by eye" along the edges of the pattern, especially if the relief inside the square is visually asymmetrical.
Step 1. Fix the axes of the facade
Measure the width and height of the door. Mark the vertical and horizontal axes with painter's tape or a removable pencil suitable for the coating.
Step 2. Mark the position of the handle and the working area for the hand
Trace the outline of the handle including its bases. Add the area for finger movement. This zone remains free.
Step 3. Place template R-058
Attach the selected size. Check distances to edges, handles, panels, and moldings.
Step 4. Compare adjacent sizes
Do not approve the first option you like. Take photos of 90, 100, and 120 mm or another suitable trio.
Step 5. Check the facade in motion
Open the door, pull out the drawer, look from the side. Make sure the decor does not touch the body or adjacent parts.
Step 6. Save the layout
Before removing the template, mark reference points. For a square rosette, it is convenient to fix two mutually perpendicular lines and the corners of the overall dimensions.
Installation of R-058: sequence without unnecessary risk
The exact technology depends on the base and adhesive, but the general order helps avoid typical mistakes.
-
Inspect the facade and R-058.
-
Confirm the size and position.
-
Check the wood shade and orientation.
-
Prepare the base in a way acceptable for the coating.
-
Remove dust and dirt.
-
Perform a compatibility test if it has not been done.
-
Apply the mounting compound according to the instructions.
-
Install the socket along the control lines.
-
Secure it for the required time without
Socket and handle in one color: how to assemble a cohesive composition
The handle is already installed, but it can be left as a standalone contrast or included in the overall finish.
If the furniture is being repainted, it is convenient to choose handles without coating under the enamel and coordinate them with R-058. But in the current situation, the holes are already drilled, so the new handle must fit the mounting. You cannot replace the hardware just for color without checking the mounting dimensions.
When the existing handle remains, R-058 can:
- repeat its material;
- match the color of the facade;
- become a contrasting wooden accent;
- connect with the molding;
- repeat the shape of the square button;
- balance a long bracket.
To compare other models, you can buy wooden furniture handles, but first measure the old holes and make sure replacement is really needed.
General rules of how how to combine furniture handles and surface-mounted decor, help assemble the entire facade into a unified system. In the article about R-058, the main focus remains different: where to place a specific square rosette when the handle position can no longer be changed.
Where R-058 works best: five real scenarios
Cabinet with smooth doors
On a tall door, R-058 helps break up a large empty surface. If the handle is near the edge, place the rosette along the central axis. If the handle is centered, raise or lower the decor, keeping the hand working area.
For one door, one rosette is usually enough. For paired doors, you need to decide whether each is decorated separately or both are perceived as a single composition. On two identical facades, the dimensions, material, and quality of sanding must match.
Chest of drawers with multiple drawers
Here, rhythm comes into play. The same R-058 on each drawer can tie the entire cabinet together, but the size does not have to be large. Often, 60–80 mm works better, especially if there are many drawers.
If the top drawer is lower than the others, the same rosette may look cramped. In that case, use decor only on large facades or choose one central composition on the doors.
Cabinet with one door
A small cabinet is easy to overload. Start with 60, 70, or 80 mm. Check the 100 mm size only on a wide open field. Thickness is especially important if the nightstand is near a bed or in a narrow passage.
Desk
On table facades, the decor is close to hands and knees. A large rosette on the bottom drawer can interfere. A compact R-058 is better suited if it does not cross the palm's movement.
Furniture panel or decorative insert
If the surface does not open and has no handle, there are fewer restrictions. Here you can use 120 or 150 mm, combine the rosette with moldings, and create more complex geometry.
Rosette, overlay, or molding: what to choose for an empty facade
R-058 is not suitable for every surface. Sometimes another type of decor solves the task more precisely.
Task What to choose Why Need a central square accent R-058 Seven sizes and clear geometry Need to design a tall narrow door Elongated overlay Better supports the vertical A frame is required around the free field Wooden molding Creates a contour without a large center Need to close the panel corners Corner overlays Work around the perimeter Need a complex carved composition Set of overlays Allows you to assemble an ornament The handle occupies the entire center Molding or corner decor Does not interfere with the grip If the square geometry of R-058 is not suitable, you can buy decorative overlays for furniture and choose an elongated, asymmetrical, or paired shape. For a wider selection, it is useful to buy carved wooden decor and compare rosettes, overlays, moldings, and other elements.
General material on how to choose a wooden furniture rosette, helps to compare different shapes. R-058 is chosen when a geometric square accent with a clear size range is needed.
What to put in the cart together with R-058
Position What it is for When to add What to check R-058 of the selected size Main overlay decor Always Size, thickness, beech or oak, sanding Second R-058 For a paired composition If symmetry is provided Identical configuration TYTAN Prof. Classic Fix Possible mounting composition After checking the base Compatibility and instructions Primer and paint Opaque finish When painting under enamel Unified material system Stain, oil, or varnish Preservation of texture For a transparent finish Test swatch Wooden handle Replacement or unified finish Only if holes match Mounting size Unpainted handle Paint with the facade On full renovation Compatibility with existing drilling Wooden molding Frame around the socket If a contour is needed Profile and footage Paper templates Scale check Before ordering Seven sizes and thickness Layout service Complex series of facades With multiple elements Exact furniture dimensions Delivery Order fulfillment When purchasing remotely Quantity, packaging, and address After selecting the kit, you can once again check the current price of R-058 and verify the cost of a specific size, material, and sanding quality. Prices for different configurations may vary, so you cannot calculate an order based on a single random line.
Mistakes that turn a beautiful socket into an inconvenient obstacle
Mistake 1. Choosing the size based on a photo
There is no scale of a specific door on the screen.
Fix: make the template 1:1.
Error 2. Measure only the free width
The height of the facade and the position of the handle remain unnoticed.
Fix: evaluate the entire field as a whole.
Error 3. Forget about the thickness
R-058 150 mm protrudes by 30 mm.
Fix: make a volumetric cardboard mock-up.
Error 4. Glue the decor close to the handle
Fingers constantly touch the relief.
Fix: mark the working area of the hand.
Error 5. Considering the center a mandatory place
The center is already occupied by hardware.
Fix: consider a position above, below, or to the sides.
Mistake 6: Use a large R-058 on a small cabinet.
The facade looks heavy.
Fix: start with 60–80 mm.
Mistake 7: Place a small socket on a huge panel.
The decor gets lost.
Fix: compare 120 and 150 mm or add a frame.
Mistake 8. Not checking the opening of the adjacent door
The relief touches the facade.
Fix: test the furniture with a template.
Mistake 9. Gluing onto peeling paint
The socket comes off along with the coating.
Fix: repair the base.
Mistake 10. Choose glue only by the word "wood"
The facade can be lacquered, film-coated, or painted.
Fix: check both surfaces.
Mistake 11. Not doing a test
Incompatibility is detected on the finished door.
Fix: test a sample.
Mistake 12. Mixing beech and oak in one pair
After transparent finishing, the difference becomes noticeable.
Fix: order paired parts of the same configuration.
Error 13. Not agreeing on sanding
The finish emphasizes the difference in preparation.
Fix: choose one option for the entire series.
Error 14. Painting without a test patch
The shade does not match the facade.
Fix: check the color on the same material.
Mistake 15. Order a new handle without checking the holes
Hardware does not fit into the pre-drilled hole.
Fix: measure the fit before purchasing.
Error 16. Using a socket as a repair patch
Fragile damage remains under the decor.
Fix: first restore the base.
Error 17. Not checking the side view
The front composition is good, but from the side the relief seems excessive.
Fix: evaluate the furniture from different angles.
Error 18. Gluing the first piece without overall marking
Paired sockets end up at different heights.
Fix: mark both positions simultaneously.
Error 19. Using aggressive preparation on veneer
The thin layer gets damaged.
Fix: coordinate the technology with the master.
Error 20. Order a batch at different times
The size matches, but the finish may differ.
Fix: count all facades at once.
Who R-058 suits, and who should choose a different solution
R-058 is suitable if:
- the facade is smooth and durable;
- the handle is already installed, but there is free space left;
- a square geometric accent is needed;
- one of the seven sizes fits the trial;
- thickness does not interfere with the use of the furniture;
- the base allows for reliable installation;
- beech or oak was chosen;
- the finish is agreed upon;
- decor is needed without milling the facade.
It is better to choose another option if:
- the work area of the hand occupies the entire free field;
- The facade is too small even for 60 mm;
- A relief of 12 mm already interferes with opening;
- The coating is peeling;
- An elongated composition is needed;
- It is required to hide a serious defect in the base;
- The furniture is located in a place of constant impacts;
- A compatibility test cannot be performed;
- The square shape conflicts with the paneling.
Purchase order at STAVROS
- Take a photo of the facade strictly from the front.
- Measure the width, height, and position of the handle.
- Mark the movement of the hand.
- Make templates of adjacent sizes.
- Choose beech or oak.
- Determine the future finish.
- Agree on "Standard" or "Prestige".
- Check the base and glue.
- Calculate the quantity for all facades.
- Add accompanying materials.
- For complex compositions order a layout design for furniture decor.
- Before payment, check delivery terms for wooden decor.
Thus, the order turns from a random purchase of a beautiful detail into a precise specification.
Series of facades: how not to get seven different rosettes on one dresser
When R-058 is installed not on one door but on several drawers or facades, the task changes. You need to control not only the size of one detail but also the repeatability of the entire composition. One rosette may be installed slightly higher, another slightly lower; on a separate drawer the difference is almost unnoticeable, but in a row it turns into a broken line.
Start with one control facade. On it, approve the size of R-058, position relative to the handle, distances to edges, material, sanding quality, and finish. After that, make a simple template-jig: a sheet of cardboard the size of the facade with marked axes, handle position, and rosette boundaries. Transfer one template to all identical parts.
To order a batch, create a specification:
Facade group R-058 size Quantity Material Sanding Position Upper drawers 60 or 70 mm after fitting By number of drawers Beech/oak One option By common axis Main drawers 80–100 mm after fitting By number of facades Same species Same sanding By template Doors 90–120 mm after fitting By number of doors Same species Same sanding Relative to the handle It is not necessary to use one size on all cabinet elements. Low upper drawers can get compact handles, and tall doors can get larger ones. But the difference should be part of a system: for example, 70 mm on the top row and 100 mm on the lower fronts. A random set of 70, 80, 90, and 100 mm looks like a configuration error.
The finish of the batch is also coordinated at the same time. For opaque enamel, the color code and gloss level are fixed. For tinting, a physical sample is kept. Natural wood will not be absolutely identical in grain, but a single species and one finish cycle keep the parts within a common color range.
If part of the handles are ordered later, keep the configuration card, finish sample, and exact layout. Then the reorder will rely not on memory and photos, but on specific parameters.
Final facade check before payment
Before moving R-058 from the wish list to the cart, do a quick check. It takes less time than removing an unsuitable overlay.
- The handle opens with a familiar motion, fingers do not touch the template.
- Size checked from the front and side.
- The thickness of the selected version is taken into account.
- Adjacent facades open freely.
- The edges of the rosette do not extend onto the panel, holes, or damaged coating.
- The wood species is coordinated with the finish.
- Standard or Prestige is chosen consistently for the entire batch.
- Adhesive checked against the base material.
- The quantity corresponds to the number of facades and the paired scheme.
- Only truly necessary materials have been added to the order.
After this check, the size ceases to be an abstract number. It becomes a confirmed part of specific furniture.
Frequently asked questions about the wooden rosette R-058
Can R-058 be installed on a finished facade?
Yes, it is an overlay decor. But the surface must be durable, and the position must be verified relative to the handle.
Is it necessary to mill the door?
For overlay installation, the pattern is not routed. Base preparation is still required.
Is R-058 an electrical outlet?
No. It is a decorative wooden rosette for furniture and interiors.
What sizes are available?
60, 70, 80, 90, 100, 120, and 150 mm.
What is the thickness of the 60 mm version?
12 mm.
What is the thickness of R-058 100 mm?
20 mm.
How much does the R-058 150 mm protrude?
At 30 mm.
What size should I choose for the cabinet?
Start with templates of 60, 70, and 80 mm. The result depends on the free space and the handle.
What should I try on the middle facade?
90, 100, and 120 mm.
Can I place an outlet directly behind the handle?
Only if the handle design, mounting, and hand movement allow it. Usually, such proximity requires particularly careful checking.
Where to place R-058 with a central handle?
Above, below, or symmetrically on the sides. Sometimes it's better to leave the center free and use a molding.
What to do if the handle is on the side?
Check the central field and try one socket of suitable size.
Can two R-058 be used?
Yes. Two compact sockets can bypass the central handle and create symmetry.
Which is better under enamel: beech or oak?
Beech is often considered for opaque painting, but the final choice depends on the configuration and finishing technology.
When to choose oak?
When visible texture matters and a transparent or tinted finish is planned.
What is the difference between "Standard" and "Prestige"?
These are sanding quality options. The choice is linked to the future finish and project requirements.
Can it be glued onto painted MDF?
Only after checking the strength of the coating and the compatibility of the glue.
Will a veneered facade be suitable?
The possibility of installation depends on the veneer finish and the chosen adhesive. A test is needed.
Is glue included in the R-058 kit?
It should not be considered automatically included. Mounting materials are added separately.
Can the socket be removed later?
Removing the adhesive joint may damage the facade coating. This should be taken into account before installation.
Do I need to order spare parts?
For one door, the exact quantity is usually calculated. For a series, the reserve is determined separately.
How to avoid mistakes with the size?
Make full-size templates and compare adjacent options.
What to choose if square R-058 is not suitable?
You can choose and buy wooden sockets of a different shape or move on to overlays and moldings.
Can R-058 be used on a wall panel?
Yes, if the size, base, and installation method fit the project.
How to calculate the quantity for a dresser?
Determine whether the socket will be on each drawer, only on large fronts, or one on the central door. Then multiply the chosen scheme by the number of elements.
Do I need to replace an already installed handle?
No, if it is comfortable and matches the new composition. R-058 is selected around the existing drilling.
Where can I see the current price?
In the card of the specific R-058 configuration after selecting the size, material, and sanding.
The solution begins with a movement of the hand and ends with a precise size.
An empty facade does not necessarily need to be replaced, milled, or re-drilled. The applied wooden rosette R-058 allows you to add relief after the furniture is made. But a beautiful result comes not from the mere fact of purchase, but from a precise sequence of actions.
First, mark the handle and the trajectory of the palm. Then measure the free field. After that, compare paper templates of 60, 70, 80, 90, 100, 120, and 150 mm, keeping in mind thicknesses from 12 to 30 mm. Only then choose beech or oak, "Standard" or "Prestige", finish, and mounting materials.
For a small cabinet, compact sizes are often more suitable. A medium facade requires comparing 90–120 mm. A large panel allows R-058 150 mm, but its thirty-millimeter protrusion needs to be checked from the side. With a central handle, the rosette is placed above, below, or on the sides; with a side handle, the free center can be used more actively.
After fitting, you can order a wooden rosette R-058 in the exact configuration. STAVROS company offers not only individual decor, but also related product groups — wooden handles, overlays, moldings, and mounting materials. This allows you to assemble the facade as a single composition, not masking an error with a new decoration, but coordinating in advance the size, relief, material, and ease of use of the furniture.