Article Contents:
- Why handles and decor cannot be chosen separately
- Five typical conflicts that can be avoided
- Handle-bracket: when it is needed and how to choose correctly
- Advantages of the handle-bracket
- How to choose a bracket for a facade with moldings
- Bracket length and aesthetics
- Handle-button: neat and decorative
- Where the button works better than the bracket
- Button parameters: what's important to know
- Polyurethane decor on furniture facades: a system, not a coincidence
- Molding frame around the facade perimeter
- Central decorative overlay
- Decor for moldings in frame corners
- Wall decor as an extension of furniture decor
- Facade scheme: why it's the first step, not the last
- Practical example: scheme for a dresser drawer facade
- Five ready-made kits: what to buy for each task
- Set 1: dresser with molding drawers
- Set 2: cabinet with doors and active decor
- Set 3: bedside table or TV stand
- Set 4: upper tier kitchen fronts
- Set 5: classic furniture for unified painting
- How to combine wood and polyurethane into a single facade
- Unified painting: the boundary between materials disappears
- Handles as a wooden accent on a painted facade
- Handles with coating as a stylistic accent
- Table: bar handle or knob handle — which to choose
- Additional keys: what else the buyer is looking for in this topic
- Mistakes when buying: eight decisions best avoided
- Buy handles before the facade layout
- Do not check the center distance of the bracket
- Place the handle over the molding
- Choose a large overlay and a long bracket for one small facade
- Do not account for drawer opening
- Mix too many decorative accents
- Forgetting the fasteners
- Do not check whether the handle will be painted or remain wooden
- Fastener calculation: practical mathematics
- FAQ: Most Frequently Asked Questions
- What is better for furniture with stucco decor: a bracket handle or a knob handle?
- Can wooden handles and polyurethane moldings be combined on one facade?
- When should the handle be chosen before installing the decor?
- What to buy to update a chest of drawers with five drawers?
- Can I paint wooden handles and polyurethane decor in one color?
- Do I need a facade diagram if I just want to add handles?
- How to choose the length of a bracket for a facade?
- STAVROS: production of handles and decor, everything in one catalog
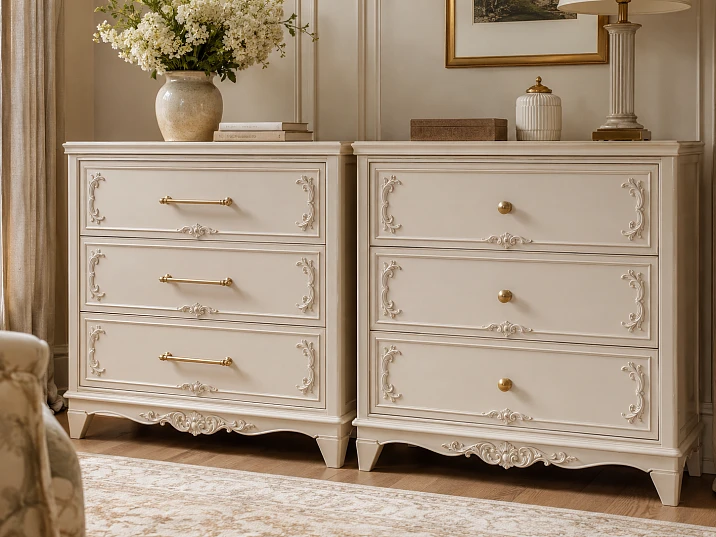
Imagine: you spent several hours gluing moldings, carefully aligned the frames, selected corner elements, painted everything in a single cream tone — and only then picked up a handle and drilled a hole directly through the profile. The molding cracked. The facade is ruined. This is not a made-up story — it's a classic mistake made by those who choose wooden furniture handles after the decor has been installed.
There is one rule, and it's worth remembering before reading further: first — the facade diagram, then — handles and decor. Everything else follows from this principle.
What exactly to choose — wooden bracket handle or wooden knob-button — depends on the size of the facade, type of furniture, nature polyurethane molding decoration and frequency of use. Let's break this down in detail, without generalities.

Why handles and decor cannot be chosen separately
The facade is a system. In it, each element has its place: the molding frame sets the rhythm, the overlay accents the center, the hinges fix the position of the handle. When one element is added without considering the others, a conflict arises.
The conflict can be physical: the handle hits the molding relief, and the mounting screw has nowhere to go. Or aesthetic: too large Wooden handle takes up all the space of a small facade, and the molding literally has no room to fit. Or functional: a bracket handle with a wide center distance hits the decorative overlay in the center of the facade, and the hand doesn't fit through.




Five typical conflicts that can be avoided
First. A bracket handle with a center distance of 96 mm is installed on a facade 150 mm wide with a central overlay. The overlay covers one of the bolts. You either need to move the handle or change the overlay. Neither can be done without leaving traces after installation.
Second. A knob-button with a round base 40 mm in diameter is installed exactly in the area of the decorative molding along the perimeter of the facade. The base sits on the relief, the handle is crooked. The result is visual sloppiness that cannot be fixed without dismantling.
Third. Polyurethane decorative appliques installed symmetrically horizontally on the facade. The handle in the center breaks the symmetry. The handle cannot be moved — the hole is already drilled.
Fourth. The handles are large, in a heavy wooden style with pronounced relief. The moldings are thin, geometrically strict, in the spirit of neoclassicism. The styles diverge so much that neither the overall color nor anything else will save the situation.
Fifth. The handles were purchased to be painted together with the facade. But the wooden handles and polyurethane moldings are prepared for painting differently — as a result, the paint on the handles holds worse and peels off after six months.
All these problems are solved in one way: the facade scheme — before any purchases.
Our factory also produces:
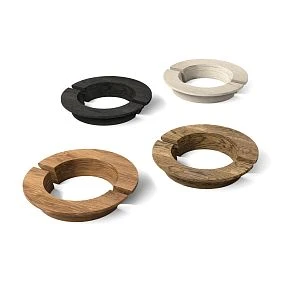
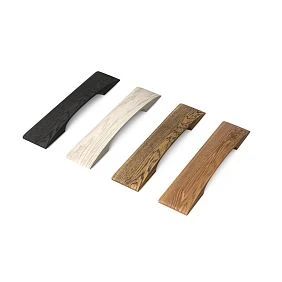
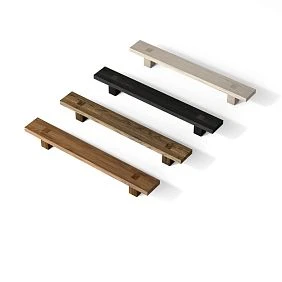
Bracket handle: when it is needed and how to choose correctly
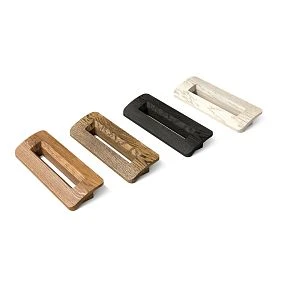
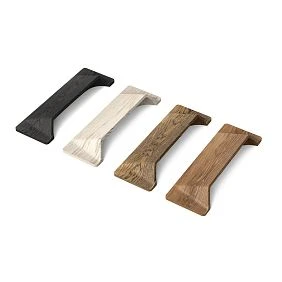
Wooden bracket handle — this is hardware with two attachment points. It is attached with two bolts at a fixed distance — the center-to-center distance (CCD), which can be 32, 64, 96, 128, 160 mm and more. It is the CCD that is the first and main parameter that needs to be known before purchase.
Get Consultation
Advantages of the bracket handle
The bracket is functionally convenient: you grab it with your whole hand, it withstands significant force, works well on heavy facades, drawers with contents, and doors that open frequently. That is why brackets are the choice for:
-
tall cabinet doors and wardrobe doors
-
kitchen facades of the upper and lower tier
-
drawers of a chest with books, dishes, heavy contents
-
TV cabinets and cabinets with doors
-
any furniture that is opened several times a day
How to choose a bracket for a facade with moldings
Key question: where exactly on the facade will the moldings be, and where will the 'clean' field for the bracket remain.
If the moldings form a frame around the perimeter of the facade, the bracket is installed in the center or in the lower quarter of the facade, in an area free of the profile. The center-to-center distance of the bracket should not exceed the width of the 'clean field' — the distance from molding to molding.
Example: a drawer facade 400 mm wide, molding frame with a 30 mm indentation from each edge. Clean field horizontally: 400 – 30 – 30 = 340 mm. A bracket with a center-to-center distance of 128–160 mm will fit without conflict. A bracket with a center-to-center distance of 320 mm will create a tight situation with a gap of about 10 mm — that's too little.
If there is a decorative overlay in the center of the facade, the bracket is installed either below the overlay, or a knob handle is chosen.
Bracket length and aesthetics
The bracket should not visually "cut" the facade. On a narrow facade of 150–200 mm, a long 160 mm bracket looks like a beam across the opening — heavy and unattractive. On such facades, choose a 64–96 mm bracket or switch to a knob.
On a wide facade of 500–600 mm or more — a 128–160 mm bracket is proportional and functional.
Knob handle: neat and decorative
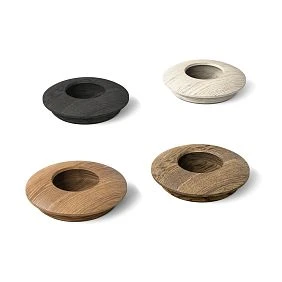
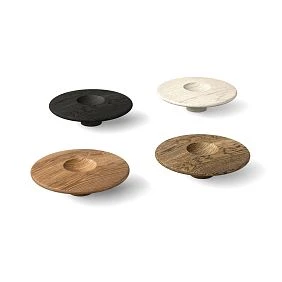
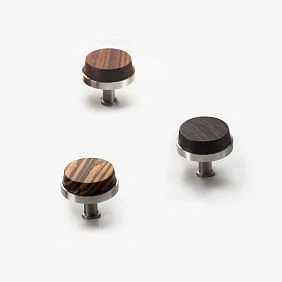
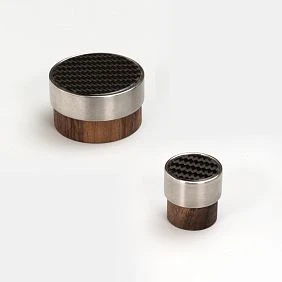
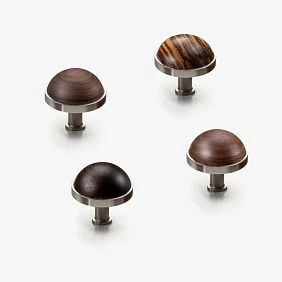
Wooden knob handle — this is hardware with a single attachment point. It is installed with one bolt, takes up minimal space on the facade, and creates a point accent. This is the choice where the facade is small, the decor is active, or the hardware should be unobtrusive.
Where a knob works better than a bracket
-
on dresser drawers up to 300 mm wide
-
on decorative cabinets with active stucco decor
-
where the central overlay occupies a significant part of the facade
-
on small doors with frame molding decor
-
in classic and neoclassical compositions, where the knob organically fits into the relief facade
-
on the top drawers of the chest, where the hand habitually reaches for a small protrusion
A knob is not a 'budget' solution compared to a pull. It is a different functional model. It requires less effort during marking, does not dictate a horizontal axis, and is easier to combine with decor.
Knob parameters: what is important to know
The base of the knob can be round (diameter 25–50 mm), square, or shaped. It is the base area that determines where on the facade the knob can be placed and where it cannot.
A round base with a diameter of 30 mm easily fits between the frame moldings and the central panel on a drawer facade of 180×280 mm. A 50 mm base already requires checking: whether there is enough clear space.
The knob's protrusion above the facade plane is from 20 to 40 mm. This parameter affects ergonomics: too small a protrusion is uncomfortable, too large looks disproportionate on a small facade.
Polyurethane decor on furniture facades: a system, not a coincidence
Before talking about specific elements, it is worth stating the principle: polyurethane decor on furniture, it works as a system, not as a set of random details. Each element has its place and its function.
Molding frame around the perimeter of the facade
Moldings made of polyurethane Around the perimeter of the facade is a base element. Four pieces of profile, joined at a 45° angle, create a decorative frame that turns a flat facade into a classic paneled one. This is the most effective way to decorate without milling.
For furniture, moldings with a face width of 15–30 mm are optimal. A wider profile narrows the space for the handle and overlay. The frame is installed with an indent of 25–40 mm from the edge of the facade — this leaves a visual "pause" between the frame and the end.
Area for the handle after frame installation: the inner field of the facade. Its width = facade width – 2 × (indent + molding width). The handle must fit within this field.
Central decorative overlay
Polyurethane decorative appliques In the center of the facade is an accent element. The overlay occupies a certain area and literally "displaces" the handle from the center. Therefore, if there is a central overlay, the handle moves to the bottom of the facade (for a drawer) or to the side (for a door).
The size of the overlay should be proportional to the facade: the overlay should not occupy more than 30–40% of the inner field area. Otherwise, the facade becomes overloaded with relief, and the handle simply does not fit in the right place.
Decor for moldings in the corners of the frame
Decor for polyurethane moldings — corner elements that are installed at the joints of profiles. They add decorative richness and hide joints. An important practical point: corner elements increase the width of the frame at the corners. This must be taken into account when placing the handle — especially if the bracket is installed close to the corner.
Decor for walls as a continuation of furniture decor
If the furniture is built-in or adjacent to a wall — Polyurethane wall decor on adjacent surfaces creates a unified architectural space. Molding frames on walls repeat the logic of frames on facades — and the furniture ceases to be an "object against the background of the wall," becoming part of the architecture.
Facade diagram: why it's the first step, not the last
Many skip this step because they consider it "for professionals." In reality, a facade diagram is just a drawing. A sheet of paper, a pencil, dimensions.
What to mark on the diagram:
-
Facade dimensions (width and height)
-
Hinge placement (most often — the vertical edge)
-
Molding frame area (inset from edges, profile width)
-
Location of the central overlay (if any), its size
-
Possible handle zones (considering free space)
-
Handle dimensions (for a pull — center distance and overall length; for a knob — base diameter)
-
Check: Does the handle not overlap the molding? Do the hinges not interfere with the handle? Does the overlay not cover the fasteners?
This drawing takes 10 minutes. It saves several hours of rework.
Practical example: diagram for a dresser drawer front
Drawer front: 400×180 mm. A molding frame is planned with a 30 mm offset from the edges, molding width 20 mm. The central overlay is a small rosette 60×60 mm.
Internal field horizontally: 400 – 30 – 30 – 20 – 20 = 300 mm.
Internal field vertically: 180 – 30 – 30 – 20 – 20 = 80 mm.
Rosette 60×60 mm in the center occupies: horizontally — 60 mm out of 300, leaving 120 mm on each side. Vertically — 60 mm out of 80, leaving 10 mm at the top and bottom.
For a pull handle: the handle axis vertically should be in the lower third of the front, below the rosette — but there is only 10 mm of free space above the molding. That's too little. So, a pull handle is impossible in this option. A knob handle is needed — it is installed below the rosette, with a 25 mm diameter base fitting into the 10 mm gap above the bottom frame molding.
Or — remove the central rosette and install a pull handle. Or — reduce the rosette to 40×40 mm, which frees up more space. It is precisely for making such decisions that the diagram is needed.
Five ready-made kits: what to buy for each task
Set 1: dresser with molding drawers
Task: update a 5-drawer dresser, add molding frames and knob handles.
-
wooden knob handles — 5 pieces
-
Moldings made of polyurethane — calculation around the perimeter of each box + 15% spare
-
Decor for polyurethane moldings — 4 corner pieces per box = 20 pieces
-
Polyurethane decorative appliques — optional, 1 small overlay per box or no overlays
-
Assembly adhesive for polyurethane (more details — what to glue polyurethane molding with)
-
Acrylic sealant for molding joints
-
Primer for MDF/wood, adhesion primer for polyurethane
-
Finish paint
-
Fasteners for handles (M4 bolts, length selected based on facade thickness + button protrusion)
-
Marking template for uniform button positioning
Set 2: cabinet with doors and active decor
Task: cabinet with two doors, molding frames, modest overlays, pull handles.
-
Wooden handle hooks — 2 pieces, MRP 96–128 mm
-
Moldings made of polyurethane for two frames on each door
-
decorative elements for furniture made of solid wood — overlays on horizontal crossbars of frames
-
Glue, sealant, primer, paint
-
Fasteners for brackets (M4×40 bolts for 18–20 mm facade)
-
Molding and corner elements reserve 12%
Set 3: bedside table or TV stand
Task: cabinet with one door or two small ones, central overlay, knob handle.
-
Wooden knob handle — 1–2 pieces with a small base
-
Moldings made of polyurethane — thin profile for the frame
-
a decorative polyurethane overlay — one, centered, no larger than 30% of the inner field area
-
Glue, sealant, primer, paint
-
Button fastener (bolt M4×30–35)
Set 4: upper tier kitchen fronts
Task: kitchen with glazed or solid upper fronts, convenient brackets, minimal molding decor.
-
Wooden handle brackets — by number of doors, MRC 96 or 128 mm
-
Moldings made of polyurethane with a smooth strict profile — for decorative frames on solid fronts
-
Without overlays: kitchen — functional space
-
Glue, fasteners, sealant, MDF primer, enamel
Set 5: classic furniture for unified painting
Task: a chest of drawers or wardrobe in a classic style, moldings, overlays, handles — all in one color.
-
Wooden handles — choosing the shape (bracket or button) according to the facade scheme
-
Moldings made of polyurethane with a classic profile
-
Polyurethane decorative appliques — pointwise, as a finishing touch
-
Decor for Molding — corner elements
-
Glue, sealant, wood primer, adhesion primer for polyurethane, finish paint in a single color
-
Marking template for all handles
How to combine wood and polyurethane into a single facade
Wooden handle — material, warm, tactile. polyurethane decor — precise, textured, easily accepting paint. Together they create a full-fledged furniture facade — provided several conditions are met.
Unified painting: the boundary between materials disappears
When the wooden handle, moldings, and overlays are painted in one color — the difference in materials ceases to be noticeable. The eye perceives the surface as monolithic. This works both in white and in any other color — from deep blue to soft green.
Technology for preparing for uniform painting:
-
Moldings and overlays made of polyurethane products are degreased and coated with adhesion primer for polyurethane
-
Wooden handles are sanded with 100–120 grit sandpaper, coated with wood primer
-
All surfaces are painted with finish paint in two coats with intermediate drying
Detailed information about installing polyurethane moldings and preparation for painting — in a special article.
Handles as a wooden accent on a painted facade
Second option: the facade, moldings and overlays are painted, while the handles are left in natural wood. This creates a tactile and color accent. On a white or cream facade, a warm-toned wooden handle looks like a deliberate design detail.
For this approach, choose handles with a pronounced wood texture — not factory-painted, but in their natural state. Uncoated handles from the section of unfinished wooden handles — specifically for this option.
Handles with coating as a stylistic accent
Handles with ready-made coating — lacquered or tinted — give a more finished look immediately after installation. They do not require additional painting and are suitable for furniture that will not be completely repainted — only complemented with decor.
Table: handle-bracket or handle-button — what to choose
| Situation | Recommendation |
|---|---|
| Cabinet with large doors from 400 mm | Bracket MRC 96–128 mm |
| Dresser drawer width 300–400 mm, molding frame | Bracket MRC 64–96 mm |
| Dresser drawer width up to 250 mm | Button |
| Facade with central overlay | Button or bracket below the overlay |
| Cabinet with one small door | Button |
| Kitchen fronts, frequent use | Bracket |
| Decorative front for painting, classic | Button or short lever |
| Front 150–200 mm wide | Button |
| Built-in wardrobe, door 600+ mm | Bracket MRC 128–160 mm |
Additional keys: what else the buyer is looking for in this topic
A buyer choosing handles for furniture with stucco decoration is simultaneously interested in several related questions.
Wooden cornice for furniture — profile for the top line of a sideboard, cabinet, display case. In the section solid wood cornice — a wide selection of profiles that complement handles and decor in a unified furniture system.
Wooden millwork from solid wood — slats, baseboards, glazing beads, millwork profiles. In the section solid wood trim — for those who work with wooden furniture bases and are looking for related materials.
Classic furniture — finished products with wooden handles and polyurethane decor. In the section classic furniture — for those who choose a ready-made solution.
Decor for moldings — corner pieces, end caps, center rosettes. All in the section polyurethane molding decor.
Mistakes when buying: eight decisions you better not make
Buy handles before the facade layout
Already mentioned above, but we'll repeat: the layout is the first step. Without it, buying handles is a lottery.
Not checking the center-to-center distance of the bracket
MRC is not an "approximate handle length." It is the exact distance between the centers of two mounting holes. The holes must fall into the clear field of the facade, free from molding and overlay. If the MRC is not checked before purchase, there is a risk that the hole will go into the profile.
Place the handle on top of the molding
Molding is a relief surface. The base of a bracket or knob placed on a relief will not sit flush. The handle will wobble and shake, and the mounting bolt will create a crack in the profile. The handle should only be on a flat field of the facade.
Choose a large overlay and a long bracket for one small facade
A central overlay 80×80 mm and a bracket with MRC 128 mm on a facade 200×300 mm is already more decor than the facade itself. A facade overloaded with relief looks chaotic. One large element — either an overlay or a bracket, but not both at once.
Not accounting for drawer opening
A handle on a drawer that, when opened, passes near a decorative overlay can catch on it. This is not a theoretical problem — it is a practical situation that occurs for anyone who hasn't thought about gaps in advance.
Mixing too many decorative accents
Molding frame + corner elements + central overlay + decorative bracket with pronounced relief — that's four decorative layers on one facade. Two or three are enough. One of the elements should be neutral.
Forgetting the fasteners
Bolts for handles are sold separately — or included with the handle if explicitly stated. The bolt length is selected as: facade thickness + handle protrusion + 4–6 mm for the nut. For example, MDF facade 18 mm + knob protrusion 25 mm = bolt M4×43–45 mm. Buying handles without the necessary fasteners means going back to the store.
Not checking whether the handle will be painted or remain wooden
This is an important question that determines which handle to choose. If the handle will be painted, a handle without coating from the series is suitable of unfinished wooden handles. If the handle remains wooden as a warm accent, a handle with high-quality surface treatment that looks finished without paint is needed.
Fastener calculation: practical mathematics
The bolt for a furniture handle seems like a small detail, but it is this small detail that is most often overlooked.
For a knob handle:
Bolt length = facade thickness + depth of knob protrusion into the hole (3–5 mm) + 5 mm for the nut.
For an 18 mm facade and a knob with a 30 mm protrusion: M4×23 mm or M4×25 mm bolt.
For a pull handle:
Bolt length = facade thickness + thickness of the pull base (or depth of the threaded hole in the pull body).
For a 18 mm facade and a bracket with a 12 mm threaded hole depth: M4×30 mm bolt.
Most wooden handles have M4 metric threads. Make sure nuts are included or purchase them separately.
FAQ: most frequently asked questions
What is better for furniture with molded decor: a handle-bracket or a handle-button?
It depends on two factors: the size of the facade and the placement of the decor. For large facades with a molding frame around the perimeter — Wooden bracket in the lower third of the facade, in the clear field of the frame. For small facades with a central overlay — wooden knob below the overlay, where there is no relief.
Can wooden handles and polyurethane moldings be combined on the same facade?
Yes, this is standard practice. Wooden handles provide the function — convenient opening. Moldings made of polyurethane и Decorative Inserts give relief and architectural character. With a uniform color, the boundary between materials disappears.
When should the handle be chosen before installing the decor?
Always. First, a facade diagram is created with the layout of all elements — moldings, overlays, hinges, and handles. Only after that is the order and installation made. Installation order: moldings and overlays → priming and painting → handle installation.
What to buy to update a chest of drawers with five drawers?
wooden knob handles — 5 pieces. Moldings made of polyurethane — calculation along the perimeter of the frames + 15% spare. Decor for Molding — 4 corner elements × 5 drawers = 20 pieces. Glue for polyurethane, sealant, primer, paint, fasteners for handles.
Can wooden handles and polyurethane decor be painted the same color?
Yes. The wood is sanded and primed with acrylic wood primer. The polyurethane is degreased and primed with adhesion primer for polyurethane. Then — finish paint in two coats on both surfaces. The result is a unified color space for the facade.
Is a facade diagram needed if I just want to add handles?
Even in this case — yes. The diagram helps to check that the mounting holes will not hit an existing molding or hinge. For simply adding handles, it is enough to draw the facade with dimensions and mark where the decor already is.
How to choose the length of the handle for the facade?
Guideline: the bracket should not take up more than 40–50% of the facade width. On a 400 mm facade — MRC bracket up to 160 mm. On a 250 mm facade — MRC bracket up to 96 mm. A smaller bracket looks neater and leaves more space for decor.
STAVROS: production of handles and decor, all in one catalog
STAVROS company produces wooden furniture handles, decorative overlays from solid wood, and a full range moldings from polyurethane — moldings, cornices, overlays, decor for moldings. All of this is in one catalog, allowing the buyer to select a complete set without searching through different suppliers.
STAVROS assortment includes: Wooden handle hooks, wooden knob handles, full section wooden furniture handles, decor for furniture made of solid wood, Wooden cornices, Pogonazh iz massiva. Wooden products are made from solid beech and oak using professional milling equipment. Polyurethane ones are made by precision casting, preserving all relief details.
STAVROS works with retail customers, designers, and furniture manufacturers. Contact us to confirm shipping to your destination. and CIS countries. Showrooms in Moscow and St. Petersburg — for those who want to hold the handle in their hand, compare textures, and ensure quality before ordering.