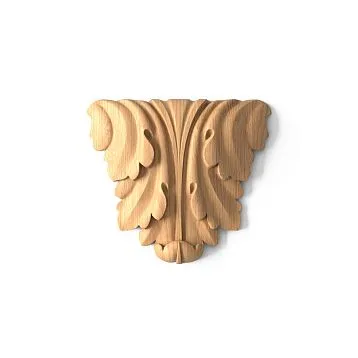
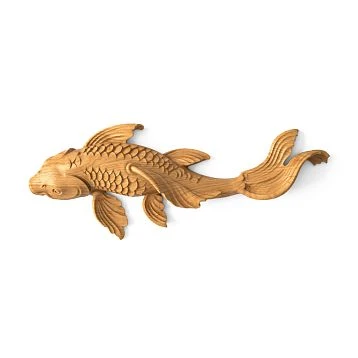
Article Contents:
- A ready-made frame, moulding, or separate carved decor: what your project actually needs
- How to choose a decorative overlay for a mirror based on the frame size
- First, measure not the mirror, but the working surface of the frame
- Size A × B × C of the decorative element
- The depth of the relief is checked separately
- Where to place carved decor on a mirror frame
- Four identical corner elements
- Upper central overlay
- Upper overlay plus two side elements
- Paired symmetrical decor
- Rosettes in four corners
- When a square or round rosette is better than an overlay
- When a rosette can cover a complex joint
- Why the rosette size is chosen relative to the frame
- Small mirror and large overlay
- Active carving requires a calm background
- Complex molding — calm overlays
- Paired pieces must be a pair not only in size
- Where to stop
- Oak
- Oak
- The material is chosen together with the finish
- Example: the central overlay is known in advance
- Example: four rosettes define the corner joint
- Why this is especially important for serial work
- Scenario 1. Four identical corners
- Scenario 2. Two top corners plus a central overlay
- Scenario 3. Four corners plus top center
- Scenario 4. Repeating sockets
- Scenario 5. Decor only on top
- Mini-specification before ordering
- What to check after applying primer or the first finishing coat
- Mistake 1. Choosing by mirror size instead of frame size
- Mistake 2. Buying decor after making the frame
- Mistake 3. Looking only at A and B, ignoring C
- Mistake 4. Mixing several independent ornaments
- Mistake 5. Not checking left and right orientation
- Mistake 6. Gluing before dry fitting
- Mistake 7. Trying to solve a structural problem with a decorative overlay
- Wooden Panels
- Carved rosettes
- Moldings and trim
- Ready-made frames
- How to place an order without unnecessary back-and-forth
- Which carved decor is suitable for a mirror?
- How to match the applique size to the frame width?
- Can wooden rosettes be used in the corners of a mirror frame?
- Which is better for a mirror — appliques or carved molding?
- How to choose decor made of beech or oak?
- Can wooden decor be painted together with the frame?
- When is it more cost-effective to buy a ready-made frame rather than assemble it?
- Where to buy carved decor for a mirror?
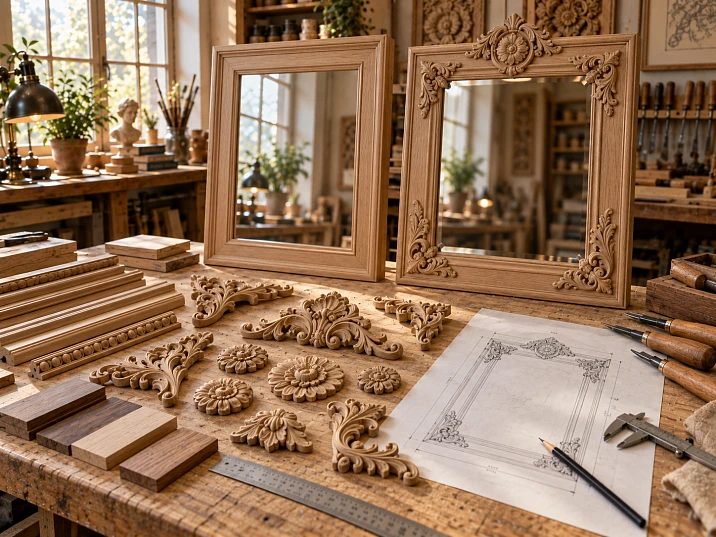
The frame is already assembled, the mirror is cut to size, and the decorative overlay suddenly turns out to be wider than the flat strip on which it was meant to be placed. Or the piece fits perfectly in length, but the relief protrudes forward so much that it begins to compete with the frame profile. Another common scenario: four beautiful carved pieces are bought separately, and after a dry layout it turns out that two of them are oriented the wrong way and a symmetrical composition doesn't come together.
With carved decor for a mirror, the problem almost never comes down to the question of whether you like the pattern or not. First you need to understand the frame construction, measure the actual working surface, choose a layout scheme for the pieces, and only then look for suitable overlays or rosettes. For a small joinery workshop this order is especially important: ready-made decor saves time on modeling and carving, but only when its dimensions are known before the frame is cut.
If the task is specifically to decorate an existing or self-made wooden frame, you should start with carved wooden inserts и wooden rosettes. This is a different scenario than buying a ready-made mirror in a frame or assembling the surround only from moulding. Here the frame remains the base, and the ready-made carved elements give it accents: corners, the center of the top rail, side points, or a repeating ornament. Such wooden decor for mirrors is convenient because the frame construction doesn't have to be turned into continuous carving.
The main principle is simple: decor is chosen not by the size of the mirror panel, but by the place it will actually occupy on the frame. From this follows all the rest of the logic — geometry, relief, material, quantity, finish, and installation.
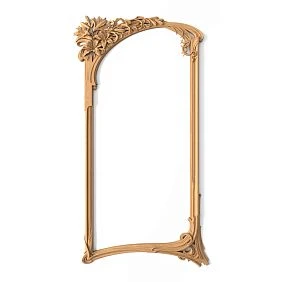
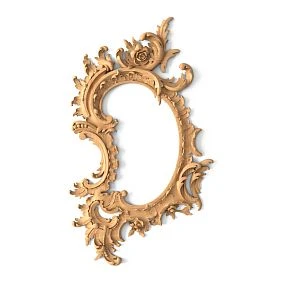
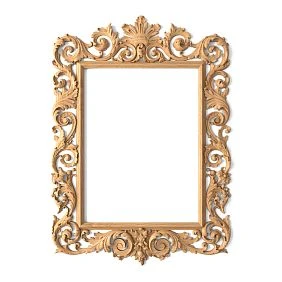
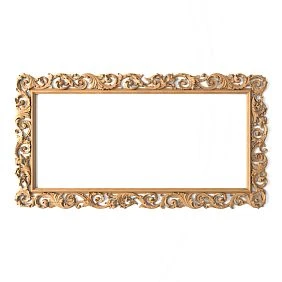
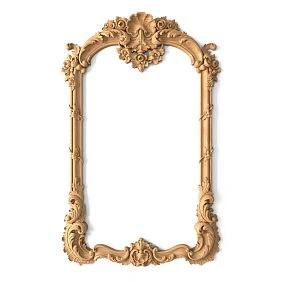
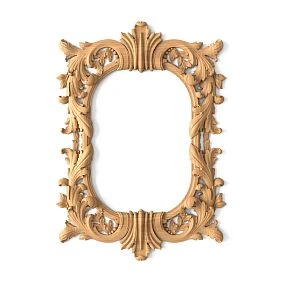
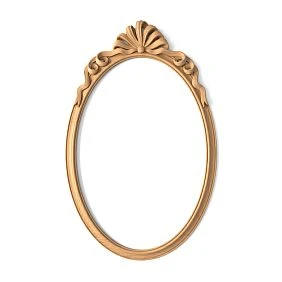
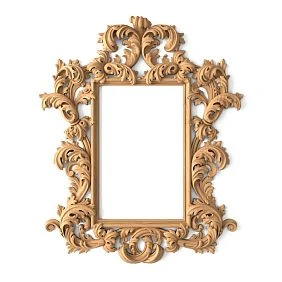
Carved decor for a mirror: what exactly can be bought ready-made
Under the word "decor" it's easy to mix up several different products. For a mirror frame this is inconvenient: moulding, overlay, and rosette can work in one composition, but they solve different tasks.
A carved overlay is a separate decorative piece that is installed on a flat or specially prepared surface of the frame. Carved elements for a mirror frame are especially useful where you need pinpoint work with the composition rather than a whole new perimeter. It can be elongated, vertical, horizontal, symmetrical, paired, with a floral ornament, acanthus, cartouche, garland, or another composition. An overlay is especially convenient where the frame is structurally simple and a decorative accent is needed in only one or several places.
A wooden rosette is a compact, self-contained element. The name doesn't mean the product is necessarily round: the catalog includes square, rectangular, and other shapes. A rosette works well in a corner, at the junction of profiles, in the center of a wide rail, or as a rhythmic element. Its advantage is its clearly defined geometry: it's easier to understand in advance how much space it will take up.
A corner element is chosen not just by the beauty of the ornament, but by orientation. The carving can be mirror-directed, right, or left. For the four corners of a square or rectangular frame this is critical: pieces that look identical can give a different direction to the leaf, scroll, or branch.
Molding and other linear trim is no longer an accent, but the basis of the frame line. You can assemble the entire perimeter from it, and then add overlays or rosettes. Catalog of wooden moldings and millwork it is useful specifically at the design stage, when the width and profile of the future frame are not yet fixed.
As a result, the finished wooden decor can be used according to two fundamentally different schemes. The same logic works when selecting other decor for wooden frames. First: a calm frame + active carved elements. Second: an expressive profiled perimeter + more restrained accents. If both the profile and the overlays are made complex at the same time, the pattern often begins to compete with itself.




A finished frame, molding, or separate carved decor: what exactly does your project need?
Before choosing an ornament, it is useful to answer one question: are you really decorating the frame, or are you trying to solve a different task?
| Task | What to choose | Why |
|---|---|---|
| You need a fully finished item | Ready-made frame | No need to design the perimeter and select individual elements |
| The frame needs to be assembled strictly to the size of the mirror | Molding or other linear trim | The size is formed by cutting the profile |
| The frame is already there, but it looks too plain | Carved overlays | You can add an accent without redoing the entire perimeter |
| Need to highlight the four corners | Corner overlays or rosettes | The decor creates finished focal points in the composition |
| Need an accent only at the top | Central overlay or rosette | The top part becomes the visual center, while the sides remain calm |
| Need a frame evenly rich in carving | Carved moulding or a ready-made carved frame | With individual overlays, such an effect is more difficult to assemble |
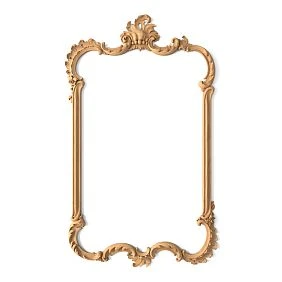
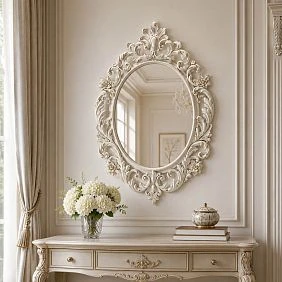
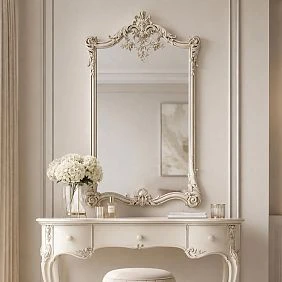
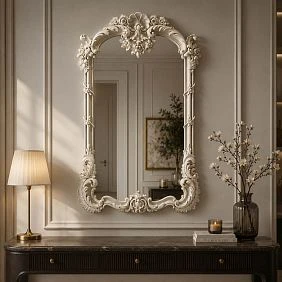
If you need a ready-made construction, it makes more sense to look at ready-made mirror frames. The STAVROS catalog features frames of various shapes and sizes; this is a standalone product scenario, and adding separate decor to it only makes sense after checking a specific model.
If, however, the task is to create a decorative border for a mirror and assemble your own perimeter to fit the mirror panel size, the more useful material is on how to assemble a frame from wooden moulding. There, the key question is the profile and cutting. Here, it is different: how to integrate a ready-made carved element into an already defined geometry.
And when you want a fully ready-made item without assembling it yourself, it is better to start your selection with the article on how to buy a ready-made wooden mirror frame.
Separating these scenarios saves more time than endlessly browsing ornaments. An overlay does not replace the frame construction. A rosette does not become a mirror fastener. Moulding does not turn into a finished product without cutting and assembly. Once the purpose is defined, the choice becomes significantly narrower.
Our factory also produces:
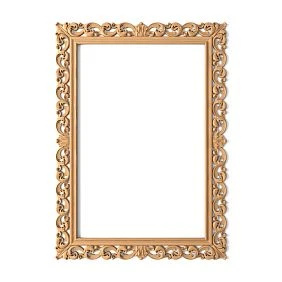
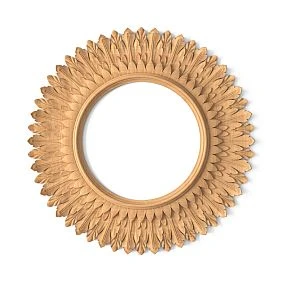
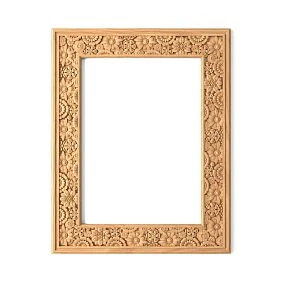
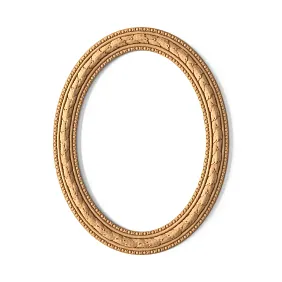
How to choose a decorative mirror overlay by frame size
A decorative mirror overlay should be selected as part of the frame, not as an ornament for an abstract glass surface. The same rule applies when choosing decorative overlays for mirrors of different sizes: first, the geometry of the wooden base is fixed.
Get Consultation
First, we measure not the mirror, but the working surface of the frame
A 700 × 1000 mm mirror says nothing about whether a 90 mm wide overlay will fit on its frame. To choose the decor, you need the dimensions of the wooden part specifically.
Measure each side of the frame and record separately:
- the total width of the plank;
- the width of the flat section where the overlay can actually rest;
- the distance from the inner edge of the frame to the start of the existing profile or chamfer;
- the distance to the outer edge;
- the thickness or height of the frame itself;
- protrusion of the adjacent relief;
- the free length of the section if the overlay is placed between corners.
The most useful figure here is not the overall frame width, but the width of the mounting surface. A strip may be 100 mm wide, but if the inner profile takes up 35 mm and the outer roll takes another 25 mm, only 40 mm remains for the overlay relative to a relatively flat surface. A 60 mm wide part can physically be placed on such a frame, but it will begin to overlap the adjacent relief and will most likely look accidental.
For the workshop, it is convenient to make a small size map before choosing the article:
| Parameter | What to measure | Why |
|---|---|---|
| W | Overall width of the frame strip | Understand the scale of the base |
| P | Flat mounting surface | Check whether the overlay fits without conflicts |
| L | Free length of the section | Check central and side elements |
| H | Frame thickness/height | Match with relief depth |
| D | Distance to the mirror surface | Prevent the decor from overlapping the reflective surface |
| S | Distance to the outer edge | Preserve the visual field around the piece |
If the frame is old or already finished, it is better to take measurements in several places. A handmade wooden structure does not always have a perfectly uniform width along its entire length. An overlay that fits snugly on top may not fit on the side.
Size A × B × C of the decorative element
In carved decor product cards, dimensions are usually listed separately. They should not be read simply as "length and width." Before ordering, it is worth opening the drawing for the specific item and understanding which letter corresponds to the desired direction of the piece.
Three things are important for selection:
- A and B describe the overall dimensions of the product in plane;
- C shows how far the relief protrudes forward;
- the orientation of the ornament determines which of the dimensions will actually work across the frame.
A telling example is Wooden socket R-020. The catalog offers several sizes: 60 × 38 × 8, 77 × 49 × 10, 93 × 59 × 12, and 110 × 70 × 14 mm. The same pattern can be fitted into frames of different scales without changing the compositional motif.
Let's imagine that the flat area of the top rail is 70 mm wide. The R-020 variant measuring 93 × 59 × 12 mm, oriented so that the 59 mm side runs across the frame, will leave 11 mm of total free space — approximately 5.5 mm on each side when precisely centered. This can already be assessed on the drawing. The 110 × 70 × 14 mm variant will fit onto the same area with virtually no side margin. Mathematically, it fits. Visually and in terms of installation, it is already a different solution.
That is precisely why "fits by size" and "suitable for the frame" are not the same thing.
Relief depth is checked separately
On a front-view sketch, two overlays may look equally suitable. From the side, the difference becomes obvious. A piece with an 8 mm relief is perceived as a neat accent. A relief of 14–20 mm already casts a noticeable shadow and requires sufficient mass in the frame itself.
Particular attention is paid to three places:
- the inner edge near the mirror panel;
- outer edge of the frame;
- the adjacent profile, if the strip already has its own relief.
If the overlay protrudes far forward, it can be beautiful on its own, but it may look "glued on top" on a base that is too thin. For a small frame, it is sometimes better to take the same motif in a smaller size than to try to compensate for scale with the number of details.
Where to place carved decor on a mirror frame
Carved elements are not perceived individually. The eye reads them as a system relative to the rectangle, oval, or other shape of the mirror. Therefore, the layout scheme is more important than the number of ornaments.
Four identical corner elements
Decorative overlays on the corners of the mirror give the clearest rhythm if all four positions are truly coordinated in size and pattern direction.
This is the clearest option for a rectangular or square frame. The four corners receive equal visual weight, while the middles of the sides remain free.
The scheme works especially well if the frame itself is assembled from a calm molding. Corner elements can overlap or emphasize the joint, but before ordering you need to check whether their shape allows such a position. Not every carved overlay that one wants to call a corner piece is geometrically designed for a corner.
If the ornament is directional, the orientation of each piece is determined in advance. A leaf, branch, or scroll may face the center of the mirror, outward, or along the strip. Random alternation of directions is noticeable even when a person cannot explain what exactly is bothering them.
Top central overlay
A single central element is a good way to make a simple frame more expressive without total decoration. Here, the axis is especially important.
First, find the geometric center of the top rail. Then mark the central axis of the overlay itself. During a dry layout, align the axes, not the edges of the piece. If the carving has an asymmetrical edge, the visual center may differ from the geometric one, so the final position is checked from the distance at which the mirror will usually be perceived.
On a tall vertical frame, the top overlay can work as a finishing touch — almost like a small pediment. On a wide horizontal mirror, an overly narrow central element, on the contrary, risks getting lost: too much empty line will remain around it.
Top overlay plus two side elements
This scheme gives a more complex composition without completely filling the perimeter. The central element sets the hierarchy, while the side elements support the motif.
The main mistake is making all three pieces equally active. Then the central accent stops being the center. It is better when the top overlay is larger or more complex, and the side elements are calmer and smaller.
Paired symmetrical decor
An elongated overlay or a floral motif often requires a left and right element. Buying two identical pieces without checking orientation is risky: the pattern may face the same direction.
In the drawing, it is useful to check a paired composition in mirror reflection. If the manufacturer produces left and right versions, they are listed as separate lines in the specification. The phrase “two overlays” is not sufficient for purchasing if the item codes differ.
Rosettes in four corners
Rosettes give a more architectural rhythm. This works especially well with straight linear moulding: four repeating points gather the perimeter and allow the middles of the sides not to be overloaded.
A square rosette is convenient if you need to emphasize the intersection of horizontal and vertical. A rectangular one — if the ornament should have direction. A round one can soften the geometry of a rigid rectangular frame, but requires sufficient field around itself.
You should not automatically place the rosette exactly on the joint line. Sometimes it is better to shift it inward onto the frame moulding so that it is perceived as an independent element, and not as a disguise for the joint.
Carved wooden rosettes for a mirror frame
Carved wooden rosettes are interesting because a single detail can solve several compositional tasks at once: mark a corner, create a center, repeat a motif along the perimeter, or replace a complex decorative knot.
In the wooden carved rosettes there are different shapes and sizes. Therefore, the word “rosette” is better understood as a type of finished ornamental element, and not as an obligatory round flower.
When a square or round rosette is better than an overlay
If the frame has a wide flat band and four identical corners, a repeating rosette usually reads more calmly than four different overlays. The composition gains rhythm: one motif repeats rather than changing at every turn.
A square rosette is convenient for frames with clear geometry. A round one adds contrast of shape. A rectangular one, such as R-020, allows the ornament to be directed along the side of the frame or used as a small central accent.
When a rosette can cover a complex joint
If the frame is assembled from moulding, the 45° corner joint must be precise. A decorative rosette can visually cover the joint area, but it should not be used as an excuse for poor joinery. First, a proper structural joint is made, then a decision is made as to whether a decorative element is needed on top of it.
This is a fundamental point. Carved decor works as a finish, not as a structural repair for a defect.
Why the size of the rosette is chosen relative to the frame
A large mirror does not automatically require a large rosette. If there is a thin frame around the glass, a large element will look heavier than the entire object. And vice versa: a wide, massive frame can "swallow" a rosette that is too small.
It is useful to evaluate the ratio of the rosette size to the width of the moulding. Not as a rigid percentage, but visually: how much free wood remains around the piece and whether there is enough of it for the rosette to be perceived as an insert rather than as an element accidentally placed over the edge.
On the product card R-020 the same model is available in several sizes. This is exactly the case when it is better to first determine the working width of the frame, and only then choose the scale of the ornament.
Central overlay or corner decor: how not to overload the mirror
A carved frame has an unpleasant characteristic: each individual element may be beautiful, while the entire composition feels heavy. The reason is usually not the number of details as such, but the lack of hierarchy.
If the frame already has an active carved molding, the additional overlay should either continue its motif or be noticeably calmer. A second complex ornament on top of the first rarely strengthens the composition. It creates two independent patterns on one small surface.
With a simple frame, the situation is the opposite. A smooth, wide plank can support a deeper central overlay because a visual pause remains around it. Here the relief reads especially clearly: light catches on the protrusions, shadow appears in the recesses, and the frame itself stops being just a rectangular outline.
A small mirror and a large overlay
Let's imagine a tabletop or small wall mirror whose outer frame width is about 450 mm. A central carved piece 300 mm long will take up two-thirds of the top side. It will no longer be an accent — in fact, it will become the main upper element of the structure.
This is acceptable if that is the effect you want. But if only a small decorative insert was intended, the scale has been chosen incorrectly. In the catalog image, the item exists on its own; on the frame, it is always perceived relative to the overall outline.
Active carving requires a calm background
Acanthus, cartouche, garland, and large floral ornament read well where they do not have to be examined among several competing profiles. If the base already consists of several beads, grooves, and carved bands, it is better to first print the overlay at 1:1 scale and place it against the frame. This is faster than ordering the item and then trying to "calm" the composition with finishing.
Complex molding — calm overlays
Carved molding sets a repeating rhythm around the entire perimeter. In that case, the central piece should indicate direction rather than begin a second narrative. A closely related motif works well: for example, a leaf profile and an overlay with the same character of floral ornament. Worse is a random combination of geometry, floral rosettes, a cartouche, and yet another large pattern simply because each element was liked separately.
Paired pieces must be a pair not only in size
Two side overlays are checked for four attributes:
- identical scale;
- identical relief depth;
- mirrored or matched orientation;
- identical material and finish preparation option.
If one element is beech and the other is oak, and a clear coat is planned on top, the difference will become part of the composition — and almost certainly an unwanted one. Under an opaque finish, the wood visually evens out more, but this will not fix the geometry and relief.
Where to stop
A simple test: cover one type of decor in the sketch or photo of the dry layout with your hand. If the composition becomes clearer without it, that element does not add function. In carved decor, empty space is a full-fledged part of the composition. It allows you to see both the frame and the mirror, as well as the ornament itself.
Beech or oak: which wooden decor to choose for a mirror
The choice of species is better made not on the principle of "what is more expensive" or "what is more prestigious," but based on the future finish and the material of the frame itself.
Beech
Beech is convenient where a smooth, visually calm wood base is needed and where the decorative element is planned to be combined with a frame in an opaque or sufficiently dense finish. If the frame is painted in a single color, the difference in wood grain ceases to be the main visual factor.
For the project, this means something else: the quality of geometry, sanding, and the joint between the part and the base becomes more important. If the overlay, after installation, should look like part of a single frame, the finish is better planned for the entire assembly at once, rather than painting the part separately without a test fitting.
Oak
Oak is chosen when the wood texture should remain part of the result: under a transparent or semi-transparent finish, tinting, oil, or another coating that does not completely hide the grain. Oak decor is especially logical on an oak frame or next to furniture where the species is already visually readable.
But a matching species name does not yet guarantee an absolutely identical tone. Wood has natural variability. If a maximally uniform transparent finish is important, frame and decor samples are better evaluated together before applying the finish.
The material is chosen together with the finish
The practical sequence looks like this:
frame material → finish type → decor material → test finish → final installation.
Not the other way around.
If you first buy a beautiful oak overlay and then decide to paint the entire frame with a dense enamel, it is functionally possible, but the advantage of the pronounced oak texture will go unused. If you buy a beech element for an oak frame and leave both surfaces under a transparent coating, the difference may become too noticeable.
When ordering ready-made parts, it makes sense to specify in the specification not only the article number and size, but also the material. The phrase “four identical rosettes” is insufficient if several species are available for one article number.
How to choose decor before the frame itself is made
For a furniture maker or carpenter, the most advantageous solution is not to adapt ready-made decor to an already manufactured frame, but to include a specific article number in the project before cutting.
The sequence is short:
sketch → specific product code → actual dimensions → frame width → cutting → dry layout → finishing → installation.
There is a fundamental point in this chain: the frame width is determined not only by the mirror and the chosen moulding. If the project includes an overlay, its dimensions become a design constraint.
Example: the central overlay is known in advance
Suppose a piece is chosen for the top section that should occupy 65 mm along the width of the frame strip. If 8 mm of clear margin is left on both the inner and outer sides, a working surface of at least 81 mm is required. If the profile itself has chamfers at the edges, the total width of the blank will be even greater.
In such a situation, it makes no sense to first make a frame 70 mm wide and then look for an "almost identical" overlay. The project is already locked in by the wrong size.
Example: four rosettes define the corner joint
If an 80 × 80 mm square rosette is to be placed in the corner, the width of the horizontal and vertical strips, the position of their profiles, and the joint scheme must account for this piece. The rosette can lie entirely on the surface, partially overlap the profile, or work over the corner joint — these are three different constructions.
The decision is made on the drawing, not at the gluing stage.
Why this is especially important for serial production
A successful prototype can be turned into a repeatable specification. The workshop gets a set: a specific profile + a specific overlay + a specific rosette + fixed frame dimensions. On the next order, there is no need to search for proportions again.
Ready-made carved elements here work as a standard component. Their value is not only that the carving does not need to be done yourself, but also that the item code and dimensions can be included in the production drawing.
How to calculate the number of overlays and rosettes before ordering
The quantity is calculated not “by how beautiful the picture looks,” but according to the chosen scheme. It is more convenient to first draw the frame from the front and place conventional symbols for the parts on it.
Scenario 1. Four identical corners
Four elements are needed for four corners only if one item code truly fits all orientations. If left and right parts are used, the specification may look like 2L + 2R.
Before ordering, check whether the upper corner differs from the lower one in the logic of the design. A directional plant motif sometimes looks good at the top and bad when turned upside down at the bottom.
Scenario 2. Two upper corners plus a central overlay
Here the set consists of three items or three product units:
- left corner piece;
- right corner piece;
- central overlay.
The lower part of the frame remains calm. This composition suits vertical mirrors, where the decorative weight is deliberately concentrated at the top.
Scenario 3. Four corners plus top center
Five elements already form a complete system. The central overlay should not be chosen before the corner ones: their relief and scale must be comparable.
If the corners are large and the center is even larger, the top side may get too much visual weight. First make a scaled diagram, then order the set.
Scenario 4. Repeating rosettes
If rosettes go not only in the corners but also along the long sides, the quantity is determined by the spacing.
For example, the free section between the corner zones is 1200 mm. If you want to place three additional rosettes with equal gaps, you must first account for the width of the items themselves. For a rosette 80 mm wide, three pieces will take up 240 mm. The intervals will have 960 mm left. If four equal gaps are required between the three pieces and the two outer zones, each will be 240 mm.
This is already a specific layout that can be checked on the drawing. If you first choose “300 mm spacing” and remember the item width later, the outer intervals will almost certainly drift.
Scenario 5. Top-only decor
For a tall frame, a single large central element is sometimes enough. But if the overlay has a pronounced horizontal orientation, check whether too much empty space remains at the edges of the top rail. Sometimes one long element is better, sometimes a central piece plus two small side pieces.
Mini-specification before ordering
| Article | Size A × B × C | Material | Quantity | Position on the frame | Orientation | Finish |
|---|---|---|---|---|---|---|
| R-020 | Selected size | Beech/oak | As per project | corner/center/side | Vertical or horizontal | As per project |
| Overlay | By card | Beech/oak | As per project | top/side | L/R or symmetrical | As per project |
| Molding | profile as per project | as per catalog | by length calculation | Perimeter | By cutting | As per project |
It is useful to fill in this table even for a single mirror. It catches a typical mistake: the product code is chosen, but the variant size is not recorded; the material was discussed verbally; the quantity was counted, but the orientation was not checked.
After such preparation, you can Buy carved inlays и Wooden sockets no longer as a set of liked parts, but as a specific project configuration.
Dry layout first — then glue and finishing
Even a good drawing does not replace fitting the real parts. Wooden decor has volume, shadow, and texture; on a flat screen they are perceived differently.
It is better not to change the order of work here.
- Lay out the elements without fastening. Install the mirror or the mirror panel template in the working position, if possible.
- Find the axes. Mark the center of the top and bottom sides, as well as the vertical axis of the frame.
- Check symmetry. Measure the distances from identical parts to the corners and to the inner edge.
- Look at the frame from a distance. From one or two meters away, minor asymmetry is sometimes more noticeable than when working up close.
- Check the edge of the mirror. No element should accidentally overlap the reflective surface unless this is intended by the design.
- Look from the side. Compare the depth of the relief with the profile of the frame.
- Fix the position. Make painter's marks, a template, or photographs with dimensions.
- Only after that proceed to finishing and installation. The fastening method is selected according to the base material, the dimensions of the part, the condition of the surface, and the chosen finish.
Dry layout has another function — it shows whether all the purchased decor is needed at all. Sometimes four rosettes look convincing in a sketch, but at real scale two upper ones turn out to be enough. It is better to discover this before glue.
What to check after applying primer or the first layer of finish
The relief changes under the finish. A light opaque surface can visually unify complex carving and make it calmer. Dark toning enhances shadows. Gloss emphasizes differences more strongly, while a matte surface is perceived as more even.
Therefore, for complex finishing, a test sample is useful. It is not necessary to paint the entire overlay: a cut-off piece of the same species or a test part with a similar relief is enough. The goal is to see how the recess behaves and how contrasting the carving becomes.
Mistakes that make good decor look random
Mistake 1. Choosing by the size of the mirror, not the frame
The mirror panel determines the overall scale, but the wooden part sets the placement of the decor. The consequence is that the overlay covers the inner profile, hangs off the outer edge, or simply does not fit on the plane.
How to prevent: record the width of the working area and check it against the drawing of the specific product.
Mistake 2. Buying decor after making the frame
This order leaves only those products that happen to fit the already specified size. The choice becomes poorer, and the craftsman has to sand, trim, or change the composition.
How to prevent: choose the item before cutting, especially if the overlay is large or is the center of the composition.
Mistake 3. Looking only at A and B, ignoring C
Frontally, the part fits. After installation, the relief turns out to be too deep relative to the thin frame or interferes with the adjacent profile.
How to prevent: look at the drawing from the side and compare the depth of the decor with the height of the frame.
Mistake 4. Mixing several independent ornaments
Acanthus, geometry, a floral rosette, and a cartouche can each be expressive on their own. On one small frame, they turn into four different languages.
How to prevent: choose the main motif and repeat it or use neutral supporting elements.
Mistake 5. Not checking left and right orientation
This is especially noticeable on floral and elongated overlays. Two elements with the same product code may not form a mirrored pair.
How to prevent: check the drawings and record L/R in the specification before ordering.
Mistake 6. Gluing before dry layout
After fixing, correcting an axis offset or uneven gaps is significantly more difficult.
How to prevent: first assemble the entire composition without fastening and mark the position of each element.
Mistake 7. Trying to solve a structural problem with a decorative overlay
A rosette can visually cover a joint, but it does not fix a weak connection. An overlay can cover a gap, but it should not replace the proper geometry of the frame.
How to prevent: first resolve the construction, then the finish.
When it is better not to buy carved decor for a mirror
Not every frame becomes better after adding carving.
If the frame already has a rich carved profile, an additional overlay may be unnecessary. Sometimes it is better to leave a single ornamental layer.
If the frame does not have a sufficient flat area, you should not choose a part of "almost suitable" size. It is better to change the frame profile or choose a different type of decor.
If the problem is that there is no frame as a structure, individual overlays will not replace it. In this case, you need molding for self-assembly or a ready-made mirror frame.
If the mirror needs to look as minimal as possible, carving can work against that goal. Even a small wooden rosette creates an extra shadow and a visual focal point.
If the finish cannot be determined in advance, it is better to postpone the purchase until the finish is chosen. Transparent and opaque finishes have different requirements for the wood species and texture matching.
If a dry fit before final fastening is not possible, the risk of error is higher. For a complex assembly, it is better to first obtain or make full-size templates.
Omitting an unnecessary element is also part of design. A commercially sound specification differs from a set with the maximum amount of decor precisely in that every item has a function.
What to buy together with carved decor for a mirror
If the frame scheme is already defined, it is convenient to assemble the set from the base to the accents. If wooden mirror decor is planned, it is better to select all items within one logic of material and finish.
Wooden Panels
Wooden carved appliqués they are needed for central, side, and corner accents. In the catalog, it is worth looking not only at the pattern but also at the product shape, dimensions, orientation, and available materials.
Carved rosettes
Wooden sockets they are convenient for repeating points in the composition, corners, and small central inserts. If you need to buy wooden rosettes for a specific frame, first select models by size, and only then compare the ornament. If you like a specific motif, check whether it is available in several sizes: this allows you to keep the pattern but choose a different scale.
Moldings and linear trim
If the frame has not yet been made, moldings and trim it is better to choose it together with the decor. Then the working width of the profile can be coordinated right away with the overlays and rosettes.
Ready-made frames
If, after calculation, it turns out that the project requires a complex profile, many carved nodes, and precise assembly, it makes sense to compare it with ready-made mirror framesSometimes a custom assembly provides the freedom you need, while sometimes a ready-made frame eliminates most of the production steps.
How to place an order without unnecessary back-and-forth
Before ordering, prepare one table or message that includes:
- article numbers;
- exact size options;
- the material;
- quantity;
- left/right orientation, if applicable;
- desired surface preparation;
- city of receipt or delivery method.
This makes it easier to check availability and avoid confusing similar variants of the same product code.
Quick selection guide: from mirror to complete configuration
If you need to make a decision without lengthy deliberation, use this order.
1. Determine the project type. You already have a frame, the frame is only being designed, or you need a fully ready-made option.
2. If the frame exists — measure its working surfaces. Do not limit yourself to the overall mirror dimensions.
3. Choose the composition. Four corners, top center, center + sides, rosettes around the perimeter, or a single accent.
4. Choose specific items. Record the product code and size right away.
5. Check A × B × C and the orientation. Especially for paired overlays and deep relief.
6. Match the material with the finish. Beech and oak are chosen in the context of what will be visible after finishing.
7. If the frame has not yet been made, adjust its width to the selected decor. This is better than looking for a compromise element later.
8. Calculate the quantity and fill in the specification. Mark the left/right elements separately.
9. Perform a dry layout. Check the axes, offsets, depth, and overall scale.
10. Only after checking, proceed to finishing and final installation.
As a result, the query "buy carved decor for a mirror" turns from an abstract search for beautiful details into a proper design task. There is a frame, there is a measurable seating area, there is a selected composition, there are specific dimensions and quantity. At this stage, the purchase becomes predictable.
FAQ
What carved decor is suitable for a mirror?
The one that is compatible with a specific frame in three parameters: the size of the seating area, the depth of the relief, and the composition. For a simple frame, you can use central and corner overlays, rosettes, or a combination of them. For an already rich carved profile, it is better to choose a more restrained additional element or abandon it altogether.
How to match the size of the overlay to the width of the frame?
Measure not the overall width of the strip, but the free flat area. Compare it with the drawing of the overlay and leave a visually justified margin to the inner and outer edges. If the part fits only "edge to edge," make a 1:1 template and evaluate the result before ordering.
Can wooden rosettes be used in the corners of a mirror frame?
Yes, if the shape and size of the rosette match the corner joint. Square and compact symmetrical models are especially convenient. But the rosette remains a decorative element: it does not replace a quality joint between the frame parts.
What is better for a mirror — overlays or carved molding?
These are different tasks. Molding forms a continuous perimeter. An overlay creates a local accent. If the entire frame needs to be made of carved profile, choose molding or a ready-made frame. If the base already exists and you need to add decor at several points, overlays and rosettes are more convenient.
How to choose decor made of beech or oak?
Look at the frame material and finish. Beech is convenient for even painting and a calm base for finishing. Oak is logical when the wood texture should remain visible and support an oak frame or nearby furniture. For transparent finishing, it is better to compare samples together.
Can wooden decor be painted together with the frame?
Yes, if the selected materials and finishing system are compatible. First perform a dry layout and final surface preparation. If you want to achieve a visually unified object, it is better to coordinate the color and gloss level for the frame and decor at once.
When is it more advantageous to buy a ready-made frame rather than assemble it?
When a custom size is not critical, and assembling it yourself requires a complex profile, several carved joints, and a large number of operations. A ready-made frame is also more convenient if there is no task of independently combining molding, overlays, and rosettes. For a non-standard size or a custom composition, separate components give more freedom.
Where to buy carved decor for a mirror?
At STAVROS you can select Wooden decorative inlays, carved rosettes, Trimming Items и ready-made mirror frames. Before ordering, it is best to record the product code, exact size, material, quantity, and the position of each piece on the frame.