Article Contents:
- What is confirmed for CRPU-070
- Why this article does not duplicate general materials about ceiling rosettes and slatted panels
- Geometry of CRPU-070 around a fixed outlet: 382.5 mm, a 765 × 765 mm square, and the actual silhouette
- Main calculation: from the chandelier center to the edge of the overall dimension, 382.5 mm is needed
- Why the 383 mm distance cannot automatically be called "fits perfectly"
- Full-size template 765 × 765 mm — a mandatory step
- The overall square and the actual carved silhouette are not the same thing
- Why the corners of the overall dimension need to be checked separately
- Three scenarios regarding the slatted ceiling strip
- CRPU-070 remains entirely on the smooth ceiling
- The dimension fits almost flush against the slats
- CRPU-070 actually extends onto the slatted field
- If the slats extend onto the ceiling only as a narrow strip, measure not its width, but the position relative to the chandelier's center
- If the chandelier outlet is offset relative to the smooth ceiling area
- The ceiling rosette should not be used to mask incorrect electrical work
- Is it necessary to remove the chandelier for CRPU-070 installation
- The chandelier's central cup must be checked together with the modular composition
- Thickness of 18 mm is important for the luminaire, shadows, and adjacent ceiling systems
- Track lighting cannot be checked only by the distance to its axis
- Spotlights inside the overall square require checking against the actual silhouette of CRPU-070
- Sensors, ventilation grilles, sprinklers, and other ceiling devices must not be covered by decor
- The ceiling cornice is checked not against the wall, but against the inner protrusion into the ceiling
- If the slats are thicker than the smooth part of the ceiling, the CRPU-070 module cannot be automatically extended through the transition
- The slat strip may frame CRPU-070, but it does not have to fit flush
- CRPU-070 and the slat strip create two different directions: radial and linear
- The orientation of the CRPU-070 must be checked against the actual pattern, even with a square footprint.
- The center of the chandelier, the center of the CRPU-070, and the center of the room can be three different points.
- The 765 mm size needs to be matched with the chandelier, but the article should not be turned into a general guide on proportions.
- The current price of 35,680 ₽ makes a full-size check mandatory from a commercial standpoint.
- The modularity of the CRPU-070 helps to more accurately verify the actual contour, but it does not eliminate the overall footprint.
- The base for the CRPU-070 must be checked before ordering, especially if the slats end nearby.
- A stretch ceiling requires a separate structure, not gluing the rosette directly to the fabric.
- The mounting of the chandelier and the mounting of the CRPU-070 cannot be combined into a single assembly without a design.
- Materials for installation are selected based on the actual ceiling base.
- The color of the CRPU-070 can visually separate it from the slats or, conversely, calm the composition
- The slatted ceiling part may already be the main accent — then the CRPU-070 is not necessary even if it fits
- Mistake 1. Measuring the distance from the slat to the wall, not from the slat to the center of the chandelier
- Mistake 2. Using the "382.5 mm radius" as a universal check for all obstacles
- Mistake 3. Treating the entire square as a solid rosette
- Mistake 4. Making the reverse mistake — treating the openwork as a guarantee
- Mistake 5. Ignoring the inner protrusion of the ceiling cornice
- Mistake 6. Trying to "shift" the CRPU-070 relative to the chandelier without checking the electrical wiring
- Error 7. Considering the polyurethane rosette as part of the luminaire mounting
- Error 8. Checking the ceiling without an installed track or cornice
- Error 9. Buying CRPU-070 only because it physically fits
- Quick CRPU-070 check in 15 minutes
- Step 1
- Step 2
- Step 3
- Step 4
- Step 5
- Step 6
- Step 7
- Step 8
- Step 9
- Step 10
- Step 11
- Step 12
- Step 13
- Step 14
- Step 15
- Full algorithm before ordering CRPU-070
- Decision matrix
- If the distance to the battens is exactly 382.5 mm, will CRPU-070 definitely fit?
- If the battens cross only the corner of the 765 × 765 mm square, must the socket be excluded?
- Can CRPU-070 be rotated to better clear the battens?
- If the chandelier is already hanging, can CRPU-070 be installed around it?
- Can the chandelier be attached through the elements of CRPU-070?
- What to do if a single recessed light falls within the CRPU-070 square?
- Is it necessary to leave the same gap to the battens on all sides?
- If the ceiling is stretch, can CRPU-070 not be used at all?
- Where to look for a smaller model if CRPU-070 does not fit?
- Do I need to buy mounting adhesive at the same time as CRPU-070?
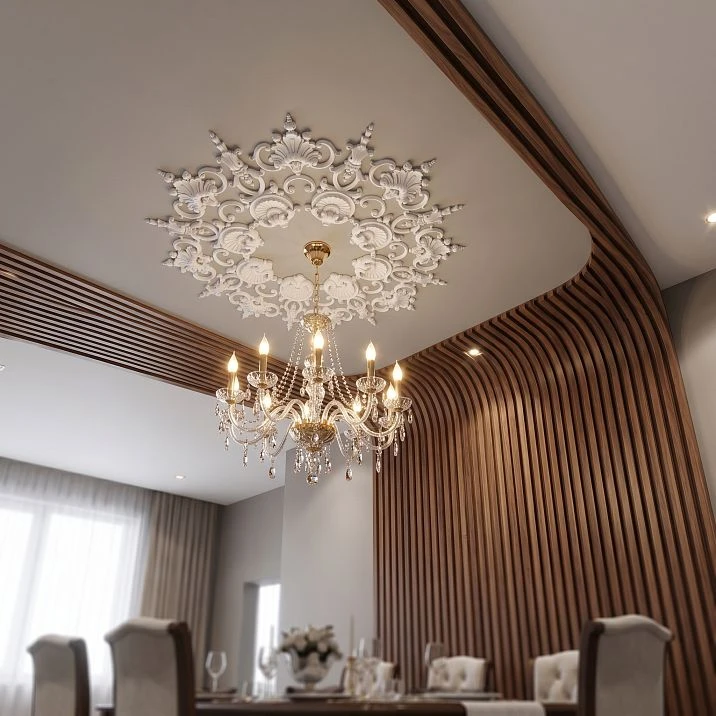
The slatted ceiling finish has already risen from the wall to the ceiling, and the electrical outlet for the chandelier is made at a specific point. At this stage, choosing a ceiling rosette "approximately by room size" is not enough. The future composition already has a rigid center — the light fixture point, and nearby there is a rigid boundary — the slatted ceiling strip.
For CRPU-070, this task is well calculated before purchase.
According to the current STAVROS product card, the following are confirmed:
-
product — ceiling rosette CRPU-070;
-
material — polyurethane;
-
dimensions — 765 × 765 × 18 mm;
-
current price — 35,680 ₽;
-
the composition is modular;
-
the composition includes NPU-244, NPU-130, and NPU-309;
-
in total, the system is assembled from 24 elements of three types.
If the center of the CRPU-070 must coincide with an existing chandelier outlet, half of the 765 mm dimension is:
765 / 2 = 382.5 mm.
That is, in the base orientation, the overall zone of the socket extends from the light point center approximately 382.5 mm to the left, right, forward, and backward.
This is the first and most useful calculation in the article.
If the nearest boundary of the slatted ceiling field is, for example, 300 mm from the electrical outlet, the 765 × 765 mm dimension already crosses this boundary:
300 < 382.5 mm.
If the boundary is at 500 mm, along this one axis the CRPU-070 fits on the smooth part of the ceiling:
500 > 382.5 mm.
But such a calculation only answers the question about the nearest straight boundary. It does not yet check the corners of the composition, track systems, spotlights, ceiling cornice, and the actual carved silhouette of the modular socket.
Therefore, the correct sequence before purchasing:
find the exact center of the outlet → measure four directions → mark a 765 × 765 mm square → overlay the real boundary of slats and other ceiling elements → compare the CRPU-070 pattern against the drawing/3D → check electrical and base → only then buy.
If all checks pass, you can buy the ceiling rosette CRPU-070 765 × 765 × 18 mm.
If the dimensions conflict with the already finished slat geometry, the correct commercial decision is 0 × CRPU-070 and comparing another ceiling rosette, rather than attempting to trim the finished modular composition for a single project.
What is confirmed for CRPU-070
| Parameter | Value |
|---|---|
| Product type | Ceiling rosette |
| Article number | CRPU-070 |
| Material | Polyurethane |
| Dimension A × B × C | 765 × 765 × 18 mm |
| Current price | 35 680 ₽ |
| Composition | modular composition |
| Number of element types | 3 |
| Total number of elements | 24 |
| Main modules | NPU-244, NPU-130, NPU-309 |
| Basic article scenario | 1 CRPU-070 per 1 existing chandelier point |
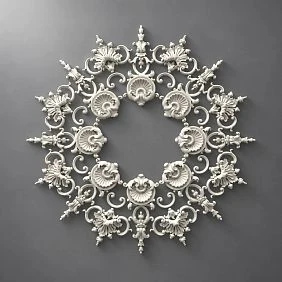
The product card also shows a 3D model, which is especially useful for this topic: the square footprint of 765 × 765 mm is needed for a preliminary check of the space, while the 3D and drawing help understand the actual carved silhouette within that footprint.
The composition cannot be considered a solid square slab just because the card gives dimensions of 765 × 765 mm.
For preliminary control, the 765 × 765 mm square is convenient as a footprint zone that needs to be cleared. For final installation, a real module layout is required.




Why this article does not duplicate general materials about ceiling rosettes and slat panels
STAVROS already has extensive materials:
-
on choosing a ceiling rosette for a chandelier;
-
on large and compact ceiling rosettes;
-
on polyurethane ceiling decor;
-
on slat panels on the ceiling;
-
about the transition of slats from the wall to the ceiling;
-
about the combination of a slatted ceiling and stucco decor.
They are needed by a reader who is still choosing the overall system.
Here the situation is much narrower.
The chandelier outlet is already made. The slatted ceiling strip already exists or its geometry is already defined. The buyer is specifically considering CRPU-070.
Therefore, the question is not:
which ceiling rosette generally suits the interior?
But:
whether a specific CRPU-070 765 × 765 mm fits around a fixed point so as not to intersect the existing slatted ceiling part and other elements.
Existing article STAVROS about the transition of slatted panels from the wall to the ceiling explains the architectural transition itself.
Material about slat panels for the ceiling and polyurethane ceiling decor covers a broad combination of two systems.
A new article is needed for pre-order measurement of one specific CRPU-070 relative to one specific light point.
Our factory also produces:
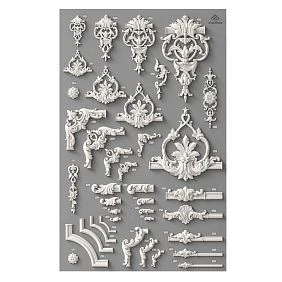
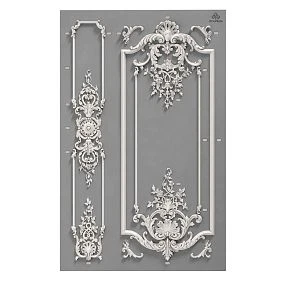
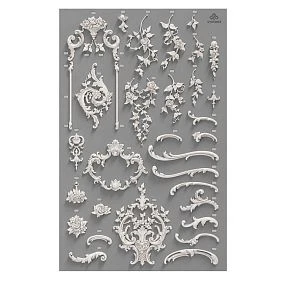
Geometry of CRPU-070 around the fixed outlet: 382.5 mm, a 765 × 765 mm square, and the actual silhouette
Get Consultation
Main calculation: from the chandelier center to the edge of the footprint, 382.5 mm is needed
With a footprint of 765 × 765 mm and the composition center placed at the chandelier outlet:
765 / 2 = 382.5 mm.
This is the baseline reference value.
It allows quick verification of four straight directions.
Let us denote:
-
L— distance from the outlet center to the left boundary of the free ceiling; -
R— to the right; -
F— forward; -
B— backward.
For the overall square in the accepted orientation, the following is required:
L ≥ 382.5 mm
R ≥ 382.5 mm
F ≥ 382.5 mm
B ≥ 382.5 mm
If at least one value is less than 382.5 mm, the overall square CRPU-070 crosses the corresponding boundary.
Important: this is not a mounting tolerance or a recommended decorative gap. This is only the geometric half of the stated size.
For example:
-
to the edge of the rack strip — 360 mm;
-
to the opposite smooth zone — 900 mm;
-
to the wall — 1200 mm;
-
to the track — 700 mm.
Towards the racks, there is already a conflict:
360 < 382,5.
So, even before discussing style, you need to move to full-size layout and understand whether the actual elements of CRPU-070 really fall on the racks.
Why the distance of 383 mm cannot automatically be called "fits perfectly"
Mathematically, 383 mm is only 0.5 mm more than 382.5 mm.
But a person does not buy a drafting square. They install a modular molding composition next to another relief system.
An almost zero remainder means:
-
the decor edge visually comes close to the rails;
-
any marking inaccuracy becomes noticeable;
-
the finishing edges of two systems begin to compete;
-
it is difficult to form a calm pause;
-
installation requires a particularly accurate diagram of the actual silhouette.
Therefore, the check consists of two different questions.
Question 1 — does the dimension physically fit?
It is solved by the number 382.5 mm.
Question 2 — is there enough visual space between the socket and the rails?
It cannot be solved by one universal number.
Need to make a ceiling template and evaluate the real composition from below.
Full-size template 765 × 765 mm is a mandatory step
For wall decor, a paper template is convenient.
For ceiling CRPU-070 it is especially valuable because it is difficult to view the ceiling at scale from a photo.
Need to transfer a 765 × 765 mm square to the ceiling with the center at the existing electrical outlet.
This can be done:
-
laser marking;
-
paper template;
-
light temporary grid;
-
a marking method safe for the specific ceiling finish.
The main thing is not to draw irreversible lines on the finished ceiling.
On the template, mark:
-
the center;
-
four sides of a square;
-
the inner boundary of the slatted ceiling strip;
-
cornice;
-
tracks;
-
spotlights;
-
sensors and other ceiling devices.
After this, not the "approximate" but the real intersection of systems becomes visible.
The overall square and the real carved silhouette are not the same thing
CRPU-070 is a modular composition, not a solid square panel.
This gives an important practical fork.
Let's imagine that the overall square of 765 × 765 mm overlaps the slatted strip by 20–30 mm.
From this, one cannot yet automatically draw two opposite conclusions:
"definitely not suitable";
Or:
"no big deal, because the socket is openwork."
You need to look at where exactly inside the footprint the actual modules are located.
If there is actually no CRPU-070 element in the formal overlap zone, physical contact may not occur.
If one of the external NPU modules falls exactly there, the conflict is real.
Therefore, the 765 × 765 mm square is a good preliminary stop filter, but not the final mounting scheme.
Final control is done by:
-
drawing;
-
3D model;
-
in the mounting layout;
-
to the actual kit, if it has already been received.
For ordering, it is better to use conservative logic: if the overall square noticeably crosses the slats, first compare another model rather than assuming that "the openwork will save it."
Why the corners of the overall dimensions need to be checked separately
Four measurements along the sides work if all obstacles run parallel to the sides of the template.
But a track, a light fixture, or a corner of a slat strip may be diagonal.
For a square of 765 × 765 mm, the distance from the center to the corner of the overall dimensions is:
√(382.5² + 382.5²) ≈ 541 mm.
This does not mean that the carved element CRPU-070 necessarily occupies each of the four corners of the square.
But for preliminary control, any point object in the sector up to approximately 541 mm from the center needs to be checked on the template, not just by the radius of 382.5 mm.
For example, a spot light is located:
-
420 mm to the right;
-
300 mm forward.
Distance from the center in a straight line:
√(420² + 300²) ≈ 516 mm.
By a simple check "it is farther than 382.5 mm" one might mistakenly conclude that everything is fine.
But by coordinates, the point is inside the square zone:
-
420 mm along X is greater than 382.5 mm — outside the square along one axis;
-
300 mm along Y is inside;
-
so the square itself no longer covers it.
Another example:
-
350 mm to the right;
-
300 mm forward.
Both coordinates are less than 382.5 mm.
This means the point is inside the bounding square, even if the diagonal distance is about 461 mm.
This is a good example of why it is better to mark the ceiling in coordinates rather than estimating a "radius around the chandelier."
Three scenarios regarding the slatted ceiling strip
After the template, the situation usually falls into one of three classes.
CRPU-070 remains entirely on the smooth ceiling
This is the simplest candidate for purchase.
Terms:
-
the footprint does not intersect the slats;
-
a readable pause remains;
-
no conflict with tracks and spotlights;
-
the chandelier point coincides with the desired center of the composition;
-
the base is suitable for installation.
In this case, the slat strip becomes an adjacent architectural zone, and CRPU-070 becomes a separate center of the smooth ceiling.
The dimensions fit almost flush against the slats
There may be no physical intersection, but a compositional risk arises.
Need to check:
-
does the socket seem "pressed" against the slats;
-
do the shadows of the two reliefs not merge;
-
is there no feeling of accidental contact;
-
Is there enough air from all other sides.
The view from below from the main point of the room is especially important.
A ceiling composition that looks neat on the plan may appear shifted in perspective.
CRPU-070 actually extends into the slat field.
This is no longer a standard installation on a smooth ceiling.
Questions arise:
-
what will intersecting modules rest on;
-
is there a difference in plane levels;
-
is it even possible to ensure proper contact;
-
will it be necessary to trim or remove slats;
-
will the rack composition be disrupted;
-
will the stucco module be a "bridge" between two different levels.
This situation requires a separate project.
For a standard article scenario, a more reasonable approach is to compare another ceiling rosette, rather than automatically overlaying CRPU-070 on top of the slats.
If the slats extend onto the ceiling only as a narrow strip, you need to measure not its width, but the position relative to the center of the chandelier
Let the ceiling slat strip have a width of 600 mm.
This figure by itself says almost nothing about CRPU-070.
More important:
-
where its near boundary runs;
-
where the far one runs;
-
where is the electrical outlet.
For example:
Scenario A
-
the rack strip starts at 550 mm from the center of the chandelier;
-
its width is 600 mm.
CRPU-070 along this axis only reaches 382.5 mm.
So the footprint does not cross the racks.
Scenario B
-
the strip starts at 320 mm from the center;
-
the width is the same — 600 mm.
The footprint already crosses it by at least:
382.5 − 320 = 62.5 mm along this axis.
The same width of the slats gave the opposite result.
Therefore, the article should not ask:
"What width is the slat strip?"
First question:
At what distance is its nearest edge from the already finished center of the chandelier?
Fixed electrical outlet, chandelier, and composition center: what cannot be corrected with a single socket
If the chandelier outlet is offset relative to the smooth ceiling area
This is one of the most important edge cases.
Often, the electrical outlet was made before the decorative ceiling layout.
After installing the slats, it turns out that the chandelier is not centered relative to the remaining smooth field.
Then the CRPU-070, centered on the electrical outlet, will also be offset.
You cannot automatically "fix" this with a decorative rosette.
There are two independent axes:
-
electrical point;
-
architectural center of the smooth ceiling.
If they do not coincide, you need to decide which system has priority.
For already finished electrical work, the main article is based on the fixed point.
But visually it is useful to draw two rectangles on the plan:
A — CRPU-070 according to the actual outlet;
B — CRPU-070 according to the architectural center.
If option B is significantly better, this is a signal not to move the socket "by eye," but to separately discuss the possibility of changing the point with an electrician.
If relocation is impossible or impractical, you need to choose ceiling decor that works with the existing outlet.
A ceiling outlet should not be used to mask incorrect electrical work.
CRPU-070 — decorative composition.
It should not serve as a solution for:
-
an improperly secured mounting plate;
-
an unsuitable mounting box;
-
damaged wiring;
-
a shifted light fixture mount;
-
a weak ceiling base.
If the technical point of the chandelier requires rework, the electrical and mounting are resolved first.
Only then — the stucco molding.
It is especially important not to confuse:
the center of the decorative composition
и
the load-bearing mounting point of the chandelier.
Polyurethane CRPU-070 is not a load-bearing part for the light fixture.
Do I need to remove the chandelier to install CRPU-070
There is no universal answer.
It all depends on:
-
the design of the light fixture;
-
the ceiling cup;
-
suspension;
-
existing mounting plate;
-
CRPU-070 assembly diagram;
-
accessibility of the base.
If the chandelier is not yet installed and there is only an electrical outlet, the task is simpler.
If the light fixture is already hanging, temporary disassembly may be required.
If this affects:
-
wiring;
-
terminals;
-
mounting;
-
mounting plate,
the work must be performed by a qualified specialist.
The article does not provide instructions to "remove the chandelier and glue the socket," because that is already an electrical engineering operation.
The central cup of the chandelier must be checked together with the modular composition.
Even if the CRPU-070 physically fits between the slats, the luminaire itself must be checked.
Parameters:
-
diameter or dimensions of the ceiling cup;
-
cup shape;
-
mounting position;
-
distance to the nearest molding modules.
The CRPU-070 card describes a modular star-shaped composition, but the article should not invent a universal diameter for the central hole or central free zone without separate confirmation.
Therefore, before ordering, you need to compare:
CRPU-070 drawing + actual chandelier cup.
If the cup is large, it can overlap part of the ornament.
If it is very small, the center of the composition will be read differently.
This is a separate check, not related to the slats.
The 18 mm thickness is important for the luminaire, shadows, and adjacent ceiling systems
The maximum dimension along the third axis is 18 mm.
This is not a huge relief, but it affects:
-
chiaroscuro;
-
visual depth;
-
the position of the ceiling cup;
-
proximity to tracks;
-
the difference in levels relative to the slats.
Since CRPU-070 is assembled from modules of different thicknesses, the actual plasticity within the composition is not uniform. The card shows elements NPU-244, NPU-130, and NPU-309 with different C values.
This is useful to consider with side lighting.
The socket will be perceived not as a flat drawing 765 × 765 mm, but as a relief system.
Tracks, spotlights, sensors, and cornice: how to check adjacent ceiling elements
Track lighting cannot be checked only by the distance to its axis
If a ceiling track is already installed next to the chandelier, it is easy to measure the distance from the center of the outlet to the center line of the track on the plan.
This is not enough.
The track has:
-
its own width;
-
lights that may protrude to the sides;
-
rotating heads;
-
service area;
-
luminous flux.
Therefore, they check not just one line, but the actual overall size of the system in its working position.
Suppose the track axis is 450 mm from the center of the chandelier.
Based on one number, it seems that 450 mm is more than 382.5 mm, and the CRPU-070 should fit.
But if the track itself and its fixtures occupy space within this zone, the actual clearance turns out to be smaller.
A full-size template shows this immediately.
Another question is light.
If a swivel spotlight is directed along the ceiling, the 18 mm relief can create a very active shadow. Sometimes it's beautiful. Sometimes the edge of the socket starts to look heavier than in the frontal photo.
Therefore, the track is checked both geometrically and photometrically according to the actual direction of the fixtures.
Spotlights inside the overall square require verification against the actual silhouette of CRPU-070
With spotlights, the situation is more subtle.
If the spot is outside the 765 × 765 mm square, a size conflict is unlikely.
If it's inside, that doesn't automatically mean CRPU-070 cannot be used, because the modular composition doesn't fill the entire square with solid material.
But before purchasing, you need to overlay:
-
the spotlight's coordinate;
-
the actual module drawing;
-
the required access zone to the spotlight.
You cannot choose a solution based on the principle:
"there seems to be a hole between the petals".
A recessed spotlight may require:
-
removing the decorative ring;
-
access to the driver;
-
replacing the lamp or module;
-
pulling it out of the opening.
Stucco molding should not turn routine light maintenance into dismantling part of the socket.
Sensors, ventilation grilles, sprinklers, and other ceiling devices must not be covered by decor.
In a residential space, sensors may be located near the chandelier.
In a commercial space, there are even more engineering elements.
CRPU-070 must not:
-
close the device;
-
reduce access;
-
cover the opening;
-
serve as the basis for moving equipment without a project.
If there is already an engineering point inside the 765 × 765 mm square, it is first marked on the ceiling plan.
After that, one of the following decisions is made:
-
CRPU-070 follows the actual silhouette and does not interfere with maintenance;
-
a different orientation is chosen if it is permissible and actually changes the situation;
-
a different outlet is chosen;
-
the engineering system is moved only within the scope of a separate project.
For an article about buying a ceiling rosette, the last option is not a "simple solution."
The ceiling cornice is checked not against the wall, but against the inner projection into the ceiling.
The cornice may occupy part of the ceiling plane.
If you only measure the distance from the chandelier to the wall, you can overestimate the free space.
Need to know:
-
where the cornice actually ends on the ceiling;
-
whether it has relief;
-
how much clean plane remains between the cornice and CRPU-070.
For example:
-
from the center of the chandelier to the wall — 900 mm;
-
the cornice extends onto the ceiling by 180 mm.
Clean distance to the inner edge of the cornice:
900 − 180 = 720 mm.
For half of the CRPU-070, 382.5 mm is sufficient along this axis.
But if the distance to the wall is 520 mm and the cornice takes up 180 mm:
520 − 180 = 340 mm.
Then the overall square already conflicts with the cornice zone:
340 < 382,5.
This is a different type of calculation than checking the slats, because here the free plane is reduced by the ceiling cornice protrusion.
Boundary of slats and CRPU-070: plane transition, visual pause, and pattern direction
If the slats are thicker than the smooth part of the ceiling, you cannot automatically extend the CRPU-070 module across the transition
Slat ceiling finish has its own depth.
The smooth ceiling has another.
If the edge of CRPU-070 crosses a boundary, one module can end up over two levels at the same time.
Then problems arise:
-
part of the back side does not adhere;
-
the module may wobble;
-
a compensating substrate is required;
-
the ornament visually breaks at the transition;
-
the shadow becomes uneven.
The article does not prescribe a method for leveling such a joint, because it depends on the specific batten system, its thickness, and the base.
For a regular purchase, a much safer rule is:
CRPU-070 should be designed so that its actual modules are entirely on one prepared ceiling plane.
If an intentional intersection of two levels is planned, a separate installation project is needed.
The batten strip can frame the CRPU-070, but it does not have to fit flush against it.
Sometimes the finished geometry comes together successfully:
-
the battens run on one side;
-
the socket is located on a smooth field;
-
a clean ceiling pause remains between them.
Such a pause is useful.
It separates two systems:
the frequent linear rhythm of the battens
и
the radial ornament of the CRPU-070.
The more active the tree is in color and texture, the more valuable the free ceiling area is.
Therefore, after checking that it "fits," it is useful to make a second template—not of the rosette's size, but of the free zone around it.
There is no need to set universal 50, 100, or 150 mm.
It is necessary to assess:
-
room scale;
-
width of the slat strip;
-
chandelier size;
-
cornice depth;
-
Light.
The pause should look deliberate, not residual.
CRPU-070 and the slat strip create two different directions: radial and linear.
The slats guide the eye in one direction.
CRPU-070 is organized around the center.
This can be a strong combination.
A linear system defines movement.
A radial one defines a stopping point.
But the effect works if these systems don't randomly cut across each other.
On the ceiling plan, it's worth checking:
-
where the battens are directed;
-
where their longitudinal axis is;
-
where the room's axes are;
-
how the star-shaped geometry of CRPU-070 reads.
If the batten strip runs strictly toward the chandelier, the CRPU can be perceived as the logical conclusion of that movement.
If the strip runs along the side, it becomes an adjacent accent.
If the slats break off right at the socket's outline, the composition looks more complex and requires a more precise layout.
The orientation of CRPU-070 needs to be checked against the actual pattern, even with a square outline.
A and B for CRPU-070 are the same — 765 mm.
This means the outline along the two main axes is square.
But a square outline does not make orientation meaningless.
The reason is the pattern of the modules.
The card describes a star-shaped composition of NPU-244, NPU-130, and NPU-309.
Before installation, you need to check:
-
where the main rays run;
-
how they relate to the rails;
-
how they relate to the walls;
-
how they look relative to a rectangular room.
If the composition has eightfold repetition, some rotations may produce an equivalent pattern. But this should not be taken as a mounting rule without a diagram.
In practice, it is better to open the 3D model and check at least two positions relative to the rails.
Not to "squeeze" the socket into a smaller dimension — the card size is not canceled by rotation itself — but for visual alignment of the rays and lines of the room.
The center of the chandelier, the center of the CRPU-070, and the center of the room can be three different points
In an ideal project, they often coincide.
In real renovation, they do not.
For example:
-
the chandelier is centered on the table;
-
the table is offset relative to the room;
-
the slat strip is centered on the TV zone;
-
the ceiling has a complex shape.
Then the CRPU-070 cannot be evaluated only by the "center of the room."
The original article is based on the existing electrical outlet, because it is what limits the buyer.
But before ordering, it is useful to mark on the plan:
-
the geometric center of the room;
-
the center of the smooth ceiling field;
-
the center of the outlet;
-
the center of the furniture, if the chandelier is tied to it.
If the CRPU-070 around the actual outlet looks deliberate, that's great.
If it visually emphasizes an undesirable offset, a more compact or differently arranged outlet may be better.
The 765 mm size should be compared with the chandelier, but the article should not turn into a general guide on proportions.
STAVROS already has separate detailed articles on choosing ceiling outlets for chandeliers.
Here only a control question is needed:
does the chandelier cover the CRPU-070 pattern so much that the purchase loses its meaning?
Check:
-
diameter of the ceiling cup;
-
span of the decorative elements of the lamp near the ceiling;
-
hanging height;
-
visibility of the outlet from below.
If the chandelier has a wide flat ceiling cup, it can cover the central part of the molding.
If the light fixture is very large and close to the ceiling, the visibility of the external modules also changes.
This does not automatically make the CRPU-070 unsuitable.
But the size of the rosette should be evaluated together with the specific light fixture, not separately on a white ceiling.
Modular design, base, and installation: what to check before ordering a kit for 35,680 ₽
The current price of 35,680 ₽ makes a full-size check mandatory from a commercial point of view.
The CRPU-070 is not a small single overlay.
The current cost of the kit is 35,680 ₽.
Therefore, the decision "we'll take it and see on site" is worse than for inexpensive local decor.
Before purchasing, you can check for free:
-
the center;
-
overall dimension;
-
intersection with rails;
-
cornice;
-
tracks;
-
lighting fixtures;
-
orientation;
-
Scale.
That is, most of the risk is removed by the tape measure, plan, and template.
Commercially correct result of the article:
1 × CRPU-070 = 35,680 ₽, if the ceiling passed the check;
or
0 × CRPU-070, if the dimension or existing ceiling architecture is not suitable.
The modularity of CRPU-070 helps to more accurately verify the actual contour, but does not cancel the overall dimension
According to the description, STAVROS CRPU-070 consists of 24 elements of three types:
-
NPU-244;
-
NPU-130;
-
NPU-309.
This is useful for installation and for final intersection checks.
If the overall square fits very close to the rail strip, you can open the diagram and see which specific module ends up at that boundary.
But modularity cannot be used as an argument:
if anything, we'll just remove one element.
CRPU-070 is sold as a finished composition.
Arbitrary exclusion of one module:
-
changes the pattern;
-
breaks the symmetry;
-
turns the finished rosette into a different project;
-
may worsen the visual connection with the chandelier.
If one of the outer elements doesn't fit due to the slats, the right solution is not to "under-assemble" CRPU-070, but to reconsider the model or the ceiling geometry.
The base for CRPU-070 should be checked before ordering, especially if the slats end nearby.
The polyurethane rosette is mounted on the ceiling surface.
But in a real interior, a smooth ceiling can be:
-
plastered and painted;
-
drywall;
-
stretch;
-
of another construction.
You cannot give the same instructions for all surfaces.
Especially if a slat system runs nearby.
At the point where the slats end, there may be:
-
frame;
-
guides;
-
substrate;
-
transition profile;
-
Different surface level.
Before purchasing CRPU-070, you need to understand what real plane all 24 modules will end up on.
If it is a regular prepared rigid ceiling, that is one scenario.
If part of the dimension ends up above a stretch ceiling system, slat frame, or non-standard joint, a separate installation project is needed.
A stretch ceiling requires a separate structure, not gluing the rosette "just to the fabric."
If the smooth part of the ceiling is stretch, you cannot directly transfer the usual molding installation logic to the fabric.
You need to know in advance:
-
whether there is a recessed mounting;
-
where it is located;
-
whether it is designed for a decorative composition;
-
how the chandelier center will be arranged.
-
How the rack ceiling part goes.
In such a situation, the dimensional template 765 × 765 mm is still useful, but it only solves the compositional task.
The mounting part should be designed by a specialist in the specific ceiling system.
That is why the article does not promise:
"CRPU-070 can be glued to any ceiling."
The product may fit in size and at the same time require different technical preparation.
The chandelier mounting and the CRPU-070 mounting cannot be combined into one unit without a project
The chandelier carries its own weight.
CRPU-070 is a decorative polyurethane composition.
They have different functions.
Correct logic:
-
the chandelier is attached to its standard support system;
-
CRPU-070 is mounted as a decorative element;
-
both systems are geometrically aligned around a single center.
It cannot be assumed that the socket:
-
reinforces the chandelier's mounting;
-
holds the lamp's cup;
-
replaces the embedded plate;
-
compensates for a weak base.
If the existing outlet or chandelier mounting is questionable, the technical part is resolved first.
Materials for installation are selected based on the actual ceiling base
In the STAVROS catalog there is a section materials for installation and finishingand on the CRPU-070 card, KUDO HIGH TACK is displayed among related products.
But this does not mean that the same composition is automatically suitable for any ceiling.
Need to consider:
-
polyurethane CRPU-070;
-
actual ceiling finish;
-
requirements of the installation material manufacturer;
-
weight and geometry of the modules;
-
temporary fixation method;
-
condition of the base.
Therefore, the article does not assign a specific adhesive as unconditional.
First, the ceiling system is confirmed.
Then, a compatible installation technology is selected.
Visual check after geometry: color, rhythm, and the necessity of the CRPU-070 itself
The color of the CRPU-070 can visually separate it from the slats or, conversely, calm the composition
After dimensions and installation, a visual question remains.
The slat strip already has:
-
color;
-
wood texture or another material;
-
vertical-longitudinal rhythm.
CRPU-070 adds:
-
chiaroscuro;
-
radial geometry;
-
classic/decorative motif.
The calmest first scenario is a rosette in the color of the smooth ceiling.
Then CRPU-070 is read through the relief, but does not turn into a separate color spot.
Contrast coloring enhances the rosette.
It can be justified if the same color is already repeated in the interior.
But if the slats are already dark and the chandelier is active, another contrasting ceiling accent can overload the upper part of the room.
The slatted ceiling part can already be the main accent — then CRPU-070 is not necessary even if it fits.
This is an important distinction between physical possibility and design necessity.
CRPU-070 can fit perfectly:
-
up to the slats 600 mm;
-
up to the cornice 800 mm;
-
no tracks nearby;
FAIL — confirmed module CRPU-070 physically conflicts with rails, cornice, light fixture, or another system.
Example:
-
to the rails — 410 mm;
-
to the opposite boundary — 860 mm;
-
to the inner edge of the cornice — 370 mm;
-
side — 700 mm.
Along the rails, the primary dimension passes:
410 > 382,5.
Along the cornice — no:
370 < 382,5.
So, even if the topic started with the rail strip, the real limiter turned out to be the other side of the ceiling.
This is a useful semantic twist: you need to check the entire square around the fixed center, not just the object that first raised doubt.
If the constraint goes at an angle, the table does not replace the template. Then the full square and the actual obstacle line are transferred to the ceiling.
Mistakes that cause CRPU-070 to be purchased before the ceiling is ready to accept it
Mistake 1. Measuring the distance from the rail to the wall, not from the rail to the center of the chandelier
Why it occurs: the rail strip is perceived as a separate zone.
Consequence: it is unknown whether CRPU-070 crosses it.
Check: measure from the fixed electrical outlet.
How to avoid: build the entire scheme from the center.
Mistake 2. Using the "382.5 mm radius" as a universal check for all obstacles
Why it occurs: half of 765 mm looks like a radius.
Consequence: diagonal points and the square zone are checked incorrectly.
Check: mark out a 765 × 765 mm square.
How to avoid: use coordinates and a full-size template.
Error 3. Treating the entire square as a solid rosette
Why it occurs: the card dimensions are perceived as the material area.
Consequence: the model is rejected upon a small formal intersection, although the actual silhouette may pass.
Check: drawing/3D.
How to avoid: use the square as a bounding filter, not an exact contour.
Error 4. Making the reverse mistake — considering openwork a guarantee
Why it occurs: "there is a lot of empty space."
Consequence: the actual module hits a rail, track, or light fixture.
Check: installation layout.
How to avoid: check the specific element in the conflict zone.
Error 5. Ignore the internal projection of the ceiling cornice
Why it occurs: measured up to the wall.
Consequence: the free ceiling zone is overstated.
Check: measure to the inner edge of the cornice.
How to avoid: apply the actual cornice dimension to the plan.
Error 6. Trying to "shift" CRPU-070 relative to the chandelier without checking the electrical wiring
Why it occurs: this way the socket fits better.
Consequence: the decorative and light centers diverge.
Check: a separate plan of the chandelier center.
How to avoid: do not change the axis just for the sake of dimensions.
Mistake 7. Considering a polyurethane rosette as part of the light fixture mounting
Why it occurs: it is located around the chandelier.
Consequence: the decorative element receives a load-bearing function.
Check: the light fixture mounting diagram.
How to avoid: separate decor from the load-bearing system.
Mistake 8. Checking the ceiling without the installed track or curtain rod
Why it occurs: some elements are not yet installed.
Consequence: after purchase, the free area decreases.
Check: the complete ceiling plan.
How to avoid: consider all future elements of the project.
Mistake 9. Buying CRPU-070 only because it physically fits.
Why it occurs: a geometric PASS is perceived as a design PASS.
Consequence: the ceiling becomes overloaded.
Check: compare the render/template with a version without the socket.
How to avoid: separately assess the necessity.
Practical check before ordering: quick test and full algorithm
Quick check of CRPU-070 in 15 minutes
Step 1
Mark the exact center of the electrical outlet.
Step 2
Measure 382.5 mm in four main directions.
Step 3
Connect the dots into a 765 × 765 mm square.
Step 4
Mark the batten ceiling strip.
Step 5
Add the inner edge of the cornice.
Step 6
Apply tracks and spotlights.
Step 7
Mark the chandelier cup.
Step 8
Check for direct intersections.
Step 9
If the intersection is small — open the drawing/3D CRPU-070.
Step 10
Check the actual module in this zone.
Step 11
Look at the ceiling from below from the main point.
Step 12
Compare the option with CRPU and without it.
Step 13
Check the ceiling base.
Step 14
If electrical work is affected, coordinate the work with a specialist.
Step 15
Make one decision:
1 × CRPU-070
or
0 × CRPU-070 and another model.Full algorithm before ordering CRPU-070
-
Confirm the product: CRPU-070 765 × 765 × 18 mm.
-
Confirm the current chandelier outlet center.
-
Do not move the center by eye.
-
Measure to the nearest edge of the batten strip.
-
Measure the opposite side.
-
Measure two perpendicular sides.
-
Compare each with 382.5 mm.
-
Mark out the entire 765 × 765 mm square.
-
Mark the corners of the overall dimensions.
-
Apply the ceiling cornice.
-
Apply tracks.
-
Apply spotlights.
-
Apply sensors and other devices.
-
Apply the actual chandelier cup.
-
For any intersection, open the drawing/3D.
-
Determine whether the real CRPU-070 module conflicts.
-
Check the plane difference between rails and smooth ceiling.
-
Do not design the module through two levels without a separate node.
-
Compare the output center with the architectural center.
-
Check the orientation of the pattern relative to rails and walls.
-
Look at the template from the main point of the room.
-
Check the evening light.
-
Assess whether the ceiling is becoming overloaded.
-
Check the type of ceiling base.
-
Check the chandelier's support system separately.
-
If the light fixture is already installed, find out if it needs to be removed.
-
Do not interfere with the wiring without qualifications.
-
Select a mounting system that matches the actual base.
-
Only after all checks, order the kit.
Decision matrix
Condition Solution More than 382.5 mm to all direct boundaries go to full-size template less than 382.5 mm to the rails there is a dimensional intersection intersection only in the empty silhouette zone check the drawing and installation diagram the real module falls on the rails another model or a separate project CRPU fits closely without a pause evaluate the visual gap the track fits into the square check the full track dimension and maintenance Spotlight inside a square verify the actual CRPU silhouette The cornice reduces the free zone below 382.5 mm conflict along this axis The output is offset relative to the smooth field do not move the socket without checking the electrical system Tension/non-standard base separate installation project Geometry passes, but the ceiling is overloaded 0 CRPU-070 All checks passed 1 × CRPU-070 for 35,680 ₽ Result: CRPU-070 needs to be checked not against the room, but against the fixed center of the chandelier
CRPU-070 is a polyurethane ceiling rosette measuring 765 × 765 × 18 mm. The current price is 35,680 ₽. It is a modular composition of 24 elements of three types.
But for a specific interior, the most important fact is different:
the chandelier outlet is already made.
This means the center of selection is effectively predetermined.
From it, CRPU-070 in its base size requires 382.5 mm in each of the four main directions.
This allows quickly filtering out clearly unsuitable situations.
Next, a 765 × 765 mm square is needed on the ceiling.
It shows:
-
intersection with the slat strip;
-
cornice;
-
tracks;
-
lighting fixtures;
-
other devices.
If the square conflicts only with a small corner or edge, the final decision is made based on the actual silhouette of the modules through the drawing and 3D, not by guesswork.
If the real element extends onto the slats or a level difference, standard installation ceases to be simple.
If everything fits, there remains a second check — whether an outlet is needed compositionally.
The slats already create a strong linear architecture.
CRPU-070 adds a radial center around the chandelier.
When there is a pause between them and each system has its own role, the combination can be very convincing.
When they collide, the ceiling looks overloaded.
Therefore, the commercial conclusion is honest:
CRPU-070 fits → 1 set for 35,680 ₽.
CRPU-070 does not fit the dimensions or visually overloads the ceiling → 0 sets and transition to another ceiling socket.
After checking the dimensions, you can order a specific CRPU-070 in the product card. If its dimensions do not fit, it is more reasonable view polyurethane ceiling rosettes, than to change the already finished slat geometry just for one model.
FAQ
If it is exactly 382.5 mm to the slats, will the CRPU-070 definitely fit?
According to dimensional arithmetic, the edge of the square coincides with the boundary. But this does not provide a visual gap and does not account for the actual mounting assembly. Such a case should be considered borderline and checked at full scale.
If the slats only cross the corner of the 765 × 765 mm square, must the socket be excluded?
No. First, you need to verify the actual cut-out silhouette of the CRPU-070. The square is a dimensional zone, not a solid shape. But you should not buy before this check.
Can the CRPU-070 be rotated to better clear the slats?
The orientation of the pattern can be checked using the 3D model and diagram. But rotation cannot be considered a way to automatically reduce the stated dimensions. You need to compare the actual geometry after rotation, not assume the result.
If the chandelier is already hanging, can CRPU-070 be mounted around it?
It depends on the fixture and the mounting scheme. If installation requires removing the fixture or interfering with the electrical wiring, that part must be done by a qualified specialist.
Can the chandelier be secured through CRPU-070 elements?
The ceiling rosette is considered a decorative system, not a load-bearing part. The chandelier mounting must have its own reliable base.
What to do if a single spot light falls within the square of CRPU-070?
Overlay its coordinate onto the actual composition drawing and check access for maintenance. If the light conflicts with the module or cannot be serviced, a different scheme is needed.
Is it necessary to leave the same gap to the slats on all sides?
Not necessarily. The slat strip can be on only one side. But a close gap should look intentional and not create accidental contact.
If the ceiling is stretch, can CRPU-070 not be used at all?
The article does not make such a conclusion. But installation on a stretch ceiling system requires separate technical preparation and embedded elements; the usual logic of gluing to a rigid ceiling cannot be automatically transferred.
Where to look for a smaller model if CRPU-070 doesn't fit?
In the category ceiling rosettes made of polyurethane STAVROS you can compare other dimensions and patterns.
Do I need to buy mounting adhesive at the same time as CRPU-070?
First, you need to confirm the type of ceiling base and the requirements of the mounting system. The STAVROS catalog contains mounting materials, but the specific composition is selected based on compatibility with the actual ceiling.
-