Article Contents:
- Why the price of a slat panel is not the full cost of finishing
- What determines the price of slat panels
- Material: MDF or solid oak
- Slat size and profile
- Coating and degree of readiness
- Complexity of junctions
- What dimensions need to be considered
- Wall height and panel height
- Wall width and panel width
- Panel thickness
- Slat direction and trimming
- Allowance for errors and joints
- How to calculate the number of slat panels
- Why the baseboard affects the final cost
- Baseboard — not just decor
- How the baseboard affects panel height
- MDF baseboard or wooden: which to choose
- Calculating baseboard in linear meters
- What additional elements are needed
- End caps
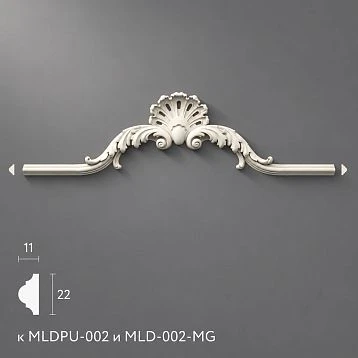
- Moldings
- Corner Elements
- Trim profile for adjoining casing
- Decorative moldings and slats
- Ceiling junction element
- MDF or wood panels: what affects finishing costs
- Example of calculating a full set
- Mistakes when calculating the cost of slatted panels
- Where to buy slatted panels, baseboards, and trim elements
- FAQ: Answers to Popular Questions
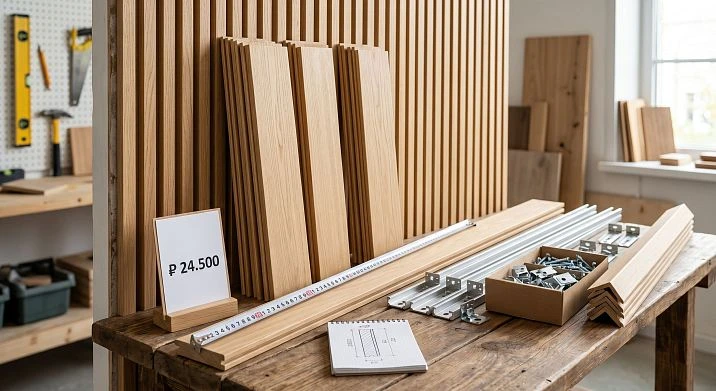
When a person first asks how much it costs slatted panels for walls, they usually think about one panel. However, the actual cost of finishing is calculated quite differently: it is the sum of the panels themselves, baseboards, end caps, moldings, trim profiles, and a reserve for cutting. That is why you need to calculate not just one item, but the complete installation set — only then can you get an accurate figure and avoid unpleasant surprises during the work process.
Why the price of slat panels is not the full cost of finishing
This is one of the most common miscalculations when planning a renovation. A person looks at the cost of slat panels per piece or per square meter, multiplies it by the wall area, and gets a sum that ultimately turns out to be significantly less than the actual expenses. The remainder is "eaten up" by accompanying elements that seem like trifles but together take up a noticeable share of the budget.
The cost of slat panels for walls is made up of several components, and each of them requires separate attention. The panels themselves are the foundation, but far from everything. Added to them are: Wooden baseboard floor perimeter strips, end strips along the side edges, moldings at the junction with the ceiling or adjacent surfaces, corner elements, profiles for adjoining door frames and casings. If the wall has niches, sockets, switches, or protrusions, each of these elements requires additional cutting and material consumption.
An experienced craftsman never starts the calculation with the panels. He begins with a full measurement of the wall and drawing up a layout diagram—only after that does the real need for each item become clear. This principle is worth adopting for anyone planning buy wall slat panels to do the finishing correctly the first time.




What determines the price of slat panels
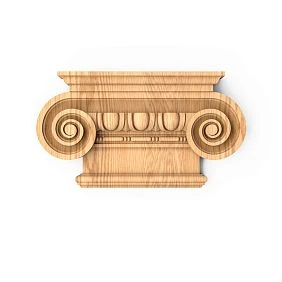
Our factory also produces:


Material: MDF or solid oak
This is the first and most fundamental question. MDF slatted panel for painting and a panel made of natural wood are two different products with different pricing logic, different visual results, and different application scenarios.
MDF panels are made from medium-density fiberboard — 750–850 kg/m³. This material is homogeneous in structure, free from natural defects (knots, resin pockets, cracks) and provides a perfectly smooth surface for applying any paint or varnish coating. It is MDF that is most often chosen for monochrome interiors in minimalist, Scandinavian, and modern classic styles — where the wall should be painted to match the main space or become a clear color accent. Wall slatted panels made of MDF are generally more affordable than their wooden counterparts.
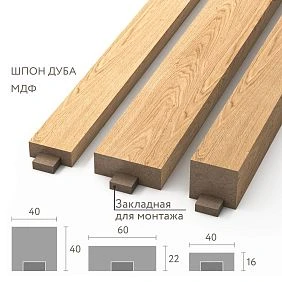
Oak Slat Panel — this is a different category. Oak with a density of 700–750 kg/m³ carries a living natural fiber pattern that cannot be reproduced by either film or veneer. Under transparent oils and varnishes, the wood reveals a warm golden tone; tinting compounds allow for Scandinavian gray, deep wenge, or restrained tobacco cognac. Wooden panels are more expensive, but it is a justified investment: the living texture of oak creates a feeling of warmth and prestige in the interior that no synthetic material can provide.
Get Consultation
Size and profile of the slat
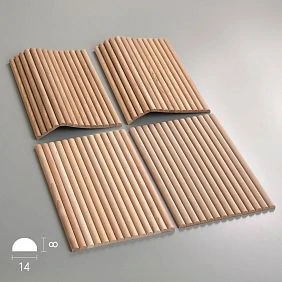
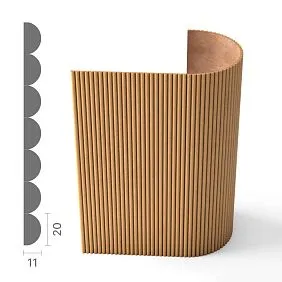
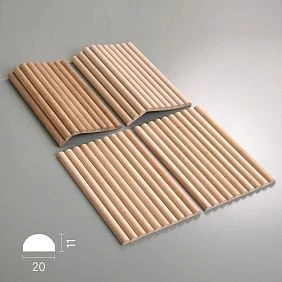
The width of the slat, the height of the profile, the spacing between slats, the cross-sectional shape — all of this affects material consumption and the final cost of the finish. Panels with narrow slats and small spacing create a denser, richer pattern. Wide slats with large spacing create an airy, light surface. The profile can be rectangular, with a chamfer, or with a rounding — and each option has its own production cost.
The thickness of the panel also matters: it determines how much the slats protrude from the wall plane and how deep the light and shadow will be. Thicker panels are generally more expensive and provide a more expressive volumetric effect.
Coating and degree of readiness
decorative slatted panels can be supplied in varying degrees of readiness: simply sanded (for self-painting or tinting), primed (ready for the final coat), or already coated with varnish, oil, or enamel. Each subsequent stage of processing adds to the price of the panel, but saves time and effort during installation.
Complexity of junctions
The more architectural obstacles on the wall — doors, windows, niches, protrusions, sockets — the more material will be used for cutting and the more complex the installation will be. The complexity of junctions also affects the consumption of additional elements: more corner profiles, more end strips, more short fragments are needed. All of this increases the final cost of finishing with slatted panels.
What dimensions need to be considered
Wall height and panel height
This is the first measurement from which any calculation begins. The wall height determines what length of panels you need and whether you will have to cut them. The standard ceiling height in Russian apartments is 2.5–2.7 m. If your wall is exactly that and the panel length matches the finishing height, you avoid cutting and waste. If not, you need to plan for extra material.
It is important to understand: the finishing height with slat panels is not necessarily equal to the wall height. Many designers intentionally stop the panels at a height of 1.8–2.2 m — below the ceiling. This creates an interesting tiered solution and saves on material. In this case, the top edge of the finish is covered with a molding, which completes the surface and gives the wall a finished look.
Wall width and panel width
The wall width is divided by the working width of one panel — this is the basis for calculating the number of panels. The working width is exactly the part of the panel that is visible after installation, excluding overlapping elements or connecting grooves.
The dimensions of slat panels are a key parameter for layout. Knowing the exact width values allows you to immediately understand how many whole panels will fit on the wall and what the remainder will be. If the remainder is less than half a panel, it may make sense to shift the layout, starting from the center of the wall.
Panel thickness
This size of the slat panel affects how much the finish protrudes from the main wall. When installing with glue without a frame, the thickness adds to the depth of the room. When installing on a frame, the thickness of the profile is added to the panel thickness. If door frames or trims are nearby, you need to ensure that the panel protrusion does not conflict with them. Otherwise, additional elements or reinstallation of trims will be required.
Slat direction and cutting
Vertical slat direction is the most popular option: it visually stretches the space upward. Horizontal direction widens narrow rooms. With vertical orientation, cutting is done by height: if the standard panel length does not match the finishing height, each panel is cut from the bottom or top. The cut fragment, as a rule, cannot be used elsewhere — it becomes waste.
With horizontal orientation, cutting is done along the length of the panel in the outer rows. The logic is the same: waste is accounted for in the reserve in advance, otherwise there will not be enough material.
Allowance for errors and joints
A professional master always takes a margin — and this is not over-insurance, but a mathematical necessity. When calculating the required number of slatted panels, the standard allowance for trimming is 10 to 15% of the calculated quantity. If the wall is complex — many corners, niches, doors — the allowance is increased to 20%. A shortage of material during installation is a serious problem, especially if the batch of panels from the same production run has run out.
How to calculate the number of slatted panels
The calculation algorithm is simple, but requires precision at every step. Here is the sequence that professionals follow:
-
Measure the width of the wall — from corner to corner, at the finishing level. If the wall has protrusions, niches, or door openings, each section must be measured separately.
-
Find out the working width of one panel — this value should be specified in the product specification. Do not confuse it with the total width: the working width may be slightly smaller due to the connecting element.
-
Divide the width of the wall by the working width of the panel — this gives the base number of panels. If the result is not an integer, always round up.
-
Add an allowance for trimming — at least 10%, for complex walls 15–20%. The allowance is needed not only in case of errors, but also for future repairs: a few panels stored as a spare can come in handy several years later.
-
Separately calculate the areas around doors, sockets, and corners — each such section requires non-standard pieces of panels that cannot be used elsewhere.
If the wall has a door opening, do not subtract its area from the total calculation — panels above the door are still needed, and trimmings from the sides of the door are rarely suitable for another place. This is one of the sources of overconsumption that is often underestimated.
Why the baseboard affects the final cost
The baseboard is not just decor
Wooden baseboard — it is a functional element that covers the bottom gap between the slatted panel and the floor. Without it, the lower edge of the finish remains exposed: uneven cuts, possible gaps, and fasteners are visible. The wall looks unfinished, as if the craftsman left without completing the job.
In addition to aesthetics, the baseboard serves a protective function: it absorbs impacts during vacuum cleaning and protects the bottom end of the panel from moisture that can accumulate near the floor. This is especially important for solid wood panels: an unprotected bottom end is an entry point for moisture.
How the baseboard affects panel height
The height of the baseboard directly affects the calculation of the finish height. If a high baseboard is planned — 80, 100, or 120 mm — it must be subtracted from the wall height when calculating the panel length. Panels are installed so that the baseboard overlaps their bottom end: this creates a clean joint without visible gaps.
If the baseboard is low — 40–60 mm — the panels are trimmed to the appropriate level. In both cases, precise coordination of dimensions is necessary, otherwise the joint will be unsightly or require additional finishing.
MDF baseboard or wooden: which to choose
When the wall is finished with MDF slatted panels for painting, an MDF baseboard is a logical choice. It can be painted the same color as the panels, creating a unified monochrome space. MDF baseboard accepts enamel well, is easy to process, and requires no complex maintenance.
If the finish is made of solid oak, a solid wood baseboard is the obvious solution. A single species, a single texture, a single coating system. Wooden baseboard made of oak or beech creates a cohesive ensemble with wooden panels, which reads as a deliberate design solution rather than a set of randomly selected materials.
Calculation of skirting board in linear meters
Skirting board is calculated in linear meters. The basic calculation is simple: the perimeter of the wall (or the length of the walls being finished) equals the required amount of skirting board. But there is a nuance: in corners, the skirting board needs to be joined — at 45 degrees for internal corners and at 45 degrees for external corners. Each joint results in a small waste. Therefore, a margin of 5–10% is added to the calculated number of linear meters.
What additional elements are needed
This is exactly the section that is most often ignored when planning a budget. Additional elements are small, but their total cost can amount to 15–25% of the budget for panels.
End strips
The end strip covers the side cut of the panel. If the slatted wall ends in a corner, the end goes into the corner and is not visible. But if the wall ends in an open space — for example, it opens onto a corridor or is a partition wall — the end must be covered with a decorative strip. Without it, the cut of the backing, the internal structure of the panel, and the fastening elements are visible.
Moldings are linear profiles used to create framed compositions, zone walls, and frame openings. They come in various widths (from 20 to 150 mm) and relief complexity — from smooth to richly decorated.
Wooden moldings are used to design the top edge of the slatted finish. If the panels do not reach the ceiling, the molding covers the top joint and forms a complete horizontal line. The molding is also used when joining the slatted finish with another material: for example, when the lower part of the wall is finished with panels and the upper part with plaster or wallpaper.
Corner elements
Internal and external corners are the most labor-intensive areas when installing slatted panels. Ideally, the corner is designed with a special corner profile that hides the joint of two panels and gives the corner a clean, finished look. The corner element must be selected taking into account the thickness and profile of the panel — not every profile will fit a specific panel.
Profile for adjoining the trim
If a slatted wall adjoins a doorway, you need to decide how the panel will join with the door casing. If the casing is already installed, the panel is trimmed flush, and the joint is covered wooden casings or with a thin trim profile. If the casings are not yet installed, they can be selected so that they overlap the edge of the panel, forming a clean joint without additional elements.
Decorative moldings and slats
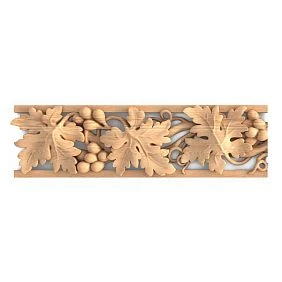
Wooden trim is a broad category that includes thin decorative slats, trims, glazing beads, thresholds, and other linear elements. In the context of slatted panels, moldings are used for finishing junctions, creating decorative frames around doorways or niches, and designing accent areas.
Element for the ceiling joint
If the panels reach the ceiling, the top joint can be finished with a ceiling molding or decorative trim. This is especially important with a stretch ceiling: the molding hides the gap between the stretch ceiling system and the top edge of the panels.
MDF or wooden panels: what affects the cost of finishing
Comparing these two materials is one of the most common questions when planning slatted panel finishing. The answer is not straightforward: it all depends on the specific task.
| Criterion | MDF panels | Wooden panels |
|---|---|---|
| Material Price | Below | Higher |
| Appearance | Uniform, for painting | Living texture, natural |
| Painting | Perfect fit | Tinting, oil, varnish |
| Surface texture | Smooth, without pattern | Wood fibers, individual |
| Durability | High with protective coating | Very high, repairable |
| Combination with wooden baseboard | Neutral | Organic, single material |
| Combination with MDF baseboard | Optimal | Possible |
| Application | Minimalism, modern classic, monochrome | Natural interiors, classic, eco |
For hallways where wear resistance and ease of cleaning are important, MDF for painting is often chosen — the surface is easy to wipe, and can be repainted if damaged. For living rooms or bedrooms where atmosphere and tactile richness of the material are paramount, oak wood panels create a feeling that no MDF can provide. The TV area is neutral territory: both options work well here, and the choice is dictated by the overall interior concept.
An important nuance: wood panels are more expensive per unit, but with proper care they last for decades without replacement. MDF panels are cheaper, but more demanding in terms of operating conditions — they do not like direct contact with moisture and mechanical damage. In rooms with a normal microclimate, the difference in durability is insignificant.
Example of calculating a complete set
To show how everything comes together in a real picture, let's look at a specific example. Conditions: wall width 3 meters, finishing height 2.7 meters. The task is to fully cover the wall with slatted panels with a baseboard, end strips, and molding along the top edge.
Step 1. Panels. The working width of one panel is 300 mm (0.3 m). Divide the wall width by the panel width: 3 m ÷ 0.3 m = 10 panels. Add a 10% reserve: +1 panel. Total: 11 panels 2.7 m long (or cut to 2.7 m if the standard length is longer).
Step 2. Baseboard. Wall length — 3 m. Add a reserve for corner joints and possible errors — 10%. Total: 3.3 linear meters of baseboard.
Step 3. End strips. The wall has two open side edges (not in corners). The finishing height is 2.7 m. You need 2 end strips of 2.7 m each. Total: 5.4 linear meters of end profile.
Step 4. Molding along the top edge. If the top end is decorated with molding, you need another 3 m of molding plus a reserve. Total: 3.3 linear meters of molding.
Step 5. Final set. 11 panels + 3.3 m of baseboard + 5.4 m of end strips + 3.3 m of molding. Only now is this a complete calculation, not just "panels."
This example shows: if you only count panels, you account for approximately 60–70% of the actual material needs. The remaining 30–40% are precisely the baseboard, ends, molding, and a reserve for trimming. That is why a proper calculation always starts with a complete set.
Mistakes when calculating the cost of slatted panels
Over years of working on finishing projects, a whole list of mistakes that repeat over and over has accumulated. Here are the most common ones:
-
Counting only the price of one panel and multiplying by the area gives an underestimated estimate and almost guaranteed budget overrun during installation
-
Forgetting about the baseboard is one of the most common mistakes. The baseboard seems like a "later" thing, but in the end it is bought in a hurry and not always suitable
-
Not accounting for ends — open edges of panels without end strips make even good installation look unfinished
-
Not adding a reserve for trimming — after the first panel with a crooked cut or inaccurate measurement, the reserve no longer seems unnecessary
-
Not calculating the junction to the doorway — a door is always a non-standard cut and additional elements
-
Forgetting about architraves — if architraves are replaced together with panels (which is often necessary), they also need to be included in the estimate
-
Not accounting for the panel thickness when adjoining existing frames, slopes, window sills
-
Choosing material only by the price of one panel, without calculating the total cost of the kit with add-ons: sometimes more expensive panels have a well-developed add-on system, which ultimately makes installation cheaper and cleaner
-
Comparing MDF and wood only by the price of the panel, forgetting about durability, maintainability, and the final result
Each of these mistakes individually is a small problem. Together, they turn the finishing budget into an unpredictable figure. A competent calculation eliminates all these risks at the planning stage.
Where to buy slatted panels, skirting boards, and add-on elements
A good result is always a systematic approach. When Rafter panels, skirting boards, moldings, and add-on profiles are selected from one catalog, from one manufacturer — everything matches in thickness, profile, texture, and color. No need to spend hours searching for 'what will fit' a specific panel. The system works as a single whole.
The STAVROS catalog presents a complete set for wall finishing with slatted panels:
-
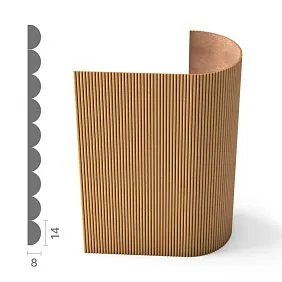
Rafter panels — made of MDF for painting and solid oak, in several structural versions — rigid and flexible, for flat and radius surfaces
-
Primed MDF slat panel — ready for final coating, ideal for monochrome interiors for painting
-
decorative slatted panels — for creating expressive accent walls with a lively play of light and shadow
-
Oak Slat Panel — natural solid wood with a living natural pattern, for tinting and transparent coatings
-
Wooden baseboard made of solid oak and beech — several profiles and heights, for any finishing height and any interior style
-
Wooden moldings — for finishing the top edge, joints and decorative accents
-
Wooden trim — slats, trims, glazing beads for finishing joints and creating decorative frames
-
Wooden casings — for framing doorways in a unified system with slatted finishes
The ability to select the entire set from one source is not just convenience. It is a guarantee that everything will fall into place: the baseboard will meet the panel without a gap, the casing will cover the end without rework, the molding will lie flat along the top edge. It is this systematic approach that distinguishes quality finishing from a set of randomly purchased materials.
Wooden items in the STAVROS catalog — it is a well-thought-out line where each element matches the next. Production from natural wood, precise tolerances, a unified coating system — all this makes installation predictable and the result beautiful.
FAQ: Answers to popular questions
How much do slatted wall panels cost?
The cost of slatted panels depends on the material (MDF or solid oak), panel size, thickness and type of profile, as well as the degree of coating readiness. It is important to remember: the price of one panel is only part of the budget. The total cost of finishing includes baseboard, end strips, moldings, additional profiles and a reserve for trimming. Only by counting the entire set can you get the real figure.
How to calculate the number of slat panels for a wall?
You need to measure the width of the wall, divide it by the working width of one panel, and add a 10–15% margin for trimming. Areas around doors, niches, corners, and sockets are calculated separately — they cause additional material consumption that cannot be ignored.
Is a baseboard needed when installing slatted panels?
Yes, in most cases a baseboard is necessary. It covers the bottom gap between the panel and the floor, protects the bottom edge from moisture and mechanical damage, and gives the wall a visually finished look. Without a baseboard, even a well-installed wall looks incomplete.
What is included in the full kit for finishing a wall with slatted panels?
The standard kit includes: the panels themselves, baseboard along the floor perimeter, end strips for open side edges, molding or decorative trim along the top edge, corner elements for internal and external corners, and additional profiles for joining to door frames and casings.
Which is cheaper: MDF or wooden slatted panels?
MDF panels are generally cheaper per unit. However, when calculating the full kit, the difference narrows: wooden panels are more durable, repairable, and create a visually richer result. For modern monochrome interiors, MDF for painting is the optimal choice. For natural, classic, and mixed styles, solid wood panels provide an effect that is difficult to replicate with other materials.
What margin should be taken for trimming slatted panels?
The standard margin is 10–15% of the calculated quantity. For walls with doorways, niches, protrusions, and other architectural elements — 15–20%. It is better to take a margin and not use it than to buy panels from another batch, which may differ in shade or size.
How to calculate the baseboard for slatted panels?
The baseboard is calculated in linear meters along the length of the walls where finishing is done. 5–10% is added to the calculated quantity for corner joints and possible cutting errors. The height of the baseboard must be taken into account when calculating the height of the panels themselves: it affects the length of the cut for each panel at the bottom.
Slat panels for the TV area: which is better?
Both materials work well for the TV area. MDF painted to match the wall creates a laconic background that does not distract attention from the screen. Oak wood panels provide a warm accent that makes the viewing area cozy and presentable. The choice depends on the overall interior concept and the color scheme of the living room.
A systematic approach to calculating slat panels is not only a way to accurately plan the budget. It is a way to get a result that looks as intended: without random gaps, unsightly ends, and unfinished joints. STAVROS company offers a complete set for wall finishing: from of slatted panels to wooden baseboard, from molding to trim — all made of natural wood, in a unified system of quality and style.