Article Contents:
- Why calculating decorative elements cannot be reduced to a single formula
- First SKU, then the final calculation
- Three levels of calculation: geometry, product, purchasing
- LEVEL 1 — geometric quantity
- LEVEL 2 — product quantity
- LEVEL 3 — purchasing quantity
- Individual slats
- Finished slat panel
- Cutting consumption
- Installation reserve
- Operational reserve
- Calculate only the area
- Count only total footage
- Add the same 10% to everything
- Combine left and right decor
- Count a pilaster as one line
- Forget individual corner elements
- Round each room separately
- Calculate using the old REV

The drawing may show exactly 24 meters of molding. The order has a completely different number.
The reason is not a “just-in-case reserve.” Between the project geometry and the actual purchase there are several intermediate steps: you need to choose a specific SKU, find out the product length, lay out the segments into whole strips, check stock, account for the ornament, left and right orientation, panel module, pilaster composition, and only then get the quantity that can actually be sent to the order.
That is why the calculation of decorative elements cannot be reduced to a single formula like “area plus 10%” or “perimeter minus doors.” For molding, the base unit is the linear meter; for a ceiling rosette, it is the piece; for a wall panel, it is the module; for a pilaster, it is a set of specific components; for a slatted wall, it is the result of the layout.
The working chain looks like this:
drawing → specific SKU → geometric quantity → product unit → cutting → reserve → purchase quantity → specification → order.
The main task of the calculation is not to get a nice final number. It is to make sure that every line of the specification answers a simple question: what exactly and in what quantity must the site receive so that the approved composition can be assembled without improvisation during installation?
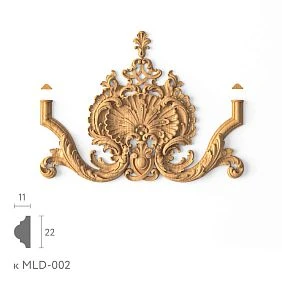
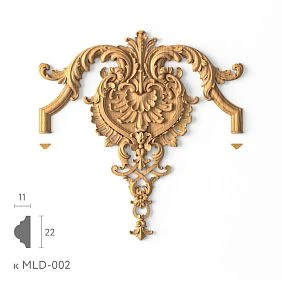
Why the calculation of decorative elements cannot be reduced to a single formula
Different types of decor have different ordering physics.
Molding exists simultaneously in two measurement systems: on the project we see linear meters, but we buy whole products of a certain commercial length.
A ceiling rose does not require conversion to meters — it is counted in pieces.
A decorative overlay may have mirrored left and right versions. A total of “24 pieces” will not help the order assembler if 12 left and 12 right SKUs need to be ordered.
A pilaster may look like a single architectural element on the facade, but in the catalog it may be assembled from a base, shaft, and capital.
A panel is calculated not only by wall area, but by actual modules, layout direction, and cutting.
Slats depend on the cross-section, spacing, edge margins, and number of verticals.
Therefore, a universal table of “decor type → plus 10%” creates a feeling of precision, but does not provide a reliable order.
A unified methodology is needed that allows different calculation methods within a single specification.




First the SKU, then the final calculation
Until a specific product is selected, only preliminary geometry can be calculated.
For example, a designer measured all the frames on the walls and got 24 linear meters of molding. Until a profile is selected, this is a useful figure: it shows the scale of the solution.
But it still says nothing about the quantity of the product.
To move to a purchasing calculation, you need to know:
- the specific SKU;
- the actual length of one item;
- the width and depth of the profile;
- the presence of a repeat, if it is ornamental;
- method of forming angles;
- ability to use leftovers;
- the material;
- unit of sale.
That is why after approving the composition, each line must be linked to a real product. For polyurethane trim, this can be done through the section Moldings made of polyurethane, rather than leaving an abstract entry like “50 mm molding” in the statement.
The project code helps read the drawing. The SKU helps buy the right item.
These are different identifiers, and both are useful.
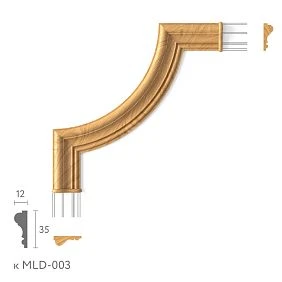
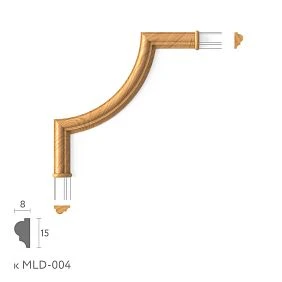
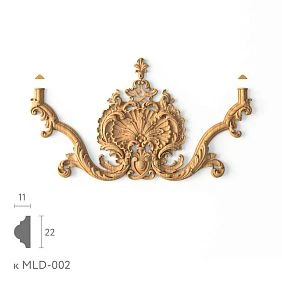
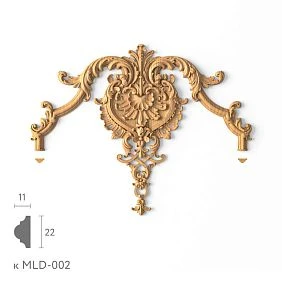
Our factory also produces:
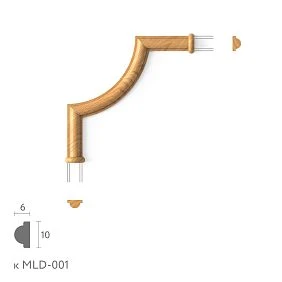
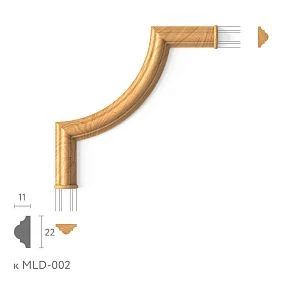
Three levels of calculation: geometry, product, purchasing
For a large project, it is convenient to divide the calculation into three levels.
Get Consultation
LEVEL 1 — geometric quantity
This is what directly follows from the drawing.
For example:
- 24 m of molding;
- 18 sockets;
- 8 covers;
- 42 m of skirting board;
- 12 panels according to the layout;
- 38 vertical slats.
At this level, it is not yet necessary to know the final number of packages or planks.
LEVEL 2 — product quantity
Here, geometry is translated into real products.
Appear:
- SKU;
- strip length;
- panel module;
- kit composition;
- left and right execution;
- individual corner elements;
- actual components of pilasters and columns.
LEVEL 3 — procurement quantity
The last level takes into account what is not visible from pure geometry:
- cutting map;
- inevitable cuts;
- inability to use part of the leftovers;
- repeat;
- reserve;
- batch consistency;
- operational stock, if needed.
Hence the main rule:
geometric quantity ≠ purchase quantity.
The difference between them must be clear, not hidden in a random coefficient.
How to calculate moldings
For a simple rectangular frame, the basic arithmetic is elementary:
2 × width + 2 × height.
If the frame has dimensions 1.2 × 1.8 m:
2 × 1.2 + 2 × 1.8 = 6 m.
Four identical frames:
6 × 4 = 24 m.
This is the net linear meters.
It is needed, but you cannot finish the calculation with it.
Let's imagine that the frames are in different rooms or consist of long vertical and short horizontal parts. Two compositions with the same total linear meterage can yield different consumption of whole strips, because the leftovers from one scheme are suitable for the next parts, while those from the other are not.
Mathematically, 24 m remains 24 m.
For purchasing — no.
Why 24 m of molding is not equal to 24 m of purchasing
Linear stock has a commercial length.
Suppose a specific profile is sold in whole strips of fixed length. The project requires several pieces of 1800 mm and several of 1200 mm.
A simple approach is to divide the total linear meterage by the strip length and round up.
Sometimes it will give the correct result. Sometimes not.
For example, one strip can yield:
- one vertical 1800 mm and a short remainder;
- two horizontals of 1200 mm each;
- vertical plus horizontal;
- only one long section, if the second one no longer fits.
Therefore, you need to calculate not only the total length, but also the cutting plan.
The difference is especially noticeable in projects with many short frames, niches, portals, and corners.
How to create a molding cutting plan
First, write down all the parts not as “frames,” but as actual segments.
For example:
| Detail | Length | Quantity |
|---|---|---|
| Vertical | 1800 мм | 8 |
| Horizontal | 1200 мм | 8 |
Net length:
8 × 1.8 + 8 × 1.2 = 24 m.
Next, take the actual commercial length of the selected SKU and build the cutting plan.
If the stock allows obtaining one 1800 mm part and one 1200 mm part with an acceptable remainder, this is one cutting pattern.
If these two segments do not fit together, a different one will be required.
A cutting map is needed to answer three questions:
- how many whole stock pieces are required;
- which remainders can be reused;
- which remainders become waste.
It is useful to calculate a large project exactly this way — not in “meters plus percentage,” but in parts.
Why rounding should be done as late as possible
One of the hidden errors is early rounding.
For example, the estimator sees 3.2 stock pieces for one zone and rounds up to 4. Then 2.3 stock pieces for the second zone — up to 3 more. The total comes out to 7.
But if both zones use the same SKU and are launched by one order, the remainder of the first can be used in the second. The total cutting plan sometimes yields 6 whole items.
The reverse situation is also possible: arithmetically, the total linear meters fit into six strips, but the lengths of individual parts do not add up to a real cutting plan, and a seventh is needed.
Therefore, it is more correct to first compile a general list of parts for one SKU, then do the cutting plan, and round only the salable quantity.
How to calculate a ceiling cornice
The base value for a cornice is the actual length of the installation sections.
Not the “room perimeter” automatically.
Check the drawing:
- whether the cornice passes over a built-in wardrobe;
- whether it is interrupted by tall furniture;
- whether there is an open niche;
- is there a section without a cornice;
- are there portals;
- is the profile included in the curtain niche;
- are columns or protrusions being bypassed.
A room 5 × 4 m has a geometric perimeter of 18 m. But if there is a 3 m long cabinet along one wall and the project does not provide for a cornice there, the net length is already different.
After that, product logic comes into play again: the length of one strip, cutting, angles, leftovers.
If a polyurethane cornice is selected, the calculation should already be based on a specific item from the category Polyurethane moldings, and not on a conventional profile from the visualization.
Cornice with a complex perimeter
The more turns there are, the less well the “perimeter + percentage” rule works.
A bay window, a protrusion, a niche, or a series of pylons may barely increase the total length, but sharply complicate the cutting layout.
Why?
Because long strips break down into many short segments. The number of cuts increases, the usability of offcuts changes, and for ornamental profiles, pattern matching is added.
In such rooms, it is useful not just to measure the line, but to number the segments:
CR-01-A1 — 1840 mm
CR-01-A2 — 620 mm
CR-01-A3 — 910 mm
After that, the real cutting picture becomes visible.
How to calculate skirting
The phrase “room perimeter minus doors” is convenient only for a very simple room.
In a real project, you need to check:
- built-in wardrobes;
- kitchen unit;
- portals;
- wall panels;
- fireplace;
- material transition points;
- floor-to-ceiling furniture;
- areas where the skirting board is intentionally absent.
For example, if a wardrobe occupies the entire wall and its base replaces the skirting board, this area should not be included.
And if the skirting board runs in front of the side panel of built-in furniture, on the contrary, it remains in the calculation.
You need to count not the room as a geometric shape, but the actual route of a specific SKU.
Why you can't use a single percentage of stock for all trim
"Add 10%" sounds convenient, but in design it's too rough a rule.
The allowance depends on:
- segment lengths;
- number of angles;
- commercial length;
- repeatability of parts;
- cutting complexity;
- pattern repeat;
- ability to use offcuts;
- risk of damage;
- material.
For a long straight wall with a single profile, the additional consumption may be minimal.
For dozens of short frames, the same percentage will be insufficient or, conversely, excessive.
It is better to separate two concepts:
cutting consumption — a consequence of geometry;
reserve — a deliberately added quantity beyond the calculated cutting.
This makes the specification more transparent.
Ornamental molding and repeat
Smooth profile can be cut according to geometry.
Ornamental requires additional pattern verification.
If the profile has a repeating pattern, then at joints and corners it may be necessary to:
- align the repeat;
- maintain symmetry;
- center the ornament;
- discard part of the short remainder;
- choose a different section of the plank.
In this case, one meter of remainder is not always equal to one useful meter.
Let's imagine that a specific phase of the pattern is needed for a short horizontal section. There is a remainder of sufficient length, but the ornament on it does not start at the right place.
Geometrically, the remainder is suitable.
Compositionally, it's not.
For such profiles, the cutting map must take the pattern into account.
How to count ceiling outlets
Here the base unit is pieces.
If 12 identical rooms each use one outlet of the same SKU:
12 × 1 = 12 pcs.
But in a real project, it is worth checking:
- whether all rooms are truly identical;
- whether the same SKU is used everywhere;
- whether there are rooms without an outlet;
- whether different sizes are needed;
- whether an operational reserve is required.
To select specific items, you can use the section ceiling rosettes.
The main thing is not to combine different models into one line like “ceiling socket — 12 pcs.”
If the SKUs are different, these are different procurement items.
How to count decorative covers
Covers are counted according to the composition map.
For example, four identical wall frames, each with two identical covers:
4 × 2 = 8 pcs.
But as the composition becomes more complex, detail is required.
Covers can be:
- central;
- corner;
- top;
- bottom;
- left;
- right;
- mirrored;
- different sizes.
Instead of the line “decor — 26 pcs.”, it is better to get a set:
DEC-01 — 8 pcs.
DEC-02-L — 6 pcs.
DEC-02-R — 6 pcs.
DEC-03 — 6 pcs.
Such a description can already be purchased.
For serial polyurethane decor, it makes sense to immediately verify the calculation against the section molded decoration made of polyurethane.
Left and right elements are counted separately
If a product has a mirrored orientation and different SKUs, they cannot be summed into one purchasing line.
Correct:
DEC-L — 12 pcs.
DEC-R — 12 pcs.
Incorrect:
decorative overlay — 24 pcs.
Why is this crucial?
Because the quantity in the project may be correct, but the order composition may not be.
If the order assembler sees only 24 pcs. without separation, the error will be discovered after delivery.
Pairing must be part of the calculation.
How to count corner elements for moldings
Some compositions use separate decorative corners. Others form the corner by miter-cutting the molding itself.
These are different specifications.
If five rectangular frames are provided with four separate corner elements each:
5 × 4 = 20 corners.
But first you need to check whether such an element exists for the selected system and whether it is actually included in the project.
If the corner is assembled from the profile itself, there is no separate purchasing line, but the importance of precise cutting increases.
If ready-made parts are used, they need to be listed as separate SKUs. Suitable items should be checked in the section Decor for Molding.
How to count a pilaster
Architecturally, a pilaster looks like a single vertical element.
In terms of procurement, this can be a system.
It may include:
- base;
- shaft;
- capital;
- additional decorative parts.
If the project has two identical pilasters, the calculation may look like this:
BASE-01 × 2
PILASTER-01 × 2
CAPITAL-01 × 2
The entry “pilaster — 2 sets” is acceptable only when the manufacturer actually sells it as a ready-made set of exactly this composition.
If the components are separate SKUs, they must be counted separately.
It is convenient to check the system in the section pilasters and columns and separately in the category Capitals.
How to count columns and half-columns
The logic is the same: first break down the architectural entity into its actual product composition.
Possible options:
- base;
- shaft;
- capital;
- additional rings or decorative parts;
- paired elements.
If a project contains four columns, that does not automatically mean four product units.
You need to understand how many SKUs are involved in one column, and multiply the composition.
That is why it is better to build the calculation from the bottom up:
component → SKU → quantity per one system → number of systems.
This reduces the risk of forgetting a repeating element.
How to count brackets
Brackets are usually counted in pieces.
But even here there may be additional parameters:
- location;
- spacing;
- pairing;
- mirrored version;
- different sizes in one composition.
For example, eight brackets for a cantilever shelf may be one SKU.
And four pairs of mirrored brackets are already two lines if the left and right versions differ.
Wooden serial solutions can be matched against the category Wooden Brackets.
How to count wooden carved decor
A composition map is especially convenient for carved decor.
For example:
DEC-A × 6
DEC-B-L × 2
DEC-B-R × 2
KR-01 × 4
The quantity is taken not from the wall area, but from the repetition of specific elements in the composition.
In a large project, it is useful to count by layouts and immediately assign a code to each type.
After approval, the code is linked to the SKU from the category wooden decorative elements or to a specific item from the section Carved Decor.
If a custom product is used, a custom-code and the current revision are recorded instead of an SKU.
How to count wall panels
The wall area is only the initial value.
Panels are calculated based on the layout.
Work sequence:
zone width/height → actual module → number of whole panels → cut piece → edge module → purchase quantity.
Need to consider:
- Doors;
- windows;
- niches;
- installation direction;
- starting line;
- symmetry;
- edge margins;
- possibility of using the cut piece in another zone.
For example, two walls may have the same area of 12 m² but different widths. If the panel module is fixed, the number of whole panels and the number of cuts will differ.
Therefore, area answers the question “what volume of surface”.
It does not answer the question “how many panels to order”.
Why the wall area is not equal to the number of panels
Let's imagine two walls of the same area.
The first is wide and short.
The second is narrow and tall.
If the panels are oriented vertically and have a fixed module, the first wall may require more whole modules across the width, while the second may require a different layout along the height.
Add a door or a niche — and the consumption will change again.
Therefore, for wall panels you need to calculate the specific layout, rather than dividing the wall area by a nominal panel area without checking the geometry.
How to calculate decorative slats
A separate slat and a ready-made slatted panel require different methods.
Individual rails
Need to know:
- rail width;
- gap;
- spacing;
- zone width;
- edge margins;
- quantity;
- length of each rail.
If the zone is symmetrical, the calculation must check the first and last element.
If the rails go around a door or furniture, the quantity is calculated based on the actual sections.
Finished slat panel
Here it is calculated:
zone width → panel module → number of modules → trimming.
Therefore, the individual rail method cannot be transferred to Rafter panels.
Externally, the result may look similar. In terms of procurement, these are different systems.
How to count a typical room
Typical rooms can greatly simplify a large project, but only after fully calculating one reference.
Sequence:
- Select
TYPE-A; - fully calculate all items;
- check the cutting layout;
- record the procurement quantity for one room;
- check the actual set;
- only after that, multiply by the number of typical rooms.
For example:
ROOM TYPE-A × 20.
If in one TYPE-A is used:
- ML-01 — 8 strips;
- ROS-01 — 1 pc.;
- DEC-L — 2 pcs.;
- DEC-R — 2 pcs.,
then for twenty identical rooms:
- ML-01 — 160 strips;
- ROS-01 — 20 pcs.;
- DEC-L — 40 pcs.;
- DEC-R — 40 pcs.
But this is only true if all twenty rooms are truly identical.
How to count exceptions from the typical zone
In practice, "20 identical rooms" often turn into:
- 17 typical;
- 2 corner;
- 1 adapted.
Then you cannot multiply TYPE-A × 20.
More correctly:
TYPE-A × 17
and three separate calculations for exceptions.
This is especially important for linear products and panels: a small change in wall length changes the cutting layout.
For piece decor, the deviation may be smaller, but the quantity still needs to be checked.
Typification is useful only where it is real.
What is net quantity
Net quantity is the volume directly according to the geometry of the approved project.
For example:
- 24 m of molding;
- 16 plates;
- 12 sockets;
- 36 brackets;
- 28 rails.
This is the base figure.
It is useful to store it separately because it shows the architectural requirement without the influence of packaging, cutting, or reserve.
If after the procurement calculation you get 29 m of material with a net length of 24 m, you can see where the difference came from.
If you store only the order total, such an analysis is no longer possible.
What is the purchase quantity
Purchase quantity — what should actually go into the order.
The following have already been taken into account for it:
- product length;
- Cutting;
- modules;
- orientations;
- completeness;
- required whole units;
- reasonable reserve.
For example:
Geometry Qty: 24 m
Purchase Qty: 9 planks
Or:
Geometry Qty: 12 sockets
Purchase Qty: 12 pcs.
For different categories, the transition from clean to purchase quantity will be different.
That is why it is useful to have both columns in the master spec.
Cutting stock, installation reserve, and operational reserve are different things
The word "reserve" too often combines three different reasons for increasing quantity.
Cutting consumption
Arises from geometry.
For example, after cutting a whole strip, a short piece remains that cannot be used further.
This is not insurance. This is a real part of the calculation.
Installation reserve
Additional items in case of damage, cutting error, or other installation loss.
Its necessity depends on the material, the complexity of the project, and agreements.
Operational reserve
Items that remain with the customer after project handover for future replacement.
Such a reserve is especially useful where the interior must be preserved for many years and the exact product may be difficult to source later.
Separating these three quantities makes the calculation professional and verifiable.
When the operational reserve is especially important
It makes sense for:
- hotels;
- restaurants;
- commercial interiors;
- chain facilities;
- a large number of identical rooms;
- individual decor;
- items with a sensitive finish;
- items that are difficult to reproduce quickly.
For example, in a hotel, one damaged decorative overlay should not trigger a new cycle of searching for an equivalent after two years.
If a reserve was provided, replacement occurs without changing the interior.
But for an ordinary apartment, buying extra complex decor "just in case" is not always rational.
A reserve must have a reason.
How to link the calculation with DWG
The source of quantities should be the approved working documentation, not the render.
DWG provides:
- actual lengths;
- zone dimensions;
- number of elements;
- codes;
- location;
- frame geometry;
- panel layout;
- part orientation.
If the project changes, the calculation must change along with the drawing revision.
To verify geometry, it is useful to use DWG and 3D models specific products, so that the specification does not rely on arbitrarily scaled profiles.
A good combination:
REV03 DWG → quantity REV03 → specification REV03.
Bad:
new drawing → old Excel table that someone edited manually.
How to link the calculation to the specification
For each row, it is useful to separate geometry and purchasing:
| Field | Value |
|---|---|
| Code | ML-01 |
| SKU | specific |
| Unit | pcs. / linear m |
| Geometry Qty | net |
| Purchase Qty | purchasing |
| Reserve | Separately |
| Room/Zone | where used |
| REV | current |
| URL | Product |
For example, for the molding:
Geometry Qty = 24 m
Purchase Qty = 9 planks
Reserve = 1 plank
If the reserve is included directly in the total, that is also acceptable, but its origin must be clear.
In a large project, such a structure greatly facilitates auditing.
How not to lose leftovers between rooms
If the same SKU is used in several rooms, it is better to calculate the cutting for the project as a whole or in large batches, rather than for one room in isolation.
Why?
The leftover from the living room can perfectly cover a short section in the hallway.
If each room is rounded separately, the quantity is overstated.
But there is an exception: when delivery or installation is strictly by separate batches and transferring remaining stock between zones is unrealistic.
Then it is more logical to calculate by batches.
The calculation must correspond not only to the geometry, but also to the actual delivery process.
How to account for different batches of one project
A large site may be purchased in stages.
For example:
BATCH-01 — public areas
BATCH-02 — rooms TYPE-A
BATCH-03 — rooms TYPE-B
In this case, it is useful to have:
- a general master calculation;
- separate purchase quantity for each batch;
- control of the already purchased volume;
- remaining requirement.
Otherwise, it is easy to order the same item twice or, conversely, consider it already closed, even though it was only in the previous batch.
Why price should be connected after quantity
An estimate looks convincing when it contains exact rubles.
But if the quantity is calculated incorrectly, an exact price only creates an illusion of precision.
Correct sequence:
what → how much → in which product unit → then price.
For example, it makes no sense to calculate the cost of “24 meters of molding” if the manufacturer sells it in whole strips and the project actually requires nine items.
First, you need to get the purchase line.
Only then multiply it by the current price.
How the estimate for decorative elements is formed
The estimate should be a continuation of the specification, not a separate calculation with different logic.
Minimum line:
- project code;
- SKU;
- name;
- unit;
- purchase quantity;
- unit price;
- total;
- reserve if necessary;
- zone or room.
Example:
| Code | SKU | Unit | Purchase Qty | Price | Total |
|---|---|---|---|---|---|
| ML-01 | specific | Plank | 9 | current | Calculation |
| ROS-01 | specific | pcs. | 12 | current | Calculation |
| DEC-L | specific | pcs. | 8 | current | Calculation |
The price is applied to the already verified quantity.
Not the other way around.
When the calculator is useful and when manual cutting is needed
The calculator is convenient for an initial estimate.
For example:
- simple rectangular perimeter;
- standard frame;
- basic estimate of the linear footage;
- several identical zones.
But the calculator does not handle design exceptions well:
- remainders;
- repeat;
- complex angles;
- L/R;
- different modules;
- standard and non-standard rooms;
- intersection of several zones;
- actual product lengths.
The more complex the project, the more important manual cutting according to approved documentation.
The calculator answers the question “approximately how much.”
The specification must answer “exactly how much to order.”
How to calculate SKU replacement
If the SKU changes after calculation, the old quantity cannot be automatically transferred to the new item.
Need to recheck:
- product length;
- dimensions;
- module;
- cross-section;
- presence of L/R;
- system composition;
- installation method.
For example, two moldings may look almost identical visually but have different commercial lengths. The net footage of the project will not change, but the number of planks will change.
For panels, a different module completely rebuilds the layout.
Replacing an SKU is a reason to recalculate the purchase, not just rewrite the article number in Excel.
Recalculation after project changes
Any significant geometric edit must be linked to a new version of the calculation.
If the following have changed:
- wall dimensions;
- number of frames;
- profile;
- SKU;
- panel layout;
- number of standard rooms;
- door position;
- composition of the pilaster,
dependent rows need to be checked.
Useful diagram:
DRAWING REV04 → QTY REV04 → SPEC REV04.
This is not bureaucracy. It is a way to understand where a specific number came from.
Typical errors in calculating decorative elements
Counting only the area
It works as a guide for material, but not for modular products.
Consequence: incorrect number of panels or slats.
Calculating only the total footage
Commercial length is not taken into account.
Consequence: the site has enough meters "in total", but not enough whole parts of the required length.
Add the same 10% to everything
The percentage does not reflect the actual cutting layout.
Consequence: overordering in some places, shortage in others.
Merge left and right decor
The total number is correct, the order composition is not.
Consequence: half of the composition cannot be assembled.
Count the pilaster as one line
The system composition is lost.
Consequence: the base or capital is not included in the order.
Forgetting individual corner elements
The project shows the corner as part of the composition, but the specification counts only linear footage.
Consequence: undercount.
Round each room separately
Leftovers cannot be used between zones.
Consequence: overestimated quantity.
Count from the old REV
The geometry has already changed, Excel has not.
Consequence: a formally accurate but outdated specification.
Final quantity audit before ordering
Before submitting the specification to procurement, it is useful to run one short check.
Check:
- the current REV is used;
- each item has a SKU or custom-code;
- the unit of measure is correct;
- the clean quantity is confirmed by the drawing;
- commercial lengths have been checked;
- cutting has been completed;
- remnants have been accounted for;
- L/R are separated;
- individual angles have been accounted for;
- the composition of pilasters and columns is broken down into components;
- panels are calculated by modules;
- slats are calculated by layout;
- the reserve is listed separately;
- typical rooms are indeed typical;
- exceptions are calculated separately;
- the procurement quantity is fixed.
If at this stage a line like "approximately 30 m" remains, it is not yet ready for ordering.
How to purchase decorative elements after calculation
After calculation, the commercial part becomes simple: each line of the master-spec must correspond to a real category or product.
For a polyurethane project, you can sequentially check polyurethane molding, Moldings made of polyurethane, Relief Decoration и ceiling rosettes.
For a project with an array — wooden decorative elements, Carved Decor, pilasters and columns и Capitals.
If a project combines several types of decor, it is more convenient to start with a general catalog of decorative elements and from there link each specification line to a specific SKU.
A professional workflow for architects and specifiers can be built through the section STAVROS for designers and architects, where the calculation becomes part of the overall path from product selection to specification.
The final formula here is more important than any universal reserve norm:
drawing → SKU → clean quantity → trade units → cutting → justified reserve → purchase quantity → specification → order.
When this chain is transparent, the estimate ceases to be a set of approximate meters and pieces. It becomes an extension of the working project — with numbers that can be verified, purchased, and then assembled on site.