Article Contents:
- What is a ceiling plinth with lighting and how it works
- When you need a plinth for lighting: real-life scenarios
- Plinth, cornice or drywall niche: what to choose for a specific task
- Ceiling plinth for lighting
- Ceiling cornice with lighting
- Drywall niche
- Ready-made aluminum profile
- How to choose the profile shape: height, width, projection
- Profile height
- Profile width and offset
- Profile with a niche for the tape
- Where the LED should shine: the physics of soft light
- Light upward is correct
- Light downward is for functional zones
- Why light spots appear on a stretch ceiling
- The problem of 'blinding' tape
- Ceiling plinth for a stretch ceiling with lighting: special requirements
- Heating is the main enemy of a stretch ceiling
- Installation must be coordinated with ceiling specialists
- Power supply: reserve in advance
- Choosing tape power for stretch ceilings
- Where to use ceiling molding with lighting: space and logic
- Living Room
- Bedroom
- Kitchen-living room
- Hallway and entrance hall
- TV area and curtain area
- Children's room
- Office
- Which material to choose for the profile: polyurethane or wood
- Polyurethane cornices and moldings
- Wooden cornices and skirting boards
- Material Comparison Table
- Color temperature of LED strip: how not to make a mistake with the atmosphere
- Dimmer for backlighting through the molding: not a luxury, but a necessity
- Installation of ceiling molding for LED: step by step
- Mistakes in Selection and Installation: Learning from Others' Experience
- What to check before purchasing: final checklist
- Ceiling decor and lighting: a systematic view
- FAQ: Answers to Popular Questions
- Can you make backlighting through a regular ceiling plinth?
- What kind of plinth is needed for a stretch ceiling with backlighting?
- Why are dots from the LED strip visible on the ceiling?
- What is better: a ceiling cornice or a plasterboard niche?
- Can you install backlighting in a room with a low ceiling?
- How to choose the color temperature of an LED strip for a bedroom?
- How to hide the LED power supply when installing a plinth?
- About the Company STAVROS
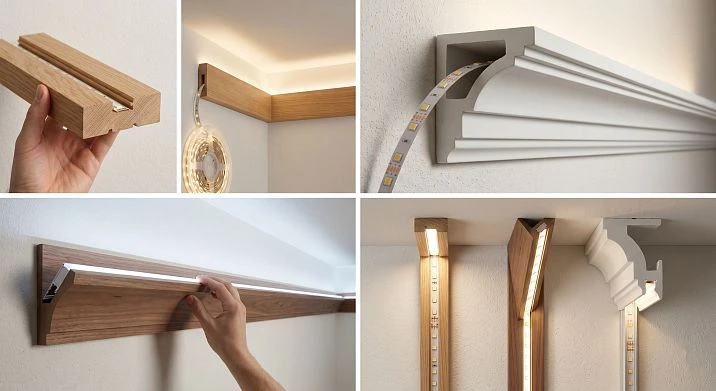
ceiling skirting board with lighting — this is not just a decorative molding near the ceiling. It is a well-thought-out lighting system that hides the LED strip, directs light in the right direction, and creates that very effect of "expensive renovation" that is so difficult to explain in words but is instantly felt upon entering the room. Choosing the right profile means getting a soft, even glow around the perimeter without dots, spots, or glare on the stretch film.
View ceiling plinths, cornices, and decorative profiles STAVROS — ready-made solutions for LED backlighting for any type of ceiling.

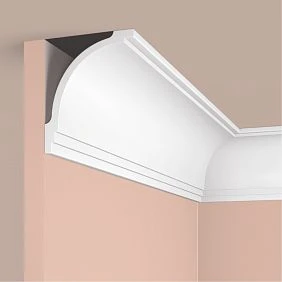

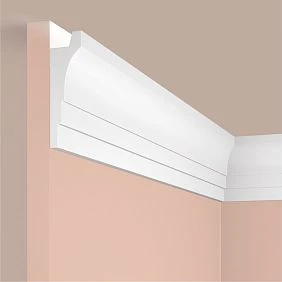
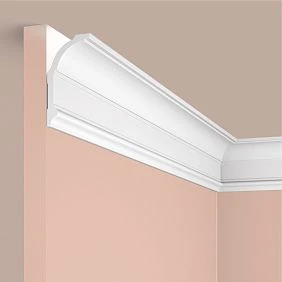
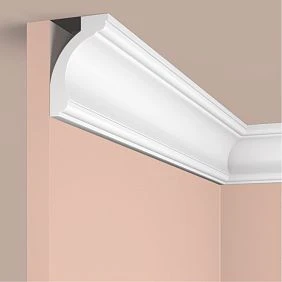

What is a ceiling plinth with lighting and how does it work
Let's break down the mechanics — simply, without technical fog.
A ceiling plinth or cornice is a profile element that is mounted at the junction of the wall and ceiling. In its design or behind its body, there is space where an LED strip is placed. The light from the strip does not go directly into the eyes — it reflects off the ceiling or the upper part of the wall and creates a soft diffused glow around the entire perimeter of the room.
It is this diffusion that creates the effect that interior magazines call a "floating ceiling" or "hidden lighting." The ceiling seems to glow on its own — without a visible source. It's an illusion, but it works flawlessly when the profile is chosen correctly.
Plinth for LED strip performs three functions simultaneously: decorative (completes the wall-ceiling joint), technical (hides wires and the strip), and lighting (directs light in the right direction). This is not just a plinth — it is an architectural tool.




When you need a plinth for lighting: real-life scenarios
There are several situations when a person comes to this solution, and each deserves a separate discussion.
Stretch ceiling without a drywall niche. The most common scenario. The stretch ceiling is already installed, there are no drywall boxes, but lighting is desired. Ceiling plinth for stretch ceiling with lighting — the only reasonable solution that doesn't require opening the ceiling and redoing the entire structure.
A regular chandelier gives off too harsh and uncomfortable light. One light point in the center of the ceiling creates sharp shadows and uneven lighting. Perimeter lighting through the baseboard provides soft background illumination that can be used both independently and in combination with the main light.
I want to visually raise the ceiling. Light directed upward from the baseboard creates an effect of vertical space expansion. This is especially valuable in apartments with ceilings of 250–260 cm, where every visual centimeter counts.
Need an atmosphere without complex renovations. Installing cornice with backlighting is much simpler than making a plasterboard box. It's a one-day installation, and the result is like after an expensive designer renovation.
Need a soft night light. In the bedroom, nursery, or hallway, perimeter lighting works as a nightlight: enough light to navigate in the dark, but not enough to wake a sleeping person or blind the eyes.
I want to make the TV area or curtain area more expressive. Local lighting along one wall — behind the TV or above the curtains — gives the space depth and cinematic quality that is hard to achieve by other means.
Our factory also produces:




Baseboard, cornice, or plasterboard niche: what to choose for a specific task
This is a key question, the answer to which determines both the budget, the labor intensity, and the final result.
Get Consultation
Ceiling baseboard for lighting
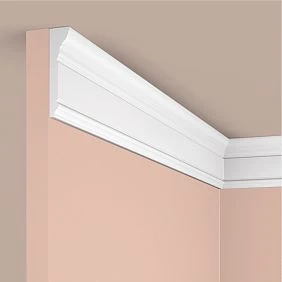
Ceiling plinth with backlight — the fastest and least expensive solution. Mounts on a finished wall without chasing or additional structures. The decorative profile hides the strip and finishes the wall-ceiling corner. For finished renovations or stretch ceilings — this is the first choice.
Limitation: fixed-size plinth. If a very deep niche is needed for a powerful strip or a dimmable system with multiple channels, a single plinth may not provide enough space.
Ceiling cornice with backlight
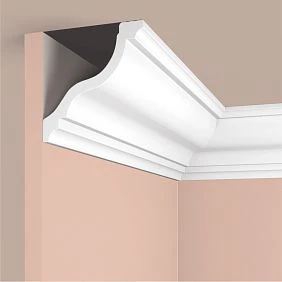
Ceiling cornice with backlight — a larger profile than a plinth. The cornice has a pronounced shape, a larger cross-sectional area, and more space inside or behind it for placing the strip. This is the choice for classic and neoclassical interiors where not just a lighting effect but also a decorative accent is needed.
The cornice is visually heavier than the plinth — this must be considered in small rooms and with low ceilings. However, in a spacious living room or a bedroom with high ceilings, the cornice creates exactly the grandeur that cannot be achieved with a thin profile.
Drywall niche
This is the most labor-intensive and most expensive option. A drywall box creates a full-fledged niche for the LED strip, power supply, and any lighting control system. The result looks perfect — the ceiling literally floats above the niche. But this solution requires a separate renovation stage, leveling, puttying, painting, and significant time investment.
For an already finished renovation, a drywall niche is not an option. For a new renovation from scratch — it is worth considering.
Ready-made aluminum profile
Technically functional solution: an aluminum profile with a groove for the strip and a diffuser. It installs quickly, works reliably, but looks "technical" — like an industrial solution, not a designer one. In most residential interiors, it's better to use a decorative baseboard or cornice for LED strip, which simultaneously solves both the lighting and decorative tasks.
How to choose the profile shape: height, width, projection
The profile shape is not just about aesthetics. It's the geometry of the light beam. How the cornice or baseboard is sectioned determines where the light goes and how it will look on the ceiling.
Profile Height
The height of the cornice or baseboard determines how deeply the strip is hidden and how high the light beam rises.
For low ceilings (240–260 cm) — it's better to choose profiles up to 80–100 mm high. A taller cornice will visually lower the ceiling further and create a feeling of oppressive space.
For standard ceilings (260–280 cm) — the optimal range is 80–120 mm. This allows you to properly hide the strip and provides a good area for light reflection.
For high ceilings (from 290 cm and above) — you can afford a cornice of 120–180 mm and higher. In spacious rooms, a tall cornice looks organic and gives the ceiling architectural completeness.
Profile width and projection
Overhang — the distance the profile extends from the wall toward the center of the room. The overhang determines whether the strip will be visible from below or completely hidden by the body of the cornice.
The rule is simple: the cornice overhang must be at least the distance from the wall to the edge of the strip plus 20–30 mm of margin. If the overhang is too small, the strip is visible at an angle when viewed from the far corner of the room. This immediately creates a feeling of incompleteness.
For a standard LED strip 8–10 mm wide, the minimum cornice overhang is 40–50 mm. For a wide strip with two rows of diodes or a strip on an aluminum base — 60–80 mm.
Profile with a strip niche
Some cornices with a niche for backlighting have a specially designed groove or shelf on the back side where the strip is placed. This is more convenient than gluing the strip arbitrarily: the groove fixes the strip in the desired position and prevents it from shifting.
When choosing a profile with a niche, be sure to check the groove width: it must match the width of your strip. Most standard strips are 8 or 10 mm. COB type strips can be 12 mm.
Where the LED should shine: the physics of soft light
This is the most important technical section — and this is where most people make mistakes that cannot be corrected later without replacing the profile.
Lighting upward is the right way
For the effect of hidden lighting and a floating ceiling, the LED strip should shine upward, toward the ceiling surface. The light reflects off the ceiling and spreads through the room as a soft, diffused flow. There is no visible source—only the glow.
This is the most aesthetic and most professional option. This is exactly what designers use in expensive projects.
Lighting downward — for functional zones
If the task is not atmospheric lighting but functional (backlighting curtains, accent above a work area), the strip can shine downward. But then you need to ensure it is not visible from the lower viewpoint. Ceiling baseboard with lighting with downward-directed light works well in the curtain area: the light glides over the fabric and creates a soft cascading effect.
Why light spots appear on a stretch ceiling
This is one of the most painful questions people ask after a failed installation. Spots on the stretch film are the result of too small a distance between the strip and the ceiling surface.
The physics is this: if the LED strip is too close to the reflective surface, each diode projects its own separate light spot. There is not enough distance for the light streams to mix—and the ceiling becomes covered with 'grains'.
The minimum distance from the strip to the ceiling to achieve a uniform light field without spots is 80–120 mm with a standard diode pitch of 60 mm per meter. For a strip with a sparser pitch (30 diodes per meter), the distance should be even greater — from 150 mm.
That is why choosing a profile with the correct offset and height is not just a matter of aesthetics; it is a physical necessity for achieving a quality lighting result.
The problem of a "blinding" strip
If the cornice or baseboard is too low or has too small an offset, the strip is visible from a sitting or standing position. This creates direct glare into the eyes: uncomfortable, unattractive, and completely destroys the effect of "hidden" lighting.
Solution: choose a profile with sufficient offset that completely covers the strip placement area when viewed from the eye level of a standing person. Typically, this means a cornice offset of at least 50–60 mm.
Ceiling baseboard for a stretch ceiling with lighting: special requirements
A stretch ceiling is a polymer film or fabric sheet that is stretched a few centimeters below the main ceiling. And it must be handled with particular care.
Heat is the main enemy of a stretch ceiling
LED strips heat up. Modern strips heat up significantly less than incandescent bulbs, but they still generate heat. If the strip is placed too close to the stretch ceiling, the temperature in the local area may rise above the permissible level — the film may deform or change color.
The minimum distance from the strip to the stretch ceiling is at least 50–70 mm for strips with a power of up to 9 W/m. For more powerful strips — from 100 mm or more.
Valance with backlighting for tensioned ceilings this gap must be provided structurally — meaning the tape inside it should be far enough from the edge of the profile adjacent to the canvas.
Installation must be coordinated with the ceiling installers
If the stretch ceiling has not yet been installed, this is the ideal moment to integrate the lighting. The stretch ceiling installers can account for the profile position in advance and route the cables so that the power supply ends up in a convenient location.
If the ceiling is already installed, you need to proceed more carefully. Attaching the baseboard to the wall near a stretch ceiling requires caution: drilling is not allowed in the area where the canvas is attached, and mounting foam or glue must not get on the film.
Power supply: location in advance
The power supply for the LED strip is a physical object ranging from 5 to 20 cm in size that needs to be placed somewhere. Hiding it behind the baseboard is only possible if a special niche is available. In most cases, the power supply is hidden in a false niche, behind furniture, or in the distribution board.
Before installing the baseboard, decide on the location of the power supply. The wire from the strip to the power supply must be concealed in the wall or in a cable duct. A protruding wire between the baseboard and the wall ruins the entire effect of a neat installation.
Choosing the strip power for a stretch ceiling
For stretch ceilings in residential spaces, it is recommended to use strips with a power of no more than 9–12 W/m. This is sufficient for soft perimeter lighting with a ceiling height of 2.6–3 m. More powerful strips (14–20 W/m) generate excess heat and risk deforming the film.
Where to use a ceiling baseboard with lighting: space and logic
Backlighting through baseboards or cornices does not work equally well everywhere. Each room has its own logic.
Living Room
The living room is a classic place for perimeter lighting. Here it serves several roles simultaneously: evening lighting for watching TV, atmospheric light for entertaining guests, background light when using gadgets. In the living room cornice for backlighting can be installed around the entire perimeter or only along one accent wall — behind the TV or opposite the window.
Bedroom
In the bedroom, backlighting through a ceiling baseboard is primarily about comfort. Soft warm light (2700–3000 K) around the perimeter creates a relaxing atmosphere. It can be used instead of a nightlight, as background light before sleep, or for meditative evenings without bright lighting. Brightness is best adjusted via a dimmer.
Kitchen-living room
In a combined kitchen and living room space, perimeter lighting helps with zoning: different brightness levels in different areas visually separate the dining and living zones. For the kitchen area, a more neutral light temperature (3500–4000 K) can be chosen, for the living room — a warmer one.
Corridor and hallway
Here, backlighting through baseboard with a niche for LED strip works as a guiding night light — it does not blind, but is enough to find a switch or shoes. Hallways with low ceilings especially benefit from upward-directed lighting: the space visually becomes taller.
TV area and curtain area
This is a local application where the baseboard is installed not along the entire perimeter, but only along one wall. Behind the TV — to create a relaxing cinematic effect. Above the curtains — so that the light glides over the fabric and provides a soft, diffused outline.
Children's room
In a children's room, perimeter lighting is an ideal nightlight. The low brightness of warm light does not interfere with falling asleep, but allows the child to navigate at night without fear of the dark. It is important that no point of the strip is visible from a lying position in bed.
Office
In a home office, perimeter lighting reduces eye strain when working at a monitor: when background light fills the field of view, the contrast between the bright monitor and the dark surroundings decreases.
Which material to choose for the profile: polyurethane or wood
This is a question asked less often than it should be. Yet the choice of material directly affects durability, paintability, and behavior during installation.
Polyurethane cornices and baseboards
Polyurethane moldings and cornices — are the most common option for ceiling lighting. Polyurethane is lightweight, easy to cut, holds its shape well, and does not react to humidity changes. Polyurethane ceiling decoration is produced in a wide range of profiles — from thin modern molding to massive classic cornice with rich relief.
Polyurethane profiles are well painted — with acrylic paint, tinting primer, decorative coatings with patina or gilding effects. This is especially important for classic and neoclassical interiors.
The only limitation of polyurethane is that it does not tolerate high temperatures and direct heating. Therefore, the distance between the strip and the profile must be sufficient.
Wooden cornices and baseboards
solid wood cornices — a choice for those who value natural material. A wooden cornice is heavier than a polyurethane one, requires more reliable fastening, but looks fundamentally different: the living texture of wood, volume, warmth of the material.
Wooden ceiling skirting board made of solid wood goes well with wooden floors, furniture, doors and other interior elements made of natural wood. For classic, neoclassical and country interiors, this is a more organic choice than polyurethane.
A wooden profile for backlighting needs to be made with sufficient overhang — it must completely cover the strip. Unlike polyurethane, wood allows individual milling of the groove for the strip — this provides more opportunities for precise geometry of the light flux.
Material comparison table
| Parameter | Polyurethane | Solid wood |
|---|---|---|
| Weight | Lightweight | Heavier |
| Painting | Acrylic, enamel, patina | Paint, varnish, oil, tinting |
| Moisture resistance | High | Medium |
| Operating temperature | Up to 60°C | Up to 80°C |
| Aesthetics | Decorative precision | Living texture |
| Installation | Simpler | Requires precise fastening |
| Compatibility | Any style | Natural interiors |
LED Strip Color Temperature: How to Get the Atmosphere Right
This is not a technical nuance — it's a fundamental choice that determines the mood of the entire space.
2700–3000 K — warm white. This is the coziest range. The light resembles candles or incandescent bulbs. The best choice for bedrooms, living rooms, children's rooms — anywhere a relaxing atmosphere is needed. Warm light pairs well with wooden surfaces, warm wall tones, and furniture.
3500–4000 K — neutral white. A versatile option. Not too warm and not too cold. Suitable for kitchen-living rooms, hallways, and work areas. Neutral light does not distort object colors and works well in spaces with mixed lighting.
5000–6000 K — cool white. An invigorating, activating light. Appropriate in a home office or bathroom. In living spaces, cool white looks clinical and creates an office-like feel rather than a home.
Dynamic Temperature (Tunable White). LED strips with adjustable color temperature allow you to change the atmosphere throughout the day: cooler activating light in the morning, warm relaxing light in the evening. This is a premium solution that requires a compatible controller and power supply, but the result is complete flexibility in atmosphere control.
The color of the light reflected from the ceiling also depends on the ceiling's own color. Warm light on a white ceiling — soft cream. The same light on a gray ceiling — takes on a grayish tint. Cool light on a white ceiling — pure white. Keep this in mind when choosing.
Dimmer for Baseboard Lighting: Not a Luxury, But a Necessity
If you are installing lighting through Ceiling cornice with backlight without a dimmer, you lose 70% of this solution's potential.
A dimmer allows you to adjust brightness from 0% to 100%. This means:
-
Evening light at 20% brightness — a soft cozy background
-
Night orientation light at 5–10% — won't wake you up, but will let you find the switch
-
Maximum brightness for reading or active activity
-
Smooth increase and decrease of light when turning on/off — without abrupt transitions
For the dimmer to work correctly, the LED strip must be dimmable (not all strips support this) and the power supply must be compatible with the dimmer. This should be clarified when purchasing the strip and power supply.
Modern dimmers can be controlled both by a regular switch and by a remote control, smartphone, or voice assistant — depending on the chosen control protocol.
Installation of a ceiling plinth for LED: step by step
Installation is not the most difficult task, but it requires precision. Let's break down the sequence.
Step 1: Marking the level. Use a pencil and a laser level to mark the installation line around the entire perimeter. Horizontal alignment is mandatory. Even a slight slope will be noticeable after installation.
Step 2: Laying cables. Before installing the baseboard, the cable from the LED strip to the power supply must already be in the wall or in a conduit. After mounting the profile, access to the wall will be closed.
Step 3: Mounting the profile. Depending on the wall material — dowel nails for concrete and brick, self-tapping screws for drywall. Polyurethane profiles are additionally fixed with liquid nails along the entire length — this prevents sagging.
Step 4: Cutting corners. Internal and external corners are cut at 45 degrees — using a miter box or corner template. For curved walls (which are common in panel houses), corners are adjusted individually.
Step 5: Puttying joints. The connection points of profiles and corner joints are puttied and sanded — only then will the cornice line look monolithic.
Step 6: Painting. If the profile is for painting, it should be painted after puttying, in the color of the ceiling or wall, or in an accent color according to the design solution.
Step 7: Installing the LED strip. The strip is glued with special tape into the groove or onto the shelf of the cornice. Important: do not stretch the strip, make a loop at the corners, do not bend it at a sharp angle.
Step 8: Connection and testing. The strip wire is connected to the power supply, the power supply is plugged into the network. Check the uniformity of the glow around the entire perimeter.
Mistakes in Selection and Installation: Learning from Others' Experience
Practice shows that even experienced craftsmen make mistakes. Knowing them in advance means avoiding costly rework.
Mistake 1: buying a regular baseboard that has no place to hide the strip. A regular thin cove molding 30–40 mm wide has neither a niche nor a projection for placing the strip. It is physically impossible to place the strip behind such a baseboard. Baseboard for backlighting must have a special cross-section shape with a space for the strip.
Mistake 2: choosing a profile that is too narrow. If the cornice overhang width is less than 40 mm, the strip will be visible from below. The entire effect of "hidden" lighting disappears.
Mistake 3: placing the strip too close to the stretch ceiling. The result is light spots on the film instead of even glow and a risk of overheating. Maintain a minimum distance of 70–100 mm from the strip to the ceiling.
Mistake 4: not leaving access to the power supply. The power supply needs to be replaced or checked in case of malfunction. If it is permanently hidden behind drywall or in a niche without a hatch, this is a problem.
Mistake 5: not considering the ceiling height. A massive cornice 150 mm high in a room with a 250 cm ceiling will feel oppressive. Choose the profile size proportionally to the room height.
Mistake 6: making the lighting too bright. Maximum strip power does not mean the best result. For residential spaces, 7–9 W/m is usually sufficient. Overly bright lighting looks uncomfortable and eliminates the cozy effect.
Mistake 7: not checking the compatibility of the strip, dimmer, and power supply. This is a technical trio that must work together. An incompatible dimmer causes the strip to flicker or not work at all.
Mistake 8: gluing the profile without a level. An uneven cornice line is immediately visible, especially when the lighting is on, which highlights any deviations.
Mistake 9: mixing different color temperatures. If part of the perimeter in one room shines with warm light and part with cold light, it creates visual dissonance. All strips in one room should have the same temperature.
Error 10: buying tape without reserve. Tape is ordered with a 10–15% reserve for cuts, corners, and replacement in case of installation damage. Buying more tape of the same series later may not be possible — a new batch may differ in shade.
What to check before purchasing: final checklist
-
Ceiling height — determines the maximum allowable profile size
-
Ceiling type — stretch, painted, or drywall: different requirements for installation and distance to the tape
-
Soft or bright light needed — tape power depends on this
-
Profile size — height and overhang so the tape is hidden and light is distributed correctly
-
Space for LED tape — whether the profile has a groove or niche of the appropriate size
-
Light direction — upward to the ceiling or downward along the wall
-
Power supply location — determine in advance and run the cable
-
Is a dimmer needed — and is the tape compatible with dimming
-
Room style — classic requires a cornice, modern interior requires a minimalist profile
-
Profile color matches ceiling, wall, or provides a contrasting accent
-
If the profile is to be painted, the material must allow it
-
LED strip color temperature is uniform along the entire perimeter, matching the room's atmosphere
Ceiling decor and lighting: a systematic approach
A baseboard or cornice with lighting is not an isolated element. It is part of the overall decorative context of the room, and it should be considered within that context.
If the room has Wooden ceiling skirting board near the floor — it makes sense for the ceiling cornice to echo it in shape or material. If there are Moldings — the cornice with lighting should be part of the same decorative system.
Slatted panels with lighting on the walls and a cornice with lighting on the ceiling — this is a dual lighting system that creates spatial volume simultaneously in horizontal and vertical planes. This is no longer just lighting — it is the light architecture of the interior.
Hidden ceiling lighting combined with the right decorative profile — this is a solution that never goes out of style. Unlike trendy colored lights or complex lighting scenarios, soft warm light around the ceiling perimeter remains relevant regardless of interior trends.
FAQ: Answers to popular questions
Can you make backlighting through a regular ceiling baseboard?
No, if the regular baseboard does not have a niche or sufficient overhang. For hidden backlighting, you need a special cornice or baseboard for LED strip with space for the strip behind the profile body. A regular thin fillet will not allow you to hide the strip so that it is not visible.
What baseboard is needed for a stretch ceiling with backlighting?
You need a profile that leaves a distance from the strip to the stretch ceiling of at least 70 mm — to prevent heating and the appearance of light spots. It is also important that the profile is installed without drilling in the area where the stretch ceiling is attached. More details in the article baseboards for stretch ceilings and LED.
Why are dots from the LED strip visible on the ceiling?
The reason is too small a distance from the strip to the ceiling surface. At a distance of less than 80 mm, the light fluxes from the diodes do not have time to mix before reflection, and each diode projects its own spot. The solution is either to increase the distance or choose a strip with more frequent diode placement (120–180 diodes per meter).
What is better: a ceiling cornice or a drywall niche?
For finished renovation or stretch ceiling — definitely Ceiling cornice with backlight: quick installation, decorative result, minimal dirt and stress. A drywall niche is better when building from scratch — it offers more possibilities for integrating engineering but requires significantly more time and labor.
Can you install lighting in a room with a low ceiling?
Yes. For a low ceiling, choose a low, laconic profile — no more than 80 mm in height. Light directed upward visually raises the ceiling, not lowers it. The main thing is not to use a massive classic cornice: it will visually compress the space.
How to choose the color temperature of an LED strip for a bedroom?
For a bedroom, 2700 K (warm white) is optimal. This range creates a relaxing atmosphere and does not interfere with falling asleep. Be sure to add a dimmer — the ability to reduce brightness to a minimum turns ordinary lighting into a full-fledged night light.
How to hide the LED power supply when installing a baseboard?
Plan a place in advance: a false niche in the wall, space behind a built-in wardrobe, a cabinet with a hatch door in a hard-to-reach spot. The power supply must remain accessible for inspection and replacement — so it cannot be permanently sealed.
About the company STAVROS
STAVROS is a Russian manufacturer of decorative products made of polyurethane and natural solid wood for interiors. The company's assortment includes Polyurethane moldings and cornices for ceiling lighting, solid wood cornices, Wooden Skirting Boards, Polyurethane ceiling decoration and a wide range of finishing profiles for any interior style.
STAVROS offers both ready-made decorative solutions for installation and products for painting — for those who want a precise color match for a specific interior. The catalog includes profiles for modern, classic, neoclassical, and country spaces — in a single material and a single decor system.
If you want to make hidden ceiling lighting without complex renovation — STAVROS ceiling plinth or cornice for LED strip — it's a ready-made solution that works from the first day of installation.