Article Contents:
- Can You Put Crown Molding on a Vaulted Ceiling?
- Vaulted, Cathedral, and Sloped Ceilings: Why the Geometry Matters
- Crown Molding on a Vaulted Ceiling: The Three Critical Transitions
- 1. Where a level wall meets a sloped ceiling
- 2. Where a horizontal run turns onto a slope
- 3. Where two sloping runs meet at the peak
- Start with projection and mounting contact
- Compare actual dimensions, not size labels
- Choose ornament after the corner works
- Measure the angles that actually matter
- Map every run and transition
- Build the difficult corner first
- Keep the cutting method consistent
- Dry-fit, secure, and finish
- Can you put crown molding on a vaulted ceiling?
- What type of crown molding is best for a vaulted ceiling?
- Can crown molding be installed on a sloped ceiling?
- How do you cut crown molding for a vaulted ceiling?
- Does crown molding work on cathedral ceilings?
- Should crown molding follow the ceiling slope?
- What size crown molding should I use on a vaulted ceiling?
- Is lightweight crown molding easier to install on angled ceilings?

Yes, crown molding can work on a vaulted ceiling. The right approach depends on where the trim will run, how the ceiling slopes, and whether the profile can sit securely at each wall-to-ceiling connection. Choosing crown molding for a vaulted ceiling starts with those decisions, before you choose the decorative pattern.
A room can look straightforward from the floor yet contain several different trim problems: a level run along a side wall, an angled run climbing an end wall, and a joint at the peak. A profile that fits one location may need a different mounting detail at the next.
The most useful starting point is to trace the intended molding line around the room. Where does it rise, turn, stop, or meet a beam? Once you can answer that, you can compare profile dimensions, select a material, and give an installer a clear brief. This guide explains those choices, including when a simpler ceiling treatment will produce a better result.


Can You Put Crown Molding on a Vaulted Ceiling?
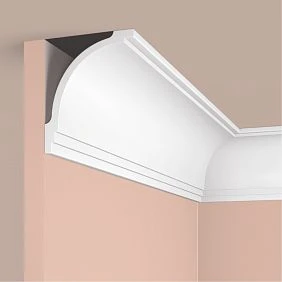
You can install crown molding on many vaulted ceilings when the mounting surfaces and transitions are planned together. Long, straight runs and a consistent slope make the work easier to organize. Several short slopes, uneven corners, and projecting beams create more decisions.
Before buying anything, choose the route your trim should follow:
| Approach | What it looks like | What must be resolved |
|---|---|---|
| Follow the wall-to-ceiling perimeter | The crown stays at the ceiling edge and climbs the gable walls. | Changes from level to sloping runs, mounting contact, and peak joints. |
| Create a level band below the vault | A horizontal line wraps the walls while the ceiling continues above it. | A supported wall-mounted detail and an intentional treatment of the exposed top. |
| Trim selected architectural areas | Molding finishes a flat ceiling section, soffit, or framed feature. | Finished ends and a clear reason for each stopping point. |
A level band can suit a room where the full perimeter would become visually complicated. It is a separate design detail: ordinary crown intended to contact both wall and ceiling cannot simply be moved down the wall and attached however convenient.




Vaulted, Cathedral, and Sloped Ceilings: Why the Geometry Matters
Vaulted ceiling is a broad term for a raised ceiling form. In homes, it may describe a simple pitched ceiling, an asymmetric arrangement, or a more complex shape. A curved vault needs its own treatment; straight rigid profiles cannot follow a continuous curve without a designed solution.
Cathedral ceiling usually describes two sloping planes meeting at a central ridge. Cathedral ceiling crown molding often combines level runs on the side walls with rising runs on the triangular end walls, also called gable walls.
Sloped or slanted ceiling may mean a single angled plane, as in a shed-style ceiling or an attic room. Crown molding on a sloped ceiling can encounter different conditions at the low wall, high wall, and end walls.
The practical question is which way the ceiling slopes relative to each run of molding. Along a gable wall, the molding may climb uphill. Along a side wall, the molding may remain level while the ceiling slopes away above it. Those situations require different checks.
Наша фабрика также производит:
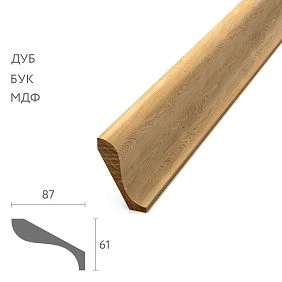
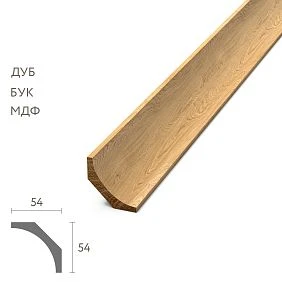
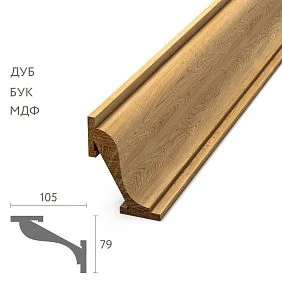
Смотреть весь Каталог продукции
Crown Molding on a Vaulted Ceiling: The Three Critical Transitions
Получить консультацию
1. Where a level wall meets a sloped ceiling
Conventional crown often has rear contact surfaces intended for a particular wall-and-ceiling relationship. A pitched ceiling changes that relationship along the side walls. The crown may touch at an edge while leaving part of its intended mounting surface unsupported.
Hold a sample in the proposed position and inspect the back. A suitable backing detail, a profile designed for that junction, or a revised trim route may be needed. Altering the rear of a profile is a material-specific carpentry decision; instructions for reshaping solid wood should not automatically be applied to a molded polymer product.
2. Where a horizontal run turns onto a slope
This is the troublesome corner in many vaulted ceiling crown molding projects. Two lengths of the same profile can present different shapes at their cut faces when their installed orientations differ. A tighter miter setting alone may not make their decorative lines meet.
A short transition piece can separate the turn around the corner from the turn uphill. Other approaches include a deliberately sized transition block, a purpose-designed matching profile arrangement, or a finished stop. The choice should be made with actual samples: every step, curve, and groove needs somewhere to go.
3. Where two sloping runs meet at the peak
The peak is a separate joint on the gable wall. Its fit depends on both slopes and the installed orientation of the profiles. An apparently centered ridge does not prove the two sides are identical.
Also distinguish the gable-wall peak from the ridge running through the room. Bringing trim together at the top of an end wall does not require extending crown along the ridge between the ceiling planes.
How to Choose Crown Molding for Vaulted Ceilings
Start with projection and mounting contact
Projection describes how far the installed molding extends out from the wall. Wall drop describes how far its lower edge sits below the ceiling junction. The width measured across an angled decorative face is a third measurement. These dimensions are related, but they are not interchangeable.
Read the product drawing before treating a listed dimension as installed height or projection. Rotating a profile changes the space it occupies and can change how its rear surfaces contact the wall or ceiling.
Compare STAVROS crown molding profiles by their cross sections first. Then consider the shape of the face, its shadow line, and how it relates to the room’s door casings, baseboards, and built-in cabinetry.
Compare actual dimensions, not size labels
These three HIWOOD polystyrene profiles illustrate different catalog dimensions. Inch values are rounded conversions; the millimeter dimensions identify the products.
| Profile | Listed cross-section dimensions | Listed length | Useful comparison |
|---|---|---|---|
| A70V1 compact crown molding profile |
2.76 × 0.83 in 70 × 21 mm |
78.74 in 2,000 mm |
The smallest listed dimensions in this group. |
| L1902S 80 mm crown molding profile |
3.15 × 1.06 in 80 × 27 mm |
78.74 in 2,000 mm |
An intermediate size to compare with the smaller sample. |
| A100 larger crown molding profile |
3.94 × 2.09 in 100 × 53 mm |
78.74 in 2,000 mm |
A substantially larger second dimension, worth checking carefully at transitions. |
These are size comparisons, not claims that a particular model is certified for vaulted ceilings. Confirm the intended installation orientation, actual projection, and mounting requirements from the drawing and a physical sample.
Choose ornament after the corner works
A smooth cove or restrained stepped face can make a change of direction easier to read. An ornate profile adds another requirement: the decorative pattern must end or continue convincingly at every joint. If the sample corner interrupts the design awkwardly, consider a simpler perimeter and reserve detailed decoration for a separate focal area.
What Size Crown Molding Works on a Vaulted Ceiling?
Measure the wall height where the crown starts, as well as the maximum ceiling height. A room that rises from 8-foot side walls to a 14-foot ridge should not be sized only by the 14-foot measurement. Much of the trim will be viewed against the lower walls.
For crown molding on a vaulted ceiling, use these priorities:
- Low side walls or limited clearance: compare compact profiles and check their installed projection.
- Tall walls and broad ceiling planes: test a larger profile from normal viewing positions.
- Several changes of angle: favor a profile whose complete transition can be built cleanly.
- Strong beams or large window trim: judge the crown alongside those existing features.
A short offcut proves fit. A longer sample helps judge scale. Temporarily position the sample securely at the actual ceiling line, then view it from the entrance and seating area. Check it in daylight and under the room’s lights before ordering the full quantity.
How to Install Crown Molding on a Vaulted Ceiling
The installation sequence below helps establish a workable assembly. Product-specific cutting, adhesive, fastening, and finishing instructions still govern the selected molding.
Measure the angles that actually matter
Separate four measurements: ceiling slope from horizontal, the included angle between wall and ceiling, the angle between adjoining walls, and the crown’s spring angle. The spring angle describes the profile’s installed tilt; it is not the ceiling pitch. Check the angle convention used by your drawing or cutting guide.
For example, a ceiling rising at 20° from horizontal above a plumb side wall creates a 110° interior wall-to-ceiling angle at that low side. Neither number is automatically a saw setting. Miter and bevel settings also depend on the joint type, profile orientation, and cutting method.
Map every run and transition
Label each run on a sketch and record its actual length. Mark inside corners, outside corners, changes in slope, peaks, beams, and finished ends. Note the selected mounting detail beside each run. Establish a consistent reference edge so the crown does not gradually rotate as installation progresses.
Build the difficult corner first
Use offcuts of the actual profile to make the complete transition, including any intermediate piece or block. A paper template can record an angle, but it cannot prove that the molded faces align. Check the assembly in position before committing full-length stock or calculating the final order.
Keep the cutting method consistent
With nested cutting, the crown is held at its required orientation against the saw’s fence and table. With flat cutting, the stock lies flat and the compound miter saw supplies the necessary miter angle and bevel angle. Appropriate jigs and stops help preserve the setup.
A setting from one method cannot simply be transferred to the other. A chart for a standard horizontal inside corner also does not automatically describe a vertical turn or a vaulted transition. Label your test pieces with their location, orientation, and settings.
Dry-fit, secure, and finish
Dry-fit all pieces that form a transition together. Check rear contact, face alignment, and the line seen from the floor. If closing the joint requires forcing the molding away from its planned position, revise the detail before attachment.
Prepare clean, sound mounting surfaces and follow the product instructions for compatible adhesive, any required fasteners, temporary support, and curing. Use filler and paint approved for the material. Small finishing gaps are different from an unsupported edge or a mismatched profile.
High walls require a stable working platform. Complex transitions or modifications to the profile are good reasons to involve an experienced finish carpenter before the material order is finalized.
What Happens at the Peak of a Cathedral Ceiling?
There are three sensible design choices. First, keep the crown on selected lower runs and finish its ends, leaving the gable peak clear. Second, continue up both sides of the gable wall and build a sample peak joint. Third, use separate decorative accents on the ceiling planes while keeping the perimeter treatment simpler.
Choose the option that supports the room’s main feature. A large window beneath the peak may benefit from an uninterrupted frame. A prominent ridge beam may already provide enough emphasis overhead.
For a symmetrical ceiling, review both sides together rather than approving one slope in isolation. For an asymmetric ceiling, let the actual architecture determine the composition; adding a centered ornament will not make unequal slopes appear structurally symmetrical.
Polystyrene Crown Molding vs. Polyurethane Decorative Elements
The A70V1, L1902S, and A100 profiles above are listed as HIWOOD polystyrene crown molding. STAVROS also offers polyurethane decorative elements for ornamental compositions. Keep those materials distinct when specifying the project.
Linear crown creates the long architectural boundary. Separate decorative elements can add an accent, complete a motif, or organize a ceiling composition. Combining them calls for matching scale, compatible finishes, and suitable mounting details for each component.
Lightweight crown molding may be easier to handle overhead, but lower weight does not correct an unsuitable cross section. Likewise, polyurethane does not automatically mean flexible. Specify a flexible product only when the manufacturer identifies it for the intended use.
For paintable architectural molding, confirm the surface preparation and coating system before installation. If moisture-resistant molding is needed, check the exact product specification and the condition of the wall or ceiling behind it; material selection cannot correct an active moisture problem.
Adding Decorative Elements to a Vaulted Ceiling
Start with one clear composition: a restrained perimeter, a framed area on a ceiling plane, or a focal accent. Keeping the decorative hierarchy simple helps the ceiling geometry remain readable.
The STAVROS ceiling decor collection offers assembled decorative compositions to explore. Treat a layout shown on a flat ceiling as a starting point for design review. A kit’s arrangement does not establish that its components can cross a ridge or span two angled planes.
For polyurethane ceiling decor around a light fixture, establish the fixture location and mounting requirements first. The decorative element should fit the mounting surface without becoming a substitute for the fixture’s structural support. Review the complete layout from below before attaching individual ornaments.
Common Crown Molding Mistakes on Vaulted Ceilings
- Buying from the front-view photo alone. Check the cross section and intended contact surfaces.
- Choosing size from ridge height alone. Compare the profile with the lower walls and nearby trim.
- Assuming every corner is 90°. Measure each location and label the result.
- Treating ceiling pitch as a saw setting. Identify the joint and cutting method before calculating cuts.
- Expecting a compound miter to fix every mismatch. Some intersections need a different transition arrangement.
- Cutting finished lengths before proving the corner. Build and approve the difficult assembly first.
- Using caulk to rebuild missing detail. Refit a visibly misaligned profile before finishing.
- Forcing decoration through every change. A deliberate stop can look more coherent than another tiny angled piece.
When You Should Not Use Crown Molding on a Vaulted Ceiling
Reconsider continuous crown when the proposed line breaks into numerous short sections, lacks suitable mounting surfaces, or competes with exposed beams and other dominant features. Correct significant surface irregularities before treating molding as a way to conceal them.
Crown molding for a slanted ceiling is also a poor choice if its necessary backing makes the assembly disproportionately bulky. Consider a restrained wall-mounted border, decorative trim around an opening, or a composition contained within one ceiling plane. Each option still needs a suitable product and mounting detail, but the geometry may be easier to resolve.
How Much Molding Should You Order?
Measure the installed path, including the sloping runs. Floor perimeter alone can underestimate the material needed for crown that climbs the gable walls.
For a simple example, imagine a symmetrical gable wall 16 feet wide with a peak 4 feet above its side-wall height. Each slope spans 8 feet horizontally and rises 4 feet. Its length is approximately 8.94 feet, so the two sloping runs total about 17.89 linear feet, before allowances for cuts and transitions.
The listed STAVROS examples come in 2-meter lengths, approximately 6.56 feet. Plan where each length and joint will fall. A total-footage calculation is only the starting point: account separately for test pieces, transitions, end returns, saw cuts, and offcuts that cannot serve another run.
How to Choose the Right STAVROS Profile
Before you buy crown molding, prepare a small project package: room photos, a sketch of the intended route, wall and peak heights, measured angles, run lengths, and the proposed finish. Include close-up photos of the most difficult junctions.
Use those details to shortlist decorative crown molding, compare drawings, and request the information or sample needed to approve the fit. When comparing crown molding for sale, check length per piece as carefully as profile size. For a U.S. project, confirm availability, shipping to your ZIP code, lead time, and the complete delivered quotation before committing to the order.
Frequently Asked Questions
Can you put crown molding on a vaulted ceiling?
Yes, when the profile, mounting detail, and changes of direction work together. Decide whether the crown will follow the ceiling perimeter, form a level band below it, or finish selected areas. Test the hardest transition before ordering the room’s full quantity.
What type of crown molding is best for a vaulted ceiling?
The best choice is a profile that fits the planned mounting surfaces and forms clean transitions at an appropriate scale. A simple face and manageable projection are useful starting points. Material, weight, and ornament matter after the physical fit is established.
Can crown molding be installed on a sloped ceiling?
Yes, but check each wall separately. The trim may climb the slope on an end wall while remaining level along a side wall. Those runs can have different contact conditions and may require different mounting or transition details.
How do you cut crown molding for a vaulted ceiling?
Measure the actual geometry, identify the joint type, and choose a consistent nested or flat-cutting method. Use a suitable cutting guide and verify the result with actual offcuts. There is no single miter-and-bevel combination for every vaulted ceiling.
Does crown molding work on cathedral ceilings?
It can. Plan the junctions between the level side-wall runs and the rising gable-wall runs, then test the peak if the trim continues that far. A symmetrical ceiling still needs measurements on both sides.
Should crown molding follow the ceiling slope?
It should when that route gives the room a clear, continuous architectural line and the transitions can be built properly. A supported level band or selected trim sections may suit a complicated room better. Choose the route before selecting the profile.
What size crown molding should I use on a vaulted ceiling?
Compare the starting wall height, installed projection, nearby trim, and room proportions. View samples at the actual installation height. A high ridge alone does not establish the right crown molding size for the lower side walls.
Is lightweight crown molding easier to install on angled ceilings?
Lower weight can make handling easier. It does not remove the need for correct geometry, sound mounting surfaces, compatible adhesive, and secure support during installation. Evaluate the material’s installation requirements along with its weight.