Article Contents:
- From the selected profile to the real base: what you need to know before ordering
- Identical trim does not mean identical installation
- What exactly you need to know about the base before ordering
- The base map shows the hidden installation structure of the site
- You need to check the finished wall structure, not just the partition material
- Concrete, brick, and plaster: visually similar walls behave differently
- Framed partition: embedded elements and internal structure must be known in advance
- Aerated concrete, porous blocks and other special substrates must not receive a random installation recipe
- Hidden utilities must be compared with the decor layout before mechanical fastening
- Adhesive cannot be considered a universal answer for any substrate
- Mechanical fastening is also not a universal solution
- A combined assembly may be correct, but it cannot be assigned blindly
- The back surface of the profile must be part of the sample approval
- Skirting, moulding and cornice create different installation tasks
- A stretch ceiling and a suspended ceiling cannot be considered an ordinary wall
- The sequence of work is directly tied to the accessibility of the substrate
- Trial installation is the best way to verify an installation unit before bulk purchasing
- How to lock in an approved installation unit without unnecessary bureaucracy
- Standard rooms save time only after the first actual execution has been verified
- Renovation requires its own logic: different walls can lie beneath the same paint
- How to work with a wall whose construction changes along its length
- Procurement should not inspect walls on its own, but it should request the right data
- Delivery must not get ahead of the readiness of the installation solution
- How to include substrate verification in the procurement schedule
- Practical example: decorative frames on drywall partitions
- Practical example: one corridor wall, but two substrates
- Practical example: a service route runs along the line of the decorative frame
- Practical example: renovation of an old restaurant
- If the wall construction was changed after approval, the installation assembly is re-verified
- When a special backing may not be needed
- How to choose between changing the wall and changing the profile
- How to coordinate the installation system with the supplier without shifting design responsibility onto them
- How to assess a position's readiness for purchase: a simple decision tree
- How a mass order turns a small mistake into a systemic one
- How to calculate what portion of a single SKU goes to different substrates
- The level of confidence in substrate data should be recorded separately
- When it's better to hold off on ordering the main batch of trim
- When a complex substrate check may be excessive
- How to hand over an approved detail to a new installation crew
- How to distinguish a base problem from a profile problem on a trial area
- The risk matrix helps determine where a full trial assembly is needed and where a standard check is sufficient
- Changing the finish coating may also require rechecking
- 12 typical mistakes before installing wooden trim
- Checklist before the main purchase
- What to send to the supplier before manufacturing the batch
- Why this check is especially important specifically for wholesale purchasing
- Practical passport of a typical substrate for repetitive rooms

The architect chose the wooden moulding, the supply department calculated the linear metres, the supplier produced the batch, and the material arrived on site. The installer opens the first package and only then discovers: some walls are concrete, some are framed with drywall, in several rooms the decorative profile must run along wall panels, and behind one of the partitions cables run through the fastening zone. In the standard rooms it also turns out that where a backing was expected, there is none.
The moulding itself may be completely correct. The error occurred earlier — the installation detail was not checked before purchase. For a large delivery of finishing materials should begin not only with the answer to the question "which profile is needed", but also with the question "what will this profile actually be attached to in each standard room?".
The same article number of wooden trim can run across monolithic concrete, a plastered brick wall, a framed partition, aerated concrete, a plywood backing, a wall panel, and a reconstructed substrate. Visually, after painting, all these walls may look the same. For the installer, these are different constructions, which means the method of substrate preparation and the fastening detail may also differ.
PROFILE → INSTALLATION LOCATION → SUBSTRATE TYPE → FINISHED CONSTRUCTION → BACKINGS → HIDDEN UTILITIES → PROPOSED INSTALLATION DETAIL → TEST SECTION → APPROVAL → MAIN BATCH
The main principle of the article: wooden trim cannot be fully approved based only on the face side, dimensions, and quantity. For a large project, it is necessary to understand in advance the actual substrate construction and confirm that the selected profile can be installed as standard on the typical walls of the site.
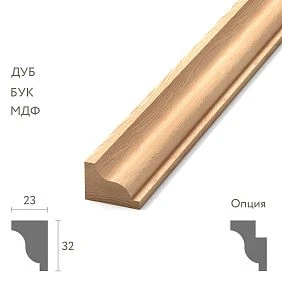
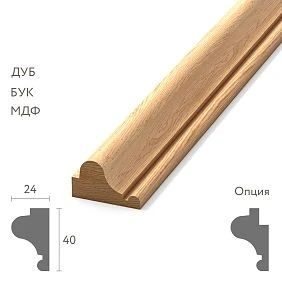
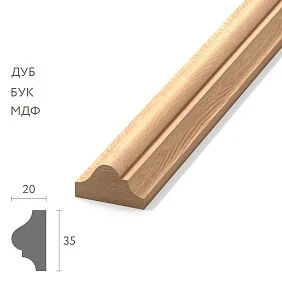


From the selected profile to the actual substrate: what needs to be known before ordering




Identical trim does not mean identical installation
A single product line can hide several wall types
The specification states: “wooden molding — 600 linear m.” For procurement, this is one line item. For installation, within these 600 meters there may be:
- 180 m on monolithic concrete;
- 220 m on framed partitions;
- 80 m on plastered brick;
- 70 m on wall panels;
- 50 m in renovated rooms with mixed substrates.
The total linear meterage is correct, but the installation conditions are fundamentally different. If this only becomes clear after delivery, procurement can no longer calmly adjust the profile, prepare blocking, or carry out a trial section on each type of substrate.
The fastening method is a property of the assembly, not a habit of the installer
In practice, you often hear: "we always glue such moldings" or "we always add mechanical fastening." For a typical apartment, this sometimes works without problems. For a large project, such an approach is too general. Compatibility depends on the actual wall, its finish layer, the condition of the surface, the dimensions and weight of the specific profile, the accessibility of the load-bearing part, hidden utilities, and the technology of the selected mounting system.
Even a single wall type can have several different constructions
The phrase "it's drywall" does not yet describe the substrate. In different rooms, the number of sheets, the position of the framing, the presence of plywood or another backing, the profile spacing, additional cladding, tiles, or a decorative panel over the sheet may differ. All of this changes the actual installation context.
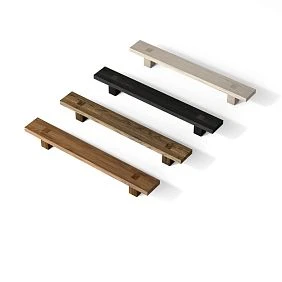
Our factory also produces:
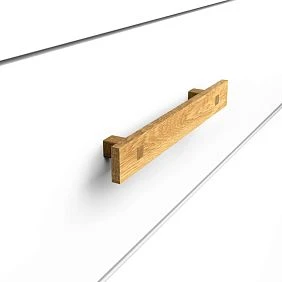

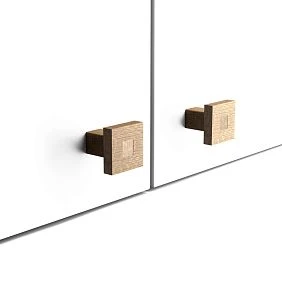
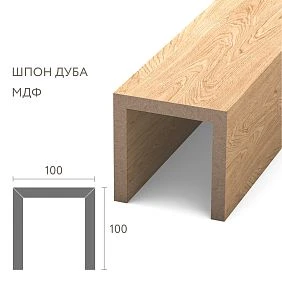



What exactly needs to be known about the substrate before ordering
Before finishing material suppliers once the final specification is received, it is useful for the project to collect minimal information for each type of room or wall.
| Parameter | What to find out | Why |
|---|---|---|
| Main construction | Concrete, brick, framing, aerated concrete, existing wall, etc. | Understand the real load-bearing base |
| Finish layer | Plaster, paint, panel, tile, wallpaper, etc. | Assess the contact surface and access to the base |
| Cladding thickness | Actual or design | Understand the depth to the load-bearing layer |
| Void behind the cladding | yes / no / unknown | Do not treat a hollow wall as monolithic |
| Embedded part | Whether provided, and where located | Prepare a working strip for future fastening |
| Utility routes | Cables, pipes, low-voltage lines | Avoid conflict with the mounting zone |
| Geometry | Evenness, local protrusions and depressions | Determine whether the profile will fit properly |
| Surface condition | Durable, dusty, peeling, contaminated | Determine readiness for an adhesive or combined joint |
The finish surface and the load-bearing structure are different levels
The installer sees a painted plane. Behind it there may be 20 mm of plaster and brick, two layers of sheet cladding on a frame, or a wall panel on a substructure. That is why the phrase "the wall is painted" says almost nothing about how a wooden profile should be attached to it.
An unknown substrate is a status of its own
During renovation, some walls may look identical, but the project does not have reliable information about what is beneath the finish. Instead of guessing "probably brick," it is better to mark the area as SUBSTRATE REQUIRES INSPECTION and verify it before placing a bulk order.
Get Consultation
The substrate map shows the hidden installation structure of the site
It is simpler than a full construction model
There is no need to describe the entire building again. It is enough to link the installation locations of the trim with the base types and special conditions.
| Zone | Linear molding | Base | Finish layer | Feature | Node status |
|---|---|---|---|---|---|
| Main hall | Molding | Monolithic concrete | Painting | Long continuous wall | Check sample |
| Number type A | Molding | Framed partition | Painting | Check embedded part | OPEN |
| Corridor | Baseboard | Brick + plaster | Painting | Check the strength of the layer | OPEN |
| Restaurant | Rail | Wall panel | Veneer | Separate installation unit | OPEN |
| Old building shell | Casing | Mixed substrate | Old plaster | Test area required | Survey |
Procurement needs the map not for choosing dowels
Its purpose is to show where a single trim SKU falls into different construction conditions and where a separate technical solution is required before purchase. The specific fasteners and adhesive are chosen by the project or installation organization based on a compatible system, not by the purchaser based on the wall name.
After the map, it becomes clear how many typical assemblies are actually needed
A site may have 8,000 m² of walls, but only four repeating constructions: concrete, brick with plaster, drywall with a backing, and panel cladding. Then, instead of endlessly discussing every room, the project checks four typical installation assemblies and, separately, the exceptions.
You need to check the finished wall construction, not just the partition material
The design term "drywall" does not fully describe the installation system
The installer needs to know how many layers of sheathing there are, where the frame is, whether there is a prepared fastening strip, and what is on top. The same applies to concrete, brick, and aerated concrete: the finish can significantly affect the surface preparation method and the accessibility of the load-bearing base.
The finish buildup may change after the architectural design is issued
For example, the wall was initially planned to be painted over plaster, and later a decorative panel was added. For the trim, this is no longer the same surface. Therefore, before the final purchase, it is useful to check not the early plan but the current construction.
Actual execution also needs to be monitored
Even a typical project does not guarantee that all contractors prepared the walls in the same way. In a 100-room hotel, the rooms may be designed identically, but in several partitions the backing is shifted or missing. A typical assembly does not replace on-site verification.
Base types: concrete, brick, plaster, porous blocks, and renovation
Concrete, brick, and plaster: visually similar walls behave differently
Monolithic concrete
For a concrete wall, the project checks the geometry, surface condition, presence of finishing layers, and concealed utility routes. Concrete can be a strong load-bearing base, but above it there are often plaster, filler, and paint, which by themselves should not be taken as the load-bearing layer without evaluating the entire system.
Brick masonry
The entire brick wall cannot be considered uniform. On an old property, there may be thick plaster with uneven strength over the masonry. On a new one, there is a leveling system. In the area of a sealed opening, an entirely different structure may appear.
Plastered surface
If adhesive contact is intended, substrate preparation is fundamentally important for any adhesive system: manufacturers of installation adhesives usually require a strong, clean, dry surface without dust, weak layers, oils, and poorly adhering paint. This is a universal preparation principle, but not a universal recommendation to use a specific adhesive for any trim.
Trim should not mask serious wall curvature
A long profile emphasizes the wave. If the wall has to be noticeably pulled to a straight wooden element, the geometry of the base must be addressed first. Strong forced bending of the profile with fasteners turns a decorative detail into a tool for correcting a construction defect.
Framed partitions, embedded supports, and concealed utilities
Framed partition: embedded supports and internal structure must be known in advance
When finishing materials wholesale are purchased for a large project, framed walls especially show why profile selection and base preparation must go in parallel.
The face plane does not show where the product can be reliably fixed
After filling and painting, a framed partition looks monolithic. But inside there remain studs, voids, utilities, and possible embedded supports. The installation unit must account for exactly this internal structure.
It is easier to provide an embedded support before the wall is closed
If a large cornice, wide molding, or repeating frame composition requires a prepared work zone, the simplest moment is the open frame stage. After sheathing, filling, and painting, adding an embedded support turns into reworking a finished wall.
At the early stage, it is not necessary to know every fastening point
It is often enough to determine:
- the height of the future trim run;
- direction;
- working strip along the wall;
- length of the section;
- type and dimensions of the decorative element.
After that, the partition designer can incorporate a compatible structure, and the exact installation points will be selected later according to the approved technology.
An embedded element must not exist only "in words"
Before closing the wall, it is useful to record its position in an as-built drawing or by another working method. Otherwise, a few months later the installation crew sees a closed surface and does not know where the prepared zone actually is.
Aerated concrete, porous blocks and other special substrates must not receive a random installation recipe
The type of substrate is communicated to the installation organization in advance
Aerated concrete, hollow masonry, lightweight blocks and other substrates have their own fastening systems. This article must not replace the technical documentation for fasteners and load calculations. The correct process is to specify the wall material in advance and select a compatible system according to the documentation for the specific fastener, adhesive and product.
It is more beneficial for the project to determine the wall type before ordering the trim
If it turns out that the selected large profile requires a more prepared base, the project can still change the assembly, reinforce the wall, or choose a different element. After delivery of hundreds of meters, there is less room for solutions.
Hidden utilities must be coordinated with the decor layout before mechanical fastening
buy finishing materials wholesale it can be done correctly, but installation will still stop if the decorative frame coincides with an engineering route.
Which systems may intersect with the trim area
- electrical wiring;
- lines to switches and sockets;
- low-voltage cables;
- pipelines;
- heating elements;
- other hidden engineering utilities.
Individually correct designs can conflict within the same wall
Engineers routed the conduit according to their working design. The architect placed a decorative frame based on the elevation drawing. Both solutions are correct within their own disciplines, but the mechanical fasteners for the frame may end up in the same zone.
A conflict before the wall is closed is cheaper than a conflict after finishing
At an early stage, you can adjust the layout, move the conduit within acceptable limits, prepare a different fastening zone, or modify the assembly. After the final finish, you first have to establish the actual position of the utilities and only then choose a safe installation method.
You cannot give the advice "just drill a little higher"
If a utility is discovered after the wall is closed, its actual position and the base structure are established first. Randomly shifting the fastening point without understanding the wall is not a technical solution.
Adhesive, mechanical, and combined assembly: why there is no universal method
Adhesive cannot be considered a universal answer for any substrate
Adhesion depends on the surface, not just on the name of the adhesive
Manufacturers of construction adhesives usually require a strong, clean, dry, and stable substrate, free from dust, grease, weak layers, and poorly adhering paint. If a decorative profile is glued to peeling finish, the strength of the adhesive itself does not compensate for the weak underlying layer.
A painted wall is a system of "paint + filler + substrate"
If one of the layers is weak, the adhesive bond may effectively hold not to the wall but to fragile paint. Therefore, before mass installation, a test area on the actual finished structure is useful.
The contact area of the profile also matters
Different moldings and cornices have different back geometries. One profile has a wide contact surface, another has a textured or narrow one. You cannot automatically assume that one adhesive scheme will work equally well for the entire range.
Mechanical fastening is also not a universal solution
The fastener must match the base material
For concrete, solid or hollow masonry, aerated concrete, sheet partitions, and other substrates, there are different anchor and dowel systems. Their permissible loads and conditions of use are specified by the fastener manufacturer. Therefore, the phrase "we'll use a regular dowel" is insufficient for a responsible project.
The depth to the load-bearing layer may be greater than it seems
Thick plaster, a panel, a substructure, or several layers of sheet material separate the front surface from the base substrate. This must be taken into account when designing the assembly, not after the first failed hole.
Mechanical fastening requires information about utilities
The more actively drilling and anchoring are used, the more important it is to reconcile the decorative layout with hidden routes.
A combined assembly may be correct, but it cannot be assigned blindly
In critical areas, fastening methods may be combined
For some products and substrates, the manufacturer or project may specify adhesive contact together with mechanical fastening. But this solution must arise from the compatibility of the specific product, surface, and installation system, not from the universal habit of "just to be safe, do both."
A test area checks more than just retention
It shows:
- profile fit;
- visibility of fastening points;
- impact on the finished surface;
- installation speed;
- tool access;
- convenience of repeating the node on typical rooms.
The back surface of the profile must be part of the sample approval
When working with materials supplier the customer usually looks at the beautiful front side. The installation organization also cares about the back.
What to check
- the width of the actual contact area;
- the presence of reliefs and recesses;
- straightness;
- availability of space for the intended fastening method;
- compatibility with the base and wall finish.
One profile may be simpler than another specifically in its back geometry
If two decorative options are visually equivalent, but one has a clearer working surface for installation on a specific wall, this can be an argument in its favor before purchase.
Skirting, molding, cornice, and ceiling systems create different tasks
Skirting, moulding and cornice create different installation challenges
The skirting works in the lower zone of the wall
Painted plaster, wall panels, tiles, furniture plinth and other finishes may be found here. It is important not to repeat a separate topic of junctions, but to check which structure is actually behind the strip where the profile will be fixed.
A tall skirting reveals the geometry of the base more strongly
The greater the height and rigidity of the element, the more noticeable local waves, protrusions and unevenness become. This does not mean that any tall skirting is "heavy", but it requires a more careful check of the wall.
Moulding often forms a composition of several lines
A small frame on one section and a series of large frames across the entire wall create a different total load and different preparation requirements. What matters is not only the weight per metre, but also the scale of the composition, repeatability and access to the base.
The cornice works in the wall and ceiling zone simultaneously
A wooden ceiling cornice may adjoin a solid wall, a framed partition, a plasterboard ceiling structure or a stretch system. It is necessary to determine in advance which structure is the working base for fixing and in what sequence the work is carried out.
A stretch and suspended ceiling cannot be considered an ordinary wall
The ceiling system has its own substructure
If the cornice interacts with a stretch ceiling, suspended structure, or drywall box, the project must determine what the wooden element is actually fixed to. The ceiling fabric or decorative finish itself is not the answer to this question.
The installation sequence becomes part of the assembly
Need to coordinate:
- when the trim is installed;
- when the ceiling system is installed;
- what gap is required;
- which structure remains accessible for installation;
- who is responsible for the final junction.
If the ceiling blocks access to the base, this must be known before delivery
Sometimes it is more convenient to install the wooden cornice before the final assembly of the ceiling system. In another project, the order will be reversed. There is no universal sequence, but it must be approved in advance.
Sequence of works, trial installation and handover of a typical unit to the crew
The sequence of works is directly tied to the availability of the substrate
Some areas can only be prepared before the structure is closed up
If the wall has not yet been boarded up, the project can easily provide for a blocking or other preparation for a future decorative element. After the installation of the boards, final filling and painting, the same operation becomes more expensive and affects the finished finish.
Therefore, when Material suppliers working with a project site, it is useful to discuss the installation logic before closing the partitions, and not after the mouldings arrive.
The typical sequence looks like this
decorative layout → substrate map → preparation of blockings and working areas → closing of walls → finishing preparation → verification of the actual structure → trial installation → approval of the unit → main delivery → mass installation.
This is not a universal schedule for any site. But it shows the principle: first a compatible substrate is created, then the finished wooden profile is installed on it.
If panels or furniture block access to the wall, this must also be taken into account
A mounting assembly may be technically correct but inaccessible after the wall panel, cabinet, or ceiling box is installed. This means the sequence of adjacent works must be included in the check before ordering.
A trial installation is the best way to verify the mounting assembly before bulk purchasing
The sample must be shown to the installation organization in advance
The architect looks at the front side of the profile. The installer must also see the reverse geometry, the contact area, the actual rigidity of the product, the nature of the substrate, and access for tools.
One real sample allows, before a large wholesale purchase of building materials Check:
- how well the profile fits against a typical wall;
- whether the chosen fastening technology is suitable;
- whether surface preparation needs to be changed;
- whether concealed utilities interfere;
- whether it is convenient to work on a repeating section;
- is the finish coat not damaged;
- whether the assembly can be reproduced identically hundreds of times.
The test area must be typical
If 80% of the moldings will be mounted on frame partitions, there is no point in testing a single sample only on concrete in the lobby. The test area must reproduce the most common construction or the most risky assembly.
When one test area is not enough
If the site has fundamentally different substrates — for example, concrete, drywall with a backing, and a wall panel on a substructure — a separate test is needed for each installation-distinct scenario.
| Substrate type | Share of volume | Test assembly | Result |
|---|---|---|---|
| Concrete + painting | 30% | U-01 | Approve / revise |
| Framed partition + embedded support | 50% | U-02 | Approve / revise |
| Panel cladding | 20% | U-03 | Approve / revise |
A trial assembly checks more than just retention
Even if the product holds, the assembly may be poor for other reasons: the fasteners are too visible, the profile does not fit well, the surface is damaged during installation, the operation takes too much time, or it requires access that a typical room will not have.
How to lock in an approved installation assembly without unnecessary bureaucracy
After the trial section, it is useful to create a short card. For a large construction materials wholesale this is much cheaper than verbal instructions for each new crew.
| Field | What is recorded |
|---|---|
| Assembly code | U-02 |
| Molding | SKU / profile type |
| Base | Framed partition with a prepared work area |
| Finish layer | Painted surface |
| Preparation | Per the approved project procedure |
| Mounting system | Reference to a specific approved technology |
| Limitations | Communication zone / embedded element boundaries |
| Sequence | After the wall is ready, before the specific adjacent stage |
| Reference | Photo / drawing / test area |
| Date | Approval date |
Why it is better to reference a specific technology rather than rewrite it in your own words
Manufacturers of fasteners and adhesive systems specify permissible substrates, preparation, temperatures, limitations, and loads for specific products. If a project uses an approved system, it is safer to keep a reference to its current documentation than to paraphrase half of the instructions in a general schedule.
A standard detail can be replicated only on an identical substrate
If U-02 is approved for a framed wall with a backing, it cannot be automatically applied to the same externally painted wall without a backing. The detail code is tied to the construction, not to the surface color.
Typical rooms save time only after the first actual execution has been verified
A 150-room hotel is the perfect example
The project has identical molding frames and identical baseboards. It makes sense to check one typical room once and then replicate the solution.
But before replication, it is necessary to confirm:
- the actual wall construction;
- presence of embedded parts;
- the position of utilities;
- the wall geometry;
- the actual sequence of work;
- the installation detail on a sample.
A standard project does not guarantee identical execution across all rooms
Different crews may have prepared the walls with slight deviations. Therefore, a standard detail reduces the scope of design work, but does not eliminate selective inspection of the actual preparation.
It is useful to inspect the first room of each crew
If different contractors handle different floors, the first room of each team can be checked against the approved reference. This helps detect a deviation before a hundred repetitions.
Renovation requires a separate logic: different walls may lie beneath the same paint
When construction materials wholesale for an old restaurant, hotel, or office, the risk of an unknown substrate is higher than in new construction.
An old wall may be multi-layered
Behind modern paint there may be:
- old plaster;
- brickwork;
- local infill of openings;
- sheet materials from previous renovations;
- old panels;
- unknown renovation layers.
Visual uniformity does not prove structural uniformity
A single long white wall may consist of a concrete section, a former door opening on a frame, and a brick insert. For architecture, it is one surface; for installation, it is three substrates.
Before a large purchase, a surveyed representative area is needed
It is not necessary to open up the entire site. The goal is to obtain a reliable picture of the characteristic areas and determine where the substrates change. If the project is indeed non-uniform, the substrate map becomes an essential part of the preparation.
How to work with a wall whose construction changes along its length
Divide the area into installation zones
For example, a 12 m long molding runs along a single visually continuous wall:
- 0–4 m — monolithic;
- 4–6 m — a former opening that has been closed up;
- 6–12 m — brick with plaster.
Instead of a single universal solution, the project determines whether one approved installation assembly can safely work on all three substrates. If not, different installation zones appear within a single decorative line.
A change of installation zone must not be noticeable on the front side
That is precisely why the task is resolved in advance: the outer profile remains continuous, while beneath it the substrate preparation or the fastening method changes according to the approved technology.
Installers need to know the transition point
After the final finish, the boundary between structures may be invisible. Its position must be in the as-built drawing, marking, or another clear source.
Supply and procurement schedule: what data is needed before the order is released
Procurement should not inspect walls on its own — but it should request the correct data
When construction and repair goods wholesale the buyer is responsible for the completeness of the order, not for opening up structures. But they may hold a major line item from the order until the key installation conditions are confirmed.
Procurement questions before ordering
- Where exactly is this profile installed?
- What types of walls are present in these areas?
- Are there framed partitions?
- Are prepared blocking or working strips needed?
- Has their actual execution been confirmed?
- Are there concealed utility lines in the area of the future fastening?
- Who approves the installation detail?
- Has a sample from the installation organization been provided?
- Has a trial section been completed on a typical base?
- Are there any bases that are not yet known?
Sources of information
Answers can be provided by the designer, general contractor, work manufacturer, installation organization, as-built documentation, and inspection of the existing wall. The purchaser consolidates the result into a clear status but does not replace the engineer.
Delivery must not get ahead of the readiness of the installation solution
When materials in bulk the temptation is strong to order everything in advance so as not to "miss the deadlines." But if half of the wall has not yet been determined structurally, the project simply transfers the uncertainty from the design to the warehouse.
The material can be manufactured before installation begins
This is acceptable if the installation assembly itself has already been determined and the base will not change. One must not conflate "installation in two months" with "the installation technology is not yet known."
Statuses help separate ready items from open ones
| Position | Base | Test assembly | Procurement status |
|---|---|---|---|
| Hall skirting board | Confirmed | Approved | Can be ordered |
| Room molding | Embedded items under review | Not completed | Do not start the main batch |
| Restaurant cornice | Ceiling assembly open | No | Clarify |
So procurement can proceed in parts
There is no need to block the entire project because of one open base. Items with a confirmed installation solution are ordered, while disputed ones remain until the technical issue is closed.
How to include substrate verification in the procurement schedule
PROFILE SELECTION → SUBSTRATE MAP → VERIFICATION OF EMBEDDED ELEMENTS AND UTILITIES → SELECTION OF MOUNTING SYSTEM → TEST SECTION → APPROVAL OF STANDARD DETAIL → MAIN ORDER → DELIVERY → AS-BUILT VERIFICATION → MASS INSTALLATION
Each transition must have a clear outcome
After the substrate map, it is clear how many wall types there are. After verifying embedded elements — which zones are ready. After the test section — which detail is approved. Only then does the main order become technically mature.
Changing the wall after approval triggers re-verification
If a load-bearing partition was replaced with a framed one, or a panel system was added on top of the wall, the old detail is not transferred automatically. The substrate is an input parameter of the installation technology.
Practical scenarios: drywall, mixed wall, utility route, and renovation
Practical example: decorative frames on drywall partitions
Initial situation
A hotel is planning 120 identical rooms. On each wall — several wooden frames. At the procurement stage, the walls are still open.
The best moment to decide
The project can:
- lock in the frame layout;
- define the working strips;
- approve the preparation of the frame structure;
- close up the partitions;
- assemble one standard unit;
- check the installation;
- launch the main volume.
Why this is more advantageous than a late decision
If the problem is discovered after painting 120 rooms, access to the internal structure is already closed, and the recurring risk is multiplied across the entire project.
Practical example: one corridor wall, but two substrates
Initial situation
A long wooden molding runs along the corridor without a visual break. The first 15 m are concrete, the next 8 m are the framed enclosure of an engineering opening.
What is checked in advance
- whether a single visually identical profile can be used;
- which mounting assemblies are used on the two substrates;
- where the boundary runs;
- whether visible fastening points appear;
- how to maintain the same molding position along the entire length.
Result
The exterior decor remains the same, but the execution plan tells installers where the substrate changes and which approved technology is used after the boundary.
Practical example: an engineering route runs along the line of the decorative frame
Problem detected before closing the wall
This is the best-case scenario. The architect and engineer see the intersection and can agree on changing the layout, the route, or the mounting strip without damaging the finished surface.
Problem detected after painting
First, the actual position of the route and the wall construction are established. Only then is a safe variant of the assembly selected. Installation must not continue based on assumption.
Conclusion
Comparing engineering and architectural plans before mass installation is significantly cheaper than finding a solution after delivery.
Practical example: renovation of an old restaurant
Initial situation
All walls are painted in a single color. The new design includes a wooden baseboard and molding around the perimeter.
The survey shows
- part of the walls is brick;
- part is old plaster on masonry;
- former openings are covered with sheet materials;
- old electrical wiring runs through one zone.
Solution
The design creates a substrate map, checks several typical areas, and only then approves the installation technologies and the scope of the main batch. The exterior finish remains uniform, while the technical preparation varies by zone.
Changing the wall or finish after approval requires a new inspection
If the wall structure was changed after approval, the installation detail is re-inspected
Changing the substrate is not a minor local construction detail
For example, the project specified a solid partition, but in the working documentation it was replaced with a framed one. For the architect, the decorative layout may remain the same. For the installation of the trim, the original substrate has changed completely.
Therefore, the change must reach not only the builders, but also the procurement specialist, the installation organization, and, if necessary, the building materials supplier, if it affects the profile itself, the sample, or the delivery procedure.
What to recheck after a change
- base type;
- presence and position of embedded elements;
- thickness of the finished structure;
- hidden utilities;
- reverse geometry of the selected profile;
- approved installation assembly;
- sequence of adjacent works.
The old node card gets the status "recheck"
There is no need to delete the history. It is more useful to keep the record: U-02 was approved for
When a special anchor may not be needed
Anchors must not be turned into a mandatory rule for every molding
A small lightweight profile on a solid prepared surface and a large wooden cornice create different tasks. Not every product requires reinforcement of a framed wall.
The decision depends on:
- specific profile;
- material and weight;
- geometry of the back side;
- partition construction;
- selected mounting system;
- project requirements.
A backing is needed when it is part of a verified assembly
If the installation contractor confirms a safe method without a separate backing for a specific structure and product, creating one "just in case" is not mandatory. An expert process differs from a template-based one in that reinforcement is applied based on actual necessity.
But it is too late to add the necessary reinforcement after the final finish
If the test area shows that the prepared zone is truly needed, this decision must be made before the walls are closed up on a mass scale.
How to choose between changing the wall and changing the profile
Sometimes it is easier to prepare the base
If the profile is an important part of the architectural concept and is repeated throughout the entire project, it makes sense to adapt the wall structure to the approved decorative element — for example, to provide a working installation zone already at the framing stage.
Sometimes it is easier to choose a different profile
If the existing base is already finished, and the selected trim requires complex rework of hundreds of meters of walls, the project can compare an alternative profile with a more suitable geometry and installation method.
We compare the cost of the entire system, not just the product
An inexpensive molding that requires opening up finished partitions, additional blocking, and complex modification may end up costing more than another profile that works with the existing structure as standard.
When construction materials suppliers are compared for a large project, it is useful to consider not only the price per linear meter, but also the labor intensity of the approved installation detail.
How to coordinate the installation system with the supplier without shifting design responsibility onto them
The supplier does not need a full building model
But for a complex or non-standard product, it is useful to provide:
- profile purpose;
- typical substrates;
- finish;
- whether there are framed partitions;
- whether there are restrictions on visible fasteners;
- whether a factory-finished surface is planned;
- Is there an approved trial assembly?
The product supplier and the fastener manufacturer solve different problems
The first is responsible for the characteristics of the profile itself and recommendations for its use. The second is responsible for the suitability of a specific fastening system for the substrate and loads. The project must combine these two parts, rather than expect a universal answer from one participant.
For wholesale supply of building materials, it is more useful to provide a confirmed installation scenario than a set of guesses
If the customer has already tested the sample on a typical wall, the supplier receives clear context. If the substrate is still unknown, it is better to say so rather than describe it conditionally.
How to assess a position's readiness for purchase: a simple decision tree
IS THE TYPE OF SUBSTRATE KNOWN?
No → SURVEY / CLARIFY
Yes → IS THE FINISHED CONSTRUCTION CLEAR?
No → WAIT FOR THE CURRENT PIE
Yes → ARE EMBEDS AND UTILITIES VERIFIED?
No → CLOSE THE ISSUE BEFORE FINISHING
Yes → IS THE MOUNTING ASSEMBLY SELECTED?
No → SELECT ACCORDING TO SYSTEM DOCUMENTATION
Yes → IS THE TEST AREA SUCCESSFUL?
No → REFINE THE BASE / ASSEMBLY / PROFILE
Yes → THE MAIN BATCH CAN BE CONFIRMED
The decision tree protects against premature purchasing
It does not require complex automation. For each major item, a single status can be set: base unknown, assembly under review, test area completed, ready to order.
Mass order: how one small mistake becomes systemic
How a mass order turns a small mistake into a systemic one
One wrong junction — a local rework
If a private room has 8 m of molding, the mistake is unpleasant but limited to one wall.
On a large project, the junction repeats hundreds of times
For example, 120 rooms × 16 m of molding = 1920 m of one repeating scenario. If only after delivery it turns out that the partitions are not prepared for the approved installation method, the problem multiplies across the entire room stock.
Therefore supply of construction materials a large batch must follow verification of one typical junction
The greater the repeatability, the higher the economic value of early testing. One trial room can prevent rework in dozens of rooms.
How to calculate what portion of one SKU goes onto different substrates
Total linear meters hide the installation structure
Suppose a project needs 720 linear meters of a single wooden molding. In the architectural schedule, this is one line item. After the substrate map, it becomes clear:
| Base | Volume | Share | Node status |
|---|---|---|---|
| Concrete + painting | 210 м | 29,2% | Approved |
| Framed partition with a prepared zone | 360 м | 50,0% | Trial section completed |
| Brick + plaster | 90 м | 12,5% | Check the condition of the layer |
| Reconstructed mixed wall | 60 м | 8,3% | Substrate being clarified |
In total, 570 m already have a clear or almost confirmed installation scenario, while 150 m require a separate solution. This is far more useful than a single status of "molding approved" for all 720 m.
This makes it possible to launch procurement in parts
If the production schedule allows, the project does not have to wait for a full survey of the old building to order material for the completed new floors. But within the order, zone attribution must be preserved so that a batch with an approved detail does not get mixed with a volume that is still under technical review.
The share of unknown substrate shows the real procurement risk
If 8% of the scope is unknown, the project can safely close it separately. If 70% is unknown, launching the entire batch just to meet the calendar means that installation uncertainty has effectively become the main property of the order.
The level of confidence in the data on the base should be recorded separately
A design assumption and actual confirmation are not the same thing
Early documentation may say "brick" because that was in the original building plan. After a survey, it turns out that part of the wall has long been covered with sheet material. If the table does not distinguish the source of information, an old assumption looks just as reliable as an actual inspection.
Simple statuses can be used:
- CONFIRMED BY DESIGN AND IN REALITY — the structure is known;
- CONFIRMED BY DESIGN — actual execution has not yet been verified;
- REQUIRES SURVEY — there is not enough data;
- CHANGED ON SITE — the design structure no longer applies.
This is especially useful during reconstruction
The buyer immediately sees where the information is final and where it cannot be used as a basis for a mass installation solution.
When it is better to hold off on ordering the main batch of trim
The basis for most of the volume is unknown
If the project only knows the exterior appearance of the walls and the internal structure has not been confirmed, it is better to first survey typical zones. The trim may turn out to be fully suitable, but the risk of later wall rework is too great.
The embedded supports have not yet been designed, and the walls will soon be closed up
In this case, the priority is not urgent purchasing of wood, but a decision on the partition structure. After the wall is closed up, there is significantly less freedom.
The installation organization has not yet seen the selected sample
If the profile is complex, wide, has unusual reverse geometry, or a factory finish, it is useful to first show it to those who will install it. One installer's comment on the sample can prevent an expensive mass mismatch.
An engineering route crosses the mass decorative layout
Until the conflict is resolved, purchasing meters does not bring the project closer to installation. First, a safe and reproducible scheme needs to be determined.
The trial section failed
This is a direct signal to stop replication. It is necessary to understand whether the problem lies in the substrate, the profile, the mounting system, or the surface preparation, and only after that approve a mass order.
When a complex substrate check may be excessive
A small, lightweight profile on a fully known standard wall
If the same assembly has already been used many times on this site, the actual wall construction has been confirmed, hidden utilities are known, and the selected mounting system has clear documentation, then every new meter does not require a new engineering meeting.
But the standard must be genuinely confirmed
The phrase "we always do it this way" does not replace a proven assembly. Simplification is possible after the standard system has already proven compatibility on the given substrate.
Wall quality control still remains
Even with an approved technology, an individual section may have peeling paint, a local wave, or a missed anchor. A standard assembly reduces design work, but it does not eliminate inspection of the installation site.
How to hand over an approved assembly to a new installation crew
It is not enough to say “do it like on the second floor”
A new team may not see the reference area or may interpret the details differently. It is better to provide:
- typical detail code;
- photo of the finished result;
- base type;
- link to the approved installation system;
- boundaries of the embedded parts or work area;
- restrictions on concealed utilities;
- sequence of operations.
It is useful to accept the new crew’s first area separately
If the result matches the reference, the work then proceeds serially. If not, the error is corrected before it spreads to the entire floor.
How to diagnose a problem in the trial area
How to distinguish a base problem from a profile problem on a test area
The profile does not fit snugly against only one wall
If the same sample lies flat on the reference surface and on another prepared wall, the issue is most likely in the geometry of the specific base.
The same problem repeats on different level bases
Then the geometry of the product itself, the storage method, the back surface, and the sample's compliance with the production batch are checked.
The adhesive joint does not hold on a specific finish layer
First, the strength and preparation of this layer, compatibility with the selected compound, and compliance with the documentation are assessed. One cannot immediately conclude that "the glue is weak" or "the wood is bad."
Mechanical fastening conflicts only in one zone
This may indicate a hidden utility line, the absence of a mounting block, or a change in the wall structure. The value of a test area is precisely that it allows the cause to be localized before mass installation.
The risk matrix helps to understand where a full test assembly is needed and where a standard check is sufficient
Not all areas of the project require the same depth of preparation. It is useful to divide them in advance based on a combination of three factors: how well the substrate is known, how complex the profile itself is, and how expensive it would be to redo the finished trim.
| Scenario | Base | Profile | Risk of rework | Recommended inspection depth |
|---|---|---|---|---|
| Standard baseboard in a new hallway | Confirmed | Simple | Low | Standard substrate inspection |
| Molding on a framed partition | Partially confirmed | Repeating composition | Medium | Test assembly + verification of embedded elements |
| Large cornice near a suspended ceiling | Complex | Voluminous | High | Joint trial unit by adjacent trades |
| Reconstruction of an old restaurant | Non-uniform | Medium | High | Survey + several trial areas |
This matrix is not a standard. It helps to allocate attention: not to spend the same amount of time on a long-established concrete wall and an unknown partition to be reconstructed.
High risk arises not only from the weight of the product
Even a small molding can be critical if it needs to be installed along an expensive finished panel, next to concealed utilities, or in 200 identical rooms. Repeatability and the cost of rework are sometimes more important than the dimensions of the profile itself.
Low risk does not mean absence of control
It means that the project already knows the substrate and has a proven technology. Before installation, the actual surface and the absence of local deviations are still checked.
Changing the finish coating may also require re-inspection
The base remained the same, but the contact surface changed
Initially, the molding was supposed to be installed on painted plaster. Then the project replaced the finish with a decorative coating or panel. The load-bearing wall is the same, but the working surface is now different.
For an adhesive joint, this is especially important: manufacturers of installation adhesives directly link adhesion to the condition and type of surface. This means that an old test area on one finish does not prove compatibility with the new one.
Repeat testing can be local
It is not necessary to fully re-approve the entire project. It is enough to repeat the test on the new type of surface and make sure that the geometry, fastening method, and visual result are preserved.
A change of finish must be included in the list of changes
If the finish was changed after the installation unit had already been approved, the information must reach the installation organization before mass work begins. Otherwise, a formally valid unit is applied to a different base.
Main mistakes before installing wooden trim
12 typical mistakes before installing wooden trim
- Ordering trim without knowing the wall construction. After delivery, you have to find an installation method for each section.
- Treat all painted walls as identical. Different substrates hide behind the same finish.
- Remember the embedded supports only after the drywall is closed. Reinforcement requires redoing the finished wall.
- Ignore hidden utility lines. The decor layout conflicts with the safe fastening zone.
- Choose the fastening method only during mass installation. The standard detail has not been tested in advance.
- Treat one adhesive as universal for all surfaces. The actual condition and material of the substrate vary.
- Treat one mechanical fastener as universal. Base materials and wall constructions require different systems.
- Do not show a sample from the installation company. The reverse geometry of the profile is assessed too late.
- Do not make a test section. The mistake is first discovered over dozens of meters.
- Check only the front side of the product. The mounting surface and contact area are ignored.
- Use one test detail for fundamentally different walls. The test does not represent the mass scenario.
- Change the wall structure without rechecking the decor. The old mounting assembly no longer matches the base.
Checklist before the main purchase
Checklist before the main purchase
| Control question | What should be clear |
|---|---|
| Are all wall types identified? | No unknown bulk substrates |
| Is the finish wall structure up to date? | Plaster, panels, cladding, and other layers are taken into account |
| Are framed partitions highlighted? | The internal structure and work zones are clear |
| Are embedded supports needed? | The decision is made before closing the structure |
| Are embedments in place? | Position confirmed |
| Are utilities known? | No blind mechanical fastening in the hazardous zone |
| Has the back surface of the profile been checked? | Contact area and fastening accessibility are clear |
| Has the mounting system been selected? | There is a reference to the documentation for the specific system |
| Has a test area been completed? | On a typical or critical substrate |
| Has the sequence of works been agreed upon? | The basis will remain available |
| Have the project changes been taken into account? | The old unit is not used after the wall change |
| Who approves the unit? | There is a responsible party |
What to send to the supplier before manufacturing the batch
What to send to the supplier before manufacturing the batch
The supplier does not need to be given all the building's engineering drawings. But for a non-standard or large item, via building materials supplier it is useful to coordinate:
- article number and material;
- profile purpose;
- typical substrates;
- presence of special installation restrictions;
- product finish;
- result of a test area if necessary;
- packaging and labeling requirements if different types of bases go to different zones.
The supplier does not need to be dictated the entire fastening design
The main goal of communication is to make sure that the product matches the actual task and that there is no hidden incompatibility in geometry, finish, or mounting surface.
Why checking the base is especially important for wholesale purchasing
Why this check is especially important specifically for wholesale purchasing
With a single installation, the problem can be solved locally. With a large delivery of finishing materials one error in a typical unit is repeated hundreds of times.
The larger the batch, the higher the value of a single early check
A trial section costing one small fragment can preserve the timeline of the entire installation program. This is especially noticeable in hotels, residential complexes, office floors, chain-format restaurants, and other projects with repeating rooms.
Early approval reduces not only rework but also the "just in case" reserve
Once the installation assembly has been verified, the customer no longer needs to increase the volume just because of the uncertainty of "what if part of the profile can't be installed properly." The reserve is calculated for real installation and operational risks, not for the unknown condition of the substrate.
A practical passport of a typical substrate for repeating rooms
For a hotel, office, or residential complex with repeating rooms, it is useful to keep a short passport of a typical wall. It is enough to specify the room code, the partition construction, the finish layer, the presence of a prepared work area, the position of concealed utilities according to the as-built documentation, the code of the approved installation assembly, and the date of the last check. Such a passport does not replace the working design and does not describe specific fasteners, but it links the architectural layout to the actual wall.
If the first type A room has been verified and matches the passport, subsequent rooms are monitored by deviations: whether the blocking is where it should be, whether the cladding thickness has been changed, whether the route has been moved, whether the wall has been replaced with a different construction. This is faster than disassembling the entire assembly anew each time, and more reliable than assuming that "all rooms are the same."
When the contractor changes, the passport becomes even more useful. The new crew receives not a verbal description but a clear connection: which profile is installed, on which construction, which assembly has already passed trial installation, and which conditions cannot be changed without re-verification. For a large project, this turns installation preparation from the personal knowledge of one foreman into a reproducible process.
Conclusion: installation of wooden trim begins with the wall construction even before ordering
A wooden skirting board, molding, casing, or cornice can be chosen flawlessly by style, material, and dimensions — and still cause a problem on site if no one has determined in advance what exactly it will be attached to.
A painted wall is not a sufficient description of the substrate. Beneath it there may be monolithic concrete, brick with plaster, aerated concrete, a framed partition with or without a backing, an old structure being renovated, panel cladding, and concealed utility runs.
The correct process follows this sequence:
select the profile → determine the installation locations → compile a substrate map → check backings and utilities → choose a compatible mounting assembly → make a test section → lock in the standard solution → and only then confirm a large batch.
At the same time, this article does not replace the technical documentation for a specific adhesive, anchor, or fastener, and does not offer a single recipe for all walls. On the contrary: its purpose is to prevent a universal recipe from appearing where the substrates are objectively different.
So wholesale supplies of building materials become part of a prepared construction process, rather than the reason for an urgent search for fastening after unloading. The customer understands in advance which walls are ready, where additional preparation is needed, which assemblies have been tested, and which items can actually be released into production.