Article Contents:
- Wooden cornice KZ-010: which detail appears above the tall cabinet
- Built-in refrigerator: air must not only enter but also exit the furniture
- Gap above the tall cabinet: decorative clearance or intended air outlet?
- Where to place KZ-010: three options for top finishing
- Grille size and free cross-section: why 500 × 20 mm may be insufficient
- Open gap 500 × 20 mm
- Grille 500 × 50 mm with a nominal 60% open area
- Why the lower and upper openings cannot be combined
- Can I close only part of the gap, leaving an opening on the side?
- What to do if the grille supplier only provides the external dimension?
- Can I add a mesh behind an already approved grille?
- Can the cornice be made removable and cover the vent only sometimes?
- Will the layout remain after replacing the refrigerator with a different model?
- Can I order oak instead of beech after the cutting layout is approved?
- Will the trim be enough for a short side extension?
- What documents should be kept after kitchen installation?
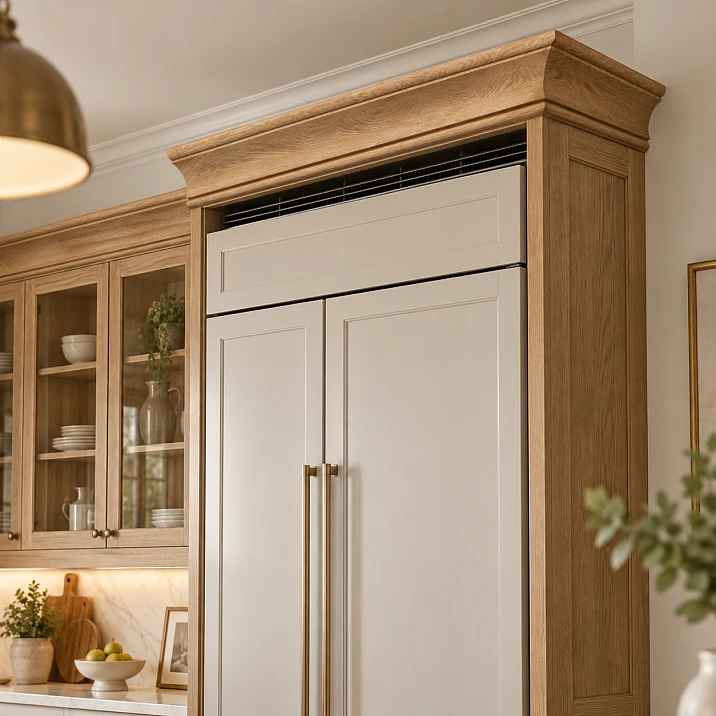
Closing the top of the tall cabinet with a wooden cornice is only possible after checking the ventilation of the built-in refrigerator. If the visible gap serves as an air outlet, it cannot be turned into a solid decorative strip. If the air exits in another designated place, the top of the furniture is finished according to the approved design. By itself, a neat facade does not confirm the correct installation of the appliance.
Let's imagine a new kitchen: a tall cabinet has already been designed, the refrigerator model has been chosen, and the top line is to be finished with beech KZ-010. This is a hypothetical project, not a description of an inspected object. Before purchasing the profile, two schemes need to be combined—the furniture composition and the air path inside the cabinet.
One should start not with the question "what to cover the void with," but with another: where does the air exit after passing behind the refrigerator? The answer will determine the position of the cornice, the design of the filler piece, the need for a grille, and the list of parts to order.
Wooden cornice KZ-010: which part appears above the tall cabinet
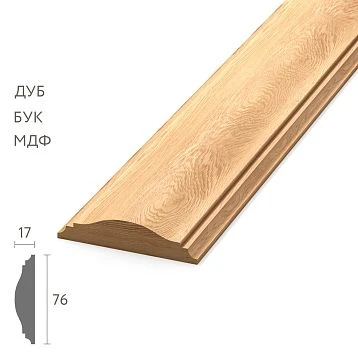
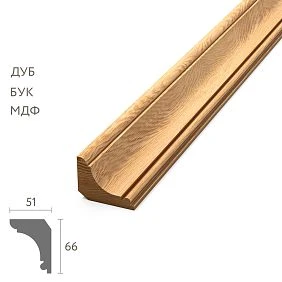
KZ-010 is a separate decorative profile. To buy wooden cornice KZ-010, the material and length of the whole strip are chosen. For the project in question, the main option is beech, cross-section in the manufacturer's designations A × C — 66 × 51 mm, length — 2400 mm.
| KZ-010 execution | Size A × C × L, mm | Sanding | Price of one plank |
|---|---|---|---|
| Beech | 66 × 51 × 2400 | «Prestige» | 7 200 ₽ |
| Oak | 66 × 51 × 2400 | «Prestige» | 11 120 ₽ |
| MDF | 66 × 51 × 2600 | «Prestige» | 3 140 ₽ |
Prices correspond to the card as of September 6, 2026. MDF here is a separate execution, not solid wood. Painting, cutting, and manufacturing of the upper assembly of the tall cabinet do not become part of the purchase just because the sketch shows a finished cabinet.
In the drawing, separate the cornice, furniture body, filler panel, and ventilation outlet. The filler panel covers the selected area above the cabinet; the cornice forms a decorative finish; the opening is left for the intended air passage. These elements may be adjacent, but they do not replace each other.
The numbers 66 and 51 mm do not provide a ready-made installation scheme. To determine the profile position, its cross-section with orientation relative to the furniture is needed. One should not assume that one of the values automatically equals a reduction in the ventilation gap. The mounting base is determined by the cabinetmaker: the refrigerator body is not used as a support for the decorative panel.




Built-in refrigerator: air must not only enter but also exit the furniture
In the scheme under consideration, air enters from below, passes behind the appliance, and exits upward into the room. The entire sequence must be checked, not just the opening visible from the kitchen.
Air from the room → lower inlet → channel behind the refrigerator → upper outlet → room.
A clear example is in the Miele instructions M.-Nr. 11 746 851 / 03 for KFN 7734 C, KFN 7734 F, and KFN 7734 D. Page 23 shows the air flow direction and ventilation cutouts marked "at least 200 cm²". Page 20 prohibits covering ventilation openings and requires their regular cleaning from dust. This is an example of reading a specific instruction, not a universal standard for any built-in refrigerator.
For your cabinet, take the documentation of the actual model. The brand name or the same height of two appliances does not replace verification: the initial data are the specific instruction, installation diagram, and the intended built-in option. From these, the requirements for each section are transferred to the furniture specification.
| Section | What to transfer from the instruction | What to show in a furniture project | Possible obstruction |
|---|---|---|---|
| Bottom entrance | Location and required dimensions | Passage through the plinth and base | Blind plinth panel |
| Rear channel | Required geometry of the free space | Continuous passage in the section | Shelf, crosspiece, back panel |
| Top outlet | Location and required outlet cross-section | Channel connection with the room | Filler strip, cornice, adjacent cabinet |
This table is filled with actual values, not the word "provided" in all columns. Next to each dimension, it is useful to note the instruction page and the designation of the corresponding assembly on the furniture drawing. Then, during approval, it is clear which requirement has already been met and which still remains unresolved.
For example, in a preliminary design, there is a grille in the plinth, but behind it is a solid bottom without the required passage. From the outside, ventilation appears organized, but the first arrow on the section hits a partition. Before ordering the top decor, such an error must be corrected in the cabinet design. Otherwise, discussion of the cornice size will begin before a workable layout of the tall cabinet itself exists.
Pay special attention to transitions between cabinet parts. A large free cavity at the appliance height says nothing about a short narrow section near the top crossbar. All changes in direction and narrowing must be shown separately. This allows detecting a conflict before manufacturing the filler strip, not after painting the cornice.
Also check which dimension is being discussed: the external depth of the cabinet, the depth of the niche for the appliance, or the free space behind it. These are different values. The thickness of the back panel and the position of internal parts must be present on the section, otherwise the statement "the tall cabinet is deep enough" remains unverifiable. Do not increase or decrease the niche yourself: furniture dimensions must be coordinated with the installation requirements of the selected refrigerator.
For top storage, separately mark the boundary between the cabinet for items and the technical passage. The drawing must distinguish shelves for dishes from the space that cannot be occupied by objects. Such marking is useful not only for the assembler but also for the kitchen owner: a closed mezzanine facade does not explain where the storage zone ends.
There is no need to independently calculate the operation of the refrigeration system. The customer's practical task is to provide the furniture manufacturer with complete documentation and receive a consistent drawing. If the instructions do not give an unambiguous answer for the proposed layout, it is coordinated with the manufacturer or appliance installer, not supplemented with assumptions.
Our factory also produces:

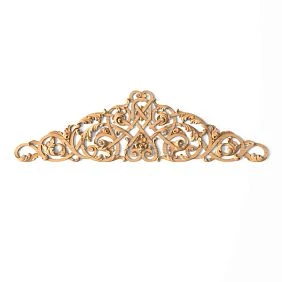
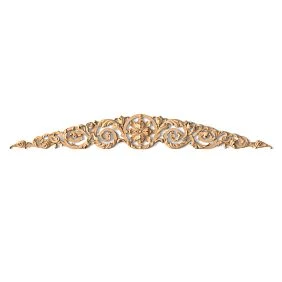
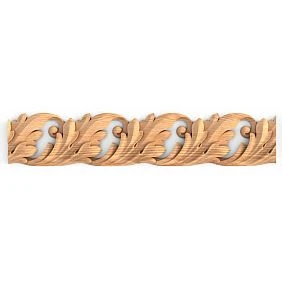
Gap above the tall cabinet: decorative clearance or intended air outlet?
A visually similar dark strip above two cabinets can serve different functions. Above a regular cabinet, it is sometimes unfilled space. Above a tall cabinet with built-in appliances, it is part of the intended air exchange. The solution cannot be transferred from the adjacent section just for the sake of a uniform appearance.
First option: the top gap indeed does not participate in ventilation. The refrigerator has another coordinated outlet to which the duct is routed. In this case, decorative closure is considered separately, checking that the new trim does not alter the already adopted scheme.
Second option: air must leave the tall cabinet precisely through the top section. Then a closed panel changes the functional unit. It is necessary to preserve the outlet, provide a suitable opening in another part, or change the cornice placement within the allowable built-in scheme.
A side section view helps verify the difference. It should show the appliance, the tall cabinet body, the top horizontal part, the filler, the cornice, and the space to the ceiling. Trace the line from the rear duct to the room. If it ends behind a decorative wall, a closed cavity is shown, not an outlet.
Suppose space is left between the top of the tall cabinet and the ceiling, but it is closed at the front by a filler, at the sides by adjacent cabinets, and at the back by a wall. The phrase "lots of air behind the cornice" in this situation does not answer where that air can exit. The project must specify a concrete open area, not just the volume of the void.
There is also a less obvious error: the outlet is shown above the refrigerator, but after the kitchen is approved, a shared shelf or closed overhead cabinet is added there. The cornice itself does not change, but the original scheme no longer matches the furniture. The entire top of the tall cabinet must be re-checked, including parts ordered from another contractor.
It is useful to designate the ventilation passage as a separate zone on the drawing. Within this zone, mounting blocks, back panels, or decorative inserts cannot be placed without re-approval. This way, the prohibition applies to a clear section of the structure, not to a vague wish to "leave a little space."
If the tall cabinet is already assembled, do not start by removing the secured refrigerator yourself for measurement. First, find the installation documentation and assembly photos. Missing information should be obtained by the installer in a safe manner. The absence of a photo of a hidden area is not grounds to consider it free or to task the customer with disassembling an unknown fastening.
Do not confuse it with the gap between movable fronts. If adjacent doors open freely, this only confirms the absence of a specific mechanical conflict. The air passage behind the furniture is checked according to a different scheme and different control dimensions.
Get Consultation
Where to place KZ-010: three options for the top finish
The position of the cornice is chosen after determining the required outlet. For discussion with the cabinetmaker, it is convenient to prepare several options of one kitchen layout and corresponding sections.
| Design solution | What is checked before approval |
|---|---|
| KZ-010 below or outside the outlet passage | The profile and mounting base do not block the path into the room |
| Grille in a separate extension piece | Its free cross-section is preserved after installation of the frame, fasteners, and cornice |
| Modified decorative line | New height, length, and endings are coordinated with the peninsular unit design |
In the first option, the decorative line can remain continuous if there is indeed space for it. But the wording "cornice located below the opening" requires a section: the protruding part of the profile or its mounting block may end up in front of the outlet, even though the frontal lines do not intersect. The volume of parts is assessed, not only their visible edges.
In the second option, the cornice and the grille become independent elements of the composition. For the grille, a position in the filler panel is selected, along with access to fasteners and a cleaning method. Its outer frame can be aligned with the rhythm of the facades, but the dimensions of the working passage cannot be reduced for the sake of symmetry. First, the function is confirmed, then the proportions of the visible part are refined.
Check both sides of the grille. From the front, it may be partially covered by a profile, and from the back, by a support bar. The mere presence of perforation does not mean that all holes communicate with the air duct. The installation diagram should make it clear which section remains open after final assembly.
The third option is needed when the previous two do not fit into the chosen composition. Sometimes it is enough to reconsider the height of the filler panel; sometimes, to end the decorative line before the problem area. It is also possible to abandon the KZ-010 above the refrigerator itself while retaining the profile on the rest of the furniture. This is not a product defect, but a result of checking a specific location.
Arbitrarily cutting into a finished cornice and considering it a ventilation grille should not be done. Verification of the cross-section, residual geometry of the part, its fastening, and appearance will be required. The catalog KZ-010 does not become a standard ventilation element after a few holes.
Before buy furniture cornice for kitchen, compare the selected profile on the overall layout. For the artistic part, you can order furniture cornice selection: the service includes decor selection and specification. It does not replace the coordination of refrigerator installation and the arrangement of its enclosure.
Grille size and free cross-section: why 500 × 20 mm may be insufficient
For a preliminary check, distinguish between the outer size of the grille, the size of the cutout in the furniture, and the free cross-section. The outer rectangle includes the frame and closed areas. The cutout shows the opening in the filler panel. The free cross-section is the area through which air can actually pass after all elements are installed.
Open slot 500 × 20 mm
Let's take a conditional calculation example that specifies the clear size of an unobstructed rectangular opening:
500 × 20 = 10,000 mm² = 100 cm².
When converting units, we consider: one square centimeter contains 100 square millimeters. The resulting 100 cm² is half of the 200 cm² from the example in the instructions. For such a comparison, the slot is already insufficient by geometry. Its length appears significant, but the small height limits the area.
This does not mean that any slot with double the height automatically fits. Arithmetic does not check the rear channel, outlet location, shape of surrounding parts, and other conditions of the instructions. It helps reject a clearly insufficient option but does not confirm the entire assembly as ready.
Grating 500 × 50 mm with a conditional 60% open area
Now we consider the outer rectangle of another, also conditional, grating:
500 × 50 = 25,000 mm² = 250 cm².
Assume solely for the example that the open area fraction is 60% of this outer rectangle. Then:
250 × 0.60 = 150 cm².
It turns out less than the 200 cm² required in our comparison, although the external size gives 250 cm². Therefore, you cannot select a grille only by its dimensions, treating the frame and crossbars as insignificant.
For a real product, request the free cross-section in square centimeters or a clear method for determining it. The number 60% is not a characteristic of all grilles. If the manufacturer specifies the percentage relative to the working part without the frame, multiplying it by the full external size would be an error.
| Training version | Area of the external or open rectangle | Free area under accepted conditions |
|---|---|---|
| Open slot 500 × 20 mm | 100 cm² | 100 cm² |
| Grille 500 × 50 mm | 250 cm² | 150 cm² at a conditional 60% |
Why the lower and upper openings cannot be combined
Suppose in another preliminary scheme the lower inlet is assigned 250 cm² and the upper outlet 150 cm². The sum of 400 cm² does not prove compliance with the requirement for each opening. These are sequential sections of the path, not two interchangeable parts of one outlet. Each of them is checked separately.
For the same reason, a large grille cannot be assessed in isolation from the narrow cutout behind it. If part of the openings is covered by an extension piece, the declared free cross-section of the grille itself does not describe the installed assembly. The drawing records both the product characteristic and the actually open passage.
The dimensions of KZ-010 are also not directly subtracted from the grille area. First, the actual intersection of parts in the adopted position is determined. In the absence of such an intersection, the profile may not reduce the opening; if present, the overlapped part must be taken into account. Two cross-section numbers of the cornice are insufficient for this.
For an irregular opening, do not use the area of the bounding rectangle: closed corners and webs are included in it, but not in the air passage. The cutout size should also be verified after processing its edges and installing the frame. In the working sheet, specify the units of measurement in full: the entry "cross-section 200" without "cm²" allows a dangerous ambiguity.
The result of the calculation section is an entry in the specification: what passage is required by the instructions, what the furniture leaves, and how much free area remains after installing the grille and decor. This is a geometric check of the project, not an air flow calculation or a refrigerator test.
Beech or oak: cornice finishing does not fix closed ventilation
After approving the scheme, the finish can be selected. For the project under consideration, the original option is the beech KZ-010. Oak is considered separately if its appearance matches the other wooden elements of the kitchen. The material is agreed upon based on a sample of the future coating, not just a photo of an unpainted strip.
Describing quality of wood and sanding, STAVROS separates surface preparation and workpiece selection. "Prestige" refers to processing and sanding, not to the finished varnish or color. The designations "for enamel" and "for tinting" describe the selection of lamellas. Therefore, the entry "beech, Prestige" does not yet define the final coating of the cornice.
Before painting, approve the color, gloss, and profile appearance next to the facade. For transparent or semi-transparent finishes, additionally confirm the suitable quality of the workpiece. Coordinate visible ends, joints, and areas near the grille: they must not accidentally remain without the intended treatment.
tips for finishing wooden decor help prepare the task for the workshop, but the sequence of cutting, fitting, and coating must be tied to the specific structure. If the grille is intended to be removed for cleaning, it must not be accidentally combined with permanent decor using glue or a shared coating film.
More expensive wood and different paint do not restore a blocked air outlet. Also, heat resistance cannot be attributed to the coating without technical data. In case of conflict, change the position of parts or the finishing scheme, rather than trying to solve the ventilation issue with the name of the varnish.
Cost of KZ-010 and estimate for the upper pencil-case node
The number of full slats is obtained from the cutting list after approving the cornice placement. Consider the front section, intended side extensions, ends, and workshop technological allowances. One pencil-case width does not describe the entire consumption.
For example, let us assume that the approved cutting layout indeed fits into one 2400 mm slat. Based on the purchase prices above, the results are as follows:
| Execution | One slat | Packaging frame | Subtotal |
|---|---|---|---|
| Beech | 7 200 ₽ | 390 ₽ | 7 590 ₽ |
| Oak | 11 120 ₽ | 390 ₽ | 11 510 ₽ |
The difference is 3,920 RUB. Packaging is added once to the considered small order; the final composition is confirmed in the invoice. This is the budget for the profile with packaging, not the price of a finished pencil case and not the cost of a complete ventilation solution.
The full estimate includes the cornice, extension piece, and grille if necessary, agreed-upon fasteners, coating samples, finishing, cutting, installation, and delivery. Lines are filled with contractors' proposals. An unknown labor price cannot be replaced with an arbitrary percentage of the wood cost.
В in STAVROS responses about order configuration it is stated that cutting to size is not provided. Therefore, the store receives a request for whole slats, and the workshop receives a cutting map. A second slat is not added automatically: the reserve is determined by the cutting plan, test joints, and the accepted work procedure.
Before payment: two documents for one furniture finish
The seller needs a product specification. For the main version, it may look like this:
KZ-010 / beech / 66 × 51 × 2400 mm / "Prestige" sanding / blank quality to be confirmed / quantity per agreed list ___ pcs. / packaging / delivery.
In a separate line, specify who performs cutting and finishing. The phrase "cornice above the refrigerator" does not define either the length of parts or the coating readiness. Before payment, check current prices, completeness, and Terms of payment and delivery for the cornice.
The furniture manufacturer needs a technical specification. It includes the refrigerator model and instructions, a cross-section of the cabinet, a continuous air path, required free cross-sections, the position of the cornice and extension piece. Additionally, the grille characteristics, cutting map, coating sample, and access method for cleaning are provided.
Acceptance is carried out not only by a frontal photo. Before closing hard-to-reach areas, check compliance with the cross-section: behind the grille there is a provided passage, the outlet is not blocked by the top of the adjacent cabinet, and mounting bases have not occupied the free zone. Photos of hidden areas are saved along with the drawing.
For a hidden passage, determine the control point in advance. For example, the upper channel can be shown before installing the decorative extension piece, and the grille position after its installation. Thus, one inspection is not passed off as confirmation of the entire assembly. When replacing the grille or changing the mounting base during assembly, the contractor must update the diagram rather than leave the original version in the documents.
After final assembly, it is useful to re-check the available control dimensions and the intended removal of the grille. A part that could be extracted on the workbench sometimes turns out to be blocked by the ceiling or an adjacent profile. The installer must demonstrate the actual maintenance sequence in the installed furniture.
The phrase "the refrigerator is cooling now" does not replace acceptance per the instructions. It does not confirm the dimensions of the hidden channel or compliance with the installation diagram. If an obstruction is found, first fix the joint; do not suggest that the owner observe the appliance instead of meeting the design requirements.
Order cornice KZ-010 can be done after approval of two documents. If the required passage is not maintained, the filler piece, profile position should be changed, or the cornice should be abandoned in that section. A part is purchased for a working structure, not as a way to hide an unresolved issue.
Questions before ordering the cornice above the refrigerator
Can only part of the gap be closed, leaving an opening on the side?
This option is considered according to the appliance instructions and the cabinet diagram. The connection of the side opening to the rear channel, its dimensions, and surrounding obstacles must be shown. An open side alone does not prove that the new path is permissible. If the documentation does not describe the proposed layout, it must first be coordinated with the party responsible for appliance installation.
What to do if the grille supplier provides only the external dimension?
Request the free cross-section area and an explanation of how it was determined. A photo of the slats does not replace the specification. Until the data is received, the grille can remain as a preliminary option, but it should not be considered an approved position. Substituting the illustrative 60% from the article's calculation is not allowed: the selected product's open area ratio may differ.
Can a mesh be added behind an already approved grille?
This is a change to the ventilation unit that requires re-verification. The characteristic of a grille without a mesh does not describe the new combination. An additional element, its mounting, and access for cleaning must be considered. Do not include a mesh just for appearance or dust protection without coordination with the project designer.
Can the cornice be made removable and the outlet closed only sometimes?
Removability is useful for maintenance, but it does not replace an open passage during the intended operation of the appliance. A solution cannot be considered suitable merely because the decorative part can be removed later. The normal operating mode must comply with the instructions without needing to remember to remove the decoration each time.
Will the layout remain after replacing the refrigerator with a different model?
This needs to be checked again. The matching external dimensions of the appliances do not confirm identical installation requirements. The saved sections and grille data will help evaluate the existing furniture, but the final decision is made based on the documentation of the new refrigerator. Reworking the cornice may turn out to be unnecessary—this cannot be promised in advance.
Can oak be ordered instead of beech after the cutting layout is approved?
The specified wooden versions have the same catalog length of 2400 mm, but the replacement is still recorded in the specification and estimate. The finish sample must be re-approved. Switching to MDF is a different material item with a length of 2600 mm; it cannot be quietly substituted into the order by calling it solid wood.
Will the offcut be enough for the short side extension?
Only if the profile, material, orientation, and actual usable length after trimming are suitable. The remainder is first included in the cutting map, then accounted for in the purchase. A piece that fits by overall length may not yield the required part due to a previously made corner cut or a section intended for a test coating.
Which documents should be kept after kitchen installation?
Keep the refrigerator instruction manual, the final cut of the pencil case, the designation of the grille and its free cross-section, photos of hidden areas, the KZ-010 specification, and the access procedure for cleaning. This set will allow explaining to the next technician why a certain gap is left intentionally and what changes cannot be made without re-approval.