Article Contents:
- First, determine the finish result
- When beech is suitable for an overlay
- When to choose an oak overlay
- How to balance grain activity and ornament depth
- What finishing for enamel or tinting means
- Enamel overlay: color and smoothness are decided separately
- Tinting: consider the entire carved surface
- Oil: a natural look does not mean the original color is preserved
- Clear lacquer: check the shade and sheen
- How to combine a solid wood overlay with another facade material
- Finish together with the facade or before installation
- How to make a test finish that can be repeated
- Paired and repeating overlays are selected at the same time
- Coordinate the overlays with handles and moldings
- Wardrobe, dresser and kitchen: where finish differences are most noticeable
- Changing the wood species does not eliminate the need to check dimensions
- An approved overlay card helps you reproduce the result
- Where to buy solid wood overlays for furniture to match the chosen finish

The same carved overlay may look like part of the facade after painting, but like a standalone wooden accent after a clear finish. Not only the color and sheen change: pores, grain direction and transitions between wood sections become more noticeable. So a suitable shape does not yet determine the material to order.
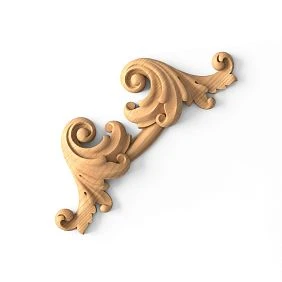
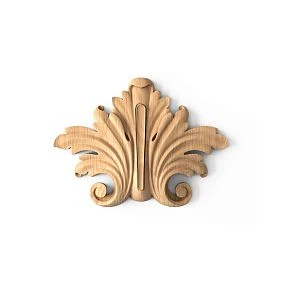
Solid wood overlays for furniture are chosen with consideration for what should remain visible after finishing. If only the silhouette of the ornament matters, a surface intended for an opaque coating is considered. If the wood texture is part of the composition, the species, the selection of the blank, and the result of tinting are checked. The final decision is made using a sample next to the actual front, and for paired parts — using both elements at the same time.

First, determine the finishing result
Start with three questions: will the wood be visible, must the overlay match the front in color, and what gloss level is needed. The answers allow you to choose the material specifically. The words "light classic furniture" are not enough: they can mean both smooth white enamel and a semi-transparent coating with noticeable oak pores.
| Desired appearance | What to consider when choosing solid wood | What to check on the sample |
|---|---|---|
| Smooth opaque paint | Surface preparation and wood species characteristics | Visibility of pores, cleanliness of the relief, matching gloss |
| Visible wood with a new shade | Texture, selection of the blank, absorption of the tint | Overall tone and contrast of different areas |
| Light wood without pronounced darkening | The wood's natural color and the effect of the finish | Shade after the finish is fully complete |
| Contrasting wooden overlay | Combination with the background and other exposed details | The boundary between materials and the legibility of the ornament |
In the solid wood overlays for furniture first find a suitable model, then check the available materials and finishes. The choice of oak or beech should match the finish used on the entire piece. The price of the species alone does not show which option will best solve the task.




When beech is suitable for the overlay
Beech is worth considering when a calm wood base is required and the expressiveness of the detail is created primarily by carving. Its less pronounced porous texture compared with oak can be convenient for a project with opaque painting. But the smoothness of the finished surface still depends on preparation and the coating system.
Beech overlays for enamel are chosen taking into account the quality of the blank, sanding and the complexity of the ornament. Narrow recesses must leave room for careful application of the coating, and thin edges cannot be endlessly corrected by sanding. The name of the material alone does not guarantee readiness for painting without additional operations.
Beech can also be used under a clear finish if it is specifically its pattern that is needed. However, the color match of several beech parts is checked on the actual set. Wood does not become uniform just because it has a calm texture.
If the task is to obtain a smooth painted facade with relief decor, compare a beech sample with the selected facade surface. This makes it easier to assess the amount of preparation and to see whether the more expressive texture of another species will actually give the project any advantage.
Our factory also produces:
When to choose an oak overlay
Oak is logical when its texture should remain visible: under tinting, oil, clear lacquer or a semi-transparent coating. In this case, the decorative effect consists of two components — the shape of the carving and the pattern of the wood itself.
Before buying oak overlays for furniture, look at what other oak surfaces will be nearby. A veneered door, a wide countertop and a small carved detail may differ in the direction and activity of the pattern. The same species does not promise an imperceptible transition between them.
For a large open ornament, the selection of the blank matters. A pronounced stripe or a contrasting area on the central leaf will be more noticeable than on a small side scroll. Therefore, under a clear finish, not only the article number but also the wood of the resulting parts is evaluated.
Oak is also acceptable under enamel. The question is the required result: to preserve the appearance of the pores or to obtain a maximally smooth surface. In the second case, appropriate preparation will be required. Choosing oak for its visible texture and then completely hiding it with labor-intensive finishing makes sense only when there are other project requirements for this.
Get Consultation
How to reconcile the activity of the texture and the depth of the ornament
A complex overlay already has its own pattern of light and shadow. Grooves, leaves and scrolls create contrast even on a solid-color surface. Pronounced wood tinting adds yet another pattern, which can either support the carving or make it harder to perceive.
Compare the sample from a normal distance from the furniture. Up close, dark pores sometimes look interesting, but on a whole facade a fine ornament turns into an uneven blotch. In such a situation, it is worth checking a less contrasting shade or a calmer wood base.
This is not a rule prohibiting oak for deep carving. The decision depends on the scale of the overlay, its position, the background color and the lighting. On a large piece, expressive texture can read separately from the form, while on a small one it can blend with it.
Patina is also evaluated as a decorative technique in its own right. It emphasizes recesses but should not accidentally mask small elements. If both contrasting tinting and patination are planned, the test sample must go through both stages: the final appearance cannot be determined from a single stain.
What it means to be finished for enamel or for tinting
The appearance of exposed wood depends, among other things, on the blank from which the overlay is made. Solid wood may be glued from lamellas; the word "solid" does not mean it must be made from a single continuous piece.
In the section quality of STAVROS wooden products different laminated constructions are described. For the enamel version, the lamellas are not matched by color and texture. For the tinted version, their visual coordination matters, although the natural differences of the wood remain.
Therefore, an overlay chosen for a dense opaque paint cannot automatically be considered an equivalent blank for a light transparent finish. If the finishing plans have changed, the selected construction must be checked again. The availability of the required variant is confirmed for a specific item code.
Sanding quality is recorded separately. It describes a different parameter and does not replace the requirements for lamella color, species or coating. For ordering, a complete wording is useful: model, size, material, laminated construction, surface quality and subsequent finishing in the workshop.
Overlay for enamel: color and smoothness are decided separately
If the overlay is to be perceived as part of the front, match the color, gloss level, and surface texture. Two parts in the same shade can differ noticeably when one is smooth and the other shows wood pores or traces of uneven preparation.
For oak, whether the pores need to be filled is decided separately. This is a task for a suitable preparation system, not simply for increasing the enamel thickness. Too generous a coating on a carved part can soften fine lines and fill small recesses. The desired smoothness is checked together with the preservation of the ornament.
On beech, also assess the end grain, relief transitions, and the quality of finishing in hard-to-reach areas. Do not assign the same preparation technique to every surface just for the sake of a uniform color. The front base and the overlay wood may require different primer solutions within a compatible system.
The sample must include all specified layers and complete drying. Only then compare the coating on a flat area of the front and on the overlay. The result under side lighting matters: it reveals texture differences that are easy to miss in a frontal view.
Tinting: consider the entire carved surface
On the overlay, areas with different fiber orientations, raised areas, recesses, and cut faces alternate. They may take the tinting product unevenly. Therefore, the color on a smooth board of the same species gives only a preliminary indication.
Oak overlays for tinting are tested on a sample with the relief characteristic of the selected product. Assess whether the end-grain areas become excessively dark, whether the shape transitions are preserved, and whether there are any random stains. Surface preparation affects the result, so its sequence must be repeated across the entire set.
The same principle applies to beech: a calm texture does not eliminate differences in absorption. If the sample turns out uneven, first check the preparation and the suitability of the selected system. Reapplying a darker product over the entire part may worsen the problem instead of evening out the shade.
Stain or another tinting material is not always a ready protective coating. The finishing layers are selected according to the instructions of the specific system. Compare the final sample with the front: the subsequent lacquer or oil, if required by the process, can change the color depth and gloss.
Oil: a natural look does not mean the original color is preserved
Unpigmented oil can make wood darker and warmer in tone. So the label "colorless" should not be understood as a promise to leave dry oak completely unchanged. If a very light look is needed, test a product intended for that effect on the chosen wood.
Pigmented oils have another characteristic: the color may show more strongly in pores and recesses. On a flat sample this looks different than in complex carving. For an overlay, even distribution and the absence of unwanted material buildup in hard-to-reach areas are important.
Oils and oils with wax differ in composition, application method, number of stages, and care requirements. There is no universal instruction to "apply and wipe off after the same time" for all products. Follow the technology of the chosen finish, including removal of excess if it is specified.
Wooden overlays under oil are compared with furniture after the specified curing is complete. At the same time, check how easy it is to care for the carving. If a different finish is used on adjacent surfaces, assess not only how close the color is, but also how consistently the sheen and texture look.
Clear lacquer: check the shade and sheen
Clear lacquer keeps the wood visible, but a specific composition can affect its color in different ways. The result depends on the product, the preparation, and the chosen layer system. For a project with light oak or beech, this matters as much as the choice of species itself.
Matte, semi-matte, and glossy surfaces show carving differently. With more sheen, reflections can emphasize raised areas and differences in finishing more strongly. A matte option changes the impression but does not automatically eliminate defects in shape or preparation.
Compare the overlay with the front under several angles. If you look only straight on, a difference in sheen may go unnoticed. Long smooth areas next to carved leaves and grooves are especially sensitive to it.
The finish is also chosen based on the furniture's operating conditions. Not every clear lacquer should be considered equally resistant to cleaning or everyday impacts. The required properties are checked for the specific material. A protective layer also does not turn a solid wood overlay into a part that is indifferent to prolonged moisture and changes in room conditions.
How to combine a solid wood overlay with another front material
A wooden overlay can be used on an MDF front, on a veneered surface, or on an already painted door. First, the visual goal is chosen: to achieve a unified look or to leave the wood as a standalone accent. Then the installation and finishing are checked for the specific combination of substrates.
Painted MDF and solid wood may differ in preparation, although the top coating should look consistent. A veneered front and an overlay of the same species may not match in pattern, grain direction, and reaction to tinting. Demanding an identical result from one can of product without testing is not enough.
With a contrasting solution, the boundary between materials becomes a visible part of the composition. It must be neat: without accidental glue marks or an unpainted area that will show up after installation. The fit and the order of work are checked in advance.
For a large overlay, wood movement and the properties of the substrate are also taken into account. The fastening method is chosen based on the actual assembly, dimensions, and conditions of use. The word "wooden" does not automatically determine either a suitable adhesive or the suitability of the existing coating as a surface for bonding.
Finish together with the front or before installation
A unified color does not necessarily require painting the entire piece of furniture after assembly. The solution depends on access to the relief, the fastening method, and the differences between substrates. It is important to determine in advance the condition of the mounting side of the overlay at the time of installation.
| Task | What can be planned for | What to Check |
|---|---|---|
| Unified painted composition | Installation of the prepared overlay and general final finishing | Access to the joints and compatibility of the prepared substrates |
| Oak accent on a painted background | Separate finishing and subsequent installation | Cleanliness of the boundary and suitability of the mounting surfaces |
| Complex carving next to a narrow field | Some operations before installation | Which areas will become inaccessible after installation |
| Preservation of the finished facade | Finishing of the overlay separately | Possibility of fastening without damaging the visible surface |
If the selected adhesive requires untreated wood, the seating area must not be arbitrarily coated with oil or varnish. For other substrates, an appropriate solution is used and its compatibility is checked. A strong adhesive does not compensate for a weak coating underneath.
Select Mounting and finishing materials should be treated as a linked system. Changing the sequence of "finish — install" can affect the joint, so it is approved on a test assembly before working with the entire set.
How to make a trial finish sample that can be repeated
To verify the material, you need a sample of the same species and the selected finish. To verify the carving finish, use a section with characteristic raised areas, grooves, and cuts. A small flat board is useful for preliminary color selection but does not answer all questions about the finished overlay.
Practical verification procedure:
- Prepare the sample in the same way the main parts will be prepared.
- Record the materials used and the sequence of operations.
- Carry out all the specified finishing stages.
- Observe the drying and curing conditions for the selected system.
- Place the sample against the actual facade and compare color, gloss, pores, and carving legibility.
- Keep the approved sample together with the process record.
Available options can be viewed in the section product samples, and confirm the availability of the required overlay and material separately. A complex assembly may require a full-size part.
If beech and oak are being compared, sign both samples and take each through to its final finish. Comparing raw beech with already oiled oak does not show how the chosen options will look at the same stage of completion.
Paired and repeating overlays are selected at the same time
A single item code confirms the product model but does not promise an exact match of natural wood. Before finishing, lay out the entire set as it will be installed: by doors, drawers, or individual furniture pieces.
Carved wooden overlays for furniture under a clear finish are compared by their base tone, texture activity, and transitions between areas of the blank. If one overlay differs significantly from the others, it is better to discover this before painting. Buying from the same batch does not by itself eliminate the need for selection: wood retains natural variations.
The right and left parts are approved together. The mirrored geometry of the ornament does not make the grain pattern mirrored. The goal is a consistent impression from the pair, not a promise of two absolutely identical natural surfaces. You cannot assume the appearance of the right overlay is fully verified based on the finished left one.
After selection, keep track of which parts belong to each front. Place the marking so that it does not damage the future face finish. If the set is passed between preparation, painting, and assembly areas, this simple measure helps avoid accidental swapping of already approved elements.
Coordinate the overlays with handles and moldings
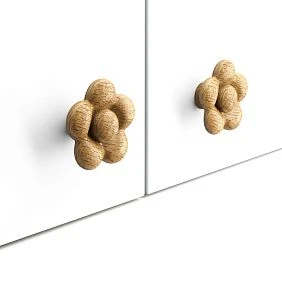
If visible wood remains on the front, Wooden furniture handles and the overlays are evaluated side by side. A smooth handle and a carved ornament have different highlight areas and different surface orientations. Even a close color may be perceived differently.
The same applies to wooden moldings for the frontA long strip shows the texture differently from a small overlay. Selecting a common shade based on only one of these elements is risky for the appearance of the set.
Define a single finish result: color, gloss, and acceptable pore visibility. Then confirm it on all noticeably different surfaces. Preparatory operations may differ, but the result must match the approved sample. For the handle, also consider constant hand contact and coating durability requirements.
Deliberate contrast is also acceptable: for example, a calm painted frame and an open oak overlay. In this case, it is more important to clearly record which parts belong to each finish group. The note "all decor in one color" will no longer accurately describe the project.
Wardrobe, dresser, and kitchen: where finish differences are especially noticeable
On different items, the same set is checked with a different focus. This helps evaluate the material under the conditions of a specific project while keeping the main focus on the coating and wood.
| Furniture item | What has a stronger influence on the impression | How to check |
|---|---|---|
| Cabinet | Combining an overlay with a large door surface | Compare with a full front from a normal distance |
| Commode | Differences between repeating elements on drawers | Lay out the entire set in installation order |
| Kitchen furniture | Coating consistency and suitability for care | Approve the set with the selected facade materials and finishing system |
Oak carved overlays on a cabinet under a clear finish can become a noticeable part of the overall wood pattern. A small color sample is useful here, but it does not replace comparing the relief detail with the door. The grain direction and the lighting of the entire surface matter.
For a chest of drawers, it is especially important to rule out a single accidentally darker element among several identical ones. In the kitchen, cleaning requirements are added, and near individual appliances there are restrictions related to heat and steam. Coating suitability and installation locations are checked for specific conditions. A universal durability promise based on the words “oil” or “varnish” is not enough.
Changing the species does not eliminate the need to check dimensions
If the model has already been chosen, when changing the material, verify the dimensional version of that specific model. Species, size, and surface quality are independent order parameters. An error in one of them may only be discovered during fitting, when the finish has already been applied.
In the STAVROS overlay catalog, dimensions are presented as width, height, and thickness. They are finally verified against the product card and the available drawing for the specific item; drawings and models help clarify the required data. The meaning of letter designations cannot be automatically carried over from another product group.
For installation, the mounting surface and the full protrusion of the part are also important. The depth of the carved ornament is not equal to the overall thickness of the overlay. A brief check of the facade field, handle, and required opening remains mandatory, even when the main task of the order is to choose beech or oak for a specific finish.
The approved sample card helps reproduce the result
After fitting and color matching, record the chosen solution. The card should allow ordering the same execution and reproducing the finish without verbal explanations. The photograph is used as a supplement to the physical sample: a screen does not convey color and gloss with the required accuracy.
| Field | What to fix |
|---|---|
| Project and location | Furniture item, front, installation side |
| Model | Exact article number, right or left execution if applicable |
| Size | Width, height, thickness of the selected option |
| Material | Oak or beech, agreed blank execution |
| Surface | Sanding quality and required subsequent operations |
| Finishing | Sample designation and technology record |
| Package contents | Quantity of each individual item |
| approval | Date, solution version and location where the sample is stored |
For example, for six identical fronts, one right and one left overlay are provided for each. Six pieces of each version will be required. If the tested pair is suitable and is included in the finished furniture, five additional right and five additional left pieces are needed. If the pair remains a separate reference, the commercial set is considered complete; the reserve is added separately.
For a repeat batch, keep not only the color name but also the preparation sequence. Useful general recommendations are collected in the section installation and finishing tips, while the specific operating modes are set by the instructions for the selected materials.
Where to buy solid wood overlays for furniture to match the selected finish
To buy decorative overlays for furniture at STAVROS, start with the model and size version, then specify the wood species, surface quality and available lamination option. In your request, it is useful to state right away whether the wood will remain visible and which front the result needs to be coordinated with.
If required Carved wooden decoration for several items, attach a list of right, left and repeated positions. For a workshop, it is also worth checking conditions for furniture manufacturers and coordinating the supply of trial pieces before the main set. Availability, configuration and lead times are confirmed for each specific order.
The decision to buy wooden overlays for furniture becomes justified after checking a sample. For enamel, it confirms the texture and preservation of the relief; for tinting, the shade and uniformity; for oil or lacquer, the final appearance of the exposed wood. The approved element next to the actual front shows which solid wood and which finish are suitable for this particular furniture.