Article Contents:
- Which overlays for wooden doors does your project need
- Choose a shape for the free area
- How to determine the working area on a smooth door
- On a paneled door, measure the flat part
- Example of calculating the free area
- Do not connect a movable panel to the frame with random fastening
- How to check the left and right overlays
- What to check on a corner composition
- Whether a wooden rosette is needed nearby
- Why a joint test paint is needed
- If the door is already painted
- Can one model be used on doors of different widths
- Are overlays for wooden doors suitable for a leaf with glass
- Can an overlay cover old handle holes
- How to replace one applique from a previously installed pair
- What to do if the chosen design fits but the required size is unavailable
- Whether both sides of the door need to be finished identically
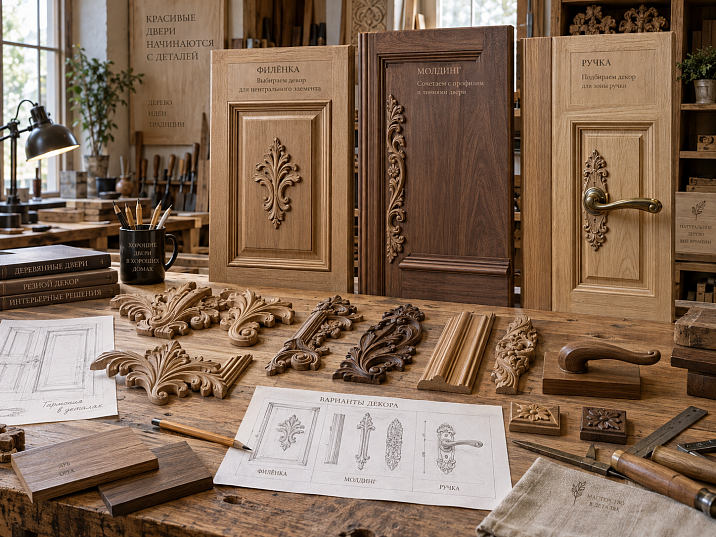
In the photo, the carved element fits within the door panel, but during a test fit its edge ends up over the shaped profile. Or the design fits in width, but a protruding scroll gets in the way of grabbing the handle. Appliques for wooden doors must be checked simultaneously against the contour, the reverse side, and the depth of the relief: one successful image on the face is not enough.
First, determine which part of the leaf the decor will be installed on and how much truly flat free space there is. Then choose the shape, verify the dimensions, and check the proximity to the molding and hardware. Before the final order, make a full-size template, and for a complex assembly, test-fit the actual piece.
A well-chosen applique sits on the base intended for it, does not overlap the working areas of the door, and allows for the chosen fastening method. These are the conditions that make it possible to move from a beautiful composition to a product that can be manufactured, finished, and used daily.
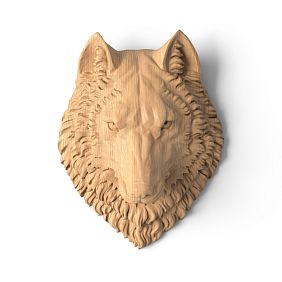


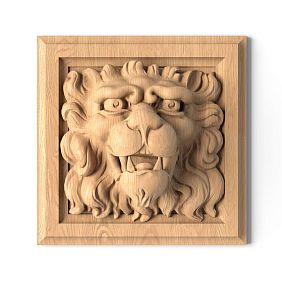
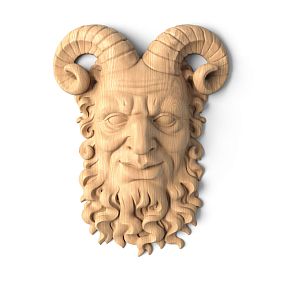
Which appliques for wooden doors does your project need
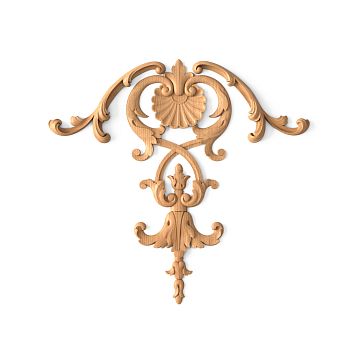
A wooden decorative applique here means a separate carved element that is installed on the surface of the leaf. It may occupy the center of a panel, extend along a narrow field, or complement the corner of a molding frame. It is not a continuous facing panel covering the entire door, nor an escutcheon: those products have different purposes and selection methods.
The name of a product category by itself does not determine where it can be used. Some decorative furniture appliques can also be used in a door project if the base, geometry, and operating conditions are suitable. Checking the specific model matters more than the word “door” in the description.
Before searching for a product, determine the construction of the leaf. The visible wooden surface may be solid wood, veneer on a board substrate, or part of a complex assembled structure. This affects the preparation of the bonding area, the possibility of mechanical fastening, and the permissible additional weight. The exterior appearance does not provide information about what lies beneath the thin face layer.
For a new door, these questions are resolved together with the manufacturer. For an already installed one, the model description is retrieved, the accessible areas are inspected, and the structure of the leaf is determined before drilling. If the base is unknown, the choice of decor is limited to trial fitting: a random screw should not become a way of investigating the construction.
You can start the selection from the section carved wooden inserts. But the final choice is made after measuring the door. This is how models matching a specific field are selected from the catalog, rather than all the elements that appealed by their pattern.




Choose a shape for the free field
The shape of the overlay must match the geometry of the area where it will be placed. In a narrow, elongated field, it is more convenient to consider vertical compositions. In a wide, low area — horizontal ones. For the corners of the frame, details are needed whose direction and alignment with adjacent profiles have been verified.
| Shape or design | Where it is considered | What is checked first |
|---|---|---|
| Central symmetrical | One standalone field or the center of the panel | Overall dimensions, clearances, base plane |
| Vertical | Tall narrow area | Actual width including protruding leaves and scrolls |
| Horizontal | Wide field of low height | Distance to the top and bottom profile |
| Corner | Corners of the decorative frame | Orientation, angle, and connection to the molding |
| Left and right | Mirrored composition of two elements | Availability of both versions in the same size |
В vertical wooden overlays pay attention not only to the height. The narrow central part may have noticeably protruding side fragments. These are what will determine whether the design fits between the panel profiles.
for horizontal wooden appliques a common problem is the opposite: a suitable length is combined with excessive height of the central motif. Check the entire outline. A size measured along a thin side branch does not describe the largest part of the composition.
Rotating the piece changes not only the rectangle it occupies, but also the direction of the design. Leaves and scrolls intended for a horizontal position may be perceived differently after rotation. For a vertical field, it is better to first find a suitable version, and check the possibility of rotation on the full image or a sample.
Our factory also produces:



How to determine the working area on a smooth door
A smooth slab does not have a ready-made panel that defines the boundaries of the composition. Therefore, first, an area for decoration is marked out on the facade drawing. The handle with a rosette, other visible hardware, the intended frame, and the zones that should remain free are placed on it.
Start with the actual dimensions of the door leaf, but do not consider its entire area available for decoration. Space for a brush is needed near the handle. Opening is checked near the hinges and the rebate. On a glazed door, exclude the glass, glazing beads, and areas that require access during maintenance.
The central axis helps evaluate the composition, but it does not remove the constraints. If a geometrically symmetrical frame comes too close to the handle, first change its dimensions or choose a smaller applique. Shifting functional hardware for the sake of the design is acceptable only in a new coordinated project where the door's construction has been rechecked.
For a smooth door leaf, one of two approaches is usually chosen. In the first, a molding frame is set first, then a carved element is selected for its inner field. In the second, a preselected applique becomes the basis of the composition, and the frame is built around its actual contour. Both solutions require checking the free space near the hardware.
If the door should remain visually light, it is not necessary to add a frame, a central ornament, and corner elements all at once. The applied decor of wooden doors can be limited to a single accent. This is especially appropriate where the expressive wood texture and a large handle are already noticeable on the leaf.
Get Consultation
On a paneled door, measure the flat part
In a frame-and-panel construction, the visible size of the panel and the area suitable for an applique can differ noticeably. At the edges there are bevels, shaped transitions, or cover moldings. If you measure the distance between the door stiles as a whole, the calculation will include areas where the flat back side of the decor cannot sit properly.
First, find the boundaries of the even area. Measure its width and height in several places, especially if the door is old or the field has a complex shape. Then assign the free gaps between the applique and the surrounding profile. They are chosen according to the specific composition and installation; there is no universal percentage of the door width here.
For a rectangular field, the calculation is simple:
Allowable applique width = width of the flat area − left gap − right gap.
The allowable height is determined similarly. If the area narrows, has an arched top, or a shaped contour, a single rectangular calculation is not enough — a template of the entire boundary will be needed.
Example of free zone calculation
Suppose the flat part of the panel is 380 mm wide and 620 mm high. For this specific project, gaps of 30 mm on the sides and 40 mm at the top and bottom were chosen. These are project-specific values, not standard clearances.
| Parameter | Calculation | Result |
|---|---|---|
| Maximum width of the selected zone | 380 − 30 − 30 | 320 мм |
| Maximum height of the selected zone | 620 − 40 − 40 | 540 мм |
| Side gaps for a 300 mm wide overlay centered | (380 − 300) ÷ 2 | 40 mm each |
| Top and bottom gaps for a 480 mm height centered | (620 − 480) ÷ 2 | 70 mm each |
A 300 × 480 mm overlay passes the first dimensional check. But this is not yet confirmation of installation: the back side, thickness, and door operation remain. A 340 mm wide part formally fits within the 380 mm plane, but it violates the selected side gaps. It can only be considered after a deliberate change to the composition.
If the upper and lower panels differ in size, do not transfer one result to both. The same model in two scales sometimes works better than two identical overlays, one of which fills its field almost completely.
Check the back side and contact area
A carved part has a front contour and a mounting base. They do not always coincide: thin leaves may protrude beyond the more massive central part, and the reverse side may have specific processing features. Before choosing a fastening method, you need to understand which areas actually contact the door.
Attach the sample without glue to the prepared area. Look at it from the side, check stability and the position of the edges. The part should not rest only on a random peak of the profile or wobble noticeably. If the overall dimensions fit, but the base lands on the bevel of the panel, this is an incompatibility of two surfaces.
Do not expect to eliminate any gap with a thick layer of glue. The permissible joint thickness depends on the specific composition and application conditions. Excess material can leave a visible gap, hold the decor unevenly, and complicate finishing. First choose a suitable joint geometry, then the fastening.
For a new product, a special base for the ornament is sometimes provided. But it becomes a separate part of the project: it changes the total protrusion, appearance, and weight. Adding a shim to a finished door only to compensate for a randomly chosen overlay is not advisable without rechecking the entire composition.
Do not connect a movable panel to the frame with a random fastening
A solid wood panel may be installed with the possibility of seasonal movement within the frame. Such a fit allows for changes in the dimensions of the wooden panel. The specific door design should be clarified with its manufacturer: externally similar leaves may have different materials and assembly methods.
If the panel is movable, an overlay glued simultaneously to it and to the stile or rail may restrict the intended movement. Therefore, the mounting area is chosen within a single suitable element, or the joint is designed taking the door construction into account. This limitation cannot be checked by the frontal pattern alone: information about the leaf construction is needed.
For the same reason, a wide wooden overlay with the grain direction running across the grain of the large panel requires a separate assessment of fastening. For such a pair, one should not automatically assign continuous rigid gluing over the entire area. The geometry, the base material, and the joining method are considered together.
Why width and height are not enough
In carved decor product cards, dimensions may be indicated by letters. Their meaning is determined by the diagram of the specific model. One must not automatically assume the first value is height, the second is width, and ignore the rest: the product may have additional dimensions that are important for layout.
For a door overlay, the protrusion of the relief is especially significant. A flat contour fits into the panel, but the volumetric part may come close to the brush, wall, or adjacent leaf. Therefore, after checking the frontal view, a side view is needed, and in a complex place, a three-dimensional sample.
The assessment takes into account the level of the mounting plane. Suppose the panel base is recessed 8 mm relative to the surrounding front plane of the door, and the selected overlay protrudes 22 mm from its base. Then the highest point of the relief will be approximately 14 mm above the surrounding plane, even without accounting for the adhesive seam and coating.
If the same overlay is installed on a smooth leaf without a recess, its protrusion will be about 22 mm plus the mounting layer. These are two different conditions with the same product code. Therefore, the part dimension from the product card cannot be directly taken as the final protrusion relative to the entire door.
In a complex relief, the highest part is not necessarily located at the geometric center. When test-fitting near a handle or wall, it is the area of possible contact that is taken into account. A low edge of the ornament does not compensate for a high scroll several centimeters further away.
Compatibility with the handle, lock, and latch
The handle zone includes its decorative rosette or plate, the moving part, and the space occupied by the hand during normal use. The overlay may not touch the metal but still interfere with fingers. On a door that is opened many times a day, this quickly becomes more noticeable than any ornament.
The check is performed with the hardware model that will be installed. Press the handle to its working position, grasp it in the usual way, and check finger access on both sides. Near a turn handle, the entire required grip and hand movement are assessed. Sharp or thin decorative protrusions must not fall within this zone.
A photograph does not verify convenience. In a photo, it is impossible to reliably assess the gap between the handle and the door leaf, the position of the relief in depth, or the trajectory of fingers. Until a sample is available, a three-dimensional mock-up that reproduces the hazardous protrusions can be used, but the final decision for a tight assembly is made based on a real fitting.
With a lock, it is not only the visible keyhole or latch that must be considered. On the reverse side of the hardware there may be screws, and inside the door leaf there may be the mechanism body and connecting elements. The decor must not block access for removing the handle and servicing the lock. The ability to replace the hardware without destroying the overlay is worth checking already on the drawing.
If mechanical fastening of the decor is planned, the drilling locations are compared with the lock diagram. Fasteners must not be directed into a technical recess, glass, or an unknown cavity. For a finished door, the fastening method is agreed with its design; a decorative task does not justify randomly altering the working mechanism.
Do not place elements on the edge of the leaf in the area of the latch and strike plate without a special design. These areas are involved in closing the door. The choice of overlay for the front face must not alter their operation.
Check the door in motion
A closed door shows only one position. When opening, protruding decor may come close to the wall, the door casing, furniture, or the adjacent leaf. Pay especially close attention to the side near the hinges and the back side of the door, which in the open position ends up next to an obstacle.
For the check, mark the expected extreme and most protruding points of the overlay. Secure a safe, lightweight mock-up in a way that does not damage the finish, or hold it during a controlled fitting. Slowly move the door through the entire required opening range. Stop the check when approaching an obstacle, without testing the strength of the thread by impact.
Assessing only the clearance at full opening is not enough. The approach may occur earlier, at an intermediate angle. If there is a door stop, make sure the door stops before the decor contacts anything and maintains the angle needed for passage. Installing a door stop should not turn normal use of the door into an inconvenience.
For double leaves, several states are checked: closing each one separately, opening together, and the intended operating sequence. Overlays near where the leaves meet must not interfere with each other or with the rebate parts.
A sliding door requires a different check. The relief may pass next to the wall, the tracks, or enter a concealed cavity together with the leaf. Whether volumetric carved decor can be used is determined by the available space and the design of the system. A solution suitable for a hinged door cannot be automatically transferred to a sliding one.
If the decoration is applied on both sides, consider the total mass of the elements and both directions of possible contact. The compatibility of the panel and hinges with the additional load should be verified against the manufacturer's data. Relief depth and mass are different parameters: an allowable protrusion says nothing about the weight margin.
The overlay and the molding must form a compatible assembly
When decorating doors with moldings, first decide what role the profile plays: it outlines a separate frame, adjoins a carved element, or forms part of a common ornament. The selection order also depends on this.
If the frame is already set, select the overlay to fit its inner opening. The outer width of the frame is not equal to the width of the available field. For example, with an outer dimension of 480 mm and a nominal width of each side strip of 24 mm, the inner opening will be 432 mm. An overlay 320 mm wide, installed in the center, will leave 56 mm on each side. The calculation applies to a rectangular frame and the specified conditions.
When choosing wooden moldings for the door also look at the cross-section. The edge of the carved overlay lying on the plane of the door leaf may end up lower than the high part of the profile. If the parts are intended to connect, their junction must be checked in three dimensions. The same width on the front pattern does not confirm this.
When the central overlay defines the decoration, first approve its model, size, and position. Then select the frame profile that fits in the remaining field and leaves the required gaps. Switching to a wider molding model after the composition is approved requires recalculation: the inner space will decrease.
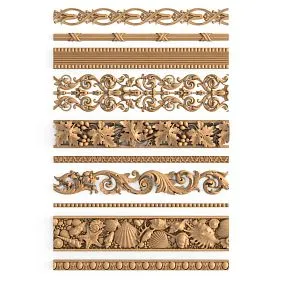
To connect profiles with carved elements, study Wood molding decor. For each assembly, the geometry must be confirmed, not just the similarity of the pattern. Even products in the same style are not necessarily intended for direct end-to-end joining.
A small intentional gap is sometimes more practical than an accidental abutment of two mismatched reliefs. But it must be equally meaningful throughout the composition. If an element was planned as a continuation of the profile, an open end or a height difference cannot be passed off as a coordinated solution after installation.
Central overlay, mirrored pair, or corner elements
A single central overlay works for a standalone field where it reads in full. On a door with several panels, such an accent can be left only in the upper part if the lower one is too small or already heavily decorated. Repeating the decor in every zone is not a mandatory condition for a finished composition.
Two pieces are chosen when two panels or a joint composition are actually intended for them. For identical panels, repeating the same article is possible. For a mirrored design, different versions are needed. This distinction is fixed before purchase: two symmetrical pieces and one left with one right form different sets.
How to check the left and right overlays
Compare the image of each model with the intended position on the door. Look at the front side in the working orientation. Rotating the left piece does not always produce the required right design, and flipping it with the back side facing out is not a method of installing a decorative element at all.
In the STAVROS catalog, for example, individual Left overlay N-349L и Right overlay N-349R. The product pages for both models list the following size options:
| Size A, mm | Size B, mm | Size C, mm | Additional size L, mm |
|---|---|---|---|
| 200 | 200 | 22 | 259 |
| 250 | 250 | 27 | 324 |
| 300 | 300 | 32 | 389 |
| 350 | 350 | 38 | 453 |
Before ordering, the values are compared with the dimension diagram. For a pair, choose the same size, material, and finish. You cannot simply write “two N-349”: both full SKUs are required. These models serve as an example of selecting finishes separately; their suitability for your door is confirmed by a test fit.
The table also shows something else: as the frontal dimensions increase, the depth changes. Replacing the 200 × 200 × 22 mm option with 350 × 350 × 38 mm requires rechecking the relief protrusion. The enlarged decor cannot be considered the same part that simply takes up more space in the design.
What to check on a corner composition
When selecting, corner wooden overlays examine all corners of the frame at once. The set must match the direction of the pattern, the shape of the profile, and the way the molding terminates. Four identical parts are suitable only when they can be oriented in the required way.
First assemble one corner without glue. Check where the molding ends, which section of the overlay rests on the base, and whether there is a step between adjacent elements. Then lay out the whole frame: the same mistake in four corners may go unnoticed in a single assembled fragment, but it can change the entire inner opening.
If the corner element extends beyond the boundaries of the frame, this protrusion is also part of the overall dimensions of the composition. It is taken into account when measuring the distance to the handle, the edge of the panel, and the edge of the door leaf. Buying a suitable molding does not yet mean that there is enough space for all the finishing details.
Is a wooden rosette needed next to it?
Wooden sockets they can occupy a small center, a line intersection, or a separate field. But a rosette does not have to accompany every carved overlay. First determine what place and what task it gets in the composition.
If the central motif is already expressed by a large ornament, another accent may be superfluous. In a small panel, it is wiser to keep the background free than to fill it with all the elements that match in style. For the actual joining of the rosette with the molding, check the thickness, the shape of the edge, and the position of the profile ends.
Make a full-size template
A template allows you to filter out unsuitable sizes before purchasing. It must correspond to the actual contour of the overlay, not just its conventional rectangle. For the first selection, a rectangle is sufficient; to evaluate the pattern, cut out the silhouette with the protruding parts.
Use drawings and product models, if the required materials are available for the selected item code. If no suitable drawing is available, request dimensions and an image from which the scale can be reliably reconstructed. A perspective photo does not replace a flat dimensional diagram.
- Mark the boundaries of the installation field and the position of the hardware on the door.
- Prepare a template based on the actual dimensions of the overlay. When printing, check a control segment, for example 100 mm long: fit-to-page mode may change the scale.
- Show the top and the installation side on the template. For a mirrored pair, make two different outlines.
- Attach the moldings or their templates so you can evaluate the entire composition at once.
- Look at the door frontally and from the usual approach angle, then check the grip on the handle.
- At potential contact points, add a light mock-up of the thickness and check the opening separately.
The method of temporary fixation is chosen taking the finish into account. Even painter's tape may be unsuitable for a weak, uncured, or sensitive finish. First test it on an inconspicuous area, or do a dry fit without adhering it to the surface.
A photograph is convenient for comparing two options if the camera is directed perpendicular to the door leaf and the scale is known. But the final size choice is better made next to the actual door. From the distance of the passage, a thin pattern and a wide relief are perceived differently than on an enlarged screen image.
A paper template does not confirm the installation plane and depth. If the outline fits but there is little space near the handle or wall, the next step is a sample. If the paper silhouette already overlaps the panel profile, there is no need to order an expensive part for this check.
Choose beech or oak together with the future finish
For a door overlay, the material determines not only the initial color but also the character of the surface after finishing. Under opaque enamel, the wood grain is hidden, but the preparation and structure of the surface still affect the result. Under a semi-transparent coating, the differences between species and individual blanks remain noticeable.
Beech overlays under enamel are considered when the door and decor should receive a uniform opaque coating. However, choosing beech does not eliminate sanding, priming, and checking the quality of the relief. Small roughnesses in the recesses are especially noticeable after applying paint under side lighting.
Oak door overlays are appropriate to consider where a pronounced wood grain is preserved: with tinting, clear lacquer, or another finish suited to the project. For an oak leaf, matching the species simplifies coordinating the texture, but does not guarantee the same shade for two different blanks.
The reverse is also possible: oak is painted opaquely, while beech is used under tinting. The choice does not come down to a strict prohibition. The question is what kind of surface you are aiming for and what preparation you are ready to perform. For a smooth opaque finish on oak decor, the nature of the pores may require additional operations according to the selected coating system.
On the page quality of wooden products STAVROS separates the preparation of blanks for enamel and for tinting. In the first case, the lamellas are not selected by color and texture; in the second, such selection is provided, although tonal differences remain possible. Choose the version according to the future finish.
Why a joint test paint is needed
The overlay and the door may perceive the same composition differently due to the species, texture, preparation, and previous coating. If a close color match is required, a separately painted decor sample says nothing yet about the combination with the door leaf. Check both materials side by side after completing the entire chosen finishing system.
For carving, it is useful to evaluate not only a flat area but also recesses, end-grain zones, and thin edges. There, the coating may look different than on a flat wood sample. Patina further enhances the pattern, so it cannot be considered a neutral addition to an already approved color.
Keep the approved sample and record the sequence of operations. For a series of doors, this is more reliable than the verbal wording “make it a little warmer.” If the overlay material changes after the color sample, the result is checked again.
When to choose overlays relative to door painting
In a new project, it is better to choose the overlays before the final finishing of the door leaf. At this stage, you can check the geometry, coordinate the mounting base, carry out a trial fitting with hardware, and decide which areas are painted separately. Changing the model after the finish is completed creates additional restrictions on fastening and surface restoration.
At the same time, "choose before painting" does not necessarily mean gluing all the decor to a completely unpainted door and then coating it in one go. The sequence depends on the construction. Movable panels, hard-to-reach areas, and the chosen adhesive may require separate preparation of parts and preserving certain zones for the joint.
For a typical new project, the working sequence is as follows: approve the article numbers, verify the dimensions, assemble the composition without glue, check the opening, approve the coating sample, then perform installation and finishing in the order prescribed by the technology. By the time of irreversible processing, it must be clear what is attached to what.
If the door is already painted
Wooden decor for doors can also be selected for an existing interior, but the surface must be assessed separately. The strength of the bond depends not only on the glue: a weak coating can peel off together with the attached piece. Contaminants, polishes, and incompatible compounds can also affect the result.
Ordinary wood glue cannot automatically be considered suitable for any painted door leaf. Many such compounds are intended primarily for bonding prepared wood. For an existing coating, confirmed compatibility is required, and sometimes local preparation of the area, permissible for the given door.
В installation and finishing tips the decor manufacturer considers unpainted and painted substrates separately. This difference must be taken into account when choosing the fastening system. The holding time, pressing time, and full curing time are taken from the instructions for the specific compound: a general recommendation for one group of adhesives does not become universal for all.
Do not begin by completely removing the coating on a visible door. First confirm the overlay model, the boundaries of its base, and the permissible preparation. For a veneered door leaf, accidental deep sanding is especially undesirable. If there is no certainty about the base, first agree on the work with the door manufacturer or a door finishing specialist.
A carved element should also not be used as a way to hide a weak surface. Bulging, peeling, or damage to the base must first be repaired. An overlay can cover the trace of an already completed repair if the joint and appearance have been checked, but by itself it does not restore the construction of the panel.
How to check a sample before ordering a series
For several identical doors, checking the first set reduces the likelihood of repeating the same mistake across the entire batch. A sample is needed for specific tests: geometry, fit with the molding, grip, panel movement, and finish. For a mirrored composition, both versions are checked; for a complex frame, the entire characteristic assembly is checked.
Begin by verifying the selected size and material. Then place the parts against one representative door or an exact mockup of its section. Check the reverse side and the actual position of the protrusions that were shown only schematically on the paper template.
After fitting, install the specified hardware or use an already finished door with this hardware. Checking without a handle does not complete the selection of decor near the grip area. Likewise, testing a separate panel on a workbench does not confirm that the entire door opens freely near a wall.
For a series with the same design but different panel widths, choose the tightest composition and check each differing geometry. A successful fitting on a wide door does not prove compatibility with a narrow one. The result can be one common design in several sizes.
Approved parts are marked in the specification, and the finish sample is retained. If the molding, handle, or overlay size changes during the check, a new version is recorded. Otherwise, the manager may receive the list from the first version, and the assembler may receive the drawing from the second.
A separate sample does not necessarily become waste. If it is undamaged and matches the final decision, it can be included in the working set. For technological trials that change the appearance or geometry, the purpose is different: it is a control or test element.
What to record in the drawing and specification
The phrases “carved overlay in the upper part” are not enough for purchasing. A link is needed between the specific door, the side of the panel, the installation location, and the selected product. Even if the set consists of two parts, such a record prevents an error with mirrored execution.
| Specification field | What to fix |
|---|---|
| Door designation | Product number in the project, for example D-01 |
| Side of the leaf | On the room or corridor side, as per the drawing |
| Zone | Upper panel, lower panel, frame, or another specific field |
| Product | Full article number, including left- or right-hand version index |
| Size | All dimensions from the selected option and a reference to the dimensional diagram |
| Material | Wood species and the specified blank version |
| Preparation | For enamel or for tinting, surface treatment quality |
| Finishing | Approved sample, compositions, and work sequence |
| Quantity | For one side, for the panel and for the entire series |
| Mounting | Accepted method with substrate specified |
| Status | Approved or re-check required |
Save the link to the product card and the selected characteristics as text. The page with toggles may open at a different size, and the original variant cannot be restored from a single link. The full SKU also does not always describe the material and the quality of preparation.
A small section through the overlay and the base is useful on the drawing. It shows what is not visible on the front view: the depth of the panel, the protrusion of the relief and the adjacency to the profile. For the area near the handle, the position of the hardware is added. Such a section helps verify the product before manufacturing, not just explain why the finished part did not fit.
How to calculate the quantity for several doors
First, the decor on one side of one panel is counted. Then the second side is taken into account, if it is decorated, and the number of panels of each type. A double-leaf opening contains two panels; this must be visible separately in the procurement list.
Suppose that for ten identical panels, one left and one right overlay are provided on each decorated side. For one-sided decoration, ten left and ten right parts will be required. For the same decor on both sides — twenty of each version.
| Decoration scheme | Left overlays | Right overlays | Total |
|---|---|---|---|
| 10 panels, one side of each | 10 | 10 | 20 |
| 10 panels, two sides of each | 20 | 20 | 40 |
The entry “20 overlays” for the first case is insufficient. When ordering a single version in such quantity, mirrored pairs will not be produced. For each article, its own number, size, and material are specified.
In a project with different doors, separate lines are created by type. For example, seven wide and three narrow panels may require different sizes of the same design. They cannot be combined into one line for convenience: the same decor series does not yet mean the same version.
Rosettes, corner elements, and molding are calculated according to their own rules. Four corners of one frame do not yield four identical overlays without checking orientation. Molding is ordered by cutting from stock strips, taking into account end trimming and profile specifics. The number of frames by itself does not show the number of strips.
The reserve is added after the main calculation and with a specific purpose. An additional part may be required for testing, or an agreed stock for servicing a series. Automatically increasing each line by the same percentage is not necessary, especially if the items are expensive and not interchangeable.
When it is better to abandon the selected overlay
Sometimes the right solution is to keep the design in a different size or choose another type of decor. If a part constantly requires compromises in the working area, its shape probably does not match the door. Adjustment should not worsen the grip, limit the required opening, or interfere with the panel structure.
| Detected problem | What to change before purchase |
|---|---|
| The base of the overlay falls on the panel bevel | Choose a smaller mounting area or another field |
| The relief obstructs the hand | Reduce the depth, change the shape or position of the decor |
| The part gets close to the wall when opening | Review the protrusion and position, check the allowable travel limit |
| The overlay connects the movable panel to the frame | Change the mounting area or develop a suitable connection |
| The pair has different sizes or finishes | Re-coordinate both article numbers in a single variant |
| The door leaf coating is not durable | Restore the base before choosing the fastening method |
| The narrow field is overloaded with several elements | Leave a single accent or use a calmer design |
You should not count on arbitrary trimming of protruding leaves after purchase. It alters the pattern, can weaken thin areas, and may require refinishing. If modification is intended deliberately, it is checked on the drawing and approved technologically. If it is needed only because the item does not fit, first look for a suitable size.
The exterior side of an entrance door is considered separately. Outdoor conditions differ from interior use, so a standard interior overlay cannot automatically be transferred to precipitation and humidity fluctuations. Confirmed suitability of the product, an appropriate substrate, fastening, and a protection system for these conditions are required.
Where to buy overlays for wooden doors
Once the dimensions and installation area are determined, choosing a product becomes easier. In the section carved decor for doors and other joinery products select the required group, then compare specific overlays by shape, size, and material. Photos are used to evaluate the pattern, while technical data are used to check compatibility.
If you need to buy decorative overlays for doors, prepare a brief specification: the full article number, size, left or right version, wood species, preparation for coating, and quantity. For a questionable assembly, attach a drawing with the dimensions of the free field and the handle position. The question "will it fit the door" without this data does not allow the product to be checked.
Examples in the section carved doors and ideas for using the decor help evaluate the combination of overlays, frames, and the door leaf. But transferring the design to a door of a different size requires recalculation. A similar composition may have a different panel depth and a different hardware position.
Before purchasing a series, check conditions for manufacturers, and plan to receive the goods taking into account payment and delivery. Cost is compared for the complete agreed version. The price of an overlay of one size and quality of preparation does not replace the calculation of the required set.
Overlays for wooden doors should be purchased after checking the base, dimensions, projection, and movement of the leaf. Then carved decor becomes part of a well-thought-out product: it fits within its field, combines with the molding, leaves the handle free, and has a clear installation method. All that remains is to transfer to the order those versions that have passed this check.
Additional questions before ordering
Can the same model be used on doors of different widths
Yes, if all doors have a sufficient mounting margin and the required clearance around the hardware is maintained. The narrowest door and any other differing designs are checked. Sometimes one model is used in several sizes; then each size gets its own line in the schedule. The same pattern does not require the same dimensions.
Are overlays for wooden doors suitable for a glass panel door
This depends on the remaining wooden sections, the design of the glazing beads, and access to the glazing. The decor is placed on a suitable base without covering service areas. A wood overlay does not become an element for adhering to glass without separate confirmation of such use. The fastening must also not fall into the concealed edge of the glass.
Can an overlay cover old holes from a handle
This is possible only as part of a well-planned repair. First, it is checked whether the base has been restored and how the new hardware will function. A decorative part does not replace a solid mounting area for the handle. It is also necessary to make sure that the chosen shape covers the repair marks with the required gaps and does not obstruct access to the fasteners.
How to replace one overlay from a previously installed pair
It is necessary to restore the full article number, side, size, and material. For a clear finish, the match of the new wood with the old is checked; for a painted one, the possibility of reproducing the coating. If the difference remains noticeable, replacing both parts of the pair is considered. The same species name does not guarantee a match in shade after use.
What to do if the chosen pattern is suitable but the required size is not available
First check the nearest catalog size with the new template. If it does not fit the base or the hardware, look for another model with a similar pattern character. The possibility of custom manufacturing and batch requirements are clarified separately. Until agreed, one should not assume that a serial overlay will be arbitrarily reduced as a one-off.
Should both sides of the door be finished the same way?
This depends on the room design. One side may have a more restrained finish, while the other has a pronounced carved accent. Each side is checked against its own conditions, and the weight of the added parts is taken into account together. In the specification, the sides are named unambiguously so that they are not mixed up during finishing and assembly.