
























































Article Contents:
- Carved mascaron M‑006: dimensions of the wooden lion head
- Wooden mascaron 120 × 120 mm: does it fit in a 135 × 135 mm field
- Why 7.5 mm may be sufficient only on paper
- When 120 mm looks cramped
- 150 mm is not just wider — it is deeper
- Why the drawing in the visualization can be misleading
- Useful field, not the full facade size
- Frame width and panel profile slope
- Handle, keyhole, and adjacent door
- Hinge zone
- Maskaron depth and opening trajectory
- How to make a cardboard template M‑006 120 × 120 × 62 mm
- How to make a template for the 150 × 150 × 77 mm variant and why it's needed if the size no longer fits
- Why the 62 and 77 mm protrusion needs to be checked separately from the face size
- When it's better to choose M‑006 100 × 100 × 51 mm instead of 120 mm
- When M-006 80 or 65 mm may be more appropriate
- Oak
- Oak
- Central panel of the cabinet door
- Sideboard or display cabinet
- Commode
- Tall door
- Decorative furniture panel
- How to check the masqueron next to the furniture handle
- How to check M-006 next to the keyhole and key
- How to check the adjacent door: closed position is not enough
- How to check the distance to the wall or cabinet side
- How to center M-006 on a 135 × 135 mm field
- Why 120 mm should not be placed flush with the start of the panel bevel
- How to measure a flat mounting area without complex tools
- Free field is smaller than the selected size
- The base is curved or heavily profiled
- The relief interferes with the handle
- The adjacent door hits the mascaron
- An almost flat overlay is required
- The furniture style does not support a mascaron
- A trial layout cannot be made
- The facade construction is unknown
- Outdoor street use is planned without confirmation
- Finish before installation
- Finishing after installation
- Why the "under enamel" option cannot be automatically coated with clear varnish
- How to combine the mascaron material with the facade material
- How to store the carved mascaron before installation
- Error 1. Measuring the entire facade instead of the useful field
- Error 2. Considering only width and height
- Error 3. Ordering 150 mm for a 135 mm field based on a beautiful visualization
- Error 4. Automatically considering 7.5 mm as a sufficient mounting field
- Error 5. Placing decor flush against the frame
- Error 6. Not checking the adjacent door
- Error 7. Not considering the handle and lock
- Error 8. Starting finishing before fitting
- Error 9. Confusing interior decor with an exterior facade product
- Error 10. Choosing material only by price
- Error 11. Ordering "Standard" and expecting the same degree of hand finishing as "Prestige"
- Error 12. Buying several carved parts without a common layout
- Practical scenario: panel exactly 135 × 135 mm, no handle nearby
- Practical scenario: 135 × 135 mm includes an 8 mm bevel
- Practical scenario: M-006 120 mm next to a tall handle
- Practical scenario: two identical doors with two M-006
- Practical scenario: mascaron on a fixed panel
- What sizes are available?
- Will a 120 mm mascaron fit in a 135 mm field?
- What margin will remain on the edges?
- Is it possible to install the 150 mm option?
- What is the difference in depth between the 120 and 150 mm models?
- What to choose — beech or oak?
- What is the difference between "Standard" and "Prestige"?
- Can M-006 be mounted on a cabinet door?
- Will the product fit an entry door?
- How do I check the opening of the adjacent door?
- Do I need to make a cardboard template?
- When should painting be done?
- Where can I buy wooden overlays for furniture?
- What should I do if 120 mm fits but looks too large?
- Can M-006 be attached to the bevel of a panel?
- Which version protrudes less in the passage?
- Can multiple M-006 be used on one piece of furniture?
- What size is the main choice for a 135 × 135 mm field?
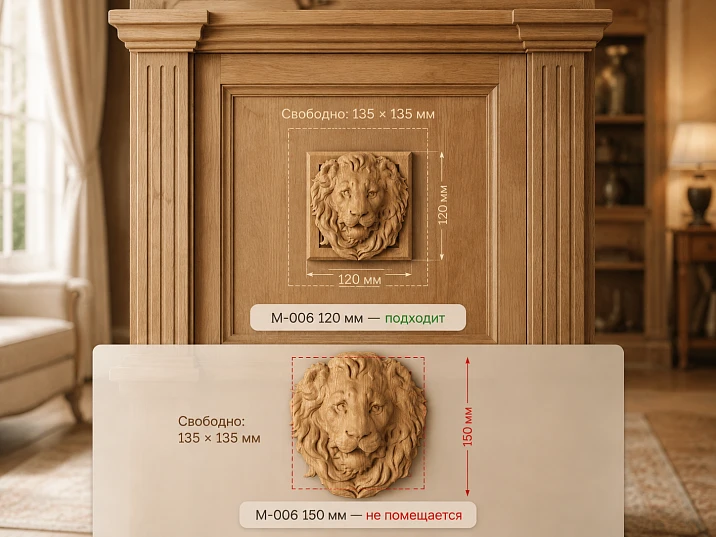
On a cabinet or sideboard door, there is already a limited decorative field — a flat panel zone of 135 × 135 mm. In the M-006 catalog, two adjacent sizes were liked: 120 × 120 mm and 150 × 150 mm. If you look only at the lion's head image, both options may seem suitable. But geometrically, the solution already differs: the 120-millimeter mascaron nominally fits, while the 150-millimeter one is larger than the free area.
For M-006 120 × 120 mm, the total remainder is 15 mm: 135 − 120 = 15 mm. With strict centering, 7.5 mm remains on each side. This means only one thing: the front dimension fits within the 135 × 135 mm rectangle. Such an indentation cannot automatically be called sufficient for installation. You need to check whether the panel frame bevel starts within these 7.5 mm, whether the gluing zone is completely flat, and whether the relief looks visually cramped.
The 150 × 150 mm option on a 135 × 135 mm field no longer fits in terms of front geometry: 150 − 135 = 15 mm. When centered, it will extend beyond the conditional boundary by approximately 7.5 mm on each side. Additionally, its relief depth is 77 mm versus 62 mm for the 120 mm option. Therefore, for the standard task of "the mascaron must be entirely within the free panel," the correct candidate is M-006 120 mm, while 150 mm requires changing the composition or intentionally overlapping adjacent zones.
After checking the facade, you can buy carved mascaron M-006, but before ordering, you need to assess not only the frontal size. The wooden lion's head has a pronounced volume: 62 or 77 mm along parameter C. This protrusion may conflict with the handle, keyhole, adjacent door, wall when opening, or the passage between two facades.
Below we will review the entire size range of M‑006, calculation for a 135 × 135 mm field, flat mounting area, relief depth, material, sanding quality, full-scale mockup, and specific situations where even the 120 mm option is better not to order.
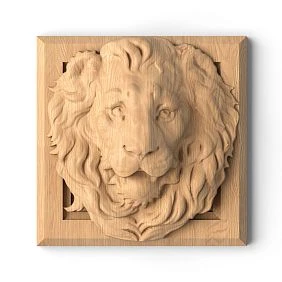
Carved mascaron M‑006: sizes of the wooden lion head
M‑006 is a carved wooden mascaron in the shape of a lion head. The card offers eight size options. For each, the front dimensions A × B and depth C increase simultaneously, so comparing products only by the number "120" or "150" is not enough.
| Front size A × B | Protrusion C | For a 135 × 135 mm field |
|---|---|---|
| 65 × 65 mm | 33 мм | Fits by frontal dimension |
| 80 × 80 mm | 41 мм | Fits |
| 100 × 100 mm | 51 мм | Fits |
| 120 × 120 mm | 62 мм | Fits nominally; 7.5 mm remains on each side when centered |
| 150 × 150 mm | 77 мм | Does not fit; exceeds by 15 mm |
| 190 × 190 mm | 97 мм | does not fit |
| 230 × 230 mm | 118 мм | does not fit |
| 300 × 300 mm | 154 мм | does not fit |
Materials — beech and oak. The card offers two levels of surface treatment: "Standard" and "Prestige". The product is made to order, and the base configuration selected by the card falls under the "under enamel" category. Before transparent or semi-transparent finishing, you need to separately check the available re-gluing option.
The full range is important even when the debate is between 120 and 150 mm. If after trying 120 mm it turns out to be visually too large due to minimal margins, you don't have to abandon M‑006 as a model: you can switch to 100 × 100 × 51 mm and get noticeably more air around the relief.




Wooden mascaron 120 × 120 mm: does it fit in a 135 × 135 mm field
By pure arithmetic — yes. Field: 135 × 135 mm. Mascaron: 120 × 120 mm. 15 mm remains on each coordinate.
135 − 120 = 15 mm.
With precise centering:
15 ÷ 2 = 7.5 mm.
That is, nominally 7.5 mm remains on the right, left, top, and bottom. Such a calculation is needed, but it is not yet permission for installation.
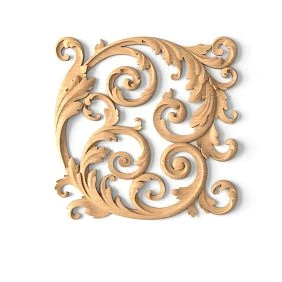
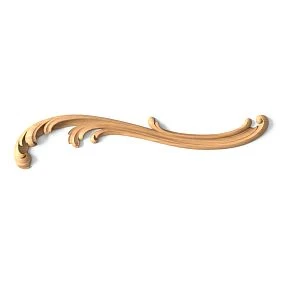
Our factory also produces:


Why 7.5 mm may be sufficient only on paper
The panel is rarely a square that is completely flat from edge to edge. A bevel, frame profile, milling, or depth transition may start nearby. If the last 10–15 mm of free field is already taken up by the slope, the actual flat area is smaller than the stated 135 mm.
In this case, the M-006 120 mm formally fits within the outer square, but part of the relief base falls on the slope. Gluing becomes less predictable, and visually the lion's head seems to "push" against the frame.
Get Consultation
When 120 mm looks cramped
Even on a perfectly flat area of 7.5 mm on each side — a narrow field relative to a 120-millimeter decorative element. If the panel frame is massive and there is a handle nearby, the composition may look overloaded. Therefore, before purchasing, it is useful to make a front template of 120 × 120 mm and evaluate the door as a whole, not just a separate square.
The geometric answer "fits" and the designer's answer "suits" are different things. The first can be obtained with a ruler, the second — with a full-size layout on the facade.
Lion mascaron 150 × 150 mm: why one visual sketch is not enough
The size 150 × 150 mm exceeds the field of 135 × 135 mm in both coordinates. The excess is:
150 − 135 = 15 mm.
If the centers are aligned:
15 ÷ 2 = 7.5 mm of overhang on each side.
Therefore, the 150-millimeter version cannot be ordered as guaranteed to fit inside the free panel. It is only possible with a different compositional solution — for example, if the mascaron intentionally overlaps part of the frame and this is provided for in the drawing and the mounting technology.
150 mm is not just wider — it is deeper
With the 150 mm version, the protrusion is 77 mm. For the 120 mm one, it is 62 mm. The difference in protrusion is 15 mm: 77 − 62 = 15 mm.
On a closed door, these 15 mm may seem small. But when the facade opens, the additional volume describes a larger trajectory and approaches the neighboring door, wall, handle, or vertical cabinet post sooner.
Why the image in the visualization can be misleading
A render or photo from the front barely shows the 77 mm protrusion. The mascaron is perceived as a flat square overlay. On real furniture, it protrudes significantly from the plane, so in addition to the frontal template, a side one is needed.
For a field of 135 × 135 mm, this makes the 150 mm option a double risk: it does not fit the front dimension and protrudes more into the space.
Carved overlay M‑006: what exactly needs to be measured on a furniture door
The size of the entire facade is almost useless for choosing M‑006. If the door is 500 × 700 mm, that does not mean there is a flat 500 × 700 mm area on it. The frame construction, panel, handle, and routing may leave much less usable field.
Usable field, not the full facade size
Measure only the flat area where the base of M‑006 can actually be placed. If the outer square of the panel is 150 × 150 mm, but a bevel takes up 10 mm on each side, the usable flat field is actually about 130 × 130 mm. Then the 120 mm version will leave about 5 mm to the start of the bevel, not 15 mm of total reserve.
Frame width and panel profile slope
Determine where the plane ends and the profile begins. A soft wide bevel may visually appear to be part of the free area, but for applied carved decor it is not equal to a flat base.
Handle, keyhole, and adjacent door
Measure the distance from the center of the intended mascaron to the handle and lock. It is especially important not only the frontal distance, but also the height of the handle above the plane. A deep relief may approach it even without intersecting squares in the front view.
Hinge zone
If the mascaron is located closer to the hinges, its trajectory when opening differs from an element near the free edge. Collision cannot be checked only in the closed position.
Mascaron depth and opening trajectory
For the 120 mm version, account for 62 mm of protrusion, for 150 mm — 77 mm. Make a volumetric template or at least attach spacers of the corresponding length to a cardboard square to see the actual volume.
After such a check, it becomes clearer whether a mascaron is needed or whether it is better to choose a flatter decorative piece. In the section, you can Buy wooden overlays for furniture of different shapes and relief heights, but for each model the geometry needs to be checked separately.
How to make a cardboard template M-006 120 × 120 × 62 mm
The most useful mockup is not a flat square, but a simple three-dimensional model. It does not replicate the shape of the lion's head, but it shows its maximum dimensions.
- Cut out a 120 × 120 mm square from cardboard.
- Mark the central axes.
- On the back side, make a spacer element 62 mm long — for example, a lightweight box or strips of cardboard.
- Secure the mockup to the door with masking tape without damaging the surface.
- Close and open the door to the full required angle.
- Check the handle, adjacent facade, wall, and passage.
Such a mockup is deliberately "rougher" than the real mascaron: the actual relief does not fill the entire volume of 120 × 120 × 62 mm as a solid block. But if even the dimensional template passes freely, the risk of collision is significantly lower. If the box already catches the adjacent element, a more precise drawing or a smaller size is needed.
How to make a template for the 150 × 150 × 77 mm variant and why it is needed if the size no longer fits
For a standard panel 135 × 135 mm, the frontal check already gives a negative answer. However, the designer may intentionally want frame overlap. Then the 150 × 150 × 77 mm template is needed to see the consequences of that decision.
Cut out a 150 mm square, mark the inner 135 mm square on it, and align the centers. It will immediately become clear which 7.5 mm on each side extend beyond the field boundary. Then add the 77 mm volume and test the door in motion.
If profile overlap is not provided for by the design, such a test only confirms the rejection of 150 mm. If it is provided, the furniture designer must verify the solution: the base of the decor must have a sufficient support plane.
Why the 62 and 77 mm protrusion needs to be checked separately from the face size
For overlay decor, the frontal dimension answers the question "does the part fit into the field," while the depth answers "does it interfere with operation." These checks are independent. A 120 mm mascaron can fit perfectly in front but turn out to be inconvenient in depth.
Imagine a cabinet door next to which another door opens toward it. In the closed position, there is no conflict between the planes. After installing M‑006 120 mm, the front point of the relief will be approximately 62 mm further from the facade. If the adjacent door passes closer than this zone when opening, a collision is possible.
Another scenario — the mascaron is installed next to a vertical furniture handle. In the front view, the handle is 30–40 mm from the edge of M‑006, but the handle itself also protrudes. The trajectories of the two volumetric elements may intersect during grip or opening.
Therefore, the project must be checked in three dimensions: width, height, and protrusion. For 120 mm, this is a box of 120 × 120 × 62 mm; for 150 mm, it is 150 × 150 × 77 mm.
Comparison of 120 and 150 mm: what is the difference besides 30 mm on the face
| Parameter | M‑006 120 mm | M-006 150 mm | Practical conclusion |
|---|---|---|---|
| Face width | 120 мм | 150 мм | Difference 30 mm |
| Face height | 120 мм | 150 мм | Difference 30 mm |
| Protrusion C | 62 мм | 77 мм | 150 mm protrudes another 15 mm |
| Position in the field 135 mm | 7.5 mm free on each side | Protrusion of 7.5 mm on each side | Only 120 mm fits completely |
| Requirement for the mounting zone | Minimum clearance | Need to overlap the adjacent zone | 150 mm requires a different composition |
Interestingly, the depth grows roughly proportionally to the face size: 62 mm for 120 and 77 mm for 150. Therefore, when the mascaron is enlarged, it not only takes up more area but also becomes more noticeable in volume. This enhances the sculptural effect, but at the same time increases the requirements for space in front of the facade.
When to choose M‑006 100 × 100 × 51 mm instead of 120 mm
Formally, 120 mm fits, but sometimes 7.5 mm around the perimeter is too little. The lineup includes a 100 × 100 × 51 mm option. On a 135 × 135 mm field, it will leave:
135 − 100 = 35 mm of total reserve, or 17.5 mm on each side when centered.
This is more than twice the side margin compared to the 120 mm version. Additionally, the protrusion decreases from 62 to 51 mm. This size is reasonable to try if the door is small, with a tight frame, handle, or adjacent decor nearby.
Switching to 100 mm does not mean that 120 mm is 'wrong'. It is an alternative for a freer composition. The choice is best made on a frontal mockup: 100 mm may look too small on a massive door, while 120 mm might be just the right scale.
When M‑006 80 or 65 mm may be more appropriate
For a narrow door, drawer, or small central panel, the 80 × 80 × 41 and 65 × 65 × 33 mm sizes provide noticeably less volume. They are suitable not as a 'spare option just in case', but as a different scale of decorative accent.
On a 135 mm field, the 80 mm version leaves 55 mm of total margin, i.e., 27.5 mm on each side when centered. The 65 mm version leaves 70 mm of total margin, 35 mm on each side. Such margins allow better visibility of the frame and neighboring elements, but the lion's head will be less dominant.
The full range helps avoid fixating on two adjacent sizes. If 120 mm passes technically but feels visually cramped, the next logical test is 100 mm, not an obligatory rejection of model M-006.
Maskaron for furniture made of beech or oak: which material to order
M-006 is available in beech and oak. It cannot be stated that one material is "better" for a maskaron in general. The choice depends on the subsequent finish, the material of the facade itself, and whether the wood texture should remain visible.
Beech
Beech has a dense, calmer texture. For opaque painting, it is a convenient base, especially when the maskaron should become part of a single painted door.
Oak
Oak has a more pronounced porous structure and shows the wood grain more strongly under transparent or semi-transparent finishes.
But the selected card M-006 shows the category "for enamel." If the project requires clear lacquer, oil, or stain with visible texture, you need to separately check the availability of a suitable lamination for tinting. Oak itself does not turn the "for enamel" option into a ready product for a transparent finish.
Before choosing, it is useful view materials and quality of wooden decor and coordinate the finish of the entire facade as a single system.
Wooden decor "Standard" or "Prestige": what to check before purchasing
STAVROS divides surface treatment into "Standard" and "Prestige". "Standard" includes milling and machine sanding; slight milling marks, roughness, and fuzz are allowed within stated limits. "Prestige" additionally includes detailed manual sanding of hard-to-reach areas.
For M-006, the difference is especially noticeable in the complex relief: the mane, eyes, mouth, and other recesses contain areas that machine tools find harder to reach. If the workshop itself performs the full cycle of manual preparation before painting, "Standard" can be a deliberate choice. If you want a more thoroughly prepared surface, it makes more sense to compare "Prestige".
But even "Prestige" does not eliminate the need to inspect the piece before finishing. Natural wood and complex carving require checking after transportation and before applying the finish.
Lion's head mascaron: where it can be placed on furniture
M-006 is an applied carved decor, so it can be used on various furniture surfaces if there is sufficient mounting space and the volume does not interfere with use. But the same item is perceived differently on a wardrobe, a chest of drawers, and a tall door.
Central panel of a wardrobe
This is the most straightforward scenario. The mascaron becomes the axial accent, and the panel frame acts as its own frame for the lion's head. Equal margins on top/bottom and left/right are especially important here.
Sideboard or display cabinet
If the facade is divided into a lower solid part and an upper glass part, M-006 can work on the central solid panel. But the protrusion must not interfere with the adjacent display cabinet door or handles.
Chest of drawers
On a tall central facade, the mascaron may be appropriate, but on a regular drawer, a depth of 62-77 mm can protrude significantly into the walkway and interfere with the grip on the handle. Before installation, the drawer opening should be simulated.
Tall door
On a tall facade of 120 mm, it may look moderate, while on a small door the same size dominates. Therefore, you cannot choose the mascaron scale only by the size of the free square — you need to see the entire door.
Decorative furniture panel
If the panel is fixed and does not open, the risk of collision is reduced. Then the visual field and the quality of the base become the main factors. But even here, 150 mm cannot be placed on a 135-millimeter surface without a specially designed overlap.
If M‑006 is used together with other overlays, in the general catalog you can to buy carved wooden decor and assemble a unified composition. But neighboring elements should be placed on the same drawing, not chosen separately.
How to check the mascaron next to a furniture handle
The handle is the most common volumetric conflict. On the front sketch, there may be 20–30 mm between the edge of the mascaron and the handle, but this is not enough for clearance. You need to know how far the handle protrudes from the facade and where the hand is when opening.
The check is performed as follows:
- Draw the outline of M‑006 on the facade.
- Add a depth of 62 mm for the 120 version or 77 mm for the 150.
- Grab the handle with a normal motion.
- Check that fingers, knuckles, or palm do not press against the relief.
- Open the door to the working angle and repeat the check.
If the mascaron is located above the handle, the conflict may not occur constantly, but only with a certain grip. For everyday furniture, this is still a drawback: a decorative element should not turn ordinary opening into a cautious operation.
How to check M-006 near the keyhole and key
On classic furniture, a keyhole may be located next to the mascaron. You need to consider not only the lock plate itself, but also the length of the key that turns in the plane in front of the facade.
The 62 mm relief may end up in the hand or key zone even with a visually sufficient distance. Therefore, in the volumetric template, it is useful to actually insert the key and turn it. If the hand catches the relief, change the position of the decor or choose a smaller size.
How to check the adjacent door: the closed position is not enough
Two doors may look completely free while both are closed. When opening, the free edge of one door describes an arc and approaches the decor of the other. The deeper the M-006, the higher the risk of contact.
For paired doors, do two tests:
- open the left door while the right one is closed;
- open the right one while the left is closed;
- then open both simultaneously in the most unfavorable position.
If the doors are at an angle, for example in a corner cabinet, the three-dimensional relief is especially critical. The 150 mm version with C = 77 mm requires more free space than 120 × 62 mm.
How to check the distance to the wall or cabinet side panel
A facade located close to a side wall moves the mascaron along an arc when opened. Even if there is 30–40 mm between the relief and the wall in the closed position, the distance may decrease at another opening angle.
Check the entire range of motion. A cardboard box is useful precisely because it can be safely attached to the door and the facade can be opened several times without risking damage to the real carved element.
How to center M‑006 on a 135 × 135 mm field
For the 120 mm version, the mathematical center is simple: the mascaron axis coincides with the field axis, leaving 7.5 mm on each side. But the actual composition may require optical adjustment.
The lion's head is a complex object with asymmetric relief: the mane and chiaroscuro can visually pull the mass up or down. Therefore, after geometric centering, look at the facade from a distance. If the decor seems to "sag" or is too close to the handle, a slight shift may be discussed — but only if it does not reduce the already minimal field to a critical zone.
On a 135 mm platform, the 120 mm element has little margin. Therefore, a large optical shift is impossible: a 3 mm shift turns 7.5 mm on one side into 4.5 mm. On a small field, this is already noticeable and can bring the base to the bevel.
Why 120 mm should not be placed flush with the start of the panel bevel
If the mascaron base partially lies on the sloped area, three problems arise at once. First, the actual contact area decreases. Second, the relief may sit skewed relative to the front plane. Third, an uneven visual gap appears along the edge.
Therefore, the 135 × 135 mm measurement should refer specifically to the flat zone, not to the nominal size between the peaks of the frame profile. If the flat part is less than 120 mm along one coordinate, the 120 version is no longer guaranteed to fit.
How to measure the flat mounting zone without complex tools
Place a short rigid ruler or a straight strip of material on the panel. Move it from the center toward the frame. The point where a gap appears under the ruler due to the start of the bevel is the boundary of the plane.
Repeat the measurement in four directions. The panel may not be perfectly symmetrical, especially if the furniture is old or handmade. Record the minimum width and height. The decision is made based on the smaller value.
If, for example, a flat zone of 132 × 136 mm is obtained, the nominal 135 × 135 is already misleading. M‑006 120 mm will leave only 6 mm on each side horizontally when centered on 132 mm.
How to choose related decor without overloading the facade
The mascaron itself is a strong accent. If you add carved baguette, rosettes, overlays, and a massive handle around it, a small panel quickly loses its free field. Therefore, the main element is chosen first, then the secondary ones.
For a 135 × 135 mm field, the M‑006 120 mm already occupies about 79% of the area width along each axis (120 ÷ 135 ≈ 0.889 linearly, and about 79% by area). This means there is little free frontal zone left. Additional decor is better placed outside this square rather than trying to fit it into the same 7.5-millimeter margins.
If you need to assemble a more complex set, you can buy wooden carved decorative elements, but their scale must be subordinate to the main mascaron, not compete with it.
When the carved mascaron M‑006 is not suitable
Even if the model is stylistically appealing, there are situations where it is better to avoid it.
Free field smaller than the selected size
If the flat area is smaller than 120 × 120 mm, the 120 version is not suitable as a fully placed overlay. If smaller than 150 × 150 mm, the 150 version also requires overlapping adjacent zones.
Base is curved or heavily profiled
Overlay decor requires a predictable mounting surface. Curvature reduces contact and changes the position of the relief.
The relief interferes with the handle
If your fingers touch the lion's head with a normal grip, it's better to move the decor, choose a smaller size, or skip it altogether.
The adjacent door hits the mascaron
Even rare contact when fully opened will eventually damage the finish and the relief itself.
A nearly flat overlay is required
M-006 has pronounced depth: from 33 to 154 mm depending on the size. For furniture in a narrow passage, it may be more practical to choose a flatter decor.
The furniture style does not support a mascaron
The lion's head is a strong classical motif. On a minimalist facade without other historical details, it may look out of place.
A trial layout cannot be done
For expensive finished furniture, buying a three-dimensional element without trying it out increases the risk. If you don't have access to the facade, it's better to at least get an accurate drawing and photos with dimensions.
The facade construction is unknown
If it is unclear what the central part of the door is made of, its thickness, and where hidden elements run, the mounting method cannot be assigned at random.
Outdoor street use is planned without confirmation
The card describes M-006 as furniture and interior applied decor. It should not be automatically transferred to an exterior building facade or street door without separate confirmation of operating conditions and a protective system.
How to prepare the surface before fitting and mounting M-006
Before choosing an adhesive or another fixing method, you need to understand the condition of the facade. Raw wood, primed MDF, finished enamel, veneer, and lacquer are different surfaces. The same mounting compound should not be considered universal for all substrates.
Before fitting, the surface must be clean and dry. If the facade is already painted, you should not mindlessly sand the visible area around the future decor: any damage that M-006 will not cover will remain on the front side. The boundaries of the mounting area are better transferred first using a template.
Before final fixation, it is useful to review tips on finishing carved decor and separately check the instructions for the chosen adhesive, primer, and paint coating.
Paint M-006 before or after installation
Both schemes are possible, but each has its own risks.
Finishing before installation
The carved element can be easily rotated, painting the mane, eye sockets, and mouth without fear of touching the facade. This is especially convenient for complex relief. But after finishing, installation must be done carefully: glue and markings must not damage the finished coating.
Finishing after installation
The mascaron and facade can be combined into one color scheme, especially under an opaque enamel. But it is harder to paint deep lower areas near the panel, and a positioning error cannot be corrected without disassembly.
For a field of 135 × 135 mm, where the 120-millimeter version has only 7.5 mm of nominal field, dry fitting before any final fixation is mandatory. An error of 3–5 mm is more noticeable here than on a large panel.
Why the "under enamel" option cannot be automatically coated with clear varnish
In the M-006 card, the base configuration is specified as "under enamel." For solid wood products, such gluing does not require mandatory selection of lamellas by color and grain, because the surface is designed primarily for an opaque finish.
If the customer wants to see the texture of oak or beech, the option for tinting or other preparation must be separately agreed upon, if available for the required size and material. You cannot first buy a product under enamel and then consider clear varnish a fully equivalent scenario.
How to combine the mascaron material with the facade material
The wooden M-006 can be used not only on a solid wood door. In furniture production, carved decor is often combined with MDF, veneer, and other substrates. But the visual and installation solution depends on the finish.
If the entire facade is painted with opaque enamel, the mascaron can be made of beech or oak, and the backing can be made of MDF. After proper preparation, the materials are unified by color. If the facade is transparent, the combination of different wood species becomes noticeable, and the texture and tone need to be compared.
The very fact that the facade is "oak-look" does not mean that the oak M-006 will automatically match. Veneer and solid wood from different batches may differ. For a responsible project, a sample or test finish is needed.
How to store a carved mascaron before installation
A carved element made of natural wood should not be left near a heating appliance, in the sun, or in a damp area. Before installation, it is better to store it in stable conditions, without loading the relief with heavy objects.
Official rules for storing wooden products it is useful to consider especially when furniture and decor arrive at the site on different days and M-006 waits for installation for several weeks.
Mistakes when ordering a wooden mascaron
Mistake 1. Measuring the entire facade instead of the useful field
The door is large, so it seems that 150 mm will definitely fit. But the central flat area is only 135 × 135 mm. The solution is to measure the installation spot, not the outer contour of the door.
Mistake 2. Considering only width and height
The 120 mm version fits in the front but protrudes by 62 mm. Without a side check, you can get a conflict with the handle or the adjacent door.
Error 3. Ordering 150 mm for a 135 mm field based on a pretty visualization
The front dimension exceeds the field by 15 mm. If the frame overlap was not part of the project, the part will be too large.
Error 4. Automatically considering 7.5 mm as a sufficient mounting gap
These 7.5 mm may already relate to the panel bevel. You need to measure the flat surface specifically.
Error 5. Placing decor flush against the frame
The relief is visually squeezed, and the edge of the base may land on the slope. The assessment is done using a full-size mockup.
Error 6. Not checking the adjacent door
Closed furniture looks fine, but when opened, the door hits the 62 mm or 77 mm relief.
Error 7. Not accounting for the handle and lock
The hand, key, or handle intersects with the volume of the lion's head. Not only the front view is checked, but also the actual grip.
Error 8. Starting finishing before fitting
After painting, it turns out that the size or position is incorrect. First mock-up and dry fitting, then finish.
Error 9. Confusing interior decor with an exterior facade product
The card confirms furniture and interior use. Outdoor conditions require separate confirmation.
Error 10. Choosing material only by price
For transparent finishing, texture and grade of lamination are important; for enamel, technological preparation. Price does not replace these parameters.
Error 11. Ordering "Standard" and expecting the same degree of hand finishing as "Prestige"
Processing levels differ. If the workshop does not plan additional hand sanding, this must be considered before purchase.
Error 12. Buying several carved parts without a general layout
Each one is beautiful individually, but together they overload the facade. All elements are applied to a single front sketch.
How to buy a carved mascaron M-006 without mistakes
For a 135 × 135 mm field, the optimal checking sequence can be reduced to a single working algorithm.
- Take a frontal photo of the door. Preferably strictly perpendicular, without perspective distortion.
- Measure the clean flat field. Do not include frame bevels in it.
- Apply a 120 × 120 mm square. For a 135 mm field, check 7.5 mm around it.
- Make a 62 mm depth. This will provide a real movement check.
- Open adjacent doors and drawers.
- Check the handle and key.
- Evaluate the entire facade from a distance. Not just the small square.
- If 120 mm looks tight, compare 100 × 100 × 51 mm.
- Choose beech or oak and the level of sanding.
- Match the finish.
- Only after that, place your order.
Such an algorithm is more useful than the general recommendation "take a smaller size." It shows why 120 mm is the primary candidate but leaves the option to switch to 100 mm if the actual furniture requires more free space.
Practical scenarios for choosing M‑006 for furniture panels
Practical scenario: panel exactly 135 × 135 mm, no handle nearby
This is the most favorable option. The field is truly flat, the handle is located far away, and the adjacent door opens in the other direction. The 120 × 120 × 62 mm mascaron leaves 7.5 mm around after centering.
Here the main check is visual. If the massive panel frame supports the lion's head well, 120 mm can be considered a working size. 150 mm still goes beyond the boundaries and is not suitable without changing the composition.
Practical scenario: 135 × 135 mm includes an 8 mm bevel
The external measurement shows 135 mm, but the flat central part is smaller: approximately 119 × 119 mm if the bevel takes 8 mm on each side. In this case, the 120 mm M‑006 no longer has a full flat mounting area.
The correct solution is to switch to the 100 mm option or change the facade design. The external size of the frame cannot be used as proof of compatibility.
Practical scenario: M‑006 120 mm next to a tall handle
Frontally, 25 mm remains between the mascaron and the handle. But the handle protrudes 35 mm from the facade, the mascaron — up to 62 mm. When gripping, the user puts fingers behind the handle and touches the relief.
In this case, the mascaron can be shifted if the margins allow, choose 100 mm with a depth of 51 mm, or change the handle. The choice is made on a physical mockup, not based on two flat rectangles.
Practical scenario: two identical doors with two M‑006
If mascarons are placed on paired facades, you need to check not only each one individually, but also the composition of the pair. Centers should be at the same height, margins should be identical, and reliefs should not collide when opened simultaneously.
For two doors, it is better to make two cardboard templates 120 × 120 × 62 mm and open both leaves at the same time. This immediately shows whether there is enough space between them.
Practical scenario: mascaron on a fixed panel
On a fixed furniture panel, there is no opening trajectory, so a depth of 62 mm less often creates a functional conflict. Here you can focus on the margin size, finish, and proportion.
But if the panel is in a passage, the protrusion still matters: a person may catch the relief with clothing. Therefore, a volumetric check remains useful.
When 150 mm can still be used next to a margin of 135 × 135 mm
There is only one type of scenario: 135 × 135 mm ceases to be considered a rigid mounting boundary. For example, the designer deliberately wants the lion's head to partially overlap the frame, and the base of the facade structurally allows such mounting.
Then you need:
- draw the actual shape of the frame profile;
- check where the supporting surface of the mascaron base is;
- ensure that the overlap does not create rocking;
- agree on the method of fastening;
- check the 77-millimeter protrusion;
- evaluate the composition of the entire door.
Without these conditions, a size of 150 mm cannot be recommended for a field of 135 mm as “slightly larger, but also suitable.”
How to select other wooden overlays around M‑006
If the mascaron is the central accent, the adjacent decor should be secondary. In the section, you can buy decorative wooden overlays For corners, verticals, or frames, but first set the scale M‑006.
A good order is first the mascaron, then the frame profile, then small overlays. The reverse path often leads to there being no visual breathing room left for the lion's head.
What to tell the manager before ordering M‑006
| Parameter | What to tell |
|---|---|
| Article number | M‑006 |
| Size | 120 × 120 × 62 mm or another selected size |
| Installation location | Furniture panel / door / panel |
| Useful field | Actual flat size, for example 135 × 135 mm |
| Material | Beech or oak |
| Sanding | Standard or Prestige |
| Finishing | Enamel or another agreed system |
| Facade base | Solid wood / MDF / veneer / other |
| Adjacent elements | Handle, lock, frame, adjacent door |
| Installation | Agreed method after fitting |
If the free field size is reported as "approximately 135", it's better to measure it again first. A difference of 3–5 mm for the 120 mm version already significantly changes the small margin around the part.
Where to order M‑006 after size verification
If the flat field is indeed 135 × 135 mm, the cardboard template 120 × 120 × 62 mm does not conflict with the handle and opening, and the scale fits visually, you can order a wooden mascaron in the shape of a lion's head in the selected material and quality of finish.
If 120 mm looks too tight, first compare 100 × 100 × 51 mm. If a larger accent is needed, you cannot automatically switch to 150 mm without changing the field: this option physically exceeds 135 mm on the front side.
Before placing the order, it is also useful check payment and delivery terms, especially if the carved decor is ordered together with other elements of the same furniture composition.
How to assess the scale of M‑006 not only by margins, but also by the field share
The 7.5 mm margin clearly shows the distance to the border, but there is another useful indicator — what share of the square field the overall square of the mascaron occupies. This is not the area of the carving itself, but precisely the share of the bounding contour, so this indicator is used only for visual size comparison.
A field of 135 × 135 mm has an area of 18,225 mm². The footprint of 120 × 120 mm is 14,400 mm². Ratio:
14 400 ÷ 18 225 × 100% ≈ 79%.
That is, the bounding square of M‑006 at 120 mm occupies approximately 79% of the area of the given square. This explains why, even with a formal gap of 7.5 mm, the element can be perceived as large and dominant.
For the 100 × 100 mm version, the bounding square occupies:
10 000 ÷ 18 225 × 100% ≈ 54,9%.
Visually, the difference between 79% and approximately 55% is very noticeable: the 100-millimeter mascaron leaves much more space for the frame and handle.
For 150 × 150 mm, the bounding square is 22,500 mm², which is approximately 123.5% of the area of the 135 × 135 mm square. This does not mean that the actual carving physically overlaps 123.5% of the panel — the lion's head silhouette does not fill the entire square. But as a footprint test, the indicator confirms: the size already exceeds the specified mounting boundary.
| Size M‑006 | Bounding square area | Share of the 135 × 135 field | Practical perception |
|---|---|---|---|
| 100 × 100 mm | 10,000 mm² | ≈ 54,9% | More free space |
| 120 × 120 mm | 14,400 mm² | ≈ 79,0% | Strong central accent |
| 150 × 150 mm | 22,500 mm² | ≈ 123,5% | The dimension extends beyond the field |
Such a calculation is useful when 120 mm "fits by the ruler," but the client doubts the scale. It shows why 100 mm may look calmer without switching to very small 65–80 mm.
How to position M‑006 on two identical doors
If the cabinet is double-door and a mascaron is needed on each door, one successful fitting does not replace checking the pair. Two voluminous lion motifs are perceived as a single composition, and a slight height discrepancy is more noticeable than on a single door.
First, mark the same baseline on both doors—for example, the center of the panel or the distance from its upper straight edge. Then attach two front templates 120 × 120 mm. After a visual check, add 62 mm of depth and open both doors.
For paired furniture, four things need to be checked:
- whether the heights of the M‑006 centers match;
- whether the margins to the panel frames are the same;
- whether the reliefs collide when the doors move;
- Doesn't the composition become too heavy due to two large elements being adjacent?
If there is a central gap between the doors, don't automatically shift the mascaroons toward the center for the sake of 'bringing the lion heads closer.' The 120mm version already has little margin within the field. First preserve a safe mounting zone, then assess the decorative rhythm.
At what height should the mascaron be placed on a tall door?
Card M-006 does not specify a universal mounting height. This depends on the furniture composition. On a tall door, the mascaron's center may coincide with the panel's center, be above the geometric middle, or be tied to the handle and other decorative elements.
Before drilling or gluing, it's better to do a vertical series of mock-ups. Place the template first at the panel's geometric center, then 30–50 mm higher if the field allows. Photograph the options strictly from the front. On tall furniture, the visual center is often perceived differently due to perspective and handle placement.
However, you cannot change the height so that the top or bottom margin to the frame becomes less than the safe flat zone. For a 135 × 135 square and M-006 120mm, the vertical adjustment range is very limited: nominally only 15mm of total free vertical space.
If the design requires noticeably raising or lowering the lion head, that's a signal that you need to enlarge the panel field or choose a more compact M-006 100mm. It has a total vertical reserve of 35mm, so there's more compositional freedom.
How to lock in the agreed-upon option before placing the order
After a successful mock-up, it's useful to save not only a photo but also a short decision card. It will be useful for the manager, cabinetmaker, and finisher so everyone works with the same configuration.
| Parameter | Example entry |
|---|---|
| Useful field | 135 × 135 mm, flat zone confirmed |
| Selected M-006 | 120 × 120 × 62 mm |
| Position | Centered in the field |
| Fields | 7.5 mm on all four sides |
| Handle | No grip conflicts |
| Opening | Adjacent door does not touch the template |
| Material | Beech or oak per project |
| Processing | Standard / Prestige |
| Finish | Under enamel or another confirmed system |
If after such fixation the handle, hinge position, or panel frame changes, the fitting must be repeated. Volumetric decor depends on neighboring elements more than a regular thin overlay.
Frequently asked questions about the carved mascaron M-006
What sizes are available?
The card offers eight options: 65 × 65 × 33, 80 × 80 × 41, 100 × 100 × 51, 120 × 120 × 62, 150 × 150 × 77, 190 × 190 × 97, 230 × 230 × 118, and 300 × 300 × 154 mm.
Will a 120 mm macaron fit in a 135 mm field?
By face geometry, yes: 15 mm of total reserve remains, 7.5 mm on each side when centered. But you need to check that all 135 mm is a flat mounting area.
What margin will remain on the edges?
7.5 mm on each side with precise centering in a 135 × 135 mm field.
Can the 150 mm option be installed?
Not as fully fitting within a 135 × 135 mm field. It is 15 mm larger and will extend approximately 7.5 mm beyond each side. It is only possible with a specially designed overlap of the adjacent area.
What is the difference in depth between the 120 and 150 mm models?
The 120 mm version has C = 62 mm, the 150 mm version has 77 mm. The difference is 15 mm.
What to choose — beech or oak?
Both wood species are available. For opaque enamel, the choice is related to technology and the project; for transparent finish, texture and the correct glue joint category are additionally important.
What is the difference between "Standard" and "Prestige"?
"Standard" includes machine processing and sanding with acceptable minor processing marks. "Prestige" additionally implies detailed manual sanding of hard-to-reach areas.
Can the M-006 be installed on a cabinet door?
Yes, as interior furniture decor, if there is a suitable flat area, the mounting method is confirmed, and the relief does not interfere with opening.
Will the product suit an entry door?
For the interior side of the door, use can be considered as a decorative scenario, but outdoor use cannot be assumed without separate confirmation of conditions and finish.
How to check the opening of the adjacent door?
Make a full-size cardboard template with the actual depth C and open the panels to the full working angle.
Is it necessary to make a cardboard template?
For a field of 135 × 135 mm, this is very useful because the clearance around the 120-mm option is only 7.5 mm on each side, and the depth reaches 62 mm.
When should painting be done?
After confirming the size and position during a dry fit. The order itself, "before installation" or "after installation," depends on the coating technology and the facade.
Where to buy wooden furniture overlays?
In a separate section of STAVROS decorative overlays, where M‑006 is one of the volumetric carved models.
What to do if 120 mm fits but looks too large?
Compare M‑006 100 × 100 × 51 mm. It will leave 17.5 mm margins on each side when centered in a 135 mm square.
Can M‑006 be mounted on a panel bevel?
The bevel should not be considered an equivalent flat mounting surface without verification. It is better to place the base on a flat area or design a special joint.
Which version protrudes less into the passage?
The smaller the size, the smaller C: for example, 100 mm has a depth of 51 mm, 120 mm — 62 mm, 150 mm — 77 mm.
Can multiple M‑006 be used on one piece of furniture?
Yes, if the composition is planned and identical elements do not interfere with opening. For paired doors, it is especially important to align centers and check two volumetric trajectories simultaneously.
What size is the primary choice for a 135 × 135 mm field?
From the 120/150 mm pair, the 120 mm option is chosen. It is the only one of the two that fully fits within the front dimension. However, the final purchase depends on the actual flat area and volumetric fitting.
Decision matrix for a 135 × 135 mm field
| Check | M‑006 120 mm | M-006 150 mm |
|---|---|---|
| Front dimension | Fits | does not fit |
| Offset when centering | +7.5 mm on each side | −7.5 mm on each side |
| Protrusion | 62 мм | 77 мм |
| Need to check the bevel | Yes, definitely | Yes, but the standard scheme no longer fits the size |
| Opening check needed | Yes | Yes, especially due to the greater depth |
| Base solution | Main candidate after the template | Only with a modified composition |
This matrix allows a decision without substituting concepts. For 120 mm, the question is: "are 7.5 mm sufficient and does the 62 mm volume pass?" For 150 mm, the question is different: "is the project ready to abandon the 135 × 135 mm boundary and deliberately overlap the adjacent zone?" These are two different installation scenarios, not just two adjacent sizes of the same product.
If the answer for 120 mm remains doubtful, the next check should not be with 150 mm, but with 100 × 100 × 51 mm. It is the reduction in size that adds real installation and visual margin, whereas increasing to 150 mm only intensifies the conflict with the specified field.
Result: for a 135 × 135 mm field, first try M‑006 120 mm, and do not consider 150 mm as fitting
The math here provides a clear starting point. M‑006 120 × 120 mm fits into a 135 × 135 mm square with a total margin of 15 mm, that is, 7.5 mm on each side when centered. M‑006 150 × 150 mm exceeds the field by the same 15 mm and extends approximately 7.5 mm beyond each side.
But the decision does not end with two subtractions. The 120 mm version protrudes 62 mm, so before ordering, you need to check the handle, lock, adjacent door, wall, and the entire opening angle. If 135 mm includes frame bevels, the actual flat mounting area may be smaller, and then even 120 mm will require reconsideration.
If 120 mm technically fits but is visually too tight, the same line has M‑006 100 × 100 × 51 mm: it leaves 17.5 mm of field on each side when centered. This is a more correct alternative than trying to place 150 mm on a platform that is smaller than the decor itself.
Correct purchase order: measure the clean surface → make a front and volumetric template → check opening → choose material and sanding quality → agree on finish → only then place order M-006. This way the size is selected based on the actual facade, not from a photo of the mascaron separately from the furniture.