Article Contents:
- Installation logic: why we think first, then buy
- What to check and measure before buying
- Width and height of the window opening
- Width of the available area around the opening
- Height of the side elements
- Space for the top plank
- Space for the bottom element
- Condition and evenness of the facade
- What elements may be needed: full list
- Carved architraves (side posts)
- Top element
- Bottom plank
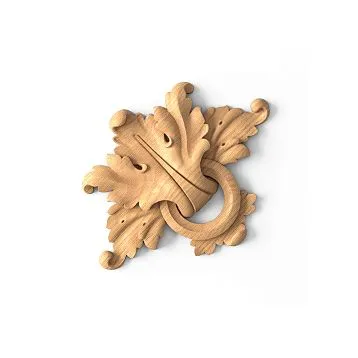
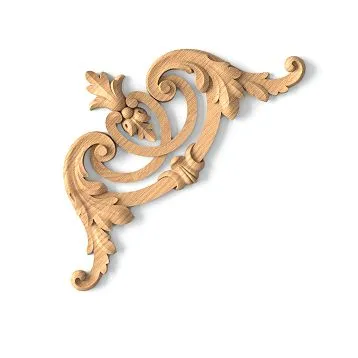
- Corner rosettes
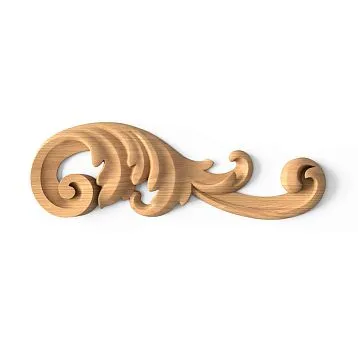
- Connecting elements
- Brackets
- Wooden decorative overlays
- Wooden frame
- Fasteners and finishing materials
- Preparing the facade: what to do before picking up the architrave
- Surface cleaning
- Checking the base
- Removing old decor
- Checking the opening geometry
- Marking installation lines
- Planning joint locations
- How to trim wooden architraves: everything you need to know
- Trimming tool
- Length trimming
- Width trimming
- End trimming
- How not to cut the ornament in an unfortunate place
- How to finish joints: rosettes, connectors, and overlays
- Corner joint: side architrave + top rail
- Joint when extending: connector
- Gaps between the trim and the wall
- When brackets are needed: placement logic
- Areas where brackets are appropriate
- What not to do with brackets
- Window design schemes: three common options
- Scheme 1: Minimal (three elements)
- Scheme 2: Standard (five to six elements)
- Scheme 3: Extended (with accents)
- Installation order: from the first element to the final sealant
- Step 1: Preparing the trims
- Stage 2: Installation of the baguette (if used)
- Stage 3: Installation of side trims
- Stage 4: Installation of the upper trim
- Stage 5: Installation of the bottom strip
- Stage 6: Installation of rosettes and connecting elements
- Stage 7: Installation of brackets (if needed)
- Stage 8: Touch-up painting and sealing
- Features of installation on a wooden house
- On a timber house with casing
- On an old house with rigid windows
- Mounting on uneven facade
- Preparation and processing of architraves: what 'proper finishing' means
- Typical mistakes when installing carved architraves
- Purchasing without precise measurements
- Trimming not accounted for
- Joints not thought through
- Installation without pre-fitting
- Unpainted ends
- Connecting parts not selected
- Only the front part painted
- Mixing different series without a common scheme
- Additional tips for complex cases
- Installation on brick or plastered facade
- Installation of trims on metal-plastic windows
- Installation with complex porch geometry
- Frequently Asked Questions
- Can carved trims be installed independently?
- What else do you need to buy besides the trims themselves?
- Do trims need to be painted before installation?
- How to seal the joints of carved trims?
- Can trims be installed on an old facade?
- How to know if brackets are needed?
- How many screws are needed for one trim?
- How to calculate the number of sockets for a house?
- STAVROS: everything for installing carved decor — in one catalog
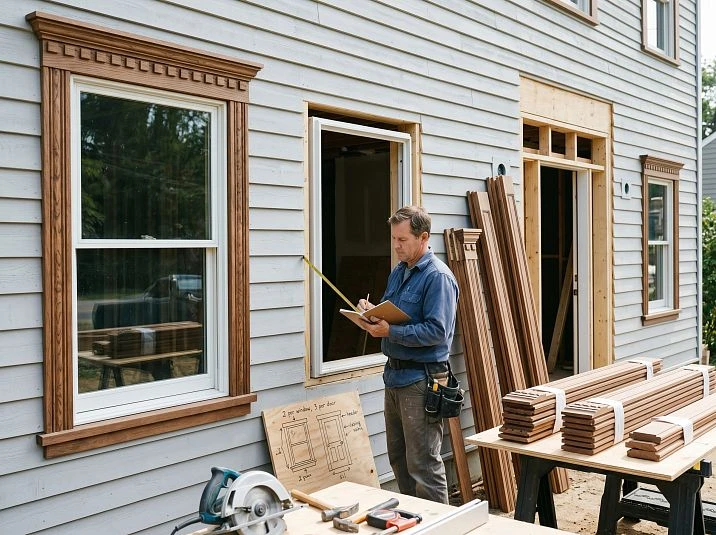
Buying beautiful carved trims is only half the task. The second half is installing them so that the result looks exactly as you imagined: neat, level, with proper joints and no "white spots" in the corners. This is where many stumble. Not because installation is technically difficult. But because no one explained the sequence — what to do first, what next, where and how to cut, how to cover joints, and why sockets and connecting elements are needed at all.
This article is a step-by-step guide for those who want to carry out installation of carved trims competently. Without unnecessary rework, without unplanned trips to the store for missing parts, without disappointment after the decor is already nailed on.
Read carefully. There is no fluff here — only what you really need to know.
The logic of installation: why we think first, then buy
The most common mistake is to buy trims without thinking about installation, and then discover that something is missing. Or that the purchased elements don't fit together properly. Or that the length turned out wrong.
Rule number one: installing carved window casings does not start with a purchase, but with measurements and a diagram. The diagram is your visual plan of exactly which parts will make up the framing of each window and door. Only after the diagram — a list of elements. Only after the list — the order.
This is not a complication of the process, it is its acceleration. Because a properly planned installation goes quickly and without surprises.




What to check and measure before buying
Measurement is the foundation. And not "approximately 1200×1400", but exact numbers with a tape measure in hand.
Our factory also produces:
Width and height of the window opening
Measure along the outer edge of the frame or along the outer slope — depending on how the casings will be attached. Write down:
-
W — opening width (mm)
-
H — opening height (mm)
The length of the side elements and the length of the top bar depend on these numbers.
Get Consultation
Width of the available area around the opening
This is the distance from the edge of the frame (or slope) to the nearest obstacle: corner of the house, adjacent window, pilaster, architectural projection. If this distance is less than the width of the selected casing, you need to either choose a narrower model or trim it to width.
Especially relevant for windows located close to the corner of the building or to another window. Check this parameter for each opening.
Height of side elements
The standard casing length is 2000 mm. The side element is installed on the side of the opening — typically slightly above the windowsill (100–150 mm) and slightly above the top edge of the frame (50–80 mm). The required length of the side casing is approximately H + 200–230 mm.
If H + 200 mm exceeds 2000 mm, connecting elements and additional pieces are needed. Take this into account when ordering.
Space for the top bar
The top bar is horizontal. Its length = W + 2 × width of the side casing + 50–100 mm on each side. Make sure there is enough space above the opening: from the top edge of the frame to the cornice, soffit, or next row of architectural elements.
Space for the bottom element
The lower element is installed under the window — like a window sill trim. Its presence depends on the facade design: if there is a protruding window sill or decorative shelf under the window, the lower casing may not be needed. If the window sill is flush with the wall, the lower trim covers the transition well.
Condition and evenness of the facade
Look at the surface around each opening. Are there any uneven spots? Peeling paint? Deformed slopes? Gaps between the frame and the wall? All of this needs to be considered before installation — not after.
What elements may be needed: a complete list
Good installation is a system. The casing itself is only one component of this system. Here is what else may be included in the set:
Carved casings (side posts)
Two elements for each window. Installed on the sides of the opening. Standard length — 2000 mm, thickness — 18 mm. Width is selected according to the window size. Buy house carving can be found in the catalog in several ornamental series and widths.
Upper element
A horizontal trim above the opening. In the catalog, it is called a window head casing or upper element. In some designs, a decorative pediment — a small canopy over the window — is used instead.
Bottom strip
Installed under the window. Not required if there is a protruding window sill.
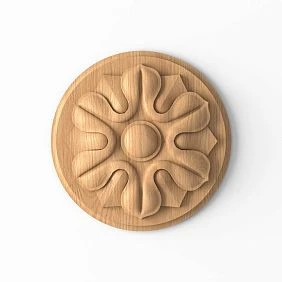
Corner rosettes
Decorative overlays covering corner joints between side and top (bottom) architraves. Essential element for neat installation. Connecting elements for house carving and rosettes — what is often forgotten during the first order.
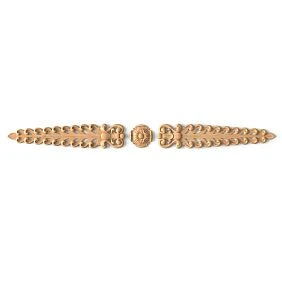
Connecting elements
Needed when extending side architraves for tall openings. Cover the horizontal joint of two vertical elements.
Brackets
Installed above windows, by the porch, under the eaves, in the canopy area. Add volume and vertical rhythm to the facade composition. Not needed on every window — only where an additional accent is required.
Wooden decorative overlays
Wooden decorative inlays — flat carved elements for horizontal surfaces: board under the window, horizontal cornice, pediment tympanum. Used where a flat surface needs to be decorated without installing volumetric decor.
Wooden molding
Wooden baguette for framing — profiled batten creating a clear architectural transition between the wall plane and the architrave. Installed around the perimeter of the opening before mounting the architraves. Adds depth and neatness.
Fasteners and finishing materials
Wood screws (length 40–55 mm), screwdriver, antiseptic for end treatment, finishing facade enamel or varnish, acrylic sealant for sealing joints with the wall.
Facade preparation: what to do before picking up the trim
A professional never starts installation with the installation itself. First — preparation. It takes time, but it ensures a result that will last a long time.
Surface cleaning
The area around the window opening must be clean: without peeling paint, without dirt and dust, without moss and plaque. Clean with a brush or spatula. On wooden houses, areas with decayed wood or fungal darkening are often found — they need to be cleaned and treated with an antiseptic.
Why is this important? Because the trim is mounted tightly to the facade, and if a damp, rotten, or peeling surface remains underneath, in a year or two it will start to come off, turn black, and the base underneath will continue to deteriorate.
Checking the base
Tap the area around the opening. If the wood produces a dull sound, there may be rot inside. Feel with your hand: soft, springy areas are a sign of damage. Such places require repair before installation: replacement of the damaged fragment or at least reinforcement with epoxy compounds.
Installing trim on a rotten base is wasted money and time.
Removing old decor
If there are already old trims on the facade, remove them completely. Do not install new decor over the old one: this increases the thickness of the framing, disrupts the proportion, and creates hidden cavities where moisture will accumulate.
After removing old trims, areas with unpainted or damaged wood are often found — they need to be treated before installing new decor.
Checking the geometry of the opening
Make sure the opening is rectangular. Check the diagonals: they must be equal. If the opening is "off", this must be taken into account when marking the installation lines. A trim on a crooked opening will result in gaps and misalignments that will ruin the entire look.
In old wooden houses, especially log houses with shrinkage, the geometry of the opening may be distorted. In this case, you either need to level the slopes or provide compensation gaps that will be sealed with sealant after installation.
Marking installation lines
Before installation, be sure to mark the installation lines of each element with a pencil or painter's tape. This will take 5 minutes but will save you from having to redo an already nailed trim.
Mark:
-
The line of the bottom edge of the side trims
-
The line of the top edge of the top plank
-
The axis of each element (along the center of the trim)
Thinking through joint locations
Before installation, mentally trace the path of each element: where exactly will the joint of the side trims with the top plank be? Where is the socket? Where is the connecting element if the opening height requires extension?
Joints should be placed where they are least noticeable: above eye level, in the area covered by the socket, or at a point where the ornament creates a natural 'pause' in the pattern.
How to cut wooden trims: everything you need to know
Cutting is one of the key stages of installation. This is where mistakes are most often made, which are then visible on the facade.
Tool for cutting
For cutting wooden trims at a right angle (90°), a miter saw is suitable. It provides a smooth, clean cut without chipping the ornament. A hand saw is less convenient: the cut requires additional sanding.
For cutting at an angle (45°) when joining side posts with the top plank, use a miter saw with a rotating table or a miter box with a saw.
Cutting to length
Length of side trim = opening height (H) + bottom overhang (100–150 mm) + top overhang (50–80 mm). Total ≈ H + 150–230 mm.
Important point: when trimming, always cut from the bottom. The lower end of the casing is usually less noticeable (especially near the ground), and that's where there are no critical ornamental elements. The top edge is more visible, and the ornament there should fit neatly under the rosette.
Width trimming
If the distance from the edge of the opening to the corner of the building or an adjacent window is less than the width of the casing, width trimming is needed. This is done along the axis of the casing: a strip of the required width is cut from the end side (the one adjacent to the wall).
Width trimming affects the ornament: part of the pattern will be cut off. It is important that the remaining visible part of the ornament does not look torn. Plan the trimming so that the cut falls on a neutral area of the pattern — the border of the ornament, not its center.
End trimming
After any trimming, the ends are immediately treated: a deep-penetrating antiseptic, then a finishing coat. The end is the most vulnerable part of a wooden product. Moisture penetrates through it several times faster than through the side surface. An untreated end is a future problem with rot and paint peeling.
How not to cut the ornament in an unfortunate place
This is a subtle point that professionals always consider. A carved casing has a distinct ornament — leaves, curls, geometric patterns. If you cut it in a random place, you can 'split' a characteristic element of the ornament in half, and this will be noticeable.
Before trimming, hold the casing against the opening and see where exactly the cut will be. If the cut falls on an active element of the ornament, shift the cut point a few centimeters up or down so that it falls on a neutral area.
How to design joints: rosettes, connecting elements, and overlays
Joints are where most installations look either neat or sloppy. It all depends on whether they were thought out in advance.
Corner joint: side casing + top rail
This is the main joint in a window framing system. Two ways to design it:
Option one: 45° angle joint. The side casing and top rail are cut at 45° and joined with a miter. A clean, neat joint — but requires precise sawing. The slightest angle inaccuracy creates a gap. For ornamented casings, this option is more difficult: the pattern on two different parts must align at the joint without breaking the design.
Option two: rosette. The side casing and top rail approach the corner with a straight cut (90°), and the joint is covered by a corner rosette. This is simpler to install and more forgiving of inaccuracies. Moreover, a rosette with a good pattern itself serves as a decorative accent — the window corner gains an expressive focal point.
For most amateur installations, the rosette option is preferable. It is more reliable, easier to execute, and more attractive when a good rosette is available.
Extension joint: connecting element
If the opening height exceeds 1800 mm and the side casing needs to be extended, a horizontal connecting element is used. It covers the joint between two vertical casing sections.
Principles for proper use of the connecting element:
-
The joint should be placed in an area where it is least noticeable — typically above eye level, around 1600–1700 mm from the ground.
-
The connecting element must have the same pattern as the main casing. Any mismatch in the pattern will be very noticeable here.
-
The lower and upper sections of the casing must be precisely aligned along the vertical axis before installing the connecting element.
Gaps between the casing and the wall
After installing the casing, a small gap may remain along its side edges where the casing plane does not perfectly fit against the uneven facade. These gaps are filled with acrylic sealant matching the casing color. The sealant is applied after the final painting of the casing, carefully, smoothing it with a spatula or finger.
Gaps must be sealed — they are points of moisture and insect ingress. An untreated gap quickly causes the wood to darken.
When brackets are needed: placement logic
A bracket is not a mandatory element for every window. But where it is needed, it makes the facade composition fundamentally more expressive.
Areas where brackets are appropriate
Entrance group and porch. Brackets under the porch canopy are a classic and very strong solution. They support the canopy cornice, create a vertical rhythm, and make the entrance ceremonial. Here, brackets are chosen with a pattern coordinated with the casings.
Cornice area. Brackets along the cornice — under the roof — create a rhythmic accent for the upper tier of the facade. This solution is characteristic of traditional Russian wooden architecture.
Veranda. Brackets on vertical posts of the veranda or under the ceiling are an expressive decorative element that fits organically into the wooden structure.
Main facade. On the main facade above key windows — for example, above the central window of the living room — a bracket creates an accent that distinguishes this window from the others.
What not to do with brackets
Do not install brackets under every window on the entire facade. This overloads the visual space and deprives the bracket of its accent role. A bracket works precisely because it is not ubiquitous.
Window design schemes: three common options
To make the choice easier, let's consider three practical window framing schemes — from the simplest to the extended one.
Scheme 1: Minimal (three elements)
-
Two side casings
-
One top casing
-
Joints — at a 45° angle or with corner rosettes
Suitable for small houses, bathhouses, and country cottages. A simple, neat option. Creates a clear framing without overloading the facade.
Scheme 2: Standard (five to six elements)
-
Two side casings
-
One top casing
-
Lower window sill strip
-
Four corner rosettes
Full window framing on all four sides. Well suited for houses with large windows and spacious facades. Creates a complete "frame" around the window.
Scheme 3: Extended (with accents)
-
Two side casings
-
Top element or pediment
-
Bottom strip
-
Four corner rosettes
-
Bracket above the top element (for the main window or entrance area)
-
Decorative overlays on the bottom board
A maximally rich framing for the main facade, entrance group, and porch. Here, the architraves become part of a full architectural composition.
Installation order: from the first element to the final sealant
Now, to practice. Here is the sequence to follow.
Stage 1: Preparing the architraves
Before installation, in the workshop or on the workbench:
-
Fit all elements to the opening — without fasteners. Ensure the length is correct and the joints align.
-
Make the cuts. Use a miter saw — cleanly, at the required angle.
-
Treat all ends with an antiseptic. Let it dry.
-
Apply the finish coating — the first layer of enamel or varnish. The front surface, side edges, all ends. Let it dry and, if necessary, sand with fine sandpaper (grit 240).
-
Apply the second finish coat.
Why paint before installation? Because after installation, the back side and ends in hard-to-reach places will be difficult to access. Unpainted areas are sources of rot.
Step 2: Installing the baguette (if used)
Wooden baguette for framing It is mounted first — directly along the perimeter of the opening. It creates a flat base surface on which the platbands will lie.
Attaching the baguette — with self-tapping screws into the facade surface, with a gap under the head. The heads are countersunk and puttied. The baguette is painted the same color as the platbands.
Step 3: Installing the side platbands
Start from the lower end: install the first side platband, align it vertically using a level, attach it at the bottom with two self-tapping screws.
Then — check the vertical again with a level. Fully attach the platband: self-tapping screws with a spacing of 400–500 mm. The screw heads are countersunk, the holes are puttied.
Do the same with the second side platband.
Step 4: Installing the top platband
The top horizontal strip is installed after the side ones. Align it horizontally, make sure the joint with the side elements fits correctly. Attach with self-tapping screws.
Stage 5: Installation of the bottom strip
The bottom strip is the last horizontal element. It typically rests on the windowsill or is mounted flush against it.
Stage 6: Installation of sockets and connecting elements
After installing the main strips — sockets in corner joints, connecting elements — over the joints when extending side trims. They are fastened with self-tapping screws or liquid nails.
Stage 7: Installation of brackets (if needed)
Brackets are installed last — after all trims are in place. They are attached to the wall or to the facade structure in the area of the cornice, canopy, or porch.
Stage 8: Touch-up painting and sealing
After installation, all joints, gaps, and fastening points are treated:
-
The heads of self-tapping screws are puttied and, after drying, painted to match the trim color.
-
Gaps along the edges of the trim are filled with acrylic sealant matching the color.
-
Areas where the coating is damaged during installation are touched up.
Installation features on a wooden house
A wooden house is a living structure. It moves: expands when moistened, contracts when drying. This must be considered during installation.
On a timber house with a casing
On houses made of timber and rounded logs, windows are installed in a casing (window frame). There is a compensation gap above the casing for shrinkage. The trim should visually cover this gap but not fix it rigidly.
Installation rule: attach side trims only to the casing, not to the wall. Do not use screws that simultaneously fix the trim to both the casing and the wall timber — this will create stress during shrinkage.
The upper gap above the top trim — if present — is covered by a separate strip attached only to the wall (not to the trim). This strip "floats" together with the wall.
On an old house with rigid windows
On old houses where shrinkage has already completed or is not relevant (stone base, metal-plastic windows), trims can be rigidly attached — both to the slope and to the facade surface. The main thing is to first ensure the base is strong.
Mounting on an uneven facade
If the facade has uneven surfaces (horizontal lines of timber, logs with a rounded surface), the casing will not fit flush against the wall. This is normal: it fits against the slope, and a gap remains between the back plane of the casing and the rounded wall. This gap does not need to be filled — it is part of the structure.
It is important to seal the side gaps around the perimeter of the casing: horizontal gaps collect water during rain. The side edges of the casing should be sealed with sealant or pressed tighter using a thin spacer strip.
Preparation and treatment of casings: what 'proper finishing' means
A wooden casing without a finish coating is like an undressed person outside in the cold. It is not ready for use.
The correct sequence of treatment is described in the section Advice on finishing and installation. Here are the key stages.
1. Antiseptic primer. Apply with a brush in 1–2 coats to all surfaces, including the back side and ends. Protects against fungus, blue stain, and mold. Especially important for outdoor use in high humidity conditions.
2. Treatment of ends. Ends are a priority. Use a specialized end sealant or an additional coat of antiseptic. Oil or wax for ends can be used.
3. Final painting. Use facade enamel with antiseptic components and UV protection. Apply in 2 coats with intermediate sanding with 240 grit. First coat — before installation, second — after (with touch-up of fastening points and puttying of caps).
4. Periodic renewal. Every 5–7 years, the finish coating is renewed. Before renewal — light sanding, treatment of damaged areas with antiseptic, application of a new coat of enamel.
More details about product materials can be found in the section Materials and quality of STAVROS products: it describes what platbands are made of and why glued pine shield is better than solid board for outdoor use.
Typical mistakes when installing carved platbands
This is not theory — these are real situations that occur in practice. Read to avoid repeating them.
Purchase without precise measurements
"Approximately one meter twenty by one meter forty" — and then it turns out that one window is 1180×1380, another is 1240×1420, and the third is even 1050×1300. Different sizes require different trimming, and if the length is bought "close to the edge", there won't be enough spare. Measure each window separately.
Trimming not accounted for
Forgot to add 200 mm for the side platband extension at the bottom and top. As a result, the platband turns out too short. Length allowance is a mandatory part of the calculation.
Joints not thought through
The corner joint is cut at 45°, but inaccurately — a gap of 3–4 mm. Or the joint of the connecting element is located at eye level and is clearly visible. Joints are planned before purchase and before installation — not during the process.
Fastening without preliminary fitting
We attached the trim and saw that it was slightly crooked. Or that the rosette doesn't align with the corner. Rule: first fit all elements without fasteners, ensure the joints are precise — then fasten.
Unpainted ends
The ends are not painted before installation, and after installation they are inaccessible. After two years — darkening of the wood at the end area, onset of rot. Ends are always painted, before installation.
Connecting parts not selected
We bought trims, but no rosettes. No connecting elements. The installation turned out unfinished, with bare corner joints. Order a complete set.
Only the front part is painted
The back side of the trim — the one that adjoins the facade — is also painted. Moisture penetrates from all sides. An unpainted back side is a source of rot.
Mixing different series without a common scheme
Trims from one series, brackets from another, rosettes from a third — as a result, the facade looks chaotic. All elements should be from the same ornamental series.
Additional tips for complex cases
Installation on brick or plastered facade
On stone or plastered facades, wooden trim is mounted using dowel screws with pre-drilling. The back side of the trim is treated with a hydrophobic impregnation to prevent moisture from migrating from the wall into the wood. It is also recommended to place a thin polyethylene foam pad under the trim — it creates a ventilation gap and prevents direct contact between the wood and the stone surface.
Installation of trim on metal-plastic windows
The metal-plastic window is installed in the opening with mounting foam, which is covered by a slope or a flashing. The trim is mounted over the slope — to the facade surface. Important: do not attach the trim to the plastic frame with screws — this will compromise the window's seal. Fastening should only be to the wall or slope.
Installation with complex porch geometry
The porch often features non-standard geometry: sloping roof lines, beveled corners, protruding beams. In such areas, cutting the trim requires additional marking and fitting. Do not rush — one incorrect cut will ruin the element. Cut using a template made from cardboard.
Frequently asked questions
Can carved trim be installed independently?
Yes. Installing wooden trim does not require special qualifications. You will need: a miter saw or miter box, a screwdriver, a level, a tape measure. The key is accurate measurements and the correct sequence: first preparation, then cutting, then painting, then installation.
What else needs to be purchased besides the trim itself?
Corner rosettes (2–4 per window), connecting elements (for tall openings), antiseptic, finishing facade enamel, acrylic sealant matching the trim color, 40–55 mm screws, a screwdriver, a miter saw or miter box.
Do I need to paint the trim before installation?
Yes. The main coating is applied before installation. This allows you to treat all surfaces, including the back side and ends. After installation, touch up the fastening points, putty the screw heads, and apply a second finishing coat to exposed surfaces.
How to close the joints of carved trims?
Corner joints are closed with rosettes or miter cuts at 45°. Horizontal joints when extending are closed with connecting elements. Gaps between the trim and the wall are filled with acrylic sealant.
Can trims be installed on an old facade?
Yes. Before installation, you need to check the base: make sure there is no rot, remove old decor, clean and paint the area around the opening. Installation on a prepared base is no different from installation on a new facade.
How to know if brackets are needed?
Brackets are needed where there is a canopy, cornice, porch roof — that is, where a vertical bracket will support a horizontal element. Brackets are also appropriate as a decorative accent on the main facade or above the front door.
How many screws are needed for one trim?
For a side trim 2000 mm long — 4–5 screws with a spacing of 400–500 mm. The first one is at the lower end (100–150 mm from the edge), the last one is at the upper end (100 mm from the edge). For the upper and lower horizontal elements — 3–4 screws.
How to calculate the number of sockets for a house?
For each window — 4 corner sockets (all four corners). For a three-element frame (sides + top) — 2 sockets (top corners). For a door frame — the same principles, but taking into account the width and height of the doorway.
STAVROS: everything for installing carved decor — in one catalog
The company STAVROS produces wooden carved decor for finishing the facades of residential houses, bathhouses, gazebos, verandas, and country buildings. The catalog includes not only Buy Carved Door Stops everything needed for them, but also a complete mounting kit system: sockets, connecting elements, brackets, Wooden decorative inlays, Wooden Picture Frame.
All elements are made from glued pine board without knots or resin pockets, CNC production with manual finishing. Standard length 2000 mm, thickness 18 mm. The surface is ready for any topcoat without additional preparation.
A special advantage of STAVROS for installation: all elements are designed in unified ornamental series. Trims, sockets, connecting elements, brackets — one series, one ornamental theme, one size. This means that when assembling the kit, nothing needs to be "adjusted" — everything fits together without modification.
The entire range, Advice on finishing and installation, Ideas for using carved decor and ordering with Contact us to confirm shipping to your destination. — on the STAVROS website.