
























































Article Contents:
- Before You Start: Identify the Exact Type of Molding
- Know the Material, Not Just the Category Name
- Tools for Installing Polyurethane Molding
- Read the Product Page Before Cutting Anything
- Step 1: Inspect the Substrate
- How Flat Does the Wall Need to Be?
- Do You Always Need Primer?
- Cleaning the Surface
- Fresh Drywall, Plaster, and Joint Compound
- Step 2: Establish the Layout
- True Level vs. Visually Level
- Wall Frames: Check the Diagonals
- Step 3: Calculate Material Quantity
- How Much Waste Should You Add?
- Step 4: Plan Joints Before Cutting
- Step 5: How to Cut Polyurethane Molding
- Use a Sharp Blade
- Mark the Waste Side
- Dry-Fit Every Critical Joint
- How to Cut Urethane Molding for a Picture Frame
- Inside Corners vs. Outside Corners
- Why 45 Degrees Is Not Always Correct
- Measure the Actual Corner
- How to Fit a Slightly Open Miter
- Outside Corners Need Extra Accuracy
- Decorative Corner Elements
- Step 6: Crown Molding Requires Different Geometry
- Wall Drop and Ceiling Projection
- Inside Crown Corners
- Outside Crown Corners
- Step 7: Choose the Adhesive by Product and Substrate
- Do Not Use “More Adhesive” to Fix a Bad Wall
- Adhesive Bead Pattern
- Working Time
- Step 8: Place the Molding
- Temporary Fixation
- When Mechanical Fastening May Be Appropriate
- Do Not Confuse Decorative Fastening With Structural Support
- Step 9: Remove Excess Adhesive at the Correct Time
- Step 10: Joint Treatment
- Filler vs. Paintable Caulk
- How Much Gap Is Too Much?
- Sand Carefully
- Step 11: Primer
- Step 12: Painting Polyurethane Molding
- Paint Before or After Installation?
- Brush, Mini Roller, or Spray?
- Remove Masking Tape Correctly
- Installing Polyurethane Wall Molding
- Installing Polyurethane Trim Molding
- Installing Molding on Furniture
- Installing Molding on Cabinet Doors
- Installing Molding Around Mirrors
- Installing Decorative Appliques With Molding
- Installing Molding Near Baseboards
- Do Not Force Vertical Molding Into the Baseboard Profile
- Installing Molding Near Crown Molding
- How to Install Polyurethane Crown Molding: SEO Question vs. Product Reality
- Common Mistake #1: Assuming Every Corner Is 90 Degrees
- Common Mistake #2: Measuring Only Once
- Common Mistake #3: Cutting All Pieces Before Dry-Fitting
- Common Mistake #4: Installing Over Weak Paint
- Common Mistake #5: Using One Adhesive for Every Surface
- Common Mistake #6: Too Much Adhesive
- Common Mistake #7: Forcing a Profile Against a Wavy Wall
- Common Mistake #8: Using Filler as Structural Repair
- Common Mistake #9: Sanding Away the Profile
- Common Mistake #10: Painting Before Joints Are Stable
- Common Mistake #11: Assuming All PU Molding Is Flexible
- Common Mistake #12: Using Decorative Corbels as Structural Supports
- Common Mistake #13: Ignoring Pattern Repeat
- Common Mistake #14: Forgetting Light Direction
- Common Mistake #15: Choosing a Profile Too Large for the Application
- Troubleshooting: The Miter Opens at the Front
- Troubleshooting: The Miter Opens at the Back
- Troubleshooting: One Piece Sits Higher Than the Other
- Troubleshooting: The Molding Slides Down the Wall
- Troubleshooting: The Joint Reappears After Paint
- Troubleshooting: Paint Looks Different Over the Joint
- Troubleshooting: Adhesive Will Not Bond to a Glossy Surface
- A Contractor-Grade Installation Sequence
- For Designers: What to Put on the Drawing
- For Homeowners: The Best DIY Strategy
- For Large Projects: Use Templates
- How to Estimate Labor Complexity
- Polyurethane Molding for Professional Interiors
- How Wall Molding Connects to the Rest of the STAVROS System
- Installing Molding Around Doors and Windows
- Keep head heights coordinated
- Do not bridge expansion or movement joints
- How do you install polyurethane molding?
- How do you cut polyurethane molding?
- How do you cut urethane molding at a 90-degree corner?
- How do you install polyurethane crown molding?
- Can polyurethane molding be glued to painted drywall?
- Do I need to sand painted walls before installation?
- Do I need primer before gluing molding?
- Can I install molding over wallpaper?
- Should I use screws with polyurethane molding?
- Can I use liquid nails?
- How do I keep long molding from sliding while glue dries?
- How do I make molding joints invisible?
- What if my corner is not 90 degrees?
- Can polyurethane molding be used on furniture?
- Can polyurethane molding be used in bathrooms?
- Can I bend polyurethane molding around an arch?
- Should molding be painted before installation?
- What paint should I use?
- How much extra molding should I order?
- Can decorative polyurethane corbels support a shelf?
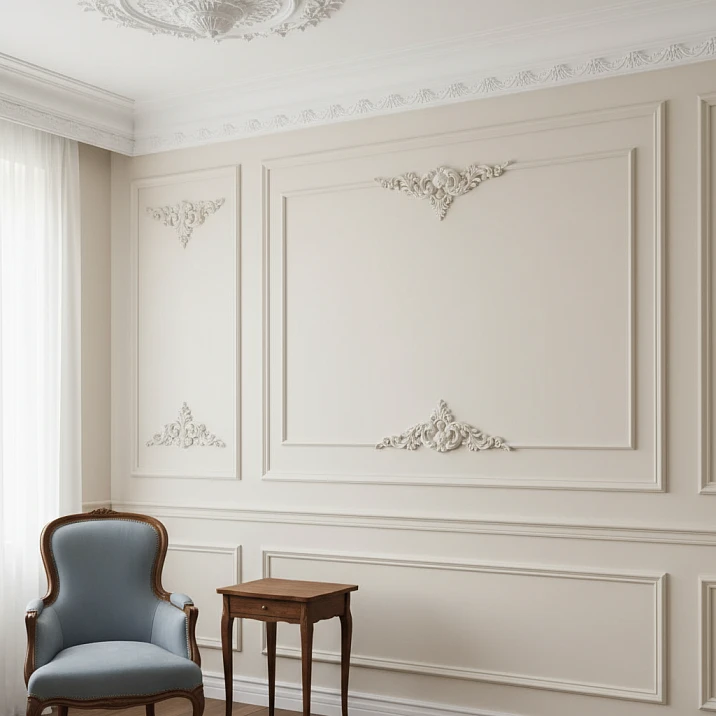
Installing architectural molding looks simple until the first corner refuses to close, the first long piece drifts off the layout line, or the first painted joint becomes more visible instead of less. The material may be lightweight, but the finish is unforgiving. A molding run is essentially a long straight reference line placed against walls, ceilings, cabinets, doors, or furniture. Any error in measurement, angle, alignment, substrate preparation, or joint finishing becomes easier to see once that line is repeated across the room.
That is why a good installation is less about “gluing trim to a wall” and more about controlling geometry from start to finish. The sequence matters: inspect the substrate, establish the layout, measure the actual angles, plan the cuts, dry-fit the pieces, select a compatible adhesive, support the molding while the adhesive cures, finish joints carefully, and only then move to primer and paint.
This guide is written for the U.S. market and focuses on rigid interior polyurethane molding and decorative polyurethane trim. It also explains how the method changes when the profile is used for wall frames, furniture, or a ceiling transition. Where crown molding is discussed, remember that the current STAVROS Crown Mouldings category contains HI WOOD polystyrene crown profiles, while the MLDPU and KPU families are polyurethane. Material-specific installation instructions should always follow the actual product.
The most useful search questions behind this topic are practical ones: how to install polyurethane molding, how to cut polyurethane molding, how to cut urethane molding, and how to install polyurethane crown molding. The answers are related, but they are not identical. A flat wall-frame profile and a true crown molding sit in different planes and therefore require different measuring and cutting logic.
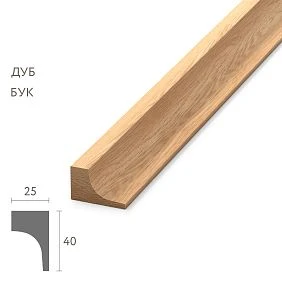
Before You Start: Identify the Exact Type of Molding
The first installation decision happens before you pick up a saw. Determine what the product is designed to do.
A linear wall profile is usually installed flat against one surface. A decorative trim or frieze may also sit flat but has a repeating pattern that has to be aligned at joints. A corner ornament may replace a mitered corner. A crown molding bridges the wall and ceiling. An applique is a separate decorative object, not a linear profile. A furniture molding has to respect hinges, handles, door clearances, and smaller-scale proportions.
These differences control everything that follows: the way you mark the layout, how you hold the profile during cutting, whether a miter is two-dimensional or compound, and where joints should be placed.




Know the Material, Not Just the Category Name
Architectural trim catalogs often contain several materials under visually similar categories. Polyurethane, high-density polystyrene, MDF, and wood can all appear as molding.
For STAVROS, verified MLDPU linear profiles belong to the polyurethane family. KPU decorative trim is also polyurethane. The current ceiling crown molding category, however, is HI WOOD high-density polystyrene.
This matters because adhesive, cutting behavior, sanding, fastening, and finish preparation can differ. Never assume that instructions written for one material automatically apply to another because the products look similar in photographs.
Наша фабрика также производит:
Смотреть весь Каталог продукции
Tools for Installing Polyurethane Molding
You do not need an industrial shop, but precise tools make the job much easier.
- tape measure;
- sharp pencil or fine marking tool;
- laser level or long spirit level;
- combination square;
- angle finder or digital protractor for non-square corners;
- miter box and fine-tooth hand saw for small projects, or a miter saw for repeated cuts;
- sharp utility knife for trimming small imperfections;
- fine abrasive paper or sanding block where permitted by the product;
- caulk or adhesive gun;
- compatible mounting adhesive;
- low-tack painter’s tape;
- clean rags and the cleanup method specified by the adhesive manufacturer;
- compatible filler or paintable sealant for joints;
- primer when required;
- paint and suitable brush, roller, or spray equipment.
For ornate molding, also keep a small artist’s brush for finish touch-ups and a soft brush for removing dust from relief before painting.
Получить консультацию
Read the Product Page Before Cutting Anything
The product page should answer several basic questions:
- What is the exact material?
- What are the width and projection?
- What is the stock length?
- Is the product primed?
- Is it rigid or flexible?
- Does it have a repeating ornament?
- Are there matching corner or center elements?
- Does the manufacturer give an adhesive recommendation?
Current STAVROS MLDPU profiles vary substantially in scale. A narrow profile such as MLDPU-001 behaves differently during cutting and layout than a much wider MLDPU-003. Both are linear polyurethane molding, but their visual weight and contact area are not the same.
Step 1: Inspect the Substrate
Molding is only as secure as the surface underneath it. A powerful adhesive cannot compensate for paint that is already peeling from the wall.
Inspect the installation zone for:
- loose paint;
- powdery or chalking surfaces;
- failing plaster or joint compound;
- wallpaper that is lifting;
- grease or cooking residue;
- construction dust;
- moisture problems;
- major surface waves;
- freshly repaired areas that have not fully cured.
If the existing finish is unstable, remove it until you reach a sound substrate. If the wall has a moisture problem, solve that before installing decorative trim.
How Flat Does the Wall Need to Be?
Architectural molding can tolerate ordinary construction variation, but it cannot make a badly warped wall disappear.
Hold a long straightedge or level against the intended installation line. Look for high points and low points. A long rigid profile will bridge some shallow depressions, but forcing it tightly against an uneven wall can distort the line or create stress in the adhesive bond.
For picture-frame molding, visual straightness is especially important because each side of the rectangle becomes a reference for the others.
Correct major irregularities before installation. It is easier to repair the wall than to hide a large gap behind filler later.
Do You Always Need Primer?
No. The correct preparation depends on the substrate and adhesive.
A porous repair area may benefit from primer. A glossy painted surface may require cleaning and light abrasion. A sound matte-painted wall may need little more than dust removal. Laminate, metal, or furniture coatings require different preparation from drywall.
The original Russian article treated priming as universally mandatory. For U.S. installation practice, the better rule is: follow the adhesive manufacturer’s substrate-preparation requirements and test uncertain surfaces before beginning the full installation.
Cleaning the Surface
Dust reduces contact between adhesive and substrate. Grease can prevent bonding entirely.
Vacuum or wipe the installation area clean. In kitchens or other greasy locations, use a cleaner compatible with the existing finish and the adhesive system. Allow the surface to dry completely.
Avoid introducing strong solvents unless the wall coating, polyurethane profile, and adhesive instructions explicitly allow them.
Fresh Drywall, Plaster, and Joint Compound
New construction materials should be fully cured before decorative trim is installed. The appropriate drying time depends on the material, layer thickness, temperature, ventilation, and humidity.
Do not rely on a fixed “seven days” or “fourteen days” rule for every substrate. A surface that looks dry may still contain enough moisture to affect paint or adhesive.
Step 2: Establish the Layout
Installation quality is largely determined before the first piece is cut.
For horizontal trim, establish a reference line with a laser level or long spirit level. For vertical trim, establish plumb lines. For rectangular wall frames, mark the complete frame—not just one side.
Painter’s tape is extremely useful because it lets you review the design at full scale before committing to holes, adhesive, or cuts.
True Level vs. Visually Level
Older rooms often contain ceilings, floors, and door openings that are not perfectly level. This creates a judgment call.
If a wall-frame system is independent of the ceiling, a true level line is usually the best reference. If trim is intentionally following an existing architectural edge, an absolutely level line may reveal the crooked edge more strongly.
Professionals often choose the line that looks correct from normal viewing positions rather than blindly following one imperfect surface.
Wall Frames: Check the Diagonals
For a rectangular frame, equal diagonals are one of the easiest ways to confirm square geometry.
After marking the four sides, measure from the upper-left corner to the lower-right corner, then from the upper-right to the lower-left. If the two measurements are equal, the rectangle is square.
This is more reliable than assuming the floor or nearby door is perfectly straight.
Step 3: Calculate Material Quantity
For wall frames, calculate each frame by perimeter:
2 × width + 2 × height = linear length per frame.
Add all frames, horizontal bands, vertical accents, and other runs.
For room-perimeter trim, measure each wall rather than multiplying room dimensions when the room contains alcoves, columns, bump-outs, or large openings.
Then compare the total with the actual stock length of the selected molding.
How Much Waste Should You Add?
There is no universal waste percentage.
A simple room with long straight runs may need relatively little extra material. A design with many small frames, outside corners, pattern matching, or short pieces generates more waste.
Instead of relying only on a percentage, make a cut list and map those cuts against stock lengths. This is more accurate and often reveals where offcuts can be reused.
Step 4: Plan Joints Before Cutting
A molding joint is not just a technical necessity. It is a visible event on the wall.
Place joints:
- away from the main viewing direction where possible;
- away from strong grazing light when possible;
- where ornamental patterns can align;
- where offcuts can be used efficiently;
- away from areas likely to receive impact.
For furniture, place joints in low-visibility areas rather than the center of a primary cabinet door.
Step 5: How to Cut Polyurethane Molding
The question how to cut polyurethane molding is simple only when the profile is simple.
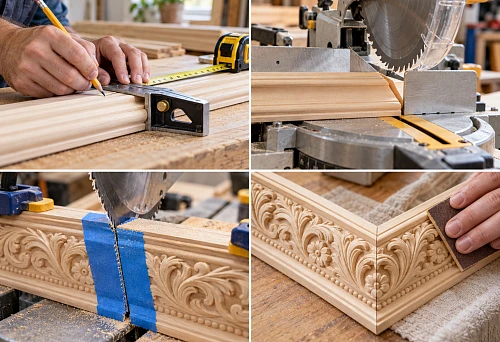
Small rigid profiles can often be cut with a fine-tooth hand saw. Some current STAVROS MLDPU product guidance also allows a sharp utility knife for small sections. Repeated miters and larger profiles are generally easier to control with a well-adjusted miter saw.
Whatever tool you use, support the profile so it cannot twist during the cut. A tilted profile produces a cut that appears correct from one side but opens at the joint.
Use a Sharp Blade
A dull blade tears and crushes the edge. That damage becomes visible when two miters meet.
Use a fine, sharp cutting edge appropriate for the profile. Cut steadily rather than forcing the tool through the material.
Mark the Waste Side
One of the easiest ways to ruin a cut is to cut on the wrong side of the line.
Mark the finished length, then mark which side is waste. Position the blade so the kerf removes material from the waste side, not from the finished dimension.
Dry-Fit Every Critical Joint
Never assume a cut is correct because the saw was set to 45 degrees.
Place the pieces together without adhesive. Check the visible face, back contact, and alignment of any ornament.
If the joint opens, determine whether the problem is the angle, the length, the wall, or the profile orientation.
How to Cut Urethane Molding for a Picture Frame
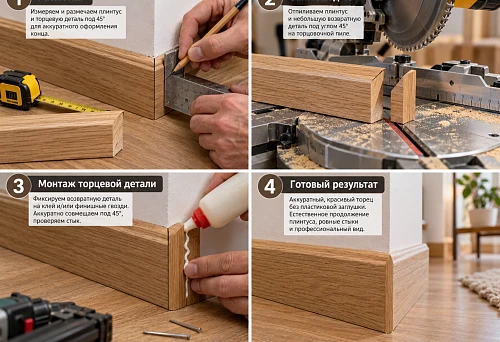
For a flat rectangular wall frame on a flat wall, each corner is usually a simple 45-degree miter because two pieces meet at 90 degrees in the same plane.
Cut matched opposite pieces. For example, cut the top and bottom to the same outside dimension, then cut the two vertical sides to the same dimension.
Before installation, assemble the frame on the floor or hold the four pieces against the marked wall layout to verify the geometry.
Inside Corners vs. Outside Corners
Room corners require more care than flat wall frames.
An inside corner occurs where two walls meet inward. An outside corner occurs at a projecting wall, column, chimney breast, or other outward turn.
The two cuts are mirror images. Label pieces before cutting so you do not accidentally create two left-hand miters.
Why 45 Degrees Is Not Always Correct
The common rule “cut both pieces at 45 degrees” only works when the actual corner is 90 degrees.
If the corner measures 88 degrees, the theoretical starting point is 44 degrees per piece. If it measures 94 degrees, the starting point is 47 degrees per piece.
Real walls can also twist vertically, so even mathematically correct cuts may need slight fitting.
Measure the Actual Corner
Use an angle finder or digital protractor. Measure near the height where the molding will be installed, not only at the floor.
For long crown or wall trim, check the angle at several heights if the wall is visibly irregular.
How to Fit a Slightly Open Miter
If a dry-fitted miter has a hairline opening, identify where it opens.
If the front opens and the back touches, the miter angle needs a slight adjustment. If one edge is longer, the issue may be piece length or a non-square frame.
Make small corrections. Removing too much material creates a new problem that filler cannot disguise elegantly.
Outside Corners Need Extra Accuracy
Outside corners are exposed to both light and impact. Their edges are visually prominent.
Take time to produce a clean joint. A large blob of filler on an outside corner will usually remain visible after paint because it changes the profile geometry.
Decorative Corner Elements
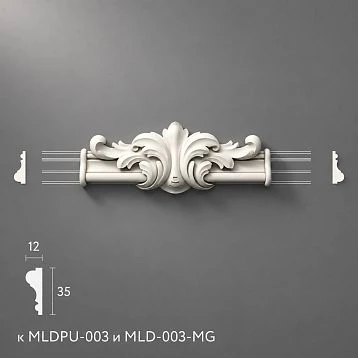
Some installations can use separate corner components rather than mitering every line.
STAVROS has a polyurethane corner moulding and molding-decor family containing corner and accent elements for certain systems.
These pieces can simplify ornate layouts, but they must match the profile family and ornament. Do not assume any decorative corner will fit any molding.
Step 6: Crown Molding Requires Different Geometry
A true crown molding sits across the wall-ceiling corner rather than flat against one plane. That means the cutting setup depends on the crown’s spring angle and installed orientation.
This is why the search phrase how to install polyurethane crown molding should not be answered by repeating flat wall-molding instructions.
If you are installing a true crown profile, follow the crown manufacturer’s cutting method. Some installers cut crown nested in the saw at the installed angle; others lay it flat and use compound miter and bevel settings.
The current STAVROS crown molding category contains polystyrene HI WOOD profiles, so use the installation guidance for those actual products rather than assuming PU instructions apply.
Wall Drop and Ceiling Projection
Before crown installation, determine the profile’s wall drop and ceiling projection.
Mark the lower wall line and, where useful, the ceiling contact line. This prevents the profile from rolling up or down during installation.
A crown piece can appear level at one end but twist out of position along a long wall if both contact lines are not controlled.
Inside Crown Corners
Inside crown corners can be mitered or, for some materials and profiles, handled with other joinery methods.
Because crown sits at an angle, the safest approach is to make test cuts from scrap before cutting full-length pieces.
Mark every test piece “left,” “right,” “wall,” and “ceiling.” This sounds excessive until you discover how easy it is to reverse a crown orientation at the saw.
Outside Crown Corners
Outside crown corners expose the full profile and require accurate projection.
Dry-fit both sides and inspect from below, because a joint that looks good from a ladder can open visibly at normal eye level.
Step 7: Choose the Adhesive by Product and Substrate
There is no single universal “best glue for polyurethane molding.”
The correct adhesive must be compatible with:
- the exact molding material;
- the substrate;
- the profile size;
- indoor humidity conditions;
- paint and primer already on the wall;
- the manufacturer’s installation guidance.
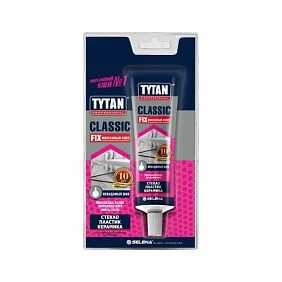
Current STAVROS MLDPU product information mentions options such as liquid nails, acrylic adhesive, and mounting adhesive for decor. That is useful guidance, but the final choice still depends on the actual wall or furniture surface.
Do Not Use “More Adhesive” to Fix a Bad Wall
Excess adhesive is not a substitute for surface preparation.
Very thick adhesive beds can make alignment difficult, squeeze onto the face, cure unevenly, or allow the profile to float before setting.
Fix major wall irregularities first.
Adhesive Bead Pattern
Apply adhesive in the pattern recommended by the manufacturer. Narrow profiles may need one continuous bead; wider profiles may need two beads or broader contact.
The objective is consistent contact, not maximum adhesive volume.
Working Time
Know the adhesive’s open time before you start a long piece.
You need enough time to place the profile, align it to the reference line, and make small corrections before the adhesive skins or grabs.
Do not follow a generic instruction to “wait two minutes” or “hold for thirty seconds” unless that matches the adhesive data sheet.
Step 8: Place the Molding
For long wall pieces, work with a helper when practical.
Bring the molding to the reference line, make initial contact, and press progressively along the length. Check the line again before the adhesive locks the piece in place.
For rectangular frames, install pieces in a consistent sequence so corners remain controllable.
Temporary Fixation
Low-tack painter’s tape can keep a profile from sliding while adhesive cures. Apply enough tension to hold the piece without pulling it out of alignment.
Some installations may benefit from approved temporary pins or fasteners, but do not automatically drill screws through decorative polyurethane simply because the profile is wide.
The need for mechanical assistance depends on the product, substrate, adhesive, and geometry.
When Mechanical Fastening May Be Appropriate
Temporary or permanent mechanical fastening can be useful where:
- the profile is large;
- the substrate is irregular;
- the installation is overhead;
- adhesive alone cannot maintain contact during cure;
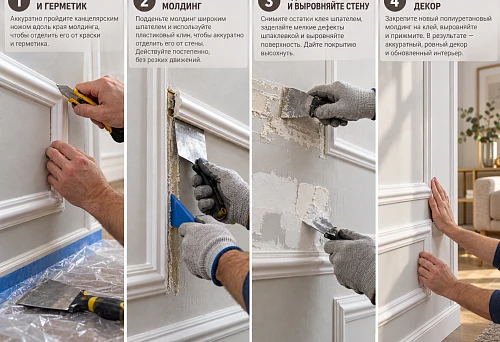
- the manufacturer specifically recommends fastening.
Fastener placement must avoid cracking the profile and must allow clean finishing afterward.
Do Not Confuse Decorative Fastening With Structural Support
Polyurethane decorative trim is not a structural component.
If a corbel, shelf, mantel, or other element carries load, the structural support should exist independently. Decorative polyurethane corbels should not be assigned structural capacity unless the specific product is explicitly rated for it.
Step 9: Remove Excess Adhesive at the Correct Time
Cleanup depends on the adhesive.
Some products are easiest to remove while wet; others should be allowed to cure before trimming. Use the cleanup method specified by the adhesive manufacturer.
Avoid smearing adhesive over adjacent painted surfaces or into detailed relief.
Step 10: Joint Treatment
A professional installation makes individual pieces disappear into a continuous architectural line.
Joint finishing is therefore not cosmetic cleanup. It is part of the installation system.
Evaluate each joint after the adhesive has stabilized. Look for:
- face misalignment;
- open miters;
- steps in the profile;
- gaps at the wall;
- pattern mismatch;
- adhesive residue.
Filler vs. Paintable Caulk
These products perform different jobs.
A sandable filler is useful where the final surface needs to become flush and rigid. Paintable caulk is useful along small perimeter gaps where a little movement is expected.
Do not fill a bad miter with a large mass of caulk and expect it to look like carved geometry.
How Much Gap Is Too Much?
A tiny paint-grade gap can often be finished cleanly. A large visible opening usually means the cut or layout should be corrected.
There is no magic threshold that works for every profile. Fine narrow molding reveals even small errors; deep ornate molding may visually hide more.
Sand Carefully
If the filler can be sanded, use a fine abrasive and protect the molding profile.
Do not flatten beads, crisp steps, or ornament while trying to erase a joint.
Step 11: Primer
Primer requirements depend on the product and repair work.
Some polyurethane molding is factory primed. If you have filled and sanded joints, the repaired areas may absorb paint differently from the factory surface. Spot primer or full primer may be useful depending on the paint system.
Verify the SKU rather than assuming every piece is primed identically.
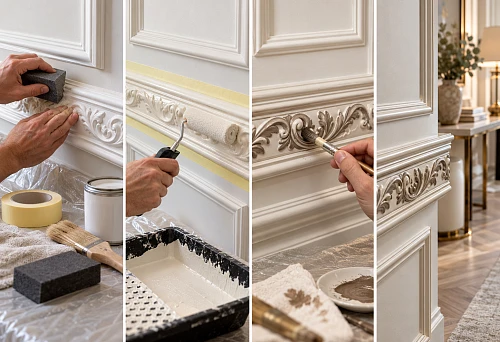
Step 12: Painting Polyurethane Molding
Paint is where the installation becomes visually continuous.
Use a coating compatible with the polyurethane surface, factory primer if present, joint filler, and adjacent substrate.
Thin coats are better than heavy coats because they preserve the profile.
Paint Before or After Installation?
Both methods have advantages.
Prepainting is convenient when the molding color differs from the wall. It reduces difficult cutting-in after installation.
Painting after installation creates the most integrated monochromatic result because joints, filler, molding, and wall can be finished as one composition.
In many projects, a hybrid approach works best: apply a base coat before installation and finish the final coat after joints are complete.
Brush, Mini Roller, or Spray?
Use a brush for deep relief. Use a mini roller for broad simple faces. Use spray when the project is large enough to justify masking and controlled application.
Do not flood ornamental details with paint. Multiple thin coats preserve crispness.
Remove Masking Tape Correctly
Masking tape can pull fresh paint if left too long or if the paint bridges heavily across the tape edge.
Follow the paint manufacturer’s guidance and remove tape carefully, scoring the paint line if necessary.
Installing Polyurethane Wall Molding
Wall molding is one of the simplest applications geometrically because the profile usually sits flat against one surface.
The process is:
- design the frame or line;
- mark the complete layout;
- cut matched pieces;
- dry-fit;
- apply compatible adhesive;
- align to the layout;
- support until stable;
- finish joints;
- prime where required;
- paint.
For available linear products, browse the STAVROS polyurethane wall molding selection and verify that the chosen SKU is polyurethane within the mixed-material category.
Installing Polyurethane Trim Molding
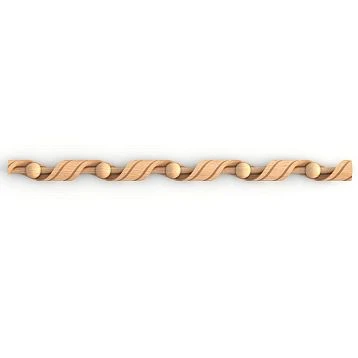
Decorative trim may have deeper relief or a repeating pattern, so the installation has an additional concern: pattern continuity.
Before cutting, determine where the pattern should begin and end. At a visible butt joint, align motifs rather than simply joining two stock lengths at random.
Browse polyurethane trim molding separately from plain MLDPU wall profiles when the design calls for ornamental relief.
Installing Molding on Furniture
Furniture surfaces require more caution than drywall because finishes vary dramatically.
Paint, lacquer, laminate, veneer, MDF, metal, and clear-coated wood all have different bonding requirements.
Before installation:
- test the adhesive on a hidden area;
- confirm the surface finish is stable;
- check door and drawer clearances;
- locate hardware;
- confirm that the added projection will not interfere with adjacent doors.
Installing Molding on Cabinet Doors
Remove the door when practical. Working horizontally makes layout and clamping easier.
Mark the frame relative to the door edges, not to the room. Measure equal side margins. Check diagonal dimensions before adhesive.
When the doors are paired, mirror the layout from one door to the other.
Installing Molding Around Mirrors
Leave a deliberate reveal between the mirror edge and molding unless the profile is specifically intended to overlap the mirror.
Account for fabrication tolerance and any mirror clips or mounting hardware.
Installing Decorative Appliques With Molding
Build the frame geometry first. Add the ornament only after the frame is correctly proportioned.
Use the STAVROS polyurethane decorative elements collection when the composition needs center, corner, vertical, or horizontal ornaments in addition to linear molding.
Installing Molding Near Baseboards
The original article devoted a large section to joining polyurethane molding directly to wood baseboard. In a U.S. wall-frame installation, the cleaner solution is often simpler: stop the vertical wall molding above the baseboard with a consistent reveal, or design the frame so it never physically intersects the baseboard.
If the two materials do meet, detail the junction deliberately. Wood can move with humidity, while rigid decorative molding behaves differently. A small paintable flexible joint may be more forgiving than a hard, overfilled connection.
Do Not Force Vertical Molding Into the Baseboard Profile
Unless the design calls for a true integrated panel system, avoid complex on-site carving just to make wall molding die into a baseboard.
A clean termination with intentional spacing often looks more architectural and is easier to maintain.
Installing Molding Near Crown Molding
Wall frames should not collide with crown.
Establish the bottom edge of the crown first, then design the upper wall-frame margin below it. This keeps the two systems visually separate.
For ceiling perimeter products, browse the STAVROS decorative crown molding category.
How to Install Polyurethane Crown Molding: SEO Question vs. Product Reality
The phrase how to install polyurethane crown molding has real informational search demand in the U.S., but the current STAVROS crown category should not be described as polyurethane because its products are HI WOOD polystyrene.
That means the correct content architecture is:
- answer the general installation question accurately;
- link polyurethane molding terms to verified PU categories;
- link general crown-molding terms to the current crown category;
- state the actual material when discussing STAVROS products.
This avoids a misleading exact-match anchor while still covering the search intent.
Common Mistake #1: Assuming Every Corner Is 90 Degrees
The saw can be perfectly set to 45 degrees and still produce an open joint if the wall corner is 92 degrees.
Measure the actual angle.
Common Mistake #2: Measuring Only Once
Long trim runs magnify small errors. Check critical dimensions twice before cutting.
Common Mistake #3: Cutting All Pieces Before Dry-Fitting
If the first frame is wrong, every repeated piece can repeat the same error.
Complete one sample frame before production cutting.
Common Mistake #4: Installing Over Weak Paint
The molding may remain bonded to the paint while the paint separates from the wall.
Test substrate stability first.
Common Mistake #5: Using One Adhesive for Every Surface
Drywall, glossy paint, laminate, metal, and wood finish are different substrates. Adhesive compatibility matters.
Common Mistake #6: Too Much Adhesive
Excess material creates squeeze-out and makes alignment harder. Use enough for reliable contact, not enough to float the profile.
Common Mistake #7: Forcing a Profile Against a Wavy Wall
A rigid molding line will expose irregularities. Fix the wall instead of bending the profile unnaturally.
Common Mistake #8: Using Filler as Structural Repair
Filler finishes a small gap. It does not correct a fundamentally wrong cut.
Common Mistake #9: Sanding Away the Profile
A joint may disappear while the decorative bead beside it becomes flat. Sand locally and carefully.
Common Mistake #10: Painting Before Joints Are Stable
Allow the installation system to reach the required cure before finishing. Follow adhesive and filler instructions.
Common Mistake #11: Assuming All PU Molding Is Flexible
Rigid polyurethane molding should not be forced around an arch. Use a product specifically designed for flexible installation when the radius requires it.
Common Mistake #12: Using Decorative Corbels as Structural Supports
Decorative polyurethane is not a substitute for hidden brackets, blocking, or structural framing.
Common Mistake #13: Ignoring Pattern Repeat
Ornamental trim can have a perfectly closed joint and still look wrong if the motif breaks at the seam.
Common Mistake #14: Forgetting Light Direction
Grazing light reveals every joint and wall wave. Inspect the installation under actual room lighting before final paint.
Common Mistake #15: Choosing a Profile Too Large for the Application
Large profiles need more visual space and create stronger shadow. Scale the molding to the wall, furniture, or room.
Troubleshooting: The Miter Opens at the Front
The angle is usually slightly incorrect, or the pieces are being forced out of plane.
Recheck the corner and profile orientation. Adjust the cut rather than filling a large triangular gap.
Troubleshooting: The Miter Opens at the Back
The face may close while the rear surfaces interfere. This can happen because the cut angle is wrong or because the wall is irregular.
Determine whether the problem is geometry or substrate before trimming more material.
Troubleshooting: One Piece Sits Higher Than the Other
The profile may have twisted during installation, or the substrate may be uneven.
Release the piece while the adhesive is still workable if possible and realign the profile face.
Troubleshooting: The Molding Slides Down the Wall
The adhesive may have low initial grab, the profile may be heavy, or the surface may be too smooth.
Use the approved temporary support method and verify substrate preparation.
Troubleshooting: The Joint Reappears After Paint
This may be a finishing problem or slight movement at the joint.
Inspect whether the filler cracked, the pieces moved, or the paint simply highlighted an uneven surface. Repair the cause before repainting.
Troubleshooting: Paint Looks Different Over the Joint
Filler and factory-primed molding can absorb paint differently.
Spot prime or prime the full profile as needed to create a uniform substrate before the finish coat.
Troubleshooting: Adhesive Will Not Bond to a Glossy Surface
The coating may be too slick or incompatible.
Follow the adhesive instructions for abrasion, cleaning, primer, or another bonding method. Do not keep adding adhesive to an unsuitable surface.
A Contractor-Grade Installation Sequence
- Confirm product material and SKU.
- Review manufacturer installation guidance.
- Inspect the substrate.
- Repair weak or uneven areas.
- Establish finished reference lines.
- Measure the actual geometry.
- Create a cut list.
- Make one test cut or sample frame.
- Dry-fit.
- Apply compatible adhesive.
- Install and support.
- Check alignment before cure.
- Finish joints.
- Prime repaired areas as required.
- Apply finish coats.
- Inspect under normal and grazing light.
For Designers: What to Put on the Drawing
A proper molding elevation should identify:
- product SKU;
- material;
- profile width;
- projection;
- frame dimensions;
- clear spacing between frames;
- distance to baseboard and crown;
- joint and corner strategy;
- paint color and sheen;
- relationship to sconces, outlets, switches, furniture, and artwork.
This prevents the installer from making design decisions on site.
For Homeowners: The Best DIY Strategy
Start small.
Choose one wall, one simple profile, and one or three large rectangular frames. Avoid starting with an ornate multi-room crown-and-panel system.
Complete one frame fully—cutting, adhesive, joint finishing, and paint—before committing to the rest of the room.
For Large Projects: Use Templates
Repeated frames become faster and more consistent when you use story sticks or spacing templates.
A simple spacer block can keep every frame the same distance from baseboard, casing, or adjacent frame.
How to Estimate Labor Complexity
Linear footage alone does not predict labor accurately.
A 100-foot straight horizontal band may be faster than 50 feet divided into ten small rectangles because each rectangle introduces eight miter cuts and multiple alignment points.
Labor rises with:
- number of corners;
- pattern matching;
- ornament;
- wall irregularity;
- height;
- furniture or built-in integration;
- multi-color painting.
Polyurethane Molding for Professional Interiors
In hotels, restaurants, retail spaces, offices, and showrooms, installation should be treated as a finish system rather than a DIY decoration.
Specify substrate preparation, approved adhesive, finish coating, replacement stock, and maintenance method. Check any applicable commercial code requirements separately.
How Wall Molding Connects to the Rest of the STAVROS System
The installation guide becomes more useful when molding is treated as part of a coordinated architectural system.
Linear polyurethane moldings create frames and lines. Polyurethane trim molding adds ornamental bands. Polyurethane decorative elements add center and corner accents. Polyurethane ceiling medallions organize the ceiling center. General crown molding resolves the ceiling perimeter.
Each piece has a different architectural job. Installation is cleaner when those roles are decided before ordering.
Installing Molding Around Doors and Windows
Openings create strong vertical and horizontal lines, so molding near them has to be coordinated rather than simply fitted into whatever space remains.
Before cutting, identify whether the profile is acting as actual casing or as decorative applied molding outside the casing. These are different jobs. Actual casing covers the transition between jamb and wall. Applied molding sits on the finished wall as a decorative frame.
If the molding is decorative, leave a deliberate reveal from the casing edge. A narrow inconsistent gap looks accidental. A consistent reveal looks designed.
Keep head heights coordinated
When several doors or windows are visible in one room, compare their head heights before laying out horizontal molding bands. A band that lands just above one casing and cuts through another can make the wall feel disorganized.
Use one of three strategies:
- align the molding with the dominant opening height;
- keep the molding clearly above all openings;
- break the molding intentionally at each opening and treat the wall sections independently.
Do not bridge expansion or movement joints
If the wall contains a designed movement joint, do not lock it together with rigid decorative molding unless the detail has been engineered for that condition. Building movement should be accommodated rather than hidden.
Installing Molding on Long Walls
Long walls introduce a different problem from small frames: cumulative alignment error.
A ten-foot piece that is slightly off the reference line may still look acceptable at one end and obviously wrong at the other. Use a laser line for the full run and check the profile repeatedly while the adhesive remains workable.
For multi-piece runs, plan the splice location before installation. Avoid placing every joint directly under the strongest downlight or at eye level from the main entrance.
Scarf Joints vs. Butt Joints
Depending on the profile and manufacturer recommendations, long runs may use a simple butt joint or a scarf-like angled joint.
An angled joint increases the contact surface and can make a slight movement less visually abrupt, but it also requires more accurate cutting. A simple butt joint is easier to reproduce but may show more clearly under grazing light.
Do not invent a joint method that conflicts with the manufacturer’s product system. Test the joint on offcuts first.
Repeated Ornament: Plan the Motif Before the Joint
With ornamental trim, a physically tight joint can still look wrong when the repeated motif is interrupted.
Before cutting, identify the repeat length. Decide whether the seam should occur between motifs, through a symmetrical center, or at another visually quiet point.
This is especially important for floral bands, bead-and-reel patterns, Greek-key-like geometry, and other repeated relief.
Installation Around Wall Sconces and Electrical Devices
Electrical devices should be part of the elevation before molding is installed.
Do not allow a molding line to pass through a switch plate, thermostat, receptacle cover, or sconce canopy unless the design intentionally incorporates it.
Where electrical relocation is required, coordinate with a qualified electrician and applicable code requirements before finishing the molding layout.
Installing Molding on Stair Walls
Stair walls introduce slope, changing viewing height, and frequent hand contact.
Decide whether the molding will follow the stair rake or remain level. A frame system usually needs a clear geometric rule rather than a mix of horizontal and sloped lines chosen ad hoc.
Mock up the design with tape from both the lower and upper landings. A stair composition can look correct from one direction and compressed from the other.
Installing Molding in High-Ceiling Rooms
High rooms create practical and visual challenges.
From a practical standpoint, staging and safe access matter. Long pieces are harder to control from a ladder, and working overhead with adhesive reduces accuracy. Use appropriate scaffolding or work platforms for professional installations.
From a visual standpoint, small joints and profile details are seen from farther away, but alignment errors remain obvious. Use stronger reference lines and verify the layout from the floor before final cure.
Installing Molding in Small Rooms
Small rooms do not automatically require tiny profiles, but they punish clutter.
Use fewer frames, consistent margins, and enough negative space. The installation itself can be technically perfect and still look crowded if the design uses too many lines.
Installing Molding in Bathrooms and Powder Rooms
In humid spaces, surface preparation and finish continuity become more important.
Verify that the substrate is dry and stable. Use an adhesive suitable for the environment. Finish perimeter gaps so cleaning moisture cannot easily collect behind the profile.
Do not install decorative trim where direct water exposure, steam, or cleaning practices exceed the product and finish system’s limitations.
Installing Molding in Kitchens
Kitchens combine grease, cleaning, cabinetry, heat, and frequent impact.
Use molding on dining walls, pantry walls, cabinet panels, or decorative zones where it will not interfere with maintenance. Near cooktops, backsplashes, and sink areas, prioritize cleanability over elaborate relief.
Quality-Control Check Before Final Paint
Before the finish coat, inspect the installation under three lighting conditions:
- normal daylight;
- room lighting;
- grazing light from the side.
Grazing light is the most revealing. It exposes high filler, shallow dents, open joints, twisted pieces, and wall waves that may disappear under flat light.
Run your hand lightly across repaired joints. A seam that feels raised will usually remain visible after paint.
Quality-Control Check After Painting
After the final coat has cured, review:
- line consistency;
- corner closure;
- joint visibility;
- paint coverage in relief;
- clean edges at the wall;
- hardware clearances;
- relationship to furniture and lighting.
Photograph the wall straight-on. A photograph often reveals spacing inconsistencies that the eye has stopped noticing after hours of installation work.
How to Plan a Multi-Room Installation
For several rooms, standardize the process rather than improvising each wall.
- Select the profile family.
- Define standard spacing rules.
- Build one approved sample.
- Create room-by-room elevations.
- Prepare cut lists.
- Label material by room.
- Complete the highest-priority room first.
- Use that room as the quality benchmark for the rest of the project.
This is especially useful for hotels, restaurants, multi-room residences, and repeated apartment interiors.
What to Document for Future Repairs
Keep the product SKU, paint color, sheen, adhesive name, and a few labeled offcuts if possible.
Years later, replacing one damaged section is much easier when the original profile and finish are known.
Maintenance After Installation
Architectural molding generally needs little maintenance beyond cleaning appropriate to the paint finish.
Dust ornate relief with a soft brush or vacuum attachment. Wipe simple profiles with a soft cloth. Avoid abrasive cleaners that can flatten sheen or scratch the coating.
Inspect joints periodically in areas with significant seasonal movement. A small paint or caulk repair is easier than allowing a minor crack to collect dirt and become visually prominent.
When to Call a Professional Installer
DIY installation is realistic for simple wall frames and small trim projects, but professional help becomes more valuable when the project includes:
- large crown molding;
- compound or irregular angles;
- very high ceilings;
- extensive ornamental pattern matching;
- curved architecture;
- commercial code requirements;
- valuable existing finishes;
- large multi-room scope.
The cost of professional labor can be less than the cost of replacing incorrectly cut material across a large project.
Final Installation Checklist
- Correct product and material confirmed.
- Substrate sound, clean, and dry.
- Layout reviewed at full scale.
- Actual angles measured.
- Cut list prepared.
- First corner or sample frame dry-fitted.
- Adhesive compatibility confirmed.
- Temporary support prepared.
- Joints planned away from dominant sight lines where possible.
- Pattern repeat considered.
- Primer requirements confirmed.
- Paint system confirmed.
- Lighting and electrical conflicts checked.
- Final quality review scheduled before and after paint.
Frequently Asked Questions
How do you install polyurethane molding?
Prepare a sound substrate, establish the layout, measure and cut accurately, dry-fit, apply a compatible adhesive, support the profile while the adhesive cures, finish joints, prime where required, and paint.
How do you cut polyurethane molding?
Use a sharp fine-tooth saw or another cutting method approved for the specific profile. Support the molding during the cut and dry-fit miters before installation.
How do you cut urethane molding at a 90-degree corner?
If the actual corner is 90 degrees, two 45-degree miters are the normal starting point. Measure the real angle first because walls are often not perfectly square.
How do you install polyurethane crown molding?
A crown profile bridges wall and ceiling, so the installation requires control of wall drop, ceiling projection, spring angle, and corner geometry. Follow the specific crown manufacturer’s instructions rather than flat wall-molding instructions.
Can polyurethane molding be glued to painted drywall?
Yes, when the paint is stable and the adhesive is compatible. Clean the surface and follow the adhesive preparation instructions.
Do I need to sand painted walls before installation?
Not always. Glossy or difficult coatings may require abrasion; sound matte paint may not. Follow the adhesive manufacturer’s guidance.
Do I need primer before gluing molding?
Not universally. Primer requirements depend on the substrate and adhesive system.
Can I install molding over wallpaper?
It is risky if the adhesive bond depends on wallpaper that may later release. A stable direct substrate is more predictable.
Should I use screws with polyurethane molding?
Not automatically. Some installations need only adhesive; large or difficult profiles may benefit from approved temporary or mechanical assistance. Follow product guidance.
Can I use liquid nails?
Some current STAVROS PU product guidance lists liquid nails as one installation option, but verify compatibility with the exact product and substrate.
How do I keep long molding from sliding while glue dries?
Use low-tack painter’s tape or another approved temporary support method until the adhesive reaches sufficient strength.
How do I make molding joints invisible?
Start with accurate cuts and aligned faces. Then use compatible filler or caulk only for small paint-grade gaps, finish smoothly, prime as needed, and paint.
What if my corner is not 90 degrees?
Measure the actual included angle and adjust the two cuts accordingly rather than assuming 45 degrees.
Can polyurethane molding be used on furniture?
Yes, if the surface finish and adhesive are compatible and the added profile does not interfere with hardware or movement.
Can polyurethane molding be used in bathrooms?
It can be suitable for humid rooms when the exact product, adhesive, substrate, caulk, and paint system are appropriate.
Can I bend polyurethane molding around an arch?
Not unless the product is specifically designed as flexible molding. Standard rigid PU profiles should not be forced around a radius.
Should molding be painted before installation?
It can be, especially for contrasting colors, but joints and repaired areas normally require final touch-up after installation.
What paint should I use?
Use a coating compatible with the specific molding surface and primer. Follow the product and paint manufacturer’s recommendations.
How much extra molding should I order?
Allow for the actual cut plan, number of corners, stock length, pattern matching, and mistakes. A cut-list calculation is more accurate than one universal waste percentage.
Can decorative polyurethane corbels support a shelf?
Do not assume they can. Use independent structural support unless the specific product has documented load capacity.
Final Principle: Precision Before Adhesive
Polyurethane molding is forgiving to handle but unforgiving visually. The material can be lightweight and easy to cut, yet one inconsistent frame margin, one twisted long piece, or one poorly fitted outside corner can define the entire wall.
The best installation sequence therefore puts precision before speed. Confirm the product. Read the material specification. Inspect the substrate. Draw the layout. Measure the actual angles. Make test cuts. Dry-fit. Only then apply adhesive.
For flat wall trim, the essential geometry is simple: straight reference lines, square frames, and clean miters. For crown molding, the geometry becomes three-dimensional because the profile bridges wall and ceiling. Treat those as different installation problems even when both products are casually called “molding.”
Use polyurethane molding where you need verified PU linear profiles. Use urethane trim for decorative polyurethane bands and relief. Use ceiling crown molding when the architectural problem is the wall-to-ceiling transition, remembering that the current STAVROS crown assortment is high-density polystyrene.
When the product, geometry, adhesive, and finish all belong to the same installation logic, the molding stops looking applied. The joints disappear, the frames feel intentional, the shadows remain consistent, and the trim becomes part of the room’s architecture rather than an accessory added after the fact.