Article Contents:
- Door on the wall: why it gets more complicated
- Anatomy of the door area: what to consider
- Door opening and frame
- Baseboard
- Skirting
- Switches and outlets
- Door leaf height
- Key principle: molding follows the trim
- Distance from the trim: numbers and logic
- Minimum distance
- Comfortable indent
- Optimal indent for a pier
- Indent table
- Piers between doors: five working schemes
- Scheme 1: One vertical molding in the center
- Scheme 2: Two symmetrical verticals
- Scheme 3: Rectangular frame
- Scheme 4: Lower half of the pier
- Scheme 5: Horizontal molding belt
- Moldings above doors: area above the casing
- Option 1: Horizontal molding above the trim
- Option 2: Small frame in the area above the door
- Option 3: Decorative element above the door
- Moldings and baseboard: bottom boundary system
- How it should not be
- Correct Solutions
- Baseboard height and proportionality
- How to create a unified system: moldings, trim, baseboard
- Color Unity
- Profile compatibility
- Scale Correspondence
- Styles and moldings around doors: what works
- Modern interior and minimalism
- Neoclassicism
- Classic
- Decorative stucco in the door area: when it is needed
- When to add decor
- Where to use decor
- When decor is not needed
- Step-by-step plan for decorating a wall with doors
- Step 1: Measurements and plan
- Step 2: Determine the scheme
- Step 3: Choose a profile
- Step 4: Calculate the footage
- Step 5: Buy the kit
- Step 6: Marking
- Step 7: Installation
- Step 8: Joints and Painting
- Practical Examples: Specific Walls with Doors
- Example 1: Corridor 1.2 × 7 m, four doors, piers 45–60 cm
- Example 2: Hallway 6 sq m, two doors, pier 90 cm
- Example 3: Living Room, Wall with Three Doors, Ceiling 3 m
- Common Mistakes: What Not to Do
- Mistake 1: Molding flush against the casing
- Mistake 2: Different indentation widths
- Mistake 3: Frame above casing level without logic
- Mistake 4: Too wide profile
- Error 5: Different profiles on the same wall
- Error 6: Molding without considering the switch
- Purchase kit for a wall with doors
- Frequently Asked Questions
- About the Company STAVROS
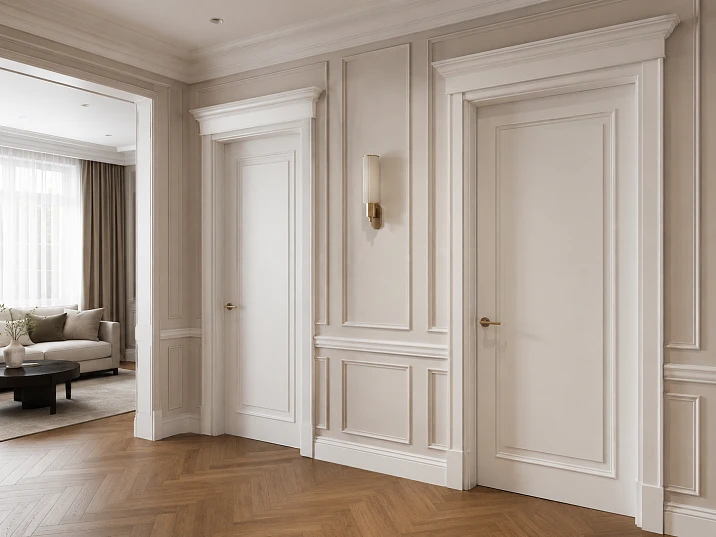
Moldings around doors look neat when they don't clash with the trim: the right indentation, a calm profile, connection to the baseboard, and uniform painting help to design the wall sections and door areas as part of a cohesive interior. This is not the simplest task—but it is what separates a professional result from a random set of decorative elements.






Door on the wall: why it gets more complicated
There is an important difference between "designing an empty wall with moldings" and "designing a wall with doors." In the first case, the task is simple: mark the frames, maintain symmetry, buy moldings, install them. In the second, the picture becomes much more complex.
A door on the wall is a whole system of elements: the doorway, trim around the perimeter, baseboard that goes around the frame, a switch on the wall section, often a door stop or door limiter. Each of these elements has its own geometry, its own size, its own place. And they all already exist before you start thinking about moldings.
The molding added to this system must harmonize with it, not compete. That's the whole point: Polyurethane moldings for walls around doors is not just decor, it's a thoughtful integration into the existing wall architecture.
Let's break it all down step by step: from indents to the purchase kit.




Anatomy of the door zone: what to consider
Before talking about moldings, you need to understand what the door zone consists of from a decorator's perspective.
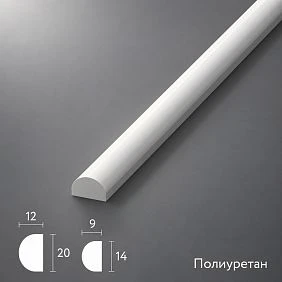
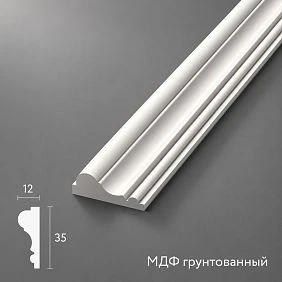
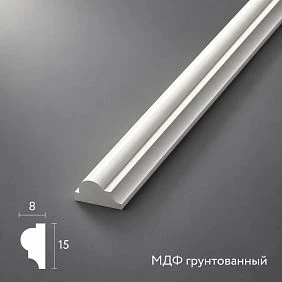
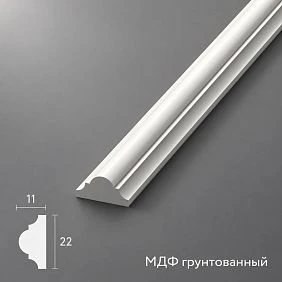
Our factory also produces:



Door opening and frame
The opening is a hole in the wall. The frame is the frame that surrounds it. The typical width of a door frame is 75–100 mm (7.5–10 cm). This is already 'occupied' space. The molding is not placed flush against the frame, but with an indentation.
Get Consultation
Casing
The casing is a decorative strip that covers the gap between the frame and the wall. Casings come in different widths — from 50 to 120 mm and wider. The indentation to the molding should be measured from the outer edge of the casing.
The casing is your main reference point. If the molding 'sticks' to the casing — they merge, and both lose their shape. If the indentation is correct — 'air' remains between them, making each element independent and distinct.
Baseboard
The baseboard runs along the lower edge of the wall. At the door frame, it either goes under it or is cut at the base of the frame. The lower edge of the molding frame or vertical profile should be aligned with the height of the baseboard.
Switches and sockets
Switches are often located on the wall sections between doors. The molding cannot cross a switch — this is both technically and visually incorrect. The position of the switch must be considered in advance.
Door leaf height
The standard door height is 2 meters. The top edge of the casing is approximately at this height plus the width of the top casing. This horizontal line is an important reference point for planning the molding system on the wall.
Key principle: molding is subordinate to the casing
This is the central principle for working with moldings on walls with doors, which must not be violated.
The casing is the main element of the door area. It existed before the molding and will exist after. The molding enters this area as a guest — it must respect the 'host'.
What this means in practice:
-
The molding never overlaps or touches the casing;
-
The molding is placed at a clear distance from the outer edge of the casing;
-
The width of the molding profile should be proportionate to the width of the casing — not wider, and preferably narrower.
If the casing is 80 mm, a molding of 60 mm is proportionate. If the casing is 60 mm and the molding is 80 mm — the molding 'outweighs' the casing and creates an imbalance.
Distance from the casing: numbers and logic
One of the most common questions: how many centimeters to leave between the casing and the molding?
The answer depends on several factors, but there are working ranges.
Minimum indent
10 centimeters from the outer edge of the casing is the absolute minimum. With a smaller distance, the casing and molding visually "merge" into one hard-to-read strip.
Comfortable indent
15–20 centimeters is a comfortable and universal range. There is enough "air" between the casing and molding, each element reads independently.
Optimal indent for a pier
For a pier of a specific width, the optimal indent is calculated as follows: pier width minus two casings, divided by three (three equal parts: left, center, right). The center part is the molding location.
Example: pier 60 cm, two casings of 7 cm each = 60 − 14 = 46 cm. 46 ÷ 3 = ~15 cm. Indent on each side is 15 cm, molding width 16 cm in the center.
Indent table
| Width of the pier | Recommended indent from casing | What to place |
|---|---|---|
| up to 35 cm | Molding not installed | Neutral wall only |
| 35–50 cm | One thin molding in the center | Vertical only |
| 50–80 cm | 12–15 cm | Vertical or narrow frame |
| 80–120 cm | 15–20 cm | Frame |
| 120+ cm | 20–25 cm | Full frame |
Piers between doors: five working schemes
The wall section between two doorways is a special zone. It is bounded on two sides by architraves, at the bottom by a baseboard, and at the top by the ceiling or an upper architrave. At the same time, it should not look 'squeezed' but architecturally meaningful.
Scheme 1: One vertical molding in the center
The simplest and most universal solution for any wall section 40–80 cm wide. One vertical polyurethane molding strictly in the center of the wall section, from baseboard to ceiling. Thin profile (12–18 mm). In the color of the wall.
Result: the wall section gains a vertical axis that makes it organized. The eye is fixed in the center, and the wall section no longer looks like a 'random leftover' between doors.
Scheme 2: Two symmetrical verticals
For wall sections 80–120 cm wide — two vertical moldings with equal distances from the architraves and between each other. Symmetry is mandatory. Profile 15–22 mm.
Two profiles create a visual 'frame' within the architrave frame, enhancing the architectural character of the wall section.
Scheme 3: Rectangular frame
On a wall section from 80 centimeters wide, you can place a rectangular frame. The height of the frame is from the baseboard to the level of the top line of the door casing (i.e., to the height of the door). This is an important principle: the frame "aligns" with the height of the door, not going higher.
Medium-sized molding (22–30 mm). In the color of the wall or a shade lighter.
Scheme 4: Lower half of the wall section
If the wall section is high (ceiling 2.7+ meters) and narrow, a full-height frame may look inappropriate. Solution: a frame only in the lower half — from the baseboard to a horizontal molding belt at a height of 90–110 centimeters. The upper zone is neutral.
Scheme 5: Horizontal molding belt
A horizontal molding belt at the height of the top edge of the casing runs along the entire wall — including through the wall sections. This is a scheme where the molding does not "surround" the doors but "aligns" with them horizontally. The top casing and the horizontal molding are at the same height — creating a single horizontal line.
This is one of the most architecturally sound schemes for corridors and hallways with multiple doors.
Moldings above doors: the area above the casing
The area above the door opening — between the top casing and the ceiling — is another place that needs to be handled thoughtfully.
Option 1: Horizontal molding above the casings
One horizontal molding running across the wall above all door casings at the same height. It visually connects all doors into a single horizontal line and gives a wall with multiple doors structure and rhythm.
The height of this molding matches the top edge of the casings or is 10–15 centimeters higher.
Option 2: Small frame in the area above the door
Above each door, in the "pocket" between the casing and the ceiling, you can place a small horizontal frame. This is a classic architectural design technique — over-door panels, found in classical and neoclassical interiors.
Condition: the height of the "pocket" above the door must be at least 25–30 centimeters — otherwise the frame will look cramped.
Option 3: Decorative element above the door
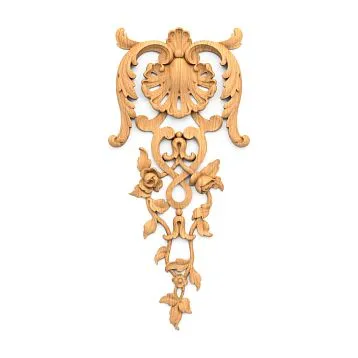
Polyurethane wall decor — a medallion, cartouche, or shaped overlay — in the center of the wall section above the door. A single decorative element without a frame. This is a concise and elegant option for those who want to add an accent without overloading the area.
Moldings and baseboard: the lower boundary system
The molding system on the wall starts from the bottom — from the baseboard. And the connection between the molding and the baseboard is not a technical detail, but an architectural solution.
How it should not be
A molding frame whose lower edge "hangs" in the middle of the baseboard or flush against it without a logical gap is a mistake. It creates the feeling that the molding is "pushing" against the baseboard, as if there wasn't enough space for it.
Correct solutions
Frame at baseboard level: the lower horizontal molding of the frame starts exactly at the height of the baseboard (or 2–3 centimeters above it). The frame appears to "stand" on the baseboard — a visually justified lower point.
Indentation from the baseboard: the lower edge of the frame is 10–15 centimeters above the baseboard. Between the baseboard and the lower molding, there is a free strip of wall. This is "breathing room" between the two elements, allowing each to be read independently.
Molding from baseboard to ceiling: the vertical profile starts strictly at the baseboard (or behind it, hidden). The lower point is the base of the baseboard. This is the most strict and architectural option.
Baseboard height and proportionality
If the baseboard is tall (150 mm and above), the frame molding should be proportionate — a profile with a width of 25 mm or more. A thin molding (10–12 mm) gets lost next to a large baseboard.
If the baseboard is modest (60–80 mm), any moderate molding will work.
How to create a unified system: moldings, casings, baseboard
The best result is achieved when moldings, casings, and baseboard form a unified system — they don't compete but complement each other.
There are several approaches to creating this system.
Color Unity
The simplest and most effective way: paint the moldings, trims, and baseboards in one color. All elements become part of a single "white system" (or cream, or another neutral) against a colored wall. The details are different, but the color unites them into a system.
Profile matching
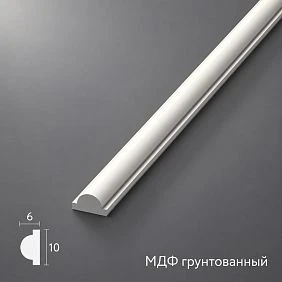
A more complex approach: choose a molding whose profile echoes the profile of the trim. If the trim has a fillet — a molding with a fillet. If the trim is flat with a chamfer — a molding with a similar chamfer. This creates a "dialogue" between the elements.
Scale correspondence
A molding approximately 60–80% of the width of the trim is a visually proportionate solution. A molding wider than the trim creates an imbalance.
Styles and moldings around doors: what works
Modern interior and minimalism
Flat trims without relief, modest baseboard 60–80 mm. Molding — thin (12–18 mm), geometrically clean profile. One vertical profile on the wall section, in the color of the wall. No decorative overlays.
The idea: the molding adds structure while remaining nearly invisible.
Neoclassicism
Trims with moderate relief 70–90 mm. Molding — medium profile (25–35 mm) with a fillet or torus. Frames on wall sections. Horizontal band at the height of the upper trim. Decor for Molding at the corners of the frames.
The idea: the molding is proportionate to the trim and baseboard, creating a unified architectural system.
Classic
Wide trims 90–110 mm with relief. High baseboard 100–150 mm. Molding — medium or wide (30–45 mm) with classic relief. Frames on all wall sections. Over-door panels. Decorative stucco as an accent.
Meaning: the molding system is as extensive and rich as architraves and baseboards.
Decorative stucco in the door area: when it is needed
Not every interior requires decorative overlays and stucco. But there are situations where they elevate the door area from "good" to "flawless."
When to add decor
-
The door is tall (2.1–2.4 meters) and there is significant space above the architrave;
-
The interior is classic or neoclassical;
-
There is a mirror, sconce, or console near the door — the decorative element "picks up" the atmosphere;
-
The wall space is wide (from 100 cm) and the frame "looks empty" without an accent.
Where to use decor
In the corners of frames: Decor for Molding The corner shape masks joints at 45° and adds a jewelry-like quality to the frame.
Above the door in the center: small Polyurethane wall decor In the form of a medallion or cartouche in the center of the space above the door.
On the wall section in the center of the frame: a decorative element inside the frame — on the wall, not on the molding.
When decor is not needed
-
Modern and minimalist interior;
-
Narrow wall sections;
-
Low ceilings (up to 2.5 meters);
-
Many doors — decor on each will create overload.
Step-by-step plan for decorating a wall with doors
Here is a working algorithm that will help avoid mistakes and achieve a neat result.
Step 1: Measurements and plan
Measure all elements:
-
width of each wall section;
-
width of the trim;
-
height of the door leaf;
-
height from the top trim to the ceiling;
-
height of the baseboard;
-
location of switches and outlets.
Draw a scaled plan of the wall — at least schematically.
Step 2: Determine the scheme
Based on measurements, choose a scheme for each pier (single vertical molding, frame, horizontal band).
Remember: different piers on the same wall must be designed with the same scheme. One pier with a frame, another with a single vertical — this creates visual clutter.
Step 3: Select the profile
The molding profile is uniform for the entire wall. From the catalog of polyurethane moldings one item is chosen, proportionate to the casing.
Step 4: Calculate the footage
Total perimeter of all frames + length of all vertical moldings + length of the horizontal band (if any) × 1.20 (20% reserve — for walls with doors where many cuts are needed).
Step 5: Buy the kit
-
Moldings of the required article;
-
Assembly adhesive for polyurethane;
-
Painter's tape;
-
White acrylic sealant;
-
Fine sandpaper;
-
Primer;
-
Paint in the selected color;
-
Decorative elements (if needed).
Step 6: Marking
Marking — on the wall with a pencil. Each line of the molding is marked on both sides. Frame corners are intersection points. Check: frame diagonals are equal (rectangularity). Verticals — strictly by level.
Step 7: Installation
The glue is applied to the back edge of the profile, the profile is pressed against the wall according to the markings, and secured with painter's tape. Installation order: first horizontal elements, then vertical.
Complete installation technique, including work with corners and joints — in the article about installing polyurethane moldings.
Step 8: Joints and painting
After the glue has dried: remove the tape, seal all joints with acrylic sealant, let dry, sand, prime, paint.
Practical examples: specific walls with doors
Example 1: Corridor 1.2 × 7 m, four doors, wall sections 45–60 cm
Situation: narrow corridor, four doors, architraves 70 mm, baseboard 80 mm.
Solution:
-
One vertical molding (profile 15 mm) in the center of each wall section;
-
From baseboard to ceiling;
-
Monochrome painting in the wall color.
Result: the corridor acquires a vertical rhythm, the piers become meaningful, and there is no visual overload.
Example 2: Hallway 6 sq. m, two doors, pier 90 cm
Situation: spacious hallway, two doors, a 90 cm pier between them, architraves 80 mm, baseboard 100 mm.
Solution:
-
Rectangular frame on the pier (profile 28 mm): frame height = door opening height (2 meters), bottom offset = 15 cm from the baseboard, side offsets = 15 cm from the architraves;
-
Decor for Molding in the four corners of the frame;
-
Moldings and architraves in the same color (white).
Result: the pier turns into an architectural element, the hallway gains completeness.
Example 3: Living room, wall with three doors, ceiling 3 m
Situation: large wall 6 × 3 m, three doors, architraves 90 mm, baseboard 120 mm. Two piers of 80 cm each.
Solution:
-
Horizontal molding belt (profile 30 mm) at a height of 200 cm — level with the top edge of the architraves — along the entire wall;
-
Frames on every pier: from baseboard to belt;
-
Small horizontal frames above each door — in the 100 cm «pocket» between the casing and the ceiling;
-
Moldings matching the color of the casings and baseboard.
Result: a wall with three doors turns into a cohesive decorative system — organized, symmetrical, architectural.
Common mistakes: what not to do
Mistake 1: Molding flush against the casing
Less than 8 centimeters from the casing — the molding and casing «stick together». Looks like an installation error.
Mistake 2: Uneven margin widths
On one wall, the left margin from the casing is 12 cm, the right is 18 cm. The asymmetry is glaring.
Mistake 3: Frame above the casing level without logic
A molding frame whose top edge is higher than the top casing without reference to the horizontal system — looks random.
Error 4: Profile too wide
On a 60 cm wall section, a 40 mm molding — the profile takes up too much visual space. On a narrow wall section — only a thin profile.
Error 5: Different profiles on the same wall
On one wall section — a profile with a fillet, on another — with a torus. After painting in one color, the difference will remain — and will look like a mistake, not a design.
Error 6: Molding without considering the switch
The vertical molding crosses the switch. Either shift the molding to the side, or place two symmetrical profiles on both sides of the switch.
Purchase kit for a wall with doors
| Position | Purpose |
|---|---|
| Moldings made of polyurethane | main profile |
| Mounting adhesive for polyurethane | Mounting |
| Painter's tape | fixation |
| White acrylic sealant | Joints |
| Fine sandpaper | Sanding |
| Acrylic primer | preparation for painting |
| Paint | Finish coating |
| Decor for Molding | corner decorative elements |
| Polyurethane wall decor | over-door and accent overlays |
| Decorative stucco | molding for classic schemes |
| Molding stock 20% | trimming and errors |
Frequently asked questions
Can moldings be glued next to door trims?
Yes. The main condition is to maintain an indentation from the outer edge of the trim of at least 10 centimeters, optimally 15–20 centimeters. The molding and trim should be visually separated.
Which moldings to choose for the wall between doors?
For walls up to 60 cm — thin profile (12–18 mm), one vertical molding in the center. For walls 60–120 cm — medium profile (20–30 mm), a frame is possible. The profile should be narrower than the trim.
Is it necessary to match the molding profile with the trim profile?
Desirable. If the trim has a fillet, it's better to take a molding with a fillet as well. A unified profile logic creates system integrity.
How to connect moldings and baseboard?
The lower edge of the frame is placed at the level of the baseboard or with an indentation of 10–15 cm from it. Painting the molding and baseboard in one color is a mandatory condition for system unity.
What to do with switches on the partition wall?
The molding does not cross the switch. It shifts to the side or two symmetrical profiles are placed on both sides of the switch with equal offsets.
Is decorative stucco molding above the door necessary?
Not necessarily. It is needed if the height of the 'pocket' above the trim is from 25 centimeters, the style is classic or neoclassical, and there are other decorative elements nearby (sconces, framed mirror).
Is a molding reserve needed?
Mandatory — 20% for walls with doors, where there are many cuts and joints. For simple walls, 15% is enough.
About the company STAVROS
A wall with doors is a complex architectural task, the solution of which requires an understanding of proportions, scales, and the logic of space. Molding here is not just decor, but a tool for creating an interior system. And it is precisely this approach — systematic, precise, professional — that STAVROS addresses.
STAVROS is a Russian company with a full range of decorative polyurethane products. Moldings of all formats and profiles, Decor for Molding, Wall Decor, Decorative stucco — everything to make a wall with doors part of a cohesive, architecturally thought-out interior.
In the STAVROS catalog: Buy polyurethane moldings the desired profile, decorative elements for door areas, and the entire range — in the section Buy moldings.