Article Contents:
- Short answer: four MLDPU-001U can save the frame, but simply gluing them over the old cuts cannot be considered a ready-made solution.
- What is MLDPU-001U and why it should not be confused with a regular overlay.
- Straight MLDPU-001: what to check in the existing frame.
- Why a gap in a 45° cut appears even after a good initial fitting.
- First, classify the defect: not every gap requires four corner elements.
- A stable thin line in one corner.
- A wedge between two cuts.
- One segment has come away from the wall.
- All four corners look rough
- The frame is noticeably skewed
- Minimal
- Medium
- Extended
- Local retouching of corners only
- Painting corners and adjacent straight sections
- Repainting the entire frame
- The cuts are geometrically unsuccessful
- The frame remains level, but the corners look visually weak
- A design update is planned
- Step 1. Confirm MLDPU-001
- Step 2. Check the frame's strength
- Step 3. Measure the space around the corners
- Step 4. Make four templates 86 × 86 mm
- Step 5. Fix the old outer contour
- Step 6. Assess whether straight ends can be obtained
- Step 7. Assess the color
- Step 8. Decide whether the original design is preserved
- Step 9. Only after this place the order
- How to form a straight end instead of the old 45°
- Why all eight new straight joints need to be checked simultaneously
- How to evaluate the frame after repair relative to the vertical rhythm of the slats
- How to determine whether the existing frame will withstand local paint removal and refinishing
- If the frame is painted in the color of the wall
- Diagonals are a quick way to understand if there is a problem with the frame's shape
- Installing all four blocks is better planned as a single operation
- New MLDPU-001 and MLDPU-001U joints must also be prepared for painting
- Mistake 1. Ordering four corners before checking the article number
- Mistake 2. Considering 86 mm as the mandatory trim length
- Mistake 3. Trying to simply glue MLDPU-001U over the miter
- Error 4. Not checking the strength of the old MLDPU-001
- Error 5. Cutting the first corner before fitting the other three
- Error 6. Forgetting about the slat panels
- Error 7. Touching up only four blocks without checking the shade
- Decision table: what to do with a specific frame condition
- Practical checklist before paying for four MLDPU-001U
- What exactly to put in the cart for a successful local rework
- If the frame turned out to be from a different series
- When slat panels are already installed, do not expand the repair unnecessarily
- Is there any point in first buying one MLDPU-001U just for a physical fitting?
- What to do if the wall corner under the frame is locally convex and the MLDPU-001U wobbles during fitting?
- Can the MLDPU-001U be used on a frame whose corner is not 90 degrees?
- What to do if there is already a mirror or panel hanging inside the frame right up against the molding?
- Can four MLDPU-001U units be painted in advance to avoid working with a brush near slat panels?
- Is a spare fifth MLDPU-001U needed?
- If the frame is U-shaped and open at the bottom, are four MLDPU-001U units still needed?
- Can the leftover of a removed MLDPU-001 be reused on another side of the frame?
- What to do if, after installing the corners, you want to add central decor inside the frame?
- Can the old internal lighting of the frame be preserved after installing the MLDPU-001U?
- Does it matter which corner to start the fitting from?
- What should be checked on four items immediately after receiving them?
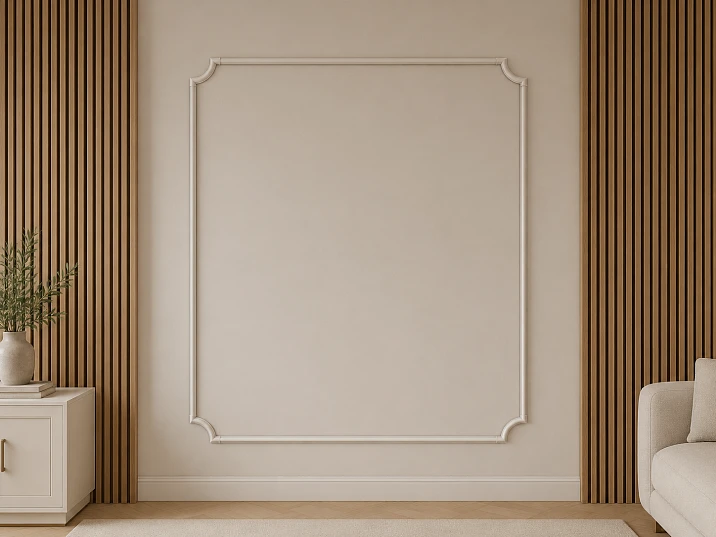
Short answer: four MLDPU-001U can save the frame, but simply gluing them over old cuts cannot be planned as a ready-made solution
If a rectangular frame made of MLDPU-001 is already glued, painted, and looks good on straight sections, four failed corners do not mean the entire composition needs to be removed. Local rework is indeed possible, and the corner molding MLDPU-001U should be considered first for such a repair, because the straight MLDPU-001 and MLDPU-001U are linked within the same STAVROS molding system.
But there is a fundamental limitation: the ready-made corner block should not be perceived as a decorative patch that can simply be placed on top of already joined 45° strips. In a system with a corner element, straight sections are brought to it with straight, perpendicular ends. This means the old miter joint usually has to be locally disassembled or trimmed.
For one rectangular frame, four identical MLDPU-001U will be needed. The current price of one element is 840 ₽, so the set of corners costs:
4 × 840 = 3 360 ₽.
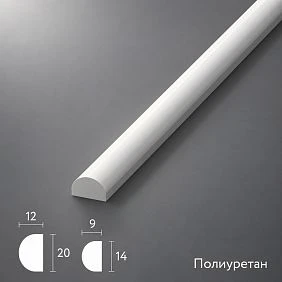
This does not mean that the repair will necessarily be limited to 3,360 ₽. If after opening the corner it turns out that one of the straight segments is damaged, poorly glued, or becomes too short for the new geometry, a new MLDPU-001 strip may be needed. Currently, the straight molding has a profile of 10 × 6 mm, a length of 2600 mm, and a price of 1,740 ₽ per strip.
Therefore, before ordering, four checks must be passed:
-
make sure that the existing frame is indeed assembled from MLDPU-001;
-
make four MLDPU-001U templates measuring 86 × 86 mm and check them on the real wall;
-
understand the cause of the gaps — a cutting error, frame movement, detachment from the wall, or only a finishing defect;
-
determine whether straight ends can be achieved by local trimming without damaging the good sections.
If all four corners are stable, the straight lines are even, and the 86 × 86 mm area does not conflict with the slat panels, full frame removal is usually not needed as a first step. But the exact scope of local rework is determined not from the product photo, but after a dry fit of the corner block and inspection of the existing joints.
Buy the MLDPU-001U polyurethane corner molding




What is MLDPU-001U and why it should not be confused with a regular trim
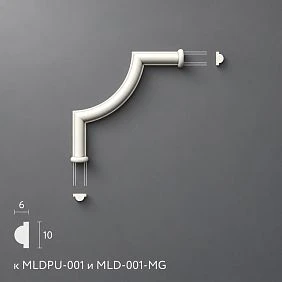
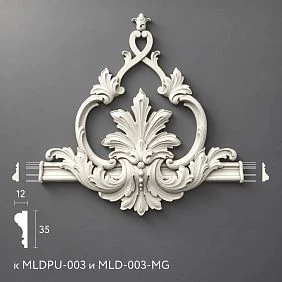
MLDPU-001U is a polyurethane corner decorative element for the molding system. The current STAVROS product page lists dimensions of 86 × 86 × 7 mm, material — polyurethane, price — 840 ₽.
| Parameter | MLDPU-001U |
|---|---|
| Type | corner molding / corner element |
| Material | Polyurethane |
| Size A × B × C | 86 × 86 × 7 mm |
| Price per 1 pc. | 840 ₽ |
| For a rectangular frame | 4 pcs. |
| Cost of four | 3 360 ₽ |
The word "corner" itself is important here. The part is not intended to simply hide a defect with a decorative patch. It forms the very rotation node of the frame. Straight moldings end at its side edges, and the corner element connects two directions into one composition.
This is why repairing a finished frame differs from decorative masking. If you leave the old mitered ends in place, the new element may overlap the profile, add extra thickness, fail to sit flush against the wall with its back surface, or visually create a double relief.
For the right solution, you need to think not "will an 86 × 86 mm square cover the gap," but "can each existing corner be rebuilt so that MLDPU-001 fits MLDPU-001U according to the system's standard logic."
Our factory also produces:
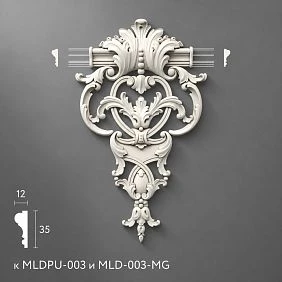
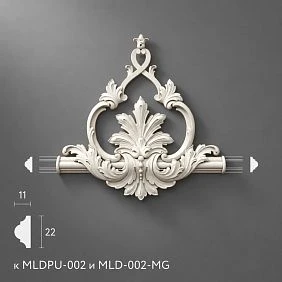
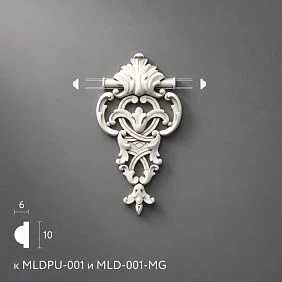
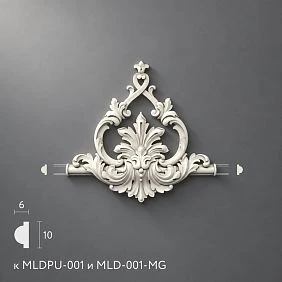
Straight MLDPU-001: what to check in the existing frame
The straight molding MLDPU-001 currently has a cross-section of 10 × 6 mm and a plank length of 2600 mm. The STAVROS card also shows MLDPU-001U among products bought together with MLDPU-001. This is more important than a simple similarity of names: we have an actual connection between two items within the catalog.
Before repair, it is worth ensuring that the frame is indeed assembled from MLDPU-001. A few months after repair, it is easy to confuse similar thin profiles. Especially if the product has already been painted several times.
It is better to check not only the width of the front line. Compare:
-
leftover packaging or order remnants;
-
the article number in the receipt;
-
the actual width of the profile;
-
height of the relief;
-
cross-section shape;
-
appearance of the straight molding with the current card.
If the profile is from a different series, a match in one dimension does not make MLDPU-001U suitable. The corner decor must align with the straight part not only in millimeters but also in the geometry of the transition.
If it is confirmed that this is MLDPU-001, the repair can be designed further. If not, it is safer to first determine the article number rather than order four corners of an "approximately suitable" size.
buy MLDPU-001 molding made of polyurethane
Get Consultation
Why a gap in a 45° miter cut appears even after a good initial fitting
A bad joint does not always mean a rough installer error. A 45° joint is sensitive to several variables at once.
The first reason is an inaccurate cut angle itself. Even a slight deviation on two pieces adds up. On one side the angle may be closed, on the other a wedge-shaped gap opens.
The second is that the actual rectangle of the frame is not equal to an ideal 90°. The layout may be slightly rhomboid, one line may deviate by a few millimeters. Then two profiles cut perfectly at 45° still do not meet.
The third is mobility after installation. If one segment is not glued well enough, it may slightly pull away from the wall or shift, and a previously neat seam becomes noticeable.
The fourth is the finishing layer. After primer and paint, a thin line that was previously barely noticeable may become more contrasting due to shadow, gloss, or cracking of the filler.
The fifth is a local wall unevenness. One profile sits deeper, the other slightly higher, and the joint is perceived as separated even with a small actual gap.
The cause must be determined before purchasing corner elements. MLDPU-001U solves the corner geometry problem well, but it does not fix a peeling straight section and does not align the entire curved frame.
First, classify the defect: not every gap requires four corner elements.
The most profitable purchase is sometimes to buy nothing.
A stable thin line in one corner.
If the frame geometry is correct, the segments sit firmly, and the defect is reduced to a small stable joint line, local restoration of the seam and paint may be simpler, cheaper, and visually calmer than introducing four new decorative blocks.
A wedge between two miter cuts.
If the gap noticeably widens toward the outer or inner side, the problem is already geometric. Here, repair with only filler may leave a rough area. A corner element becomes a more interesting option.
One segment has come away from the wall.
First, the fastening of the MLDPU-001 itself must be restored. If you simply add MLDPU-001U, the new corner will be connected to an unstable base, and the problem will return elsewhere.
All four corners look rough.
This is a strong argument in favor of a systemic rework of the corners. Four identical blocks will turn a forced repair into a deliberate new frame pattern.
The frame is noticeably skewed
MLDPU-001U will not fix the overall rhombus. It can hide the miter joints themselves, but the geometry of the straight lines will remain incorrect. A more serious correction is needed here.
Therefore, the decision is made not on the principle of "there is a gap — a corner piece is needed," but based on the type of defect.
Four corner elements also mean a change in the design of the finished frame
Before repair, the frame made of MLDPU-001 with 45° cuts has a continuous thin line. The corners are almost not highlighted: the task of a good miter is precisely to make the profile turn look unnoticeable.
After installing MLDPU-001U, the character changes. Each corner becomes an independent decorative element measuring 86 × 86 mm. That is, four pieces not only fix a technical defect — they make the frame visually richer.
This is especially important between slat panels. Vertical slats already create an active rhythm. The thin MLDPU-001 frame can work as a calm graphic line between them. If you add four noticeable corner blocks, four new points of attention will appear.
This can improve the composition if the smooth field between the slats looks too empty. But if the frame was supposed to be almost invisible, the repair will unexpectedly change the entire design.
Therefore, before ordering, it is useful to make four square templates of 86 × 86 mm and attach them over the corners only as a visual model. Not as a model of actual installation. Look at the wall from a normal distance and decide whether you like the four accents.
If they are visually redundant, it is more logical to repair the old cuts rather than change the language of the entire frame.
Why 86 × 86 mm cannot be turned into a ready-made trim size
The size MLDPU-001U 86 × 86 mm describes the overall dimensions of the corner element. It cannot automatically be concluded: "you need to cut 86 mm off each straight molding from the old corner."
This is one of the most dangerous mistakes in a repair scenario.
The corner element has its own shape, relief, and connection points with straight strips. The line to which the end of MLDPU-001 must reach is determined by the geometry of the specific product, not just by the outer square of 86 × 86 mm.
The correct order is different:
-
obtain the actual MLDPU-001U or use its precise technical drawing;
-
position the element in the design corner;
-
determine the actual contact lines of the straight profiles;
-
transfer these lines to the existing MLDPU-001;
-
only after this perform the cut.
At the pre-purchase stage, a paper square 86 × 86 mm helps check the location and visual scale, but does not define the exact cut line.
This approach is especially important on an already painted wall: too deep a cut is irreversible and may force you to buy a new straight molding.
Is it possible to avoid completely dismantling the frame?
Yes, partial repair without removing the entire frame is possible if the straight sections of MLDPU-001 hold securely, the frame geometry itself is satisfactory, and the problem is localized in the four corners.
But here it is important to distinguish between two concepts.
Without complete dismantling means that the long straight sections mostly remain in place, and work is carried out only in the corner areas.
Without redoing the corners means trying to leave the old miter joints as they are and simply add new decor. You cannot count on that.
With the standard logic of a ready-made corner element, the straight molding approaches it with a straight end. Therefore, the old 45° cut must be removed from the area of the future joint.
In practice, three levels of intervention are possible.
Minimal
The straight sections are firmly glued, the corner is accessible, and the old miter can be carefully trimmed to a straight end in place. Then only a small section near each corner is dismantled or cut out.
Medium
One or more segments are more convenient to partially detach from the wall, remove, carefully cut on a table, and put back. The frame remains in its design position, but individual straight pieces are temporarily removed.
Extended
Old glue holds unevenly, paint peels off, the molding is deformed, or the frame lines have already deviated from geometry. Then trying to preserve all straight segments may take more time than replacing them. In such a situation, local repair ceases to be rational.
Therefore, promising "four corners — and the frame is ready in an hour" would be incorrect. The actual scope of intervention is determined by the condition of each corner.
How to understand whether you can cut the existing MLDPU-001 directly on the wall
Cutting the profile on an already painted wall is only possible after assessing the risk to the substrate. The molding itself is thin — 10 × 6 mm, but nearby there are paint, putty, the wall, and, in this topic, already installed slat panels.
Plus, working on site means you don't need to completely tear off a long segment and risk breaking it.
Disadvantages:
-
easy to hit the wall with the cutting tool;
-
you can chip the paint along the edge of the molding;
-
it's hard to get a truly perpendicular and clean end without a convenient stop;
-
it is inconvenient to control the depth of cut;
-
with a strong adhesive layer, part of the profile may break out rather than separate cleanly.
Before working, it is useful to first cut the paint film along the future line with a sharp knife. This reduces the risk that the paint will pull in a long strip. Then you need to understand whether there is physical access for the tool at the required angle.
If the corner is located close to slat panels, a saw or miter box may simply not have enough space. Then it is safer to partially remove the straight section and process it separately.
The principle is simple: local trimming on the wall is acceptable only when it is truly more accurate and safer than dismantling. If you have to work awkwardly and blindly, keeping the old molding becomes false economy.
When it is better to remove one straight section rather than cut it in place
Imagine a horizontal section of the frame. Both of its ends are joined at 45° and both corners need to be redone for MLDPU-001U.
Theoretically, you can cut both ends directly on the wall. But if the section is short, removing it entirely is sometimes easier. On a table, it is easier to get two even straight ends, check the length, attach the corner elements, and only then return the piece to the wall.
This option is especially reasonable if:
-
the old adhesive allows careful removal;
-
The frame color differs from the wall, and the tear-off spot will still need to be touched up later;
-
Both ends of one segment need correction;
-
The profile is already partially peeling off;
-
Access to the tool on the wall is inconvenient;
-
There are slats nearby that must not be touched.
But removing a straight piece carries its own risk: polyurethane molding can withstand bending better than many brittle materials, but a long glued strip cannot simply be yanked off. You can damage both the profile and the wall paint layer.
If the attachment is very strong and the straight segment fits perfectly, it often makes more sense to keep it and decide how to handle only the corner areas.
What to do with the already applied paint around the old corner
In a finished interior, the main difficulty is often not the polyurethane itself, but the paint layer that has visually and sometimes physically bonded the molding to the wall.
Before local rework, you need to decide which type of paint was used:
-
the molding and wall are painted with the same compound in one pass;
-
the molding is painted separately, and the wall in a different color;
-
the frame has a contrasting color;
-
the decorative profile was painted before installation;
-
sealant and paint were already applied over the joints.
If the molding and wall are the same color, local repair is easier to hide by shade, but harder to neatly cut the common film. If the frame is contrasting, damage to the wall is more noticeable, but the paint boundaries already exist.
Special attention should be paid to the old filler in the 45° joint. It may hold on as a hard crust. If you start cutting through it without prior cleaning, a piece of material can break off along with the paint nearby.
Therefore, restoring the corner usually consists not only of a new part. Stages appear:
-
separation of the paint film;
-
removal of weak old filler;
-
local trimming;
-
dry fitting;
-
installation of MLDPU-001U;
-
filling new straight joints;
-
restoration of primer and paint.
That is, the corner block can indeed save from a complete rework of the frame, but it does not eliminate local finishing.
Why painting only four corners is sometimes not enough
After installing MLDPU-001U, the new elements may differ from the old frame not only in shade, but also in texture.
The old surface has already endured:
-
installation;
-
filling of joints;
-
Priming;
-
one or more layers of paint;
-
natural aging indoors.
New polyurethane comes with a different surface and will be painted anew. Even paint from the same can may look slightly different due to layer thickness, gloss level, and application direction.
Therefore, there are three levels of finish.
Local touch-up of corners only
Suitable if the frame is painted with matte paint, the shade is preserved, and the repair boundaries are small.
Painting corners and nearby straight sections
Allows for a smooth blend of the transition and removes a visible difference.
Repainting the entire frame
The most reliable way to achieve a uniform color after a design change. At the same time, the slat panels and the wall around can be left untouched if they are carefully protected.
Full repainting of the frame is not the same as complete dismantling. Sometimes this compromise gives the best result: the geometry is preserved, only the four corners and the decorative coating are changed.
How slat panels limit the repair area
In a regular wall frame, there is often a lot of free space around it. Between slat panels, the situation is stricter: on the left and right, there are bulky vertical surfaces that cannot be accidentally hit with a tool or a new corner block.
MLDPU-001 is a thin profile with a width of 10 mm. MLDPU-001U has a total face dimension of 86 × 86 mm. Therefore, after repair, the corner will visually become significantly larger than the frame line itself.
Before purchasing, you need to check two distances:
-
from each old corner to the nearest slat;
-
from each old corner to other details inside the smooth field.
If the paper template of 86 × 86 mm overlaps the slat panel, installation in the original position already raises a question. It may be necessary to shift the entire decorative frame, which contradicts the idea of local repair.
If the template fits, but there is a very small gap left between it and the slat, evaluate not only the technical possibility but also the appearance. A massive corner almost touching the slats may look cramped.
It is the slat environment that makes this topic different from a regular article about corners for moldings: here, not only the joining of elements matters, but also preserving the air between the corner block and the vertical rhythm of the panels.
How to make four MLDPU-001U templates before ordering
For this task, cardboard, thick paper, or masking tape is sufficient.
Make four squares 86 × 86 mm. If you have a straight-on photo of the MLDPU-001U, you can print it to scale. This is better than a plain square, because the real element does not fill the entire area with equal mass.
Attach the templates to the four corners of the existing frame and check:
-
whether they overlap the rails;
-
whether the bottom corners look too heavy;
-
whether the inner field of the frame visually shrinks;
-
whether the scale of the top and bottom elements matches;
-
whether they conflict with outlets, switches, lighting, or furniture;
-
whether you actually want to see four accents instead of subtle miters.
After that, photograph the wall from a normal viewpoint. The photo is useful because it allows you to compare "before" and "after" without getting used to the patterns.
If you don't like the solution visually, there's no need to move on to technical trimming. First, choose a new frame character, and only then decide on the repair method.
The 86 × 86 mm template does not show the 7 mm depth
The MLDPU-001U has a third dimension — 7 mm. The straight MLDPU-001 protrudes by 6 mm. For products of the same system, this difference in itself is not a reason to consider them incompatible: the corner element has its own relief.
But the paper model shows only the face area. In reality, the corner will be slightly more voluminous than a straight line and will catch side light more strongly.
If the adjacent slats also protrude above the smooth field, you need to look at the side angle. Sometimes everything looks fine from the front, but from the side you can see too tight a combination of three depths: the wall, the corner decor, and the voluminous slat.
To check, you can place cardboard about 7 mm thick under the paper template. This won't convey the profile shape, but it will show the overall protrusion.
Such a voluminous mockup is especially useful in a narrow passage, where a person walks along the wall and sees the frame not from the front, but at an acute angle.
How much space the new corners will "eat up" inside the frame
The old miter joint has practically no separate decorative spot: two lines simply meet at the vertex.
MLDPU-001U creates a corner block measuring 86 × 86 mm. Because of this, the inner field of the frame will visually become more complex. But it cannot be automatically assumed that each corner will reduce the useful width by exactly 86 mm on both sides.
The reason is the same as with trimming: 86 × 86 mm is the overall dimension of the product. The actual geometry of its inner contour and the attachment points of the molding are determined by the shape of the part.
Therefore, a correct check is not done with the arithmetic of "minus 172 mm," but with a template or technical drawing.
This is especially important for small frames. On a large panel, four corners look like small accents. On a compact smooth field between the slats, they can occupy a noticeable share of the composition.
If, after using the template, the inner field seems too compressed, it is better to restore the old miters or choose a less pronounced repair method.
How to preserve the external size of the frame when switching from miters to corner blocks
The main fear with a local rework is understandable: if you saw off the ends of the existing MLDPU-001, won't the frame become smaller?
If the corner element is installed within the previous corner zone, the external size of the frame can be preserved, but this requires precise marking based on the actual MLDPU-001U. The straight slat is shortened not "to reduce the frame," but to free up space for the corner block, which occupies part of the previous length and connects two directions.
Therefore, first fix the original geometry:
-
the external width of the frame;
-
external height;
-
position of all four vertices;
-
distances from the frame to the slat panels;
-
distance to the floor, ceiling, or adjacent elements.
Then MLDPU-001U is set using a template or an actual part into the design position relative to the old vertex. Only after this does it become visible where the straight moldings should end.
If you start cutting without fixing the old dimensions, the frame can indeed "shift": one side will become shorter, one corner will move inward, and the gap to the slats will become asymmetrical.
It is convenient to mark the outer contour of the existing frame with painter's tape before the renovation. Even if part of the profile is temporarily removed, the contour will remain on the wall and help return the composition to its original place.
The four corners need to be assessed separately: an identical gap does not guarantee an identical repair
Externally, it may seem that there is one problem — four bad cuts. But each corner can have its own cause.
The top left, for example, may simply have an inaccurate cut. The top right — a slight detachment of the horizontal molding. The bottom left — a paint chip. The bottom right — a real divergence in the frame's geometry.
If you buy four corner pieces and apply one repair method to all points, you might miss a hidden problem.
Before ordering, it's useful to fill out a simple table:
| Angle | Do the straight profiles hold? | Is the gap stable? | Is the wall intact? | Is there space for 86 × 86 mm? | Preliminary solution |
| Top left | Yes/No | Yes/No | Yes/No | Yes/No | repair / MLDPU-001U |
| Top right | Yes/No | Yes/No | Yes/No | Yes/No | repair / MLDPU-001U |
| Bottom left | Yes/No | Yes/No | Yes/No | Yes/No | repair / MLDPU-001U |
| Bottom right | Yes/No | Yes/No | Yes/No | Yes/No | repair / MLDPU-001U |
If at least one corner requires significant rework, that doesn't yet prohibit using four identical blocks. But you understand the real amount of work in advance.
The four corners should look the same after repair, even if technically they were fixed in different ways.
Why can't you install MLDPU-001U on just one bad corner if the other three remain mitered?
Technically, a single corner element can be placed where it fits. But for a regular rectangular frame, this almost always changes the composition too much.
Three corners will remain thin and unobtrusive, one will get a decorative block of 86 × 86 mm. Visually, it will look not like a repair, but like a random accent.
The exception is a deliberately asymmetrical composition where one corner is already highlighted by other decor. But that's a separate design project.
For the finished frame in question, there are two logical paths:
-
restore all four mitered joints and preserve the original appearance;
-
convert all four corners to MLDPU-001U.
That's why a commercial order consists of four elements, even if the biggest defect is visible in only one place.
This is an important point: four pieces are purchased not because each corner is equally damaged, but because the frame must maintain a unified visual language.
When it's enough to restore the old cut and not buy MLDPU-001U
A corner block is not a mandatory cure for any gap. Sometimes the old joining method is worth preserving.
Repairing the miter is more reasonable if:
-
the gap is small and not growing;
-
both straight profiles are firmly held;
-
the frame lines are straight;
-
the profile is not broken;
-
the decorative nature of corner blocks does not suit the interior;
-
there is little space around the corner due to slat panels;
-
the old frame should remain as thin as possible;
-
the problem occurred only in the finishing layer.
In that case, you can carefully remove the weak old material from the seam, restore the filling with a compatible compound, and after it dries, sand and repaint the area.
Here, it cannot be promised that any sealant will solve the problem forever. If the gap appeared due to profile movement or poor adhesion, the movement must be eliminated first.
A simple check: lightly press on both adjacent segments. If one of them noticeably moves, cosmetic seam repair is pointless. The fastening must be restored first.
If everything is rigid and the defect is only visual, buying four corners may be excessive.
When MLDPU-001U gives a better result than repeated miter repair
A ready-made corner element is especially useful in three cases.
The cuts are geometrically unsuccessful
If a wedge has formed in each corner and the edges have already been touched up several times, another attempt to "patch up" the corner with filler can only enlarge the rough area.
The frame remains level, but the corners look visually weak
Then MLDPU-001U solves two tasks at once: it removes problematic miters and turns four points into deliberate decorative nodes.
A design update is planned.
If the frame is going to be repainted anyway, local corner reconstruction becomes easier. Cut marks and new joints can be hidden with the overall finish.
The main advantage of a corner block in a repair scenario is that it allows changing the type of joint. Instead of two pieces that must meet perfectly at 45°, there are two straight ends adjoining a ready-made corner.
This reduces dependence on miter accuracy, but does not eliminate precise marking.
Step-by-step diagnostics before purchasing four MLDPU-001U
Before placing an order, it is useful to go through the entire scenario without tools.
Step 1. Confirm MLDPU-001
Compare the article number, 10 × 6 mm profile, and shape with the card.
Step 2. Check the frame's strength
Each straight section should sit stably. If the profile comes off, note it as a separate repair task.
Step 3. Measure the space around the corners
Especially the distance to the slat panels.
Step 4. Make four templates 86 × 86 mm
Check the appearance and absence of conflicts.
Step 5. Fix the old outer contour
With painter's tape or pencil control points.
Step 6. Assess whether straight ends can be obtained
Need to understand if there is access to local trimming or if individual straight sections will have to be removed.
Step 7. Assess the paint finish
Is there saved paint, will a full repaint of the frame be required.
Step 8. Decide whether the original design is preserved
If the four corners are visually too active, stop and repair the miters.
Step 9. Only after this, place the order
If all checks are passed, the four MLDPU-001U units have a clear function and do not turn into a purchase "on a whim."
What to do after receiving the MLDPU-001U, but before the first cut
The actual part is more important than any paper template. Before trimming the old frame, a dry fit must be performed.
Place the corner element at each corner and check:
-
its actual orientation;
-
The position of the decorative pattern;
-
where the junction lines of the straight MLDPU-001 are located;
-
whether the element extends beyond the allowable zone;
-
is it the same in all four corners;
-
does its depth match the expected one;
-
is there no local unevenness of the wall causing one edge to hang.
After that, not the overall square 86 × 86 is transferred to the wall, but the actual junction points.
It is very useful to label the parts: TL, TR, BL, BR — top left, top right, bottom left, bottom right. Even if all elements are identical, a specific wall may have slight unevenness, and after fitting it is better not to confuse the positions.
Before cutting, it is worth photographing each marking. If the marking wears off, the photo will help restore the position.
How to form a straight end instead of the old 45°
The official logic of the finished corner decor STAVROS assumes that the straight molding fits the corner element with a perpendicular cut.
So, you need to switch from the old miter to a straight end.
Technically, this means:
-
determine the exact junction line based on the real MLDPU-001U;
-
transfer it to MLDPU-001;
-
check that after cutting, sufficient length of the straight section remains;
-
make a clean perpendicular cut;
-
clean only the irregularities without removing excess material;
-
reapply the corner element;
-
check the gap.
You cannot first "cut a 45° triangle to the straight edge by eye" and then try to adjust the corner. On the already finished frame, the length allowance is limited.
It is better to leave a minimal reserve and adjust gradually than to remove too much at once.
Why all eight new straight joints need to be checked simultaneously
After switching to four corner blocks, the frame will have not four miter joints, but eight straight abutments:
-
two at the upper left corner;
-
two at the upper right;
-
two at the lower left;
-
two at the lower right.
Each MLDPU-001U connects a horizontal and a vertical profile.
If you start gluing the first corner immediately after its individual fitting, by the fourth corner you may find that a size error has accumulated. Therefore, before final fixation, it is useful to assemble all four corners "dry" and check the entire frame.
Check:
-
horizontality of the top and bottom lines;
-
verticality of the sides;
-
equality of external dimensions;
-
same position of the four corners;
-
gaps to the slat panels;
-
width of the new straight seams.
This is like fitting a furniture frame: until all parts come together, a single good joint doesn't guarantee anything.
What to do if a straight molding becomes too short after trimming
This is one of the scenarios that needs to be anticipated before starting work.
If the old straight section was cut almost to the exact size between two miter vertices, the transition to corner blocks usually frees up some length thanks to the corner elements themselves. But the specific geometry is determined by the actual connection points of MLDPU-001U.
If after a test fit it turns out that the existing section doesn't reach the side edge of the corner block, you cannot stretch the gap with filler.
There are two proper solutions:
-
replace this straight section with a new MLDPU-001;
-
change the design position of the corner blocks, if possible without breaking the symmetry of the entire frame.
Currently, one MLDPU-001 strip 2600 mm long costs 1,740 ₽. If one new segment fits within this length, one strip can solve the problem. If several long sections are needed, the cutting layout must be calculated separately.
It is better to purchase a new straight profile in advance only when measurements show a real risk of shortage. Buying it "just in case" without calculation is not necessary.
Renovation budget: four corners, one new profile, or a complete rework
The base budget for four corner elements is 3,360 ₽.
If one new MLDPU-001 strip is needed:
3 360 + 1 740 = 5 100 ₽.
If two strips are needed:
3 360 + 2 × 1 740 = 6 840 ₽.
This is only the cost of the decorative items themselves at current prices, excluding glue, finishing materials, and labor.
| Scenario | MLDPU-001U | New MLDPU-001 | Cost of products |
| Local rework of four corners | 4 pcs. | 0 | 3 360 ₽ |
| Four corners + one bar | 4 pcs. | 1 pc. | 5 100 ₽ |
| Four corners + two bars | 4 pcs. | 2 pcs. | 6 840 ₽ |
The table is useful not for choosing the cheapest option in advance. It shows the moment when local repairs start to approach the cost of a more serious overhaul.
If you need to replace three or four straight sections, it's worth recalculating the entire frame as a whole. Sometimes partial salvage no longer saves either money or time.
When the frame still has to be substantially redone
Four corner elements help only when the main frame is worth preserving. If the straight lines themselves are problematic, corner blocks won't fix the system.
A serious overhaul is likely if:
-
the frame is noticeably skewed;
-
one or more MLDPU-001 are coming off the wall along their length;
-
the straight profiles are already cracked or broken;
-
after removing old corners, the lengths of several segments are insufficient;
-
four MLDPU-001U conflict with the rack
If the gap appeared after painting, and before that the corner was normal
This scenario requires special attention. Sometimes the geometry of the joint itself has not changed, but the seam became more noticeable after the finishing materials dried.
The reasons can be different:
-
the filling has shrunk;
-
the paint cracked along the joint line;
-
one layer gave a glare;
-
the corner was poorly sanded before the finish;
-
a step formed at the joint from several layers.
If the profiles do not move and the edges of the mitre still match, before switching to MLDPU-001U it is worth trying to restore the finishing layer specifically.
This is especially reasonable if the original idea was minimalist: a thin frame between active slat panels without corner accents.
A corner moulding in this case can technically solve the problem, but it changes the design more than necessary.
Therefore, it is useful to first take a macro photograph of each corner under side lighting. It clearly shows where the real gap ends and only a shadow from uneven paint begins.
When four MLDPU-001U look better specifically next to slat panels
Although the new corner blocks increase decorativeness, in some interiors this is precisely a plus.
Slat panels create a strict vertical rhythm. The inner smooth field between them can look too empty, especially if there is no picture, mirror, TV, or other accent inside the frame.
Then four MLDPU-001U make the frame more self-sufficient. It ceases to be just a thin outline and gains four distinct points that separate it from the adjacent slats.
This option is especially convincing when:
-
the central field is large enough;
-
simple and solid-color slats;
-
the frame itself is painted in the wall color;
-
the interior allows neoclassical decor;
-
the corners do not touch the slats;
-
a subtle accent is planned inside the frame.
If the slats have an active wood texture, backlighting, variable width, or decorative inserts, the four corner elements may become redundant.
That is, proximity to slat panels does not automatically make MLDPU-001U a good or bad solution. It increases the importance of visually fitting all four corners at once.
How to evaluate the frame after renovation relative to the vertical rhythm of the slats
On a slat wall, the eye easily notices mismatches. The slats form many parallel verticals, so even a slight tilt of the side MLDPU-001 becomes more noticeable.
Before final fixing of the corner blocks, it is useful to check:
-
are the vertical sides of the frame parallel to the adjacent rails;
-
are the gaps on the left and right the same;
-
do the top corners create a feeling of frame displacement;
-
does the visual center of the frame coincide with the center of the smooth field;
-
is symmetry not broken after increasing the corners.
If the frame itself was slightly skewed, the old thin miters could hide this. The new 86 × 86 mm corners will make the vertices more noticeable and can enhance the perception of skew.
Therefore, local rework is a good time to check the geometry of the entire composition. If the deviation is small and the straight profiles can be slightly adjusted during corner repair, it is better to solve the problem now.
What to do if MLDPU-001U is visually too large
A paper template may show that the element technically fits, but aesthetically four 86 × 86 mm squares are too active.
Then you don't need to force a specific product to work at any cost.
Possible alternatives:
-
restore four old miter joints;
-
replace only the damaged straight sections of MLDPU-001 and make a precise 45° cut again;
-
choose a different decor for the moldings, compatible with the required profile and more suitable in scale;
-
completely change the frame system if the old design no longer suits.
When choosing a different corner element, you cannot rely only on the smaller face size. You need to re-check compatibility with the straight profile.
Choose decor for polyurethane moldings
This link is needed specifically at the alternative stage: not all decorative corners are universal, and another article must be selected as part of the system, not as a random overlay.
How to determine whether the existing frame will withstand local paint removal and refinishing
Before repair, it is worth assessing not only the molding, but also the wall layer nearby.
If the paint is old, applied over a weak base, or already has cracks, masking tape and local stripping can remove it in large sections. Then "repairing four corners" will turn into restoring the entire smooth field between the slats.
Check:
-
are there any bubbles;
-
is the paint peeling at the edges of the frame;
-
does the old material get soaked during cleaning;
-
is there a thick layer of putty that may crumble;
-
is the coating resistant to painter's tape.
If the base is weak, it is better to plan a wider local finishing in advance.
Slat panels in such a situation need to be well protected. Their texture is often more difficult to repaint than a wall, so an accidental trace of sealant, primer, or paint on the slats can be more unpleasant than the original frame defect itself.
How to work with four corners if the frame is painted in a contrasting color
A contrasting frame requires more precise repair.
If MLDPU-001 is dark, gold, gray, or another color on a light wall, any new joint is more visible. The new MLDPU-001U needs not only to be fitted but also painted so that it matches the existing straight sections.
In this case, it is especially useful to keep a sample of the old paint or record the shade code and gloss level.
Before installation, you can pre-paint the corner elements, leaving the back surface and bonding areas according to the technology of the chosen mounting compound. After installation, perform local touch-up of the joints.
If the shade of the old frame has already changed over time, painting only the new blocks "by code" may result in a difference. Then it is easier to refresh the entire MLDPU-001 along with the corners.
With a contrasting scheme, four MLDPU-001U will be visually more noticeable than in the wall color. Therefore, the template should be painted approximately in the future shade, rather than left as white paper.
If the frame is painted in the wall color
This is the most favorable option for local repair.
After installing the corner blocks, the entire decor can be unified again with one color with the smooth panel. Small differences in profile and thickness are read through light and shadow, not through contrast.
But there is a nuance: when the frame is the same color as the wall, any gap in the new straight joint of MLDPU-001/MLDPU-001U will also be emphasized by shadow. Therefore, installation must still be precise.
After fitting, the new joints are filled with a suitable finishing material, then primed or prepared in accordance with the painting system used and repainted.
If the color is complex and the old coating has faded, local touch-up may differ. On a small smooth field between the slats, it is sometimes easier to repaint the entire central panel along with the frame, if this does not disrupt the design.
Why MLDPU-001U should not fix a crooked inner rectangle
Suppose the four corners visually become neat, but one vertical side of the frame is offset by 5–10 mm relative to the other, or the top line is not parallel to the bottom.
Corner decor does not change this. Moreover, large decorative vertices enhance the reading of geometry: the eye more easily connects four noticeable points and notices that the rectangle is not rectangular.
Therefore, before local repair, measure:
-
both diagonals;
-
width at the top and bottom;
-
height on the left and right;
-
distances to the slat panels;
-
the position of the frame relative to the center of the smooth field.
If the deviation is large and noticeable, first correct the frame itself.
If the difference is minimal and almost imperceptible to the eye, the four corners can be set according to the existing contour. But the decision is made after a frontal inspection, not just by tape measure.
Diagonals are a quick way to understand if there is a problem with the frame's shape
For a rectangular frame, the two diagonals must be equal. This simple check helps distinguish "bad cuts" from skewed geometry.
Measure the distance:
-
from the top left corner to the bottom right;
-
from the top right to the bottom left.
If the values match within the accuracy of your measurement, the shape is close to rectangular. If the difference is noticeable, one or more corners have shifted.
But even equal diagonals do not negate the level check: the entire frame can be a perfect rectangle that is tilted as a whole relative to the rails.
This is especially important for the theme between rail panels, because the vertical background visually sets a very precise coordinate system.
Before ordering four corner blocks, it is useful to check both local gaps and the global shape.
When it makes sense to buy one new MLDPU-001 bar in advance
A new 2600 mm bar can be a useful safety net if diagnostics revealed that one of the straight sections is already damaged.
It makes sense to add MLDPU-001 to the order if:
-
one profile cracked near the miter;
-
during the old installation it was cut too short;
-
the edge is heavily filled with solid filler and it's hard to get a clean end;
-
the straight section partially detached and is deformed;
-
it needs to be removed entirely, and the risk of damage is high;
-
measurements show that the new section will fit into one 2600 mm bar.
Don't buy a straight molding just because "it might come in handy." If all four sides are sturdy and the length is sufficient, local trimming can be done without additional bars.
But if the repair is performed by a technician in a single visit and repeat delivery is undesirable, having a calculated spare profile may be economically reasonable. This is a matter of project logistics, not a mandatory component of the MLDPU-001U.
What control dimensions should be recorded before removing at least one straight section?
If part of the MLDPU-001 still has to be removed, the original frame will no longer serve as a template by itself. Therefore, before dismantling, it is useful to record several control dimensions rather than limiting yourself to overall width and height.
Fix:
-
the external width of the frame at the top and bottom;
-
the external height on the left and right;
-
both diagonals;
-
the distance from the left edge of the frame to the nearest slat panel at the top and bottom points;
-
the same distance on the right;
-
the position of the top line relative to a noticeable horizontal line in the room;
-
the distance from the bottom line to the floor, baseboard, or another permanent reference point.
These dimensions help restore the exact position of the frame on the wall, not just its inner rectangle.
This is useful because after removing, for example, the upper MLDPU-001, it is easy to accidentally return it a few millimeters higher or lower. The corner block itself will align, but the entire composition relative to the slat panels will change.
A good safeguard is to take a frontal photo with a tape measure or an applied ruler and place four small control marks with painter's tape outside the future repair area. Then, even after cleaning off the old glue, independent reference points will remain.
Why the inner frame size after rework does not need to be preserved at all costs
When transitioning from an inconspicuous mitered corner to the decorative MLDPU-001U, the outer contour of the frame is usually more important than trying to maintain the old inner clearance to the millimeter.
The reason is simple: the corner element has its own pattern and internal geometry. If, for the sake of the previous inner size, you start shifting the blocks outward, you can disrupt the symmetry relative to the slat panels or bring the decor too close to them.
Before repair, you need to decide which parameter is the main one:
-
the outer size and position of the frame in the smooth field;
-
the inner size, if there is a specific mirror, panel, or other item inside;
-
equal margins to the slat panels;
-
alignment with other frames on the same wall.
If inside the frame there is just a painted wall, usually a slight change in the inner contour is less critical than shifting the entire composition.
If, however, an object of exact size is already installed inside, such as a decorative panel or mirror, the situation changes: MLDPU-001U must not overlap its edge. Then the inner dimension becomes a rigid constraint, and the possibility of local rework needs to be checked especially carefully.
This check helps to understand whether the frame can be left in place or whether corner repair already affects the entire composition.
Working sequence for local repair of four corners
When the decision is made in favor of MLDPU-001U, it is better not to start with the first corner "until ready." The frame must remain a system.
Practical sequence:
-
confirm the MLDPU-001 article number;
-
take a photo of the original frame;
-
measure the outer size, diagonals, and gaps to the slats;
-
make four templates of 86 × 86 mm;
-
check the design;
-
order four MLDPU-001U;
-
after receiving, perform a dry fit of the actual parts;
-
mark the actual junction lines of the straight moldings;
-
determine which segments can be cut on the wall and which are better to remove;
-
separate the paint along the future lines;
-
remove weak old material;
-
perform preliminary trimming with a small allowance;
-
gradually bring the ends to a precise fit;
-
assemble all four corners without glue;
-
re-check the diagonals and distances to the slat panels;
-
only after that proceed to fixing;
-
restore the new joints;
-
perform the final painting.
This order may seem longer than "cut and glue," but it prevents the most expensive mistake — an irreversible cut made too early.
It is better to plan the installation of all four blocks as a single operation
If the first MLDPU-001U is perfectly fitted and glued immediately, it becomes a rigid reference point. This is good only when the remaining three positions have already been checked.
Therefore, before applying glue, all four blocks must simultaneously fit into the design geometry.
One convenient order is to first secure the two upper corners, check the horizontal level, then the two lower ones. Another is to start with diagonally opposite elements. There is no universal rule, because the condition of the old frame differs.
But there is another rule: do not fix each corner as an independent mini-frame. In the end, four beautiful separate nodes can result in a crooked overall composition.
After installing the first element, measure the distance to adjacent battens and the position of the straight molding again. If a shift occurs, it is easier to catch it at the first step than after the fourth block.
New joints of MLDPU-001 and MLDPU-001U must also be prepared for painting.
A ready-made corner element eliminates the complex miter, but does not automatically create a seamless surface.
Each block has two new straight connections. Even with a precise cut, a thin line may remain that needs to be prepared for the finish.
The task of finishing is not to "fill everything with a thick layer," but to achieve a neat transition without a noticeable step.
If a large gap remains between the ends, do not consider it normal just because the connection is straight. First, check the length and fit. The filler is needed for a thin technological seam and micro-irregularities, not to compensate for a serious cutting error.
After the repair material dries, the transition should be sanded and painted together with adjacent surfaces.
As a result, the viewer should see a decorative corner block, not eight new repair spots.
Seven mistakes that turn a local rework into a full dismantling
Mistake 1. Ordering four corners before checking the article number
Why it occurs: MLDPU-001 looks similar to other thin moldings.
Consequence: the corner element does not match the straight profile.
Check: size, cross-section, order, product card.
Error 2. Considering 86 mm as the mandatory trim length
Why it occurs: the overall dimension of the product is taken as the junction line.
Consequence: straight segments become too short.
Check: actual block or technical drawing.
Error 3. Trying to simply glue MLDPU-001U over the miter
Why it occurs: wanting the simplest possible repair.
Consequence: the block may not sit flush against the wall, resulting in a double relief or rough overlap.
Solution: rebuild the node itself with straight ends.
Error 4. Not checking the strength of the old MLDPU-001
Consequence: the new angle is installed on the moving system, and the seam opens again.
Error 5. Cutting the first corner before fitting the other three
Consequence: the size and position of the first block begin to dictate the entire geometry, although the opposite corner may have less space.
Error 6. Forgetting about slat panels
Consequence: the corner blocks physically fit, but look cramped or interfere with the tool.
Error 7. Touching up only four blocks without checking the shade
Consequence: the repair becomes more noticeable than the old gaps.
All seven errors share one thing: too early a transition to an irreversible action. First diagnose, then fit, then cut.
When full dismantling is still more rational than local repair
Local repair is only valuable as long as it is truly local.
Full dismantling is worth considering if several conditions are met simultaneously:
-
three or four straight segments need to be replaced;
-
the frame is skewed;
-
the adhesive holds poorly;
-
the old paint is peeling;
-
corner blocks require shifting the entire composition;
-
the inner field loses normal proportions after rework;
-
the straight MLDPU-001 already has numerous damages.
In such a situation, trying to preserve individual pieces creates many new seams and compromises.
The new assembly allows you to immediately:
-
mark out the correct rectangle;
-
use four MLDPU-001U as the original system, not a repair;
-
cut straight moldings for a straight end;
-
perform a dry assembly before installation;
-
paint everything in a single coat.
This is more expensive in terms of labor and materials, but sometimes cheaper in terms of final time and quality.
Therefore, "without a complete redo" is a goal, not a dogma.
How to make a decision before ordering
Decision table: what to do with a specific frame condition
Condition What is more likely reasonable Are MLDPU-001U needed Thin stable seams, frame is even restore joints and repaint Rather no Wedges in four corners, straight lines are good locally rebuild corners yes, 4 pcs. One profile is coming off the wall first restore the mounting too early to decide The frame is skewed fix the geometry the corners alone won't solve the problem MLDPU-001 is damaged at the ends corners + possible new plank Possible Corners 86 × 86 mm overlap the battens look for another repair Rather no The four blocks look good visually and fit local rework is justified Yes Almost all straight sections need to be replaced reassemble the frame use in the new build already This table is needed before the cart. It shows that the same external symptom — a gap — leads to different purchases.
Practical checklist before paying for four MLDPU-001U
-
The article number of the direct molding MLDPU-001 is confirmed.
-
Its profile of 10 × 6 mm has been checked.
-
All four straight sections have been assessed for strength.
-
Both diagonals of the frame have been measured.
-
The position relative to the slat panels has been checked.
-
Four templates of 86 × 86 mm have been made.
-
Templates do not fit on the rails.
-
Four decorative corners are visually appealing.
-
It is clear where the straight ends of MLDPU-001 will be.
-
No one is going to automatically cut off 86 mm.
-
The risk of paint damage has been assessed.
-
It has been decided whether cutting on site is possible.
-
It is known whether a new straight profile will be needed.
-
The budget for the products has been calculated.
-
There is a plan for the final painting.
If there is no answer to at least three or four points, it is better to postpone the order until the fitting.
What exactly to put in the cart for a successful local remodel
For one rectangular frame:
-
MLDPU-001U — 4 pcs.
-
cost of corners — 3,360 ₽.
If diagnostics showed that one new straight profile is needed:
-
MLDPU-001U — 4 pcs.;
-
MLDPU-001 — 1 pc. 2600 mm;
-
cost of these decorative items — 5,100 ₽ at current prices.
If two new planks are required — 6,840 ₽.
Glue, fillers, primer, and paint are calculated separately. They cannot be precisely calculated without the chosen technology and the condition of the base.
Order four corner moldings MLDPU-001U 86 × 86 mm
If the frame turned out to be from a different series altogether
This is a separate stop signal.
Do not try to pick MLDPU-001U just because it looks nice and has a suitable overall size.
Compatibility of the corner element is determined by:
-
the profile of the straight molding;
-
height;
-
width;
-
end geometry;
-
styling;
-
the method of joining.
If after measuring it turns out that the frame is assembled from MLDPU-003, MLDPU-027, or another profile, you need to open the decor catalog specifically for that system.
buying polyurethane molding decor
Such a transition is better than trying to turn the MLDPU-001U into a universal patch. Corner elements are effective precisely when they work as part of a compatible system.
When slat panels are already in place, there is no need to extend the renovation unnecessarily.
In this situation, the finishing around the frame is already complete. Therefore, proper repair should preserve the existing slats and the smooth field as much as possible.
There is no need to remove slat panels just to access the frame corners if they do not interfere with the tool and the new decor fits.
If the corner block presses against a slat, shifting or trimming the slat system to save four miters is usually not rational. Then it is simpler to return to repairing the old corners or choose a different decor.
The main priority is to preserve the already successfully completed part of the wall. That is the essence of a local rework.
Final recommendation
For an already painted rectangular frame made of MLDPU-001, four MLDPU-001U units can allow fixing unsuccessful corners without fully dismantling the entire frame. The cost of four corner elements at the current price is 3,360 ₽.
But the correct scenario does not look like this: "glue four corners over the gaps."
Correct logic:
check MLDPU-001 → check frame stability → try on four zones of 86 × 86 mm → obtain real MLDPU-001U units → determine actual joint lines → locally remove old 45° cuts → form straight ends → assemble all four corners dry → fix → restore joints and paint.
If the straight sections are in good condition, full dismantling may indeed not be necessary.
If gaps appeared due to profile detachment, the frame is skewed, corner blocks conflict with slat panels, or after trimming several planks the length is insufficient, the local scheme ceases to be advantageous. In that case, it is better to partially or fully reassemble the frame.
The most important pre-order check is not the gap size, but the condition of the entire geometry. MLDPU-001U well replaces an unsuccessful corner finishing method, but does not cure an unstable base.
FAQ
Does it make sense to first buy one MLDPU-001U only for a full-scale trial fitting?
Yes, if the project timeline allows for two orders. One real element will let you check not only the overall dimension of 86 × 86 mm, but also the actual contact lines of MLDPU-001, the relief, the fit on a painted surface, and the visual scale next to the slats. For the final symmetrical rectangular frame, four identical corner elements will then be required.
What to do if the wall corner under the frame is locally convex and MLDPU-001U wobbles during trial fitting?
You should not compensate for a noticeable unevenness with a thick random layer of adhesive without checking the technology. First, you need to understand whether the base can be locally leveled to obtain a stable seating plane. Otherwise, the decorative block will be installed on a stressed or incomplete support, and a new straight joint with MLDPU-001 will be harder to make neat.
Can MLDPU-001U be used on a frame where the corner is not 90°?
You cannot automatically transfer the solution for a rectangular frame to an arbitrary angle. For non-standard geometry, you need to separately check the shape of the corner block and the mating lines. If the existing frame is intentionally trapezoidal or another shape, a standard ready-made corner may not match its geometry.
What to do if a mirror or panel is already hanging inside the frame, flush against the molding?
First, check the actual inner contour of MLDPU-001U. The new corner decor must not overlap the edge of the mirror, the mounting, the access door, or another object. In such a situation, the inner dimension of the frame becomes a strict constraint, and a visual template based on the outer square of 86 × 86 mm is insufficient.
Can four MLDPU-001U units be pre-painted in advance to avoid brush work near the slat panels?
Pre-painting can reduce the amount of finish work near the slats, but after installation there will still be new straight joints that may require local touch-ups. Bonding zones and surface preparation should be left according to the chosen mounting system, and the final color should be checked next to the old MLDPU-001.
Is a spare fifth MLDPU-001U needed?
The calculated quantity for one rectangular frame is four. A fifth element only makes sense as a deliberate installation spare if repeat delivery is inconvenient or the work is carried out under conditions of increased damage risk. It does not need to be automatically included in the mandatory kit.
If the frame is U-shaped and open at the bottom, are four MLDPU-001U units still needed?
No. Four elements apply specifically to a closed rectangle with four corner nodes. For an open composition, you need to count the actual number of places where a straight MLDPU-001 must turn through a ready-made corner element.
Can the leftover removed MLDPU-001 be reused on another side of the frame?
This option can only be considered after checking the length, straightness, condition of the back surface, and absence of damage. An old segment after dismantling should not automatically be considered a full-fledged new blank: residual adhesive and damaged paint may make reinstallation impractical.
What should be done if, after installing the corners, you want to add central decor inside the frame?
First complete the corner rework and evaluate the updated composition as a whole. Four MLDPU-001U units already increase the decorative richness of the frame. The central element is selected only after this, so as not to overload the narrow smooth field between the slat panels.
Is it possible to keep the old internal frame backlight after installing MLDPU-001U?
If an LED strip, cable, profile, or channel runs near the corners, you need to check whether the new corner block blocks access and the light pattern. Electrical elements must not be pinched or hidden by new decor without checking their maintenance and thermal conditions.
Does it matter which corner you start the dry fit from?
For the first fit, it is better to choose the most constrained corner — the one closest to a rail, outlet, furniture, or other detail. If MLDPU-001U does not fit there, there is no point in perfectly fitting the three free corners first.
What should be checked on four items immediately after receiving them?
Check the article number, dimensions, integrity of thin sections, condition of the back surface, and consistency of the overall pattern. Then lay out all four blocks side by side before cutting the old frame. This allows you to see possible damage before the existing MLDPU-001 is irreversibly shortened.
-