Article Contents:
- First apply the purchased decor to the furniture sketch
- Each part must have its own approval boundary
- Legs determine the height and structure of the base
- Replacing legs affects more than one dimension
- The handle is chosen before holes are made in the facade
- First the mounting and facade thickness
- Then the grip and working area
- The left and right parts are recorded separately
- The rosette needs its own axis
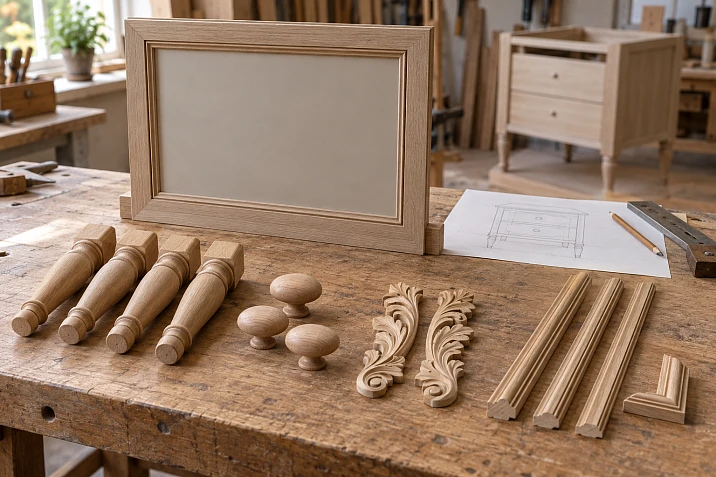
If the carcass is already manufactured and a suitable leg turns out to be 25 mm taller than the design height, the height of the entire furniture piece will change. If the fronts are drilled for one handle, another model may require new holes. Even a small replacement of the moulding can reduce the space for the central overlay: an extra 10 mm of profile width on each side will take 20 mm from the field.
Therefore, purchased parts should be selected in order of their influence on the construction. First, the base and the installed height of the supports are determined, then the mounting and working area of the handles, the cross-section of the mouldings, and the free fields for threading. After that, the opening is checked, the finish is agreed upon, and a control sample is assembled. Each decision has its own boundary: the operation by which the part must be finally selected.
For a small workshop, this order is especially useful. The designer, purchaser, and assembler here are often one person, and decisions are stored in correspondence and memory. A short list with item codes, dimensions, and approval deadlines helps put into production exactly the furniture that was designed.


First, apply the purchased decor to the furniture sketch
Start with a front and side view of the product. Mark the base, fronts, top cornice, side verticals, handles, frames, and central ornaments. At this stage, it is enough to show where each group of parts is located and how much area it occupies.
The result will be a decor map: a clear layout of the purchased elements. On a chest of drawers, these could be four supports, six handles, frames for three drawers, and paired overlays. On a wardrobe, pilasters and capitals will be added. An empty field should also be considered a decision: it does not need to be filled just because a suitable rosette was found in the catalog.
Immediately separate fixed parts from moving parts. A decoration on the side panel, an overlay on the door, and a drawer handle may look consistent in the closed position, but can collide when moving. In a side view, such places are more noticeable than in a beautiful image of the facade.
It is convenient to build the map while reviewing decorative elements for furniture. At this point, the purpose and location of the parts are important. Specific dimensions and article numbers will appear when each assembly is checked.




Each part must have its own approval boundary
The moment of final selection is tied to a dependent operation. For a leg, this is calculating the height and attaching the base. For a handle, it is drilling the facade. For a molding, it is issuing the final drawing of the frame and cutting it.
| Parts group | What depends on the choice | Up to which operation to approve |
|---|---|---|
| Legs and supports | Furniture height, lower assembly, fastener position | Manufacture of related body and base parts |
| Handles | Holes, grip, distance to adjacent decor | Drilling of fronts |
| Moldings and trim | Frame dimensions, internal fields, joints | Final drawing of fronts and profile cutting |
| Overlays and rosettes | Field composition, protrusion, installation | Final marking, preparation for finishing and installation |
The word "approve" means that the article number, finish, dimensions, material and installation method are known. An image in the selection does not yet provide this data.
Preliminary selection of parts can be done in parallel. Moreover, if the entire project is built around a large carved overlay, its overall dimensions must be set immediately and the frame calculated to fit it. The sequence describes dependencies, but does not prohibit returning to the sketch. The main thing is to complete approval before manufacturing dependent parts.
Our factory also produces:
Legs determine the height and structure of the base
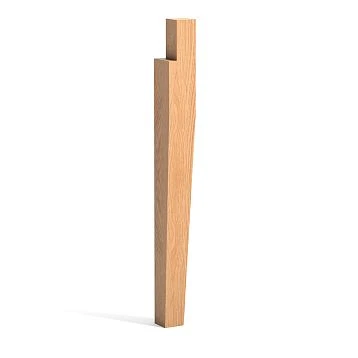
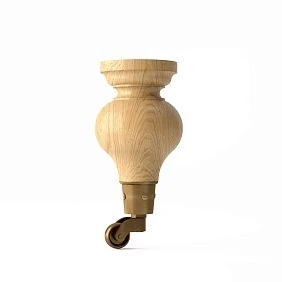
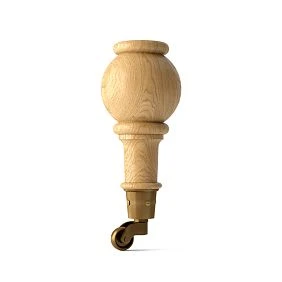
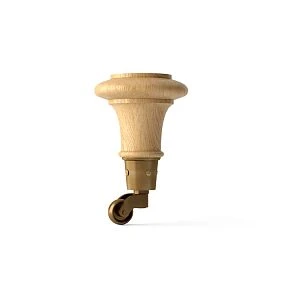
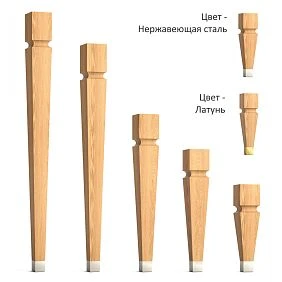
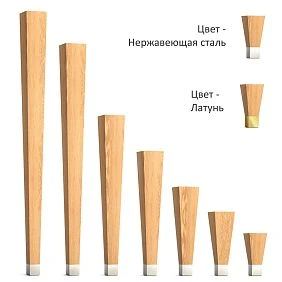
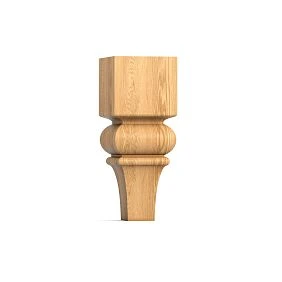
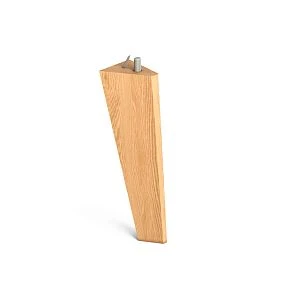
When selecting Furniture legs, check them together with the lower part of the body. You need not only the appearance and height from the product card, but also the mounting area, the position of the fastening, the base material, and the position of the support relative to the edge of the furniture.
For a simple cabinet standing on supports, the following relationship applies:
Furniture height = cabinet height to the top finished surface + height of the installed support assembly.
The second term is measured from the floor to the selected lower mounting plane of the cabinet. It may differ from the full dimension of the wooden part: part of the support sometimes fits into the mounting seat, and a separate mounting plate may add height. A threaded stud extending into the cabinet does not by itself raise the furniture.
Suppose the finished cabinet is designed to have a height of 820 mm. The installed support assembly takes up 150 mm, so 670 mm remains from the mounting plane to the top. If, after manufacturing this part, a 175 mm assembly is chosen, the result will already be 845 mm. This is a hypothetical calculation, but it shows why supports cannot be replaced based only on similarity of shape.
In addition to the overall height, check the actual clearance. The lower rail or decorative strip may extend below the mounting plane and reduce the space under the furniture. Stability and fastening are assessed on the assembled structure: four legs selected by size do not yet confirm that the base is suitable for a specific product.
Get Consultation
Replacing legs affects more than one dimension
A taller support changes the position of the countertop relative to adjacent furniture. A wider mounting plate may extend beyond the edge of the support block. A different fastening method will require access from inside the cabinet, where a drawer bottom or partition is already installed.
Therefore, along with the leg, the drawing of the lower assembly should be retained. It should show the supporting surface, the fasteners, and access for assembly. For finishing in the same color as the cabinet, you can consider in advance from STAVROS open boundless possibilities for designers, furniture makers, and anyone striving to create unique high-quality furniture., including their preparation and finishing in the work on the sample.
The cost of a later replacement consists of the part itself and the operations already performed. Sometimes a new leg can easily be installed in the same assembly. Sometimes, because of it, the blocks have to be changed, the cabinet recalculated, and the finishing repeated. It is useful to clarify this difference before purchasing a batch, especially if the delivery time for the chosen version has not yet been confirmed.
The handle is selected before drilling holes in the facade
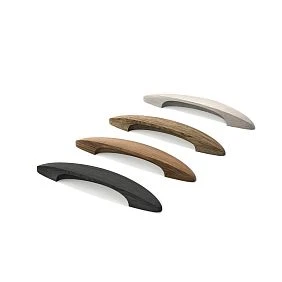
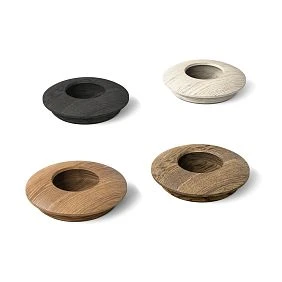
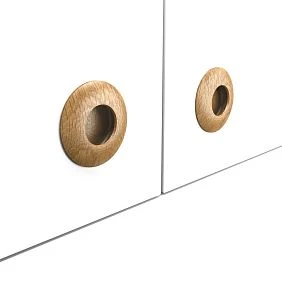
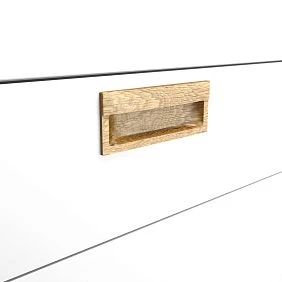
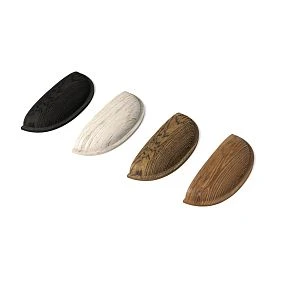
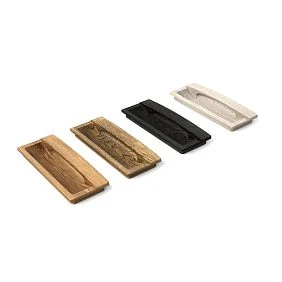
У wooden furniture handles two things need to be coordinated: the mounting and the space for the hand. Matching overall length does not mean matching holes. And a correctly installed handle may turn out to be inconvenient if the fingers rest against the molding or a high relief.
First, the mounting and the thickness of the facade
Clarify the number of mounting points, their position, and the parameters of the thread or other connection. For a handle with two mountings, fix the center-to-center distance. Check the length of the fastener taking into account the actual thickness of the facade and the provided connection parts. A screw that is too long may rest against the bottom of the threaded hole before the handle is pressed tight.
Drilling is specified according to the drawing of the specific model and a verified sample. If the handle is placed next to the frame, first check where the holes will come out on the reverse side and whether the fastener can be tightened. Access for the tool is also part of the project.
Then the grip and working area
Place the handle at the required height and in the required orientation. Check whether the fingers fit, whether it is convenient to pull the door, and whether you have to catch the thread with your nails. The outline of the handle on the facade takes up less space than the hand when opening, so the boundary of its working area should be marked separately.
The final check is carried out on the actual door or drawer. The resistance of the hinges and slides affects the feel of the handle. When a craftsman selects components for a furniture maker, the exterior design of the facade and the opening method must come together in one working assembly.
The molding sets the dimensions of the frame and the inner field
The width of the profile occupies the actual area of the facade. Therefore Wooden moldings for furniture are selected until the final placement of frames, handles, and center overlays.
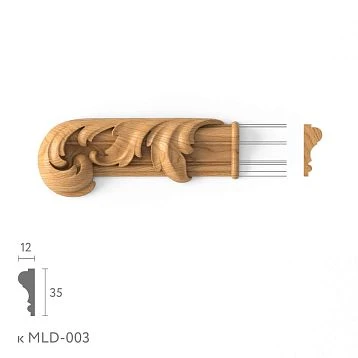
The STAVROS mouldings catalog uses designations for width, section height, and length. Transfer the dimensions themselves into the project with their interpretation, checking against the product drawing. A letter without a label is inconvenient for a work schedule: in different product groups, designations may refer to different directions.
Check the profile in section. Two strips of the same width can protrude differently above the facade, have different bonding surfaces, and look different at the corner joint. If the moulding fits flush against the handle, the height of the specific part of the section where the fingers will be is important.
For a carved profile, a pattern is added. After cutting, the scroll may land on a corner or break off at the rosette. Therefore, decorative wooden mouldings with a repeating ornament require checking the placement of the motif even before determining the number of blanks.
The free field is calculated after selecting the section
Let's consider a conventional rectangular facade 500 mm wide and 700 mm high. The outer edge of the overlay frame is located 40 mm from each side. The width of the moulding in the facade plane is 25 mm; the entire profile is inside the outer contour of the frame.
| Parameter | Calculation | Result |
|---|---|---|
| Outer frame width | 500 − 2 × 40 | 420 мм |
| Outer frame height | 700 − 2 × 40 | 620 мм |
| Inner field width | 420 − 2 × 25 | 370 мм |
| Inner field height | 620 − 2 × 25 | 570 мм |
A 290 mm wide overlay, when installed centered, will leave 40 mm to the inner edge of the molding on each side. If the profile is replaced with a 35 mm wide version while keeping the same outer frame contour, the field narrows to 350 mm, and the side distances decrease to 30 mm.
These are geometric distances, not a universal setback norm. Sufficiency is checked against the composition, the protrusion of neighboring elements, and the space available for installation. If the frame has shaped corners or connecting rosettes, a rectangular calculation is not enough: their contours also occupy part of the field.
The handle can be preselected before the molding, but its final position must be verified against the resulting frame. The line of mounting holes and the free zone for fingers must remain compatible after all adjustments.
Overlays are checked against the contour and protrusion
When selecting Decorative wooden inlays, transfer the entire outer contour of the part onto the facade. In an elongated floral ornament, the outermost leaves may come noticeably closer to the frame than its massive central part. You cannot rely on the middle of the pattern alone.
Width and height show whether the overlay fits on the plane. Thickness or depth from the drawing helps estimate protrusion. However, the overall thickness is not equal to the depth of individual relief cutouts. To check for collisions, you need the actual volume of the installed part, taking its fit into account.
Look at the adjacent door in intermediate positions. Sometimes closed facades have sufficient clearance, but a protruding overlay approaches the neighboring handle when the leaf swings. A similar problem occurs with a drawer under an overhanging decorative strip. Such intersections are checked along the movement path, not only in the two extreme positions.
From the back side, assess the contact surfaces. If the part must rest on a plane, it cannot be forced against an unsuitable curve of the facade. The mounting method and the location of contact areas must be coordinated before finishing, while the design can still be adjusted.
Paired overlays and rosettes receive precise positions
The left and right parts are recorded separately
Directional carved decor for furniture can have two mirrored versions. The bill of materials needs separate lines with part numbers for the left and right pieces, quantities, and positions on the product. An entry like “overlay — 2 pieces” does not tell the purchaser which two specific parts need to be ordered.
On the elevation drawing, specify from which side the furniture is viewed. It is convenient to count sides when looking at the closed product from the front. Rotating one overlay does not always replace a mirrored version: the direction of the leaves and the top of the ornament also change.
A rosette needs its own axis
Wooden sockets they can mark the center of a field, complete a vertical, or connect sections of the frame. For each role, check the position relative to the surrounding lines. A round shape does not mean the part can be placed in any free gap.
If moldings meet the rosette, decide in advance where the strips end and how the junction is finished. Their length depends on this. When the rosette is simply located inside the frame, the molding cut is not changed by it. The difference is small on the sketch, but significant for production.
The capital and pilaster are coordinated as a single assembly
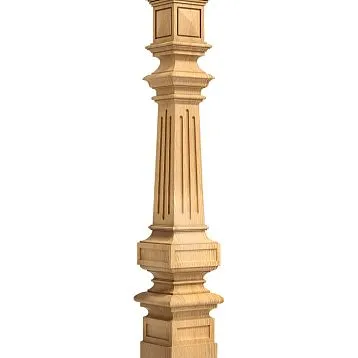
For a cabinet with decorative verticals, the chain of connections is longer: lower base, pilaster, capital, and upper cornice. The width of one part affects the junction of the next. Therefore wooden capitals should be selected together with pilasters and columns, checking the assembly from the front and side.
Do not add catalog heights automatically. First determine whether the parts stand end to end in sequence, overlap each other, or have seating areas. For furniture, the overall height of the installed composition and the position of the joints relative to doors and cornice are important.
If the project provides for Wooden Brackets, match the height, width, projection, and adjoining surfaces. In the front view, the bracket may appear suitable, but from the side it may protrude beyond the shelf or interfere with the door's movement. If it is intended to bear a load, the suitability of the part and its fastening must be confirmed separately: a decorative shape alone does not determine this.
Such assemblies are best coordinated at the stage of the overall decor plan. Leaving a capital "for later" is risky when its size already affects the width of the side vertical and the top of the furniture.
The fitting should show the entire composition in three dimensions
After the preliminary selection, assemble the elements on a test carcass or a suitable mock-up of the assembly. Install the supports in the specified way, attach the handles to test fronts, and lay out the frames, overlays, and rosettes. Heavy and protruding parts must be held securely during fitting.
A full-size paper template helps verify placement and clearances. However, it does not convey the thickness of the overlay, the shape of the handle, or the projection of the cornice. These parameters require actual parts or a three-dimensional mock-up with the appropriate geometry. Final approval of a new purchased part is carried out using the part itself.
Evaluate the furniture from a working distance, then check the assemblies up close. From the overall viewpoint, an overly heavy lower section, misaligned axes, and inconsistent scale of the ornament are noticeable. On close inspection, an uncomfortable grip, poor fit, and insufficient space for fasteners are revealed.
Doors and drawers should be operated through their full range of motion. At the same time, check whether the assembly can be assembled and disassembled: sometimes an overlay covers a screw that will be needed for the final installation of the handle. If this is discovered during fitting, the assembly sequence or the placement of parts can be changed before the batch is painted.
The material is chosen in advance; the final finish is approved on a sample
The wood species and the intended type of coating are determined already when selecting the item. If a clear finish is planned, the wood grain is part of the composition. For enamel as well, the actual material of each item must be known: the same color name does not eliminate differences in surface and preparation.
It is reasonable to approve the final finish after the geometry has been agreed upon. Otherwise, the workshop risks spending time on finishing a part that will then not fit in size. For your own coating, you can choose handles without coating and coordinate them together with the other wooden elements of the project.
The overall finish sample should include characteristic surfaces: a flat molding, the relief of an overlay, and the rounded part of a handle or leg. On them, color, gloss, and tinting are perceived differently. A single painted offcut does not show how the entire composition will look.
For related parts, enter a clear designation, for example “Finish 01.” Attach the approved sample and a description of the result to it: color, gloss, visibility of the texture, presence of patina. If the material differs, the method for achieving the desired appearance is specified for each item. The common finish number denotes the agreed result, not the mandatory application of one composition in the same way to any wood.
Also decide on the installation sequence. Parts can be finished separately or after assembly, if the chosen technology allows this. At materials for installation and finishing compatibility with the actual surfaces is checked. Where wood-to-wood gluing is required, the contact areas must not accidentally be covered with an unsuitable coating.
The sample must confirm a specific decision
One new handle is enough to check its shape and attachment on a trial front. One support is enough to check the selected connection to the base. But one leg does not replace testing the assembled furniture, and one overlay does not confirm the entire composition with a mirrored pair and frame.
Before ordering samples, formulate exactly what needs to be checked. If the question is about the shade of the wood, a suitable material from the section may be useful product samples. If the question is about the overhang, grip, or fit, a sample of the specific product in the required size is needed.
After the fitting, record the result next to the item: which dimensions were checked, with which fastening the assembly was put together, and which finish option was agreed upon. The date and project version designation help distinguish the current decision from an earlier selection.
It is worth keeping the finished control item accessible until the batch is accepted. It allows you to compare the arrangement of parts, the type of finish, and the ease of opening. If it has been disassembled into components for the series, save the necessary measurements and a finish sample in advance: photographs convey neither the exact size nor the full texture of the surface.
The decor schedule links purchasing to the drawing
A separate schedule of purchased decor helps show which parts for furniture manufacturing have already been approved and which may still change the project. In each row, specify the name, supplier item code, specific size, material, quantity per product, finish, and installation location. For directional decor, add the side.
An important column is “Approve by.” It links the ordering of a part to the production operation. Below is a fragment of such a schedule for a conventional chest of drawers. This is an example of the composition and approval deadlines; when preparing an order, each row is supplemented with the actual item code and finish.
| Position | Per chest of drawers | What should be checked | Approve by |
|---|---|---|---|
| Leg | 4 pcs. | Installed height and bottom fastening | Base manufacturing |
| Handle | 6 pcs. | Fastening points, grip, and overhang | Drilling of fronts |
| Molding | According to the cutting map | Section, lengths, corner joints | Frame cutting |
| Left overlay | 1 pc. | Contour, side, protrusion | Preparation for finishing and installation |
| Right overlay | 1 pc. | Contour, side, protrusion | Preparation for finishing and installation |
The schedule must not exist separately from the drawings. If the position of a handle on a facade is changed, the corresponding marking and approval information must also be updated. For project preparation, you can use the materials available from STAVROS drawings and models, checking that the data corresponds specifically to the selected product and size.
Do not leave wording such as “the same, only smaller” or “oak instead of beech” in the work order. These are different versions that must be specified precisely. A category reference helps with searching, but the purchase line must lead to a specific part.
The quantity is counted after checking the set
For the four chests of drawers from the example above, 16 legs, 24 handles, four left and four right overlays will be required. This is the production requirement without reserve. Stock, parts for trial finishing, and samples that will remain in the workshop are counted separately.
If the control chest of drawers is included in these four items and its parts remain suitable for handover, then for the remaining three chests of drawers you need to order 12 legs, 18 handles, and three overlays of each direction. If the sample is stored separately from the series, the requirement for four saleable items does not decrease.
Moldings require a separate cutting plan. First, the lengths of the segments are determined according to the accepted measurement method, for example along the long ends of the cut, then they are laid out across the available workpieces. The calculation includes the saw kerf width, end preparation, and, if necessary, pattern alignment.
Dividing the total linear meters by the length of one strip gives only a preliminary estimate. Two long segments may not fit into one workpiece, even though the total meters for the order are formally sufficient. The profile can be changed to reduce waste before the frame is approved; after that, its internal field will need to be rechecked.
Before launch, check the transition from sample to series
Production is launched based on a set of approved data. For decor, a short readiness check is useful:
- All purchased items have exact article numbers, dimensions, and materials.
- The set support height is taken into account in the overall height of the furniture.
- Handle fastenings have been checked, and drilling is linked to the current drawing.
- Molding cross-sections are marked on the fronts, and free fields are calculated.
- Overlays and rosettes are placed along the axes, and mirrored parts are distributed.
- The movement of doors and drawers has been checked with protruding decor.
- The finish has been approved on the characteristic details, and the installation sequence has been determined.
- The quantity has been calculated taking into account samples and a separate reserve.
Additionally, the ordered versions and confirmed delivery dates are verified. An approved sample does not help the production schedule if the wrong size was ordered for the batch by mistake or if the required item arrives after the planned assembly.
When the parts arrive, check them against the list before mass drilling, cutting, and painting. For left and right elements, it is better to immediately sort the sets by product: the same total quantity does not yet mean the correct distribution of directions.
After launch, the part is changed together with the dependent decisions
Replacement may be necessary due to a project change or delivery conditions. It is assessed by the affected assemblies. A similar photo and a matching single dimension are not sufficient.
| What was replaced | What to return to before continuing work |
|---|---|
| The leg | Furniture height, base fastening, clearance, and stability |
| Handle | Drilling, fastening, hand clearance and opening |
| Molding | Inner panel, joints, handle position and cutting |
| Size or side of the overlay | Composition, adjacency and clearances in motion |
| Part material | Surface preparation and finish sample |
The check can be limited to the affected part of the project. If the new handle has a different projection but the same holes, the front does not necessarily need to be re-drilled. However, the grip and collisions will have to be re-evaluated. If the moulding has become wider, both the overlay and the frame cutting should be checked.
After approving the replacement, update the bill of materials, the related drawings and the sample designation. Otherwise, the purchaser will continue ordering the old item, and the assembler will receive the new part with the previous markings. In a small batch, this easily turns one project into several subtly different variants.
Where to buy furniture decor for a furniture maker
At STAVROS you can select legs, handles, moldings, overlays and other wooden elements for furniture manufacturing, matching specific dimensions and finishes. Selection wooden carved decoration is convenient to navigate using a prepared map: this way you can immediately see which items the project needs and which parameters still need to be clarified.
On the page conditions for furniture manufacturers shipping is specified from one piece. This allows you to start with a single part for verification; the availability of the selected finish and ordering conditions must be clarified before purchase. For a batch, prepare a list with quantity, material, dimensions and finishing requirements.
Furniture decor for a furniture maker becomes part of the production project at the moment when the selected part is linked to height, an opening, a joint or a free field. Record these links before the relevant operations — and the finished purchased elements can be installed according to verified data, preserving the agreed appearance and structure of the furniture.