Article Contents:
- 1. Start with a unified product designation in the project
- 2. Separate linear moldings and individual elements
- 3. Which polyurethane properties are useful for a designer
- 4. When to consider another material or construction
- 5. Which parameters to record for linear moldings
- 6. Profile width does not define the entire composition
- 7. Ornamental linear moldings require pattern verification
- 8. A ceiling cornice should be checked in section
- 9. The socket and the light fixture must fit into a single assembly
- 10. How to assemble a wall frame with overlay panels
- 11. Finishing is part of the selected product
- 12. The sample, model, and drawing confirm a single solution
- 13. What should be clear from the installation assembly
- 14. What a specification line looks like
- 15. Why 34.8 meters does not equal a completed order
- 16. How to count overlay panels, sockets, and paired parts
- 17. How to approve a replacement before purchase
- 18. How to hand off the project to procurement and installation
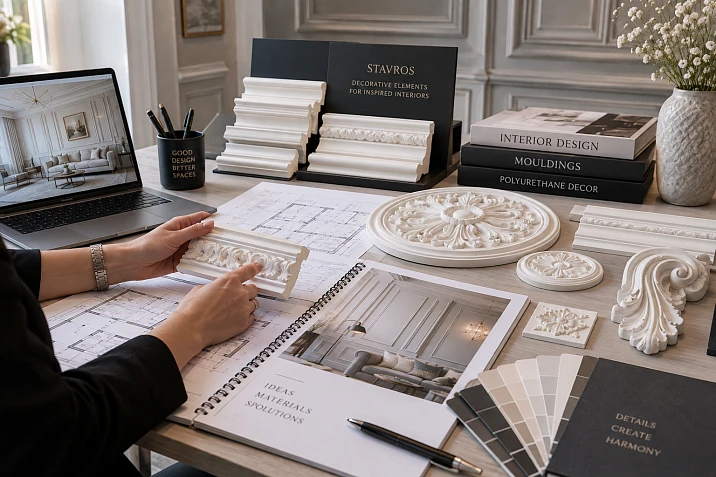
In the visualization, the molding has already been approved, but the specification lists "profile for painting, 35 mm." The procurement specialist finds a product of suitable width, the installer receives a different depth, and an unforeseen protrusion appears next to the architrave. Each participant completed their part of the work, yet the original intent was lost between the files.
Polyurethane stucco for designers is primarily specific products with a defined cross-section, size, and purpose. The project needs to include more than just their appearance. It will be necessary to establish exactly what is being purchased, how the surface is prepared, where the joints run, and in what units the quantity is counted.
A well-prepared project allows you to trace every detail from the room image to the packaging on site. If a substitute is offered instead of the approved model, it is clear which dimensions, assemblies, and calculations will need to be rechecked.
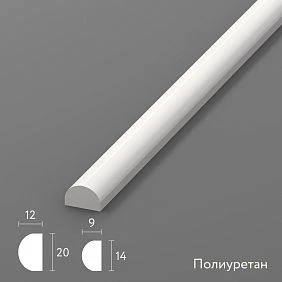



1. Start with a single product designation in the project
Assign each type of decor a short project designation: for example, D-01 for wall molding, D-02 for ceiling cornice. These are internal project designations, not manufacturer article numbers. Next to each one, the full name of the selected product must be provided.
A single designation is used on the elevation, in the section, in the specification, and in the comments to the visualization. Then the phrase "change D-01" refers to a specific item, not to all similar lines in the room.
Before approval, keep the status as "under selection" or "being checked." After the article number, size, and finish are agreed upon, lock in the version of the solution. The mere presence of an item in a beautiful picture does not yet mean it can be sent for procurement.
Catalog moldings from polyurethane It is convenient to use as the basis for such a specification. First, the purchased part is identified, then the project designation is linked to it. The entry "analog at the supplier's discretion" breaks this link and requires a separate procedure for approving substitutions.




2. Separate linear trim and piece elements
Molding, a rosette, and a capital may be part of one composition, but they cannot be treated as the same. For a straight profile, the lengths of individual sections and the cutting plan are needed. For a piece element, the quantity, orientation, and composition of the supplied item are needed.
| Group | What determines placement | What is included in the purchase |
|---|---|---|
| Moldings, cornices, baseboards | Cross-section, section lengths, angles | Whole planks of the selected length |
| Ornamental trim | Lengths, spacing and pattern direction | Planks with pattern matching |
| Overlays and rosettes | Dimensions, center, mounting surface | Individual items |
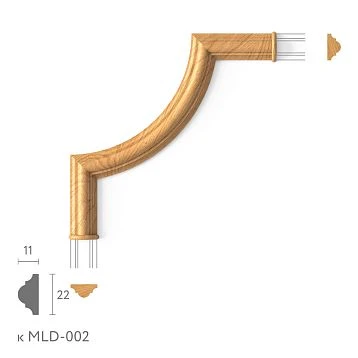
| Corners and frame endings | Connection to a specific profile | Left, right, and other versions separately |
| Capitals, bases, component elements | Place in the overall assembly | Pieces or sets according to the product card |
Check what the supplier means by a set. Two parts in the photo may be sold separately. Conversely, one product item sometimes includes several parts — adding each part again will increase the order unnecessarily.
This grouping helps to spot forgotten items even before calculation: straight strips are present, but open line ends and corner pieces have not yet been selected.
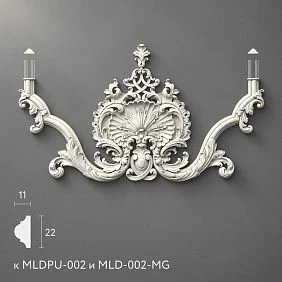
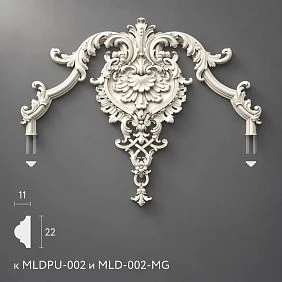
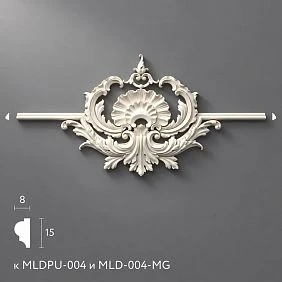
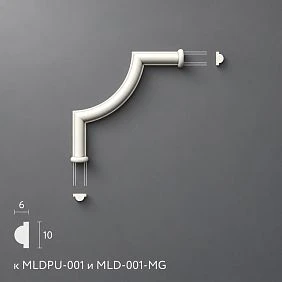
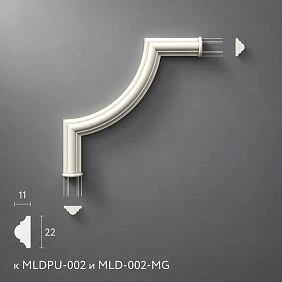
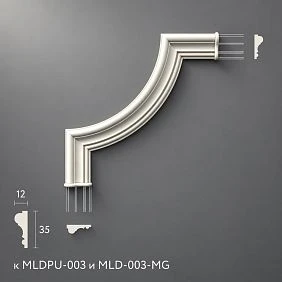
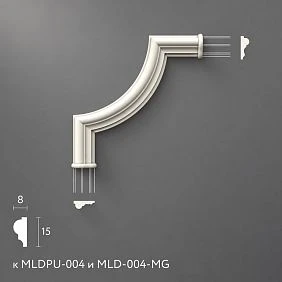
Our factory also produces:

3. Which properties of polyurethane are useful to a designer
Polyurethane decor allows working with standard shapes: repeating the same profile on several walls, using one motif in different rooms, and checking geometry in advance using the product card. For a design interior, this is convenient when a reproducible solution tied to the manufacturer's assortment is required.
But the word "polyurethane" does not describe all the characteristics of the finished part. Weight depends on dimensions and construction, the quality of the visible relief is assessed on the specific product, and readiness for painting — by the condition of the supplied surface.
At the same time, polyurethane cannot be used as a general name for any white profiles. Products made of polystyrene, MDF, and other materials may have a similar shape, but require their own verification of finishing and installation. If the project specifically calls for polyurethane, the material is kept as a separate field in the order and checked against the card of each item.
| Property that interests the designer | What decision it helps to make | What needs to be clarified |
|---|---|---|
| Mass | Preparation of a ceiling or wall assembly | Part weight and mounting requirements |
| Shape repeatability | Using a single element in a series | Dimensional execution, orientation, permissible deviations |
| Relief definition | Selection of lighting and finish | Appearance of the sample after the intended painting |
| Paintability | Color coordination with the wall and furniture | Surface preparation and coating compatibility |
| Use in a wet area | Placement of decor in a specific location | Acceptable conditions for the product, adhesive, and finish |
A material's resistance to moisture does not by itself make the finished joint waterproof. Likewise, a relatively low weight of the part does not remove the requirements for the strength of the substrate. The project evaluates the entire assembly, including the wall finish layer that supports it.
Get Consultation
4. When to consider a different material or construction
Polyurethane moulding is suitable for many paintable decorative compositions if the required shape is available in the range and the installation conditions meet the product requirements. The choice is especially clear for repeating frames and individual overlays with a predetermined geometry.
If the interior is built around exposed wood texture, a solid wood profile may better match the joinery system. When restoring existing plaster decor, the compatibility of the new section with the old one must be assessed: matching shape alone does not resolve the issue of joining materials.
A custom sculptural composition also cannot always be assembled from standard parts. First, it is determined whether the design can be adapted to the catalogue or whether custom fabrication will be required. One should not promise an exact realisation of an arbitrary shape by stretching a ready-made element.
For areas subject to regular impacts, contact with hot equipment, or special finish requirements, the characteristics of the specific product and project detail are needed. The name of the material does not confirm impact resistance, permissible temperature, or fire performance. If the necessary data is unavailable, the item is left pending approval and an alternative is considered.
Curved sections also require clarification of execution. A rigid profile cannot automatically be assigned to an arch. First, the availability of a suitable flexible option, the permissible radius, and the bending direction are checked, then its transition to straight parts is agreed. External matching of the cross-section does not replace this check.
5. Which parameters to record for linear mouldings
For each profile, record the manufacturer, article number, material, size version, and commercial length. Attach the cross-section indicating the mounting plane. For an ornamental strip, the direction of the pattern will also be required.
For example, molding MLDPU-003 The product card lists dimensions A × C × L: 35 × 12 × 2600 mm, material — polyurethane. Here 35 mm is the profile width, 12 mm is its projection, and 2600 mm is the length of the strip. This information allows the item to be described unambiguously in the specification.
Check the dimension designations for each category. For a cornice, the designer needs dimensions along the wall and ceiling; for an overlay, the overall dimensions and projection; for a rosette, the outer size and the geometry of the central part. The meaning of the letters cannot be mechanically transferred from one product to another.
When selecting, polyurethane molding do not limit yourself to the total length of the line on the plan. The product length is needed in advance: the joint locations and the number of whole strips depend on it.
6. Profile width does not define the entire composition
For a wall moulding, assess the frame size, the free field inside it, and the distances to openings and furniture. The same profile may look calm on a large panel and overload a narrow wall pier. The universal rule “up to a certain width — for a small room” is of little help here.
Examine the cross-section. A convex bead, a flat band, and a deep cove create different light transitions at equal width. The overall projection from the mounting surface is also not equal to the depth of an individual groove.
On the adjacent casing, check the height of the specific edge that the molding meets. The maximum projection at the center of a complex profile may be significantly greater than at the edge. For the joint, the local geometry of the connection matters.
If polyurethane wall moldings are installed on a panel, its thickness is included in the overall assembly depth. Otherwise, a profile chosen as shallow may, after installation, protrude forward relative to the joinery trim.
7. Ornamental trim requires checking the pattern
A repeating ornament has a repeat — the distance over which the motif is reproduced. It does not necessarily coincide with the length of the product strip. A single item may contain several repeats, and trimming can change the appearance of the beginning and end of the line.
for decorative trim determine in advance what needs to be preserved: a whole central motif, symmetry about the axis, or pattern alignment at the corners. These tasks may require different cut locations.
On the layout, show not only the outer contour of the frieze, but also the position of prominent elements. If a whole sheet or ornament rosette must be centered on the wall, the layout starts from that axis. Offcuts after trimming are evaluated with the pattern in mind: a suitable length does not yet mean the piece is usable.
At the corner, separately check the geometry of the joint and the meeting of motifs. A precise cut does not guarantee a continuous ornament. If a suitable connection is unavailable, you can revise the composition, introduce a standalone corner piece, or end the line before the corner — the solution must be shown in the design.
8. The ceiling cornice is checked in section
Polyurethane ceiling molding interacts with things that are often not visible in a beautiful overall image: curtain mounts, the top of a cabinet, a ventilation grille, and lighting equipment. Therefore, a ceiling plan alone is not enough.
In the section, indicate how much space the cornice occupies along the wall and ceiling, where it rests, and how it runs near a niche. A conventional cornice that looks good from the front may block access to the curtain mount or fall within the opening zone of a tall cabinet door.
For the lighting, check the purpose of the selected profile and the installation design of the lighting equipment. You cannot automatically assume that any cornice cavity is suitable for placing the strip and power supply. The specified operating conditions and access for maintenance are required.
Show internal and external corners and the ends of open sections separately. If the cornice continues from the room into the hallway, coordinate the levels at the transition. A change in ceiling height must have a drawn solution rather than remaining a question for the installer after delivery.
9. The socket and the light fixture must fit within a single assembly
When choosing ceiling rose made of polyurethane take into account its outer dimensions, projection, and the pattern of the central part. The diameter alone does not show whether the ceiling cup of the light fixture will fit and whether a visible ornament will remain around it.
Align on the drawing the center of the composition, the suspension point, and the actual dimensions of the cup. For a non-circular ceiling rose, mark the orientation relative to the room. If the geometric center of the ceiling differs from the axis of the dining table, first decide which reference determines the position of the light fixture.
The ceiling rose serves a decorative function. The fixture mounting is provided independently of it, to a suitable base or a designated structure. The presence of an opening, the feasibility of making one, and the required access are confirmed before finishing.
The same principle applies to decorative brackets and consoles: the appearance of a support does not confirm its load-bearing capacity. If a load is intended to be transferred to an element, this must be explicitly provided for by the product's specifications and structural design.
10. How to assemble a wall frame with overlays
Decorative polyurethane molding for walls often consists of several independent items: a straight molding, ready-made corners, a central overlay, and paired end pieces. They are first checked together, then included separately in the specification.
Start with the frame without decorations. Make sure its dimensions and position are coordinated with doors, furniture, and equipment. After that, add Polyurethane decorative appliques, evaluating the actual clear opening inside the frame.
For the overlay, check not only the overall dimensions but also the contact area with the base. If part of the relief overhangs the molding, a clear installation method will be needed; one cannot assume that two decorative surfaces will form a suitable support on their own.
In the section decoration for moldings select parts to match the chosen profile and size variant. Mark left and right elements separately. After adding a ready-made corner, recalculate the straight sections: the connecting geometry may change their length compared to a frame assembled only with miter cuts.
11. Finishing is part of the selected product
The wording "wall moulding for painting" does not define the final result. The project needs a colour, a gloss level, an approved sample, and a specification of who performs the finishing: the supplier, a separate contractor, or the on-site installation crew.
When painted in the wall colour, the composition is perceived mainly through relief and light-and-shadow. A contrasting colour adds a pronounced graphic outline: a small frame begins to fragment the surface more strongly. One colour with different gloss levels offers yet another option, which is best assessed under the project lighting.
The same colour code on the wall and the decor does not guarantee the same visual impression. The result is influenced by the surface, the applied coating, and the gloss. Therefore, the combination of materials is approved side by side, not as two separate swatches.
Clarify the condition of the supplied moulding and the required preparation. Do not write "ready for painting" based solely on the light colour of the item in the photo. In the finishing specification, separately indicate the treatment of joints and cut sections. The compatibility of primer, paint, and joining materials is agreed according to the technical recommendations of the selected system.
12. Sample, model, and drawing confirm one solution
It is convenient to combine the checks into a single approval stage. The sample shows the actual relief and the paint result, the 3D model shows the position of the item in the room, and the drawing shows the dimensions and the junction design. Each check must relate to the same article and profile section.
In the section samples and stucco catalogs clarify the format of the required material. A printed catalogue, a display stand, and a physical fragment of the selected profile serve different purposes. The presence of one of them does not mean that a specific installation assembly has been verified.
В 3D models and DWG STAVROS select the appropriate file and check the scale after import. If the actual profile section measures 35 × 12 mm, it must not be stretched to 45 × 18 mm for the sake of a good picture while keeping the same article number.
If a different size is needed, return to product selection or agree on the possibility of custom manufacturing. The outcome of this stage is a set: the selected product, the verified file, the finish sample, and the approved assembly. A large purchase is calculated based on this decision.
13. What should be clear from the installation detail
On the working section, show the base, finish layers, the position of the decor, and the method of its fastening. The installer needs to understand which surface the dimension refers to: the load-bearing wall, the prepared base, or the face plane of the panel.
Separate the bonding of the product to the base, the joining of the ends, and the final treatment of the seam. These operations may require different compounds. The note “adhesive for stucco molding” without specifying the task leaves too many possible interpretations.
The choice of materials is agreed with the decor manufacturer and the adhesive manufacturer for the actual base. The condition of the surface, the conditions of the room, and the required fixation until strength is reached are taken into account. Do not transfer the application regime of one compound to another: the holding time and working procedure relate to a specific product.
Do not expect to correct the wall geometry by arbitrarily increasing the adhesive layer. The substrate is prepared before installing the profile. For moving joints and near opening elements, provide separate solutions; the decorative strip must not accidentally connect parts that need to move independently.
14. What a specification line looks like
Each item must have an unambiguous name and a reference to the source of characteristics. Below is an example of filling in for a conditional project with six frames. The project designations and finish are given here for illustration; the article number and molding dimensions correspond to a real product.
| Field | Entry in the hypothetical project |
|---|---|
| Designation on drawings | D-01 |
| Manufacturer and item code | STAVROS, MLDPU-003 |
| Purpose | Wall frames, straight molding |
| Material | Polyurethane |
| Cross-section and commercial length | 35 × 12 mm; 2600 mm strip |
| Finishing | On-site painting per color sample V-01 |
| Color and gloss | RAL 9010; matte finish approved on V-01 |
| Quantity | 16 strips: 15 per cutting plan and 1 in a separately approved reserve |
| Link | Product card MLDPU-003 |
| Related documents | Layout drawing, assembly unit, cutting plan, finishing schedule |
| Status | For procurement after approval of the listed documents |
In the working file, keep a direct product link, not just the category name. An additional "date and version" field will help distinguish the current sheet from the previous one. If the item is used in several rooms, the distribution by room must match the total quantity in the order.
15. Why 34.8 meters does not equal a finished order
Let's work through the calculation for the same six rectangular frames. The outer size of each is 600 × 2300 mm, the profile is smooth, the corners are miter-cut at 45 degrees, with no ready-made corner pieces. All sides are made as single pieces. The segment lengths are specified along the long points of the outer edge.
Net length per frame: 2 × (600 + 2300) = 5800 mm. For six frames, 34,800 mm, or 34.8 m of finished segments, will be required.
| Segments | Quantity | Placement on a 2600 mm bar | Planks per preliminary cutting plan |
|---|---|---|---|
| Vertical, 2300 mm each | 12 | One segment | 12 |
| Horizontal, 600 mm each | 12 | Four segments | 3 |
| Total | 24 | Taking length splitting into account | 15 |
If you simply divide 34.8 by 2.6 and round up, you get 14 strips. But after a 2300 mm cut, no more than 300 mm remains before accounting for processing — a solid side 600 mm long will not fit there. Therefore, according to the chosen layout, 15 strips are needed.
The installer clarifies the cuts, end trimming, and actual angles. In our example, it was separately decided to keep one whole plank in reserve, so the bill of materials lists 16. This is a project-specific decision, not a mandatory rule for all orders.
Cutting leftovers and reserve serve different purposes. A short leftover may be useful for a test finish, but it will not replace a damaged long side. Therefore, automatically adding 10% does not explain which parts could be restored if needed.
16. How to count overlays, rosettes, and paired parts
Piece decor is counted by placement on the drawings. If each of the six frames has one separate central overlay, six overlays are required. Its projection and position are checked separately; the amount of molding does not determine the size of the ornament.
For mirrored endings, record the quantity of each side. For example, eight pairs mean eight left and eight right parts — sixteen items in total. The wording “end caps, 8 pcs.” does not convey this composition.
Reserve is assigned in whole units and with a clear purpose. An extra left element will not solve the problem of a missing right one, and a spare corner in a different size version may not connect to the installed profile.
Check repeating rooms individually. Externally identical rooms sometimes have a different number of frames due to openings, a built-in wardrobe, or equipment. Multiplying the first room's set by the number of all rooms without verifying the elevations transfers the error to the entire project at once.
17. How to approve a replacement before purchase
If the approved item is not available within the required timeframe, the comparison begins with the reasons for its selection. For the replacement, check the material, dimensions, cross-section, connection with adjacent parts, finish, and available documents. Matching width or a similar pattern does not make products interchangeable.
Pay especially close attention to the product length. Replacing a 2600 mm strip with a 2000 mm strip will affect the ability to obtain solid vertical sides of 2300 mm from the example above. The previous cutting plan will no longer work, even if the external profile looks very similar.
After approval, change all related materials: the item designation or description, model, assembly drawing, schedule, and order. The old version is withdrawn from use. A printout of the previous solution left on site can negate the corrections in the main file.
If the replacement affects the approved exterior appearance, a repeat review of the relevant project fragment is required. There is no need to re-discuss the entire room, but a new part cannot be considered approved simply because the previous one had already been approved.
18. How to hand over the project to procurement and installation
Before You can buy ready-made stucco matching the Baroque style. Calculate the quantity: linear meters of cornices and moldings, number of rosettes, pilasters, consoles, corner elements. Add a ten to fifteen percent allowance for trimming., provide the supplier with the current schedule, product links, quantity in commercial units, and the approved delivery status. Separately specify the materials for installation and finishing if they are included in the purchase. Timelines, availability, and cost are confirmed for the specific order composition.
For project collaboration, use the section for STAVROS designers and architects. Attach elevations and unresolved details to the request: this will allow discussing specific positions rather than the entire interior based on a general image.
Upon receipt, match the marking, dimensions, and quantity with the specification sheet. Check the completeness of mirrored parts and the condition of visible surfaces before painting and trimming. On site, keep the approved sample and the distribution of items by room.
Polyurethane stucco for designers becomes a predictable project material when the concept is tied to real products: the item code is selected, dimensions and finish are verified, the detail is shown, and the quantity is calculated. Then procurement and installation continue the approved project, and replacement issues are resolved before the parts end up on the wall.