Article Contents:
- Short answer: what to check before placing an order
- One product item does not mean one physical part
- Confirmed specifications of CR-02-1.1
- Seven item numbers: what exactly needs to be accepted
- Why the number of parts cannot be determined from a photo
- What the size 1470 × 1470 × 53 mm means
- How to check if the composition fits on the ceiling
- Three centers that do not always coincide
- Geometric center of the room
- Center of the furniture and functional composition
- Actual center of the luminaire
- Front surface
- Back side
- Dimensions
- Party uniformity
- Checking wiring output
- Checking light fixture mounting
- Checking the bowl and suspension
- Concrete or plastered base
- Drywall system
- Plywood or wooden base
- Stretch or suspended ceiling
- Counting the kit as one part
- Equating seven SKUs to seven units
- Considering 1470 × 1470 mm as the size of R-023
- Ordering before checking the ceiling field
- Align room center and chandelier automatically
- Assume presence of wiring hole
- Rotate elements according to photo
- Pass anonymized set to painter
- Mix beech and oak
- Use different skill levels
- Assign universal adhesive
- Mix kit with electrical outlet
- Work on two URLs simultaneously
- Start installation without dry layout
- What is CR-02-1.1?
- Is CR-02-1.1 one large ceiling socket?
- Do seven article numbers mean seven parts?
- Which article numbers are included in the list?
- What material is the kit made of?
- What to choose: beech or oak?
- What does the "Standard" or "Prestige" preparation mean?
- Can the parts be sent for painting immediately?
- What is the 1:1 template for?
- Does the center of the composition coincide with the center of the room?
- Is R-023 suitable for any chandelier?
- Does R-023 have a hole for the wire?
- Can the kit be mounted on drywall?
- How to accept the kit upon delivery?
- How to store parts before installation?
- What to do in case of shortage?
- Can one part be replaced with a similar overlay?
- Where to see other kits?
- Where to buy wooden decorative rosettes separately?
- Where to clarify the price and timelines?

Buy the CR-02-1.1 ceiling decor kit makes sense after checking not only the overall size of 1470 × 1470 × 53 mm, but also the actual delivery contents. In the cart, the buyer sees one product item, whereas various carved parts linked by a single composition arrive at the site. They need to be accepted according to the current specification, marked, matched with the drawing, laid out at full scale, and only then handed over for finishing.
The main mistake is to perceive CR-02-1.1 as one large ceiling rosette. The size of 1470 × 1470 mm refers to the entire composition, not to a single product. The central item R-023 has dimensions of 400 × 400 × 53 mm; the other articles are significantly smaller. Moreover, the list of seven article positions does not yet indicate how many units of each position are included in a specific kit. The quantity of repeating parts is confirmed by the delivery document and the current drawing, not by a photo on the product card.
The article is intended for the customer, designer, assembler, furniture or finishing production, painter, and installation crew. It helps to guide one set through all stages without depersonalizing parts: ordering, acceptance, storage, dry layout, trial finishing, painting, delivery to the room, and installation. This order is especially important for carved wood, where elements similar in scale may have different orientations and different coordinates.
CR-02-1.1 does not replace the ceiling plan, the lighting fixture mounting diagram, or the base calculation. The set solves a decorative task, but the position of the chandelier, electrical outlet, embedded elements, ventilation, and service access is checked separately. A commercially correct route begins not with choosing a color, but with confirming the composition, field size, material, preparation, and working version of the drawing.

Short answer: what to check before placing an order
Before purchasing, it is necessary to gather five related documents: the ceiling plan, the current CR-02-1.1 card, the set specification, the layout drawing, and the finishing list. If at least one document is missing, the customer does not understand how many physical parts the warehouse will accept, where they will be stored, how to orient them on the ceiling, and which coating system to apply. A single order line is convenient for purchasing, but installation preparation is always carried out by individual items.
| Inspection | What must be confirmed | Why this affects the purchase |
|---|---|---|
| Product | CR-02-1.1 and the working URL of the card | Prevents mixing with another set or an old page |
| Dimension | 1470 × 1470 × 53 mm | Allows checking the free ceiling field |
| Composition | Seven item positions and the quantity of each according to the specification | Provides actual delivery completeness |
| Material | Beech or oak for the entire set | Defines finish and visual unity |
| Preparation | "Standard" or "Prestige" | Aligns surface quality with the painting system |
| Layout | Drawing version, axes, and orientation | Does not allow assembling parts from a photo |
| Base | Actual ceiling construction | Defines permissible installation scheme |
| Luminaire | Outlet, mounting, and service access | Prevents conflict between decor and electrical wiring |




One product item does not mean one physical part
CR-02-1.1 is processed as a set. For the buyer, it is one item in the order, one selected wood type, and one preparation level. On site, the logic changes: the warehouse receives individual carved pieces, the painter works with each of them, and the installer places each according to its coordinates. Therefore, an inventory card must appear between the commercial line and the physical parts.
| In the order | On site | Required action |
|---|---|---|
| One SKU CR-02-1.1 | Several individual items | Create an object code for the set |
| One common size | Details of different sizes | Check each item separately |
| One material | Multiple elements from the selected species | Do not allow mixing of batches |
| One level of preparation | Each surface is inspected separately | Record the condition before finishing |
| One composition | Installation by coordinates | Make a dry layout 1:1 |
| One packaging delivery or multiple locations | Different storage locations | Link packages with the packing list |
The phrase "set of seven elements" may be inaccurate. Seven different item numbers are confirmed, but one item can repeat within the composition. Therefore, the article uses the wording "seven item numbers" or "seven positions," while the actual quantity of physical parts is always left to the current specification.
Our factory also produces:








Confirmed characteristics of CR-02-1.1
| Parameter | Confirmed value | What to check before ordering |
|---|---|---|
| Product type | Set of wooden carved decor | Do not mix with an electrical outlet or polyurethane kit |
| Overall dimensions | 1470 × 1470 × 53 mm | Match with the actual ceiling field |
| Material | Beech or oak | Choose one wood species for the entire set |
| Preparation | "Standard" or "Prestige" | Coordinate with the finishing contractor |
| Enamel finish | Presented in the card | Check the current version when placing an order |
| Manufacturing | Custom Order | Clarify the current terms in the card |
| Composition | Seven item positions | Quantity of each item — per the document |
| Drawing | Needed for layout | download STAVROS element drawings and fix the version |
Thickness of 53 mm is the maximum size of the composition in the third dimension, but this does not mean that each part has such thickness. The listed items have different values: from 12–14 mm for some overlays to 53 mm for R-023. The mounting plane and protrusion of each product should be read from the drawing, especially if a cornice, light profile, or suspended structure runs nearby.
Get Consultation
Seven item positions: what exactly needs to be accepted
| Object code | Article | Confirmed Size | Quantity | Status |
|---|---|---|---|---|
| CR02-R023 | R-023 | 400 × 400 × 53 mm | According to the current specification | Check |
| CR02-N025 | N-025 | 70 × 72 × 14 mm | According to the current specification | Check |
| CR02-N371 | N-371 | 163 × 80 × 13 mm | According to the current specification | Check |
| CR02-N219 | N-219 | 92 × 180 × 14 mm | According to the current specification | Check |
| CR02-N415 | N-415 | 151 × 190 × 20 mm | According to the current specification | Check |
| CR02-N135-1 | N-135.1 | 280 × 280 × 12 mm, L = 381 mm | According to the current specification | Check |
| CR02-N372 | N-372 | 195 × 120 × 16 mm | According to the current specification | Check |
The article number and size allow recognizing the position, but do not give the right to invent its role in the composition. One cannot declare one overlay as corner, another as axial, and a third as mirrored based on the shape in the photo. The function, direction, and coordinates are confirmed by the manufacturer's layout. The inventory table is needed primarily for accounting: what was expected, what was received, what condition the item is in, and at what stage of work it was transferred.
For each position, it is useful to have a separate row with photos of the front and back sides. If there are multiple instances, a serial number is added to the code: for example, CR02-N371-01, CR02-N371-02. Such marking does not confirm the place on the ceiling; it only makes each physical part traceable.
Why the number of parts cannot be determined from a photograph
A photograph shows the decorative result but is not a picking list. Perspective can hide repeating elements, part of the ornament may blend with the central rosette, and symmetrical positions are visually perceived as a single shape. Additionally, the card may be updated, while the saved image remains old.
The correct procedure is to request the current composition, verify the item numbers and quantities, then match the document against the actual delivery. If the list does not include quantities, that is not a reason to assign one piece of each item number. The customer must receive confirmation from STAVROS before handing the set over to contractors.
- do not count seven item numbers as seven physical parts;
- do not accept sealed packages based only on the total number of packages;
- do not sign the acceptance certificate without verifying the material and preparation;
- do not send the set for painting before inventory;
- do not remove the packaging labeling until the dry layout is completed.
What does the size 1470 × 1470 × 53 mm mean
The size 1470 × 1470 mm describes the overall dimension of the assembled composition. It is needed for a preliminary check of the ceiling area but does not reveal the shape of the outer contour or the distances between individual parts. You cannot simply draw a filled square of 1470 mm and assume that the carving occupies its entire area. There may be gaps between elements, and the extreme points are determined by the drawing.
The third parameter of 53 mm is especially important for nodes near the luminaire, backlight niche, or suspended ceiling. This is the maximum confirmed thickness of one of the positions, not a uniform thickness for all parts. The designer must check the protrusion of the central element, access to the chandelier mounting, and shadows from the relief under the chosen lighting.
How to check whether the composition fits on the ceiling
The check starts not with the room area, but with the clear ceiling field. Cornices, beams, ventilation grilles, fire detectors, hatches, tracks, hidden curtains, niches, and areas where technological seams run are excluded from it. After that, a square of the overall dimensions and external points are applied to the plan according to the current drawing.
- Record the actual dimensions of the room, not just those from the architectural plan.
- Draw the axes of the clear ceiling field.
- Mark the electrical outlet and the mounting zone of the luminaire.
- Show all engineering elements and access to them.
- Place the 1470 × 1470 mm contour along the selected axis.
- Check the distances to the cornice and other protruding parts.
- Coordinate the layout with the designer, electrician, and installer.
There is no universal minimum setback from the cornice in the source data. It cannot be invented. The practical sufficiency of the field is assessed by the overall drawing, the scale of the room, the installation zone, and the ability to neatly finish the background between carved details.
Three centers that do not always coincide
Geometric center of the room
This is the intersection point of the axes of the actual room. It is useful for a symmetrical ceiling, but it may cease to be the compositional center if the room is combined with a kitchen, has a bay window, portal, or built-in furniture that changes visual perception.
Center of the furniture and functional composition
A table, island, bed, meeting area, or reception desk can set its own axis. In such a case, the ceiling decor is tied to the layout, not mechanically to the middle of the walls. The decision is fixed on the plan before ordering.
Actual center of the light fixture
The wiring outlet often turns out to be shifted relative to the design axis. It is necessary to decide whether it is moved, whether the chandelier remains at the existing point, or whether the CR-02-1.1 composition is built around another coordinate. The decor itself does not correct an electrical installation error and does not confirm compatibility with a specific chandelier.
Central R-023 is not the entire set
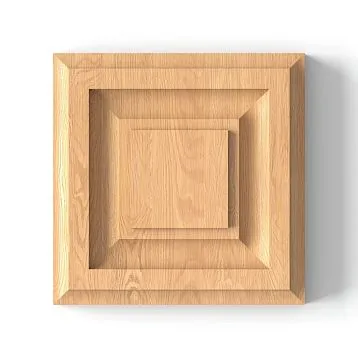
R-023 measuring 400 × 400 × 53 mm is the largest confirmed item in the list and the central part of the composition. But the commercial value of CR-02-1.1 lies precisely in the coordinated surroundings: the customer receives not a separate rosette, but a set of parts for the overall layout. Therefore, one cannot accept only R-023, see it in the packaging, and consider the set verified.
For a buyer who needs only one wooden decorative rosette, the task should be compared with the category of individual products. A set is justified when a coordinated composition, a common axis, and a field of 1470 × 1470 mm are needed. This helps avoid buying random overlays one by one and trying to independently reproduce the factory composition.
Inventory card: a document that accompanies the set
The inventory card links the commercial order with the physical parts. It does not replace the factory specification but transfers it into the working format of the object. The card records the article number, object code, quantity per document, actual quantity, condition, packaging, material, preparation, coordinate on the drawing, and the current responsible person.
| Card field | Example of filling | What it's for |
|---|---|---|
| Object | Living room, ceiling P-01 | Do not mix sets from different rooms |
| kit | CR-02-1.1 | Link all items to one purchase |
| Specification version | Document date and number | Do not work with outdated composition |
| Position | N-415 | Identify the product |
| Object code | CR02-N415-01 | Track physical instance |
| Material | Beech or oak | Do not mix species |
| Preparation | Standard/Prestige | Control surface quality |
| Condition | No damage / remark | Record acceptance |
| Stage | Warehouse / paint-out / installation | Understand location |
| Coordinate | According to the approved drawing | Return part to composition |
Acceptance of CR-02-1.1 at the site
Acceptance is carried out before opening all internal protective layers and before transferring products to other contractors. First, transport locations and labels are photographed, then the order, number of packages, and visible damage are checked. After careful opening, each item is matched against the specification.
- Verify the CR-02-1.1 article number and order documents.
- Check the number of transport locations.
- Record the condition of the outer packaging.
- Lay out products by article number without removing protective pads.
- Count the instances of each item according to the document.
- Check beech or oak and a uniform level of preparation.
- Inspect edges, thin sections, and relief.
- Assign object codes and take photographs.
- Record comments before handing over to the next stage.
Acceptance should not turn into a rough fitting on the floor. Carved parts are protected from impacts, dirt, and pressure. If the room is still under construction, prepare a clean, flat surface with a soft backing for inventory.
What to inspect on each part
Front surface
Check for chips, dents, dirt, signs of improper storage, and damage to thin carved sections. Differences in the natural texture of oak do not in themselves indicate a defect, but for a transparent finish it is useful to assess in advance how the parts look together.
Back side
The back plane is inspected to understand contact with the base and to preserve markings. You must not drill, mill, or trim it yourself before the installation scheme is approved.
Dimensions
A control measurement is needed for identification and comparison with documentation. It should not turn into an attempt to recalculate all the thread geometry with a tape measure. A complex contour is read from the DWG and template.
Uniformity of the batch
They check the wood species, the selected preparation, and the absence of accidental mixing with elements from another order. For oak, the general character of tone and texture is additionally recorded before distributing parts across the composition.
Marking that cannot be lost after painting
Factory or site marking must be preserved on the packaging, tag, or in an acceptable area on the back side. Do not write on the face carving, apply aggressive tape to the prepared surface, or use a method that will show through the coating.
Before handing over to the painter, a correspondence map is compiled: site code — article — photo — position on the drawing. After finishing, the code is returned to the individual packaging. If all parts are placed in one box without labels, even correct painting does not guarantee correct assembly.
- room code;
- set code;
- article number;
- serial number of the item;
- orientation according to the approved scheme;
- finishing status;
- transfer date and responsible person.
Storage between acceptance and dry layout
The wooden carved set must not be piled up, lean on thin edges, or be used as a temporary stand. Parts are stored in a protected place, preserving individual spacers and connection with packaging. Conditions must comply with the manufacturer's recommendations and the chosen finishing system.
The loss of one small item is especially dangerous: visually, the warehouse may not notice the shortage, whereas during layout the symmetry will be disrupted. Therefore, the movement of each part is recorded. Transferring "one box to the painter" without an act is replaced by a line-by-line inventory.
Dry layout 1:1 before finishing and installation
Dry layout is a control assembly of the composition without final fastening. It is needed to confirm the composition, direction of parts, external dimensions, and mutual position of elements. Performing it only on a reduced plan is insufficient: at a 1:1 scale, real intervals, thread orientation, and possible conflicts with engineering points become noticeable.
- Record the working version of the drawing.
- Prepare a clean, flat area or a full-size template.
- Apply a square of 1470 × 1470 mm and the main axes.
- Place R-023 according to the drawing coordinates.
- Arrange the remaining items without guessing the rotation.
- Check the quantity of each repeating element.
- Match the extreme points with the overall dimension.
- Take photos of the general view and each group.
- Record the coordinates and orientation in the installation sheet.
- Approve the layout before priming and painting.
Template on paper, film, or temporary base
A full-size template can be printed, constructed by coordinates, or transferred to a temporary base. The key is to preserve the scale, axes, and reference of each position. A simple square without contours is insufficient: it shows only the overall dimension and does not help understand where a specific ornament ends.
The template must contain a version number. If the designer changes the composition position, the old scheme is removed from the work. Installation using two different printouts is a common cause of shifting individual elements and losing symmetry. The responsible person marks the approval date and attaches a photo of the test layout.
For a complex ceiling, it is reasonable to prepare a ceiling layout CR-02-1.1 before starting the finishing. The design service is especially useful when the light fixture axis is offset, the ceiling is divided by beams, a lighting niche is nearby, or the composition must be linked to the furniture arrangement.
Element orientation: top, bottom, and direction toward the center
Some patterns look symmetrical at a glance, but this does not prove the possibility of free rotation. The direction is determined by the drawing. For each item in the list, the top, bottom, side toward the center, and coordinate are indicated. These marks are made before painting and duplicated on the packaging.
Self-mirroring is also dangerous. If there are repeating positions in the composition, they may be used with the same or different orientation. Only the scheme provides the answer. Until confirmation is received, the installer must not choose the direction "by beauty," because a locally attractive rotation can disrupt the overall rhythm.
| Code | Coordinate | Orientation | Check |
|---|---|---|---|
| CR02-…-01 | According to the drawing | Top marked | Verified on dry layout |
| CR02-…-02 | According to the drawing | Marked toward the center | Verified on dry layout |
| CR02-…-03 | According to the drawing | Turn only as per the diagram | Confirmed by the responsible person |
The working version of the drawing is more important than a saved photo
A project must have one active version of the DWG or another drawing. It should include the date, number, overall dimensions, axes, positions, and changes. A screenshot of a product card does not replace the file because it lacks precise coordinates and may refer to a different revision.
Before starting work, you need to download STAVROS element drawings, then compare them with the current specification of the set. If the composition or number of items in the documents differs, work is halted until written clarification. Any change is recorded as a new version so that the warehouse, painter, and installer do not use different diagrams.
The light fixture and decor are designed together, but not instead of each other
CR-02-1.1 can create an expressive field around the light fixture, but the card does not confirm a universal opening, mounting, or compatibility with any chandelier. The electrician is responsible for the outlet, embedded part, and connection; the decor installer is responsible for placing wooden elements; the designer or engineer links them on a single plan.
Checking the wiring outlet
The drawing marks the actual cable exit point, the diameter of the service zone, and the path to connections. Access must not be blocked by a decorative element without approval. If the outlet needs to be relocated, the decision is made before the template is produced and the ceiling is finished.
Checking the light fixture mounting
The chandelier mounting transfers the load to the calculated base, not to the carved decor. CR-02-1.1 should not be described as a load-bearing element or mounting platform. The embedded part, anchors, and electrical components are designed by a specialized engineer.
Checking the canopy and suspension
The dimensions of the ceiling canopy, its fit, and maintenance requirements are compared with R-023 according to the working drawing. The phrase "fits any chandelier" is not acceptable. Even if the diameter matches, the canopy height, cable exit, and the ability to remove the fixture without damaging the finish must be checked.
Engineering elements within the 1470 × 1470 mm field
A ventilation grille, sensor, sprinkler, hatch, projector, track, or hidden lighting may fall within the composition boundaries. They can only be moved for decorative purposes within the scope of the engineering project. If relocation is not possible, the position of CR-02-1.1 is adjusted, or another design scenario is chosen.
| Element | What to Check | The decision is recorded |
|---|---|---|
| Ventilation | Dimensions and maintenance | HVAC project and ceiling plan |
| Sensor | Work area and access | Specialist |
| Hatch | Full opening | Ceiling designer |
| Track | Intersection with terrain | Lighting plan |
| Cornice | Free field and scale | Design project |
| Beam | Actual protrusion | Measurement and working drawing |
They separately check not only physical intersection, but also visual competition. A small sensor may not interfere with installation, but may end up in the center of a carved motif. Such a conflict is better seen on the plan and template, rather than after painting the ceiling.
Beech or oak for the entire set
The material is chosen not for the central rosette separately, but for the entire CR-02-1.1. Beech is practical to consider for opaque enamel, when the wood texture is not the main decorative effect. Oak is justified with transparent or tinting finish that preserves the wood grain.
| Criterion | Beech | Oak |
|---|---|---|
| Typical project scenario | Opaque solid-color finish | Transparent or tinting system |
| Visual task | Uniform color and emphasis on relief | Relief together with visible texture |
| Batch control | Uniformity of preparation under enamel | Tone and character of texture of adjacent elements |
| Sample | Primer, enamel, preservation of threads | Tinting and uniformity |
| Risk of replacing one part | Difference in preparation or color | Difference in wood species, texture, and tone |
This is a practical comparison, not a claim of superiority of one species. The final decision depends on the project, substrate, lighting, and finish. Mixing beech and oak within one set without a special design intent should be avoided. For a series of rooms, the material is fixed with a single line in the specification.
"Standard" or "Prestige": preparation must be uniform
Before ordering, it is useful choose the "Standard" or "Prestige" preparation together with the painter. The preparation level affects the amount of further finishing, especially in recesses and thin relief areas. Different levels for parts of one composition create an uneven surface after the same coating.
The choice is linked to ceiling height, viewing distance, light direction, type of enamel or tinting, and requirements for manual finishing. It cannot be automatically assumed that a higher level completely eliminates preparatory operations for the finisher: a specific coating system still requires a technical data sheet and a reference sample.
Test paint-out before finishing the entire set
The test confirms not only color. It shows how well the primer and finish preserve fine carving, do not fill recesses, how patina reads, and how the material looks under ceiling lighting. For oak, transparency and uniformity of tinting are evaluated; for beech under enamel, coverage and surface uniformity.
- Select an acceptable test fragment or a separate material sample.
- Record the primer, intermediate treatment, and finish.
- Check the result under main and side lighting.
- Compare with the cornice and adjacent decor.
- Approve the sample with code and date.
- Pass the written system to the painter, not just the color name.
Suitable materials for finishing carved wood are selected based on compatibility with the wood and the project system. The article does not specify a particular adhesive, primer, or coating without data on the substrate and the contractor's technology. Changing commercial items are checked immediately before purchase.
Why parts cannot be handed to the painter without a list
After priming, the back marking may become less visible, packaging changes, and identically painted elements are harder to distinguish. Therefore, the handover is done line by line: code, article number, quantity, condition, orientation, selected system, and the requirement to return the item in signed packaging.
The painter must not independently decide which parts are paired, which are rotated, and where they are located on the ceiling. His task is to preserve the geometry of the carving and perform the approved finish. Coordinates remain in the installation list, and if doubts arise, work on a specific item stops until clarification.
Sequence of finishing a composite composition
The exact technological process depends on the chosen coating, but the organizational sequence is the same: first identification, then a sample, then processing all elements under one system and returning them to individual packaging. Control is carried out not only after the finish, but also between stages.
- verification of codes and quantity;
- surface preparation control;
- approved trial color sample;
- single batch of materials;
- preservation of fine relief;
- control of front and side surfaces;
- restoration of packaging marking;
- photo of the finished part with code.
For composite ceiling decor, controlling coating thickness in recesses is especially important. Excessive filling can smooth out the relief and make adjacent parts visually inconsistent. The painting card should describe not only the color, but also the application order, interlayer treatment, and acceptance criteria.
The ceiling base determines the installation scheme
The initial data lacks the total weight of the composition and a universal fastening scheme. Therefore, the same solution cannot be assigned for concrete, drywall, plywood, plaster, wooden substrate, stretch, or suspended ceilings. Installation is designed based on the actual structure, weight of each part, contact area, and requirements of the selected materials.
Concrete or plastered base
They check the strength of the surface layer, evenness, compatibility of the finish, and the acceptability of the chosen fixation. Weak plaster cannot be considered a reliable base just because there is concrete behind it. If the finish is peeling, the decorative element may separate along with the surface layer.
Drywall system
The location of profiles and embedded elements must be known. The phrase "glue to drywall" is not a design. The structure must bear the load without damaging the sheet and the finish layer. If embedded elements are not provided, the possibility of installation is assessed by a specialist before final finishing.
Plywood or wooden base
They check the thickness, the fastening of the base itself, and its evenness. The presence of a wooden base does not eliminate the calculation of the entire system. It is important to understand how the base is connected to the floor or frame, and how the chosen finish will behave in the contact area.
Stretch or suspended ceiling
Decor is not mounted on the fabric by default. A pre-designed rigid base and level coordination are required. Service access to the light fixture is also maintained. Any element passing through the decorative ceiling covering must have a separate node.
General recommendations for installing wooden decor help prepare questions, but the final scheme is approved by the responsible specialist for the specific base. The article intentionally does not provide universal fasteners, because such a recommendation without data about the object would be unreliable.
Installation sheet: translating the layout into work
| Part code | Article | Coordinate | Orientation | Base | Status |
|---|---|---|---|---|---|
| CR02-R023-01 | R-023 | Center by drawing | Along the axis | As per project | For installation |
| CR02-N025-… | N-025 | According to the drawing | Marked | As per project | For installation |
| CR02-N371-… | N-371 | According to the drawing | Marked | As per project | For installation |
| CR02-N219-… | N-219 | According to the drawing | Marked | As per project | For installation |
| CR02-N415-… | N-415 | According to the drawing | Marked | As per project | For installation |
| CR02-N135-1-… | N-135.1 | According to the drawing | Marked | As per project | For installation |
| CR02-N372-… | N-372 | According to the drawing | Marked | As per project | For installation |
The ellipsis in the code is replaced by the number of the actual instance. The table does not indicate the quantity until it is obtained from the specification. This preserves the principle: not to guess repeatability and not to turn a document example into unconfirmed assembly.
The list is accompanied by a ceiling diagram, a photo of the dry layout, and a list of installation materials. If an actual part has no code, it is not sent to the ceiling until its connection with the documents is restored.
Control marking on the ceiling
Before fixing the parts, the main axes, extreme points of the composition, and coordinates of each element are transferred. The marking must be visible to the installer but removable or coverable without damaging the finish. First, the central axis and overall square are checked, then individual positions.
A control photo of the ceiling with marking and an attached scale is useful. It confirms that engineering points are accounted for and the actual field matches the approved plan. If the ceiling has changed after measurement, the layout is revised before installation.
The marking is accepted by at least two participants: the installer and the person responsible for the project layout. This reduces the risk when one person transfers an erroneous coordinate and then uses it as the source for all other parts.
Installation procedure without invented universal fasteners
The article does not assign specific fasteners. Organizationally, installation is built from the center and control axes, or in another sequence specified in the working diagram. Each subsequent element is checked against the already installed one and the overall template.
- Accept finished parts from the finisher by codes.
- Check the ceiling base and markings.
- Compare the drawing, the list, and the actual products.
- Perform a trial fitting of key positions.
- Secure according to the approved mounting system.
- Control axes, intervals, and orientation after each group.
- Do not cover service areas of the light fixture and engineering systems.
- After completion, verify the actual composition against the list.
If one part does not match the coordinate, the error cannot be compensated by arbitrarily shifting the others. The cause must be established: incorrect orientation, a different version of the drawing, a marking error, or a supply mismatch. Only then is the specific component corrected.
What to buy and prepare together with CR-02-1.1
First, it is worth looking at wooden carved decor sets and making sure that the composite composition matches the project. Then, not a random set of consumables is assembled, but a coordinated system of drawings, finishing, and installation.
| What to add | Why | What to Check | Link | ||||||||||||||||||||||||||||||||||||||||||||||||||||||||||||||||||||||||||||||||||||||||||||||||||||||||||||||||||||||||||||||||||||
|---|---|---|---|---|---|---|---|---|---|---|---|---|---|---|---|---|---|---|---|---|---|---|---|---|---|---|---|---|---|---|---|---|---|---|---|---|---|---|---|---|---|---|---|---|---|---|---|---|---|---|---|---|---|---|---|---|---|---|---|---|---|---|---|---|---|---|---|---|---|---|---|---|---|---|---|---|---|---|---|---|---|---|---|---|---|---|---|---|---|---|---|---|---|---|---|---|---|---|---|---|---|---|---|---|---|---|---|---|---|---|---|---|---|---|---|---|---|---|---|---|---|---|---|---|---|---|---|---|---|---|---|---|---|---|---|
| Drawings and catalogs | For layout and identification | Current version | Download drawings | ||||||||||||||||||||||||||||||||||||||||||||||||||||||||||||||||||||||||||||||||||||||||||||||||||||||||||||||||||||||||||||||||||||
| Project layout | For axes and engineering conflicts | Field 1470 × 1470 mm | Prepare layout | ||||||||||||||||||||||||||||||||||||||||||||||||||||||||||||||||||||||||||||||||||||||||||||||||||||||||||||||||||||||||||||||||||||
| Finishing materials | For a unified covering system | Compatibility with beech/oak |
Materials dHow not to confuse a wooden set with polyurethane CPUCR-02-1.1 refers to wooden carved decor and is confirmed in beech or oak. Polyurethane CPU sets have a different material, different article numbers, construction, and preparation. Their installation techniques, dimensions, or completeness cannot be transferred to CR-02-1.1. The similarity of the word "set" does not make products interchangeable. The specification must always include the full article number CR-02-1.1, material, and preparation level. This also helps search: phrases about a wooden decorative rosette should not lead the reader to electrical products or polyurethane molding. When CR-02-1.1 is truly suitable
The set is especially appropriate in a project where repeatability of the factory composition is important and you don't want to select seven article groups separately. One card simplifies the purchase, and the list turns the delivery into a manageable installation set. The more participants a project has, the higher the value of such an accounting system. For a private interior, CR-02-1.1 is suitable when the client understands the scale of the composition in advance and is ready to coordinate it with the ceiling lighting. For a hotel, restaurant, or representative hall, the serialization of documents and the ability to repeat the same acceptance procedure at multiple sites are especially important. When it's better to choose another solution
An honest refusal of an unsuitable set is cheaper than buying it and then excluding some parts. If the field or task differs, you should return to the category and select individual items or another set. The CR-02-1.1 composition should not be used as a random donor of individual overlays without checking their standalone applicability. Another option is more reasonable also when the ceiling does not yet have a final geometry. First, complete the project of cornices, niches, and engineering, and then check the composite decor. Otherwise, one of the later elements may take up space necessary for the composition. Order for one room and for a series of roomsWith one set, the object code can be simple: CR02-P01. For several identical rooms, each set gets its own number, even if the material and color match. You cannot combine all items in the warehouse and then distribute them by eye.
A serial project benefits from one trial kit. It is used to check the layout, finishing, and installation unit, and then the approved documents are replicated. However, the actual completeness is still accepted separately for each set. The loss of a part in one room should not be masked by removing an item from another. If rooms differ in height, lighting fixtures, or ceiling niches, they are assigned different layout versions. The same kit article does not mean that the installation scheme is automatically the same in all halls. What to do if one part is lost or damagedFirst, record the object code, article, quantity, material, preparation, finishing, and position on the drawing. You cannot order a replacement from a photo without an article. For oak, a possible visual mismatch with the already finished batch is important; for enamel, the repeatability of the system and color is important.
It is not allowed to independently replace a missing item with a similar overlay: the pattern and coordinate logic of the composition will change. If the part is already finished, the replacement request must specify not only the color but also the entire technological system, the date of the color sample, and a photo of the approved sample. Until the replacement is received, the remaining items are stored according to the inventory list. Do not complete part of the composition in such a way that subsequent installation becomes impossible or requires damaging adjacent decor. Transfer of the set from the warehouse to the painter and installerEach transfer is accompanied by a manifest. The responsible party receives not a "box of props" but a list of codes. The document specifies condition, quantity, and stage. This allows determining at which section a loss or damage occurred.
In the transfer certificate, it is useful to specify not only the quantity but also the package numbers. This way, a small item can be quickly found without reopening the entire set. With each move, the storage location is updated: warehouse, painting area, installation room, or reserve. The person responsible for the kit must be appointed in advance. When each contractor thinks someone else is keeping the inventory, the smallest part ends up without an owner. One coordinator maintains an up-to-date list and issues the working version of the drawing. Acceptance after installationThe finished composition is checked not only from the floor. First, it is compared with the drawing and photos of the dry layout, then the axes, orientation, intervals, finish condition, and access to the light fixture are assessed. Side lighting helps to see relief displacement and traces of damage.
After acceptance, the as-built diagram, photographs, and material list are kept. These documents are needed for repairs, replacing a luminaire, or reordering. If coordinates were changed by agreement during installation, this is reflected on the as-built drawing, not left only in correspondence. Inspection is performed under normal room lighting and directed light. The first shows general perception, the second reveals local defects. Results are recorded before installing furniture and other items that could restrict access. Ceiling composition passport after completion of work
The passport is not published as advertising copy; it is a working archive of the object. It reduces risk during maintenance and eliminates the need to reconstruct the composition from memory. The document is stored together with the luminaire passport and the engineering communications plan. For a commercial object, the passport includes the room, floor, responsible organization, and the date of the next inspection. If the interior is transferred to a new operating entity, the archive must be part of the documentation, not remain solely with the original contractor. How side lighting affects the perception of the compositionThe carved relief is read through light and shadow. Directional luminaires can enhance the depth of R-023 and small overlays, but at the same time emphasize differences in height, offset elements, and uneven finishes. Therefore, the lighting plan is checked at the dry layout stage. If the light source is located close to the ceiling and directed along the surface, even a small axis error becomes more noticeable. This is not a reason to abandon the relief, but a reason to more precisely control the template, base preparation, and coating thickness. The test swatch is examined in the same light direction that will be present in the finished room. A color approved under diffuse daylight may reveal recesses differently under warm evening light. How to connect CR-02-1.1 with the cornice and other wooden detailsA ceiling kit rarely exists in isolation. Nearby there may be a wooden cornice, molding frame, panels, or carved wall decor. To make the composition look cohesive, the material, color, gloss level, and relief scale are agreed upon in advance. With oak trim, the difference in tone between the ceiling and cornice is especially noticeable. It is not necessary to achieve a complete match of every grain, but samples should be viewed together. For enamel, a uniform shade and gloss are controlled, because differences on one ceiling plane are more noticeable. You cannot automatically add any cornice from the catalog to CR-02-1.1. First, assess the free field: a large profile reduces the space around the composition and can change its scale. The decision is made on the overall section of the room. Dry layout on the floor and control on the ceiling are not the same thingLayout on a horizontal surface is convenient for checking composition and symmetry, but it does not show perception from the floor. After approving the scheme, it is useful to transfer key contours to the ceiling using a template or temporary marking and evaluate the composition from the main viewing points. On the ceiling, perspective changes: distances visually shrink, the central part is perceived larger or smaller depending on the room height. Therefore, a reduced visualization, full-size layout, and control marking complement each other. If the project involves installation above a staircase or in a double-height space, access for installation and future maintenance is checked separately. A beautiful view from below does not negate the requirement to safely bring and secure each position. Main mistakes when ordering CR-02-1.1Treating the kit as a single partOne line in the cart hides a complex physical delivery. Without a packing list, some items are easy to lose between the warehouse, painting area, and installation. Commercial simplicity of the order does not cancel line-by-line acceptance. Equate seven SKUs to seven unitsThe list confirms the nomenclature but not the number of repetitions. Numbers are taken only from the current specification. Any example table in the article should leave the quantity open until the document is received. Count 1470 × 1470 mm as size R-023This is the overall dimension of the entire composition. The central position has a size of 400 × 400 × 53 mm. An error leads to an incorrect assessment of scale and free space. Order before checking the ceiling fieldCornice, beams, and engineering systems can reduce the available area. The overall dimension is applied to the actual plan, and extreme points are checked against the drawing. Align the center of the room and the chandelier automaticallyGeometric, functional, and electrical centers may differ. The decision is made by the project, not by the convenience of the existing outlet. Assume the presence of a hole for wiringThe size and cable passage capability are checked against the current drawing. The decor is not drilled or milled by guesswork, especially after finishing. Rotate elements according to the photoEven a visually symmetrical overlay is oriented according to the working diagram. A single rotation error can disrupt the entire pattern. Hand over an anonymized set to the painterAfter painting, similar parts are harder to identify. Codes are kept on packaging, and transfer is done according to the inventory list. Mix beech and oakThe material is selected for the entire set. A random replacement will disrupt the finish, texture, and perception of the composition. Use different levels of preparationAn uneven surface under one coating gives different results and complicates finishing. Standard or Prestige is fixed in one line for the entire set. Assign a universal adhesiveInstallation depends on the base, weight, and finish. The product card does not replace the mounting project, and a neighboring product in recommendations does not automatically become suitable. Mix the kit with an electrical outletThe SEO phrase is always clarified with the words "wooden," "decorative," and "carved." CR-02-1.1 is not related to electrical work and does not replace the mounting plate of a luminaire. Work on two URLs simultaneouslyThe internal link must lead to one active product card. Before publication, the canonical and the actual working path are checked to avoid distributing commercial weight between duplicates. Start installation without a dry layoutCorrecting a composition or orientation error after final fixation is significantly more difficult. A 1:1 trial fit is a mandatory control stage for a composite composition. How to submit a request for CR-02-1.1A good request contains not only the name of the kit. It links the product to the project and asks to confirm the data that cannot be derived from a photo. This way, the manager sees not an abstract interest in the outlet, but a ready purchasing task. Example request: A ceiling decor kit CR-02-1.1 with a total size of 1470 × 1470 × 53 mm is required. Material: __. Preparation: __. Finish: __. Please confirm the current completeness, the quantity of each of the seven item positions, the working layout drawing, the orientation of parts, and the current delivery requirements. A ceiling plan with axes, a luminaire, an electrical outlet, and engineering elements is attached to the request. Checked before sending Order and delivery terms CR-02-1.1. Deadlines, price, and availability are not fixed in the article because they should be checked in the current product card and confirmed at checkout. If the object is at the rough work stage, the planned date of base readiness is indicated in the request. The full project cost is not just the price of the kitFor the budget, consider the CR-02-1.1 itself, the design layout, base preparation, test paint, finishing materials, storage, marking, installation, electrical work, and possible recessed fixture mounting. The article does not substitute changing prices but shows the cost structure so the buyer does not compare only the price of a single product line.
The most expensive mistake is not an extra line in the estimate, but re-finishing the ceiling after an incorrect layout. Therefore, design and inspection work are considered part of the purchase, not an optional add-on. How to buy CR-02-1.1 without losing design logic
This route turns a purchase from a single line into a manageable set. The buyer understands exactly what they will receive, who is responsible for each stage, and which data cannot be left to the installer's discretion. Before payment, it is useful to record the working URL of the product page and attach it to the request. If the site has both old and new paths, the manager must confirm which page is the main one and which characteristics apply to the order being placed. Frequently asked questions about CR-02-1.1What is CR-02-1.1?This is a set of wooden carved decor with a total composition size of 1470 × 1470 × 53 mm. The card lists seven item positions. Is CR-02-1.1 one large ceiling rosette?No. It is a composite composition. The central R-023 has a size of 400 × 400 × 53 mm, and the other positions are smaller. Do seven item numbers mean seven parts?Not necessarily. Seven different positions are confirmed, but the quantity of each needs to be taken from the current specification. Which item numbers are included in the list?N-025, N-371, N-219, N-415, N-135.1, N-372, and R-023. What material is the set made of?The source data confirms beech and oak. One species is selected for the entire set. What to choose: beech or oak?Beech is often considered under an opaque enamel, oak — under a transparent or tinting system. The final choice depends on the finishing project. What does the "Standard" or "Prestige" preparation mean?These are surface preparation quality options. They are chosen together with the finishing contractor and applied uniformly to the entire set. Can parts be sent for painting immediately?No. First, the completeness is confirmed, codes are assigned, and a dry layout is performed. Why is a 1:1 template needed?It shows the actual dimensions, intervals, orientation, and conflicts with engineering elements that are poorly visible on a reduced plan. Does the composition center coincide with the room center?Not always. The project may be oriented toward the furniture zone or the actual light fixture. Is R-023 suitable for any chandelier?Universal compatibility is not confirmed. The bowl, mounting, wiring outlet, and service area of the specific fixture must be checked. Does R-023 have a hole for the wire?This must be determined based on the current drawing. You cannot assume the hole or modify the part on your own. Can the kit be mounted on drywall?The possibility depends on profiles, embedded elements, part weight, and the mounting system. A project for the actual base is required. How should the kit be accepted upon delivery?According to the specification: item numbers, quantities, material, preparation, condition, and marking of each part. How should parts be stored before installation?In a protected place, preserving packaging, gaskets, and object codes. Thin carved sections must not be subjected to pressure. What to do in case of shortage?Record the article number and object code, stop the corresponding stage, and contact the seller with documents and photos. Can one part be replaced with a similar overlay?No. This will violate the approved pattern and dimensions of the composition. Where can I see other sets?They can be see in the category of wooden carved decor sets. Where can I buy wooden decorative rosettes separately?Individual wooden decorative rosettes are presented in the relevant category. Where can I clarify the price and delivery time?In the current card CR-02-1.1 and when placing an order. The article intentionally does not fix changing commercial conditions. What to do if the ceiling project changed after orderingAfter placing an order, the position of the chandelier, the height of the suspended ceiling, the width of the cornice, or the location of the ventilation grille may change. The previously approved layout cannot be considered automatically still suitable. Any change to an element inside or near the 1470 × 1470 mm field requires re-checking the overall outline and coordinates. The responsible person issues a new version of the ceiling plan, marks the changed points, and re-approves them against drawing CR-02-1.1. Old printouts are withdrawn. If the kit has already been received, a new dry layout is performed with the actual parts. If finishing has begun, an additional check is made to see whether the new assembly will require cutting or modification of the product; such actions without approval are not allowed. The commercial solution depends on the stage: sometimes it is enough to shift the entire composition, sometimes an engineering point needs to be moved, and sometimes it is wiser to choose a different decor. The main thing is not to hide the change until installation day. The earlier it is reflected in the documents, the lower the risk of redoing the ceiling and reordering. Room height and access for the installation crewThe size of the composition does not fully determine the complexity of installation. The cost and organization are affected by the ceiling height, the presence of a stairwell, furniture, a podium, scaffolding, and the ability to safely lift individual parts. The central R-023 has noticeable volume, and small elements require precise marking work. Before delivery, it is checked whether packages can be brought into the room where the clean unpacking area will be located and how the installer will gain access to the entire 1470 × 1470 mm square. Finished parts cannot be stored on the work deck where they might be hit by tools. Supply is organized by codes and in the sequence specified in the list. If the ceiling is above a staircase or a double-height space, the work execution plan is approved separately. The decorative article does not replace safety requirements, but helps to see in advance that the kit consists of several items and will require repeated precise access to the ceiling. Control before the start of each working dayDuring installation planned over several shifts, at the start of the day the remaining parts and the condition of the already installed section are checked. This protects against a situation where a small element was accidentally moved and its absence was only discovered at the end. The inventory list is updated after each installed item.
Such control is especially useful at sites where electricians, painters, and ceiling installers work simultaneously. Access to the composition is restricted until acceptance is completed, and all changes are made through one responsible person. Care for finished carved ceiling decorAfter installation, the care method depends on the approved finish system. Universal cleaning agents cannot be used: a composition suitable for one enamel may change the gloss or shade of another, and excessive moisture is undesirable for a wooden product. Care recommendations are requested from the finishing contractor and saved in the composition's passport. Dust is removed using a method that does not catch thin carved areas or create pressure on parts. Before servicing a light fixture, the decor is protected from tools and accidental contact. If a crack, chip, or coating change appears, first photograph the area and determine the cause, rather than masking it with a random compound. The as-built diagram helps identify the article number of the damaged item and its object code. This is especially important after several years, when original packaging is no longer available and the coating color has changed due to lighting exposure. Final order audit before payment
If there is no answer to any question, it is better not to move the purchase directly to the installation stage. The product itself can be ordered, but in parallel, missing design data should be closed. Especially critical are the quantity of each item, the working version of the drawing, and the actual base. The final audit does not complicate the order, but prevents a gap between the manager, the client, and contractors. After it, the commercial line CR-02-1.1 turns into a clear specification: what is produced, what arrives, where it is stored, how it is finished, and according to which document it is installed. Conclusion: the set starts with a specification, not with installationCR-02-1.1 is convenient to purchase as a single product item, but professionally it should be handled as a composite system. The overall dimension of 1470 × 1470 × 53 mm is checked against the ceiling plan; seven article positions are accepted according to the current specification; each physical unit receives a code; the layout is approved at a 1:1 scale; the material, preparation, and finish are selected for the entire set. This procedure protects the client from three costly mistakes: shortages, depersonalization of parts after painting, and incorrect placement around the light fixture. It also clarifies the responsibility of the warehouse, painter, designer, electrician, and installer. Before purchasing, open the product card again and order the CR-02-1.1 set after checking the composition and drawing. Attach the ceiling plan, selected material, preparation level, and a request for confirmation of the quantity of each item to the order. Then one line in the cart will turn into a fully controlled ceiling composition, not a set of unidentified carved parts. |