Article Contents:
- When buying a "similar" wooden trim is not enough for reconstruction
- Complete replacement
- Partial Replacement
- Step 1. End comparison
- Step 2. Direct joint
- Step 3. Corner test
- Step 4. Light
- Step 5. Coating
- Local matching
- Repainting the entire architectural line
- Replacement from the natural boundary to the boundary
- Can trim be ordered to custom dimensions?
- Is it enough to bring an old piece of molding?
- Should the entire volume be ordered at once?
- How to compare the old and new profile?
- How to calculate partial replacement?
- Is a reserve needed?
- What to keep after reconstruction is completed?
- Where to view standard wooden trim?
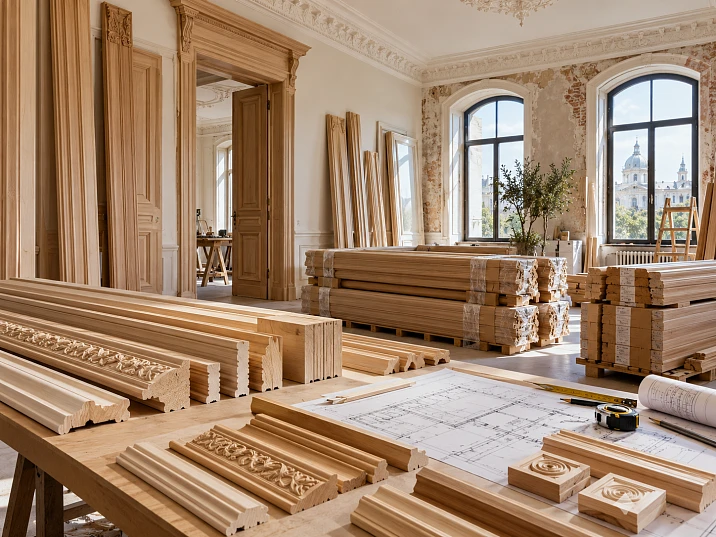
When reconstructing an old interior, the task rarely comes down to buying a new skirting board, moulding or cornice "in roughly the same style". If part of the historical or simply long-installed trim is preserved, the new profile must join with the existing one. A difference of a few millimetres in width, thickness or relief depth may be unnoticeable in a catalogue, but will immediately show up at a corner, in the continuation of a frame, or at the point where an old element transitions to a new one.
Therefore comprehensive supplies of building materials for reconstruction it is better to start not from the catalogue, but from the existing object:
survey → selection of the preserved reference sample → measurement → drawing → control sample → comparison with the old profile → adjustment → approval → calculation of linear metres → reserve → delivery in stages → acceptance.
STAVROS indicates the possibility of manufacturing mouldings to individual drawings and dimensions. For standard profiles, samples of moulded products are available, which can be used for preliminary approval. This gives reconstruction two paths: find a suitable catalogue profile or prepare custom geometry based on measurements of the existing element.
The main range can be checked in the section STAVROS wooden molding, and for physical verification of profiles — in the product samples section.
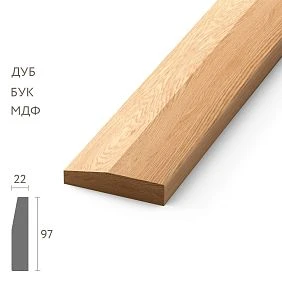
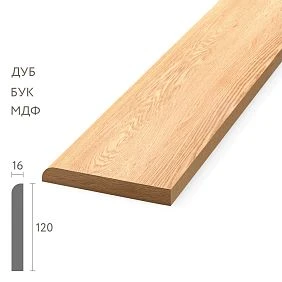
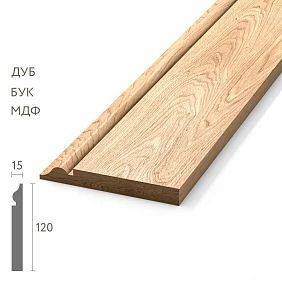
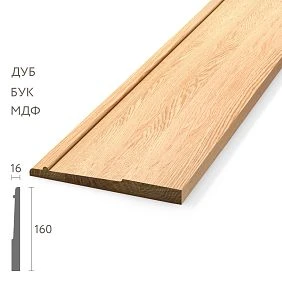
When, during reconstruction, it is not enough to buy "similar" wooden mouldings
There are two different scenarios.




Complete replacement
The old skirting board, moulding or cornice is removed throughout the entire room, and the new system is designed from scratch. Here, matching the old profile may not be necessary.
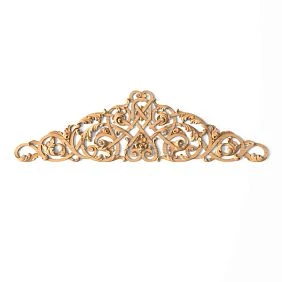
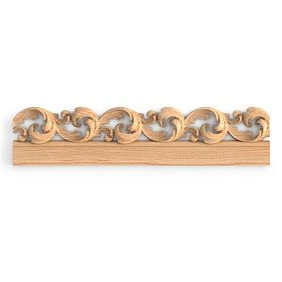
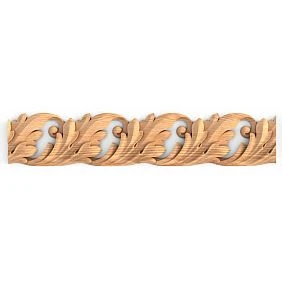
Our factory also produces:

Partial replacement
Part of the old profile remains. The new material must continue the existing line.
In the second scenario, a "similar" profile can create a problem even with a visually close pattern.
Discrepancies are especially noticeable:
- at the straight joint between old and new;
- at the corner joint;
- in a frame where one side has been replaced;
- near the door casing;
- when continuing a long cornice;
- in repeating rooms.
Therefore, the first question of reconstruction:
Do we preserve the old geometry or completely replace the system?
The entire subsequent order depends on the answer.
Get Consultation
Comprehensive supplies of building materials begin with an inspection of the existing finish
Before requesting a price, it is useful to compile a schedule of existing elements.
| Element | Condition | Decision | Reference sample needed | | --- | --- | --- | --- | | Baseboard | partially intact | partial replacement | yes | | Molding | locally damaged | reproduction | yes | | Cornice | heavily damaged | replacement by profile | yes | | Casing | good | preserve | no | | Trim in hidden area | satisfactory | leave | no |
This makes it clear what actually needs to be produced.
Without such an audit, it is easy to order a new baseboard for the entire floor, even though 60% of the existing one could have been preserved, or conversely — to try to join a new profile where it would be more reasonable to replace the entire line.
Wooden baseboard: what to remove from the site to reproduce the profile
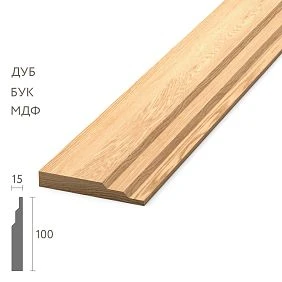
For the skirting board, you need the most intact section possible.
It is better to choose a fragment:
- without severe wear;
- without thick repair layers of paint;
- without chipped edges;
- without deformation;
- with a clearly readable cross-section.
It is necessary to record:
- full height;
- full thickness;
- cross-section shape;
- photos of the front side;
- photos of the end face;
- the material, if it can be reliably identified;
- old finish;
- lengths of existing sections.
If only a damaged fragment has survived, it cannot automatically be considered an ideal reference. The defect may be the result of use rather than the original geometry.
Why a straight joint between old and new is especially important for a skirting board
Let's imagine that 8 meters of old skirting board are preserved, and the adjacent 14 meters need to be replaced.
If the new profile is only 2 mm taller than the old one, the line will no longer match.
If the height is the same but the shape of the top edge is different, the joint will also be visible.
Therefore, the reference sample should be placed not only next to, but also end-to-end with the preserved profile.
Check:
- whether the height matches;
- whether the thickness matches;
- whether the relief transition aligns;
- whether there is a step;
- whether a clean joint can be achieved.
Only after this does it make sense to calculate the entire volume.
Wooden molding: why the exact profile matters more than a similar pattern
Molding is especially sensitive to small geometric deviations.
Two profiles may have the same overall width but differ in:
- the radius of the convex part;
- the depth of the groove;
- the position of the central relief;
- edge height;
- symmetry;
- transitions between planes.
On a straight section, the difference may be barely noticeable.
At a 45° corner, it is more pronounced: the pattern line stops continuing naturally.
If a wall frame is being reconstructed, where one side remains old and the other is made new, the profile must be checked specifically at such a junction.
How to remove molding if the entire strip cannot be dismantled
It is not always possible to remove an existing element without damage.
Then a set of data will come in handy:
- a precise photo of the end face;
- measurement of the overall width;
- measurement of the overall thickness;
- section template;
- photographs under side lighting;
- several reference points of the relief;
- a drawing prepared from measurements.
If it is possible to obtain a small, inconspicuous fragment from the area of future dismantling, it greatly simplifies verification of the new sample.
But it is better to send a technical drawing to the production order, not just the old part and a request to “make it the same.”
Wooden cornice: how to restore the profile without a whole sample
A cornice can be more complex than a baseboard and molding because it is located high up and often has a large cross-section.
If it is not possible to remove a whole fragment, the restorer needs:
- front photographs;
- bottom photographs;
- photo of the end face, if there is an open section;
- precise measurements;
- section template;
- data on the junction with the wall and ceiling;
- angle diagram.
Based on this data, a working drawing is prepared.
STAVROS offers the manufacture of mouldings to individual drawings and dimensions, so a reconstruction order is logically translated into the format of technical geometry.
Photographs remain supplementary material.
What to do if the old profile is covered with many layers of paint
In old interiors, paint can change the visible cross-section.
For example, several renovations have smoothed out a thin groove or reduced the legibility of the relief.
If you take a measurement directly over the paint and treat it as the original geometry, the new profile may reproduce the already accumulated deformation of the finish layer.
Therefore, before preparing the drawing, you need to determine:
- what belongs to the wood;
- what belongs to the old coating;
- which profile elements should be restored;
- whether the current state or the original geometry should be replicated.
It is better to finalize this decision before making a control sample.
First the control sample — then the entire footage
For an individual reconstruction profile, starting with 500–600 meters at once is risky.
Rational scheme:
old profile → measurement → drawing → control sample → attachment to the original → comments → adjustment → approval → main batch.
A control sample is needed not only for visual assessment.
It is used to check:
- cross-section;
- joint;
- the material;
- surface;
- relief;
- compatibility with the surviving sections;
- Future finishing.
The format of the control sample and the conditions for its production must be agreed separately with the manufacturer. It cannot automatically be considered a mandatory standard service for any individual order.
How to compare a new profile with the old one
For reconstruction, the comparison “they seem identical” is too weak.
A sequence is needed.
Step 1. End-face comparison
The old and new profiles are placed against each other by cross-sections.
Step 2. Straight joint
The fragments are aligned as a future continuous line.
Step 3. Corner test
If the profile is used in frames or corners, the joint is checked on a mock-up.
Step 4. Light
The texture is examined under side lighting.
Step 5. Coating
If the old element is painted or tinted, the new sample is checked after the agreed test coating.
This way, the reconstruction goes through several real joints before mass production.
Comprehensive supply of building materials: restoring skirting boards, moulding and cornice as a system
Comprehensive supply of building materials as part of the reconstruction, must take into account the entire architectural contour of the room.
For example, it is technically possible to completely replace the cornice independently of the skirting board.
But visually, a new large cornice may turn out to be too massive relative to the preserved old skirting board and narrow mouldings.
Therefore, the survey proceeds vertically:
floor → skirting board → wall mouldings → doors and architraves → cornice → ceiling.
This does not mean that all elements must necessarily be replaced at the same time.
The point is that the decision on one profile is checked against the other preserved parts.
What to preserve and what to make anew
Convenient decision matrix:
| Condition | Decision | | --- | --- | | The element is intact and fits the new concept | preserve | | Local damage | replace the section or repair | | Most of it is damaged, but the original profile is required | reproduce | | The profile is technically preserved but no longer fits the project | replace the system | | The condition is ambiguous | create a test section |
It is especially important not to confuse “can be preserved” with “worth preserving.”
Sometimes complex partial joining requires more labor than replacing the entire short line.
When custom reproduction is more advantageous than a complete switch to a new profile
Custom manufacturing makes sense not because the old profile is “too much of a pity to replace,” but when it saves other reconstruction work.
For example, in a hotel corridor, 180 m of old skirting board has been preserved, and only 22 m is damaged. A complete replacement means dismantling the entire line, re-preparing the walls, new material, and re-finishing. If the geometry of the old skirting board can be correctly reproduced and the new fragment cleanly joined, partial replacement may be more rational.
The opposite situation: in a small room, only 4 m of the old profile has been preserved, while the remaining 26 m is damaged. Here, custom reproduction for the sake of four meters may be unjustified. It is easier to replace the entire perimeter with a standard catalog profile.
Therefore, the decision is made based on four questions:
- how much of the old material is actually preserved;
- how much new material needs to be produced;
- how complex the joint is;
- how much related work a full replacement creates.
How to calculate the quantity for a partial replacement
Reconstruction is calculated differently from a new project.
For example:
total skirting board perimeter — 140 m;
retained — 80 m;
actually replaced — 60 m.
You cannot automatically buy exactly 60 m.
First, you need to build a map of the sections to be replaced.
For example:
- section A — 18.4 m;
- section B — 12.6 m;
- section C — 9.8 m;
- section D — 19.2 m.
Total:
18.4 + 12.6 + 9.8 + 19.2 = 60 m.
If a 2400 mm profile is selected, the simple mathematical minimum:
60 / 2.4 = 25 planks.
But if the sections require many short cuts and clean joints, the actual order may be higher.
Therefore:
total perimeter ≠ purchase volume;
purchase volume = map of replaced segments + cutting plan + reserve.
Why partial replacement may require more reserve than a new project
On a new project, the installer can optimize the cutting layout across all rooms.
During reconstruction, additional constraints arise:
- existing joint points;
- the need to fit into the old geometry;
- short local repairs;
- the inability to move the joint;
- the need to preserve part of the old element;
- hidden defects discovered after dismantling.
This does not mean that a universal 15% or 20% should be assigned.
The reserve is calculated based on actual units.
Why the reserve is especially important for a custom-made profile
For a standard catalog SKU, reordering is usually simpler.
For custom geometry, a new additional order may require:
- re-checking the drawing;
- starting production;
- separate packaging;
- new logistics;
- additional waiting.
Therefore, after calculating the installation volume, it is useful to separately decide whether an operational reserve is needed.
For example:
main batch — 120 planks;
installation reserve — 4 planks;
operational stock after handover — 2 planks.
This is only an example of the structure, not a quantity standard.
Comprehensive supply for construction sites: how to break a renovation into phases
Comprehensive supply for construction sites for a large renovation, it is convenient to manage by zones.
For example:
Phase I — lobby;
Phase II — corridors;
Phase III — rooms;
Phase IV — executive premises.
At the same time, the approved profile must not change from phase to phase without separate approval.
One product passport is used for each delivery.
What “turnkey” means in this article
The phrase turnkey comprehensive supply of construction sites here should be understood in a limited sense.
This refers to comprehensive outfitting of the site with wooden interior trim and related decor:
- skirting boards;
- Moldings;
- cornices;
- Baseboards;
- other approved wooden profiles.
This does not mean supplying the entire construction site with cement, plumbing, electrical, rolled metal, and other general construction categories.
Thus the term remains accurate for the actual specialization.
Why all phases must use a single profile passport
The passport records:
| Parameter | Value | | --- | --- | | Project code | ___ | | Product type | skirting / molding / cornice | | Article or custom profile number | ___ | | Drawing | revision ___ | | Material | ___ | | Size | ___ | | Length | ___ | | Reference sample | No.___ | | Finish | ___ | | Approval date | ___ |
Six months later, a new crew receives this document and does not start the selection process over.
If the profile has changed, a new revision is created, and the old one remains in the archive.
How to version a custom profile
For reconstruction, it is useful to use a simple system:
M-R01 rev.1
After the first adjustment:
M-R01 rev.2
After approval:
M-R01 rev.3 APPROVED
The order must reference the approved version specifically.
If the manufacturer receives an old PDF without a revision number, the risk of running the wrong profile increases.
How to label reconstruction zones so old and new are not mixed up
On site, it is useful to link each zone to a code from the schedule.
For example:
- LOB-P01 — lobby baseboard;
- COR-M02 — corridor molding;
- RM-K03 — standard room cornice;
- VIP-M04 — VIP area molding.
The same code must appear on the removed sample, the drawing, and the control fragment.
Then it is impossible to accidentally use the lobby baseboard as a reference for the corridor just because they look similar.
For a project with multiple phases, such labeling is especially useful: the second team sees not only the profile name but also its origin.
Oak, beech, or another wood: geometry alone is not enough
Even the same profile in a different wood can be perceived differently.
For reconstruction, it is necessary to determine:
- which species was used originally;
- whether the wood will be visible;
- whether an opaque enamel is planned;
- whether there will be tinting;
- whether the old texture needs to be visually continued.
If the profile is fully painted with opaque enamel, the visible texture may be secondary.
If a transparent or semi-transparent finish is used, the difference in wood becomes more noticeable.
Therefore, the material is included in the passport as mandatorily as the dimensions.
What to do if the old coating cannot be matched exactly
It is impossible to promise a perfect match between the old and new surface without a test.
The old finish changes over time:
- fades;
- darkens;
- receives local repairs;
- absorbs dirt;
- differs in gloss.
Several strategies are possible.
Local matching
The new element is tinted as closely as possible to the surviving one.
Repainting the entire architectural line
For example, the entire baseboard of one room receives a new coating.
Replacement from natural boundary to boundary
The profile is replaced not in separate pieces, but as a whole section between doors or corners.
Which option is better depends on the condition of the object.
Why a finish test should be done after geometry approval
There is no point in spending a long time matching the color on a profile whose geometry may still change.
Correct order:
section → control sample → geometry approval → coating test → final approval.
This way, the painter does not waste time on a piece that will still have to be redone after comparison with the old profile.
Comprehensive building material supplies: how to link several individual profiles in one delivery
If the baseboard, molding, and cornice are being reconstructed at once, comprehensive building material supplies it is more convenient to manage them not as three separate unrelated orders, but as a single schedule.
| Zone | Type | Profile | Material | Volume | Reference | Queue | | --- | --- | --- | --- | ---: | --- | --- | | Lobby | baseboard | PLT-R01 | oak | ___ | S-01 | I | | Lobby | molding | MLD-R02 | oak | ___ | S-02 | I | | Lobby | cornice | KZ-R03 | oak | ___ | S-03 | I | | Corridor | baseboard | PLT-R01 | oak | ___ | S-01 | II |
This way, the same profile is not created again for each zone.
How to accept the first batch
Before mass installation, the first delivery must be compared with the approved reference.
Check:
- profile code;
- the material;
- cross-section;
- length;
- surface;
- the joint with the remaining element;
- batch marking.
If there is any doubt, it is better not to distribute the disputed profile across floors until a decision is made.
The main task of the first acceptance is to confirm that the production batch matches what was approved on the sample.
What to do if the first batch differs slightly from the reference sample
There is no need to discuss the discrepancy using words like "slightly thicker" or "a slightly different radius."
You need to:
- set aside the disputed material;
- bring up the drawing;
- attach the reference sample;
- take measurements;
- photograph the joint;
- describe the specific discrepancy;
- agree on the solution before installation.
If the project allows a difference, it is documented.
If not, the profile should not go into concealed installation just because the batch has already arrived.
How to arrange a reorder after several months
A repeat order should begin with the passport.
Bad request:
We need another 30 meters of that cornice for the lobby.
Good:
KZ-R03 rev.3 / oak / drawing ___ / reference sample S-03 / previous batch No.___ / required ___ pcs.
This way, a new manager, a new purchaser, or a new crew understands exactly what is being repeated.
For a custom profile, this order is especially important.
When custom reproduction is not needed at all
Not every old element is worth copying.
A custom profile may be excessive if:
- all the old trim is being removed anyway;
- the new concept completely changes the architecture;
- only a very short section has been preserved;
- a suitable catalog profile can be used throughout the entire area;
- the cost of custom production is not justified by the scale of the renovation;
- a precise joint with the old element is not needed anywhere.
In that case, it is wiser to choose a completely new system.
Mistakes in reconstructing wooden moulding
Mistake: choosing a "similar" profile from a photo.
Cause — it seems that a few millimeters are unnoticeable. Consequence — a step at the joint and a different pattern in the corners. Solution — measurement, drawing, and a control sample.
Mistake: treating a damaged old fragment as an ideal reference.
Cause — there is no other sample. Consequence — deformation is transferred to the new profile. Solution — compare several surviving sections.
Mistake: starting the entire footage before checking the sample.
Cause — the desire to save time. Consequence — the mistake scales to hundreds of meters. Solution — a separate approval stage.
Mistake: treating the total perimeter as the purchase volume.
Cause — partial reconstruction is treated as a new project. Consequence — excess or insufficient material. Solution — a map of replacement sections.
Mistake: not keeping the profile passport.
Cause — the first batch has already been installed. Consequence — six months later, all approvals start over. Solution — SKU, drawing, revision, material, and reference sample.
Mistake: promising an exact match to the old finish without testing.
Cause — the geometry already matched. Consequence — the new section stands out in color and sheen. Solution — separate finish control.
Final scheme for reconstructing wooden trim
- Survey the site.
- Divide the elements into “keep / replace / reproduce.”
- Select the best preserved reference samples.
- Take dimensions and cross-sections.
- Prepare working drawings.
- Check whether a suitable catalog profile is available.
- If necessary, coordinate custom manufacturing according to the drawing.
- Obtain and verify the reference sample.
- Join it with the old profile.
- Approve the material and finish.
- Calculate the replacement sections and cutting layout.
- Add a justified reserve.
- Split the delivery into phases.
- Accept the first batch against the reference.
- Keep the passport and operational reserve after handover.
This is how reconstruction turns from a search for “something similar” into a managed system of reproduction and delivery.
Questions before ordering
Can mouldings be ordered to custom dimensions?
STAVROS indicates the possibility of manufacturing mouldings to custom drawings and dimensions.
Is it enough to bring an old piece of moulding?
It is useful for verification, but for a production order it is better to convert the geometry into an exact drawing.
Should the entire volume be ordered at once?
For a custom critical profile, it is wiser to first check a control sample and only then start the main footage.
How should the old and new profile be compared?
By cross-section, butt joint, corner joint, material, and future finish.
How should partial replacement be calculated?
Based on the actual replaced sections and the cutting plan, not on the overall perimeter of the room.
Is a reserve needed?
If the cutting plan, local repairs, and future operation require it — yes. There is no universal percentage.
What should be preserved after the reconstruction is completed?
The profile data sheet, the approved sample, the drawing, the material, the batch number, and several whole elements of the operational reserve, if it is provided for by the project.
Where can I find standard wooden trim?
In the STAVROS trim products catalog; a custom profile is needed only when the standard catalog does not cover the reconstruction task.