Article Contents:
- 1. Assign roles to profiles before browsing the catalog
- 2. Choose the main molding for a standard wall
- 3. The second profile should solve a different task
- 4. Reserve a specific area for a wide molding
- 5. Compare widths using the dimensions of ready-made frames
- 6. Align depth and mounting planes
- 7. Assign a separate function to the ornamental profile
- 8. Check the repeat before approving the ornament
- 9. Plan the arch solution in advance
- 10. Decide how the corners will be finished
- 11. Match the mouldings with the cornice and skirting
- 12. Can different series be combined
- 13. Compile a single table of the selected profiles
- 14. Assign the set to rooms and reduce exceptions
- 15. Check the entire system in a single 3D scene
- 16. Compare the sections in the DWG
- 17. Approve the samples together, not one by one
- 18. Calculate the cutting layout separately for each SKU
- 19. Turn a set of profiles into a purchasing specification
- 20. How to order a coordinated molding collection
A 35 mm wide molding can frame a large panel well and take up too much space in a narrow frame near a door. Replacing it with a slim profile solves the local problem but creates the next one: how do you tie two different lines together in one interior? If you choose decor separately for each wall, by the end of the project you can easily end up with a dozen SKUs and no clear distribution of roles.
Molding collections for designers are useful precisely as a system. The main profile repeats in ordinary zones, the secondary one works at a smaller scale, and the accent one highlights the main composition. Ornament and curved sections are added when there is a specific place for them and a proven product.
Such a project collection is assembled by geometry, section character, and method of use. The series name helps narrow the search, but the final decision is made based on a joint layout of real profiles.
1. Assign roles to profiles before browsing the catalog
Start with a list of tasks: large wall frames, small inner contours, panel framing, a horizontal band, an arch. Then combine the tasks that one profile can perform. For two rooms similar in scale, separate moldings may not be needed at all.
Assign the designation M-01 to the main profile, M-02 to the secondary one, and M-03 to the accent one. These are project codes, not manufacturer SKUs. They let you discuss the function of a detail before the final product selection and preserve the connection between rooms.
You do not have to fill every role. An interior with several identical frames can get by with one molding. A second one is needed when a different task actually appears: for example, an inner slim contour that the main profile makes too heavy.
Every new code must have a reason to appear. The wording “another profile I liked” does not explain where to use it and why the one already chosen cannot be used. At this stage it is easier to remove an extra item than to coordinate a replacement after all the documentation has been prepared.




2. Choose the main molding on a regular wall
The most striking wall rarely represents the entire property. It may have a large panel, a high ceiling and symmetrical furniture, whereas in the hallway the same profile will sit next to doors and narrow wall sections. That is why the main molding is checked first of all on repeating areas.
Look at the width, projection, shape of the bead, grooves and steps. A semicircular contour and a flat band of the same width produce different light and shadow. Room height matters, but by itself it does not determine the profile size: viewing distance, frame dimensions, door casings and furniture are taken into account.
Make two test layouts: one of a regular wall and one of the tightest area where this profile is intended to be repeated. If on the second it prevents you from preserving the margins, you do not necessarily have to reduce the entire collection. Perhaps this is exactly where an auxiliary size is needed.
Moldings for designed interiors are chosen with the repeatability of the solution in mind. The more zones the main profile serves without forced compromises, the more robust the system is during further specification.
Our factory also produces:






3. The second profile must solve a different task
An auxiliary molding is introduced for a smaller scale or a subordinate contour. For example, a wide outer frame organizes the wall, while a thin inner outline emphasizes a separate field. The difference between them must be visible in the composition where they are used.
At the same time, two close sizes are not always redundant. A difference of a few millimeters can be significant next to a door casing or inside a narrow panel. What is checked is not the abstract distance between the numbers, but whether the new item eliminates a specific limitation.
Preserve the kinship of form: the character of the rounding, the way it transitions to the wall, the combination of projections and recesses. A thin rounded profile can support the central bead of the main molding even if the other details of the section differ.
If both candidates are equally suitable in all the intended places, try leaving just one. This will reduce the number of lines in the schedule and the likelihood of confusing the outer and inner outlines during installation. But merging is permissible only after checking the frame dimensions.
Get Consultation
4. Assign a specific zone to a wide molding
An accent profile can frame a panel in the living room, a large composition in the hallway, or a separate wall insert. Its presence does not obligate you to repeat the same width in every room. On the contrary, the difference in scale becomes clearer when a large contour appears where the compositional center is actually located.
The word "wide" is relative. A 35 mm profile is noticeably wider than a 10 mm one, but next to a massive door portal it may be perceived as calm. Compare moldings on a single elevation with the actual adjacent elements.
Check whether enough free space remains inside the frame. If a large profile requires reducing the image, moving a sconce, or shortening the gap to the door, this is a change to the entire composition, not a simple enhancement of the decor.
A separate accent item is not needed when expressiveness is already created by color, a large panel format, or an ornamental band. Several equivalent accents can make it harder to read the main wall structure.
5. Compare widths through the dimensions of finished frames
There is no universal series of "narrow — 20 mm, standard — 40 mm, wide — 60 mm." Sizes are chosen relative to a specific composition. It is useful to translate the difference between profiles into a change in the free space.
A conventional rectangular frame has an outer width of 500 mm. With the same profile on both sides, its inner opening is calculated as follows:
Inner width = outer width − two molding widths.
For a 10 mm profile, the result is 480 mm; for 22 mm, 456 mm; for 35 mm, 430 mm. Replacing 22 mm with 35 mm will reduce the inner space by 26 mm if the outer dimension remains the same.
With a double frame, the distance between the contours is added. If, in the same 500 mm frame, the outer profile takes up 22 mm, the free gap is 40 mm, and the inner profile is 10 mm on each side, the central field will be 356 mm.
Therefore, the auxiliary molding is checked together with the gap around it. Even a thin additional line takes up space and may prove superfluous in a compact wall section.
6. Coordinate the depth and mounting planes
Width A shows the size of the profile on the development, C shows its thickness or maximum projection in the accepted product scheme. The meaning of the designations is clarified on the drawing. The ratio of A to C helps compare cross-sections, but does not fully describe their relief.
A narrow molding with a strong projection can attract more attention than a wide flat one. This is acceptable if the composition is intended that way. If, however, the auxiliary line accidentally becomes the main volume, it is worth reconsidering its cross-section or finish.
Compare profiles from a common starting surface. A 6 mm thick molding on a 12 mm thick panel will project 18 mm from the wall, excluding other layers. An 11 mm thick profile installed directly on the wall will project 7 mm less, even though it is thicker in itself.
Next to a door casing, furniture, and skirting board, such a discrepancy affects how the junction is constructed. A common color finish will not eliminate the difference in planes. It must either be accepted as part of the project or the design must be changed before purchase.
7. Assign a separate function to the ornamental profile
Smooth and ornamental moldings can be combined in one system. To do this, determine in advance where the pattern arises: in the upper band, around the central panel, on one formal section. The remaining lines support the composition with their scale and cross-section.
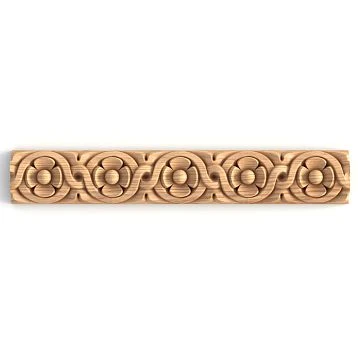
When selecting, ornamental trim compare the motif, the size of the repeating element, the depth, and the direction. Beads, braid, and plant frieze differ not only in name: they have different pattern density and different behavior on a short segment.
First consider the ornament next to the main molding, then across the entire wall. A catalog fragment may look delicate, but after repeated repetition it can become the most active element in the room.
Do not add a new motif just for the sake of variety in the adjacent room. Sometimes it is enough to keep the same profile and change the frame format. This will maintain the connection between the rooms without introducing another decorative theme.
8. Check the repeat before approving the ornament
A repeat is a recurring fragment of the pattern. When laying out, its position relative to the center of the wall, the ends of the strip, and the transition through the corner are important. Matching the overall length does not yet guarantee a successful completion of the motif.
Suppose a conventional ornament repeats every 120 mm, and the straight section between the ends is 1100 mm. It accommodates nine full repeats and another 20 mm. Simple centering of the cut will leave 10 mm on each side, but without the pattern it is unknown which part of the motif will fall on these edges.
Show the ornament layout to scale, choose the position relative to the central axis, and check both ends. Sometimes the pattern needs to be shifted, sometimes a different termination or a change in the length of the decorative field is required.
At the corners, check the direction separately. Rotating a finished strip and mirroring its image are different actions. Not every directional pattern can be continued by simply turning it around; the availability of a corresponding version should be confirmed for the selected article.
9. Plan the solution for an arch in advance
If the project includes an arch, an oval frame, or a curved wall, the special profile must be checked before the final approval of the straight sections. Otherwise, it may turn out that the selected section does not have a suitable version for the required bend.
Flexible polyurethane molding is selected according to the geometry of the specific section: radius, bending direction, mounting surface, and fastening method. The material designation does not confirm that a standard strip can be bent. The availability of a flexible version and the permissible radius must be confirmed for the specific model.
When joining straight and flexible sections, compare the width, projection, face profile and finish. Matching overall height is not enough: a bead or groove may end up at different levels. A trial joint shows this better than two separate photographs.
If a suitable pair is not confirmed, revise the profile of the entire continuous line or provide a meaningful separation of the sections. You must not leave a conditional "flexible version" of an article in the schedule whose existence has not yet been verified.
10. Decide how the corners will be finished
For a rectangular frame made of identical profiles, a standard joint can be made with a 45° miter cut. This applies to right-angle geometry; other angles and spatial junctions require separate marking. A decorative corner piece changes both the pattern and the lengths of the straight sections.
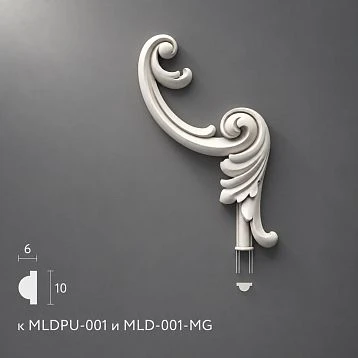
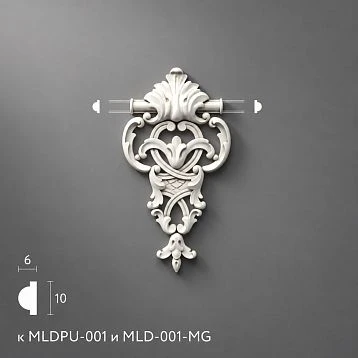
У corner element MLDPU-002U the size 172 × 172 × 13 mm is specified, and the description links it to molding MLDPU-002. This is an example of matching to a specific profile. A match in stylistic name alone does not confirm such a link.
The overall dimensions of the corner decor cannot be automatically subtracted from the length of each side of the frame: first, find the actual joint lines on the drawing. The maximum thickness of the decorative part may also differ from the thickness of the straight molding without a conflict at the joint itself.
Select Decor for Molding only for those areas where an expressive corner is needed. A single design collection may include understated mitered frames and a separate composition with decorative terminations.
11. Relate the moldings to the cornice and skirting
The cornice finishes the wall at the top, the skirting connects it to the floor, and the moldings organize the intermediate fields. These elements do not have to share the same pattern. What matters is that their sizes and projections support the chosen distribution of primary and secondary elements.
Check the entire wall from floor to ceiling. An active cornice can make an additional ornamental band unnecessary. A tall skirting board changes the available height of the lower frames, and the door casing limits the side margins.
Polyurethane mouldings and cornices are compared by their specified profiles. A cornice has a position relative to the wall and ceiling; it cannot be assessed by a single width figure alone, next to a flat wall-mounted profile.
In the selection moldings from polyurethane treat these products as neighbours within a specific junction. Compatibility means that the planned margins, terminations and planes are achieved between them, not merely that the material matches.
12. Can different series be combined?
A project collection does not have to match a single manufacturer's series. Products that are related in profile and scale can be coordinated for one interior. This is especially convenient when the main decor is understated and a separate ornament is needed in only one area.
A ready-made series is more useful where the composition contains many related parts: straight profiles, decorative corners, centre inserts and terminations. Selecting each part independently is more difficult, since more joints and repeating motifs need to be coordinated.
But belonging to a series does not remove the need to check a specific pair of product codes. Different sizes within one line may be intended for different tasks. The collection name also does not replace information about the material and surface condition.
If products with different bases or preparation are combined, the finish and installation are checked additionally. A common colour allows the elements to be tied together visually, but does not make the requirements for adhesive, joint treatment and painting the same.
13. Compile a single table of the selected profiles
After comparing the candidates, record the preliminary set. Below is an example of how roles can be distributed among real STAVROS mouldings. The dimensions are taken from the product cards, and the role assignments are conditional: this is not a ready-made recommendation for any room.
| Project code | Intended role | Article | A, mm | C, mm | L, mm |
|---|---|---|---|---|---|
| M-01 | Main wall frames | MLDPU-002 | 22 | 11 | 2600 |
| M-02 | Fine inner contours | MLDPU-001 | 10 | 6 | 2600 |
| M-03 | Larger panel frame | MLDPU-003 | 35 | 12 | 2600 |
У MLDPU-002 the central bead combines with stepped transitions. The thinner MLDPU-001 has a semicircular profile, while MLDPU-003 — a wider multi-level section. Their combined use is checked on the layout and samples.
Ornamental M-04 or special M-05 are added after selecting a specific product. Until the item code is confirmed, the line remains a selection task and is not included in the order. The approved collection must contain only unambiguously defined items.
14. Link the set to the rooms and reduce exceptions
The application matrix shows which profiles are actually needed. For a hypothetical project, it might look like this:
| Room | M-01: main | M-02: slim | M-03: accent |
|---|---|---|---|
| Living room | wall frames | Inner contours | Panel framing |
| Corridor | Repeating frames | Narrow sections | Not applicable |
| Bedroom | Main composition | Individual small frames | Not applicable |
| Hall | Side margins | Not applicable | Central composition |
If a new profile appears in only one place, check the reason. An exception may be justified: for example, a study may need its own scale, or a lobby may have an arch. In that case, the item keeps its own code and exact area of application.
Before approval, try replacing functionally similar candidates with an already selected profile. Evaluate the result by dimensions, depth, and junctions. The goal is a sufficient set without random duplicates.
Treat different finishes of the same moulding separately when finishing and distributing across rooms. A shared product code does not yet mean that painted strips can be freely swapped on site.
15. Check the entire system in a single three-dimensional scene
For comparison, you need a shared test wall where the main and secondary profiles, the accent frame, the cornice and the skirting are visible at the same time. Separate attractive images of each product will not show which contour draws the attention.
Use 3D models of moldings with verified product codes and dimensions. Compare options under the same lighting, finish material and camera position. Then assess the view from ordinary points in the room, including the entrance.
Do not change the width or depth of the model to make it fit the wall better. After such a transformation, the visualization will show a product that differs from the selected item. Change the layout or choose a different cross-section.
Consider the lighting along the wall separately. It is precisely this that often reveals that a narrow profile protrudes more than expected or that several calm lines together create too dense a pattern.
16. Compare cross-sections in DWG
After the visual check, place the cross-sections side by side at the same scale. Bring them to a common mounting plane and label the product codes. This reveals differences that are lost in a perspective image: the width of the support part, the position of the roller, the height of the edge and the direction of the profile.
Check not only individual elements but also real connections. A thin moulding may look good next to the main one and yet not be suitable for butt-jointing into its side surface. Such an abutment requires a separate detail.
The symbols on the drawings must lead to the same profile table that was used in the visualization. If the product code has changed after the check, update the model, dimensions and schedule. The old image must not remain the basis for ordering.
Assign one current version of the set with an approval date. This is especially useful when the visualizer, specifier, and installer work with different copies of the project.
17. Approve samples together, not one at a time
Physical verification is arranged after the list of candidates has been narrowed down. If only four suitable profiles remain out of several dozen items, samples are needed to resolve specific doubts: scale, transition between sections, pattern, or finish.
In the section samples and catalogs check the contents of the selected set. A printed catalog, an exhibition stand, and a sample of the required profile serve different purposes. You cannot assume that any set necessarily contains all the item codes of the project.
Place the selected elements on a common base, reproduce the gaps and the intended coverage. For a complex joint, a trial assembly is needed; for an ornament, a sufficient fragment is needed to evaluate the pattern repeat.
On the approved samples, record the item code, finish, color, and gloss. Also keep the designation of the project role. This will allow the delivery and the finished finish to be compared against a single agreed reference.
18. Calculate the cutting layout separately for each item code
The total linear footage of all moldings is needed for an approximate estimate, but it does not determine the number of strips. The remainder of a wide profile will not replace a missing piece of a narrow one, even if the length fits.
Let us consider a conditional order of two items with a commercial length of 2600 mm. All segments must be continuous; the lengths are specified according to the accepted measurement line of the finished part.
| Position | Ready-made segments | Net area | Strips up to reserve |
|---|---|---|---|
| M-01 | 10 at 2100 mm and 10 at 600 mm | 27 м | 13 |
| M-02 | 8 at 1500 mm and 8 at 450 mm | 15.6 m | 8 |
| Total | Two different profiles | 42.6 m | 21 |
For M-01, each long segment occupies a separate strip. The remaining 500 mm cannot accommodate a 600 mm piece. Ten short pieces are placed on three more strips: four, four, and two.
For M-02, eight long pieces require eight strips. On four of them, two 450 mm segments can additionally be placed: a total of 2400 mm per blank. In the final map, the cuts, end trimming, and joint specifics are checked.
Dividing the total 42.6 m by 2.6 m gives, after rounding, 17 strips instead of the required 21. The reserve is assigned additionally for each item. For ornament, pattern matching is also taken into account: the calculation for smooth profiles cannot be transferred to it without verification.
19. Turn the set of profiles into a purchasing specification
In the final statement, rooms, the list of segments, the number of whole strips, the reserve, and the product reference are added to the code, role, item, and dimensions. The finish and delivery condition are stated explicitly, even if all the decor will be the same color.
Separate the statuses "selected," "approved," and "ready to order." The last means that the specific execution, quantity, and delivery terms have been confirmed. An unresolved issue regarding a flexible section or decorative corner must not be hidden inside a generic "moldings" line.
Before ordering, four representations are cross-checked: the approved sample, the 3D model, the working drawing, and the specification. The main errors show up precisely between them: the old section remained in the image, a length was lost in the table, and a different profile ended up in the calculation.
When replacing an item code, the related part of the system is re-checked. A narrower moulding will change the frame fields, a deeper one will change the junctions, and a different product length will change the cutting plan. A similar photograph is not sufficient grounds for replacement.
20. How to order a coordinated collection of mouldings
Once the set is approved, you can buy polyurethane moldings by specific item codes and size versions. Compare the supplier's offer with the specification sheet: material, lengths, units of measurement, quantity and configuration. A single catalog section may contain products made of different materials, so each line is checked.
If required Polyurethane trim with an ornament, submit the pattern layout diagram together with the quantity. Before buying a flexible polyurethane moulding, confirm its version and suitability for the planned area. A single generic name is not enough.
To discuss a set via the section for designers and architects prepare a table of profiles, layouts and questions about the junctions. Keep the distribution by room and mark the reserve separately: this will help to receive and issue material for installation.
Moulding collections for designers work when each profile has a purpose and all purposes are tied together by one verified geometry. Then a coordinated set of real products is purchased that can be reproduced from drawings and checked on site.