Article Contents:
- What are decorative polyurethane overlays and how they differ from stucco molding
- Polyurethane as a material: why it is the choice
- Overlay formats: from medallion to cartouche
- Where to glue decorative overlays: eight real scenarios
- Scenario one: above the mirror
- Scenario two: inside a frame of moldings
- Scenario three: above a console or cabinet
- Scenario four: decorative overlays on furniture
- Scene five: above the doorway
- Scene six: next to the sconce
- Scene seven: in the hallway
- Scene eight: ceiling area and connection with the cornice
- How to choose the size of the decorative overlay: specific guidelines
- Proportion rule
- Table of guidelines by location and size
- Wall height and overlay size
- Corner overlays and their special calculation
- Single element or paired overlays: logic of choice
- When to choose a single element
- When paired L/R overlays are needed
- Serial decor: rhythmic repetition as a technique
- Overlay style and interior style: how not to make a mistake
- Overlays for classic interiors
- Overlays for neoclassicism
- Overlays for modern interiors
- Overlays for Provence and romantic style
- Are moldings needed for decorative overlays
- When moldings are mandatory
- When moldings are not mandatory
- Decorative overlays for different rooms: specifics
- Living room: the main place for stucco decor
- Bedroom: restrained accent
- Entryway: First Impression
- Study: status through details
- Children's room: very carefully
- How to glue decorative overlays: installation technology
- Tools and Materials
- Step one: marking
- Step two: surface preparation
- Step three: applying adhesive
- Step four: installation
- Step five: sealing the edge
- Step six: painting
- What to buy with decorative overlays: complete set
- Basic set (one or two overlays as an accent)
- Set for wall framing
- Set for a classic interior
- Set for furniture decor
- Typical mistakes when choosing and installing decorative overlays
- FAQ: popular questions about polyurethane decorative overlays
- About the Company STAVROS
There comes a moment in renovation — the walls are painted, furniture is arranged, everything is clean and tidy, but something is missing. An accent is missing. That point that gives the interior character and completeness. That's when, in the decor catalog, your eye catches a beautiful stucco element — an elegant medallion, an ornamental overlay, an expressive cartouche — and your hand reaches for the "Add to cart" button. But then comes the logical question: where does this even go? On the wall? Above the mirror? On furniture? What size to choose? Is anything else needed?
Great questions. And we will answer them — in detail, specifically, and honestly.
Polyurethane decorative appliques — is a universal decorator's tool that works on many surfaces: wall, ceiling, furniture, door, mirror, molding frame. They turn a neutral plane into a meaningful part of the interior. But only when chosen correctly — for a specific place, a specific task, and a specific style.
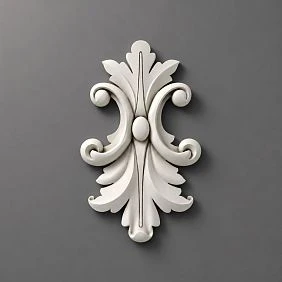
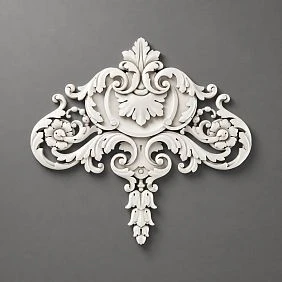
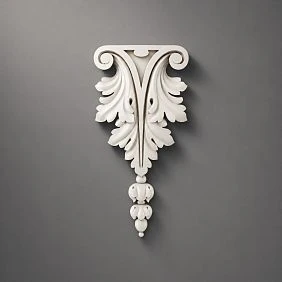
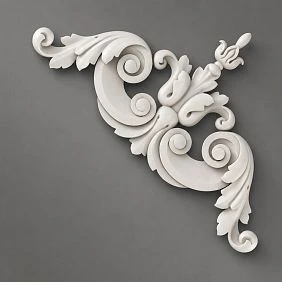
What are polyurethane decorative overlays and how do they differ from stucco
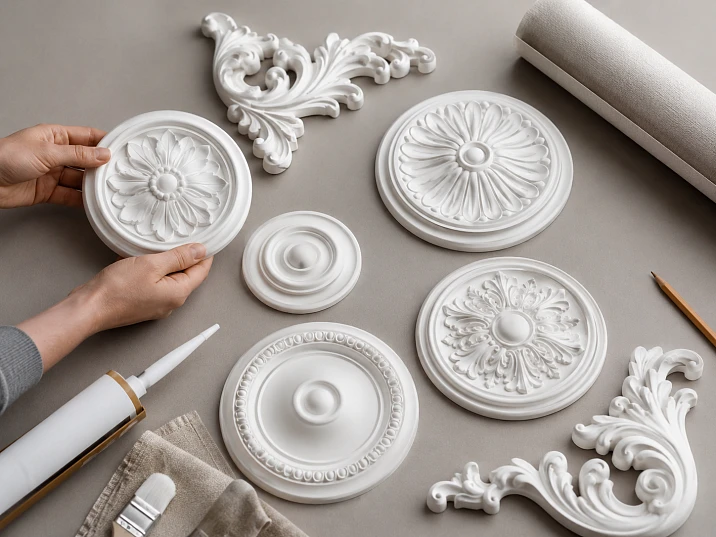
First of all — a bit of terminology, because it's easy to get confused in this topic. Decorative overlay, stucco decor, decorative stucco, applied decorative element — these are all the same thing. Ready-made molded polyurethane products with a relief ornament that are attached to the surface with glue.
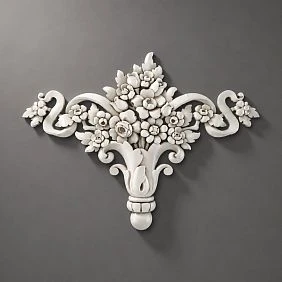
Unlike classic linear stucco, overlays are individual, not linear. Molding is a linear meter. Cornice is too. But an overlay is a separate element: medallion, rosette, cartouche, corner overlay, floral rosette, heraldic shield, acanthus leaf, petal ornament, or figured decorative medallion.
buy decorative moldings in the form of applied elements means getting a ready-made accent that can be installed pointwise: in one place, at two symmetrical points, in four corners of a frame, or across the entire wall in a uniform rhythm. This is maximum flexibility with minimal labor costs.




Polyurethane as a material: why it
Polyurethane is the optimal material for overlay decor due to its combination of properties. Lightweight — the overlay stays on with glue without additional fasteners. Moisture-resistant — does not deform with humidity changes. Clear relief — modern polyurethane molds reproduce ornamentation with high detail. Paintable — acrylic paint applies evenly, and the finished product is indistinguishable from plaster stucco.
Plaster overlays are heavier, more fragile, and require more complex installation. Wooden ones are sensitive to humidity and expensive to process. Polyurethane PU overlays combine the decorativeness of plaster with the practicality of modern polymer.
Our factory also produces:

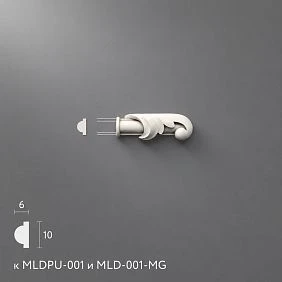
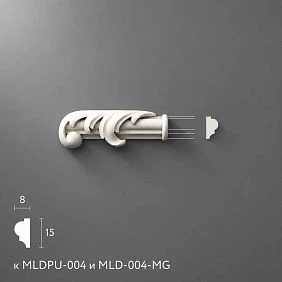
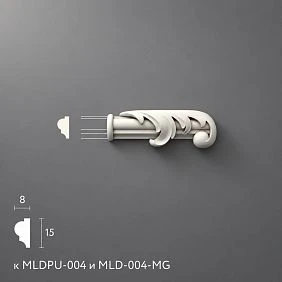
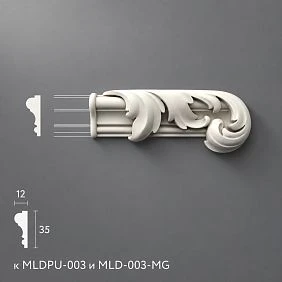
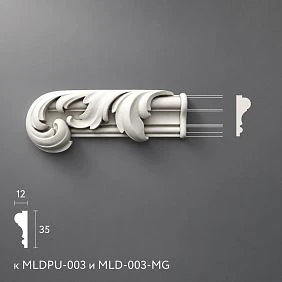
Overlay formats: from medallion to cartouche
In the catalog of decorative overlays, you can find several product formats.
Medallion — a round ornamental element. A classic. Works well as an independent central accent: above a mirror, above a console, in the center of a frame.
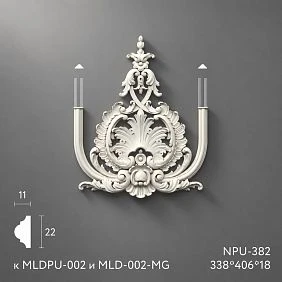
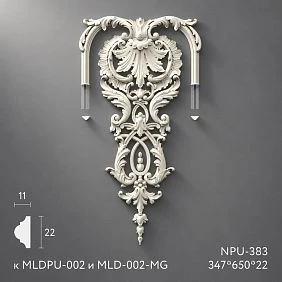
Cartouche — a figured overlay with a frame border and ornament. Often elongated horizontally or vertically. Used as an accent above a relaxation area, above a door, in the upper part of a wall.
Corner overlay — installed in the corner of a molding frame. Solves two tasks at once: decorates the corner and masks the molding joint during non-standard cutting.
Paired elements L/R — mirror-symmetrical overlays. One element is left, the other is right. Used on the sides of a mirror, symmetrically on the sides of a frame, or on both sides of a fireplace.
Rosettes and floral elements — small round or flower-shaped overlays. Used as rhythmic decor: in a series along a wall, inside a frame, at the intersection points of moldings.
Large ornamental panels are more complex multi-element overlays. They are installed as an independent decorative panel on a wall or ceiling.
Get Consultation
Where to glue decorative overlays: eight real scenarios
This is a key question. An overlay is not a self-sufficient object. It only works in conjunction with a specific location, and it is the location that determines whether it is needed at all and which format to choose.
Scenario one: above a mirror
A mirror in a hallway, bedroom, or bathroom is an ideal place for a decorative overlay. The space above the mirror often remains empty, and this empty space visually 'breaks' the connection between the mirror and the wall. The overlay fills it and simultaneously turns the mirror into an architectural object.
A horizontally elongated medallion or cartouche works well for this location. The width of the overlay should be within 60–80% of the mirror's width. This creates a sense of framing without overloading.
Relief Decoration Above a mirror is one of the most popular and visually advantageous ways to use decorative overlays. With the right choice of size and ornament, the mirror ceases to be just 'glass on the wall' and becomes a decorative zone.
Scenario two: inside a frame made of moldings
A molding frame on the wall is a beautiful element in itself. But if the wall is large and there are many frames, they can look identical and monotonous. A decorative overlay inside the frame is an accent that highlights one or several frames from the general row.
The overlay is placed in the upper part of the frame, centered, or in the center of the entire frame. It adds a lively ornamental element to the geometric shape. The result is the effect of classic paneling with stucco inserts.
Corner overlays are ideal for this application — they are mounted in the four corners of the frame and give it a "finished" architectural look. Or a small medallion at the center of the top side of the frame.
Buy Molded Decoration For molding frames — a logical next step after decorating walls with moldings. Frame + overlays = a full decorative panel that looks like expensive trim.
Scenario three: above a console or cabinet
The wall above a console table or cabinet is a mini-stage. It's common to hang a mirror, painting, or create a decorative composition here. An overlay in this area works as a top accent that completes the wall above the furniture.
A large cartouche or an elongated horizontal medallion works well. Its center should align with the center of the console. If a mirror hangs above the console, the overlay is placed above the mirror on the same axis.
Scenario four: decorative overlays on furniture
This is a less obvious but very effective way to use them. Decorative stucco On furniture facades — this is a technique that turns standard furniture into a work of art. Especially relevant for:
-
Facades of a dresser or cabinet in a classic or neoclassical style
-
Sliding wardrobe doors without a pattern
-
facades of kitchen cabinets in Provence or neoclassical style
-
panels of a walk-in closet
-
decorative elements of a fireplace or portals
For furniture, small overlays with a neat pattern are used. It is fundamentally important: the furniture surface must be clean, degreased, and painted. The glue is selected taking into account the characteristics of the facade material.
Scenario five: above the doorway
The area above the door is one of the most classic places for stucco decor. In historical interiors, a frieze, cartouche, or bas-relief was always placed here. Today, this technique works great in hallways, living rooms, and studies.
The overlay above the doorway should be proportional to the width of the door. Too narrow — it will get lost. Too wide — it will overload the opening. Guideline: the width of the overlay is 50–70% of the width of the door leaf.
Scenario six: next to a sconce
A sconce on the wall is a light accent. A decorative overlay next to it is a decorative accent in the same area. The overlay is placed above the sconce, on the same vertical axis. Two sconces on the sides of the bed mean two mirror-symmetrical L/R elements above them. The result is a complete headboard area with lighting and decor.
Paired L/R overlays are exactly for such symmetrical scenarios. They are designed to create a mirror axis, and it is almost impossible to make a mistake during installation.
Scenario seven: in the hallway
The hallway is a small space with high visual load. This is where the guest forms the first impression of the hosts and the interior. Small but expressive decorative insert on the key wall of the hallway works as a "signature" under the renovation — it shows that details were considered here.
In the hallway, it's better not to overload. One central element above the mirror or above the coat rack. Compact, neat, with moderate ornament.
Scenario eight: ceiling area and connection with the cornice
to buy molding in the form of overlays can also be used for ceiling applications. Ceiling overlay elements are not only rosettes under the chandelier, but also corner elements where the cornice meets the wall, decorative accents above windows, ornamental inserts in ceiling coffers.
If there is {name} in the room Ceiling molding in the form of a cornice and rosette, decorative overlays on the walls become an organic continuation of the theme. One stylistic line from ceiling to walls — that's what creates the feeling of a well-thought-out, architecturally complete space.
How to choose the size of a decorative overlay: specific guidelines
Choosing the size is the second most important question after choosing the location. An overlay that is too small for its place looks random. Too large — overloads the area and disrupts proportions.
Proportion rule
Key principle: the overlay should be proportionate to the object it works with. Above the mirror — relative to the width of the mirror. In a frame — relative to the width of the frame. On a furniture facade — relative to the width of the facade.
A good proportion for a single accent overlay: its width is 30 to 60% of the width of the supporting object (mirror, frame, facade). At the same time, the overlay should not occupy more than 15–20% of the height of this object — otherwise it ceases to be an accent and becomes a dominant element.
Reference table for placement and size
| Place of application | Recommended overlay size |
|---|---|
| Above a mirror 60–80 cm | Width 35–50 cm, height 10–20 cm |
| Above a mirror 90–120 cm | Width 50–75 cm, height 15–25 cm |
| Inside a frame 80×100 cm | Corner overlays or medallion 20–35 cm |
| On a furniture facade 40×70 cm | Overlay 15–25 cm |
| Above the console | Width 40–60 cm |
| Above a door opening 80 cm | Width 45–60 cm |
| Above a door opening 90 cm | Width 50–65 cm |
| In the hallway, central accent | 25–45 cm |
| In the living room, accent on the large wall | 45–80 cm |
Wall height and overlay size
Another guideline: the higher the ceilings, the larger the rosette can be. With a ceiling of 2.5 m, rosettes 60–70 cm wide are already perceived as a large accent. With a ceiling of 3 m, the same size looks organic. With ceilings above 3.5 m, you can work with rosettes from 70–90 cm — they won't overload the space, but on the contrary, will properly scale a tall wall.
Corner rosettes and their special calculation
Corner rosettes are calculated differently. Their size must match the width of the molding they work with. A corner rosette for a 30 mm wide molding is one size. For a 50 mm molding, it's another. Manufacturers usually indicate the recommended molding width for each corner rosette, and this should be considered when ordering.
Buy stucco decor corner rosettes should be purchased simultaneously with the moldings — this makes it easier to immediately check the size compatibility.
Single element or paired rosettes: the logic of choice
This is a question that often arises when browsing a catalog. Some rosettes are sold as single elements, others in L/R pairs. How to decide which one you need?
When choosing a single element
A single rosette is a central accent. It defines an axis: horizontal (above a mirror, above a console) or vertical (on a wall, above a door). One element works well when:
-
there is a clear center — a chandelier, mirror, console, fireplace
-
the interior is calm, and additional decor would create overload
-
the space is small — hallway, bedroom, study
-
the task is to create one precise accent, not a system of decor
One correctly chosen molding element in the right place says more than five random ones. This is the principle of 'less but more precise,' and it works flawlessly.
When paired L/R overlays are needed
Paired overlays create symmetry. Symmetry is the main visual technique that gives a sense of order, completeness, and status. That is why paired decor is associated with expensive, well-thought-out interiors.
Paired overlays are appropriate when:
-
there are two mirror-symmetrical objects — two sconces, two doors, two shelves
-
a long wall with several frames is being decorated
-
a furniture facade with two doors needs to be decorated
-
a symmetrical headboard area is being created in the bedroom
-
a fireplace is being designed: overlays on both sides of the portal
buy decorative moldings in a paired format means getting a ready-made symmetrical solution right away. There is no need to select a "similar" second element — it is already mirror-matched.
Serial decor: rhythmic repetition as a technique
The third option is the serial use of identical small overlays in rhythmic repetition. Identical rosettes at equal intervals along the horizontal line of the wall. Identical floral elements in every corner of each frame. This technique creates an ornamental pattern and is associated with high-end classic finishes.
For serial decor, choose small, not large overlays with a simple but expressive ornament. The main thing is precise marking and equal distances between elements. An error of even 1–2 cm is immediately noticeable.
Overlay style and interior style: how not to make a mistake
Decorative overlays are always a stylistic statement. Rich floral ornament with curls and acanthus leaves is classic and baroque. Geometric repeating motifs are art deco and neoclassicism. Smooth floral shapes are Provence and romantic style. A laconic medallion with minimal design is modern neoclassicism and transitional style.
Overlays for a classic interior
Classic is the main habitat of stucco decor. Rich ornaments work here: acanthus leaves, laurel garlands, rosettes with petals, figured cartouches with curls. Size — medium and large. Color — white or with gold/silver patina.
In a classic interior, overlays should support the overall theme: if the moldings have an ornament, the overlays should be from the same ornamental series. Mixing styles — a baroque medallion and geometric moldings — creates a stylistic contradiction.
Overlays for neoclassicism
Neoclassicism is a more restrained system. Overlays with moderate ornamentation are appropriate here: a light meander, pearl strands, rhythmic ionics, a restrained acanthus leaf. The size is medium. The color is white to match the wall or with minimal tinting.
Buy Moldings For a neoclassical interior, it is best to choose series with a geometric basis for the ornament — they work simultaneously in both classical and modern spaces.
Overlays for a modern interior
A modern interior with stucco overlays sounds like a contradiction, but in practice it works perfectly under one condition: the overlays must be laconic. A medallion with minimal relief, a geometrically correct rosette, a cartouche with clear contours without lush ornamentation.
In a modern interior, an overlay is more of a sculptural object than an ornamental one. One precise element on a neutral wall is expressive, bold, and modern.
Overlays for Provence and romantic style
Floral rosettes, woven wreaths, elegant garlands with bows, petal medallions — all of this is organic in romantic and Provence styles. Small, delicate overlays painted in soft colors — milky, cream, pink — create an atmosphere of coziness and gentle decorativeness.
Are moldings needed for decorative overlays
Short answer: not always, but often yes. Let's break down the logic.
A decorative overlay on an empty wall is an accent in a vacuum. It is beautiful, but exists on its own, without context. The eye finds it, but doesn't understand what to do with it. Why is it here? What is around it?
When there is a molding frame next to the overlay, it instantly gains context. The frame is a "frame," the overlay is an "accent within the frame." This is exactly how classic decor works: the frame organizes the space, the overlay brings it to life.
When moldings are mandatory
Mandatory if the overlay is placed on a large empty wall without other decorative elements. In this case, moldings create a frame system that structures the wall, and the overlay organically integrates into this system.
Mandatory if the interior is built on the principle of paneling — frames across the entire wall or several walls. Here, overlays work inside or at the junction of frames, and without moldings they are simply unnecessary.
Moldings made of polyurethane for this task, they are chosen in coordination with the overlays: of the same stylistic direction, with a compatible profile. A smooth molding and a laconic medallion. A relief molding and a rich classic overlay.
When moldings are not mandatory
If the overlay is used above a specific object — a mirror, door, sconce — a frame is not needed. The object itself creates the context. The overlay is attached above it along the axis, and this is a self-sufficient composition.
If the overlay is used on a furniture facade — moldings on the walls are not related to this task. There is its own logic: the overlay works at the scale of the furniture, not the wall.
buy polyurethane moldings as a set for overlays is worth it when the task is to decorate a wall, not just place one accent.
Decorative overlays for different rooms: specifics
Living room: the main place for stucco decor
The living room is the most expressive room in the apartment. It is here that Relief Decoration works at maximum efficiency. Frames made of moldings on the walls, overlays inside the frames or in the corners, a ceiling cornice — all together creates an interior that is perceived as expensive and complete.
For the living room, medium and large-sized overlays are suitable. The relief is moderate or rich depending on the overall style. The technique of "three frames on an accent wall" works well: each frame is made of moldings, with a medallion or cartouche in the upper center of each. Three identical elements create a rhythm that is immediately readable.
Bedroom: restrained accent
In the bedroom, there should be exactly as much decor as needed — no more. One overlay above the headboard, maybe paired corner elements in the frame behind the bed. That's it. Overlays in the bedroom are the finishing touch, not the main decorative theme.
Size — small or medium. Ornament — delicate. Color — matching the wall. It is this approach that creates a feeling of subtle, airy decor in the bedroom.
Entryway: first impression
In the hallway, the rule of "one precise element" applies. Above the mirror or above the nightstand — one expressive medallion or cartouche. Nothing extra. The hallway is small, and decor here always risks overloading the space.
A good solution for the hallway is paired L/R overlays on the sides of the mirror. They frame the mirror without blocking it and create a symmetrical decorative frame.
Study: status through details
A study is a space that speaks to the character of its owner. Decorative overlays here work like details of a men's suit: inconspicuous individually, but creating a collective image.
For a study, overlays with geometric or strict classical patterns are suitable. They work well above built-in shelving: an overlay at the top of each section creates the feel of a library portal. This is both beautiful and prestigious.
Children's room: very carefully
In a children's room, decorative overlays can be used, but with limitations. Only smooth ones or those with simple plant or animal motifs. The size should be small. The placement should be above the door or in one central spot. A children's room is a space for a child, and it should be understandable and joyful, not overloaded with decor.
How to glue decorative overlays: installation technology
Installing a polyurethane decorative overlay is a simple operation if you follow the sequence of steps. Mistakes during installation are costly to fix, so let's break down the technology step by step.
Tools and materials
-
Acrylic mounting adhesive (for polyurethane products)
-
Acrylic sealant for joints
-
Painter's tape for fixation until the adhesive sets
-
Level and tape measure
-
Marking pencil
-
Thin brush for painting the relief
-
White acrylic paint
Step one: marking
Determine the exact installation location. Find the axis of symmetry of the object (mirror, doorway, frame) and mark it with a pencil. Measure the distances from the axis to the edges of the overlay. Ensure the overlay is precisely centered.
For paired overlays, mark both locations symmetrically: measure the distance from the axis to each element. Even a 5 mm error is immediately noticeable.
Step two: surface preparation
The surface must be dry, clean, and free of peeling paint. If the surface is painted with glossy paint, lightly sand the installation area with fine sandpaper to improve adhesion. If the surface is porous, prime it with acrylic primer.
Step three: applying adhesive
Apply glue to the back of the overlay. For small elements, apply dots around the perimeter and one in the center. For large ones, apply a snake pattern over the entire area, keeping 5–7 mm from the edges.
After applying the glue, allow the open time according to the instructions — usually 1–3 minutes. During this time, the glue will slightly "grab" and provide better initial hold.
Step four: installation
Align the overlay with the markings. Press evenly. Hold for 3–5 minutes. Secure with masking tape at 2–4 points and leave until the glue fully sets (2–4 hours, longer for large elements).
Step five: sealing the edge
Apply a thin strip of acrylic sealant around the perimeter of the overlay. Immediately smooth it with a wet finger or rubber spatula. Allow to dry. If necessary, sand with fine sandpaper.
Step six: painting
After the glue and sealant have fully dried, paint the overlay in the desired color. Paint relief areas with a thin brush, ensuring the paint gets into the recesses. Two coats with intermediate drying will give a smooth matte result.
If the overlay is painted the same color as the wall, paint the wall and overlay in one go. If a different color, mask the wall with painter's tape along the edge of the overlay.
What to buy together with decorative overlays: complete set
Here is a practical checklist for different scenarios.
Basic set (one or two overlays as accent)
-
decorative insert of the required size and style
-
Mounting acrylic adhesive
-
Acrylic sealant
-
Painter's tape
-
Paint (if painting in a separate color is needed)
Wall decoration kit with frames
-
Polyurethane decorative appliques for frames
-
Moldings made of polyurethane for creating frames
-
Glue with extra
-
Acrylic sealant
-
Paint
-
Level, tape measure, miter box for trimming moldings
Classic interior kit
-
Relief overlays according to the decor plan
-
Relief moldings of a consistent style
-
Ceiling molding for the cornice
-
Glue with extra
-
Sealant
-
Paint or special finish (patina, glazing)
Furniture decor kit
-
Small overlays to fit the facade size
-
Special adhesive for polyurethane on lacquered surfaces
-
Paint in furniture color
-
Painter's tape
Typical mistakes when choosing and installing decorative overlays
Mistake: buying a beautiful overlay without knowing where to glue it. An overlay without a place is a problem. Solution: first determine the place and task, then choose the element.
Mistake: taking an overlay of the wrong size. Too small gets lost. Too large overwhelms. Measure the area and follow the proportion table.
Mistake: using a relief classic overlay in a modern interior. Stylistic dissonance is the most noticeable mistake in decor. Choose an ornament that matches the room's style.
Mistake: installing without markings. Axial displacement or skew can only be fixed by removing the overlay, which is not always possible without damage. Markings take 10 minutes and ensure absolute accuracy.
Mistake: not sealing the edge with sealant. The gap between the overlay and the wall is noticeable and looks careless. Sealant solves this in 20 minutes.
Mistake: painting the overlay with a roller without brushing the relief. The recesses of the ornament remain unpainted, which reads as unfinished work.
FAQ: popular questions about decorative polyurethane overlays
Where can decorative polyurethane overlays be glued?
On walls, ceilings, furniture facades, areas above mirrors, above doorways, next to sconces, inside molding frames, in frame corners. The main condition is that the base must be dry, strong, and well-prepared.
How to choose the size of a decorative overlay?
Focus on the size of the object the overlay works with. Overlay width: 30–60% of the mirror, frame, or facade width. Height: 10–20% of the object's height. For high ceilings, you can go larger.
Are moldings needed for decorative overlays?
If the overlay is on an empty large wall, yes. A frame of moldings creates context and organizes the space. If the overlay works above a specific object, moldings are not necessary.
Can decorative overlays be glued to furniture?
Yes. Facades of dressers, cabinets, nightstands, kitchen cabinets — all these are suitable surfaces with proper preparation and choice of glue.
How do paired L/R overlays differ from regular ones?
Paired L/R overlays are mirror-symmetrical: left and right elements. They are used in symmetrical areas — on the sides of a mirror, two doors, two sconces. Regular identical overlays do not have mirror symmetry.
What should I buy together with decorative overlays?
Mandatory: glue and sealant. If necessary: Moldings made of polyurethane, Ceiling molding for ceiling decoration, paint.
Can overlays be installed independently without a specialist?
Yes. Installation is accessible with basic skills. The main thing is careful marking and the right glue. Large overlays are better installed by two people.
How long does a polyurethane overlay last?
With proper installation, they last for decades. Polyurethane does not deform, peel, or yellow under acrylic paint.
Can the overlay be painted gold or a dark color?
Yes. White acrylic, dark, gold patina — polyurethane accepts any acrylic coating. Gilding relief overlays looks especially impressive in classic interiors.
What is PU overlays?
This is an abbreviated trade name for decorative polyurethane overlays (PU — polyurethane). The same type of products as decorative stucco or stucco decor — just a different name in the catalog.
About the company STAVROS
If you have reached this point in the article, it means you already have an idea of where and how to use decorative overlays. All that remains is to find the right source. STAVROS is a Russian company specializing in the production and sale of decorative polyurethane products for residential and commercial interiors.
The STAVROS catalog offers a wide range of polyurethane decorative overlays — medallions, cartouches, corner overlays, paired L/R elements, rosettes, and ornamental panels in various styles. Additionally, Moldings made of polyurethane for creating frames, Ceiling molding for ceiling decor and a full range of moldings for interior solutions of any level.
STAVROS products feature a clear relief, stable dimensions, and polyurethane quality ready for installation and painting. Delivery across all of Russia. A decorative overlay is a small detail with a big effect. STAVROS helps you find exactly the one your interior needs.