Article Contents:
- What Is a Decorative Pilaster?
- Pilasters vs. Columns
- Pilasters vs. Half-Columns
- Pilasters vs. Ordinary Wall Molding
- 1. Ready-Made Solid Wood Pilasters
- 2. Applied Polyurethane Molding Pilasters
- 3. Hybrid Wood and Polyurethane Compositions
- Comparing the Three Approaches
- Defining the Shaft
- Connecting Vertical and Horizontal Elements
- Adding Ornamental Relief
- MLDPU-001: Fine Architectural Lines
- MLDPU-002: Stronger Decorative Definition
- MLDPU-003: A More Substantial Architectural Border
- Comparing Profile Sizes
- PLM-021: Solid Wood Pilaster for Vertical Decoration
- DD-002L and DD-002R: Directional Carved Wooden Pilasters
- Selecting Wood for the Intended Finish
- Polyurethane Capital KLPU-004
- Polyurethane Capital KLPU-013
- Wooden Capital KL-004.02
- Decorative Brackets Are Not Automatically Capitals
- Pilasters for 8-Foot Ceilings
- Pilasters for 9- to 10-Foot Ceilings
- Pilasters for Ceilings Above 10 Feet
- Practical Proportion Guidelines
- Separating Living and Dining Areas
- Using Symmetry to Establish Order
- Avoiding Excessive Decoration
- Creating a Classical Door Surround
- Coordinating With Existing Door Casing
- Creating a Contemporary Portal
- Door Clearance and Building Requirements
- Start With the Main Wall Axis
- Place the Pilasters First
- Develop a Hierarchy of Molding Profiles
- Control the Number of Decorative Elements
- Step 1: Establish the Vertical Zones
- Step 2: Allocate Capital, Shaft and Base
- Step 3: Choose the Shaft Width
- Step 4: Calculate the Vertical Molding
- Step 5: Calculate Stock Lengths
- Step 6: Plan the Horizontal Details
- Step 7: Choose the Capital
- Step 8: Add the Wall Panels
- Step 9: Finish the Composition
- When to Use a Capital
- When to Use a Decorative Bracket
- Avoiding Decorative Confusion
- Beaded Molding
- Rope Molding
- Acanthus Leaf Molding
- Ornate Molding
- Floral Molding and Vertical Onlays
- Rectangular Wall Frames
- Tall Vertical Panels
- Double Frames
- Wall Molding Kits
- Modern Classic
- Neoclassical
- Contemporary Transitional
- Art Deco
- Minimalist Interiors
- Industrial and Loft Interiors
- Living Room Accent Walls
- Dining Room Wall Decoration
- Bedroom Headboard Walls
- Entryways and Hallways
- Framing a Wall Niche
- Classical Arched Openings
- Modern Rectangular Openings
- Step 1: Assess the Existing Wall
- Step 2: Confirm the Design and Dimensions
- Step 3: Check Product Compatibility
- Step 4: Prepare the Materials
- Step 5: Mark the Installation Lines
- Step 6: Install the Backing or Shaft
- Step 7: Install the Polyurethane Molding
- Step 8: Fit the Capital and Base
- Step 9: Finish the Joints
- Step 10: Prime and Paint
- Step 11: Perform a Final Inspection
- Painted Hybrid Compositions
- Natural Wood With Painted Molding
- Decorative Faux Finishes
- Main Decorative Elements
- Polyurethane Molding
- Capitals and Bases
- Decorative Onlays
- Installation Materials
- Buying Checklist
- Ready-Made Wooden Pilasters
- Applied Polyurethane Pilasters
- Hybrid Compositions
- Total Project Cost
- Verify the Material
- Use the Product Drawings
- Check Directional Products
- Confirm Stock Lengths
- Request a Sample When Appropriate
- Confirm U.S. Delivery Terms
- Choosing a Capital Before the Shaft
- Using Too Many Ornament Styles
- Ignoring the Room's Actual Scale
- Confusing Decorative and Structural Elements
- Mixing Incompatible Products
- Failing to Plan the Lighting
- Using Inappropriate Adhesives
- Ordering Without a Cut List
- What Is a Decorative Pilaster?
- What Is the Difference Between a Pilaster and a Column?
- Can You Make a Pilaster From Polyurethane Molding?
- Does STAVROS Sell Polyurethane Pilasters?
- What Is the Best Molding for Decorative Pilasters?
- Can Wooden Pilasters Be Combined With Polyurethane Trim?
- What Is a Pilaster Capital?
- Does a Pilaster Need a Capital and Base?
- Can Decorative Pilasters Make a Ceiling Look Higher?
- How Wide Should a Decorative Pilaster Be?
- Can Pilasters Be Used in Small Rooms?
- Can I Use Pilasters Around a Doorway?
- Are Polyurethane Capitals Structural?
- How Do I Choose Between Oak and Beech Pilasters?
- Can I Paint Wooden Pilasters and Polyurethane Molding the Same Color?
- What Is Acanthus Leaf Molding?
- Is Rope Molding Suitable for Modern Interiors?
- How Much Polyurethane Molding Do I Need for Two Applied Pilasters?
- Where Can I Buy Wooden Pilasters and Polyurethane Architectural Trim?
A beautiful interior is not necessarily one filled with expensive furniture, elaborate finishes, and ornamental details. The most memorable spaces often rely on something more fundamental: architectural proportion.
The placement of vertical elements, the rhythm of wall panels, the relationship between door openings and ceilings, and the depth of carefully positioned decorative profiles can change the appearance of an entire room.
A plain wall can become an elegant architectural composition. A conventional doorway can become a refined entrance. An open-plan living room can acquire a sense of structure without adding partitions.
Two decorative elements are particularly useful for achieving these effects: decorative pilasters and polyurethane wall molding.
Pilasters introduce vertical architectural rhythm. Polyurethane molding establishes horizontal lines, framed panels, ornamental borders, and transitions between surfaces.
When used together, they create an interior that feels intentional and cohesive rather than simply decorated.
The combination is especially relevant to American homes with traditional, transitional, neoclassical, and contemporary interiors. It allows homeowners and designers to introduce elements of classical architecture without turning every room into a reproduction of a historic palace.
A narrow pilaster can emphasize a doorway. A pair of decorative vertical elements can define an entry into the dining room. Smooth wall molding can connect those elements to adjacent panels. A restrained capital can introduce just enough ornament to create a sense of refinement.
But successful results require more than choosing attractive products.
The proportions must suit the ceiling height. The shaft, capital, and base need compatible dimensions. Decorative molding must connect logically with the pilaster composition. Materials must be selected for their actual purpose, and the installation must respect the underlying wall construction.
This guide explains how to design architectural interiors using decorative pilasters, polyurethane molding, ornamental trim, pilaster capitals, and decorative wall panels.
It also shows how to combine real wooden pilasters with polyurethane architectural elements from STAVROS, create a nonstructural pilaster effect using applied molding, calculate materials in inches and linear feet, and develop complete decorative compositions for modern American homes.
What Is a Decorative Pilaster?
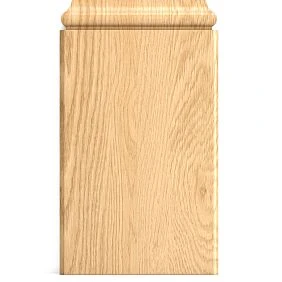
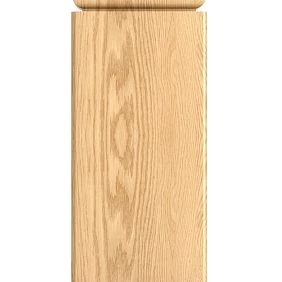
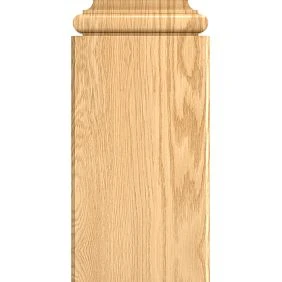
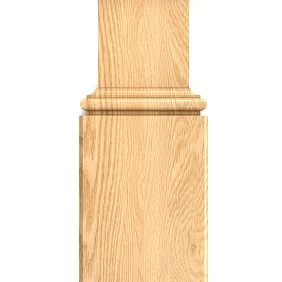
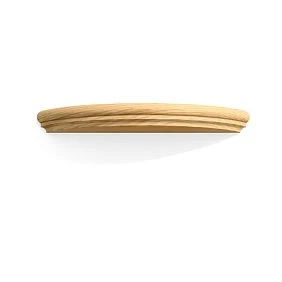
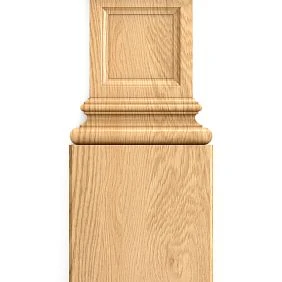
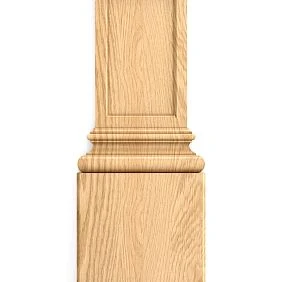
A pilaster is a vertical architectural element that resembles a flattened column attached to a wall.
In classical architecture, a pilaster commonly includes three principal components:
A base at the bottom
A vertical shaft or body
A capital at the top
The pilaster may form part of a larger architectural arrangement involving a cornice, architrave, frieze, or entablature.
Historically, pilasters were not always purely decorative. In certain architectural systems, they could also participate in the structural organization of a building.
However, the applied wooden and polyurethane pilasters discussed here are nonstructural decorative elements. They are intended to establish architectural character, not support beams, ceilings, or other building loads.




Pilasters vs. Columns
A freestanding column is usually circular or polygonal in section and occupies space independently of the wall.
A pilaster is attached to or formed against a wall and usually has a rectangular appearance.
This creates a useful visual distinction.
A column makes a stronger physical statement because it projects into the room.
A pilaster creates architectural rhythm while using less floor space.
For a residential hallway or living room, applied decorative pilasters are often easier to integrate than full columns.
Наша фабрика также производит:
Смотреть весь Каталог продукции
Pilasters vs. Half-Columns
A half-column has a rounded profile that projects from the wall.
A pilaster typically has a flat front face with clearly defined edges.
Both may include a base and capital.
For contemporary interiors, the flatter geometry of a pilaster is often easier to combine with rectangular decorative wall molding.
Получить консультацию
Pilasters vs. Ordinary Wall Molding
A straight molding profile creates a decorative line.
A pilaster creates the visual impression of a vertical architectural member.
This difference matters when planning a room.
Simply attaching two vertical strips to a wall does not necessarily produce a convincing pilaster.
The overall composition should establish a clear shaft, appropriate proportions, and intentional transitions at the top and bottom.
For a minimalist interior, these transitions can be extremely subtle.
For a classical interior, they can be more elaborate.
Three Ways to Create Decorative Pilasters
There are three principal approaches to creating pilaster-style wall decoration.
Each has advantages depending on the desired appearance, budget, and construction conditions.
1. Ready-Made Solid Wood Pilasters
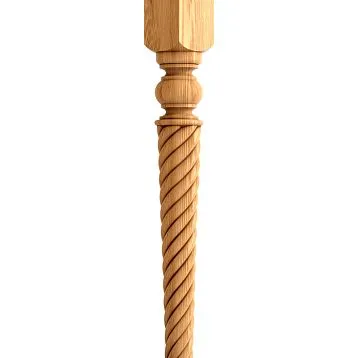
A finished wooden pilaster provides a distinct architectural component.
Its body may feature fluting, carved details, or another shaped profile.
Some products are available in different lengths and widths.
A matching wooden capital and base may complete the composition.
STAVROS offers a dedicated collection of wooden decorative pilasters and columns, including designs manufactured from oak and beech.
This is the appropriate choice when the project calls for genuine wood, traditional carved ornament, or a ready-made vertical architectural element.
2. Applied Polyurethane Molding Pilasters
A second approach uses architectural trim to create the appearance of a pilaster on a flat wall.
Instead of purchasing a complete pilaster shaft, the designer builds a visual composition using:
Vertical decorative molding
A flat or decorated central surface
A base treatment
A decorative capital or upper termination
Optional ornamental onlays
The central shaft may be formed by the existing wall surface, a separately specified backing panel, or another appropriate material.
The polyurethane molding creates the edges and decorative relief.
This approach offers considerable flexibility in width, height, and visual complexity.
It is particularly useful for painted interiors.
3. Hybrid Wood and Polyurethane Compositions
The third approach combines wooden pilasters with polyurethane architectural molding.
For example, a pair of carved wooden pilasters can frame a doorway.
Polyurethane molding can continue across adjacent walls to establish a coordinated decorative panel system.
A polyurethane onlay can provide a central ornament above the opening.
The wooden pilasters remain genuine wood components.
The polyurethane elements supply complementary architectural detail.
This is often an attractive solution when the design calls for substantial classical ornament without requiring every decorative component to be carved from solid wood.
Comparing the Three Approaches
| Approach | Main advantage | Best application | Important consideration |
|---|---|---|---|
| Ready-made wooden pilaster | Authentic solid wood and defined architectural form | Classical door surrounds, formal rooms and cabinetry | Product length, mounting and compatible capitals |
| Applied polyurethane molding | Flexible control over the layout and painted appearance | Accent walls, contemporary interiors and custom panel designs | The assembly must be designed and measured |
| Wood-and-polyurethane hybrid | Combines carved wood with molded decorative profiles | Transitional interiors and elaborate architectural compositions | Dimensions, finishing and material compatibility |
No approach is automatically superior.
The right one depends on the architectural intent.
Polyurethane Molding: Why It Works With Decorative Pilasters
Polyurethane molding is useful because it creates consistent decorative profiles that can be repeated across multiple walls.
The material can be molded into smooth, stepped, rounded, or highly ornamental cross-sections.
This makes it suitable for creating architectural outlines around vertical pilasters.
Defining the Shaft
A pilaster shaft does not have to be heavily carved.
For a contemporary painted interior, two narrow vertical molding strips may be enough to define its edges.
A flat central area provides visual restraint.
The shadows created by the profiles establish a sense of depth.
For a more traditional composition, wider moldings can create a stronger architectural border.
Connecting Vertical and Horizontal Elements
Pilasters work best when they belong to a larger composition.
A pair of vertical elements can align with a horizontal decorative band.
Wall panels can occupy the space between pilasters.
A crown or cornice can provide a visual termination above them.
The result is an architectural system rather than isolated decoration.
Explore the STAVROS polyurethane molding collection for straight profiles that can be used in suitable decorative wall applications.
Adding Ornamental Relief
A classical pilaster composition may include leaf ornament, floral appliques, scrollwork, or a decorative capital.
These details establish visual emphasis.
However, ornament should be distributed carefully.
A highly detailed capital paired with a simple shaft can create a balanced composition.
Adding elaborate ornament to every component may overwhelm the wall.
Choosing the Right Polyurethane Molding Profile
The straight molding profile determines much of the finished pilaster's appearance.
Width, projection, cross-section, and ornamental complexity all influence how the wall is perceived.
MLDPU-001: Fine Architectural Lines
The STAVROS MLDPU-001 polyurethane molding has a narrow semicircular profile.
Its listed dimensions are approximately:
Face width: 0.39 inches
Projection: 0.24 inches
Stock length: 102.36 inches
Material: polyurethane
This profile creates a relatively delicate raised line.
It is useful for considering slim decorative pilasters, secondary outlines, narrow wall frames, and restrained geometric compositions.
For a contemporary interior, the narrow profile can help establish architectural detail without overwhelming the existing wall.
MLDPU-002: Stronger Decorative Definition
The STAVROS MLDPU-002 polyurethane wall molding has a more pronounced stepped cross-section.
Its listed dimensions are approximately:
Face width: 0.87 inches
Projection: 0.43 inches
Stock length: 102.36 inches
The profile includes a rounded central detail and stepped transitions.
It creates stronger shadows than the narrower MLDPU-001.
This makes it appropriate for consideration in neoclassical wall frames and decorative pilaster-style compositions.
The profile can also connect vertical elements to rectangular wall panels.
MLDPU-003: A More Substantial Architectural Border
The STAVROS MLDPU-003 polyurethane molding provides a broader cross-section.
Its dimensions are approximately:
Face width: 1.38 inches
Projection: 0.47 inches
Stock length: 102.36 inches
This profile creates a more prominent decorative line.
It may suit larger rooms where architectural details need to remain visible from a greater distance.
The wider profile can be useful around substantial wall panels or in compositions with larger capitals.
However, it may appear oversized when applied to a narrow pilaster shaft.
Comparing Profile Sizes
| Molding | Face width | Projection | Visual character |
|---|---|---|---|
| MLDPU-001 | 0.39 in | 0.24 in | Fine, restrained |
| MLDPU-002 | 0.87 in | 0.43 in | Defined, neoclassical |
| MLDPU-003 | 1.38 in | 0.47 in | Substantial, architectural |
The choice is primarily a matter of scale.
Do not select the widest molding simply because it appears more expensive or elaborate.
A balanced proportion is more valuable than unnecessary projection.
Wooden Pilasters From STAVROS: Real Products for Architectural Interiors
When a project requires a genuine wooden pilaster rather than an applied molding effect, STAVROS offers several appropriate products.
These are separate from the company's polyurethane molding collection.
PLM-021: Solid Wood Pilaster for Vertical Decoration
The STAVROS PLM-021 wooden pilaster is available in oak and beech.
Published size options include lengths of approximately 39.37 and 78.74 inches, with several width and thickness combinations.
For example, certain versions are available with widths of approximately 1.97, 2.76, and 3.94 inches.
Larger width options are also listed.
This variety allows the profile to be considered for different decorative applications.
A narrower version may be suitable for selected cabinetry or compact vertical accents.
A broader version may be better proportioned for a formal doorway composition.
Because each version has its own dimensions, the exact product option must be selected before calculating the finished assembly.
DD-002L and DD-002R: Directional Carved Wooden Pilasters
STAVROS also offers paired carved wooden pilasters.
The DD-002L left wooden pilaster and DD-002R right wooden pilaster are available in oak and beech.
Their published dimensional specification includes an overall height of approximately 43.11 inches and a principal width of approximately 6.97 inches.
Additional dimensions define the shaped profile.
These pieces have directional ornament.
That means their left-hand and right-hand versions should be treated as separate products.
For a symmetrical decorative composition, the orientation of the carved pattern matters.
The products can be considered for formal architectural accents, decorative cabinetry, and other appropriate interior applications.
Selecting Wood for the Intended Finish
Oak and beech offer different visual and material characteristics.
Oak is often preferred where visible grain is part of the design.
Beech can be attractive for painted or stained decorative work, depending on the desired result.
However, both are solid wood and respond to environmental moisture.
Proper conditioning, installation, and finishing are necessary.
A wooden pilaster should not be assumed suitable for exterior or frequently wet applications merely because it is made from hardwood.
Pilaster Capitals: Creating the Correct Upper Termination
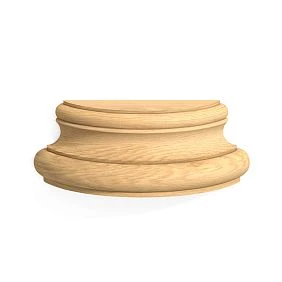
The capital is the upper decorative element of a pilaster.
It creates a visual transition from the vertical shaft to the surrounding architectural composition.
In a traditional design, the capital may include molded or carved ornament.
In a contemporary composition, it may be reduced to a simple geometric block.
A capital should relate to the shaft width and the overall scale of the room.
Polyurethane Capital KLPU-004
The STAVROS KLPU-004 polyurethane capital provides several size options.
Its listed dimensions range from approximately 2.36 × 2.83 × 0.75 inches for a small version to approximately 6.22 × 7.48 × 2.01 inches for a larger version.
The catalog provides additional reference dimensions for the full profile geometry.
This range makes it possible to compare different capital sizes for decorative vertical compositions.
However, size compatibility must be verified carefully.
The existence of a capital and a straight molding in the same catalog does not mean they automatically form a complete pilaster system.
Polyurethane Capital KLPU-013
For a more substantial classical accent, consider the STAVROS KLPU-013 polyurethane capital.
Its published dimensions include approximately:
Height: 7.40 inches
Width: 9.84 inches
Depth: 3.03 inches
This is a significantly larger component.
It is better evaluated in the context of a substantial decorative pilaster or a larger architectural composition.
A capital of this scale can become a focal point.
For a narrow wall strip in a small room, it may be visually excessive.
Wooden Capital KL-004.02
For solid wood pilaster installations, STAVROS offers the KL-004.02 wooden capital for PLM pilasters.
It is available in oak and beech and has several published size configurations.
For example, one option measures approximately 5.31 × 6.38 × 1.85 inches across its principal dimensions.
Other variants are available for different scales.
This product is specifically presented for the PLM pilaster family.
Nevertheless, the exact capital size must be matched to the selected pilaster variant.
Decorative Brackets Are Not Automatically Capitals
A decorative bracket or corbel may resemble a capital in certain compositions.
However, the two elements serve different design roles.
For example, the STAVROS KRPU-021 polyurethane decorative bracket is available in several sizes.
Its decorative relief can be incorporated into suitable architectural compositions.
But it should not automatically be substituted for a capital or treated as a structural support.
The intended use, dimensions, and mounting method of each product must be checked.
How to Choose Pilaster Proportions for Different Ceiling Heights
Successful architectural decoration depends on proportion.
A pilaster that looks convincing in a large foyer may overwhelm an ordinary bedroom.
Similarly, a very narrow decorative shaft can become visually insignificant when placed beside a wide double doorway.
The correct dimensions depend on the room's scale.
Pilasters for 8-Foot Ceilings
Many American homes have ceilings approximately 8 feet high.
In such rooms, decorative pilasters should usually be relatively restrained.
A narrow shaft, limited projection, and compact capital can provide a refined effect.
A shaft width of approximately 3–5 inches may be worth evaluating for certain small decorative compositions.
This is a design starting point, not an architectural standard.
The finished dimensions should be checked against the doorway, wall width, and surrounding trim.
A large classical capital may feel too heavy beneath an 8-foot ceiling.
Pilasters for 9- to 10-Foot Ceilings
Higher ceilings offer more room for architectural detail.
A shaft width of approximately 4–7 inches may provide an appropriate starting range in certain residential designs.
A more defined capital and base can be introduced.
This scale often works well in formal living rooms, dining rooms, and substantial entryways.
The pilaster should still maintain a clear relationship to the adjacent door casing and wall molding.
Pilasters for Ceilings Above 10 Feet
Larger spaces may support broader pilasters and more elaborate ornament.
However, adding size without a coherent composition does not necessarily improve the result.
Consider the complete vertical organization of the wall.
The pilaster may relate to the baseboard, a horizontal molding band, the upper cornice, and the ceiling itself.
When these elements align, the room gains a sense of architectural order.
Practical Proportion Guidelines
The following are preliminary design ranges, not mandatory dimensions.
| Ceiling height | Possible shaft width to evaluate | Typical visual approach |
|---|---|---|
| 8 ft | 3–5 in | Restrained vertical accents |
| 9–10 ft | 4–7 in | Balanced residential pilasters |
| Above 10 ft | 6–10 in or project-specific | Larger classical compositions |
A pilaster capital may project wider than the shaft to establish its upper termination.
However, there is no universal percentage that guarantees a correct result.
Evaluate the actual design, capital cross-section, and architectural style.
A full-size mockup or scaled elevation is particularly valuable before ordering large decorative components.
Using Decorative Pilasters to Define Open-Plan Rooms
Open-plan interiors are common in contemporary American homes.
The living room, dining room, kitchen, and entry may share one continuous space.
This arrangement creates a sense of openness but can make it difficult to establish distinct architectural zones.
Decorative pilasters offer a nonstructural way to introduce visual boundaries.
Separating Living and Dining Areas
Consider an open-plan room where the living area flows into a dining space.
Instead of building a partition, a pair of applied pilasters can define the transition.
The decorative elements may be installed on the wall at the point where one zone ends and another begins.
A coordinated horizontal molding band can connect them.
The result creates an architectural threshold without closing the room.
Using Symmetry to Establish Order
Two pilasters positioned symmetrically around an opening create a stronger architectural statement than one isolated element.
Their spacing establishes a visual center.
This can be particularly effective for dining room entrances or substantial interior doorways.
When the pilasters are combined with wall molding, the adjacent panels should relate to the same centerline.
Misaligned decorative frames can undermine the sense of symmetry.
Avoiding Excessive Decoration
A common mistake is applying vertical elements at every possible wall junction.
Too many pilasters can make the room feel fragmented.
Use them to emphasize meaningful transitions.
The objective is to make the architecture easier to understand.
A small number of correctly positioned elements often creates a more compelling result than a wall filled with decorative components.
Decorative Pilasters Around Doors and Openings
Doorways are among the most natural locations for pilaster decoration.
A doorway already represents an architectural transition.
Adding pilasters can make that transition more prominent.
Creating a Classical Door Surround
A decorative doorway composition may include:
A pilaster on each side
A coordinated base treatment
A capital at the top of each shaft
A decorative horizontal element above the opening
Additional ornamental accents where appropriate
The parts should establish one visual system.
For a traditional home, the composition may be relatively elaborate.
For a transitional home, the same arrangement can be simplified.
Coordinating With Existing Door Casing
A pilaster should not be selected without considering the existing casing.
If the casing remains in place, the decorative shaft must fit beside it.
A large capital may overlap the casing or interfere with nearby trim.
Measure the available wall area.
Record the casing width, opening height, and distance to the ceiling.
Where a doorway includes existing historical millwork, preserving compatible proportions may be more appropriate than adding unrelated ornament.
Creating a Contemporary Portal
In a contemporary interior, a pilaster effect can be achieved through minimal vertical profiles and a simple horizontal header.
A pair of narrow polyurethane decorative moldings can define the edges.
The surrounding wall may be painted in the same color.
A capital may be omitted entirely or expressed as a subtle geometric transition.
This produces architectural emphasis without creating an overly traditional appearance.
Door Clearance and Building Requirements
Decorative pilasters should not reduce required clearances or interfere with a door's operation.
Check swing clearance, hardware, adjacent switches, and accessibility requirements.
Do not modify fire-rated door assemblies or other regulated components without verifying the applicable requirements.
Applied pilasters and decorative headers are not substitutes for structural jambs, beams, or load-bearing supports.
How to Design a Pilaster Wall With Decorative Molding
A decorative pilaster does not need to stand beside a doorway.
It can also organize an entire accent wall.
This approach is particularly effective in living rooms, bedrooms, and formal dining areas.
Start With the Main Wall Axis
Identify the primary visual center.
For a living room, this may be the sofa.
For a bedroom, it may be the headboard.
For a dining room, it may be the center of a sideboard or the room's main architectural axis.
A symmetrical composition can be developed around that point.
Place the Pilasters First
Determine the locations of the vertical elements before drawing the decorative panels.
The pilasters create the principal rhythm.
The wall panels should fit between or beside them.
This is more effective than adding pilasters after the panel layout has already been established.
Develop a Hierarchy of Molding Profiles
Use one primary profile for the main architectural lines.
A narrower secondary profile may be introduced for additional detail.
For example, MLDPU-002 might establish the main frame.
A narrow MLDPU-001 profile could provide a secondary inner line.
This creates depth without introducing unrelated ornamental patterns.
Control the Number of Decorative Elements
A pilaster wall can become visually crowded when every frame includes corner ornaments, a central applique, and an additional decorative border.
Instead, determine which elements should attract attention.
The capital may be the primary accent.
A simple framed panel can support it.
Alternatively, a prominent central ornament may be used while the pilasters remain understated.
The composition should have a clear focal point.
A Complete Example: Designing a Pilaster Wall With 9-Foot Ceilings
Consider a residential living room with a ceiling height of 108 inches.
The design calls for a pair of applied decorative pilasters on a flat wall.
The intent is to introduce vertical architectural structure without installing a complete carved wooden pilaster.
Step 1: Establish the Vertical Zones
Assume the room has an existing baseboard approximately 6 inches high.
The design also reserves approximately 6 inches near the ceiling for the upper decorative transition.
The available height between these zones is:
108 − 6 − 6 = 96 inches.
This is the design envelope for the applied pilaster composition.
Step 2: Allocate Capital, Shaft and Base
Suppose the design assigns:
Upper capital zone: 6 inches
Shaft zone: 83 inches
Lower base zone: 7 inches
Total:
6 + 83 + 7 = 96 inches.
This provides a preliminary vertical arrangement.
The actual capital and base products must be selected according to their published dimensions.
These allocations are schematic design zones, not claims that a specific STAVROS capital and base are supplied in those exact dimensions.
Step 3: Choose the Shaft Width
For a relatively restrained composition, consider a visible shaft approximately 5–6 inches wide.
The shaft may consist of a painted flat central surface with raised molding along both vertical edges.
The complete outer width depends on whether the stated width includes the profiles.
Establish that measurement before cutting.
Step 4: Calculate the Vertical Molding
Each pilaster uses two vertical molding pieces.
There are two pilasters.
Total:
2 × 2 = 4 vertical pieces.
Each piece measures 83 inches according to the preliminary drawing.
Required length:
4 × 83 = 332 inches.
332 ÷ 12 = 27.67 linear feet.
Step 5: Calculate Stock Lengths
Suppose the design uses MLDPU-001 polyurethane molding.
Each stock strip is 102.36 inches long.
An 83-inch vertical piece can be cut from one strip.
Because two 83-inch pieces cannot fit into one stock strip, the design requires:
4 full molding strips for the vertical pieces.
Each strip leaves an offcut of approximately 19.36 inches before accounting for the saw kerf.
These offcuts may be useful for short horizontal decorative connections or other small pieces.
Step 6: Plan the Horizontal Details
If the shaft design includes short horizontal ties at the top and bottom, determine their exact finished dimensions.
For illustration, four 5-inch pieces would require 20 inches of molding.
These may be cut from the remaining material if the cut plan permits.
However, the horizontal components should not be added without considering the selected capital and base geometry.
A large capital may already provide the intended horizontal transition.
Step 7: Choose the Capital
A small polyurethane capital, such as an appropriately sized KLPU-004, may be considered for the upper portion.
The actual capital width must be checked against the finished shaft.
Do not assume that the capital and MLDPU-001 form a factory-matched kit.
This is a custom decorative composition requiring dimension verification.
Step 8: Add the Wall Panels
The area between the pilasters can remain plain or incorporate decorative frames.
For a more classical appearance, a rectangular wall panel may be positioned between them.
Use the same primary molding family to maintain visual consistency.
Step 9: Finish the Composition
A single paint color can visually integrate the separate parts.
A muted off-white, warm gray, or another coordinated wall color may provide an appropriate finish.
Under directional lighting, the profiles create subtle shadows that emphasize the architectural geometry.
The result is a custom pilaster-style wall treatment assembled from measured decorative components.
Polyurethane Pilaster Capitals vs. Ornamental Brackets
Capitals and brackets can both contribute sculptural detail, but they should not be treated as interchangeable.
A pilaster capital is positioned at the upper termination of the shaft.
A decorative bracket or corbel usually expresses support beneath another element or functions as an ornamental projection.
In a modern interior, the two may share a similar decorative language.
However, their installation orientation, proportions, and mounting surfaces differ.
When to Use a Capital
Choose a capital when the design needs a clear architectural termination at the top of a pilaster.
The capital should relate to the shaft and any horizontal element above it.
For a symmetrical doorway composition, a pair of matching capitals is generally appropriate.
When to Use a Decorative Bracket
A bracket may be used beneath a suitable decorative shelf, a nonstructural architectural header, or in other ornamental applications.
For example, the STAVROS KRPU-027 polyurethane decorative bracket provides sculpted relief in a compact architectural form.
However, a decorative polyurethane bracket should not be assumed capable of supporting structural loads.
Its function must be established from the product specification.
Avoiding Decorative Confusion
One of the most common design mistakes is combining too many classical motifs without considering their architectural meaning.
A pilaster capital, a floral onlay, and an ornamental bracket may all look attractive individually.
Placed together without hierarchy, they can produce a confusing composition.
Choose the primary decorative element first.
The surrounding profiles should support it.
Ornamental Molding: Adding Detail Without Overloading the Room
Straight polyurethane profiles establish the framework.
Ornamental molding adds texture and visual richness.
For American interiors, the following decorative patterns are especially useful when creating coordinated classical details.
Beaded Molding
Beaded molding consists of a repeating series of rounded decorative elements.
The pattern introduces a subtle rhythm.
It can be used around wall panels, within larger architectural frames, or as a detail beside selected vertical elements.
The STAVROS KPU-105 beaded molding is a polyurethane decorative profile.
Its compact dimensions make it suitable for consideration as a secondary ornamental accent.
Beaded trim works particularly well when the primary pilaster is relatively restrained.
Rope Molding
Rope molding features a twisted or braided pattern.
It has a stronger decorative character.
The STAVROS KPU-125 rope molding is a narrow ornamental strip that can be used on suitable flat surfaces.
The pattern may be incorporated into a classical decorative border.
However, its repeating design should be considered when planning joints and corner transitions.
Rope molding should not simply be applied to every edge of a pilaster.
Use it selectively.
Acanthus Leaf Molding
Acanthus leaf molding is strongly associated with classical architecture.
Its botanical relief introduces movement and depth.
The STAVROS KPU-001 acanthus leaf molding provides an example of this decorative language.
Acanthus ornament may complement an elaborate pilaster capital or a traditional interior frieze.
For a room with simple painted furniture, however, it may introduce more ornament than necessary.
Ornate Molding
Ornate molding is a broader term covering profiles with pronounced sculpted relief.
These may feature floral patterns, scrollwork, acanthus leaves, or other classical motifs.
The STAVROS ornamental polyurethane trim collection includes several pattern families.
When choosing a decorative border, consider both the visual style and the pattern's physical scale.
An ornament that reads clearly at eye level may become visually insignificant when placed near a high ceiling.
Floral Molding and Vertical Onlays
Floral molding can introduce softer detail within a geometric architectural composition.
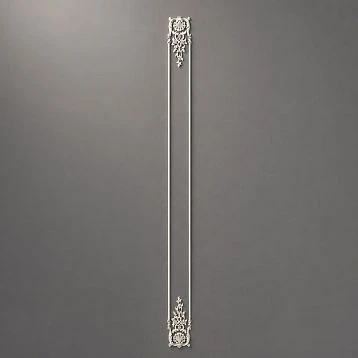
For a pilaster-style wall, a vertical floral onlay can be an effective decorative accent.
For example, the STAVROS NPU-501 polyurethane onlay measures approximately 2.28 × 11.81 × 0.43 inches.
Its elongated format can be considered for a selected vertical decorative application.
The product is a separate ornamental onlay, not a complete pilaster shaft.
This makes it useful as an accent within a larger custom composition.
Combining Pilasters With Decorative Wall Panels
Pilasters create rhythm.
Decorative wall panels establish the surfaces between them.
The relationship between the two determines whether the room feels architecturally coherent.
Rectangular Wall Frames
A common solution uses rectangular molding frames between pilasters.
The pilasters become vertical boundaries.
The molding frames create a repeated visual pattern.
For example, a formal dining room may feature three large framed panels separated by pilaster-style accents.
This composition creates symmetry without requiring full-height raised wood paneling.
Tall Vertical Panels
Tall rectangular panels emphasize ceiling height.
They work particularly well when aligned with the pilaster shafts.
In a room with 9- or 10-foot ceilings, the panels may extend through much of the wall height while leaving controlled margins at the top and bottom.
Double Frames
A double frame uses one profile for the outer border and another, usually narrower profile, for the inner border.
For example, MLDPU-002 can establish a defined outer frame.
MLDPU-001 may create a restrained secondary line.
This technique introduces depth through layered shadow.
However, the spacing between the profiles must be consistent.
Wall Molding Kits
For buyers who prefer to begin with a coordinated decorative composition, STAVROS offers wall molding kits and decorative wall systems.
Some sets include polyurethane decorative components and primed MDF profiles.
Check the actual material specification before selecting a kit.
A complete wall arrangement may be useful as a reference for developing a pilaster composition.
However, a wall molding kit is not automatically a ready-made pilaster system.
Decorative Pilasters in Modern Interior Styles
Pilasters are associated with classical architecture, but they do not require an entirely traditional interior.
Their geometry can be adapted to different design languages.
Modern Classic
Modern classic interiors combine traditional architectural proportions with restrained contemporary finishes.
A pair of decorative pilasters may define a doorway.
Smooth wall molding can connect them to adjacent panels.
The entire composition may be painted in a single soft neutral color.
The result is elegant without excessive ornament.
Neoclassical
Neoclassical interiors emphasize symmetry, order, and a clear relationship between architectural components.
Pilasters are especially appropriate here.
A well-proportioned shaft, defined capital, and coordinated wall molding can create a convincing architectural composition.
However, the details should remain balanced.
Not every wall panel requires an elaborate floral accent.
Contemporary Transitional
Transitional interiors combine elements of traditional and contemporary design.
A simplified pilaster with a flat shaft and modest capital can provide architectural character.
The surrounding wall molding may remain clean and geometric.
This approach works well with contemporary sofas, understated lighting, and natural wood furniture.
Art Deco
Art Deco interiors emphasize geometry, rhythm, and strong silhouettes.
A pilaster effect can be created using stepped profiles and restrained geometric capitals.
Decorative wall molding can reinforce the same lines.
Metallic finishes may be used selectively.
Avoid overly elaborate botanical ornament when the principal design language is geometric.
Minimalist Interiors
Minimalist interiors generally benefit from fewer decorative components.
A conventional carved capital may be unnecessary.
Instead, narrow vertical molding can establish a simplified pilaster rhythm.
Tone-on-tone painting preserves the restrained appearance.
The effect comes from light, shadow, alignment, and proportion.
Industrial and Loft Interiors
A loft-style interior may feature exposed brick, concrete, metal, or visible structural elements.
Introducing decorative pilasters creates a contrast between industrial surfaces and classical forms.
This can be effective, but the contrast should be intentional.
A single architectural feature may be more successful than applying classical ornament across every wall.
Pilasters in Living Rooms, Dining Rooms and Bedrooms
The same architectural elements can serve different purposes depending on the room.
Living Room Accent Walls
A living room pilaster composition may be centered behind the sofa.
The vertical elements establish a broad architectural frame.
Polyurethane molding fills the space with restrained panel geometry.
A central artwork, mirror, or another decorative feature can occupy the focal area.
Avoid placing a pilaster where it interferes with furniture positioning or electrical installations.
Dining Room Wall Decoration
A dining room often benefits from symmetry.
Decorative pilasters can define the space around a sideboard or large central wall panel.
A narrow frieze molding may connect the composition horizontally.
This creates a formal architectural framework without requiring elaborate ceiling decoration.
Bedroom Headboard Walls
A bedroom can use pilaster-style accents to frame the headboard wall.
The composition may consist of two slim vertical elements and one large central panel.
For a calm interior, the molding can be painted in the same color as the wall.
Larger carved capitals may be unnecessary.
The objective is to provide depth without distracting from the furniture.
Entryways and Hallways
An entryway is a natural location for a pair of decorative vertical accents.
Pilasters can define a transition into the main living area.
In a narrow hallway, use restrained profiles to avoid excessive projection.
The clear walking width, door swing, and placement of lighting controls must remain practical.
Decorating Niches and Arches With Pilasters
Recessed niches and arched openings provide opportunities for a more elaborate architectural treatment.
Framing a Wall Niche
A decorative niche can be emphasized with a pair of narrow pilaster-style elements.
The vertical components define the sides.
A restrained horizontal molding establishes the upper boundary.
A central sculpture, painting, or decorative object can provide the focal point.
The pilaster should not compete visually with the object displayed inside the niche.
Classical Arched Openings
For an arched doorway, pilasters can provide the vertical sides of the composition.
The arch itself requires a separate treatment.
Depending on the design, it may use purpose-made curved components or verified flexible molding.
Standard rigid polyurethane molding should not be forced around an arch.
Its permitted bending radius and orientation must be confirmed before a curved installation.
Modern Rectangular Openings
Rectangular openings are generally easier to coordinate with straight decorative profiles.
A pair of pilasters may establish the vertical emphasis.
A simple header completes the composition.
This can create the appearance of a formal architectural portal without altering the load-bearing opening.
How to Install Decorative Pilasters and Polyurethane Molding
Installation requirements depend on the exact material, substrate, component weight, and design.
Wooden pilasters and polyurethane decorative moldings should not automatically be installed using identical methods.
Step 1: Assess the Existing Wall
Before beginning, inspect the wall surface.
Identify the substrate: drywall, plaster, masonry, wood paneling, or another material.
Check whether the existing finish is stable.
Remove loose paint or deteriorated surface material.
A decorative element should not be attached to an unstable coating.
Step 2: Confirm the Design and Dimensions
Create a dimensioned elevation.
Record the pilaster height, shaft width, capital dimensions, and base treatment.
Mark the locations of adjacent wall molding.
For a symmetrical arrangement, establish the central reference axis.
Step 3: Check Product Compatibility
If using ready-made wooden pilasters, verify the selected capital and base.
If building an applied polyurethane composition, check how the straight molding connects to the proposed capital or ornamental accent.
Do not assume that products with similar decorative styles have matching cross-sections.
Step 4: Prepare the Materials
Inspect all pieces before cutting or installing them.
Confirm product codes, dimensions, and quantities.
For wood, follow the manufacturer's conditioning and finishing requirements.
For polyurethane, follow the recommended handling and environmental conditions.
Step 5: Mark the Installation Lines
Use a suitable level and measuring tools.
Vertical pilaster lines should be straight and aligned with the overall design.
For symmetrical compositions, measure from a common centerline rather than independently from opposite wall corners.
This reduces visible asymmetry.
Step 6: Install the Backing or Shaft
For a ready-made wooden pilaster, use the specified attachment method.
This may include mechanical fasteners, adhesive, or a combination, depending on the product and substrate.
For an applied pilaster, the shaft may be formed from a suitable backing panel or the prepared wall surface.
The backing must be stable and properly attached.
Step 7: Install the Polyurethane Molding
Cut the molding according to the measured design.
Dry-fit the pieces.
Use an adhesive approved for the selected polyurethane product and substrate.
Apply the specified amount.
Support the material during curing where necessary.
The installation should not rely on an arbitrary holding time.
Step 8: Fit the Capital and Base
Position the capital and base according to the final drawing.
Check alignment and projection.
Use the manufacturer's approved attachment method.
Larger elements may need additional support.
Decorative polyurethane capitals and brackets should not be used as structural load-bearing components unless explicitly engineered and rated for that purpose.
Step 9: Finish the Joints
Inspect transitions between materials.
Use compatible filling or joint-finishing products.
Do not conceal large dimensional mismatches under excessive filler.
If the profiles do not meet properly, correct the fit.
Step 10: Prime and Paint
Follow the finishing requirements for each material.
Wood and polyurethane may require different preparation.
Where they will be painted together, a suitable coating system should provide a consistent final appearance.
Test the finish on a sample when combining materials or applying specialty decorative coatings.
Step 11: Perform a Final Inspection
Check alignment, joint quality, finish consistency, and mounting stability.
Make sure decorative projections do not interfere with doors, furniture, lighting fixtures, or access panels.
A successful installation should appear intentional at both close range and normal viewing distance.
Combining Wood and Polyurethane Without Visible Material Differences
A hybrid composition can look cohesive when the materials are selected and finished carefully.
However, wood and polyurethane are not identical.
They have different surface characteristics, movement behavior, and finishing requirements.
Painted Hybrid Compositions
An opaque painted finish can visually unify the two materials.
This is useful when the project combines wooden pilasters with polyurethane wall molding.
The appearance may be coordinated through color and sheen.
However, the primer and preparation requirements may differ.
Do not apply one coating system to both materials without checking compatibility.
Natural Wood With Painted Molding
Another approach deliberately preserves the difference.
A stained oak pilaster can be paired with painted decorative wall molding.
This creates contrast between natural grain and smooth architectural profiles.
The result can work well in transitional interiors.
To avoid visual fragmentation, repeat the wood color elsewhere in the room.
A wood vanity, dining table, or cabinet may provide that connection.
Decorative Faux Finishes
Polyurethane ornament can be finished to simulate certain visual characteristics of wood, stone, or metal.
However, a painted imitation is not identical to the actual material.
When natural grain is essential, genuine wood remains the appropriate choice.
Material Planning: What to Order for a Pilaster Project
A complete purchasing schedule should separate wooden elements, polyurethane profiles, decorative accents, and installation supplies.
This is especially important for projects using more than one material.
Main Decorative Elements
Record the required quantity of pilasters.
For a symmetrical doorway, this may be one left-hand and one right-hand product.
For a room with four identical architectural divisions, the requirements may differ.
Check whether the design uses separate shafts, capitals, and bases.
Polyurethane Molding
Calculate the total installed molding length.
Then prepare a cut list.
A product measuring 102.36 inches long cannot automatically provide two 60-inch vertical pieces.
The stock length affects the number of strips required.
Capitals and Bases
Count the number of upper and lower terminations.
Verify dimensions and product compatibility.
A catalog containing several capitals does not mean they all fit every pilaster shaft.
Decorative Onlays
Determine the location and quantity of additional ornaments.
A symmetrical wall panel may require paired accents.
A single central ornament may be sufficient for another composition.
Installation Materials
Specify the correct adhesive and fastening system for each material.
Calculate quantities from the manufacturer's coverage instructions.
Include suitable filler, primer, paint, surface preparation supplies, and temporary supports where required.
Buying Checklist
| Component | Information to confirm |
|---|---|
| Wooden pilaster | SKU, material, height, width, thickness, left/right orientation |
| Polyurethane molding | SKU, face width, projection, stock length |
| Capital | Dimensions, intended mounting position, compatibility |
| Base | Dimensions, shaft relationship and mounting method |
| Decorative onlay | Material, relief depth, overall footprint |
| Bracket | Intended decorative or rated functional use |
| Adhesive | Compatibility with product and substrate |
| Finish | Primer and paint suitable for each material |
| Shipping | Current availability, packaging and destination terms |
This process is particularly important for professional interior projects where missing one component can delay the completion of an entire room.
Cost Comparison: Ready-Made Pilasters vs. Custom Applied Molding
A ready-made wooden pilaster and a custom applied polyurethane composition should not be compared solely by their individual material prices.
They involve different products and installation methods.
Ready-Made Wooden Pilasters
The material cost includes the selected pilaster and any separate capital or base.
Costs depend on the wood species, dimensions, finish preparation, and ornament.
Installation may involve additional carpentry, fastening, and finishing.
However, much of the decorative shape is already manufactured.
Applied Polyurethane Pilasters
An applied pilaster-style composition may use relatively simple straight molding.
The material requirements can be economical for restrained designs.
However, the final result depends on accurate layout and installation.
Additional backing panels, decorative capitals, and ornaments increase cost.
The labor involved should not be overlooked.
Hybrid Compositions
Combining wooden pilasters with polyurethane molding provides greater design flexibility.
However, the order must account for both materials.
The finishing and installation requirements may differ.
A hybrid project can be efficient when the wooden pilasters provide the main architectural emphasis and polyurethane molding supplies the surrounding decorative framework.
Total Project Cost
A useful formula is:
Total project cost = pilasters + molding + capitals + decorative accents + installation materials + labor + finishing + delivery
For larger projects, the purchase should be calculated from a complete component schedule.
Do not rely on generic claims that one material is always several times cheaper than another.
Buying Decorative Pilasters and Polyurethane Molding Online
Online architectural catalogs provide access to products that may not be available at a typical home-improvement store.
However, selecting specialized decorative components requires more information than a photograph.
Verify the Material
A wooden pilaster is not a polyurethane pilaster.
A polyurethane capital is not automatically a complete column component.
Check the product specifications.
For example, STAVROS lists PLM and DD pilasters in its wooden carved-decor catalog.
Polyurethane profiles appear in separate architectural molding and relief-decoration categories.
Use the Product Drawings
Technical drawings are particularly valuable for pilasters and capitals.
They show the full geometry.
A pilaster may have several reference dimensions rather than only overall height and width.
These details determine how the capital and base connect to the shaft.
Check Directional Products
Some carved pilasters and ornamental elements have left-hand and right-hand versions.
Order the correct combination.
A mirrored pair may be necessary to achieve the intended architectural symmetry.
Confirm Stock Lengths
Polyurethane molding and ornamental trim may be supplied in different lengths.
For example, MLDPU profiles commonly use a stock length of approximately 102.36 inches.
Selected KPU decorative profiles are supplied in shorter lengths.
Calculate the order from the individual product specifications.
Request a Sample When Appropriate
For a large project, a physical sample may help confirm the profile's scale and surface appearance.
Place the sample against the wall.
Review it under the planned lighting.
This is especially useful for decorative capitals and ornate molding, where projection and relief have a major effect on the finished appearance.
Confirm U.S. Delivery Terms
The STAVROS English-language catalog displays prices in U.S. dollars and dimensions in inches.
However, the company's published delivery information primarily describes shipment within Russia and certain neighboring markets.
For a U.S. project, confirm international delivery availability, freight costs, import requirements, and lead times before placing the order.
Do not assume that U.S.-dollar pricing means the products are stocked domestically in the United States.
Common Mistakes When Combining Pilasters and Wall Molding
Choosing a Capital Before the Shaft
A capital should relate to the shaft dimensions.
Selecting a large ornamental capital first may force the rest of the composition into unsuitable proportions.
Establish the pilaster width and overall height before choosing the upper termination.
Using Too Many Ornament Styles
Acanthus leaves, rope molding, floral appliques, and heavily carved capitals can all be beautiful.
Used together without a clear hierarchy, they can create visual confusion.
Choose a coherent decorative language.
Ignoring the Room's Actual Scale
A pilaster designed for a large formal room may overwhelm an 8-foot-ceiling bedroom.
Use the room's dimensions to guide the composition.
Confusing Decorative and Structural Elements
Applied pilasters do not provide structural support.
Decorative polyurethane brackets are not automatically load-bearing.
Do not use them to replace structural components.
Mixing Incompatible Products
A capital from one series may not fit the shaft of another.
A corner ornament may not align with the selected molding.
Review technical drawings and product dimensions.
Failing to Plan the Lighting
Relief decoration changes appearance under different lighting conditions.
A deep capital may cast a dramatic shadow.
A narrow molding may become almost invisible under diffuse lighting.
Evaluate the proposed composition under realistic light.
Using Inappropriate Adhesives
The correct installation system depends on material, substrate, component size, and environmental conditions.
Do not assume that a general-purpose adhesive is suitable for every wooden and polyurethane component.
Ordering Without a Cut List
Total linear footage is only a starting number.
The actual quantity of molding strips depends on stock lengths and individual cuts.
Prepare the cutting plan before ordering.
Frequently Asked Questions About Decorative Pilasters
What Is a Decorative Pilaster?
A decorative pilaster is a vertical architectural feature resembling a flattened column attached to a wall. Applied decorative versions are nonstructural and are used to establish symmetry, rhythm, and architectural emphasis.
What Is the Difference Between a Pilaster and a Column?
A column is generally freestanding or projects significantly into a space. A pilaster is integrated with or attached to a wall and typically has a rectangular appearance.
Can You Make a Pilaster From Polyurethane Molding?
Yes. A nonstructural pilaster-style composition can be created from suitable straight molding, a central surface, an appropriate base treatment, and a decorative upper termination. The components must be measured and installed as a coordinated assembly.
Does STAVROS Sell Polyurethane Pilasters?
STAVROS sells polyurethane molding profiles, capitals, brackets, and decorative onlays that can be considered for custom pilaster-style compositions. Its dedicated ready-made pilaster collection primarily contains wooden products. Do not assume that every decorative polyurethane component is sold as a complete pilaster kit.
What Is the Best Molding for Decorative Pilasters?
The best profile depends on the design. A narrow smooth molding can create a restrained contemporary effect. A stepped profile can provide stronger neoclassical definition. Larger decorative profiles may suit more substantial compositions.
Can Wooden Pilasters Be Combined With Polyurethane Trim?
Yes. Wooden pilasters can be coordinated with polyurethane molding and decorative accents. However, their dimensions, installation systems, and finishing requirements must be checked independently.
What Is a Pilaster Capital?
A capital is the upper architectural element of a pilaster. It creates a visual transition between the vertical shaft and the surrounding architectural composition.
Does a Pilaster Need a Capital and Base?
A classical pilaster commonly has both. Simplified contemporary pilaster-style designs may omit elaborate capitals and bases or express them through restrained geometric transitions.
Can Decorative Pilasters Make a Ceiling Look Higher?
Vertical elements can emphasize the height of a wall and create a stronger perception of vertical rhythm. However, their visual effect depends on the room's proportions, spacing, color, and surrounding architectural details.
How Wide Should a Decorative Pilaster Be?
There is no universal correct width. Smaller rooms may suit narrower pilasters, while high-ceiling spaces can support broader designs. Compare the shaft with adjacent door casing, wall panels, and the chosen capital.
Can Pilasters Be Used in Small Rooms?
Yes, when their dimensions and projection are carefully controlled. Narrow decorative pilasters can provide architectural structure without consuming substantial floor space.
Can I Use Pilasters Around a Doorway?
Yes. Pilasters are commonly used to emphasize door openings and create decorative portals. The installation must not compromise required clearances, door operation, or structural elements.
Are Polyurethane Capitals Structural?
Ordinary decorative polyurethane capitals should be treated as nonstructural unless they have specific engineering documentation for another use.
How Do I Choose Between Oak and Beech Pilasters?
Oak is attractive for projects where visible natural grain is important. Beech can also be used for decorative millwork and painted finishes. The choice depends on appearance, product dimensions, finish, and environmental conditions.
Can I Paint Wooden Pilasters and Polyurethane Molding the Same Color?
Yes, provided the preparation, primer, and finish systems are compatible with their respective materials. A consistent opaque finish can visually unify a hybrid composition.
What Is Acanthus Leaf Molding?
Acanthus leaf molding features stylized foliage associated with classical architecture. It can complement pilaster capitals and selected ornamental wall compositions.
Is Rope Molding Suitable for Modern Interiors?
Rope molding has a traditional decorative character. It may be used selectively in transitional interiors, but it is generally more ornate than the profiles used in minimalist designs.
How Much Polyurethane Molding Do I Need for Two Applied Pilasters?
Calculate the finished length of each vertical and horizontal decorative piece. Prepare a cut list and compare it with the selected stock length. The quantity depends on the complete design rather than simply the number of pilasters.
Where Can I Buy Wooden Pilasters and Polyurethane Architectural Trim?
You can explore wooden pilasters and columns at STAVROS, along with polyurethane architectural moldings and decorative polyurethane capitals and brackets.
Review exact specifications, compatible components, and delivery arrangements before placing an order.
Final Thoughts: Classical Architecture, Modern Design
Decorative pilasters and polyurethane wall molding can do more than embellish a room.
They provide a method for organizing space.
Pilasters introduce vertical rhythm. Wall molding creates horizontal relationships and framed surfaces. Capitals and ornamental accents establish focal points. Together, these elements can transform ordinary walls into cohesive architectural compositions.
The effect does not depend on excessive ornament.
In a minimalist interior, narrow profiles and restrained pilaster details may be enough.
In a neoclassical living room, broader moldings and defined capitals can create a more formal appearance.
In a transitional home, genuine wooden pilasters can provide warmth while polyurethane trim supplies consistent painted architectural detail.
The important principle is coherence.
Every component should have a reason for being there.
The shaft should relate to the capital. The pilaster should relate to the ceiling height. The adjacent wall frames should follow the same visual system. Materials should be used according to their actual technical properties.
STAVROS offers a range of wooden decorative pilasters, polyurethane molding profiles, polyurethane capitals, ornamental trim, and decorative onlays that can be considered when developing coordinated architectural interiors.
For a successful project, begin with a dimensioned elevation.
Select the vertical elements.
Establish the wall-panel geometry.
Choose compatible capitals and molding profiles.
Calculate the materials.
Then complete the installation using appropriate techniques and finishes.
The most impressive architectural interiors are not created by adding the greatest number of decorative details. They are created by arranging the right details into a clear, balanced, and intentional design.