Article Contents:
- What exactly is hidden behind the decorative door: a complete list of technical objects
- The main rule: why the panel cannot be sealed shut
- Electrical panel — an emergency point
- Ventilation — mandatory
- Meters must be readable
- What this means in practice
- Five ways to hide an electrical panel and meters in the hallway
- Method 1: Decorative door with a wooden frame
- Method 2: Frame made of wooden baguette — "camouflage as a painting"
- Method 3: Panel with moldings — "part of the wall"
- Method 4: Mini cabinet in the hallway
- Method 5: Decorative screen made of wooden decor
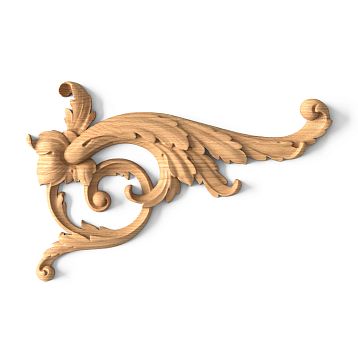
- Which wooden elements to use: the full arsenal
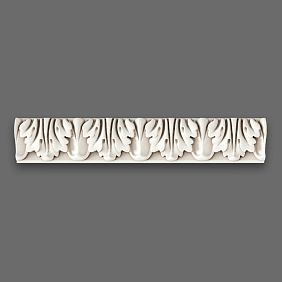
- Wooden baguette and trim
- Furniture moldings
- Wooden Handles
- Decorative appliqués
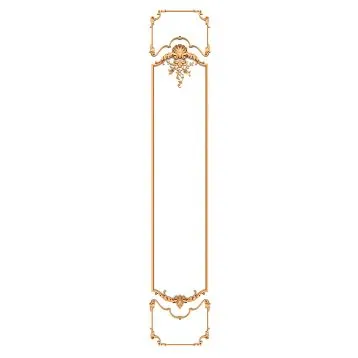
- Wooden frames
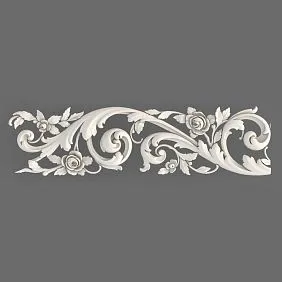
- Carved decoration
- How to choose a decor style for the hallway interior
- Modern interior, minimalism
- Neoclassicism
- Classic
- Country house with wooden accents
- Light-colored hallway, Scandinavian style
- Comparison table: design methods by scenarios
- Mass scenarios: from new building to country house
- Electrical panel in the hallway of a new building
- Meters in the corridor
- Router and wires in the corridor
- Inspection hatch in the wall
- Technical niche near the entrance door
- Installing a decorative door for the electrical panel: step-by-step breakdown
- What you'll need
- Work sequence
- Mistakes when designing the electrical panel: don't repeat others' miscalculations
- Additional tips: nuances that make a difference
- What to buy for panel design: list of elements
- FAQ: answering the most common questions
- About the Company STAVROS
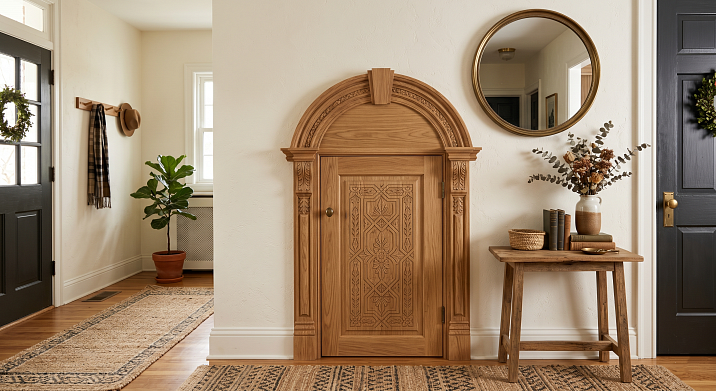
The renovation is finished. The walls are fresh, the floor is laid, the lights are hung, the furniture is arranged. The hallway looks good — almost. Because in the corner, in the most visible spot, a gray plastic electrical panel sticks out with three wires hanging out. Or meters in an ugly plastic box. Or an inspection hatch with peeling paint. One detail — and the whole impression is ruined.
This is not rare — it's a widespread story. In almost every Russian apartment, technical units are located in the hallway or corridor, at eye level, without any decorative design. Designers thought about function, but not about appearance. And now you're thinking: how to hide the electrical panel in the hallway so that it looks beautiful while still maintaining access to the equipment?
There is an answer — and it's wooden. A wooden frame, Wooden Picture Frame, furniture moldings, a decorative door with a wooden handle — this is the toolkit that turns a technical unit into an interior element. Or makes it invisible.


What exactly is hidden behind the decorative door: a complete list of technical objects
Before talking about methods, you need to understand the task precisely. Because "hiding the panel" is one scenario. And "designing a niche with a router, intercom, and inspection hatch" is a completely different scale of work.
Behind a decorative wooden frame you can hide:
-
Electrical panel — a metal or plastic box with circuit breakers;
-
Meters — electric, gas, water;
-
Router and low-current cabinet — internet, TV antenna, intercom unit;
-
Inspection hatch — access to pipes, valves, manifolds;
-
Manifold cabinet — for underfloor heating or water supply systems;
-
An ugly plastic door — which already exists but looks out of place;
-
A small built-in cabinet in the hallway — which the builders left "as is";
-
A technical niche — a recess in the wall where all the engineering is gathered.
Each of these objects requires a different approach, a different scale of decor, and different structural requirements. They share one thing: access to the equipment must remain fast and safe.


The main rule: why the electrical panel cannot be sealed shut
This is not just a recommendation — it is a safety requirement. Let's break it down in detail, because people often make mistakes here.
Our factory also produces:


The electrical panel is an emergency point
The circuit breakers in the panel must be accessible at any moment: during a short circuit, network overload, or planned shutdown. If the panel is sealed shut — in an emergency, you lose precious seconds.
According to the rules established in the PUE and SP, access to the electrical panel must be provided without tools. That is, the door must open by hand — without a key, without unscrewing screws, without removing the panel.
Get Consultation
Ventilation is mandatory
Inside the panel, heat is generated when the equipment operates. If it is sealed tightly — the temperature inside rises, which reduces the service life of the circuit breakers and, in extreme cases, can lead to fire. The decorative frame or door must not block the ventilation gaps of the panel housing.
Meters must be readable
According to the requirements of resource supply organizations, meters must be accessible for reading readings. Seals must remain intact. The design must allow opening without breaking the seals.
What does this mean in practice
The right solution is not to seal it tightly, but neatly:
-
a door that opens on hinges or a magnetic lock;
-
a removable decorative panel;
-
a lightweight frame that can be removed in seconds.
Good news: all these options are beautifully finished with wooden elements, and this is what allows you to achieve both beauty and functionality.
Five ways to hide the electrical panel and meters in the hallway
Method 1: Decorative door with a wooden frame
This is the most common and most versatile solution. The door is mounted on hinges — like a cabinet door — and completely covers the panel. From the outside, it looks like part of the furniture or wall.
Construction. The base is a plywood or MDF sheet the size of the panel plus a small margin around the perimeter (2–4 cm). Onto this base, wooden slats are glued or screwed furniture moldings — to create a frame structure. Along the perimeter of the door — Wooden Picture Frame as a framing profile.
Mounting. The door is mounted on a piano hinge from above or on two furniture hinges from the side. Fixation in the closed position — a magnetic lock or furniture magnet. Without a visible lock and key — access is quick, the look is clean.
Handle. Without a handle, the door looks flat and functionally incomplete. Wooden furniture handle — the right accent. Depending on the interior — a knob, a bracket, a pull. In a classic interior, a wooden handle made of oak or beech under varnish or enamel completes the look of the door as a furniture element.
Coating. The door is painted in the color of the wall — and becomes almost invisible. Or it is coated in the color of the furniture — and becomes part of the set. This is the most "urban" and universal option.
Method 2: Frame made of wooden baguette — "disguise as a painting"
This is a more elegant and unexpected technique. Its meaning is not to close the panel with a door, but to make its door beautiful in itself. If the panel already has its own door (metal or plastic), it is framed with a wooden frame so that the structure resembles a decorative panel or even a painting.
How it works. A wooden frame is attached to the wall around the panel — not to the panel itself, but to the wall. The panel door opens freely inward into the frame. Externally, you see a beautiful wooden frame. The panel inside it is like a "painting" that can be opened.
Frame options. In the catalog frames made of wood there are products of different styles — from a classic carved frame to a strict rectangular one in the neoclassical style. For a hallway, rectangular frames with a moderate profile work especially well: they look like architectural decor, not an art gallery.
The trick with a mirror or panel. An even more elegant option: the panel door is covered with mirror film or decorative wood-grain film — and combined with the wooden frame, it resembles a mirror in the hallway. The functional object turns into a decorative one.
Method 3: Panel with moldings — "part of the wall"
This method requires a bit more work but gives the best result in terms of "invisibility" of the technical unit. The idea: create a flat panel with a frame structure made of furniture moldings — the same as the decorative panels on the walls in other parts of the hallway. The panel is hidden behind one of the sections of such a panel — and visually becomes part of the wall.
Principle. The entire hallway wall (or part of it) is decorated with vertical panels with molding frames. One of the panels — the one behind which the panel is — has a hinge and opens. From the side, it is indistinguishable from the "blind" neighboring panels.
Detailing. The moldings are selected with the same profile for the entire wall. This is important: a single profile = a single rhythm = the feeling of a planned solution. Wooden trim for vertical and horizontal frame elements — from the same series.
Method 4: Mini cabinet in the hallway
If there is a router, intercom, video surveillance control unit, key holder, and other small items near the electrical panel, consider a small built-in cabinet. It combines all the "unsightly" technical objects in one place, hides them behind a door, and adds functionality.
Construction. A box made of plywood or MDF, mounted flush with the wall or hanging. A door with molding and a wooden handle. Inside — shelves for equipment, cable holes, ventilation slots.
Decor. The cabinet facade — decorative inlays for furniture in the corners or center of the door. These are small carved elements that instantly transform a faceless box into a furniture piece with character.
For the router. A separate point: the router cannot be completely closed — the signal weakens. The cabinet door for the router must have perforation or ventilation slots. A perforated wooden insert with a geometric pattern is a beautiful and functional solution.
Method 5: Decorative screen made of wooden decor
A non-standard but interesting option for interiors with a distinct character. The panel is hidden not behind a solid door, but behind a decorative screen — a wooden lattice, patterned panel, or screen made of carved decor elements.
Through the lattice or ornamental cutouts, the panel is invisible — the color of the wood, play of shadows. But ventilation is preserved, and the panel itself is accessible: the panel is either removable or hinged.
Such a screen works especially well in interiors in the Russian style, in country houses with wooden accents, in interiors with oriental motifs.
Which wooden elements to use: the full arsenal
Now specifically — about specific materials.
Wooden baguette and molding
Wooden trim — the basis of most decorative solutions. A profiled strip made of solid wood (oak, beech, pine) is used for:
-
framing frames around the panel;
-
the perimeter of the door;
-
connecting profiles between panels;
-
horizontal and vertical divisions on the molding wall.
Width of the molding profile: from 15 to 80 mm. For a small panel (40×50 cm) — profile 25–40 mm. For a large manifold cabinet — 50–70 mm.
Furniture moldings
furniture moldings — profiled wooden slats with a decorative cross-section. They are glued to the surface of a door or panel, creating a frame structure. Molding 15–25 mm — a delicate frame contour. Molding 35–50 mm — an expressive frame with a voluminous relief.
Molding profiles: oval, scotia, straight chamfer, complex multi-tiered. The choice of profile determines the stylistic character of the entire door. A simple straight chamfer — modern classic. A complex tiered profile — pronounced classic or neoclassical.
Wooden handles
Wooden furniture handle — a small detail with great significance. It is the handle that turns a panel into a door, and a door into a furniture element. Without a handle, the structure looks technical. With the right handle — decorative.
For the hallway, the optimal choices are:
-
button handle (concealed mounting, minimal projection) — for a modern interior;
-
bracket handle — a universal option, comfortable grip;
-
pull handle with profile — for classic and neoclassical styles.
Handle material: solid oak or beech under varnish, enamel, or stain. It is important to coordinate the handle with other handles in the hallway: the entrance door, cabinet, mirror.
Decorative appliqués
Decorative wooden inlays — carved wooden elements that are glued onto the surface of a door or panel. Corner rosettes in the corners of the frame, a central ornament on the door field, a horizontal frieze — all of these add decorative individuality.
For a small cabinet door — small overlays: corner elements 5×5 cm and a central motif 10–15 cm. This does not overload the surface and at the same time creates an accent.
Wooden frames
wooden frames — ready-made products that can be used to frame a panel. The catalog includes frames in various formats, from small to large. A rectangular wooden frame installed around the panel on the wall creates an instant decorative effect without complex installation.
Carved decor
Carved wooden decoration — for those who want individuality. An overlay carved detail on the center of the door or a keystone above the panel frame elevates the solution from "neat" to "custom."
How to choose a decor style to match your hallway interior
The panel door should be coordinated with the interior. This is the main rule. Let's break it down by style.
Modern interior, minimalism
Smooth door without relief molding. Thin profile made of wooden trim around the perimeter — no wider than 20 mm. Finish: in the color of the wall (matte paint) or in the color of the furniture. Handle — hidden or a minimalist wooden button. Result: the door "dissolves" into the wall and becomes almost invisible.
Neoclassicism
Frame structure made of furniture moldings medium width (25–35 mm). Symmetrical frame on the door. Handle-bracket or pull made of oak. Finish: white or light gray enamel. Small a decorative element In the center — corner overlays. Result: the door looks like an element of a built-in wardrobe in a classic style.
Classic
Multi-tiered molding. Wooden Solid Wood Frame with a profiled section. Carved corner rosettes. Handle with a figured profile. Coating: white enamel with a thin patina, dark oak under varnish. Result: the door looks like an antique cabinet door — noble and decorative.
Country house with wooden accents
Natural wood under oil or varnish. Large molding with a simple profile. Wooden pull handle made of oak — warm brown shade. Patterned carved decor in Russian style is possible. Result: the door fits organically into a wooden interior as another piece of solid wood furniture.
Hallway in light tones, Scandinavian style
Door in the color of the wall — white, cream, light gray. Minimal molding or its complete absence. Wooden handle made of light oak — the only visible accent. Result: the panel almost disappears, and the light wood handle reads as a detail of Scandinavian design.
Comparison table: design methods by scenarios
| Object | Best method | Wooden elements | Finish |
|---|---|---|---|
| Small panel | Door with frame | Moldings, handle, overlays | Wall color |
| Meters in niche | Opening panel | Trim, moldings | Wall/furniture color |
| Router + wires | Cabinet with perforation | Door, overlays, handle | Varnish, enamel |
| Access hatch | Molding frame | Moldings, trim | Wall color |
| Distribution cabinet | Mini cabinet | Moldings, handle, cornice | Varnish, enamel |
| Technical niche | Decorative screen | Carved decor, frame | Varnish, oil |
Mass scenarios: from new building to country house
Panel in the hallway of a new building
Typical story. Apartment with finishing, panel in plain sight — a gray metal box at eye level right at the entrance. The developer installed it according to regulations, but without any thought for aesthetics.
The best solution is an MDF door for painting. Profile around the perimeter of wooden trim 25–30 mm. Coating in wall color — matte paint. Wooden knob handle made of beech. Installation: piano hinge to the wall next to the panel, magnetic lock. Result: the panel is not visible. The hallway looks as intended.
The budget for this solution is minimal. Materials are available, installation is simple, the result is radical.
Meters in the corridor
The corridor is narrow, the hallway is not. Electricity and water meters stand nearby, closed with a plastic box with an ugly door. The task is not to close, but to redesign.
Optimal: leave the standard door on hinges, but frame it wooden frame. The frame is attached to the wall around the plastic cover — and "dresses" it in wooden decor. Additionally — decorative insert in the center of the door and a handle made of solid wood. The plastic inside the frame is no longer visible, and the entire structure looks like an architectural element.
Router and wires in the corridor
Wires are a separate headache. Router, patch panel, bundle of cables — technical chaos that ruins any hallway.
Here you need a lightweight wall-mounted cabinet. 10–15 cm deep, width according to the equipment size plus a small allowance. Door with a perforated or slatted wooden insert — for signal passage. furniture moldings a frame structure is created on the door. A wooden handle completes the look.
The wires inside the cabinet are neatly gathered with cable ties and laid along the walls. Outside — a closed cabinet as part of the furniture.
Inspection hatch in the wall
An inspection hatch is a small door in the wall, usually in the hallway or corridor, behind which are pipes. A standard hatch is plastic, unattractive, not concealed.
The simplest solution: a molding frame made of wooden trim around the hatch perimeter — it frames it like a small painting. The frame is painted the color of the wall. The hatch inside the frame is also painted to match — and the whole structure resembles a small decorative panel.
If you want more — the hatch door is covered with decorative material and a furniture moldings. Result: the hatch looks like a small decorative wall element.
Technical niche next to the front door
Sometimes all the engineering is gathered in a special niche — a recess in the wall. The niche is large, closed with unattractive plastic doors or completely open.
For such a niche, the optimal option is decorative doors styled as a furniture cabinet. Wooden frame facades with moldings, applied decor и wooden handles — and the niche turns into a "built-in cabinet" that fits organically into the hallway.
Installation of a decorative door for the panel: step-by-step breakdown
What you'll need
-
MDF or plywood 10–16 mm thick (door base)
-
Wooden trim or Moldings for framing
-
Piano hinge or furniture hinges (2 pcs.)
-
Furniture magnet for fixation
-
Mounting glue, screws, putty, paint
Work sequence
1. Measurement. Measure the panel precisely: width, height. The door is made with an overlap: 3–5 cm wider and higher than the panel on each side.
2. Cutting. Cut the door base from the MDF sheet according to the calculated dimensions.
3. Moldings. Glue moldings onto the base using a frame pattern: perimeter frame + horizontal or vertical divisions as desired. Use PVA glue + finishing nails.
4. Decor. If desired — glue Decorative Inserts in the corners or in the center.
5. Hinges. Attach hinges to the side of the door. A piano hinge along the entire height — maximum reliability. Or two furniture hinges — at the top and bottom.
6. Mounting to the wall. Determine the opening side. Hinges are attached to the wall next to the panel — not to the panel, but to the wall. This is important: the door should open freely without hitting the panel.
7. Magnet. A magnetic lock is installed on the opposite side from the hinges — to secure the door in the closed position.
8. Handle. Wooden Handle is screwed on from the outside. Drilling for the handle — through the door base, with edge cleaning.
9. Coating. Putty on molding joints, primer, painting or varnishing. For painting to match the wall color — matte paint with a roller in 2–3 coats.
Mistakes in panel design: don't repeat others' miscalculations
Each of these mistakes is a real story from practice.
Sealing the panel tightly. The most common one. A person glues MDF to the panel and forgets about it. Until the first accident.
Making a door without a handle. The door is held by a magnet, no handle — to open it, you need to pry it with a fingernail. After a month, the edge is chipped. A handle is mandatory.
Too heavy door. A door made of 22 mm MDF with massive moldings — 4–5 kg. On a piano hinge attached to a drywall wall — it starts to sag. The door should be light, or the hinges should be fixed into concrete/brick with dowels.
Door opens in an inconvenient direction. Opening to the left in a narrow 80 cm corridor — the door hits the wall and blocks the passage. The opening direction should be thought out before installation.
Style mismatch with the rest of the interior. A classic frame with carving in a hallway with Scandinavian furniture — a conflict. Or vice versa: a simple flat door in an interior with lush classic decor — looks cheap. The door decor should align with the overall hallway design.
Too massive frame in a narrow corridor. 50 mm moldings in a 90 cm wide corridor feel oppressive and visually reduce the space. For narrow corridors — thin profile, light moldings.
Forgetting about the slope overlap. The door is made exactly to the size of the panel, but the gap between the panel and the wall is visible around the perimeter. The door should overlap the panel with a slight 'overhang' onto the wall around the perimeter.
Additional tips: nuances that make a difference
Door color — match the wall or match the furniture? If you want an "invisible" door — match the wall. If you want a "furniture accent" — match the cabinet or nightstand. Both options are correct.
Ventilation gap. Leave a 5–10 mm gap along the bottom edge of the door or provide several drilled holes in the lower part of the base. This ensures minimal air exchange.
Lighting. In the cabinet for the router and technical devices, an LED strip is sometimes installed — for visibility of indicators when the perforated door is closed.
Panel marking. After closing the door, the panel gets lost in the space. Make a small label on the inside of the door: "panel", "main breaker" — this will come in handy in an emergency.
Connection with door trims. If there are wooden trims on the doors — moldings of the panel door from the same series will create a unified style code in the hallway.
What to buy for panel design: list of elements
Complete list for creating a decorative door or frame:
-
wooden moldings and picture frames — for the perimeter of the door and profile frames;
-
furniture moldings — for the door frame structure;
-
Decorative wooden inlays — corner and center decorative elements;
-
wooden furniture handles — for fixation and aesthetics;
-
wooden frames — for "picture frame" framing;
-
Wooden frames — ready-made solutions of various formats and styles;
-
Carved wooden decoration — for custom accents;
-
Wooden items — full range for selecting additional elements.
FAQ: answering the most frequent questions
Can I cover the electrical panel with a decorative door?
Yes — provided the door opens and provides quick access to the machines and meters. The panel cannot be sealed shut. Ideally, a door on hinges with a magnetic lock and wooden handle.
How to beautifully cover the meters in the hallway?
With a decorative door with molding design, wooden frame around the existing door or a molding frame in the color of the wall. The main thing is to maintain access to the meters for reading and sealing.
Can the panel be hidden behind a painting?
Yes. A decorative panel or "false painting" in a wooden frame is installed on hinges — it swings open or is removed, revealing the panel. This is an effective solution: the equipment is hidden behind a beautiful wooden frame.
Which moldings are suitable for the frame around the panel?
For a small panel (40×50 cm) — Molding 20–30 mm wide. For a large technical niche — 40–50 mm. Profile: simple chamfer (for modern interiors) or tiered (for classic and neoclassical styles).
Is it possible to make a door for the panel in a classic style?
Yes. For classic style — wooden Solid Wood Frame, furniture moldings with a frame structure, Decorative Inserts with corner details, a figured wooden handle. Finish — white enamel or dark varnish.
What to do if the panel is in the narrowest part of the hallway?
Choose a minimalist solution: a thin profile made of trim around the perimeter, a smooth door matching the wall color, a small button handle. The door opens outward — ensure it does not obstruct the passage.
How to match the panel door with the rest of the hallway decor?
A unified principle: the same material (wood, MDF), the same style of moldings, the same finish color, the same handle series. If the hallway has wooden doors with architraves and a wooden baseboard — a wooden panel door with molding frames will become an organic part of a cohesive interior.
Are decorative overlays on the panel door necessary?
Not necessarily — but they instantly enhance decorative value. Small corner overlay elements in a classic style turn a functional door into a furniture piece with character. For a modern interior — better without overlays, a clean plane.
About the company STAVROS
The hallway is a space that everyone sees. Owners, guests, couriers. It sets the first impression of the home and of you. A technical unit in the center of this space is not a fatality, it's a task that can be solved beautifully.
STAVROS is a manufacturer of wooden decor since 2002. The company started with the restoration of historical interiors — Konstantinovsky Palace, the Hermitage, Alexander Palace. This experience has shaped a quality standard that today is available not only to state museums but also to ordinary apartments in new buildings.
In the Stavros catalog — Wooden trim и molding for frames, furniture moldings for framed doors, Decorative Inserts for accents, Wooden handles to complete the look, wooden frames for framing technical units, Carved Decor for individuality. All — from solid oak and beech, from real wood, not from imitations.
Production — in Saint Petersburg. Showrooms — in Moscow and Saint Petersburg. Delivery across Russia and CIS countries. Purchase from one item.
When the gray electrical panel in your hallway stops catching your eye — that will be the work of STAVROS and your hands. The task is simpler than it seems. The result is better than you expect.